NEXT-LEVEL TECHNIQUE: MAKING INFUSIONS
In our early days of creating new cocktails, the wide variety of spirits and liqueurs on our back bar provided plenty of inspiration. But now that there are so many amazing bartenders creating delicious drinks every day, we’ve had to up the ante in our search for new and unique flavors to add to our repertoire. Infusions are one of the easiest ways to accomplish this; once flavors have been added to a base spirit or modifier, the infusion can be swapped into recipes, opening up a vast new realm of combinations. (By the way, an invaluable resource for developing new drinks is The Flavor Bible, by Karen Page and Andrew Dornenburg. Organized by ingredients, it’s a compendium of what goes with what, from obvious to unexpected combinations.)
For us, coming up with new ideas for infusions is generally a matter of simple problem solving. When we work on a new drink, we often begin by zeroing in on a desired final flavor profile. Then we pick a base formula—inspired by one of the six foundational recipes featured in this book—and develop the drink from there. For example, let’s say we want to use lemon as a key flavor. Lemon matches nicely with honey, no surprise there. We then look at honey and consider that it loves chamomile. Then we ask ourselves what base spirit might work best with this combination of flavors while also being unexpected. The combination of lemon, honey, and chamomile is warming and, for some people, tinged with nostalgia. What if we were to take advantage of that connection and choose a warming spirit, like calvados, that reinforces the comforting qualities of the other ingredients? Once we’ve envisioned a rye-based cocktail with lemon, honey, and chamomile, we could express these flavors in a couple of different ways in a drink: as a sour made with lemon juice, perhaps (the La Valencia, this page, which uses yellow Chartreuse’s honeyed flavor matched with chamomile and rye whiskey); as a Collins (the Fuji Legend, this page); or even a Hot Toddy (Gun Club Toddy, this page).
Making an infusion can be as simple as steeping an ingredient in a spirit, and that’s pretty much the way people have done it for years. Alcohol is a great solvent because it excels at extracting flavor. In fact, sometimes it works too well and can pull out undesired flavors, along with the desirable ones. For example, when you eat a ripe raspberry, you’ll mostly taste the fresh berry flavor. But if you soak raspberries in alcohol for an extended amount of time, the infusion will develop an unpleasant bitterness from compounds in the raspberry seeds.
For this reason, we use a number of different infusion techniques—cold infusion, room-temperature infusion, sous vide (or immersion circulator) infusion, pressurized infusion, and even a centrifuge method—choosing among them depending on the ingredients and flavors we’re trying to extract. The first step in making that decision is to look at the ingredients and predict how their flavors will be expressed in the final infusion. Then we try one or more infusion methods to test our predictions. In the case of fresh fruits, macerating (soaking them in liquid) for a long time can draw out unwanted flavors, and cooking them at high temperatures can destroy their fresh flavor. The volatile aromatic compounds present in fresh fruits can be also be muted by an overly long infusion process. In this case, our solution would be to use an immersion circulator to heat the infusion at a very low temperature for a short amount of time (a process we’ll describe in depth shortly). This allows us to extract only the flavors we desire and also has the benefit of speeding the process—most of our infusions are complete within a couple of hours.
We also give a lot of thought to our base liquid (spirit, liqueur, fortified wine, and so on). A key consideration is alcohol content. Common wisdom holds that spirits with a higher ABV yield better extractions, but that isn’t universally true. A highly alcoholic spirit, such as Everclear, will extract flavors quickly and thoroughly, especially from dry ingredients, but the higher the proof, the more the ingredients’ bitter flavors will be pulled out. That can be great for making homemade bitters, but not so hot for when using fresh ingredients. We’ve found that using spirits between 40% and 50% ABV generally produces great results no matter what infusion technique we use, and if we’re using fresh fruits that have bitter elements, such as citrus peels, spirits at the low end of that spectrum extract the best flavors. It’s also possible to use lower ABV spirits, such as liqueurs, fortified wines, and even still wines. But this requires taking care to prevent oxidization, which causes flavors to change quickly.
In the sections that follow, we’ll provide detailed instructions on how to make infusions using five different techniques. Specific infusion recipes, including all of the infusions called for in the recipes in this book, are located in the appendix.
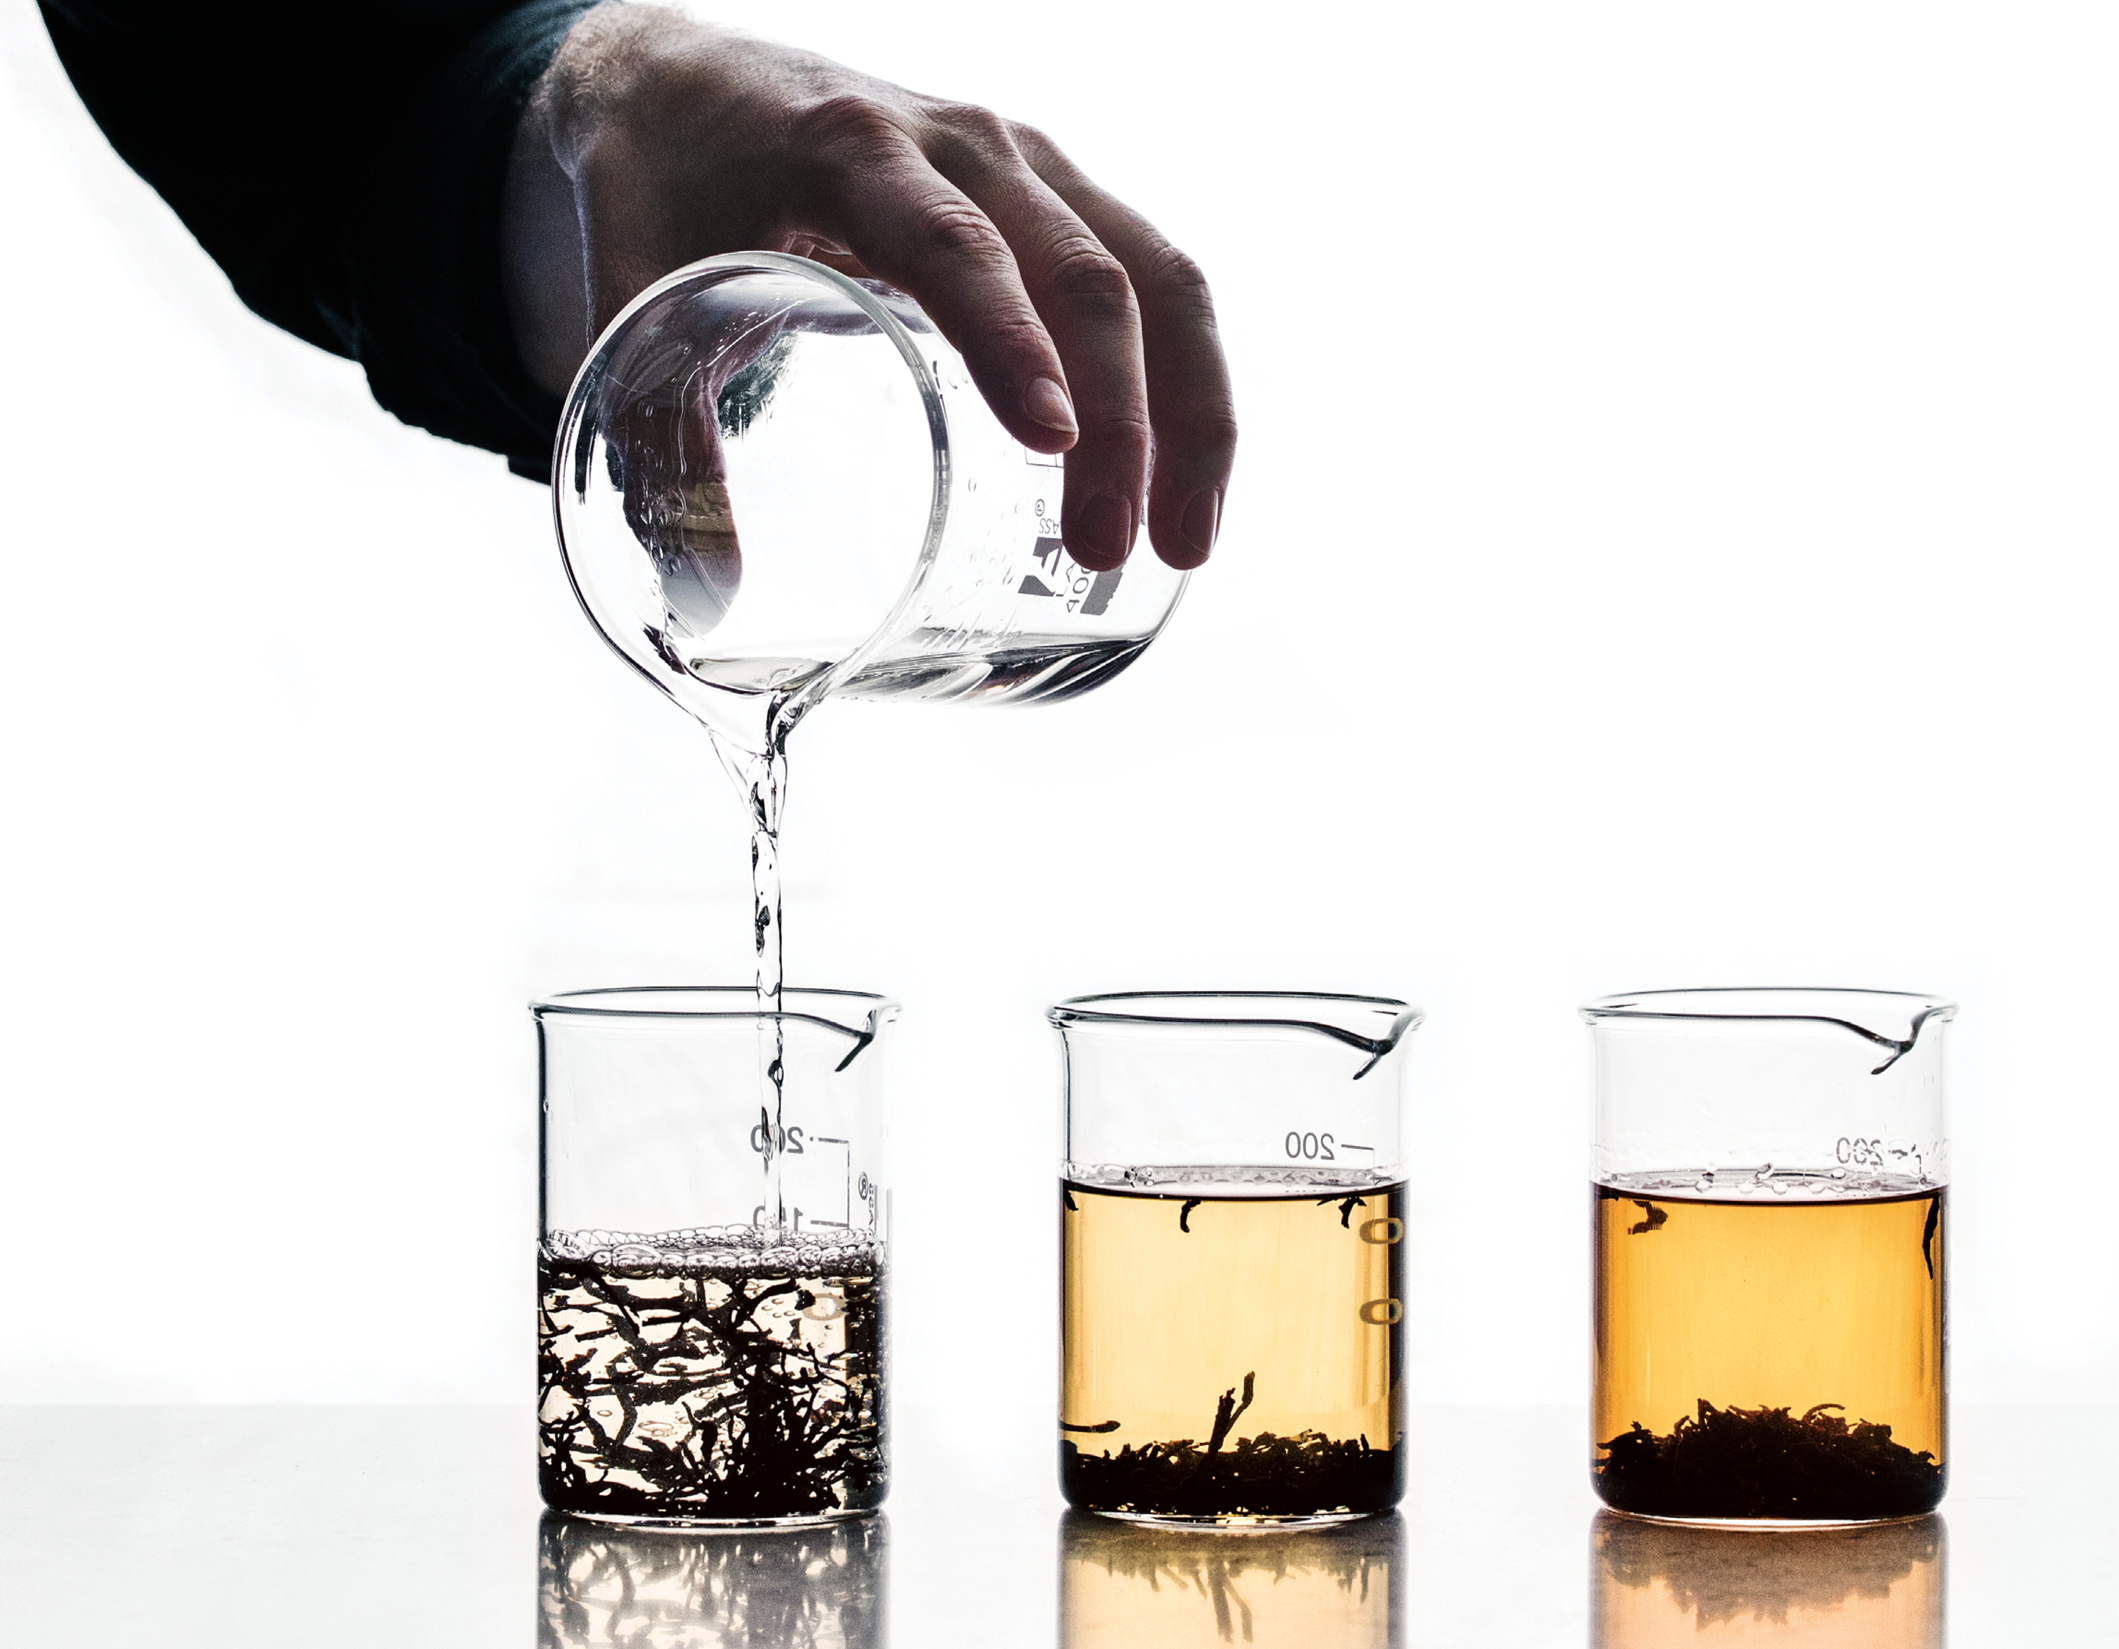
Tea extraction in vodka after thirty seconds, one minute, and two minutes.
COLD INFUSIONS
When working with ingredients from which we want to extract as much fresh, vibrant flavor as possible (coffee beans, for example), cold maceration helps draw out the desired flavors. Chilling slows the process of flavor extraction, which means the flavoring ingredients can interact with the alcohol longer. A more mellow process, it yields infusions with deep, complex flavors that could be lost or changed for the worse in a room temperature or heated infusion. Importantly, we only use this method when an ingredient doesn’t have unpleasant flavors that will be extracted over time—for example, berries with seeds that can impart an acrid flavor.
We also use lower temperatures in a process known as fat washing, which was pioneered by our friends Don Lee and Eben Freeman. When alcohol is combined with a fatty ingredient (such as butter, cream, oil, or animal fats) and then frozen, the fat will congeal into solids that can easily be strained out, leaving just the flavor of that fat in the alcohol. This is a great technique for introducing richness into cocktails that aren’t rich, such as the Root Beer Float (this page).
One word of caution on cold infusions: Ensure that there aren’t any pungent ingredients in your freezer or refrigerator when making these infusions, as those aromas and flavors may find their way into the infusion.
COLD INFUSION METHODS
Fat washing: If using a solid fat, gently melt it in a saucepan or microwave. Combine the fat and spirit in a wide container, as this will maximize contact between the fat and spirit, producing better flavor, and stir or whisk to combine. Cover and freeze until the fat has solidified into a layer on top of the liquid, usually 12 hours or less. Carefully poke a hole in the fat layer and drain the liquid out; reserve the fat for another use (or discard). If any particles remain in the liquid, strain it through a fine-mesh sieve lined with several layers of cheesecloth or through a Superbag (a flexible, heat-resistant sieve). Though you can store fat-washed infusions at room temperature, we find they retain their flavor better when refrigerated. See Milk-Washed Rum (this page) and Coconut-Infused Bourbon (this page).
Eggs: Line a shallow, resealable container with paper towels. Arrange a layer of the flavoring ingredient (such as lavender) on top of the paper towels, then arrange whole, uncooked eggs, still in their shells, in a single layer on top. Seal the container and refrigerate overnight.
ROOM-TEMPERATURE INFUSIONS
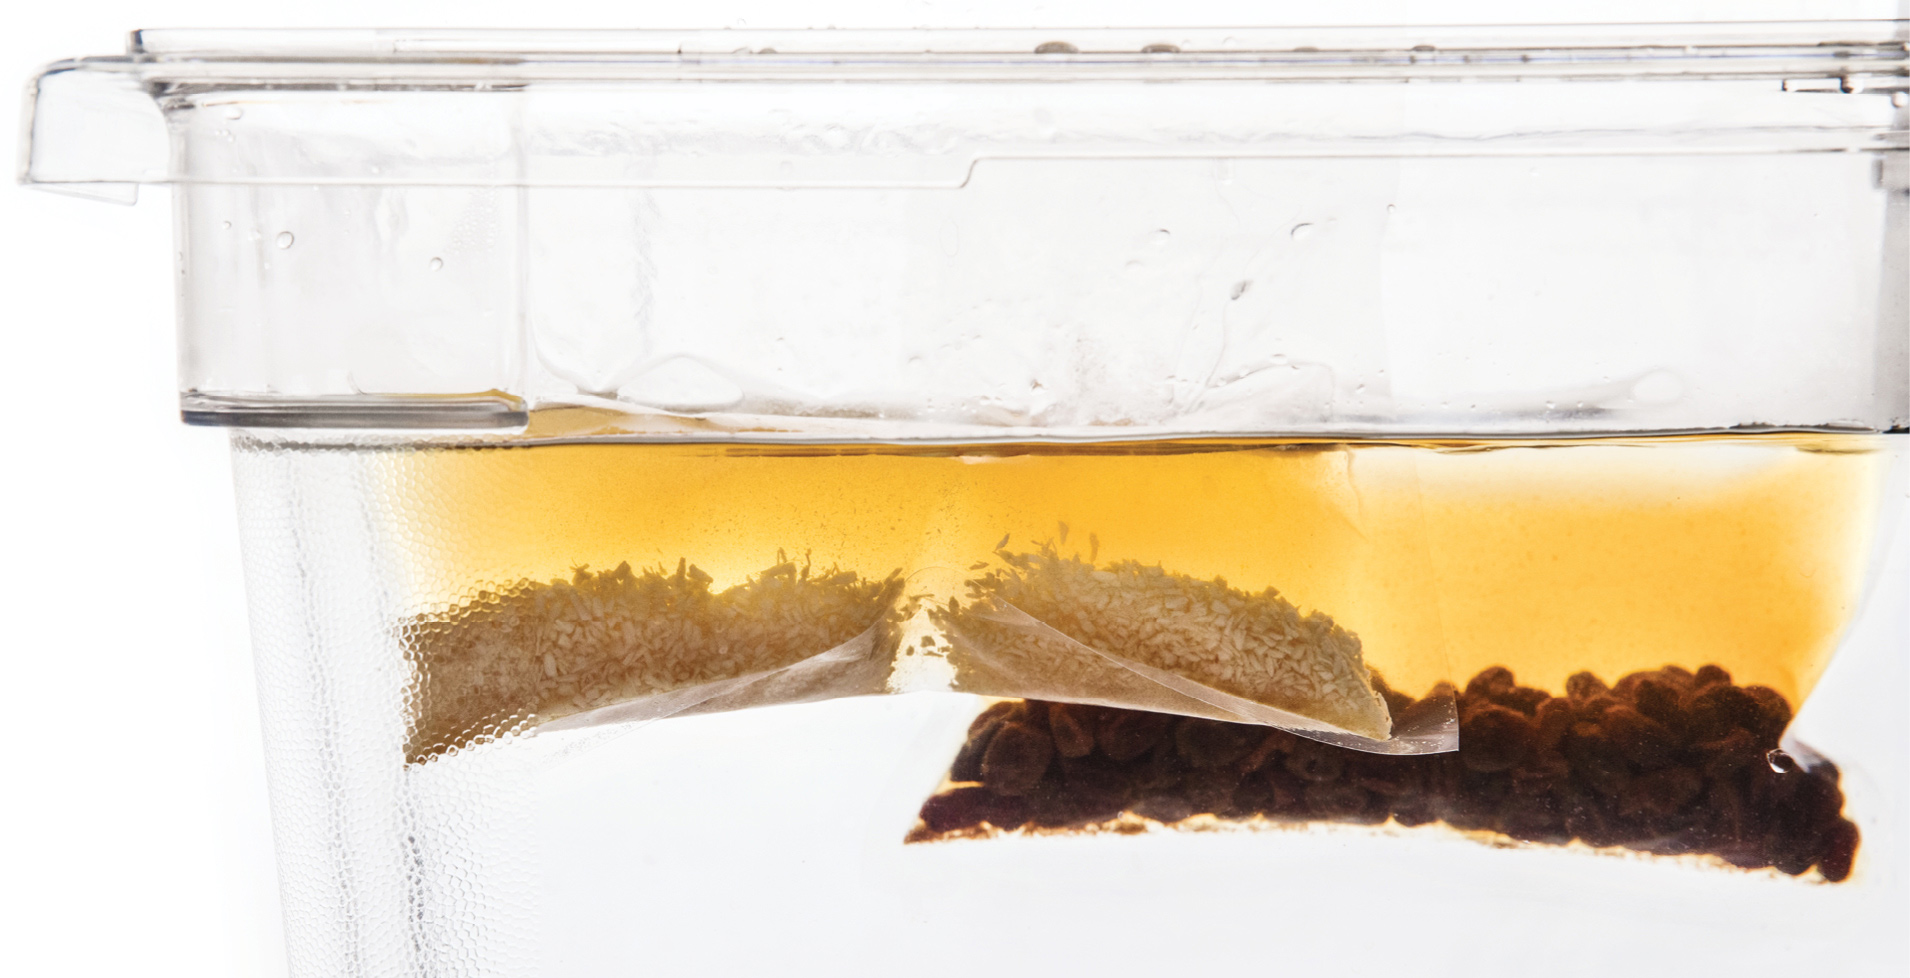
With ingredients that infuse very quickly, generally an hour or less, we simply combine the ingredients and let the alcohol do its job at room temperature. These ingredients are often very flavorful and temperamental—such as jalapeños in tequila, which can overinfuse in a heartbeat; or black tea, which can become tannic if overextracted—so it’s important to taste them every couple of minutes throughout the infusion process. This will help you develop a baseline standard for comparison and decide when to stop the infusion process. A case in point is our Thai Chile–Infused Bourbon (this page), which we typically infuse for just 5 minutes—or less! Another example is the Oolong-Infused Vodka (this page), which develops a distinctive color from the tea within about 20 minutes, providing a visual indicator that it’s time to strain the infusion.
Also, keep in mind that some ingredients, like dried or fresh chiles, vary; thanks to nature, no two jalapeños are the same. So even if you’ve made a specific chile infusion before, taste often during the process every time you make it.
As discussed, the alcohol content of the spirit will play a large part in how quickly the infusion occurs. If you use a higher-proof spirit, the amount of time needed for optimum extraction will probably be short. If you use a lower-proof spirit, such as vermouth, it will take much longer. For example, we allow our Cardamom-Infused St-Germain (this page) to infuse for about 12 hours because the St-Germain, at 20% ABV, is somewhat low in proof, and because the cardamom is more delicate. On the other hand, our Madras Curry–Infused Gin (this page), made with fiery curry powder and equally fiery 44% ABV Dorothy Parker gin, is only infused for about 15 minutes.
HOW TO MAKE ROOM-TEMPERATURE INFUSIONS
Gram scale
2 large containers with lids
Fine-mesh sieve and cheesecloth, or a Superbag (see this page)
-
Weigh the ingredients on a gram scale.
-
Combine the ingredients in a container. Whisk or stir to combine.
-
Taste the infusion often: every minute or so at first, then every 15 minutes, then every hour (depending on the ingredients used). For longer infusion times, keep the container covered except when tasting.
-
When the infusion is ready, strain it through a fine-mesh sieve lined with several layers of cheesecloth, or through a Superbag, into a clean container.
-
Transfer the infusion to a storage container and refrigerate until ready to use.
SOUS VIDE INFUSIONS
At our bars, we use the sous vide technique not only to extract flavor for syrups (see this page), but also to flavor alcohol. We’ve adopted this method for two reasons. First, heat speeds the infusion process. Second, heating the mixture at a precise temperature without allowing any liquid to evaporate yields infusions that are more subtle and nuanced than those made using any other method. Importantly, the temperature remains consistent throughout the process, allowing us to select exactly the right temperature to preserve the flavors we want (typically the flavor of the raw ingredient) without extracting off-flavors. For example, in our Coconut-Infused Bourbon (this page), the sous vide process results in a final product with fresh coconut flavor, whereas an infusion made by simply macerating coconut flakes in bourbon at room temperature for a few days will be far less vibrant, though still tasty.
Most of our sous vide infusions employ temperatures between 135°F and 145°F, with the lower end of that range being suitable for delicate ingredients such as fruits and the higher end being best for sturdier flavors, like coconut, nuts, or dried spices. As you’ll see in the method that follows, at the end of the cooking time we submerge the infusion in an ice bath, which condenses any vapor present in the bag and preserves the alcohol content.
HOW TO MAKE SOUS VIDE INFUSIONS
Large water basin
Immersion circulator
Gram scale
Bowl
Resealable, heatproof plastic bag, such as a freezer bags
Ice bath
Fine-mesh sieve
Storage container
-
Fill the basin with water and place the immersion circulator inside.
-
Set the circulator to the desired temperature.
-
Carefully measure the ingredients by weight and combine them in a bowl.
-
Transfer the mixture to a sealable, heatproof plastic bag. Seal the bag almost completely, then remove as much air as possible by dipping the bag (other than the unsealed portion) in the water. The counterpressure from the water will push the rest of the air out. Finish sealing the bag, then remove it from the water.
-
When the circulator has reached the desired temperature, place the sealed bag in the basin.
-
Carefully remove the bag when the specified time is up.
-
Transfer the bag to an ice bath to cool.
-
Strain the infusion through a fine-mesh sieve to remove any solids.
-
Transfer the infusion to a storage container and refrigerate until ready to use.
PRESSURIZED INFUSIONS
Manipulating pressure is a valuable way to extract flavor from ingredients that are extremely fragile: those that perish too quickly to allow for extended maceration, or those that change dramatically with any amount of heat. We use two different techniques for pressurized infusions: rapid infusions using an iSi whipper (a gadget more typically used to make whipped cream) and nitrous oxide (N2O), and vacuum infusions using a chamber vacuum machine.
In rapid pressurized infusion, flavors are extracted quickly by using compressed gas to force liquid into a solid ingredient. All of the ingredients are placed in the chamber of an iSi whipper and charged with N2O, which forces the liquid into the cells of the solid ingredient, somewhat like a sponge sucking up water. When the pressure is released, the liquid is pulled back out of the solid ingredient, now carrying its flavor. Rapid infusions are particularly useful for extracting delicate flavors, such as those of fresh herbs, as well as with ingredients that have a wide range of flavors, such as cacao nibs. Because the infusion process is so quick—usually around 10 minutes—it doesn’t run the risk of extracting any of the off-flavors that can come with long maceration times.
The vacuum infusion process is similar but requires a very expensive piece of equipment: a chamber vacuum machine. Instead of forcing liquid into solid ingredients using pressurized gas, it does so by removing all of the air inside the chamber. When a liquid and a solid are combined under vacuum, the pores of the solid open, letting the air within out and forcing the liquid into the vacated spaces. Then, when the chamber returns to the ambient atmospheric pressure, all of the liquid is sucked back out of the solid ingredient, now infused with flavor.
HOW TO MAKE VACUUM INFUSIONS
Gram scale
Wide plastic or metal container, such as a baking pan
Chamber vacuum machine
Plastic wrap
Fine-mesh sieve and cheesecloth, or a Superbag (see this page)
Storage container
-
Carefully measure the ingredients by weight.
-
Put the ingredients into the widest high-walled container (at least 2 inches deep) that will fit into the chamber and put it into the vacuum machine. Cover with plastic wrap, poking about ten holes into the top (this will help hold back any splashing liquid when the vacuum is released—it can get messy).
-
Turn the machine on to full vacuum, keeping your finger on the stop switch. As the air is vacated, dramatic boiling will occur. Stop the machine if the infusion ever risks boiling over. Run the machine at full vacuum for 1 minute. Repeat the cycle at least two times for the best results—you’ll notice that the boiling will subside.
-
Remove the container and use a straw to taste the infusion.
-
If your infusion is weak, there are two options for extracting more flavor: First, you can simply run the vacuum cycle multiple times until you achieve the desired flavor. Or, another great way to pull more flavor from the infusion is to turn the machine to full vacuum, then turn it off. The machine will hold at vacuum and the infusion will continue until you turn it back on. We recommend doing this for 10 minutes, then checking the infusion’s flavor.
-
When you’re satisfied with the flavor, strain the infusion through a fine-mesh sieve lined with several layers of cheesecloth or through a Superbag.
-
Transfer to a storage container and refrigerate until ready to use. Because these infusions extract delicate flavors, they are best used within 1 week (though they will remain usable for up to 4 weeks).
HOW TO MAKE RAPID PRESSURIZED INFUSIONS
Gram scale
iSi whipper, preferably 1 quart capacity
2 N2O cartridges
Large, deep container
Fine-mesh sieve and cheesecloth, or a Superbag (see this page)
Storage container
-
Carefully measure the ingredients by weight.
-
Put the ingredients in an iSi whipper, taking care not to fill it higher than the “Max” line. Seal tightly. Charge with one of the N2O cartridges, then shake the canister about five times. Change the cartridge, then charge and shake again. We recommend allowing the mixture to sit under pressure for 10 minutes and shaking it every 30 seconds or so.
-
Point the canister’s nozzle at a 45-degree angle into a container. Vent the gas as quickly as possible without spraying liquid everywhere; the quicker the venting, the better the infusion. When all of the gas is out, open the canister and take a listen. Once there is no longer audible bubbling, you can proceed. Strain the infusion through a fine-mesh sieve or Superbag.
-
Funnel the infusion back into the original liquor bottle and refrigerate until ready to use. Because these infusions extract delicate flavors, they are best used within a month—though some delicate flavors (such as herbs or citrus zest (see Meyer Lemon Aperitif, this page) are most vibrant within 1 week.
ISI WHIPPERS
We highly recommend the whippers made by iSi. While other “culinary whippers” are available, we find that the longevity of an iSi stands up to their higher price point. Their whippers come in many sizes, and we recommend using the 1-liter Thermo Whip model for its high-quality components and insulated chamber. Aside from infusions, these whippers are perfect for making whipped cream (see White Russian, this page), especially if you’re making high volumes of cocktails.
CENTRIFUGE INFUSIONS
We learned this technique (among many others) from Dave Arnold, food scientist extraordinaire, and it has allowed us to create some of our most outlandish infusions, featuring flavors we’d never imagined we could use in cocktails, such as our Graham Cracker–Infused Bourbon (this page) to make an Old-Fashioned variation (Campfire, this page). Unfortunately, it does require a centrifuge, which is a very expensive piece of equipment.
Generally speaking, making a centrifuge infusion involves first blending solid ingredients with booze to maximize surface contact and speed the infusion process, then using a centrifuge to separate the solids and clarify the liquid. Note that with this process, some of the liquids from the solid ingredient end up in the infusion. For example, in our Strawberry-Infused Cognac and Mezcal (this page, used in the Berry Picking, this page), some strawberry juice ends up in the infusion. This can yield delicious results, but the infusion may be more prone to spoilage and therefore have a shorter life span. Also, be aware that if much liquid from the flavoring ingredients ends up in the infusion, this may decrease the proof of the final product.
It can take some trial and error to figure out the right proportion of booze to flavoring ingredient. With dry ingredients, such as dried fruits or graham crackers, start with a 1-to-4 ratio by weight of flavoring ingredients to booze. For ingredients that contain water, such as bananas or strawberries, start with a 1-to-2 ratio. With ingredients that have very subtle flavor, such as watermelon, you might use a 1-to-1 ratio.
HOW TO MAKE CENTRIFUGE INFUSIONS
Gram scale
Blender
Fine-mesh sieve
Bowl or other vessel
Centrifuge
Paper coffee filter or Superbag (see this page)
-
Carefully measure the ingredients by weight.
-
Combine the ingredients in a blender and process until the solids are completely pureed.
-
Next, strain the mixture into a container. But first, weigh the container. (Or, if your scale has a tare function, place the container on it, zero the scale, then add the mixture and determine its weight.)
-
Strain the mixture through a fine-mesh sieve to remove any large particles.
-
Weigh the filled container, then subtract the weight of the container to determine the weight of the liquid to provide the baseline weight for the following calculation.
-
Calculate 0.2% of the weight of the liquid (multiply by 0.002) to get X grams.
-
Stir X grams of Pectinex Ultra SP-L (see this page) into the liquid. Cover and let sit for 15 minutes.
-
Stir again to mix any separated liquid and divide the liquid evenly among the centrifuge containers. Weigh the filled containers and adjust the amount of liquid in each as needed to ensure their weights are exactly the same; this is important for keeping the centrifuge in balance. (Off-balance centrifuges are dangerous!)
-
Run the centrifuge at 4,500 rpm for 12 minutes.
-
Remove the containers and carefully strain the infusion through a paper coffee filter or Superbag, being careful not to disturb the solids that have collected on the bottom of the containers.
-
If any particles remain in the infusion, strain it again.
-
Transfer to a storage container and refrigerate until ready to use.