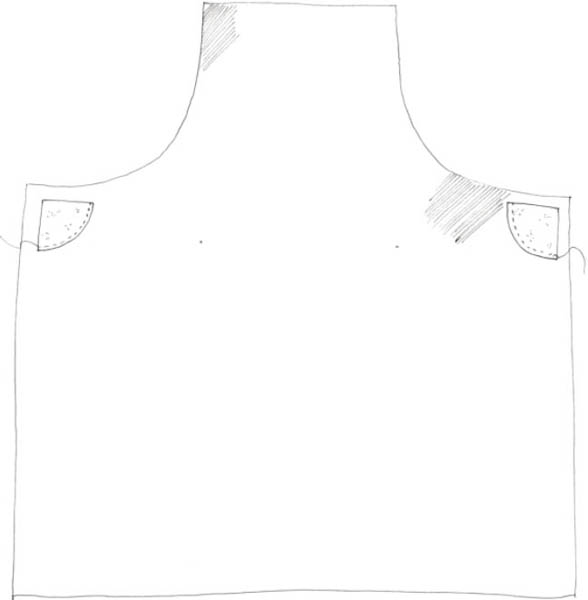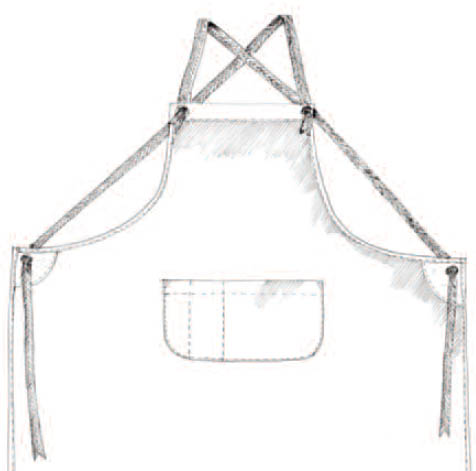
Our denim apron makes an industrious statement in the kitchen, the garage or your artist’s studio. It has some nice touches, such as the traditional crossover cotton tape tie arrangement instead of the more usual loop neckband and waist ties. We especially like the reinforced leather corner pieces, which will only improve with wear. The bib and side seams are turned over and stitched to the front of the apron, but we have made the divided pocket the right way around and hemmed in the standard way.

The cotton tape ties are threaded through large zinc eyelets; these have a front and back so get it right!
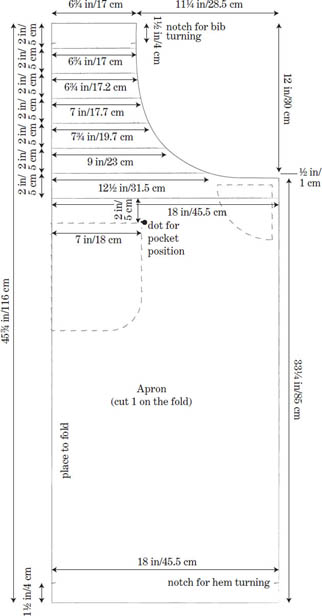
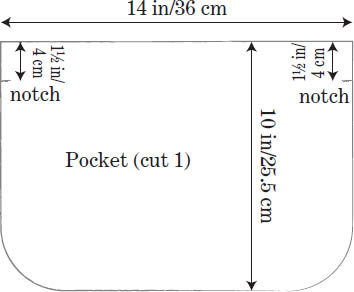
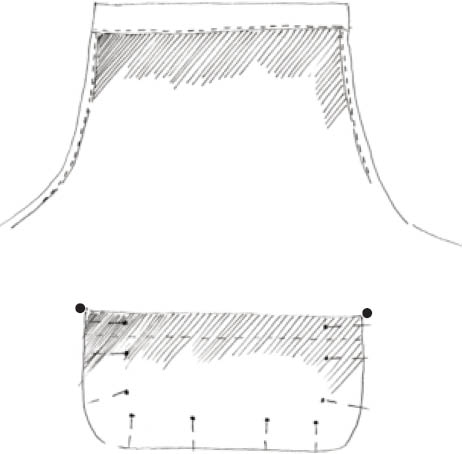
1• Make paper patterns for the apron and the pocket following the measurements given in Figs 1a and 1b. Fold the denim cloth in half and pin the pattern pieces in place. Cut out. On both sides of the apron piece and using the tailor’s chalk, mark the dots for the position of the pocket and the notches for the bib and hem turnings. On the pocket piece mark the notches for the turning at the top of the pocket.
Fig 1a
Fig 1b
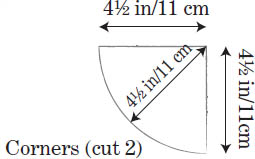
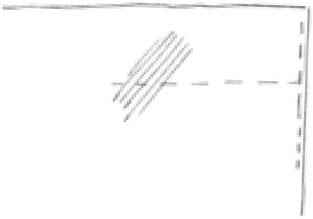
2• Mark out two quarter circles on the leather following the measurements given in Fig 2. Cut out.
Fig 2
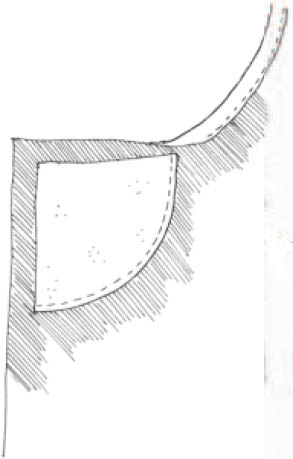
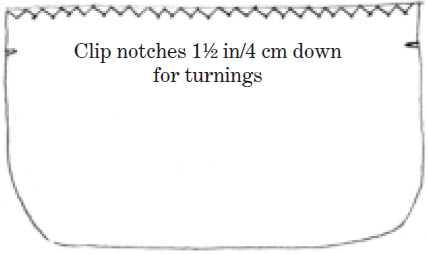
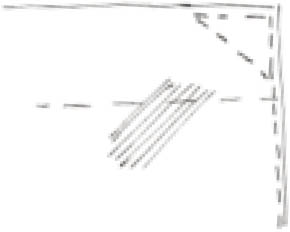
1• Start by zigzagging the edges of the apron using a wide but short stitch; alternatively, overlock. Place the leather pieces 3/8 in/1 cm away from the side corners on the right side of the apron as shown in Fig 3.
Fig 3
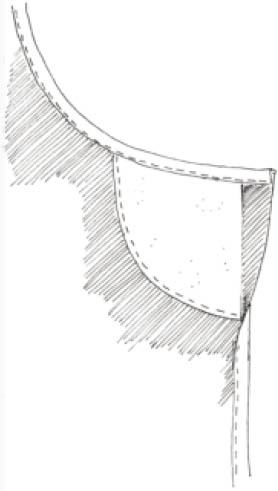
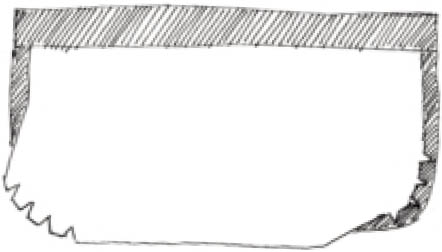
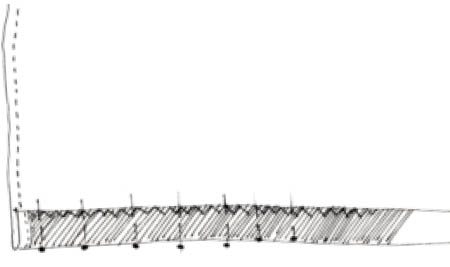
2• Sew along the curved side of the leather corner pieces 3/8 in/1 cm away from the edge (Fig 4a) – see page 96 for advice on sewing on leather. Fold over a 5/8-in/1.5-cm seam allowance at the sides of the bib onto the right side of the apron – note, this will cover the top of the leather corners (Figs 4a and 4b). Press and edge stitch into place. Sew the seams along the sides of the apron skirt in the same way (Figs 4b and 4c).
Fig 4a
Fig 4b
Fig 4c
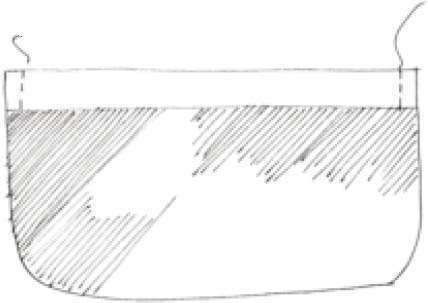
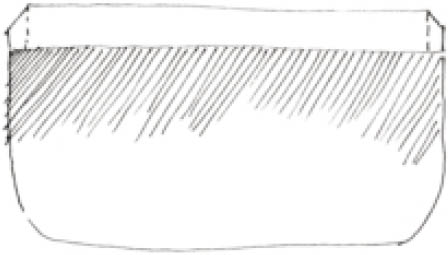
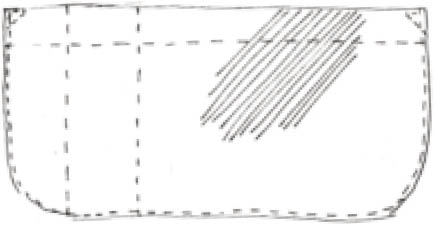
3• Turn over the top edge of the bib to the right side of the apron and pin into place (Fig 5).
Fig 5
4• Press well and edge stitch into place (Fig 6).
Fig 6
1• Take the pocket piece and clip the turning notches. Zigzag or overlock along the top edge (Fig 7).
Fig 7
2• With the pocket right side facing you, fold over the turning at the top edge (wrong side facing) and pin into place (Fig 8a). Sew at either side taking a 5/8-in/1.5-cm seam allowance (Fig 8b). Trim the corners (Fig 8c). Turn the top turning through to the right side and poke out the corners.
Fig 8a
Fig 8b
Fig 8c
3• Now turn the pocket over to the wrong side. At the bottom curves, snip triangles about 3/8 in/1 cm deep; then fold over the 5/8-in/1.5-cm seam allowance and press (Fig 9). The snips make a neat curve without bulk; keep pressing until the curves are perfect and the corners really neat.
Fig 9
4• Turn over the pocket to the right side and topstitch along the top turning (Fig 10).
Fig 10
5• Using the marked dots as a guide, pin the pocket on to the front of the apron (Fig 11). Edge stitch into place.
Fig 11
6• Finish the corners with a triangle for extra strength. Make one reverse stitch when stitching the top edge to give a straighter corner (Fig 12a). To make sure that your corners are the same size, count the stitches used along the top edge: 7–8 stitches should be about right if you are using a medium stitch length (Fig 12b).
Fig 12a
Fig 12b
1. Working on the wrong side of the apron, turn the them up at the notches and pin into place (Fig 13). Sew along the top of the hem.
Fig 13
2. Now make the divisions in the pocket. Use a ruler and tailor’s chalk to mark to your preference, then stitch carefully along the lines. You can decide on the size of the pocket divisions you want, or have none at all.
Fig 14
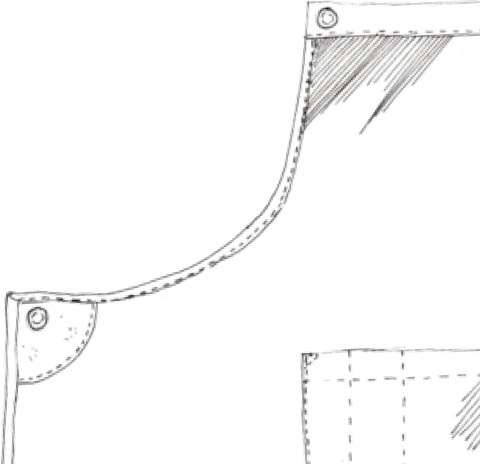
3. Following the manufacturer’s instructions, fit • an eyelet to each corner of the top of the bib so that the center for the eyelet hole is approximately 3/4 in/2 cm from the top edge and 5/8 in/1.5 cm from the side edge. Now fit an eyelet through the leather corners at the top of the apron skirt so that the center for the eyelet hole is approximately 1 in/2.5 cm from both the top and side edges (Fig 15).
Fig 15
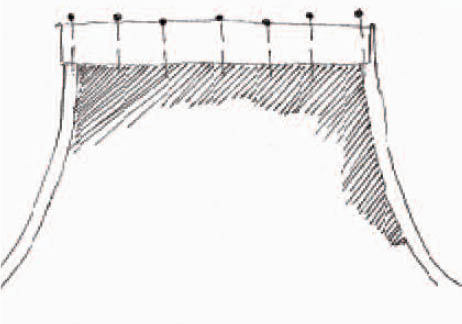
4. Cut the cotton webbing tape in half. Thread each piece of webbing tape through the bib eyelets, making knots on the right side to secure. Crossover at the back and thread through to the front of the side corners (Fig 16). The ends of the ties can be attractively finished by cutting into a “V” shape.
Fig 16