We have made this useful little bag from oilskin. Sling it over your shoulder and keep your little essentials safe and close – ideal for the passport, tickets and keys. With this project you will get to make a strap from scratch and fix an eyelet to attach it to. Small as it is, the making of the document bag requires some skill and concentration. On the bright side, oilskin is very easy to sew as it is very stable and topstitches well.
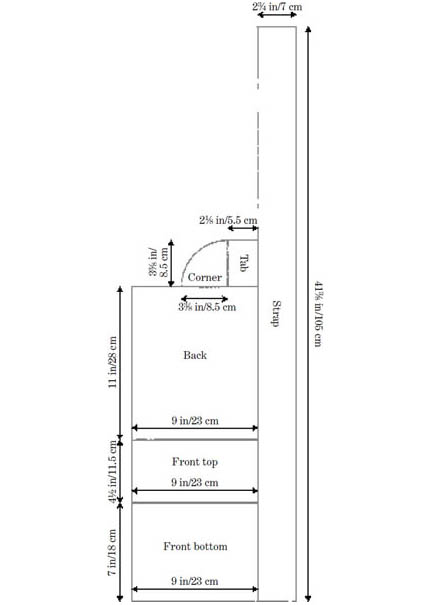
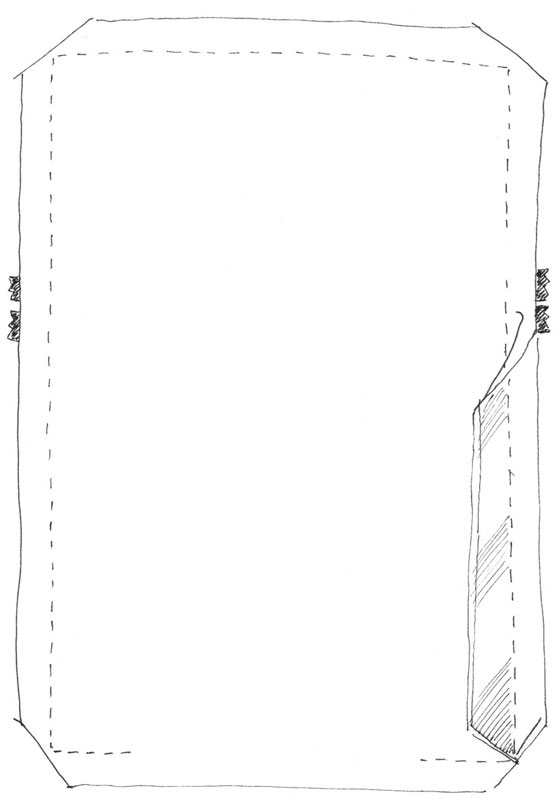
1. Following the measurements given in Fig 1, use the tip of a small pair of scissors to mark the main bag pieces directly onto the oilskin (there is no need to use chalk or a pencil), and cut out. For the bag lining cut a piece of cotton canvas or dry oilskin measuring 11 by 9 in/28 by 23 cm.
Fig 1
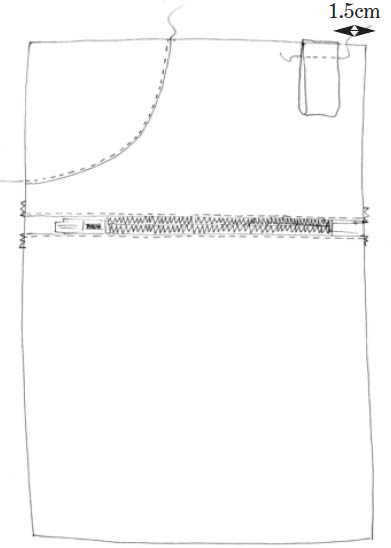
1. Take the main bag front top and front bottom pieces and zigzag (or overlock) along the edges where the zipper will be inserted, as shown in Fig 2.
Fig 2
2. First the zipper is stitched to hold it in place (you can tack it before you sew if you prefer). Using the zipper foot, and with right sides facing and edges aligning, sew the zipper to the front top (Fig 3a), then to the front bottom (Fig 3b), ensuring that the zipper is centered perfectly (Fig 3c).
Fig 3a
Fig 3b
Fig 3c
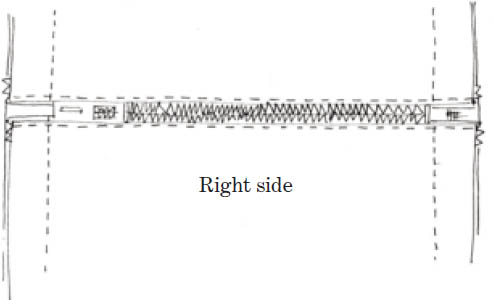
3. Working on the right side, fold the edges of the fabric over to meet the teeth of the zipper, and edge stitch as close as you can to the zipper (Fig 4a). Check the zipper is even and straight (Fig 4b).
Fig 4a
Fig 4b
1. Change back to your standard presser foot ready to make the ring tab. Fold the tab piece in half and sew lengthwise taking a 3/8-in/1-cm seam allowance; trim the seam to 1/4 in/5 mm (Fig 5a). Open the seam and move it to the center; sew along one end taking a small seam allowance (Fig 5b). Turn the tab through to the right side and push out the corners using a loop turner, pencil or knitting needle (Fig 5c).
2. Now make the corner piece. With right sides facing, sew the bias binding along the curved edge of the corner piece, following the fold line of the binding (Fig 6).
Fig 6
3. Turn the bias binding to the wrong side and roll the edge so that the curve is perfect. Pin the corner piece to the top left corner of the front of the bag (Fig 7) and edge stitch into place.
Fig 7
4. Fold the ring tab in half, and pin to the top right-hand corner of the bag front 5/8 in/1.5 cm away from the side, aligning the tab ends with the fabric edge. Sew into place 3/8 in/1 cm from the edge (Fig 8).
Fig 8
5. Place the right side of the lining to the wrong side of the bag front; pin and sew together all the way around. The stitch line should cross the very end of the zipper so that there is no gap. Sew carefully; if you hit the metal of the zipper you will break the needle (Fig 9).
Fig 9
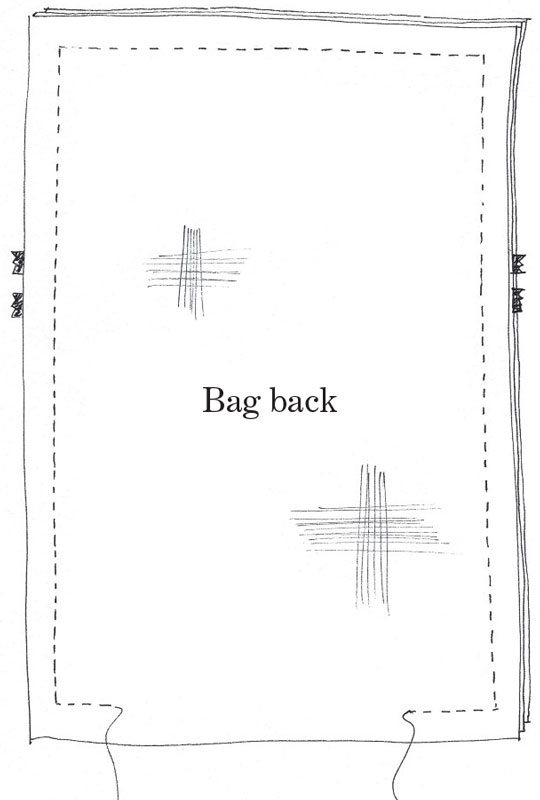
6. With right sides together, pin and sew the bag back to the lined bag front along the stitching line in step 5, leaving a 6-in/15-cm gap at the bottom edge (Fig 10).
Fig 10
7. With the bag still inside out, trim the corners. Open the seams and force flat using your tailor’s shears; press down hard and run the closed blades along the seams until they lie perfectly flat (Fig 11). Repeat through all the layers until the seams are really flat. The better you do this, the better the finish.
Fig 11
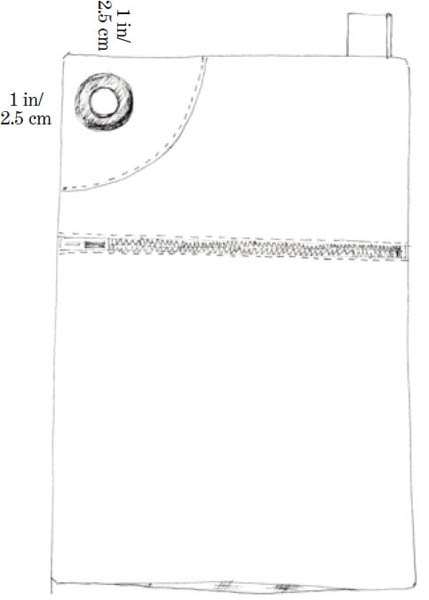
8. Turn the bag right side out and roll all the edges until they are really flat. On the top corner piece, mark the position of the eyelet 1 in/2.5 cm from the side and 1 in/2.5 cm from the top (Fig 12). Insert the eyelet following the manufacturer’s instructions. Slip stitch the opening at the bottom of the bag closed.
Fig 12
1. Fold the strap piece in half, right sides together and sew lengthwise 3/8 in/1 cm from the edge, leaving a 20-in/50-cm gap in the center (Fig 13). Sew along the ends and trim the corners.
Fig 13
2. Turn through to the right side pulling each end through the gap. It is hard to poke out the corners so try pulling them out from the right side using a pin. Turn in the seam allowances of the gap and lightly press to align them perfectly with the rest of the strap (see The Pressing Needs of Various Materials on page 63). Roll the edges of the strap until nice and flat. Edge stitch all the way around, stitching the gap closed as you go (Fig 14).
Fig 14
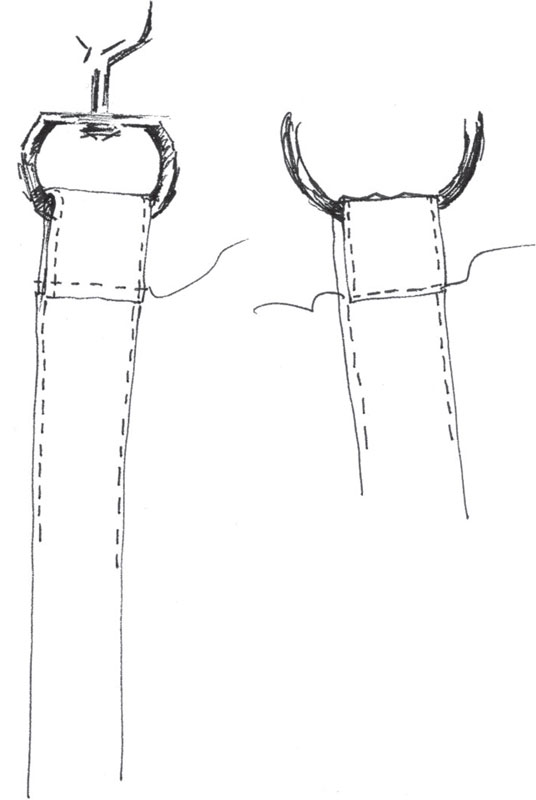
3. Fold one end of the strap over the ring end of the swivel hook and the other end of the strap over the 1-in/25-mm ring. Pin and topstitch into place (Fig 15). Thread the ring onto the ring tab and clip the hook onto the eyelet.
Fig 15