


BE A HOME-IMPROVEMENT HERO
When a problem arises and the other members of your household are wailing and gnashing their teeth, it’s always nice to be the hero. To stop a messy leak or to unclog a toilet—those are feats of great strength and brilliance, and your family will surely sing your praises as you come to the rescue.
This chapter will show you the typical systems and components of a house and how to make quick fixes that can save the day without delay. Every homeowner should have a firm grasp of how their home functions as a system, from the insulation to electrical wires to the moisture barriers that protect the living space from water intrusion. A basic understanding of these house components will help you locate problems and make simple repairs. Plus, you can identify areas in need of improvement.
We delve into basic plumbing techniques and electrical work. Learn to solder copper pipe and join PVC plumbing. Learn to replace a light fixture and how to wire an electrical outlet. Maintenance is another major focus, because it’s smarter to make a small early repair than pay to fix major damage later. You’ll even find advice on how to conduct your own home inspection, much like a pro does. Whether you need to patch a rotting window, silence a squeaking floor, or fight mold in the household, we show how to get it accomplished with minimal headache. Keep this book in safe, dry place to grab whenever you need to a fast answer.

069 INSPECT YOUR HOME
The purpose of a professional home inspection is to examine the grounds, structure, and mechanical systems for defects, broken or obsolete components, and any damage from weather, rot, or wear and tear. Making your own annual home inspection can help to determine any necessary repairs you can make to prevent bigger problems in the future.
A home inspection will have three major considerations: water, safety, and HVAC (heating, ventilation, and air conditioning). For example, the primary concern for a site’s grounds is ensuring that water drains away from the house. Another area to inspect is the sidewalks, making certain that cracks won’t be a trip hazard.
070 WATCH FOR WATER
Water should always be diverted 10 feet from the house foundation. This can be accomplished by using a gutter system’s downspout extensions, splash blocks, or downspout drains. The grading should be sloped away from the house, dropping 6 inches for every 6 feet. Poor drainage can lead to accumulated hydrostatic pressure against the home’s walls, which can cause basement walls to buckle, or lead to water erosion, which can weaken the home’s foundation.
071 CHECK THE EXTERIOR
A home’s exterior reveals a lot about potential issues you may face. Here’s what to check for.
PLANT INVASION Inspect tree overgrowth that causes excessive shade, which can contribute to mildew and rot on the house. Overgrown trees and shrubs that contact the house can lead to pest infestation and should be trimmed back.
WALL TROUBLE Any evidence of bulging or bowing exterior house walls could indicate a problem with the studs. Studs can warp if water has penetrated the wall and contacted the wood.
A TIGHT SEAL Use a pick or awl to prod at the wood casing and trim of your doors and windows. Look for peeling paint and soft, spongy wood. Make sure that the flashing is installed above and around the windows to divert water. At the doors, check the thresholds for normal wear and tear and any wood rot. All of a home’s wood trim is susceptible to rot; check for warping, splitting, peeling paint, and missing caulking. Cut away deteriorated caulking and replace with a new high-quality exterior sealant.
DECK DAMAGE Check every single deck, porch, and balcony for structural integrity. For any decks attached to the house, pay close attention to the ledger board connection, which is prone to rot and water damage if improperly installed. If damaged, it can be a common cause of deck collapse.
072 GET UP ON THE ROOF
Check all these basic roofing components, too.
SURFACE Use a ladder and binoculars to inspect the roof exterior. Missing or damaged shingles, or gutters full of granules, indicate a need for replacement. Check all roof penetrations for worn or missing roof flashings. Look out for bowing, expansion, or waviness in the roof deck, indicating a problem with the framing.
CHIMNEY Look for cracks in the chimney or evidence of any smoke escaping through mortar joints. A distorted or discolored rain cap, creosote flakes on the roof and ground, or damaged roofing material could indicate a dangerous creosote buildup in the chimney.
GUTTERS Inspect gutters and downspouts for leaks or cracks. Ensure that they’re free of leaves or other debris that impede drainage. Gutter covers help keep them clog-free.
EXTERIOR WALLS Check the exterior siding for structural integrity, secure attachment, and signs of rot or water penetration. Weep holes in brick and veneer should be open. Look for cracks in stucco—due to expansion of plywood sheathing beneath—that can allow moisture to penetrate. Inspect the exterior insulating finish system (EIFS) with a moisture meter to check unseen areas behind the wall surface.

073 CHECK IT OUT INSIDE
After examining a home’s exterior, it’s time to look inside for the following things.
WATER DAMAGE Examine all surfaces, doors, and windows for any water issues. Check the basement, fireplace, and attic. Stuck interior doors can be a sign that the foundation is moving due to water pressure. A wall or ceiling may sag if it’s been exposed to water. Plaster walls exposed to water can lose all structural integrity. On walls that have wood paneling, ensure the panels aren’t bowed or warped, which could indicate moisture behind the wall. The attic needs proper ventilation; humidity can originate from a bathroom vent that terminates in the attic, as well as from roof leaks. Find and repair the source immediately. In bathrooms, check out the ceiling beneath the shower pans for signs of moisture. Test behind tiling using a moisture meter.
STRUCTURAL ISSUES Popping nails might be a sign of inadequate wall framing. Check for any floor framing problems in the basement. Look for twisted, damaged, or rotted joists that can cause a weakness in the floor area. Sagging floors may be caused by a sagging main bearing beam. Check ceilings for nail pops, cracks, or sags that could indicate underlying structural problems. If the ceiling joists are causing the ceiling to sag, this will put stress on the adjacent walls as well as the ceiling.
ELECTRICAL SAFETY Check all smoke detectors, and use a three-prong circuit analyzer to ensure that outlets work in the proper 120-volt range. Wiring problems can cause shocks, sparks, fires, equipment failures or poor performance. Low voltage may be caused by wiring too small for the electrical load, overly long circuits, or conductors with a higher resistance when operating at high temperatures.
074 CHECK PIPES AND DUCTS
Check the plumbing pipes room by room for leakage, corrosion, and adequate insulation. In older homes, the plumbing may be lead, which is a health hazard. Apply a magnet to metal pipes. If the magnet adheres, the pipe is made of galvanized steel; if not, it’s likely a lead pipe. One way to verify that the house has adequate water pressure is to turn on all faucets. A steady stream of water should come from each one. If not, the pipe diameter could be too narrow. A professional inspector often checks for gas leaks in plumbing and appliances with a battery-operated combustible gas detector; you can buy one at a home center. The HVAC system isn’t inspected for safety or water, but for its performance. In older systems, an inspector would open the furnace to inspect the flames and other parts; newer furnaces cannot be inspected in that manner. HVAC systems can be powered by electricity, gas, or oil, and can be configured as forced air, boiler, steam, or radiant systems. If you aren’t well versed in the technology of your system, then it’s a good idea to have your home’s HVAC system inspected annually by a certified technician.
075 GET A GOOD FOUNDATION
Inspect crawlspaces and basements for signs of water penetration or cracks in foundation walls. Water forced through below-grade walls indicates drainage problems outside the home. Check foundation and retaining walls with a 4-foot level. If they list or bow from external pressure, they may eventually collapse, and you should consult a structural engineer.
CRACKS Hairline cracks in a foundation may simply be cosmetic (occurring as the foundation cures), but they should still be monitored. V-shaped cracks (wide at top, narrow at bottom), or ones extending the wall’s full height, are likely caused by uneven settlement of the footing and will usually worsen over time. A floor slab that cracks or heaves upward may indicate a high water table. Install footing drain tiles to counteract the issue.
DRAINAGE If a home has a sump pump, drainage is a possible issue. Check the outside foundation perimeter for ruts on the ground or bare spots from erosion, which indicates more water flow than the soil can absorb. Installation of drainage conduit can provide a solution.
WOOD ROT Use a screwdriver or awl to check areas for wood rot or decay inside the framing. Wood rot is caused by a fungus and is as damaging as termites. Inspect framing members near the ground for signs of termite infestation, such as mud tubes lined with dirt. Termites’ wings fall off easily, so a pile of wings is another clue to their presence.
EXTERIOR WALLS Check exterior siding for structural integrity, secure attachment and signs of rot or water penetration. Look for functional weep-holes in brick and brick veneer. In stucco, check for cracks due to the expansion of the plywood sheathing beneath it. Cracks of any size in the stucco will allow moisture to penetrate. When inspecting the EIFS, use a moisture meter to inspect unseen areas that might contain moisture behind the wall surface.
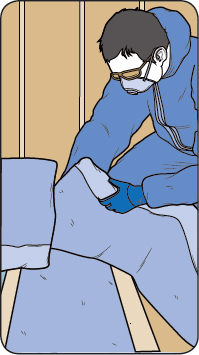
076 UNDERSTAND INSULATION
Insulation helps keep a home warm in the winter and cool in summer. It saves energy, lowers your utility bills, and can makes for a more comfortable home. Any exterior walls that separate conditioned and unconditioned spaces should be insulated to create a thermal envelope. There are several insulation products designed for specific uses. For the best energy efficiency, you should combine several of them to make a total insulating system, including products for insulating the foundation walls, exterior walls, crawlspace (underfloor), floors, basement walls, HVAC ducts, and more. Here are some other things you should know.
MIND THE GAP Maintain a minimum 3-inch space between any electrical fixtures and their surrounding insulation. This is mandated by electrical code, and if necessary you can nail wood barriers between ceiling joists to keep the insulation away.
KNOW THE R-VALUE Insulation levels are determined by the R-value, a measure of the insulation’s ability to resist any heat traveling through it. The higher the R-value, the better the thermal performance.
Your recommended insulation level will depend upon the geographic area where your home is located. According to the Department of Energy, the warm, southern regions of the country should have enough attic insulation to achieve a value of R-30 to R-60. The northern, colder areas of the United States, meanwhile, require attic insulation of at least R-49 to be properly cost effective.
DO THE MATH The amount of insulation that you need to achieve a certain R-value depends on the type of insulation that’s being used. For example, 3½ inches of fiberglass will achieve R-13, while 2 inches of rigid foam polystyrene achieves R-10. The R-value will be printed on the package of the insulation product so that you can easily calculate how much is required. R-values of individual products can be added to achieve recommended levels. For example, an R-38 added to an R-11 results in R-49.
A home’s exterior walls should include both a moisture barrier and insulation installed upon construction. Any other areas of your home that you determine to have inadequate insulation can usually be retrofitted to increase the R-value.

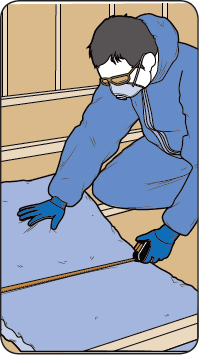
077 KNOW YOUR MATERIALS
A wide range of insulation products is available to totally envelope and insulate a building. The major types of insulation include fiberglass, blow-in, spray foam, rigid foam, and various types of loose fill. Here are the basics on each kind.
TYPE
Fiberglass
TYPICAL USAGE
Commonly used in walls, attics, and crawlspaces.
YOU SHOULD KNOW
• The most commonly used type.
• Inexpensive and easy to install.
• Available in rolls (cut to suit) and batts (precut lengths available for 8- and 9-foot walls).
PRO TIPS
If you install additional fiberglass insulation over existing attic insulation, be sure to use unfaced rolls or batts. When the joist cavity is full, install the second layer of unfaced insulation over the ceiling joists to reduce heat loss through the wood.
Blow-in
TYPICAL USAGE
A good choice for installing a large amount of insulation in enclosed walls or in narrow spaces, like between ceiling joists in cramped attics.
YOU SHOULD KNOW
• Achieves uniform coverage even in hard-to-reach areas.
• Can easily be done by a DIYer with a weekend to spare.
PRO TIPS
To fill enclosed walls, an access hole can be cut in the wallboard near the ceiling to fill the stud cavity. Once filled, the hole can be patched or concealed with trim molding.
Spray foam
TYPICAL USAGE
Popular in new construction, where the exposed framing can be filled without obstruction.
YOU SHOULD KNOW
• The foam expands to provide a flexible foam blanket of millions of tiny air cells, filling building cavities and sealing cracks and crevices.
• Dries quickly, and any excess material can easily be trimmed off, leaving a surface ready for drywall.
PRO TIPS
Most spray-foam products are dealer-installed and arrive on a truck with a lot of complex equipment to seal a whole house. However, some companies make products available to the do-it-yourself homeowner.
For room additions, remodels, and targeted areas in the attic or basement, check into disposable self-contained polyurethane kits, which are engineered for professional duty but are also easy to use.
Rigid foam
TYPICAL USAGE
Can be used to retrofit basements and other areas of a home where there is not enough room for batts or blow-in.
YOU SHOULD KNOW
The 4X8 polystyrene sheets are available at home stores in thicknesses typically ranging from ½ to 1 inch.
PRO TIPS
The material is easy to cut with a straight edge and a utility knife, and installation is similar to fiberglass batts.
Radiant barrier
TYPICAL USAGE
Blocks the sun’s rays from transferring heat to your attic, reflecting up to 96 percent of solar energy and saving on air conditioning.
YOU SHOULD KNOW
In cooler weather, it helps to keep any radiant energy from leaving the roof, thus reducing heat loss so that you don’t have to blast the furnace as much.
PRO TIPS
Various radiant barrier products are available that install as flexible sheeting that fastens with staples, or as friction-fit panels that snap between rafters.
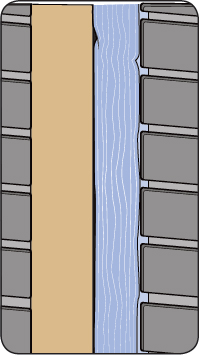
078 SEARCH FOR LEAKS
Whether from drywall, carpentry, flooring, or HVAC, air leaks represent money out the window. In cold weather, warm air rises into the attic of the home. As it enters the attic, it leaves the living space, which you’re paying to heat. It also pulls in cold air from other cracks and crevices in the home, around doors and windows, and through the basement. In essence, these leaks create a vicious cycle that can drain away energy and money. Inspect your home carefully for any leaks, which can be difficult to find when hidden beneath insulation. Some common problem areas include the attic hatch, plumbing vents, wiring holes, recessed lights, and the soffit boxes that contain them.

LIGHT A CANDLE A simple way to check for air leaks is to use a burning candle. On a cool, windy day, close all doors and windows and turn off the furnace. Turn on all the vent fans in the house to encourage the leaks. Move the lit candle around the edges of doors and windows. Look for the smoke to flutter or the flame to flicker, which indicates a leak.

TEST THE TEMPS If temperatures differ more than 1 or 2 degrees in various areas of a room, it may be poorly sealed. Use weather-stripping and/or caulking, then retake the temperatures. (If the differences persist, you may have an HVAC airflow problem.)
KNOW YOUR WEAKNESS Certain spots in the home are particularly vulnerable. Check round the furnace flue or the duct chaseway (the box that hides the ducts) for leaks. Next, investigate indoor areas including heating and dryer vent penetrations, gaping baseboards and cracks along sill plates ,and floor-to-wall junctions. On the outside, look for leaks at the bottom of siding edges where they meet the foundation, along garage ceiling and wall joints, and all electric, gas, and A/C penetrations. Also examine the basement rim joists and all windows and doors.
DO AN AUDIT Consider investing in an infrared thermometer, for a DIY home energy audit. For as little as a hundred bucks, handheld laser-sighted tools can detect energy loss around doors and windows, insulation, ductwork, and other areas throughout the home.

PRO TIP
APPLY CAULK Sprayable release agents can prevent caulk from sticking to the surrounding areas, making shaping the joint that much easier. Similarly, masking the joint with painter’s tape can also help to eliminate mess if you are not fully comfortable with your prowess with using caulk.
079 FILL THE GAPS
Seal leaks between moving parts with weather stripping. Use caulking between non-moving parts. You can use a wide variety of products, such as caulk and foam backer rods, silicone or water-based sealants, or rolls of foam. Another popular sealant is spray-in expandable foam, which comes in an aerosol can. It’s important to select the right insulating foam for the job; too much expansion in the wrong place can put unwanted stress on the construction. Use “no warp” formula around windows and doors.
080 LAY A BETTER BEAD
Caulking is a necessary evil. Applying the stuff is a messy job, whether you’re sealing the home or filling joints on trim to achieve the finished look that separates professional jobs from amateur attempts. Control and consistency are the keys to a better caulk bead.
STEP 1 Clean the work area before application to promote adhesion, to prevent debris from disrupting application of the bead, and to keep any unsightly dirt from being embedded in your fresh caulk.
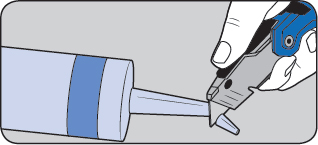
STEP 2 Cut off the tip of the tube at a straight 90-degree angle. Start at the tip to keep the hole small. If the hole is too big you’ll sacrifice control of the bead. Puncture the seal inside the nozzle with a stiff wire or thin rod.

STEP 3 With the tube loaded in the caulk gun, pull the trigger several times to advance the caulk to the tip of the nozzle. Release pressure from the plunger any time you’re not applying caulk to prevent excess from squirting out of the gun’s tip.
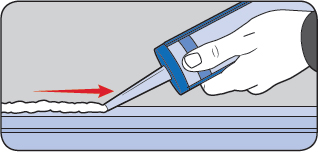
STEP 4 Begin at the horizontal joints. To ensure that a full bead adheres to both planes of the caulk joint, rest the tip of the nozzle equally on both surfaces. Depress the trigger with one hand to force caulk into the joint as you stabilize the gun and move the bead with the other.
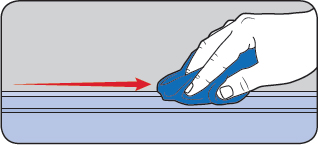
STEP 5 Keep the gun at a 90-degree angle to the wall for consistent application and easy visibility. Move steadily to keep the bead as consistent as possible to avoid gaps. If you cross any vertical joints, caulk a few inches up or down the joints, which makes it easier to connect the caulk beads later.

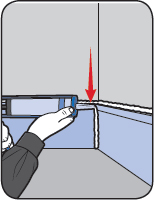
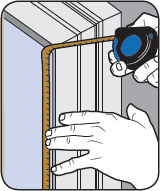
STEP 6 Fill in all the vertical joints, tying them into your horizontal runs. Wet a short wooden dowel or shaping tool, and draw its tip over the bead to scrape away excess caulk and to press it into a concave shape. Keep plenty of paper towels for cleanup.
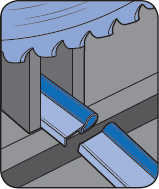
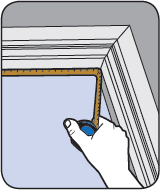
081 SEAL A LEAKY DOORWAY
Even the most energy-efficient HVAC systems can still cost plenty if warm or cool air is wasted through leaky doors. As a house settles over time, door frames often shift, creating a gap around the perimeter. A general rule of thumb: If you can see light between the closed door and the jamb, you have a problem. If this happens to a door leading outdoors or to an unconditioned living space, it equates to leaving a window cracked. The solution here is to install a simple weather-stripping kit.
WHAT YOU’LL NEED:
• Weather-stripping kit
• Drill or driver
• Measuring tape
• Hacksaw
Hardware stores sell several varieties of weather stripping, but the best type for doors has a rigid aluminum bar along with a soft rubber gasket, called a bulb. The bulb compresses against the closed door to prevent the passage of air and moisture. The kits are usually sold with three pieces—one for the top and two for the door sides (screws included). The pieces often come in standard door heights, but any of the three components can be trimmed to size.
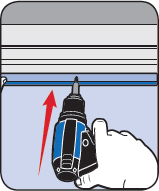
STEP 1 Measure from the door sill to the upper jamb.
STEP 2 Cut the weather-stripping to length using a hacksaw.
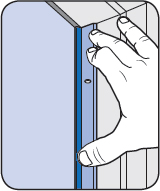
STEP 3 Close the door and press the weather-stripping firmly onto it.
STEP 4 Drive screws into the slots, but leave them all loose (predrill holes if fastening into a metal door frame). Repeat for the door’s opposite side.
STEP 5 Close the door and position the strips so that the gasket is compressed.
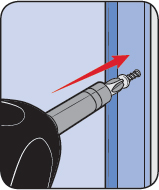
STEP 6 Measure between the side strips for the top piece of stripping.
STEP 7 Cut the top strip to fit, and fasten tightly in place when compressed.
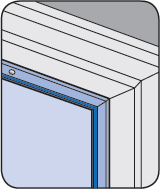
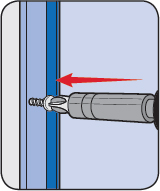
STEP 8 Close the door a few times to check the seal and make minor adjustments. Retighten until you’ve completely closed off the gap.
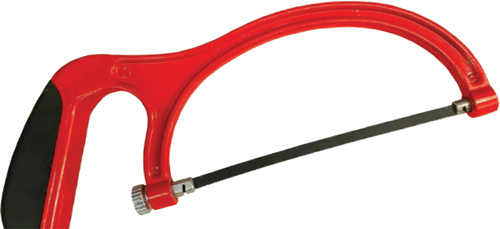
082 BE A HAPPY HACKER
A hacksaw is a frame-type saw that cuts metal. The blade is replaceable, thin ,and flexible, with fine hardened teeth that are held in tension by the frame. Plenty of people own a hacksaw but feel uncomfortable using it, since cutting metal can be tricky. Here are basic hints for happy hacking.
STAY SHARP Hacksaw blades are cheap; there’s no excuse for using a dull one. Buy a box of at least two different teeth; change a blade when it begins to grab.
STIFFEN UP Flexibility is your enemy here. If your blade isn’t screwed in as tight as possible, it’s possible that it may twist or flex during sawing, making the process less efficient (and your arms more sore). Tighten the nut until the blade is totally rigid, then see if you can tighten it a little more.
TRY THE TEETH Blades range from 14 to 32 TPI (teeth per inch); coarser blades are suited for soft metals like brass or aluminum, and finer blades are best for thin, harder materials. Use the right blade to ensure a precision cut.
PRESS HERE, PLEASE Keep in mind that the blade’s teeth face forward, so cutting will only occur on the forward stroke. You shouldn’t be using any pressure at all on the backstroke.
STROKE SMOOTHLY Use long strokes that allow you to use as much of the blade as possible on each pass. Push firmly, but not so hard that you bend the blade or move more quickly than the saw’s capabilities, and maintain a smooth, constant pace. Lubricate the teeth with a little oil or WD-40 to cut down on friction and help remove metal particles from the teeth.
083 STAY IN THE ZONE
Zone heating is an efficient method for optimizing the way you warm your home. Typical occupants spend 80 percent of the time in 20 percent of the house, so it makes sense to only heat or cool the area that’s currently in use.
A basic technique with an existing forced-air heating system is to adjust the vents in the unoccupied rooms. Do not close the vents completely, however. Sealing the vents closed could decrease airflow through the air handler, cause pressure imbalances, and put stress on the duct connections. Closing vents by 75 percent can be effective. (The vent closest to the thermostat should always be open.)
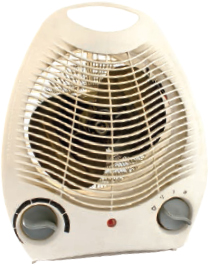
SPACE HEATERS A simple and cost-effective way to supplement your central heating system is with a plug-in heater. The most common are ceramic space heaters with fan-forced air. Available in a wide range of designs, these are safe, compact, and ideal for heating spaces up to 150 square feet.
INTEGRATED SYSTEM ZONING This involves a set of multiple thermostats connected to a control panel that operates different dampers within the HVAC ductwork. Radiant floor heating is another option for controlling heat zones.
FORCED-AIR SYSTEMS These work best inside homes where the different zones can be isolated from each other by closing doors. Avoid shutting off the heat entirely in an unused part of your home, because condensation could form on cold interior wall surfaces and lead to mold. Also, keep all rooms at a minimum of 50 degrees Fahrenheit during the winter to keep water pipes from freezing.
084 SAVE ENERGY
Heating and cooling system costs account for approximately 45 percent of the average home’s utility bill, or about 45 cents of every dollar. For lower bills, use less energy.
One good way is with modern energy-efficient windows. These include spacer systems, inert gas fillings, and special glass options that reduce energy usage by 34 percent compared to non-coated, single-pane windows. The space between the double panes may be filled with argon, an odorless, colorless, nontoxic gas six times denser than air. This design prevents air infiltration and acts as an added barrier to prevent harmful ultraviolet rays from entering the home. Low-E (emissivity) glass also has a transparent metallic oxide coating to reflect heat.
Aluminum storm windows are another alternative, installed over existing windows to insulate and block drafts. Some storm windows even come with Low-E glass.

085 JOIN THE PROGRAM
Programmable thermostats automatically adjust your home’s temperature settings several times a day to fit your lifestyle. They can save money on energy costs and allow you to program when the system should scale back on heating or cooling. In winter, set the heat to kick on during your commute home so you step into a warm house. In summer, keep air conditioning low in the morning to avoid cooling an empty house while you’re out.
PRO TIP
STAY DRY, KINDA Indoor humidifiers soothe irritation from dry air, but any excess humidity can breed mold or bacteria. Ideal humidity in your home should be kept between 30 and 50 percent.
086 CHANGE YOUR FILTER
Be diligent about regularly replacing the filters that remove dust from the air as it circulates through the HVAC system. Most systems use disposable filters. Some furnaces have an electrostatic filter, which is a sturdy metal filter that needs to be cleaned every few months. In either case, a clogged filter hinders airflow, and your system has to work harder to get the temperature set by your home’s thermostat.

087 GET READY FOR WINTER
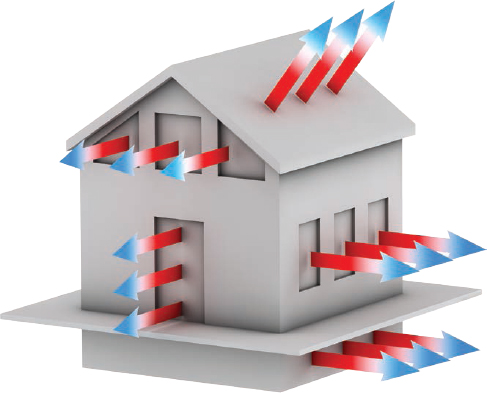
When the temperature drops and cold weather rolls in, it’s time to prepare your home—inside and out—for the winter elements because, yes, winter is coming. Sealing off air leaks and installing adequate insulation are two of the most effective ways to save energy, but your efforts shouldn’t end there. When giving your house its annual physical exam, don’t overlook any of these crucial areas.
WINDOWS Ideally, your home should have double-pane and low-emissivity coated window glass. You can also insulate your windows using heat-shrink plastic insulation. One option for wooden-frame windows is to cover the outside with heavy plastic to reduce cold air infiltration. Staple the sheeting over the outside, leaving a 4-inch overhang at the perimeter. Secure the edges with wooden furring strips, fasten to the outside window frame, then trim off the excess plastic.
HVAC Have an HVAC technician do a full inspection of your furnace for proper performance. If the furnace is made of old-fashioned sheet metal ductwork, consider replacing it with insulated ducts, including the plenum. If you use propane or heating oil, ensure that the tank has been filled.
PLUMBING Insulate outdoor hose bibs and exposed plumbing, including those in unheated crawlspaces. If you go on a winter vacation, leave your heat set to at least 50 degrees Fahrenheit so pipes don’t freeze.
GUTTER AND ROOF Replace worn or damaged shingles or flashing. An ice dam is a ridge of ice that forms at the edge of a roof, preventing melting snow from draining and causing backed-up water to leak into the home. To prevent ice dams, clean your gutters to ensure proper drainage, and install gutter covers to prevent debris accumulation. Proper attic ventilation removes heat and keeps the roof deck evenly cool to prevent melting of the ice.
FIREPLACE CHIMNEYS Have a pro chimney sweep inspect, clean, and repair any fireplaces, flues, or wood stoves. Add chimney or flue caps to keep out birds and pests. Tuck-point or repair any loose masonry, and make sure the dampers work on fireplaces and stoves. Store a winter’s supply of firewood and kindling away from the house (for safety), and cover it for protection.
ATTIC Inspect the attic for evidence that the weather seal of the house has been broken. Check for any wet or damp insulation and moldy, rotted attic rafters or ceiling joists, any of which could indicate a leaky roof. Address any problems before they can worsen.
BASEMENT/FOUNDATION Install covers over the crawlspace ventilation openings. Cover basement windows with plastic shields. Rake leaves and debris away from the foundation. Seal foundation cracks and other openings to keep out mice and other pests.
088 KEEP WARM FOR LESS
Energy bills aren’t getting any lower—even if you’ve done your inspection properly and fixed everything you can, you will still need to turn on the heat this winter. Here are a few ways to minimize your heating costs.

ADJUST YOUR FAN It may sound counterintuitive to turn on a ceiling fan in the winter, but most ceiling fans have a switch that has two settings. The counterclockwise setting cools a room during the summer. However, since heat rises, during winter the fan’s clockwise setting forces warm air downward into the living space.

ADD MOISTURE Anyone who’s spent a steamy summer in the South can attest that humid air feels warmer than dry. For a more comfortable rest, and to soothe sinuses irritated by cold, dry air. use a humidifier. Both cool- and warm-mist humidifiers are available, and either can help make a room feel warmer.
LET THE SUN SHINE The radiant heat of the sun can be harnessed to keep your home toasty warm by
strategically adjusting the blinds and curtains. On sunny days, open up the curtains that face southward to let in the sunlight. You should remember to keep the curtains closed at night, however, in order to provide an extra insulating barrier between your home’s interior and the cold outdoor air.

089 HIT THE DECKS
Sweep away leaves, needles, and branches from between the deck boards and off the surface. Debris can retain water and lead to mildew. Mildew should be removed from a deck as soon as it appears. Make a mildew-killing solution with 3 quarts of water, 1 quart of oxygen bleach, and ¼ cup of ammonia-free liquid dishwasher detergent. Apply with a garden sprayer, let set, then rinse clean. For tougher stains, use a soft bristle brush.
090 FLIP THE DECK BOARDS
In some cases of weathered deck boards, you can try prying them up and flipping them over. The underside of the boards are often in good condition because they have been hidden from water and sun exposure. If so, just turn them over, fasten them down, and then stain and seal them for an economical way to renew your worn deck’s appearance.
PRO TIP
THINK AHEAD Take care of problem with small engines in your yardwork machinery, or similar issues, in winter, instead of spring when the repair shops are busy. Drain oil and replace it along with the filter. Drain the gas from lawnmowers and similar equipment, or add a fuel stabilizer to all engines.
091 CLEAR THE CLOGS
Plumbing can be a very messy, smelly, and altogether nasty job, but if your pipes are clogged, you can often solve the problem by simply following the guidelines detailed here.
Gravity carries water away from appliances and sinks, and out of the house via drainpipes ranging in size from 1¼ to 4 inches in diameter. The size of the pipe depends on the size of the fixture. Each fixture also has a trap that holds water to seal off sewage gases, and the traps are handy for catching wayward objects that go down sink drains, such as toothbrushes or hair clasps, which can be rescued by unscrewing the trap.
It will be easier to unclog a slow drain than it is to open one that is completely stopped, so look for signs of a sluggish drain. Pour scalding water down the pipe to loosen any grease buildup. If this doesn’t solve the problem, check the other household drains. Multiple clogged drains mean a clog in the main pipe. Here are some declogging methods to try.
TYPE
Cup-style plunger
WHAT IT IS
The most common clog-fighting tool, found in just about every bathroom
WHEN TO USE
Best for sinks and shower drains
Flanged plunger
WHAT IT IS
Variation on the classic style
WHEN TO USE
Designed to be more efficient in a toilet; flange makes it less useful in sinks and showers
Cylinder plunger
WHAT IT IS
New design allows for drawing water into a cylinder and then pushing it out with sudden force
WHEN TO USE
Good for toilets and drain clogs with standing water
Plumbing snake
WHAT IT IS
Flexible steel cable that works its way through the drainpipe
WHEN TO USE
If clogs are farther down a drainpipe
Compressed air
WHAT IT IS
Cartridge shoots air down the pipe, blasting the clog away
WHEN TO USE
If you don’t have a snake or would like to avoid removing your traps
Chemical products
WHAT IT IS
Various chemicals that dissolve clogs
WHEN TO USE
Use judiciously in sinks and tubs; not for use in a toilet or laundry outflow
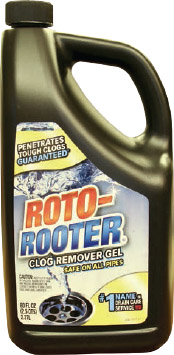
092 TRY THIS SOLUTION
Chemical clog removers can be helpful in opening the occasional plugged pipe. But don’t be suckered by thin liquid products. If you pour a watery cleaner down a sluggish drain, it’ll go right by the clog and into the depths of your plumbing system, leaving the problem stuck in the pipe. Choose a thicker product that sticks to the inside of the pipe. Chemical cleaners use either an acid or a base to dissolve stubborn clogs and organic matter; the thicker products have improved coverage and better contact with blockage. Allow the cleaner to sit as directed; follow with running water to test the drain.
Chemical cleaners come with a few red flags. The first is that the active ingredient is often chlorine bleach, which is bad for septic tanks because bleach can kill off the beneficial bacteria in a septic system. Bleach-based products are best suited for systems linked to a city sewer. Also, laundry drain clogs are often due to accumulated clothing fibers. Liquid drainers don’t dissolve those particles, so all of those clogs will have to be removed physically, not chemically. Furthermore, liquid drain cleaners are not intended for every household clog. They’re not designed to remove the waste that may be clogging your toilet.
The general rule of chemical cleaners: Read the instructions on the label and only use it as intended. Always use in a well-ventilated area, and wear rubber gloves. Don’t use a plunger if a liquid cleaner is in the drain, because you risk splashing caustic chemicals onto your skin. And don’t pour in a liquid cleaner if the drain is completely blocked or you will be faced with a sink full of caustic water—another mess that you’ll have to deal with afterward.
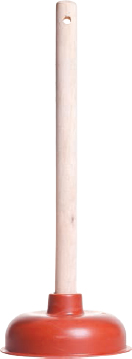
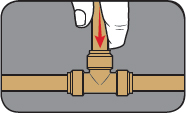
093 PLUNGE A SINK
Most people think of plungers in terms of clearing a stopped toilet, but they’re also great for blocked drains. Use a simple plunger with a large enough suction cup to completely cover the drain, creating an airtight seal around it. Fill the sink with water to completely cover the suction cup (it may help to coat the rim of the cup with petroleum jelly). Seal off any other outlets, such as the overflow drain in sinks, to create a vacuum. Push out any trapped air beneath the cup and give the plunger about 15 vigorous up-and-down pumping strokes to jolt loose the clog. This might take 3 to 5 sets of strokes.
If a plunger doesn’t work and you end up needing to open the P-trap underneath the drain, then use a wrench to disassemble and inspect the trap. Often the trap is congested, and a thorough cleanout and replacement is all that’s needed.
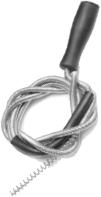
094 USE A SNAKE (OR NOT)
To clear stubborn clogs farther down the drain than a plunger can go, a plumbing snake is a handy tool. It’s basically a flexible steel cable that goes through the pipework, physically removing clogs. However, the snake doesn’t work very well in tight turns, so remove the P-trap and the horizontal trap arm from the rear wall first.
Insert the snake directly into the drain pipe. If snaking a tub’s drain, remove the overflow plate and run the cable down the tube. Push the snake into the pipe until you run into the obstruction. Try to hook the clog by twisting the plumbing snake’s handle; once it’s hooked, push the snake back and forth to help break up the obstruction, then flush with cold water.
If you don’t have a plumbing snake, or if you want to avoid removing the traps, try out one of the new clog-removal products that shoot compressed air into the drain and force the clog to move. Some products are available in disposable cans. Another type is a reusable device that uses cartridges of compressed CO2. Once the cartridge is loaded, press down firmly on the tool handle; a needle punctures the cartridge, sending a powerful burst of air into the drain, instantly unclogging it.
PRO TIP
FILL YOUR BLADDER Another drain-clearing tool is the reusable rubber drain bladder. This attaches to a standard garden hose and is inserted into the pipe. When the water is turned on, the bladder expands into the pipe while sending a powerful jet of water down the drain to force out the clog.
095 CLEAN THE MAIN DRAIN
If multiple fixtures are clogged, you may need to clear the main drain line. Locate the clean-out plugs on the large drainpipes in your basement or crawlspace; they may be in a garage or outdoors, along the foundation of the house. Each plug has a cap with a square fitting at the top. Remove the cap with a wrench. (Be sure no one uses the facilities while the main drain line is open.) Use a plumbing snake to break up any clogs in the open main line, running it in both directions of the pipe.
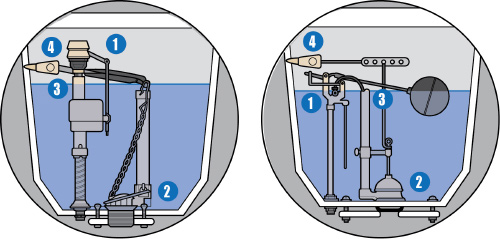
096 KNOW YOUR TOILET
A toilet is something that everyone needs to have working. It must fill and flush, and if all is in proper working order, a toilet will do so with minimal noise and hassle. While fairly simple in design, over time any of these toilet components can wear out and corrode. This can lead to problems with flushing and refilling the tank.
 FILL VALVE Attached to a water-supply connector through the bottom of the tank, the fill valve controls the flow of fresh water into the toilet tank. The two main valve types used today are the traditional float ball (also called a ballcock) and the float cup type.
 FLUSH VALVE This valve consists of a flapper (or “stopper” or “tank ball”) that aligns over the drain and is attached to the overflow pipe. It regulates the discharge of water from the tank to the bowl.
 OVERFLOW PIPE Often attached to the flush valve, this pipe supplies refill water to the bowl and prevents overflow of the tank.
 TANK LEVER Consisting of a lever arm and a flush handle, the tank lever allows water to flow into the bowl by lifting the flapper when the flush handle is pressed.
097 TROUBLESHOOT A TRICKLING TOILET
You might hear fresh water trickling into the tank when you haven’t flushed the toilet. Here’s how to figure out what’s happening and fix it.
CHECK THE VALVES Look down inside the overflow pipe. If water is running through the refill tube into the overflow pipe, check the fill valve. For ballcock-type fill valves, the float ball rod will be at the top of the tank, with a hollow plastic or copper ball on the right-hand end. If it is bent in any direction, then carefully straighten it by hand. If the rod is straight and the float ball does not lightly rest on the tank’s water surface, it probably has a leak and requires replacement.
LOWER THE LEVEL The tank’s water level may also be set too high. Lower the water level by moving the adjustment clip located on the ballcock link. Simply squeeze the sides of the clip and then push down on the link to adjust the water. Float cup–type fill valves also feature a water-level adjustment clip located on the cup mechanism.
LOOK FOR CORROSION Look for any sticking or corrosion in the lever. If you do see rust, replace the entire mechanism.
CLEAN YOUR SEAL Remove any buildup beneath the fill valve seal. To do this, shut off the water and remove the top of the ballcock or the float cup valve. Cover the opening with an upside-down glass. Turn the water on and off a few times, and any buildup should be flushed by the water stream. Turn the top over and rinse it under a faucet, then reattach.
FIX THE FLAPPER The trickling water may be due to a leaky flapper. If the flapper is dirty, you can simply clean it with a rag to remove any grime or buildup. If the stopper is damaged or worn, it can sit askew and not seal properly. Replace it along with the valve seat. If you’ve tried all of these aforementioned methods and the water is continuing to run through the refill tube, then the fill valve seal is probably defective and requires replacement.
GO BEYOND If you hear water trickling but you do not see water running from the refill tube into the overflow pipe, check the placement of the refill tube. The refill tube is the small vinyl tube that stretches from the fill valve on the left to the hollow pipe on the right. If the refill tube is stuck down inside the overflow pipe, raise the end until it is just above the top of the pipe. The adapter should hook to the top. If none of these troubleshooting tips work, the overflow pipe or flush valve may be corroded or leaking and need replacement.

098 GET A ROYAL FLUSH
A toilet that doesn’t flush properly can be both gross and annoying. Inspect the shut-off valve at the wall; the water supply might be off or partly shut. Just turn the valve counterclockwise to open it. Then, tighten the top of the ballcock or float cup. Make sure it locks tightly into place. In some cases, the chain between the toilet lever and the flapper may have detached. If this is the case, the chain can easily be reattached or replaced.
If the toilet bowl doesn’t totally flush or won’t fill properly, the holes under the rim could be limiting the water flow. Use a coat hanger or stiff wire to clear them of any obstructions. Next, tighten the set screw attaching the flush handle; remember to allow a small amount of play up and down. If the handle or set screw is corroded, then replace the entire mechanism. Also, be sure that the flapper is closing only after the tank is emptied. Finally, adjust the chain, allowing ½ inch of slack. Test flush a few times, and you should be all set.
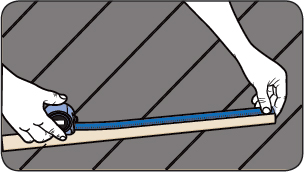
099 SOLDER COPPER PIPE
Most American homes have copper water lines. Soldering is the process of joining two copper or brass surfaces with metal by heating the solder to a little under 750 degrees Fahrenheit. When the joint cools, it will be as strong as the pipe. You need a few basic specialized tools to work with copper pipe, and they’re worth putting in your toolbox. Here’s what you’ll need to get.

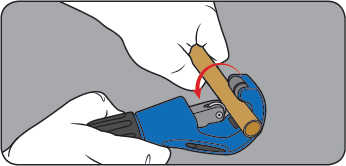
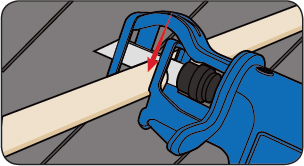
PIPE CUTTER This tool allows you to make a clean, square cut to ensure a good joint every time.
FOUR-IN-ONE TOOL This tool will quickly remove dirt and oxidization from the interior of fittings and the exterior of copper pipe in both ½- and ¾-inch sizes to increase your chances of a successful solder job.
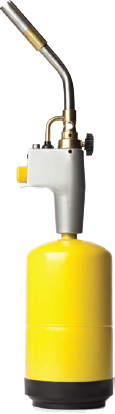
PROPANE TORCH You can use a handheld, self-contained unit for basic soldering. Get one with an auto-ignite feature and locking ON/OFF switch or button.
100 PLAN THE INSTALLATION
For new plumbing installation, plan to have as few soldered joints as possible to reduce the chance of leaks. Determine the materials required for the task, and have them as well as extra parts on hand before beginning, including all flux, solder, pipe, valves, and elbows for male and female connectors. Note that building codes require leadless solder for domestic water lines, because lead-based solder can leach into the water standing in the pipe.
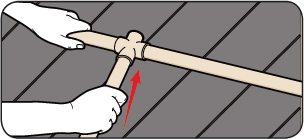
STEP 1 Measure, cut, and dry-fit all parts. This will ensure that the project works before soldering. Make certain there is no strain on the run of pipe or joints, because stress can result in failure over time.
STEP 2 Assemble and clean all parts to remove any surface oxidation. Clean both the exterior of copper pipe and the interior of all fittings. When this is done correctly, the pipe or fitting interior will shine like a new penny.
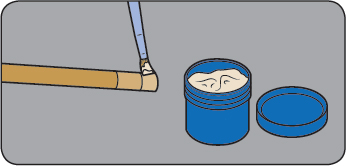
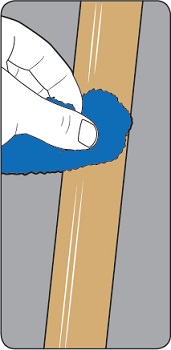
STEP 3 Apply a light coat of self-cleaning, non-acid flux to all mating surfaces. Use a small “flux brush” for this task. The purpose of the flux is to remove any unseen surface oxidation, to etch the copper to promote adhesion, and to help the solder bond well with the copper pipe and fitting. Reassemble the pieces. You’re ready to solder!

101 SOLDER SAFELY
Always wear safety glasses and gloves when soldering. If the project requires overhead soldering, never stand directly below the work. Next, follow the steps below to ensure a job well done.
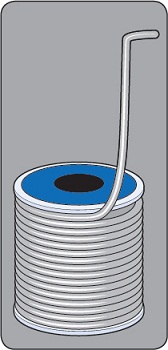
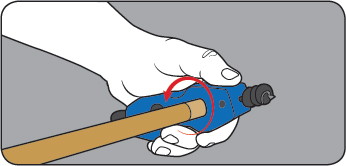
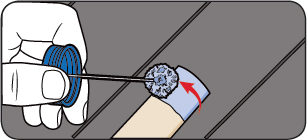
STEP 1 Pull about 12 inches off the roll of solder and bend the top 3 inches to form a right angle. This will make it easier to deposit solder all around a joint.

STEP 2 Begin heating the fitting first, then apply heat to the pipe/fitting joint with a back and forth motion. When the pipe and fitting reach the proper temperature, the solder will melt when touched to the joint, and the heat will draw the solder into the joint. The flux will bubble and smoke slightly.
STEP 3 Make sure to fill the joint completely. Use a damp rag to quickly wipe off any excess solder from the joint. Continue soldering all joints in this manner. (While soldering around wooden framing members, be careful to avoid a fire.)
102 TACKLE TANK TROUBLE
A number of things could be causing issues with how the toilet tank functions. Here are some common issues.
FILL IT UP If your tank is refilling slowly, or not at all, you will need to clean the fill valve interior. Shut off the water at the wall connection, lift the float arm and twist the ballcock or float cup top until it unlocks. Use a coat hanger or other similar stiff wire to gently scrape out the inside of the fill valve. Hold an upside-down glass over the valve opening and turn the water on and off three or four times to flush deposits from the inside. Rinse the fill valve top under a faucet to clean the seal, and then replace the top, turning it clockwise until it locks. Turn on the water supply. If the tank still doesn’t fill properly, replace the pipe that runs from the wall to the toilet. Braided stainless steel toilet connectors are preferred.
KEEP IT QUIET If the toilet is too loud when refilling, make sure the shut-off valve at the wall is completely open. Also, inspect the angle adapter, which is typically a rigid, plastic elbow on the end of the refill tube. Tweak the adapter slightly toward the inside wall of the overflow pipe to ensure that fresh water hits the pipe wall a couple of inches from the top before running to the bottom of the tank. If this didn’t do the trick, replace the fill valve.

103 HANDLE BRASS VALVES
Brass valves require special treatment when soldering, and there are two commonly used approaches. The first is to remove the valve stem (along with its rubber washer) from the valve body and attach the pipe by soldering. Once the valve has cooled, reinstall the valve stem. Do not try to solder the valve with the stem in place because the heat from soldering will melt the rubber washer and thus render the valve ineffective.
The second method involves using a female threaded valve and attaching male threaded couplings to the ends of the copper pipe. After the pipe and couplings cool, thread them into both sides of the valve.
PRO TIP
SEAL WITH LIQUID SOLDER For small, targeted repairs, liquid solders offer a strong, water-resistant alternative to conventional hot soldering. Once these molten metals are applied, the bond should be clamped together, then left undisturbed for up to 24 hours in order to achieve maximum strength.
104 JOIN PVC PIPING
PVC is the most commonly used plastic piping since it’s corrosion-resistant, cost-effective, and promises a long service life. Pieces are joined with PVC cement. Each type of plastic pipe is made of different materials and requires its own blend of cement to ensure a proper bond. Here’s how to put it all together. These same steps can be used to join CPVC pipe as long as you use CPVC cement.
MEASURE The ends of PVC piping will slide inside the fittings up to the shoulder. When measuring pipe length, always measure the distance between the shoulders of the fittings; transfer this measurement to the pipe.
CUT Make the cut as straight and square as possible, using a standard hacksaw, miter saw, or reciprocating saw.
DEBURR Use a utility knife or file to remove burrs from inside the pipe joint.
CLEAN For good adhesion and a strong, leak-free joint, lightly scuff the ends of the PVC with fine-grit sandpaper to remove the sheen and any dirt. Clear off dust with a clean rag.
DRY-FIT Assemble everything to be sure it’s the correct length. The orientation of certain fittings is critical to plumbing design. Make directional reference marks on the pieces for easy realignment during final assembly. Mark the depth of pipe concealed by the fitting to guide where to apply the primer and cement.
PRIME Apply PVC primer around the entire end of the pipe, as well as the inside of the fitting. The primer temporarily softens a thin layer of the PVC material, allowing the cement to create a strong, leak-free bond between the pipe and fitting.
CEMENT Brush PVC cement over the pipe end and inside the fitting, completely covering the contact surfaces of the joint.
CONNECT Slide the pipe into the fitting until it presses firmly against the shoulder. Give the pipe or fitting a ¼-inch turn to spread the adhesive and make sure it completely seals the joint. Make sure the reference marks on the fittings are properly aligned. Hold the joint for at least 30 seconds as the cement cures.
105 SHUT DOWN A LEAK
If you have a water leak, first shut off the water supply. If you have a leak at a toilet, sink, washing machine, or bathtub (with exposed plumbing), shut off the water at the valves located at the floor or wall, below or behind the fixture. But those aren’t the only ones that you need to know about, so read on.
MAIN SHUTOFF VALVE To stop any leaks upstream of the fixture valves, you need to close the house’s main shutoff valve, allowing you to open up any pipe within the house. Locate it prior to an emergency, check it periodically, and then keep it maintained—if you don’t know where this crucial valve is, every minute spent searching for it during an emergency could result in gallons more water spilling into your home. The valve doesn’t get used often, so don’t let it rust and become nonfunctional. To locate the main water valve, look around the inside perimeter of your house at the ground level. Follow a straight path from the outdoor water meter to the home for the most likely location. Look for access panels in the walls, which often conceal the valve, or check your home inspection report.
OUTDOOR SHUTOFF VALVE If the previous options fail, or you have an outdoor leak in the yard, then shut off the water main outside. Look for a round or rectangular steel or iron lid. (Note: In cold climates the lid may be covered with sand or dirt to prevent pipes from freezing). Remove the lid to access the water meter and valve. Storm runoff may have covered outdoor valves with dirt or mud, requiring you to clear it with a hand spade. Connected to the water meter is the water company’s shutoff valve, which usually needs a special wrench and can be very difficult to turn. Check for an additional residential valve on the house side of the meter that uses a nut or handle to close it, which is the simplest option. If there’s no residential valve, use locking pliers and elbow grease to turn off the company valve until the leak can be fixed. (Special wrenches for outdoor valves are also sold in hardware stores.)
PRO TIP
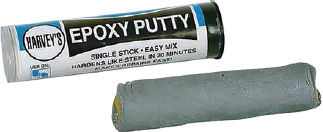
USE PLUMBER’S EPOXY You can quickly fix a leaky pipe with plumber’s epoxy. Follow the manufacturer’s instructions, and use the claylike epoxy ribbon to form a seal around the leak. Turn on the water and check for any leaks. This will only be a temporary solution, however, until permanent repairs can be performed.
106 THAW FROZEN PIPES
If pipes have frozen, shut off the water and inspect them for damage due to expansion from freezing water. If the pipe is undamaged, drain it by opening a downstream faucet. Use a hair dryer or heat gun to warm the pipe and melt the blockage. You can also wrap the pipe in a towel and pour hot water into the towel. After the pipe has thawed, turn on the water supply and check again for any leaks.
107 TRY PUSH-FIT CONNECTIONS
It’s sometimes necessary to completely repair a pipe and/or joint to make a repair. Push-fit connections provide the fastest and easiest method to connect PEX, copper, or CPVC pipe. Push-fit connections utilize a compression fitting to join the pipes, requiring no soldering, clamps, or glue, and they’re certified up to 200 PSI and 200 degrees Fahrenheit. Here’s how to make a push-fit connection.
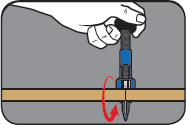
STEP 1 Make a square cut on the end of the pipe.
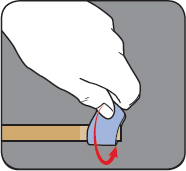
STEP 2 Sand down the rough edges.
STEP 3 Some push-fit connections use a ring fitted in the end of PEX pipe to keep its round shape while the connector crimps over it. Mark the depth of the pipe that goes in the push-fit connection.
STEP 4 Push the fitting together to the depth mark so that it “clicks,” then the permanent connection will be complete.

STEP 5 When a pipe goes in the fitting, stainless steel teeth grip it tightly, and the O-ring compresses to create a perfect seal. A disconnect tool releases the O-ring to easily change and reuse valves and fittings.
Push-fit plumbing connections range in size from ⅜ to 1 inch, available as couplings, elbows, tees, connectors, reducers, and end stops. More than just a quick fix, these connections can be used for all sorts of new plumbing installations.
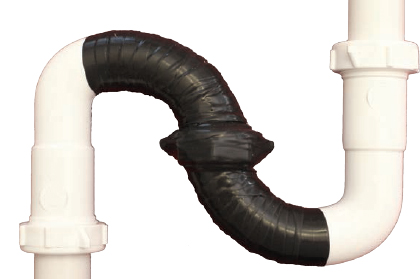
108 USE SELF-FUSING TAPE
Since the water found in drainpipes is not under pressure, leaks can often be fixed using self-fusing silicone tape. Stretch a length of the tape and wrap it around the problem area, overlapping the tape and making sure to cover the surface on both sides of the leak. The tape will fuse to itself to form a waterproof seal.
109 LIGHT THE BATHROOM
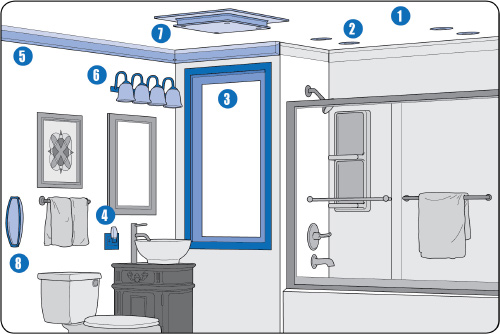
People spend a great deal of time looking into the mirror, and they naturally want to see themselves in a complimentary light. Start your design for the bathroom lighting scheme with the vanity mirror, which typically has the brightest light, then decide what ambient or accent sources will work the best to complement the vanity station. Layer the light sources to fill in gaps and reduce glare.
Remember: Recessed or canned lighting is not ideal for a bathroom’s only light source because it tends to cast a shadow across the face. The room decor is better when the design and finish of the light fixtures work together with all the plumbing accessories. A wide range of fixture styles, shapes, sizes, and finishes are available. Here are more hints to brighten the smallest room in the house.
WATCH THE WATER Showers need light fixtures designed for use in wet areas. If you have room, table lamps can add a soft, human touch to bathrooms—but place them away from water sources.
TAKE RECESS Tubs need good general light, which can be provided by a recessed fixture. To avoid glare, aim the light beam at the outside edge of the tub.
SHINE ON Windows provide opportunity to add natural lighting or replace the electrical options.
LIGHT UP THE NIGHT The toe space below vanities and cabinets can be lined with rope lighting for a nice night-light.
 GET YOUR GLOW Indirect (or cove) lighting, with its hidden light source, adds a soft, warm glow to the bathroom, but is purely aesthetic.
 LOOK YOUR BEST For the mirror, lighting from warm fluorescent vertical wall sconces can provide the kind of even facial illumination that eliminates dark circles and shadows. Halogen lighting above the vanity provides cross-illumination when used in conjunction with wall sconces.
 GO HIGH Ceiling fixtures suspended overhead can provide an elegant touch while adding extra light.
 GET READY TO READ Focused flood lights or halogen fixtures over the commode can provide good light for reading (you know you do it).

110 COOK UP A KITCHEN SCHEME
Today’s kitchens are often the hub of family living. The lighting should be suitable for reading, paying the bills, feeding the kids, and more. A single kitchen light source means that work around the perimeter of this central light is relegated to the dimmer areas of the room. The proper lighting scheme depends on the size and complexity of the kitchen. Smaller kitchens may require only a central overhead fixture coupled with under-cabinet task lighting placed near your sink and stove. Larger kitchens may require a combination of general, task, and accent lighting.
PREPARE BEFORE SHOPPING When visiting a lighting showroom, bring photos of your kitchen and take note of the room’s dimensions. How tall is the ceiling? Where are the doors? How much space is there between the cabinets and the countertop? This information will help determine your options.
START WITH THE BIG FEATURES Kitchen tables and islands are focal points; light them up first, then design your scheme outward. Try pendant lighting or a fixture with three lights over an island.
CREATE A BALANCED MIX The biggest mistake is overlooking subtleties in your lighting scheme. Recessed lighting can create a blanket of light, but it doesn’t illuminate exactly where you need it. Don’t just add more recessed fixtures, which will just over-saturate the room with light. Combine lighting types, and remember that dimmer switches add flexibility.
CHOOSE A NICE FINISH The topmost trends in decorative finishes for kitchen fixtures include: wrought iron, often used in rust and earth tones; pewter and satin nickel finishes, where brass used to be popular; painted finishes; and colored glass, as opposed to plain white. Of course, fashions change, and you may not want to remodel often, so go with what you love over what’s in style.
DON’T OVERLOOK DETAILS Under-cabinet lighting can reduce shadows on the counter and add critical light to work space. Mini-pendants mounted over a kitchen island can make countertop activities easier for everyone. And step lights around an island prevent stubbed toes during midnight snack runs.
111 KNOW YOUR WIRING BASICS
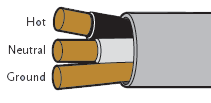
In modern wiring, individual wires are bundled together inside a sheathed cable. In older houses, knob and tube wiring is used in place of cables. Whatever your wiring system, the white wire is usually the neutral wire, and the black is the live or “hot” wire. Any red wires are hot, too. The unsheathed, exposed copper wires are ground wires. (Note: In some cases, a wiring installation may have required a white wire to be hot, in which case it should have been marked with black tape. However, just because it should be marked doesn’t mean that it was marked.) Many light fixtures don’t have black and white wire, in which case, look for a rib on the wire sheathing to determine the neutral wire.
If only a single cable, or one set of black and white supply wires, enters the box, then the fixture is at the end of the circuit. This is common—but is not guaranteed—with ceiling fixtures and allows for the simplest method of installation. If two cables (or two sets of black and white wires) enter the box, then your fixture is in the middle of a circuit. If a light is in the middle of a circuit, you will have to twist multiple wires together.
TYPE
Two-wire with ground
WHAT IT IS
DESCRIPTION
A black wire, a white wire, and an uninsulated ground wire
Three-wire with ground
WHAT IT IS

DESCRIPTION
Used with three-way and four-way switches, and has a black wire, white wire, red wire, and an uninsulated ground
Knob and tube
WHAT IT IS

DESCRIPTION
A two-wire system in which individual wires are insulated with white or black treated fabric

112 USE THE RIGHT BULB
When purchasing a lighting fixture, check its maximum wattage. A bulb with more wattage than necessary can present a fire hazard from the excess heat. Wattage indicates the power a bulb consumes—not the light that it generates, measured in lumens. If you’re getting excess light, use lower-lumen bulbs.
PRO TIP
GET HUNG UP Many ceiling fixtures are often positioned above focal points, such as a dining room table. A good rule of thumb is to install the fixture about 30 inches above the table. To shorten a chain, cut it to length with metal snips, and then cut the wiring 6 inches longer than the chain.
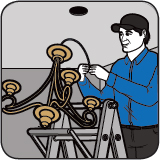
113 UPDATE FIXTURES
Your primary concern when you are selecting a replacement fixture is to ensure that the box and ceiling will support the fixture’s weight. If a new fixture weighs about the same as the old one, the existing electrical box will likely suffice. If its new replacement is heavier, the ceiling box may need to be replaced. Have all of the work professionally inspected when you’re done.

STEP 1 Turn off the power at the breaker box by flipping a circuit breaker or unscrewing a fuse. Use a voltage tester to make sure the power is off.

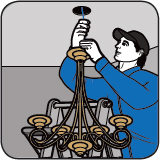
STEP 2 Use a work platform fastened to a ladder to support the weight of the old fixture while you remove the mounting screws from the electrical box. With the screws out, pull off the box cover and disconnect the wiring by unscrewing the wire nut and untwisting the wire pairs.
STEP 3 Organize the fixture’s components, such as the canopy and hanging hardware. Ceiling fixtures vary greatly in style and construction, as do the related components and the assembly process. Any quality lighting manufacturer will include assembly instructions for the model; usually you need to use only a screwdriver.

STEP 4 Thread the box cover, mounting strap (which screws into the junction box), and any other necessary parts over the wire and chain before installing.
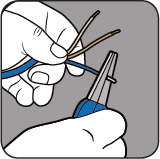
STEP 5 Strip about ¾-inch of insulation from the end of each wire. Match the fixture wires to the supply wires by color (see item 111). Twist exposed ends together clockwise, securing them with a UL-listed wire nut. Ground wires can be connected to a ground screw on the junction box or joined to the supply ground using a wire nut.

STEP 6 Install a light bulb to test the connection before installing the fixture. If it won’t light up, you probably have a loose connection. Once the light functions, protect connections by wrapping electrician’s tape around the wire nuts.
STEP 7 If you haven’t yet installed the mounting strap, screw it to the junction box. Then screw the threaded mounting stem on the chain solidly into the mounting strap. Cover up the junction box with the cover or “canopy,” and secure it in place with the locknut included with your light fixture.
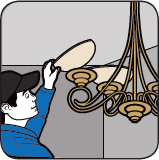
STEP 8 Install the glass and light bulbs. Balance light output by using several sockets; use higher-wattage bulbs for fixtures with fewer sockets.
114 GET GROUNDED
A ground fault circuit interrupter (GFCI) is a type of electrical outlet that helps protect people from shocks due to hazardous ground faults. Ground faults occur when an electrical current “leaks” or follows an unsafe direction instead of following its intended path. When a ground fault occurs and electricity from an appliance passes through the person’s body, the resulting shock can cause serious injury or even death. GFCIs detect when current is leaking from an electrical circuit to ground and automatically shut off the power at the receptacle in a fraction of a second.
GFCIs not only protect what’s plugged into them but also provide feed-through protection to ordinary outlets wired downstream (other outlets on the same circuit). The UL standard has been recently updated to require that GFCIs be self-testing, which incorporates an auto-monitoring feature into the GFCIs, beginning in mid-2015.
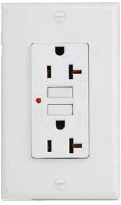
INDOORS Bathrooms, kitchens, laundry rooms, or any other place around the house with a water source within 6 feet of the receptacle needs GFCI protection. Remember: Electricity and water can be a deadly combination, so keep appliances such as radios or hair dryers away from sinks, tubs, or pools.

OUTDOORS Protect outdoor receptacles, including any around pools, decks, and patios, using GFCIs with weatherproof covers. Plug pool pumps, hot tubs, and any outdoor appliances into GFCI outlets.
115 KEEP UP WITH TECHNOLOGY
Technology is moving fast; electrical advancements are no exception. Here are a couple of cool options for your home.
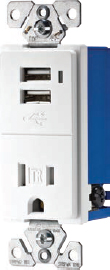
USB ENABLED Offering a simple solution to charge a wide range of electronic devices, the newer duplex electrical receptacles now often come equipped with a USB interface. Increasingly popular in homes and businesses, these replace the standard AC duplex receptacle and eliminate the need for bulky adapters by including a set of integrated USB charging ports. These new receptacles make it easy to quickly charge virtually any applicable electronic device, including smartphones, tablets, e-readers, MP3 players, cameras, and more.

WIRELESS SWITCHES Another new home electrical trend is the growing popularity of wireless switches. These battery-powered switches control home lighting options by radio frequency. The advantage here is that you can place the light switch anywhere in the home without the need to wire it into the electrical system, which saves a lot of time and work. Mount it to any wall surface or even hold the device in your hand. A few of the new switches can wirelessly control up to five light sources simultaneously from anywhere in the home. Once the switch is installed, it searches for installable devices and ultimately synchronizes itself with them, granting remote-control capability. Using Z-wave wireless technology, the switch operates on a dedicated radio frequency so it does not interfere with Wi-Fi or other wireless communications in the house.
116 TEST YOUR GFCI
GFCIs sold today offer improved protection by automatically blocking the outlet’s reset button (ensuring that no power is available) if they’re improperly wired. With both newer and older models, it’s important to periodically test your installed GFCIs (following the manufacturer’s instructions as you do so) to ensure they’re working properly.
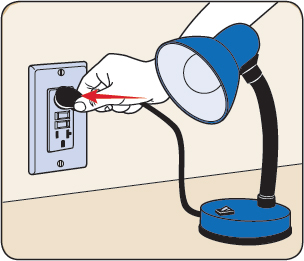
STEP 1 Plug a night light or lamp into the GFCI.

STEP 2 Turn the light on and push the TEST button on the GFCI. The GFCI should trip and the light should go off.
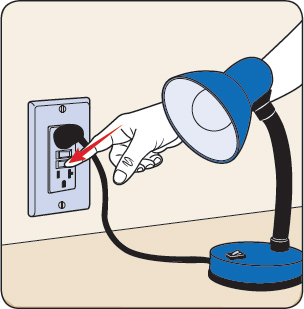
STEP 3 Press the RESET button to reset the GFCI; the light should come back on.
STEP 4 If the light either does not go off when the TEST button is pressed or does not come back on when the RESET button is pressed, the device is malfunctioning and should be replaced at once.
117 KNOW YOUR OUTLETS
The basic outlet in the United States has a pair of vertical slots, the left slightly bigger than the right. The left slot is neutral, the right slot is “hot”; the hole centered below them is the ground. Outlets and plugs vary around the world, but these basic components are found everywhere in some configuration.
We probably don’t have to tell you why grounding is so important, but it bears repeating since a good ground can literally mean the difference between life and death. Most of the things you plug in are made of metal, or at least have significant metal components, making for a potential shock risk. If a wire comes loose inside an appliance, contacting metal inside the case, the entire object is now “hot,” and anyone who touches it can get a nasty shock. If it’s plugged into a grounded outlet, as it should be, that charge will flow straight to ground instead of trying to go through you in a potentially deadly way.

118 ASSESS YOUR OPTIONS
If you live in a home that was built before the 1970s, it likely has at least some two-pronged outlets. The now-familiar standard grounded, three-pronged model first appeared back in the 1960s and became mandatory for homes built after 1974 in the United States. Older houses were grandfathered in under most building codes, so you may not be required to replace the outlets—but you should consider it. If money and time is no object, the best thing would be to replace all the old outlets with grounded, three-prong outlets. But if time and money are tight, here are some options.
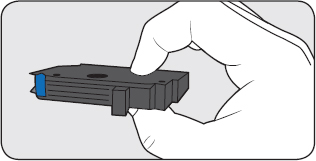
INSTALL A GFCI A two-pronged slot that’s safe by your bed is a real risk in a kitchen or bathroom (or anywhere else it might get wet). A GFCI is a safer solution (see item 114). You need to put a warning label on any ungrounded GFCI (the labels come in the box when you buy one) and it’s not as safe as a fully grounded outlet, but it will provide protection against electrical shocks.
REPLACE IT ENTIRELY Sensitive appliances (such as a computer or plasma TV) should be plugged into an outlet that has a properly grounded circuit all the way back to the circuit breakers. A DIYer who is comfortable with electrical work can easily take care of this.
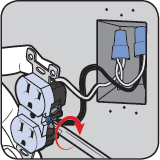
119 REPLACE A TWO-PRONGED OUTLET
The first step below is absolutely crucial—do not continue if the metal box that’s holding your current two-pronged outlet is not grounded. Even when the outlet isn’t grounded, the box usually is, so it’s unlikely to be an issue. The boxes in older homes are generally wired with armored (or BX) cable, which has a flexible metal jacket that essentially serves as a grounding wire for the box.

STEP 1 Check for ground. Insert one prong of a circuit tester into the shorter slot (the hot one), and touch the other to one of the screws securing the plastic cover plate. The tester should light up to indicate a proper ground. If it turns out not to be grounded, you can still install a GFCI safely, but installing a three-pronged receptacle will be a job for an electrician.
STEP 2 If the box is grounded, turn off the power at the breaker panel or fuse box, then unscrew the cover plate from the wall, remove the receptacle, and disconnect it from all wires.
STEP 3 To connect the new receptacle, attach the “hot” black wire to the brass terminal in the box and the white neutral wire to the silver one.
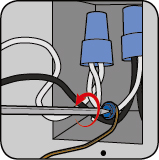
STEP 4 Twist one end of an 8-inch grounding wire (or pigtail) around the green ground screw in the outlet box, and tighten. If a ground screw isn’t present, you can buy one in a hardware store.
STEP 5 Secure the other end of the grounding wire to the green grounding terminal on the new three-pronged receptacle. Screw the new receptacle into the box.

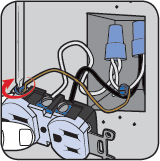
STEP 6 Turn on the power. Use a circuit tester to make sure the circuit is working.
PRO TIP
USE A USB PORT Are you annoyed by your phone trying to sync while you’re busy working, or just have too may devices plugged into your phone and not enough of the charging-cord adapter plugs that are always underfoot until you really need one? Several manufacturers make a relatively easy-to-install three-pronged outlet that also incorporates a USB port, so you can charge devices without an adapter. Be aware that they’re almost twice as thick as a standard receptacle, which may be more than an older junction box is engineered to handle. Check first to avoid wasting time.
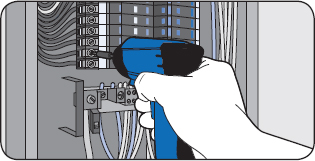
120 REPLACE A STANDARD SINGLE-POLE BREAKER
When replacing a circuit breaker, stand on a rubber mat or a piece of plywood to insulate yourself against an electrical shock. Use an insulated screwdriver and insulated wire strippers. Most houses will have a combination panel, with a main breaker, and then all the branch circuit breakers below.

STEP 1 Remove the cover to the breaker panel and test the breaker to verify that it is faulty.
STEP 2 Before shutting off the main breaker, first shut off all branch circuit breakers. Double-check with a voltage meter that the faulty breaker and adjacent breakers are shut off. Most homes will have “push in” or “stab in” types of breakers.
STEP 3 Use a screwdriver to disconnect the wire from the load terminal of the breaker. Bend the wire out of the way.
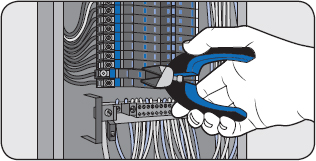
STEP 4 Carefully pry the defective breaker out of its position. Take note as to how the breaker locks into position in the panel.
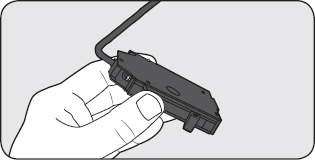
STEP 5 Connect the load wire to the new breaker. With the new switch off, push it firmly into place. Reattach the wire to the load terminal.

STEP 6 After the cover is back on, turn on the main breaker and then, one by one, all individual breakers. Test all systems to see if everything is normal. Replace the panel cover.
121 CHOOSE THE RIGHT REPLACEMENT
Circuit breakers are designed to protect your wires from carrying too much current by tripping off an overload or a short circuit. Whenever you need to add a new circuit, you’ll need to install a new circuit breaker. Occasionally an existing circuit breaker fails and needs to be replaced. You can safely replace a circuit breaker in your electrical panel if you take the proper precautions.
Before you do anything, gather all the information that you can (the brand name, part number, breaker size, breaker type, and so on) to determine the proper replacement. Although some breakers are interchangeable, many are not, even if they look similar. Replacing with the wrong breaker can be dangerous and may void your breaker or panel warranty. Check the breaker panel door for information about which breakers are compatible with your panel. Here are some common types you may find yourself dealing with.
CIRCUIT BREAKER TYPE
Standard circuit breaker
WHAT IT DOES
Monitors the flow of electricity as it enters the home.
Single-pole breaker
WHAT IT DOES
Protects one energized wire and supplies 120V to a circuit. They’re generally rated 15 or 20 amps, occupy one slot on a breaker panel, and are the most common breakers in a home.
Double-pole breaker
WHAT IT DOES
Typically occupies two slots on a breaker panel and consists of two single-pole breakers and a shared trip mechanism. They supply 120V/240V or 240V to a circuit, protect two energized wires, and range in capacity from 15 to 200 amps. Double-pole breakers are required for large appliances like dryers and water heaters.
GFCI circuit breaker
WHAT IT DOES
Cuts power to the circuit when they’re tripped by an overload of current, a short circuit, or a line-to-ground fault. All GFCI breakers have test buttons on the front and coiled wires. They function in the same way as GFCI receptacles but protect an entire circuit, eliminating the need for GFCI receptacles on that circuit.
AFCI (arc-fault circuit-interrupter) breaker
WHAT IT DOES
Protects against an unintentional electrical discharge in wiring that could cause a fire. Once the breaker senses the abnormal electrical path, it instantly disconnects the damaged circuit before the arc builds enough heat to catch fire. AFCI breakers look like GFCI breakers with test buttons and coiled wires. The only way to tell them apart is to read the fine print on the breaker.

122 TEST A BAD BREAKER
Before you replace a circuit breaker, make sure that you’ve correctly diagnosed the issue.
STEP 1 Unplug any devices along the problem circuit, turn off all lights, and flip the switch on the breaker. If it resets, you can then reconnect the electronic devices one at time and turn on the lights to determine where the problem is.
STEP 2 Turn off the breaker before plugging each item back in, and then reset the breaker. This prevents a dangerous surge of current should you have a short circuit in a device, which can send a very high amount of electrical current before the breaker trips.
STEP 3 If the breaker won’t reset, test it with a voltage meter. If the meter doesn’t read voltage on the load terminal, even when all known loads are disconnected, then the breaker is probably faulty and needs replacement.
123 INSTALL A NEW THERMOSTAT
Thermostat installation is a fairly simple job. All that’s typically required is a slotted screwdriver, a small Phillips screwdriver, a hammer, an electric drill/driver, a  -inch bit, and two AA batteries.
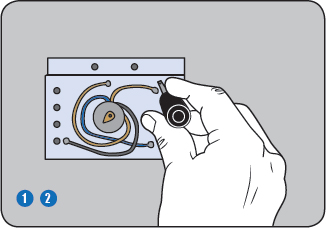
STEP 1 Cut power to the thermostat and furnace. Remove the thermostat’s cover, which is usually fastened with plastic push tabs.
STEP 2 Unscrew the old unit. The wires might be mounted to the thermostat or wall plate by screws. Each wire will be wrapped in color-coded insulation that corresponds to the terminals on the rear of the new thermostat (or wall plate). When connected to the existing thermostat, all of these wires are usually marked with a code letter. It may help to label them to avoid confusion. The number of wires in a system can vary from two (for heat only) to as many as eight.
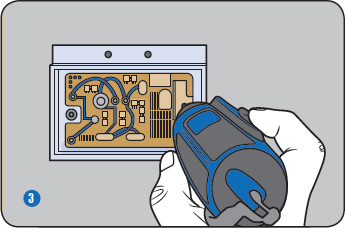
STEP 3 Disconnect the wires and then unscrew the wall plate from the wall.
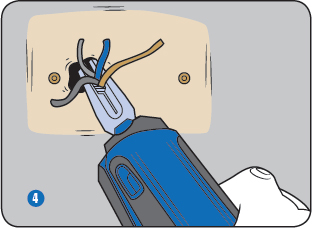
STEP 4 Pull out the wires and clip them so they don’t slide back through the hole. Then screw them to the color-coded terminals on the new wall plate.
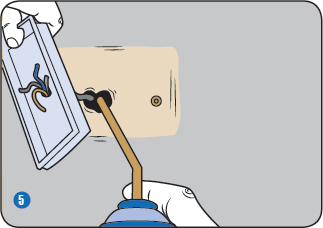
STEP 5 Attach the wires to the matching mounting screws of the new unit. Ignore any wires that were not connected to the old thermostat. Push extra wiring back into the hole. If the hole in the wall behind the wall plate is larger than necessary, seal it with insulation to prevent air from entering the thermostat and affecting its temperature reading.
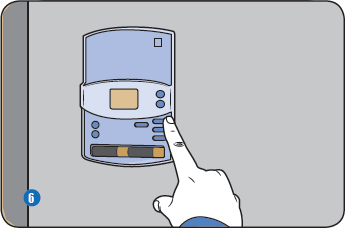
STEP 6 Use a torpedo level to make sure the new wall plate is plumb, then screw the plate to the wall. Drywall mounting requires first predrilling the anchor holes with a -inch bit and hammering in drywall anchors to house the screws. You may get lucky, as in the installation shown, if the per-existing drywall anchors from the old thermostat happen to line up with the screw holes on the new unit. If no new drilling is required, simply line up the mount holes and drive in the screws.

STEP 7 Fasten the thermostat to the wall plate. On the unit shown, the thermostat attaches using press-release tabs at the top and bottom of the unit. Be sure the thermostat is set to OFF and the fan switch is set to AUTO. Insert the two AA batteries. Switch on the main power to the furnace.
STEP 8 Program the thermostat according to the manufacturer’s guidelines. You’ll soon be saving energy and money, and helping the environment.
124 UPGRADE YOUR THERMOSTAT
Programmable thermostats automatically adjust your home’s temperature settings several times a day to fit your lifestyle. These units contain no mercury, are more accurate than manual thermostats, and can also save you money each year in energy costs.
Programmable thermostats include four default periods per day. They maintain accuracy within two degrees to keep the temperature steady. The newest programmable thermostats also have digital backlit displays, touch-pad screen programming, voice and/or phone programming, and other helpful features.
You’ll find three types of programmable units, each of them equally easy to install.
TYPE
7-day models
DESCRIPTION
The best choice if your daily schedule changes often. These offer the most flexibility by allowing you to set different programs for different days.
5+2-day models
DESCRIPTION
Use the same schedule every weekday and another schedule for weekends.
5-1-1-day models
DESCRIPTION
Keep one schedule Monday through Friday, another schedule on Saturdays, and a third on Sundays.
PRO TIP
HAVE A SMART HEATER One new advancement in thermostat technology is a model that learns the temperatures you like and programs itself in about a week. The thermostat turns itself down when no one is home to help you save energy, and you can even connect it to Wi-Fi for remote control. The new tech even alerts homeowners when temperatures drop to help avoid frozen pipes.
125 Customize Landscape Lighting
Outdoor light systems are wired up using either line-voltage or low-voltage power. Heavy-duty line-voltage wiring plugs into GFCI outdoor outlets, and the wires should be buried in a conduit. The more common low-voltage systems plug into a transformer. The wires of a low-voltage system are thin and can be buried discreetly in the soil.
Home centers sell multi-fixture DIY kits for low-voltage systems. Or purchase individual fixtures, wiring, and transformer separately and customize a system. Small plastic fixtures cost as little as a few dollars. More durable metal fixtures are about twice as expensive.
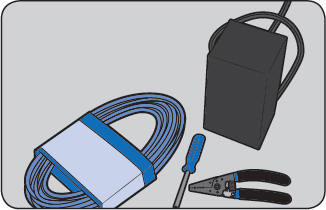
STEP 1 Choose a transformer, or power pack, that offers a wattage output greater than the total wattage of all the light fixtures in the system. For example, let’s say a system includes four 7-watt fixtures, two 11-watt, and two 35-watt fixtures: 7 + 7 + 7 + 7 + 11 + 11 + 35 + 35 = 120 watts total. In this case, you would need to have a transformer that offers a capacity of at least 121 watts. (Some are also equipped with built-in timing and/or photocell devices—popular features for many homeowners.)
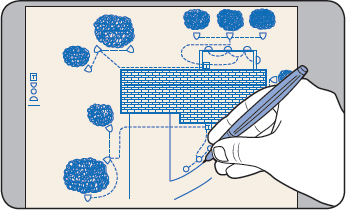
STEP 2 Determine the number and style of fixtures you need. Walk the perimeter of your home, noting areas to illuminate. Sketch the plan on graph paper, noting key features such as trees, shrubbery, paths, decks, and patios. (Space path lights a minimum of 10 feet apart. Depending on wattage, flood lamps will cast light 20 to 40 feet.)

STEP 3 Locate a 120-volt GFCI outlet for your power pack. Certain manufacturers offer “weatherproof” outdoor power packs. Professionals still do suggest keeping the transformer inside to avoid the elements, which requires you to drill through a wall to run the cable. The transformer should be mounted within 3 feet of the outlet and at least 1 foot above the ground.
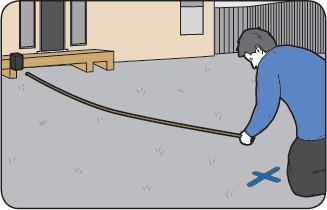
STEP 4 Determine the length of cable you’re going to need for this project by measuring the distance from the outlet to the farthest fixture location. Include the length of cable that branches off the main line. Allow for several feet of extra cable. Cable for low-voltage systems is available in 8-, 10-, 12-, and 16-gauge sizes. The appropriate cable size depends on the maximum length of run from the transformer and the total wattage of the lights in the run. Check the cable manufacturer’s recommendations.
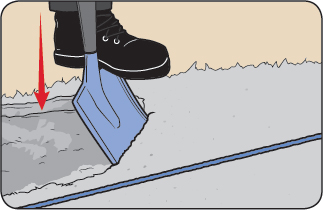
STEP 5 Dig a narrow channel for the cable at least 6 inches deep from the transformer to each fixture location. At each fixture location, create a loop of cable (about 2 feet) for the attachment of the fixture.
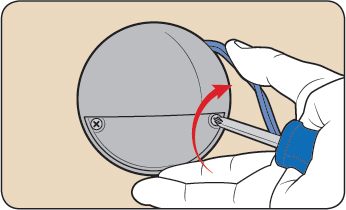
STEP 6 Place each fixture at its desired location, attaching the fixture to the proper mounting device. “Surface mounts” are used for placing fixtures on trees or structures. “Ground mounts” are stakes or spikes driven into the ground to support the fixture.
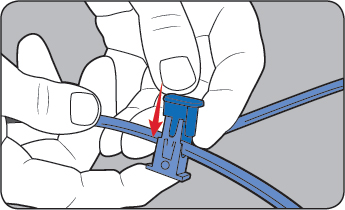
STEP 7 Connect the lead wire of the fixture to the cable run by splicing the wires together using wire nuts (apply a sealant and electrical tape to prevent corrosion, or solder the wires to ensure a strong connection). Cable connectors are a quick way to splice a fixture’s lead wire to the cable run; some manufacturers even supply the connectors along with the fixtures.
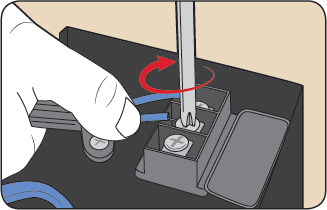
STEP 8 Plug in the transformer, connect all of your cable runs to the transformer terminals, and turn on the system. If there’s any trouble, recheck all wiring connections. Once the system functions properly, fill in the cable trench that you dug in step 5, and you’re ready to light up the night.
126 FIGHT THE FUNGI
Mold is a top concern for indoor air quality in homes nationwide. Mold and mildew are both fungi and share many traits. They thrive in warm, moist, and humid environments and on surfaces. They can blacken the grout lines in your shower, discolor the walls, darken your decks, or rot wood anywhere in or around the home. From causing musty smells to serious allergic reactions, indoor mold and mildew can be a pesky nuisance or a health hazard.
KNOW THE DIFFERENCE Mold is typically fuzzy in appearance  and can be seen in many colors, including blue, green, yellow, brown, gray, black, or white. Mold can cause structural damage to homes over time and lead to health problems, including respiratory problems, migraines, and more. Mildew will usually grow in a flat pattern
  and may be powdery or downy. Powdery mildew usually starts out white and then might later turn to yellow, brown, or black. Downy mildew usually starts out yellow and later turns brown. Like mold, it can also lead to respiratory problems and allergic reactions.
TELL BY SMELL Musty odors can be a sign of mold growth, but such a smell may also indicate an infestation of mice. Microfungal growth of mold and mildew can sometimes be difficult to spot. Try shining a flashlight nearly parallel to the lower portion of wall or leg of furniture. Look for any fuzzy white, pale yellow, or blue-green spots. These are likely mold colonies; when disturbed, the spores can become airborne and emit a musty odor.

127 SPOT CLEAN
When you’re cleaning up mildew and mold, ventilate your work area; several cleansers can give off fumes that are harmful to breathe. Wear rubber gloves, and use a face mask to avoid breathing in spores and any fumes given off by the cleaning product.
For a simple household solution, mix ¼ cup of bleach per gallon of water, spray on surfaces showing mold growth, and let dry for 10 minutes. Never mix bleach and ammonia, which creates toxic chlorine gas.
Bleach is often used to kill spores and clean surfaces, but it has harsh fumes and can be toxic, and the mold can return. Also, when it attacks the surface mold, it leaves a residue that prevents other antimicrobial products from penetrating to the mold roots or hyphae. If you’ve treated an area with bleach, clean the area with warm water and detergent; once the area is dry, apply a commercial antimicrobial product to the surrounding area as well as where you actually see the mold and mildew, to ensure you remove all traces.
Remove any items that cannot be thoroughly cleaned, such as insulation, carpeting, and drywall, and replace those with new mold-free materials.

128 TACKLE MAJOR DAMAGE
If your home has suffered any water damage from flooding, sewage backup, or plumbing problems, it will be prone to a mold infestation. The worst part of this is the speed with which mold develops—from only 24 to 48 hours of water exposure.
DRY OUT Set out fans and dehumidifiers, and move wet items away from walls and off of the floors. Find out the source of moisture and then prevent it from worsening the problem.
TOSS THE TRASH Items that have absorbed moisture and have mold growing on them need to be thrown out. If there has been flooding, remove the sheetrock a level above the high-water mark. Any kind of porous material that shows visible signs of mold should be thrown away.
CLEAN UP Surface mold growing on any nonporous materials can usually be cleaned. Thoroughly scrub contaminated surfaces using hot water, non-ammonia soap, detergent, or commercial cleaner. Use a stiff brush to scrub out all contaminants. Rinse with clean water, and collect the excess rinse water and detergent with a wet/dry vacuum, a mop, or a sponge.
DISINFECT Apply a bleach solution or antimicrobial cleaner to surfaces that show any mold growth. An effective way to eliminate mold and musty smells in large or inaccessible spaces is to use a “cold fogger.” A fogger will create a mold-control mist that distributes the cleaner evenly throughout the living space, even into hard-to-access areas, crushing the mold spores as it dries.
LOOK OUT Be alert to the signs of mold returning to the areas of past infestation. If it does return, repeat cleaning steps or, in cases of heavy infestation, seek professional help. Regrowth is usually a sign that the moisture has not efficiently been controlled.
PRO TIP
SPOT THE PRIME SUSPECT To prevent growth on paint film, newer mold-killing primers now contain an EPA-registered antimicrobial agent. You can apply the primer directly to any problem areas without extensive preparation, and paint over and kill any surface mold, mildew, and odor-causing bacteria. This water-based primer can be used on nonporous interior and exterior surfaces and is recommended for bathrooms, basements, window frames, and more.

129 SEAL YOUR HOME UP TIGHT
As we’ve discussed already, water can be your home’s worst enemy, causing cosmetic and structural damage, and leading to mold and mildew infestations. Water can seep in a number of ways, so be sure that your home’s exterior is well sealed.
ROOF Replace any missing or damaged shingles. Look for any exposed or protruding nails; replace them with larger hot-dip galvanized types if the flashing is galvanized sheet metal, or stainless steel nails if the flashing is made of stainless steel. Remove moss and lichen growth anywhere on the roof using a broom or garden hose that has a spray nozzle. Remove debris buildup in valleys and at wall-to-roof intersections. Inspect flashing around chimney and penetrations. If flashing is cracked or pulled off, call for expert repairs
GUTTERS AND DOWNSPOUTS Clean gutters with a blower, hose, or broom. A hose can help pinpoint leaks and other trouble spots. Use gutter cement on cracks, or replace the gutter sections according to the manufacturer’s instructions. Replace rusted screws and ensure downspouts drain away from the house.
WINDOWS, DOORS, AND SIDING Inspect and recaulk siding, windows, utility penetrations and doors. Place a foam backer rod in any seams more than ½ inch wide or ¼ inch deep. Check that all of the weatherstripping around doors and windows is sealed tightly to prevent moisture from entering. Inspect all stucco and brick surfaces for cracked mortar; repair it with patch kits from your hardware store. Keep a minimum 6 inches of clearance between the siding and the ground.
130 KEEP THE WATER OUT
Your yard is a prime suspect in water damage. Check the following area to be sure the water stays where you want it: outdoors!
SPRINKLERS Water your plants, not your house. Redirect lawn sprinklers so they do not wet the siding, windows, or foundation walls. Overwatering your lawn or plants can create moisture and mold problems even in summer.
LANDSCAPING Trim plant life away from the siding. Large shrubs or vegetation may need to be moved if the foliage persistently contacts the house’s siding, windows, or utility penetrations such as dryer vents. Tree roots can interfere with perimeter footing drain systems, disrupting the flow of water away from the house and causing dampness or flooding along the foundation and into the basement. Design your landscaping to minimize potential root blockage of underground pipes.
DRAINAGE Make sure that the perimeter ground is sloping away from the foundation. If any downspouts dead-end near the foundation, add some splash blocks to redirect water away from the home.
Inspect the outdoor deck connection to the house. This is a major source of water intrusion that often goes unnoticed. This ledger connection should be flashed and have sufficient space between the ledger board and the deck boards to allow drainage away from the house.
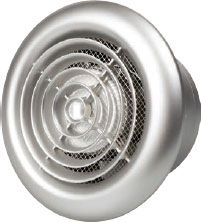
131 LOOK FOR MOISTURE
Once you’ve checked ways that the exterior of your home might be letting water in, it’s time to move indoors and investigate these common problem spots.
VENTILATION Install timers on bathroom and laundry fans, and run fans for 20 minutes after showers. Your bath/kitchen/laundry fan ducts should vent outside and never terminate in the attic. Do not vent your dryers inside the home. Use an approved aerosol foam sealant to seal around any ceiling penetrations that may allow moist air to flow into the attic space. Place foam rubber insulation gaskets around attic space access panels.
ATTIC Be on the lookout for water stains on the underside of the roof, rusted nails, and discolored moldy sections on any surface. If you find any of these warning signs, look for the source of the moisture, possibly a faulty vent that isn’t directing air to the outside. Also check that there is room for air to flow from the eaves (soffit vents) into the attic space and out the upper roof vents.
 KITCHEN AND BATH Inspect plumbing fixtures under sinks and toilets and around shower and tub enclosures. Look for stains, cracks, and mold on caulk and repair as necessary. Use tile and marble sealers annually or as recommended by manufacturers.
 BASEMENT Check your basement and crawlspace for any moisture problems: standing water, mold on floor joists, or rust on metal fasteners. Replace loose or missing batt insulation. If the crawlspace is not insulated, install a 6-millimeter polyethylene vapor barrier over exposed ground. If you find serious moisture damage or standing water in either the crawlspace or basement, call a contractor to repair and correct the source of the problem.
132 UPGRADE YOUR LOOK
Knowing how to “accessorize” is the way that many fashionistas describe their penchant for flaunting jewelry; some interior designers have that same outlook on household hardware. If you consider the vast number of knobs, pulls, hinges, handles, and even heating registers that permeate the home, you may realize that hardware makes up a major component and can really make a visual statement. Classy cabinet knobs and pretty drawer pulls can make an old piece of furniture look decades newer and help focus the overall design of a room.
GO CLASSIC A traditional rule of thumb has been to match materials to the existing décor, for example, by choosing granite knobs to match the countertops, or purchasing pulls with the same metal and finish, such as stainless steel with stainless steel, and copper with copper. However, that idea took hold when there was less of an assortment of decorative options. With such an amazing array available today, all those old rules are taking a backseat to a more intuitive approach in which anything goes, as long as it looks good.
MAKE IT MODERN Modern options not only include crystal, ceramic, and wood but also a wide range of metal finishes such as brushed nickel, antique brass, zinc plate, and many more—too many to list. Hardware stores and home centers offer plenty of choices for inspection, but the widest selection and best cost savings for major house purchases are often found with online retailers.
Style is a personal choice, but size is not, and your selection of cabinet and drawer hardware will of course be limited in size. When you remove a piece of hardware, the replacement should fit the same mounting holes, or cover them. For paint-grade furniture pieces, you may get away with filling the old holes, repainting, and drilling new locations, but this isn’t recommended where woodgrain is exposed.

133 COME UNHINGED
When ordering hardware for cabinets, you’ll also need matching hinges. The finish should match the décor, and new hinges should match the size and shape of the old ones. Face-frame cabinets have a frame over the top of the opening and need face-frame mounted hinges; other hinges have a recessed overlay. Check how much overlay the hinges need. Cabinet doors completely on top of cabinet faces require a full overlay hinge. If there’s only a partial overlay, use a ⅜-inch inset hinge door that completely conceals the hinge from sight when the door is closed.
To change hinges on a cabinet (or when replacing a door), remove the lower hinges first to keep the unsecured weight of the door from stressing the lower hardware or tearing the wood. Fasten the new top hinge first, and store old hardware until the swap is complete. If the new bolts aren’t right, you may be able to use the old ones.
134 PAINT YOUR REGISTERS
Replacing an old, ugly metal HVAC register can rid the room of an eyesore. However, replacing a whole house full of them can get pretty expensive. Over time, metal HVAC registers accumulate rust and grime. You have three options: leave them as is, replace them, or paint them.

Painting is definitely a cheaper improvement, and companies are making some very cool new spray-paint formulas that mimic the look of antique hammered metal, namely copper, bronze, and silver (although more colors are available). The register shown here was thoroughly cleaned and then given a coat of Rust-Oleum’s “Hammered Bronze” paint. Afterward, it looked brand new and stylish—for a fraction of the cost of replacing it.
PRO TIP
MOUNT UP Whenever you need to make new mounting holes in hardwood, always predrill the fastener holes to prevent splitting the wood. To tighten a loose hinge screw, remove the screw and tap pieces of toothpick into the screw hole. Cut the toothpicks flush with the cabinet face. Reinsert the screw, and the toothpick material should tighten the connection.
135 HANDLE IT
Most cabinet door handles have two mounting holes that you need to match precisely when replacing; spacing is not universal. Measure the handle or pull at the point between the pair of holes to the closest ⅛ inch. Removal (along with replacement) will require only a screwdriver, usually one that has a Phillips-head tip. You might still, however, come across an escutcheon—a plate behind certain types of drawer pulls—but these can be removed with a small cat’s-paw tool or (carefully) pried up with a putty knife.
136 INSTALL CUSTOM CLOSET SHELVES
Organizing a closet by adding shelves supported by 1X2 wood cleats is a fairly simple procedure and can add much-needed storage.
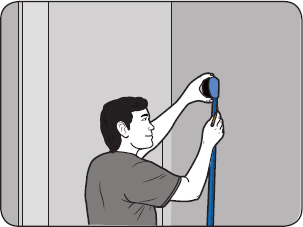
STEP 1 Mark the elevation (top surface) of each planned shelf on the back wall of the closet. When you’re marking the elevation, take into account the thickness of each shelf (often ¾ inch) as well as the height of the cleats (1¾ inch).
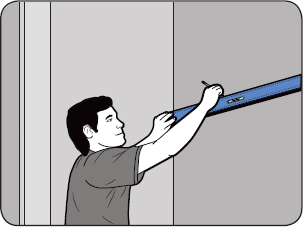
STEP 2 Mark level horizontal lines along the wall to indicate the tops of the shelves. Then mark out secondary horizontal lines that indicate the bottom of each shelf.

STEP 3 Cut 1X2 wood strips into cleats that fit flush between the side walls of the closet. Position each cleat along the lower line that indicates the bottom of the shelf and fasten it into the wall studs using an air nailer.

STEP 4 Level and fasten the side support cleats to the side walls, which intersect flush with the rear cleat. The side cleats can be cut to match the depth of the shelves, or they can extend all the way to the opposite wall if you plan to install full shelves on three walls of the closet.
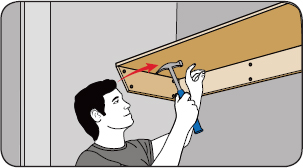
STEP 5 Cut the shelf material to fit over the support cleats and flush against the three walls. From the bottom, tilt the shelves to install them over the cleats, and fasten them into the cleats with 1½-inch nails. Shelves are often built from ¾-inch MDF stock or other paint-grade wood product, which you can then finish to your preference. For wraparound shelves mounted to three walls of the closet, consider adding vertical partitions to compartmentalize the storage space for increased organization.

137 MOUNT SHELVES
The easiest way to mount a shelf on a wall is by using the right-angle shelf brackets commonly sold at home centers and hardware stores. They’re available in a wide array of styles, finishes, and weight-bearing capacities. These L-shaped brackets mount into wall studs using strong screws, and the shelf is then screwed to the bracket.
SMALL SHELVES You can first locate the stud centers with an electric stud finder. Measure the distance between the studs where you’ll mount the shelves. On the bottom of the shelf, center and then mark the corresponding bracket locations. Screw the brackets to the shelves with the rear arms flush with the back of the shelf. Level the shelf on the wall and screw the brackets into the wall studs.
LONG SHELVES You might find it easier to mark a level line on the wall to indicate the top of the shelf brackets. Line up the brackets along the line and screw them securely into the studs. Center the shelf over the brackets and mount with screws from below.
PRO TIP
FLOAT YOUR SHELVES Floating shelves are made to hover on the wall with no visible brackets or mounting hardware. There being no brackets to contend with, the shelves can often be situated more closely together, thus granting more room for more shelves. Floating shelves are basically made of flat, hollow boxes. Depending on the method of construction, the hollow shelf mounts to either metal rods or a wooden cleat that fit inside the rear of the box and supports it from within. The rods or cleat are fastened securely into the wall studs for the strongest holding power.
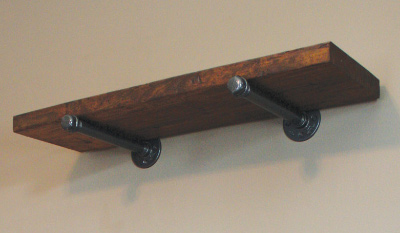
138 JOIN THE INDUSTRY
You can make rugged “industrial style” shelves using support brackets made from ¾-inch threaded galvanized pipe, floor flanges and end caps. Assemble the brackets from the pipe components and coat them using a black spray paint with a hammered finish for a wrought-iron appearance. The shelves can be cut from 2× lumber and stained to your preference. Fasten through the flanges of the brackets into the wall studs using heavy-duty wood screws for sturdy holding power.
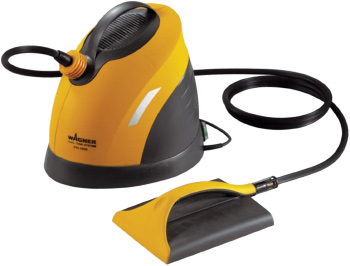
139 REMOVE OLD WALLPAPER
Removing wallpaper is sometimes a necessary evil if you plan to give your walls a pro-quality paint finish. Painting over wallpaper will not conceal seams or keep the paper from peeling in corners. Plus, any paint can cause the paper to wrinkle or bubble. For the best results, you should remove the wallpaper before painting.
Look for any loose corners or seams, and if you don’t find one, make one. Give the loose tab a slow, controlled yank. You might be able to peel away large sections of paper by hand with little effort. Move along the wall, pulling off all the paper you can, because the follow-up methods require more time and work. Use a drop cloth to catch the debris.
The paper won’t always completely come away from the wall while pulling it off by hand, however. The adhesive on the back can be stubbornly fused to the paper face of the drywall. To remove the paper without damaging the wall surface, you will need to weaken the chemical bond of the glue. There are two ways to do this: a liquid wallpaper stripper, or a steam-powered stripper.
PRO TIP
PREP BEFORE PAINTING After removing wallpaper, wash the wall several times to remove glue residue. Use fresh water and a sponge. Otherwise, the residue will impair the bonding of the paint and cause it to peel. Use a box fan to hasten the drying process. Once the wall is completely dry, apply a coat of primer, then paint.
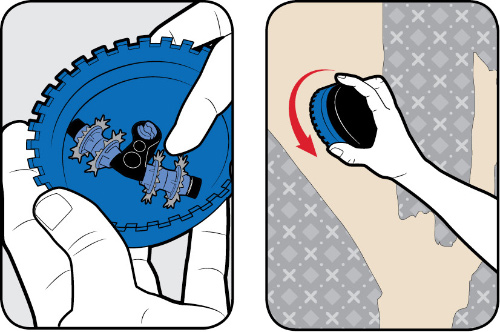
140 KNOW THE SCORE
Before you remove wallpaper, you should first use a perforation tool to abrade the paper so that it can absorb liquid (whether chemicals or water). This tool is sold at most hardware stores; it’s basically a palm-size handle that houses wheeled spurs. Apply just enough pressure to perforate the paper without damaging the drywall. Alternatively, score the paper with the edge of a wall scraper in a crisscross pattern with 6-inch spacing.
141 USE A CHEMICAL STRIPPER
Using a chemical wallpaper stripper is one of the easiest and least expensive methods to do the job. Here’s how to do it right.

STEP 1 Mix the liquid wallpaper remover with hot water, according to the manufacturer’s instructions.

STEP 2 Use a paint roller or spray bottle to apply the remover to the perforated paper. Wait about 10 minutes for the remover to weaken the adhesive, and then peel off as much as you can with your hands.
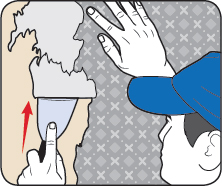
STEP 3 For stubborn swaths of paper, lightly use a 3-inch scraper at a shallow angle to scrape the paper without nicking the wall.
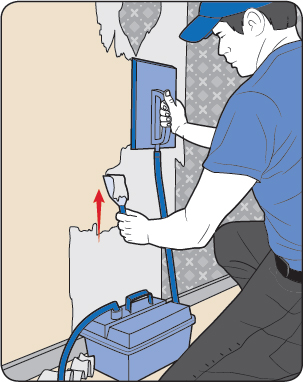
142 STRIP WITH STEAM
If you frequently remodel or redecorate, consider investing in a steam-powered wallpaper stripper. These tools eliminate the need to use chemicals and can be reused over and over. The simplest steamers require only that the user fill the tank with water and plug the cord in an outlet to start the heating element. Once the water heats up, the steam that is generated escapes through a hose. At the end of the hose a steam plate collects the steam over a targeted area.
Just hold the steam plate flat to the wallpaper for about 10 seconds. The steam will heat and dampen the paper, which loosens the glue. Move the plate onto the spot immediately next to the one just steamed, from which the paper should easily come off with a little bit of encouragement from a wall scraper. This pattern should allow you to continuously remove paper. Don’t forget that steam is hot; water will boil at 212 degrees Fahrenheit, so be careful when using a steamer.
143 SILENCE A SQUEAKY FLOOR
Floor squeaks are caused by flexing of materials in the flooring or subfloor, which usually rubs against a nail or adjoining floorboard to create the noise. A loose board is a common culprit.
USE A SHIM The easiest way to fix a floor is from below. If the floor is above a basement or crawlspace, you might have exposed floor joists; the simplest solution is to tighten the connection between the squeaky floor and the joist. Wedge a shim between the top of the joist and the subfloor. Use a hammer to tap in just enough material to close the gap and tighten the joint. Construction adhesive can hold the shim in place when the wood contracts.
SCREW IT If you know which boards have come loose, you might be able to tighten them from below with a screw and a large washer. Drill a pilot hole up through the subfloor using a drill bit slightly narrower than the screw. Consider the thickness of the subfloor, along with the finished flooring, and use a short enough screw that won’t penetrate through the finished floor when driven in; its point should remain ¼ inch below the floor surface. Insert the screw and washer into the hole, driving it up through the subfloor into the floorboard, pulling the layers together against the washer.
ADD A CLEAT For larger areas that have multiple loose boards, wedge a wood cleat beneath the subfloor and fasten it to the floor joist. Position a 1X4 or 1X6 cleat against the joist and the subfloor and prop it in place with a 2X4. Hammer-tap the 2X4 to wedge the cleat to the subfloor. Fasten the cleat to the joist with 2- to 3-inch nails or screws.
BRIDGE THE GAP If the floor squeaks across a large area, the floor joists might be shifting as the house settles. To reinforce them, nail diagonal bridging between joists in an X pattern. You can cut your own pieces to fit or purchase precut wooden or metal bridging from a home center.
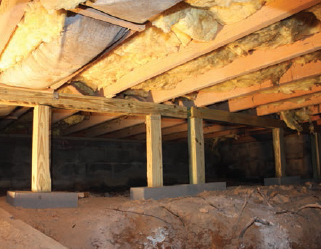
144 STABILIZE A FLOOR
A floor may be solidly constructed and adequately supported but still have a degree of “bounce” or vibration when people are moving throughout the room. This is usually not a major problem, but should be addressed if your plan to install a tile floor, because any minor amount of deflection within the subfloor could result in cracked grout or flooring. If you can gain access beneath the subfloor, you can construct a perpendicular girder and piers to help level the joists and stabilize the framing with additional support that connects to the ground.
145 REPAIR A CARPET BUBBLE
A “bubble” in a wall-to-wall carpet is an area of the rug that lifts above the subfloor and creates unsightly hills or ridges in the finished surface. It can be expensive to have the carpet professionally restretched to eliminate these bubbles. However, there’s a simple and low-cost method to repair the carpet that takes only a few minutes to complete. All you need is a bottle of carpet-seam glue, a large syringe, pliers, and a towel.
STEP 1 Analyze the lay of the carpet throughout the room to locate all the areas of loose carpeting that need to be repaired. Purchase enough carpet-seam adhesive to address the square footage that you require.
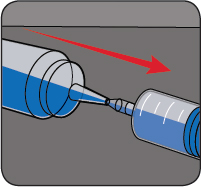
STEP 2 Using a large syringe, just like the ones used to inject marinade into your Thanksgiving turkey, draw glue into the syringe.

STEP 3 Use pliers to gently lift the carpet off the subfloor/padding at the midpoint of the bubble. Pierce the carpet with the syringe and angle the tip toward the edge of the bubble.

STEP 4 Depress the plunger and then rotate the syringe so the glue is applied in a circular pattern, covering as much of the loose carpet area as possible. As you empty the syringe, draw the needle partially out of the carpet so the glue contacts the center of the bubble as well as the periphery.
STEP 5 Working from the center outward, press the carpet firmly into the adhesive and spread the glue beneath the carpet. If you have a laminate roller or rolling pin, put it to work.
STEP 6 Place a flat weight over the repaired area to provide clamping force while the adhesive is setting. Heavy boxes or books will work so long as they press the carpet flat into the glue. Keep pressure on the glue according to the adhesive manufacturer’s recommended drying time.
Repeat all steps of this process for any areas of the floor that show signs of bubbling and, with any luck, your carpet should eventually stay down and bubble-free.
146 GIVE THREADS SOMETHING TO GRAB
Screws often come loose because the wood that surrounds the threads has been worn out, often due to the wear and tear from movement over time. To tighten a screw, the threads need more material to bite. To fix this, simply add wood to the hole.
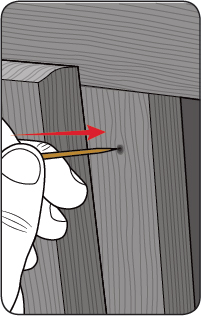
Depending upon the size of the hole worn in the wood, you can fill it using a wooden golf tee, barbecue skewers, or toothpicks; in the event of a sizable hole you can even try using a wooden chopstick. In a pinch you could even whittle some scrap wood slivers using a pocketknife.
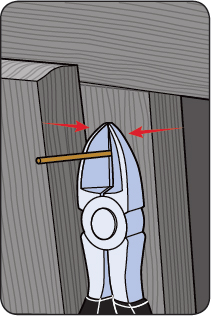
Insert the wood pick into the hole as deep as it will go, then cut it flush with the mouth of the hole. Repeat this step until the hole is packed.
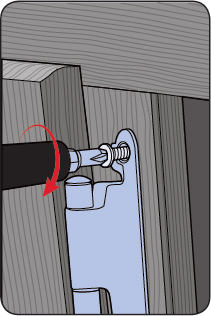
Reinsert the screw and tighten with a screwdriver. The threads of the screw should crush against the new wood fibers with outward pressure to mount securely inside the hole.
147 FIND PARTS ON THE WEB
Sometimes a simple repair won’t be enough to fix the problem, and you need a replacement part. When it comes to furniture, those various parts—sofa legs, metal brackets, caster wheels—often have unique shapes that aren’t so easy to find at the local hardware store. For a specific component, try looking online for furniture-part suppliers who offer a wide variety legs, clamps, adapters, mirror supports, daybed parts, sleeper sofa mechanisms and many other specialty items. In some cases, you can even email the supplier a picture and description of the item you need, and a product specialist will help you find the right part.

148 USE WOOD FILLER
Fixing larger dings and dents might require the use of wood filler. Also called wood putty or wood patch, this substance usually comes in two varieties: water-based and solvent-based. The product is perfect for restoring any damaged areas in wood to like-new condition. Solvent-based fillers have long been the mainstay in woodworking, but new water-based fillers perform as well as solvent-based.
Keep more than one color of filler on hand. If you’re trying to match the wood closely, having a variety of colors allows you to mix up the right shade to match the item. Water-based and solvent-based filler are both easy to mix.
TYPE
Water Based
PROS
Free from solvent fumes and easy to handle. No acetone or turpentine. Won’t dry out in the can. Easy to handle and clean up.
CONS
Not as many color choices. Dries more slowly.
Solvent Based
PROS
The choice of most professionals. Works better in larger areas. Larger selection of grain colors. Looks more natural.
CONS
Chemical smell. Difficult to dispose of. Can’t work it in smaller spaces due to fumes.

149 HIDE SCRATCHES
Scratches are a drag, especially when visible in a nice piece of stained wood furniture. Use a permanent ink felt-tip marker to color the bare wood. If you don’t have a set of colored markers handy, home centers and hardware stores usually stock felt-tipped stain pens made by popular wood-stain companies in colors that match the most popular furniture tones. This technique doesn’t actually repair the scratch so much as hide it, but it’s the quickest fix you’ll find for concealing unsightly nicks and dings.
150 STEAM IT OUT
In the event that you dent or scratch finished wood of furniture, flooring, a picture frame, or such, you can often make a repair by dampening and heating the area to raise the wood grain. To do this, use a very small brush to apply a small amount of water to the scratch or dent. Then use a hot laundry iron covered with a soft cloth to heat the area, which should cause the fiber of the wood grain to swell and refill the dent.
151 TAKE CARE OF YOUR ROOF
An older roof may develop black streaks or stains, usually caused by algae. Chlorine bleach or sodium hydroxide solution that is applied using non-pressure methods will kill black algae and generally remove stains with the rinse phase, but this will not prevent the algae from returning in just a few months. These methods can also accelerate the corrosion of metal gutters, flashings, and fasteners;chlorine can also be harmful to surrounding plant life.
Try a cleaner designed for roofs, such as Defy Roof Cleaner, a blend of detergents and a nonpolluting chemical made of sand and soda ash. With spray-on/rinse-off application, this cleaner will remove algae without damaging the roof or harming any of the surrounding vegetation.
You can then follow up on cleaning with a stain-blocking agent to inhibit new growth, or install zinc strips at the roof line. When rainwater flows over the zinc, it generates zinc oxide, a harmless, invisible substance that coats the roof surface and inhibits the growth of fungus, moss, and algae. To install zinc strips, start at either end of the roof peak and then install a continuous row under the ridgeline. Apply roofing cement along the sealant edge and slide the strip under the shingle, leaving the lower half exposed to treat the rainwater.
152 DO AN INSPECTION
At least twice each year you should fully assess your property to make sure no major maintenance issues have gone unnoticed. Here are key spots to check.
LANDSCAPING Check that all irrigation paths are clear and unobstructed to divert runoff away from the house. Pull weeds and shovel away brush, leaves, or other organic matter that block drainage.

DRAINAGE Inspect all gutters and downspouts for drain blockage. A putty knife or even a spatula makes a good tool to scoop away the debris.
FOUNDATIONS Remove any dead wood near the house foundation—it’s dinner to termites, luring them to your home. Even mulch (which termites can’t eat) should be kept 12 to 14 inches away from the home to avoid providing the moist, dark environment they like.
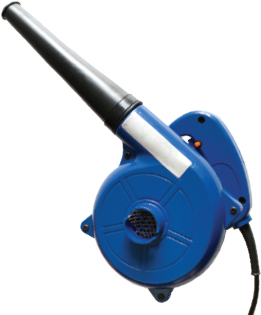
PROTECT YOUR WOOD Dead leaves, downed limbs, and other organic matter can threaten any wood structures around the home. Shovels, gloves, rakes, and wheelbarrows will likely be the only tools you’ll need to remove it. A powered blower can make quick work of clearing rubbish. Keep your decks and porches clean from leaves to reduce mold and mildew staining.
For similar reasons, you also need to clean the bottoms of deck posts and fences. Accumulated organic matter can retain water and transfer it to the wood, which may wick moisture into the end grain, contributing to rot and providing a pathway for pest infestation.
153 APPLY SOME PRESSURE
Pressure washers can work wonders on metal, masonry, and concrete. The PSI (pounds per square inch) rating of a power washer refers to the pressure that the washer unit is capable of producing. Pressure washers rated up to 2,200 PSI are generally used only for light-duty cleaning of mud and dirt from sidewalks and lawn equipment. Washers rated 2,200 to 3,000 are intended for more frequent use or larger jobs, such as cleaning siding.
Choosing the right nozzle can make a world of difference. Most manufacturers offer a range of options that attach to a washer wand with a standard quick-coupler. Some nozzles spray a fine fan of water for easy coverage when spraying a cleaning agent. When you need to blast away tough stains on concrete, switch to a zero-degree nozzle, which shoots a concentrated jet that can cut through stubborn dirt and discoloration.
154 SLUICE THE SIDING
Metal, concrete, and masonry siding can be cleaned fairly easily with a long-handle scrub brush or a pressure washer. Many of the recent spray-on bleach products are designed to clean on contact, requiring only a rinse coat to do the job without the work of scrubbing. (It never hurts to scrub, though.)
PRO TIP
CLEAN STUBBORN STAINS To tackle tough stains marring your brick masonry, try scrubbing with a wire brush. The harsh abrasion will often remove the stain by actually scraping away the material’s surface.
155 WATCH YOUR WOOD
When wood is exposed to sunlight, it can damage the fibers, causing the surface to turn gray over time. When it’s in the shade and exposed to moisture, mold and mildew can become a problem.
POWER CLEAN The most direct way to renew the appearance is to sand or pressure-wash the surface. However, sanding can be very difficult and time consuming for large areas, and pressure washing must be approached with caution, because too much pressure can damage the wood surface, removing the gray and green but causing the surface to fuzz or splinter. When using a power washer, limit your pressure to no more than 1,000 or 1,200 PSI, and carefully work in the direction of the grain—never against it.
SCRUB IT DOWN A less aggressive but effective method of cleaning is to scrub outdoor wood with a long-handled, stiff-bristle nylon brush. Some brushes even attach to a garden hose and feature nozzles that direct pressurized water right in front of the broom head for the most efficient scrubbing action.
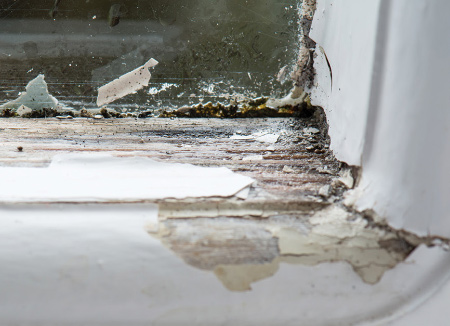
156 PATCH WOOD ROT WITH PUTTY
Wood rot is the result of a type of fungal infection that destroys wood. It is as damaging as termite or other insect infestation, and it can wreak havoc on wooden windows. If the windows aren’t maintained with paint, caulk, and glazing, then wood rot can take hold and completely ruin the casing.
However, in some cases you can catch the rot and make repairs before a complete window replacement is necessary. Try Durham’s Water Putty, a powder product that has been around more than 80 years. The powder is mixed with water on site and can be used to repair damaged wood if applied properly. The putty is also easy to use and easy to clean up.
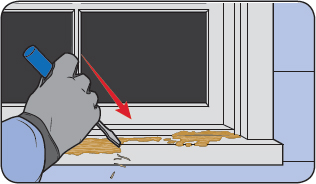
STEP 1 Remove damaged material and wood rot with a screwdriver, chisel, shop vac, and so on.

STEP 2 In a mixing container, add a little water at a time to the powder and then stir with a paint stick until you achieve a consistency similar to thick pancake batter.
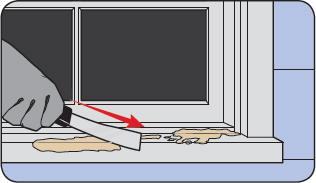
STEP 3 Apply the product in layers up ¼ inch thick at a time. Allow each application to dry before adding more product.
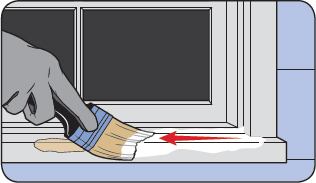
STEP 4 Once the damaged area is completely filled and dried, sand the area smooth. It is also important to finish the repair by sealing it with a waterproofing product such as exterior primer and paint.
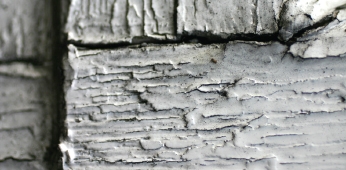
157 PERFORM SURGERY
In some cases, the best solution may be to cut out the damaged section of wood, carefully cut a replacement piece of pressure-treated wood to the same shape and dimensions, and then glue the piece into the window casing with a high-quality, exterior-grade adhesive that accepts paint. An oscillating multi-tool equipped with a plunge blade is an excellent device for cutting out the problem area.
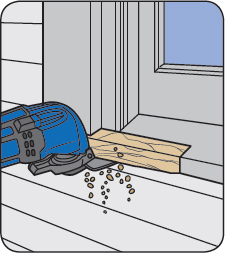
STEP 1 Remove all loose wood, dust, and debris. A clean work area will mean clean repairs as well.
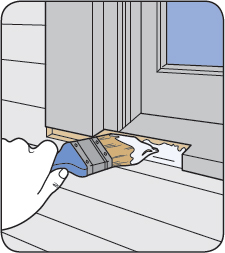
STEP 2 Coat all sides of the replacement piece of wood—and do the same with the damaged area—using an exterior primer before fastening in place, in order to add an extra measure of moisture protection.
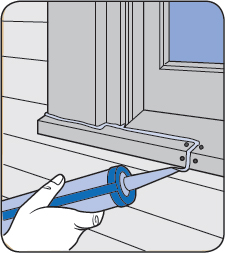
STEP 3 After gluing and nailing or screwing in the replacement piece, fill every holes and seam with exterior-grade wood putty, and then sand the joints smooth. Apply paintable waterproof sealant, primer, and matching paint to complete the repair. For extra protection, coat all sides of the wood replacement with exterior primer/paint before installing.
158 USE TWO-PART EPOXY
Another great fix for painted window casements relies on a two-part polyurethane-based wood repair filler. It’s sold as a kit including a resin and hardener, which are mixed together to create a light tan epoxy. The filler is thin enough to fit into small gaps and cracks but thick enough that you can mold it. And, unlike some other wood fillers, it does not shrink or crack. The downside to the epoxy is that it’s very sticky, which will make it tricky to work with and difficult to clean up. However, the upside is that the material can be molded into a three-dimensional wood replacement that can be cut or routed into shape. If you need to replace a damaged sill corner or chipped molding profile, you can form the repair from the epoxy and cut the final shape once it’s dry.
159 PATCH IT UP
To patch up larger holes or cracks, you can try Vinyl Concrete Patcher, a self-bonding mix that’s made for repairing any broken, chipped, or loose concrete and masonry, as well as filling cracks up to 2 inches deep. The material is available in tubs or a 40-pound bag. It will adhere to all properly cleaned surfaces and can be troweled to a feather edge of  inch.
inch.
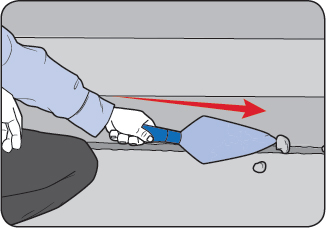
STEP 1 Chisel away cracked or crumbled materials, squaring off the edges. Even better yet, you can undercut the edges with a chisel and hammer.
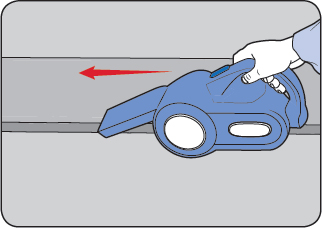
STEP 2 Use a wire brush to scrape away crumbling materials and to roughen the surface if it has been finished smooth. The repair product should not be applied over painted surfaces. Clean away all debris and rinse with water.
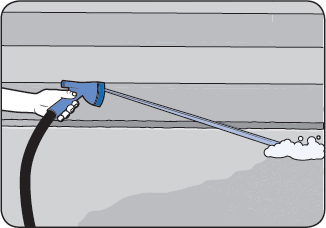
STEP 3 Before application, dampen the area with clean water.
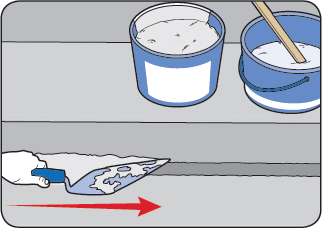
STEP 4 Apply the mix with a trowel, using heavy trowel pressure to force it into the crack. Overfill it slightly and then trowel it smooth to match with the surrounding concrete. If the cracks are deep it may be necessary to apply in a series of ¼-inch-deep layers, allowing the mix to dry for 2 hours between layers. Clean the tools immediately afterward with water.

160 TAKE THE TUBE
Some concrete crack-repair products fit into a caulk gun and are ready to apply. Sashco’s Slab concrete crack repair caulk offers good adhesion and elasticity for a long-lasting fix. The product’s water-based formula is also easy to apply and clean up. Just as with caulk, fill the crack level with the product and smooth the top of the bead. The formula even offers a heavily textured repair that matches the sand texture in the concrete. When used with a foam backer rod, the caulk will adhere to joints up to 3 inches wide. A number of patching products come in easy-to-use squeeze tubes, such as Blacktop Crack, used for repairing cracks in asphalt driveways.
161 CARE FOR CONCRETE
Concrete is a very durable building material and can also be aesthetically pleasing. Over time, though, concrete can deteriorate. Most repair projects are fairly simple using some of the specially formulated patch and repair products available these days.
Various special concrete repair products are user-friendly and have distinct traits such as fast setting times, a high final strength, or an increased degree of resistance to cracking and chipping.
For most repairs you’ll need a few tools: a cold chisel, ball-peen hammer or 8-pound sledge for larger areas, protective goggles, and a pair of gloves. Use a brush and broom for cleaning up, and a pointed trowel for application. If you’re resurfacing steps and slabs, then you’ll need an edger too. You may also need lumber for forming major repairs.
Prep the repair area properly before applying the concrete product. Remove all cracked and crumbling areas. For larger areas, use a sledge and cold chisel to break away thin or loose edges. Sweep, vacuum, or hose away dirt and debris down to a solid base.

162 GO TO REFORM SCHOOL
Larger repair jobs, such as broken corners or slabs of walkways, usually require re-forming. The first step is to remove the broken area down to the gravel fill. If the gravel fill has deteriorated, dig down a couple of inches below ground level and add a new gravel base. Use 2X4 or other material to re-form the area. The tops of the form boards should be even with the top edges of the adjoining concrete surface. Forms should be level and should follow the natural grade. Stakes should be driven into the ground to support the forms every 4 feet. They should also be cut off even with the top of the forms.
Packaged, ready-mix concrete can be used. Mix the concrete product, then trowel or shovel it into the form. Roughly smooth it up with a trowel, then cut around any forms with an edger. Allow the concrete to stiffen slightly until all water has evaporated from the surface. Once the surface turns dull, smooth and compact the concrete with a trowel. Keep the trowel pressed firmly down on the surface and flat. Use the edging tool around the edges to smooth them up. For a textured, nonskid surface, use a wood float or broom for finishing.
Cover the repair with a plastic sheet, or periodically spray with a garden hose to keep the concrete damp for 5 to 7 days, which helps the hardening, or curing, process. Concrete that has been moist-cured will be approximately 50 percent stronger than that exposed to dry air.
163 TREAT YOURSELF
You will be sadly disappointed in your outdoor construction project if you try to build it using any manner of wood products that were not meant for exterior use—your work will more than likely end up swelling, twisting, rotting, hosting a colony of insects, or any combination of these various tragic outcomes in a very short amount of time.
For many, if not most, outdoor projects, you will be looking at pressure-treated wood, which has been infused with various chemicals that help protect it from termites and other insects, as well as fungal decay.
Often made from pine or fir, treated lumber has a natural appearance, and its resistance to termites and rot is a major advantage for outdoor projects. Better yet, it is a plentiful and renewable resource, and is also usually the most economical choice available.
In addition, it can support more weight and span longer distances than cedar, redwood, or other woods. For this reason, many outdoor structures, such as decks, are framed with and supported by treated lumber, even if a different type of wood or other material is used for the finished surfaces.
Treated wood can be found in a variety of lumber grades, from knot-free, close-grain grades to lower grades that have more knots, splits, and wane (missing corners of the wood where the bark once existed). You can find the grade designation stamped on each piece of wood.
Generally, the higher the lumber grade, the higher the cost. Select the right board by one of three categories, which should be indicated prominently on the product label. They are as follows below:
ABOVEGROUND USE Best for decking, fences, and rails.
GROUND-CONTACT USE Great for posts, beams, and joists.
BELOW-GRADE Works for support posts that are partially buried below grade and for permanent wood foundations and planters.
164 TRY STURDY SOFTWOODS
For applications that don’t require pressure-treated woods, or if you want to minimize the chemicals you’re using, there are a good number of attractive hardwoods used for outdoor projects that possess some natural protection against insects and other damaging factors. Here are some of your options.

WESTERN RED CEDAR This wood’s natural fibers contain natural compounds that make it naturally insect- and moisture-resistant without chemical treatments. Plus, the even, consistent grain and low density make cedar less likely to swell, warp, cup, and twist than other woods. As a result, it lies flat and straight. Cedar is also free of the pitch and resin found in other softwoods—a quality that makes it ideal for a fairly wide range of finishes, whether you choose a lightly tinted semi-transparent stain or a two-coat solid-color finish.

REDWOOD Not only is redwood strong and beautiful, it is naturally resistant to insects, rot, and decay; it can also withstand high heat and pressure. It shrinks and swells less than other woods when exposed to water, which means that it’s less likely to warp, split, or check (crack parallel to the grain), making it highly durable for building. It is one of the most pliable softwood species, making it easy to saw, nail, and drill. Redwood is also lightweight and has little to no pitch or resins. It is extremely easy to paint, stain, and glue, and a redwood deck can be restored repeatedly with minimal effort and cost.

CYPRESS While actually a softwood, cypress grows alongside hardwoods and is usually grouped with them in manufacturing. Its natural durability is a great benefit for exterior applications. Cypress generates cypressene—its own preservative oil—which makes its heartwood naturally resistant to insects, decay, and chemical corrosion. These inherent strengths make the wood an ideal choice for long-wearing outdoor projects such as fences, decks, docks, and siding.
165 SIZE IT UP
Check local building codes for specific minimum lumber sizes required in your area. Depending on the size of the structure, support posts are usually made from 6X6 or 8X8 beams. Railing systems require 4X4 posts. Deck boards are often sold in 4X6-inch sizes, or you can use 2X6 lumber. Avoid using any boards wider than 2X8 for the flooring because of their tendency to cup. The length of deck boards will depend on the structure’s design, and in some cases you can purchase boards long enough to install over the joists with no end joints between them. The sizes of joists and beams will depend on the size and joist span of the structure.

166 GO EXOTIC
Some lumberyards have begun specializing in bringing exotic woods to the market, such as mahogany , and less familiar rainforest hardwoods such as ipe and Pau-Lope  . These unusual woods can offer a rare beauty, as well as hardness and durability that far exceed that of conventional lumber. The durability is a great advantage for outdoor projects but can also present a variety of challenges. Typically, these types of woods are very dense, making it difficult for stains to be absorbed. Their high amount of natural oils also make them resistant to penetration and require special steps for finish application. And of course, “exotic” also means you can expect to pay premium prices.

167 DO A DECK CHECK
You should give your deck a full close annual inspection and fix anything you find. This will ensure years of function and beauty outdoors.
CHECK THE BOARDS Look out for damage such as splitting, warping, and major checking. Replace entire boards if you should find any severe deterioration.
TIGHTEN UP Make sure no fasteners are coming loose. A good way to do this is to walk the entire deck, back and forth along the joists, while being alert for any weakness or instability. Check for nails that have lifted or screws that show signs of significant weakening. Replace fasteners with any significant rust or corrosion, because they can deteriorate the surrounding wood. Replace with quality decking screws or spiral/rink-shank nails.
PUSH IT Inspect railings and banisters by pushing them to make sure there is no give.
FLASH IT Flashing is a metal or plastic guard that directs water out and away from sensitive areas that are prone to holding moisture and therefore being weakened. A piece of properly installed deck flashing should be somewhat L-shaped. One leg of the L runs up behind the siding, the other over the top of the ledger board. Be sure that the flashing at the ledger board is still sound, and be prepared to replace it if necessary. Also, make sure the proper ledger fasteners are used. Acceptable fasteners include through-bolts, ½-inch galvanized lag screws, or heavy-duty structural screws—but not nails.
CHECK CONNECTIONS Check the framing connections. Where the joists meet the ledger board there should be metal hardware (joist hangers). Nails driven at an angle (“toe-nails”) are not a sufficient structural connection. Bolts in post-to-beam connections should be ½-inch in diameter and galvanized.
STEP UP Make sure stairs are of proper rise (height) and run (depth). The combined rise and run of a code-approved stair should be no more than 17 inches: ideally 7-inch rise, 10-inch run.
BRACE YOURSELF The posts, beams, and angle bracing should be the appropriate size and spaced properly. Your local building inspector can to tell you what’s the expected standard where you live. Generally speaking, deck posts should be a minimum 6X6 and spaced 6 feet on center.
PRO TIP
KEEP THE PRESSURE OFF Should you use a pressure washer to clean your deck? You can, but first you should check the industry association website of the wood species (pine, redwood, cedar) to determine if power-washing is recommended. Always use as low a pressure as possible, and try to never spray closer than 12 inches to the deck.
168 KEEP IT SPARKLING
With regular maintenance, the weathered look of decks usually can be revived with the application of the right deck cleaner. Even if your deck is several years old, it’s easy to restore the original color and beauty of the wood by applying a cleaning solution and wood brightener. (Follow the manufacturer’s guidelines for proper use and to make sure you’re using the right product for your deck’s wood species.)
CLEAN IT UP Deck cleaners and restorers generally fall into one of three categories—chlorine bleaches, oxygen bleaches, or oxalic acid-based formulas. Chlorine bleaches are especially effective at killing mold or mildew spores—a common cause of discoloration and staining. Oxygen bleaches are effective at removing mildew stains and weathered gray residue from sunlight-degraded wood decks. Oxalic acid products are useful brighteners for a wood deck but not very effective for removing mildew.
CONTROL MILDEW If you do have a mildew problem, treat your deck using an oxygen or chlorine bleach and water solution (typically 1:3, bleach to water) and follow up by using an oxalic acid-based product to brighten the wood color. Products with oxalic acid and bleach are also available. They will work on deep stains, mold, and mildew, but these are commercial- grade products and should be handled very carefully (pre-rinse and/or cover plants, and shield siding and doors, to protect finish). Mold and mildew may require an additional round of scrubbing and application of both a bleach/water solution and oxalic acid.