
Let’s talk about love. A bivalve revered since ancient Rome (when oysters were imported from England, put in saltwater pools, and fattened up with wine), oysters have been eaten on the coast for at least a thousand years, evidenced by mounds of discarded oyster shells (called middens) that line the banks of Maine’s Damariscotta River and other points along the shore. As the Colonies developed, oyster bars sprang up; when Boston’s Union Oyster House opened in 1826, Daniel Webster came daily, drinking a tall brandy and water and often eating six plates of a half-dozen oysters.
Long considered an aphrodisiac because of its high zinc content (in the Middle Ages oysters were thought to “exciteth Venus,” while in the 18th century Italian lover Casanova purportedly ate 50 for breakfast), the sensual oyster has some scientific merit: scientists in 2005 discovered that oysters are rich in a rare amino acid that triggers sex hormones.

What is it about this creature that outlived the dinosaurs, and can be confidently dished up raw in a multitude of situations — from a fancy wedding to a beachy clambake or a roadside fish shack? That can be stuffed, boiled, pickled, smoked, baked, stewed, steamed, grilled, canned, iced, or fried? Ardent environmentalists, oysters clean our waters with constant filtration, moving up to five gallons an hour across their gills. Rich in minerals, high in protein, they are a nutritional juggernaut. Farmed or wild, they connect us to our environment, our earth, our seas.
Oysters used to be cheap — one of the earliest fast foods, they were sold on city streets, where oyster houses and oyster bars proliferated. In the 1800s, New Haven became an oyster center with its vast oyster population and a railroad system. Oyster farming thrived in the Ocean State, too, where in the early 1900s, oyster growers leased 30 percent of the bottom of Narragansett Bay for underwater farms. Today, from New Haven, Connecticut, to Mattapoisett, Massachusetts, you can still find Greek Revival–style oystermen’s houses on the shore, architectural gems that were practical: a place to live above and store their catch below. Peaking in the early 1900s, New England oyster production began a slow, steady decline as oyster beds and wild oyster reefs became nearly extinct, wiped out by overfishing, a devastating hurricane in 1938, urban sprawl, failed septic systems, pollution, and bacteria that thrive on pollution. By the 1970s, many people wouldn’t eat raw oysters. As Woody Allen said, “I want my food dead. Not sick. Not wounded. Dead.”
There’s been a resurgence, beginning in the late 1990s, that wouldn’t have been possible without the Clean Water Act and other efforts to restore the ecosystem of our bays, waterways, rivers, and ocean. But cleaner waters also dovetailed with the foodie revolution, leading to an oyster renaissance where East Coast oyster production has doubled in the last five years. While the big guns who supply the bulk of commercial oysters (sold by the gallon for fries and stews) are located in Virginia and Louisiana, New England raw oysters grown by small-craft farmers have achieved cachet status. The days of being served a plate of Malpèques (a popular oyster from Canada) are over — people want Duxbury, Cuttyhunk, or hundreds of other named oysters.
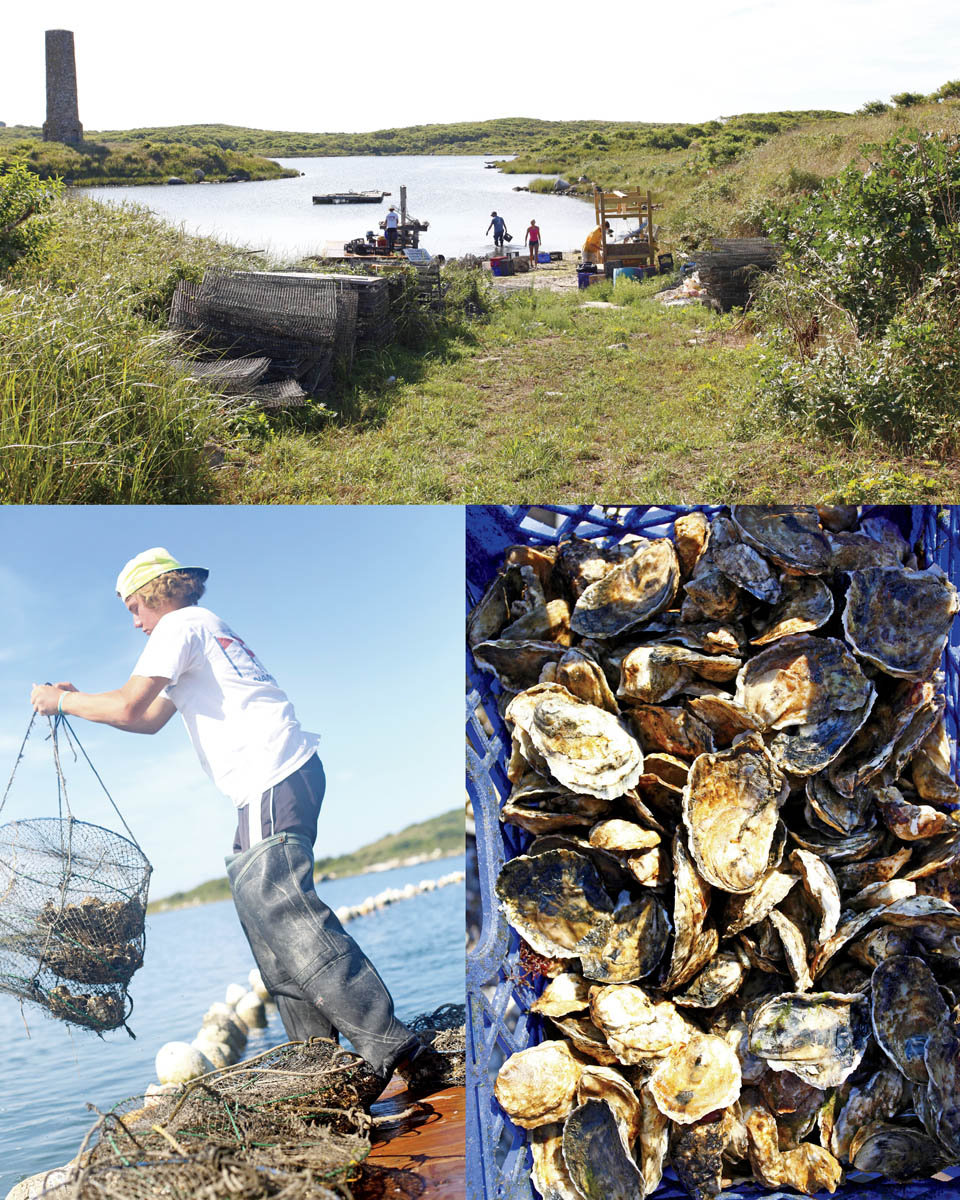
Barriers to entry are few. Many New England oyster growers are young, according to Perry Raso, who started the Matunuck Oyster Farm at age 26. He’s typical: a native New Yorker, he came to Rhode Island as a boy when his dad retired as a cop and decided to try his hand at fishing. That didn’t last, but 12-year-old Raso was already making money selling the clams he’d dug, and caught the bug. Today, he owns the popular Matunuck Oyster Bar, where New Yorkers drive three hours to have their Matunuck oysters brought from pond to plate. It’s a lifestyle as much as a job — good thing, since you may think it’s the best job in the world on a hot summer day, but not so much in the middle of January when you’re standing hip-deep in finger-numbing water.
Or consider Walrus and Carpenter Oysters in Kingston, started by a Yale forestry school grad who wanted to work on the water with sustainable aquaculture. Walrus and Carpenter supplies 25 Rhode Island restaurants, shucks at parties, and sells to individuals. In December, the owner drives weekly to New York and Brooklyn (he’s no fool), offering free beer, shucking lessons, and oyster samples to folks who come to the evening pick-ups, mostly because he wants to connect individuals to their farmer. In 1996, Rhode Island had six oyster farms; today there are thirty.
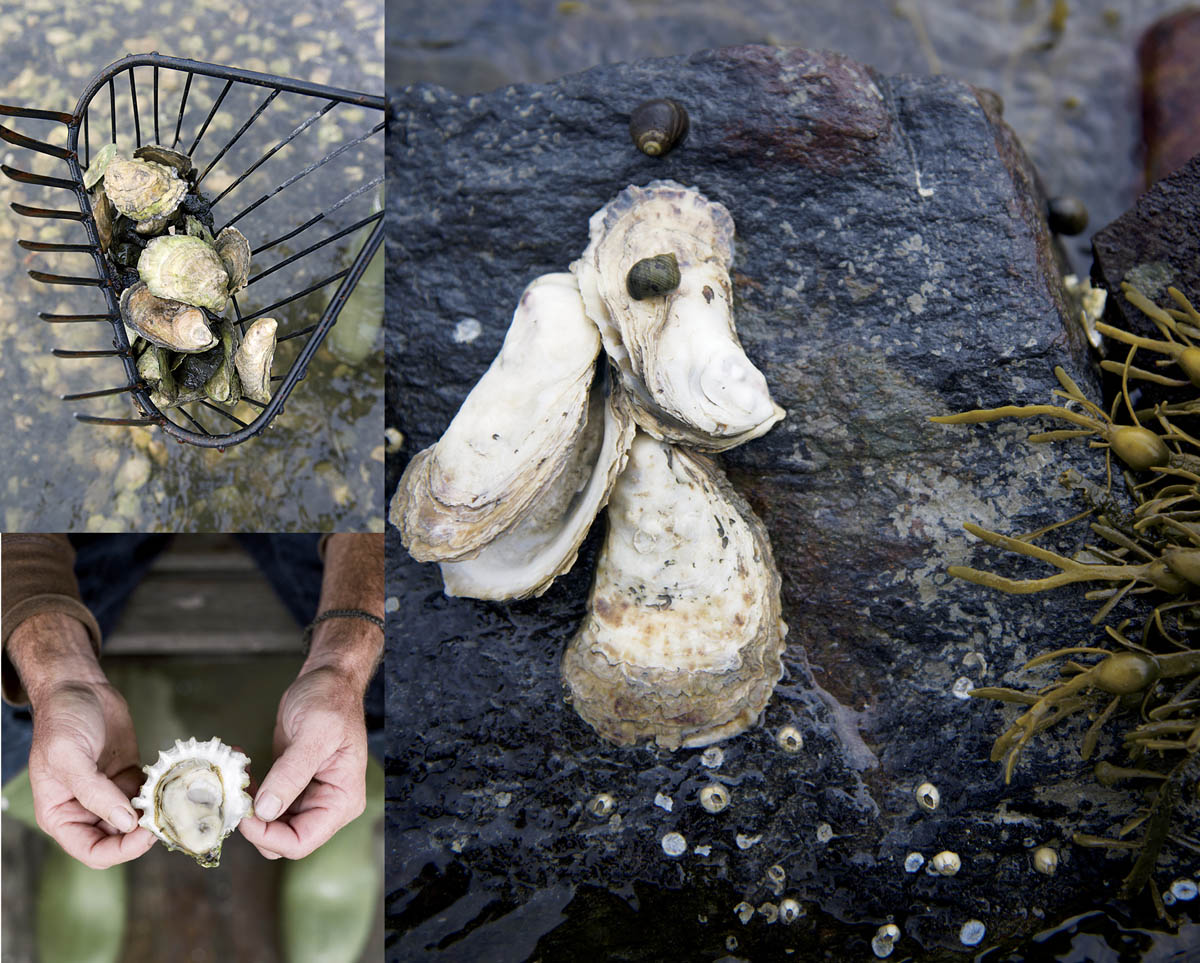
Oysters reproduce by spawning when water temperature reaches about 68°F (38°C). They grow faster in warmer waters (sometimes ready to harvest in a year), whereas up north it takes longer — two or three years for an oyster to mature — and oyster connoisseurs believe the slower-growing, cold-water varietals have more flavor. Considering that all oystermen start with the same seed, it’s amazing how different oysters can taste; artisanal growers rely on marketing these distinctive flavors to enthusiasts who appreciate (or at least are curious about) the special characteristics of geography and climate of a place — what the wine industry calls terroir. Flavor profiles are determined by many factors — what plankton the shellfish eat, water salinity, time of year, tidal flow, temperature, and the water’s nutrient-richness.
Consider Maine, where the cold water slows the oyster’s growth (taking up to four years to mature), yielding a firm plump meat, thick shell (easier for shucking), and distinct brininess. On the Damariscotta River alone, farms closer to the mouth (where the water is saltier) produce a brinier oyster with a salty finish, while farms upriver yield mellower, sweeter oysters. Barbara Scully, a former marine biologist who founded the Glidden Point Oyster Sea Farm, is among the few farmers who don a wetsuit and dive for oysters. (Her kids chip barnacles off the shells when she surfaces with them.) Sean Rembold, chef at the Wythe Hotel in Williamsburg, Virginia, says the extra care taken with Glidden Point oysters produces a buttery briny taste that is “majestic.”
New Hampshire, with the shortest shoreline of any coastal state, has a handful of oyster farmers in the Great Bay Estuary, and The Nature Conservancy, recognizing what an ecological linchpin oysters are, teamed up with the University of New Hampshire to restore oyster reefs in the Great Bay and provide the natural filtration necessary to maintain healthy eelgrass beds.
Oysters are a microcosm of our relationship with nature and sea.
In Massachusetts, Wellfleet oysters have a lineage dating back to days when whaling and oystering drove the local economy, and lovers of Wellfleet oysters insist that the shallow bays turn out lighter-bodied oysters than you’ll find off the islands of Nantucket Sound. Just west, Island Creek Oysters in Duxbury benefit from cold, hyper-salty water and a tidal system that flushes out the rivers 80 percent with each tide — producing a crisp, firm, super-briny oyster. Island Creek, which started growing clams in 1990 (when there were no other aquaculturists in the area), is a collective of 15 farmers who work together selling their designer oysters to French Laundry, Per Se, and other renowned restaurants where raw oysters have become a menu mainstay. In Connecticut, Thimble Island oysters started the first community-supported fishery (CSF) in Connecticut and Long Island Sound history, creating a way for local residents to support their efforts to restore the shoreline’s ocean ecosystem and enjoy their oysters.
A small percentage of oysters sold today are caught wild; oysters are usually farmed in nets and trays suspended in the water, requiring little or no chemicals. Given that oysters filter plankton and improve local water conditions, oyster farming is considered a good environmental choice. With a seemingly insatiable half-shell market, there is constant demand and decent profits for farmers who can succeed in this burgeoning business. But there remain uncertainties, notably the impact of climate change, warming waters, and increased ocean acidity, not to mention property owners and boaters who don’t always like sharing narrow estuaries with pens and tenders.
Regardless, oysters are good for the earth and for you, and many committed farmers are working to ensure that their environment is sustainable. One of New England’s success stories, oysters are a microcosm of our relationship with nature and the sea, seen through the prism of nature’s pearl. This chapter is about oysters and other mollusks that we harvest from estuaries and coastal waters.
Serves 2–4 as an appetizer
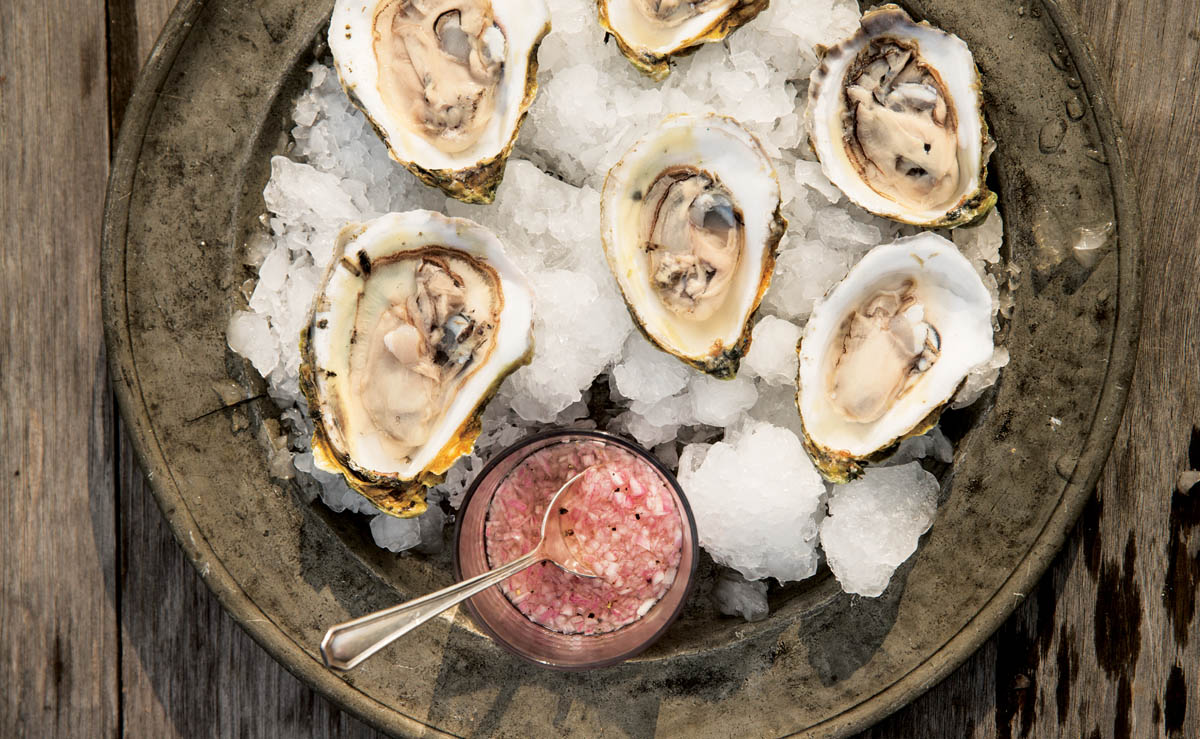
Raw and unadulterated — that’s confidence food. Freshly shucked? It doesn’t get much saltier. If you shuck your own, you’ll really impress someone. It’s a beachside ritual, Zen in spirit.
“Food and meals are influenced by the context in which they are consumed. Slurping oysters in Paris at Le Dâme with a tower of seafood in front of you makes you feel like a king. Eating them on the dock in Menemsha as the sun sets over the ocean in the autumn, when the crowds have gone and your sweater still smells musty from storage, makes you feel calm and blessed.”
— Chris Fischer, chef of The Beach Plum restaurant, Martha’s Vineyard
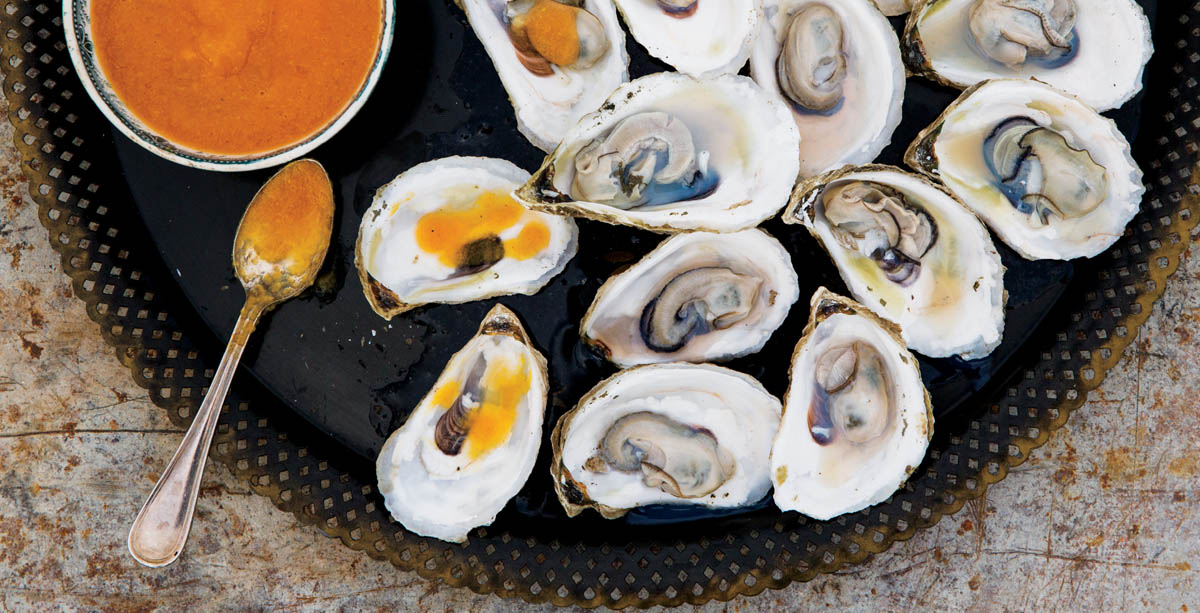
Having a party? Consider a raw bar. Lay some oysters from East Dennis, Duxbury, and Wellfleet on a bed of shaved ice and decorate with seaweed. You’ll need a few good shuckers to make your raw-bar party really rock. Stock the bar with hot sauces, fresh horseradish, mignonettes (here and here), and lemons. Oysters pair well with microbrewed beers and artisanal rum.
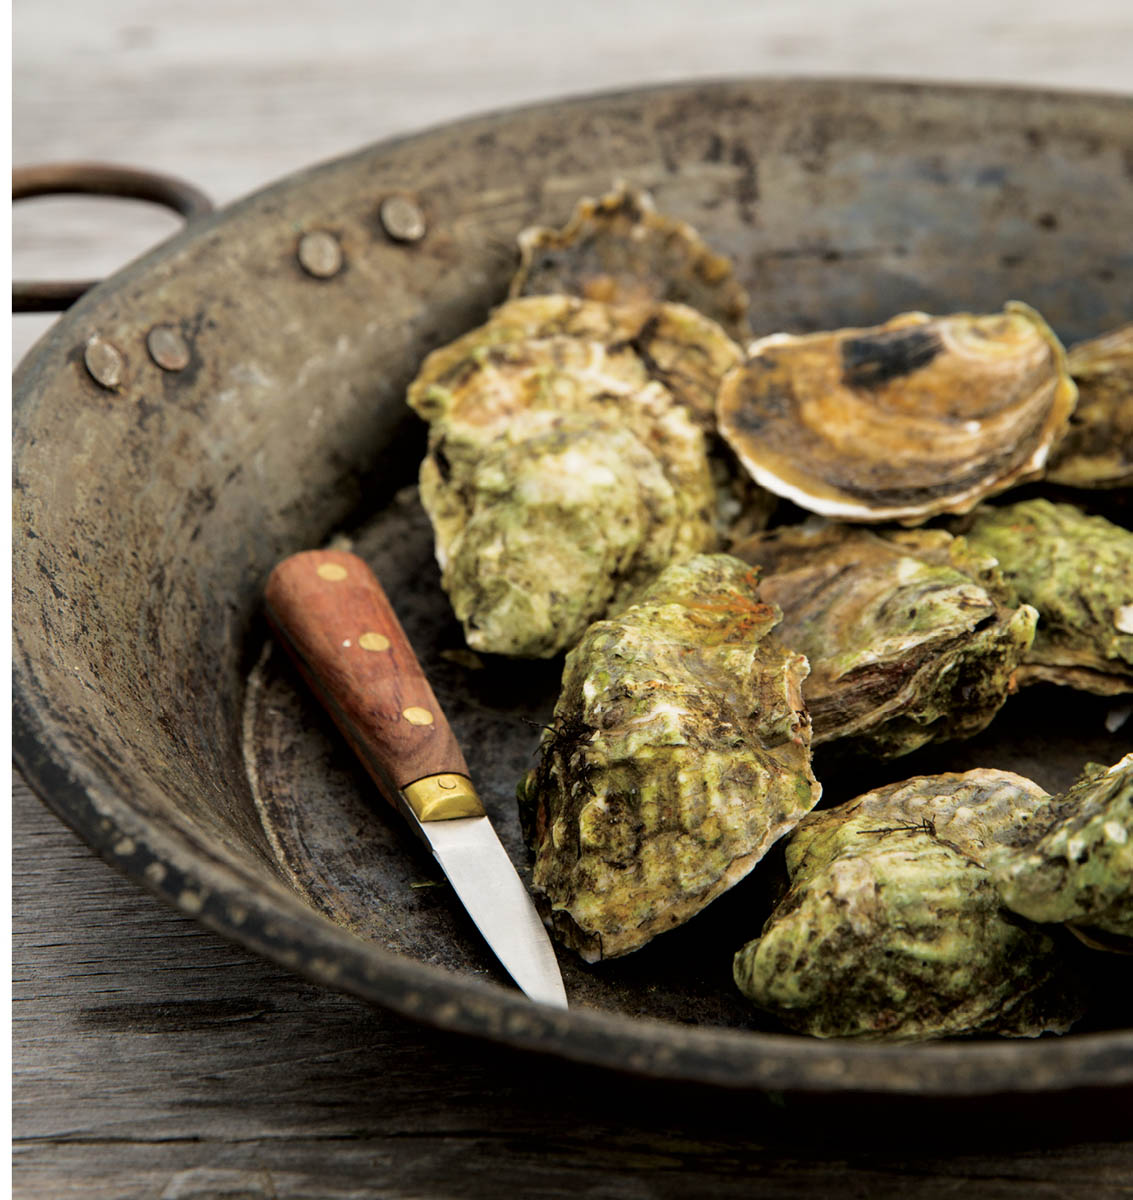
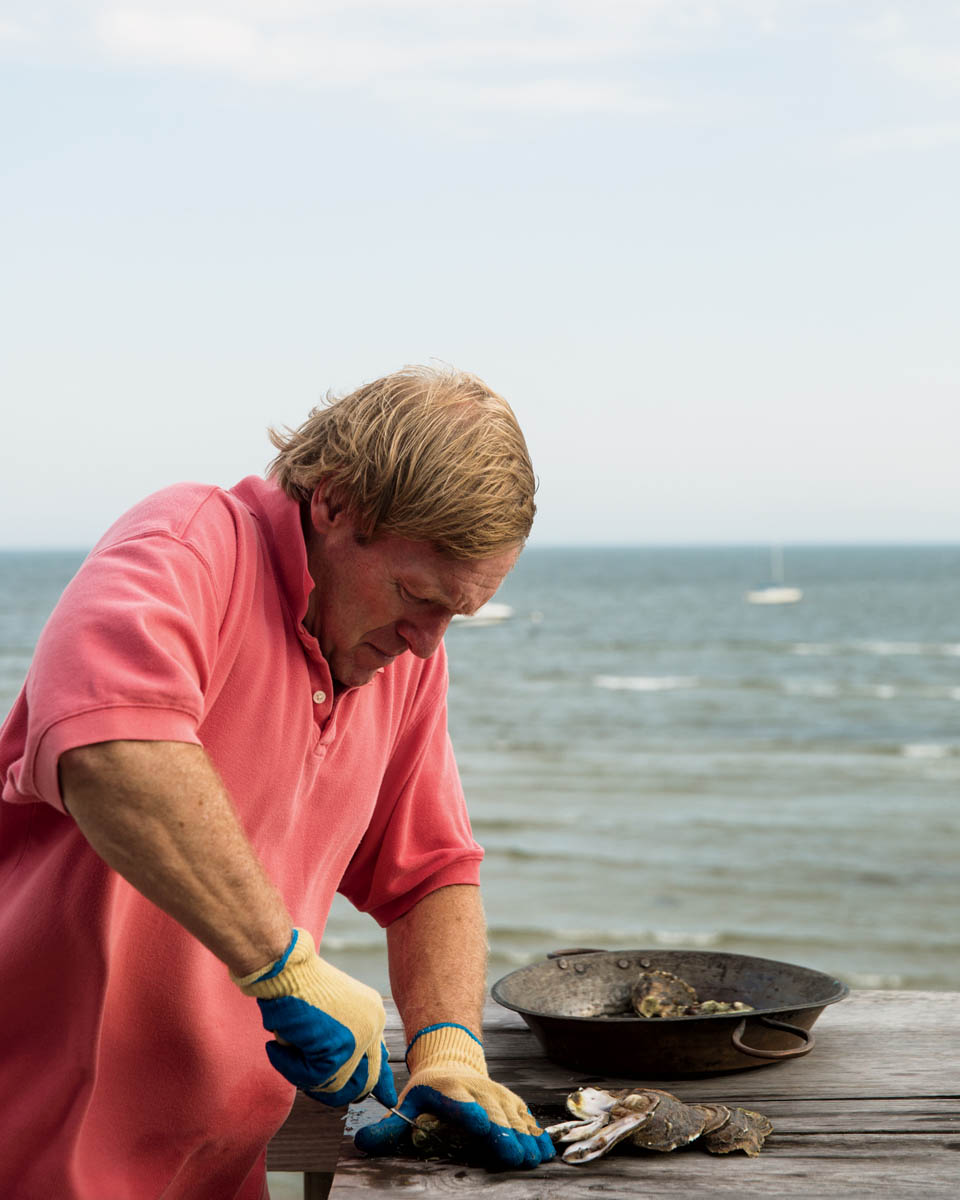
Resembling a hair comb Marie Antoinette might have worn, oysters can be intimidating, but needn’t be. First, don’t panic. Shucking them is not that hard. And you will so impress your guests if you shuck them at the last minute (plus, the oysters won’t dry out). At an annual summer family party in Duxbury, we shuck raw Duxbury oysters outdoors on a picnic table near the bonfire, with only a bottle of hot sauce and a few lemon wedges, while everyone stands around, greedily slurping them on the spot.
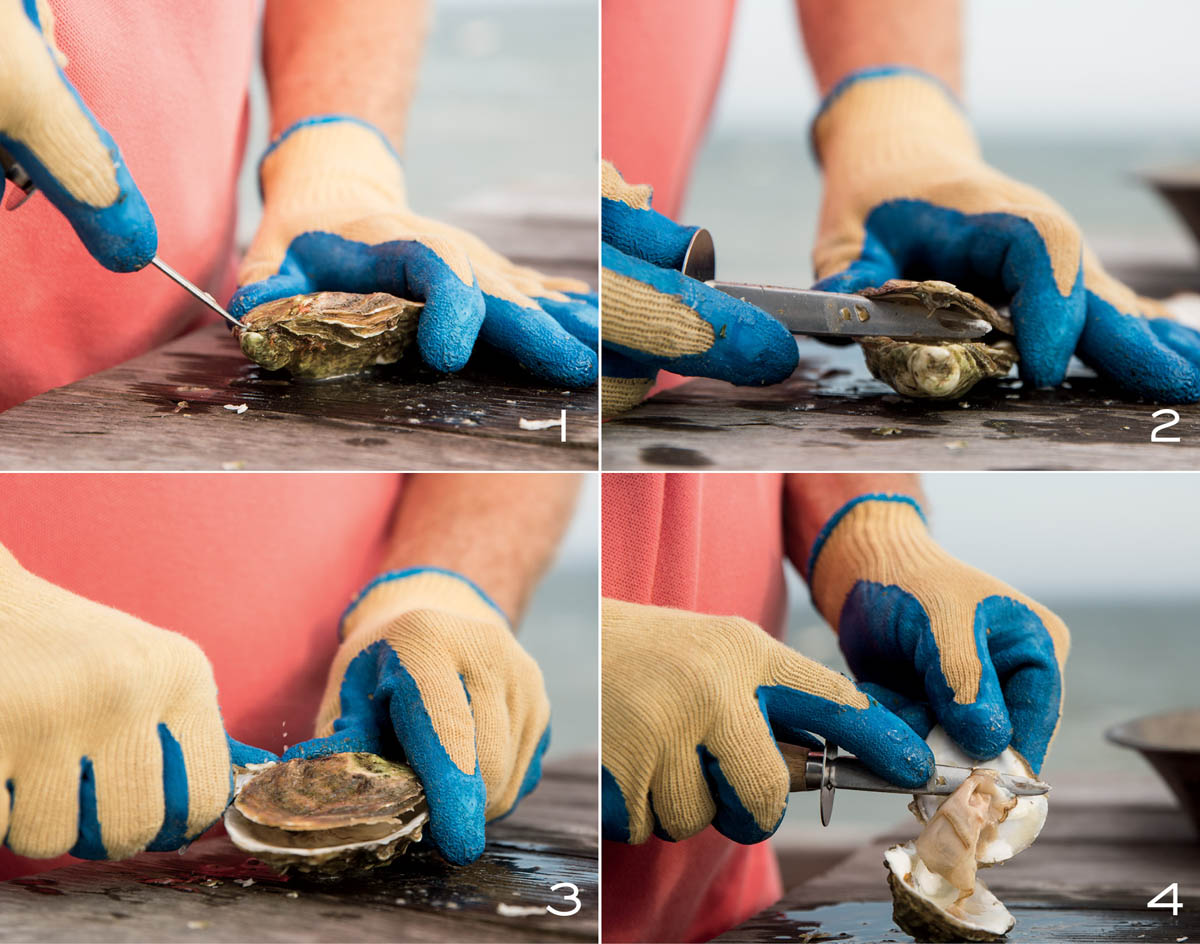
You’ll need heavy rubber or mesh gloves, an oyster knife (the best are slightly curved on top), and an old kitchen towel or rag. If you can’t find an oyster knife, use a flat-head screwdriver — you need something thin enough to slip between the shells but strong enough to pry it open.
Keep the oysters cold and buy them the day you shuck them, if possible. Don’t suffocate them in plastic. Discard any oysters that have opened. Rinse them under cold water with a stiff brush to remove dirt, and with a knife, remove any barnacles that might get in the way of slurping.
Place the oyster in the center of the kitchen towel and hold it down with your hand. Insert the tip of the knife into the hinge (it’s indented, where the shells come together, and no two hinges are alike) and jimmy open the shell.
Run the knife around the edge to loosen the oyster, taking care not to dump the liquid — it’s delicious, and contributes to the salty brininess of the experience. Discard the top shell, and cut the muscle holding the meat to the shell so you can slurp it. (Don’t rinse the oyster.) Serve on a bed of ice if you aren’t eating immediately.
Serves 4
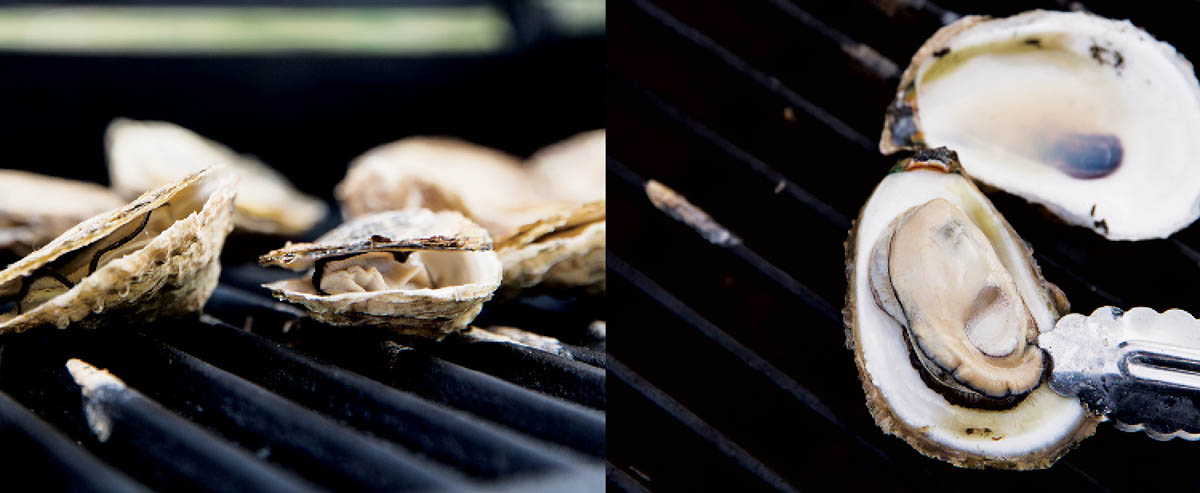
Don’t like shucking? Put oysters on the grill whole. Voilà. Easy. This versatile Caribbean-style sauce also goes well with clam cakes, fried clams, and other seafood appetizers.
Size, shape, and taste vary, depending on location and the characteristics of local waters, which are as key as grape regions are to varietals. As a rule, the deeper the water, the healthier the oyster. (Oysters found in deep water also have less brittle shells.)
The flavor of an oyster also depends on the season — in the fall and winter, you’ll find sweeter oysters because the oysters have stored up sugar to insulate themselves from the cold; summer oysters are brinier and crisper.
When is an oyster fresh? When you stick your nose up to the shell, you should smell the sea air. If you get that low-tide, eelgrass-marsh, slightly sour smell, forget it.
With sampling oysters, trying ten different types is like sipping ten different wines; each flavor is impacted by the previous. Rather, try a few of each — say, three of one variety, three of another — to better savor the distinctions.
I don’t know who came up with the idea of shooting an oyster and swallowing it whole, but not only is it slimy and sort of gross, you miss the true taste of the oyster: the plump briny meat with its bright flavor, slightly metallic sea taste, and modestly sweet finish. When William Thackeray toured America in 1852, he was served oysters at the Tremont House Hotel in Boston. When asked how he should eat this “animal,” he was told to swallow it whole. He was so disgusted that he blurted out, “I feel as if I’d swallowed a live baby.”
The R rule about only eating oysters in months with an “r” harkens back to days before refrigeration and is largely retired because oysters are often farmed and carefully monitored. However, with raw wild oysters, stick to fall, winter, and spring; they spawn in summer, which makes them watery, soft, and less flavorful. Some connoisseurs still believe oysters taste best in the winter, when the beds are the coldest (though with farmed oysters you can eat them anytime).
What about the pearl? Don’t worry — you won’t break a tooth; pearl oysters are harvested strictly for pearl production. To find one spontaneously in the wild is extremely rare — your chances are 1 in 10,000. But here’s hoping!
Serves 4–6 as an appetizer
Matunuck, Rhode Island, is near the fishing village of Jerusalem, which is across the harbor from the road to Galilee. (You can’t make this stuff up.) Today, a half dozen oysters is considered a serving (in Europe, it’s a dozen) — a far cry from appetites in colonial times, when men would eat oysters by the gross (roughly 10 bushels each year per capita). This recipe is from the Weekapaug Inn nearby, where they drizzle a ginger-shallot vinaigrette over oysters, and finish them with fresh shaved cucumber and a mango granita.
South Norwalk, Connecticut, is local and salty, gritty and coming on, with tequila bars around the corner from old oyster joints and places like Hillard Bloom Shellfish Company, which has been farming and harvesting oysters since oyster rights to under-water acreage were granted by the King of England before the American Revolution. The late 1800s were the heyday of Connecticut oystering; people still talk about how oysters virtually disappeared from Long Island Sound from 1955 to 1965 — they don’t know whether it was pollution, hurricanes, or a natural cycle. Selling clams to Campbell’s Soup kept Hillard’s in business, and since the 1970s they’ve seen a boon, with Hillard Bloom now owning about 11,000 underwater acres from Greenwich to Branford. “We’re underwater farmers,” said owner Leslie Miklovich simply, looking out at a few of her 11 boats tied up to the docks, including Bivalve, a wooden oyster boat from the early 1800s.
Serves 2–4
New Orleans–style fried oysters make an excellent appetizer. Put them in a bun, and you’re approaching a Po’ Boy.
Serves 2–3
Don’t tell guests how easy this delicious recipe is, and they’ll never know.
Oysters thrive in Connecticut’s tidal rivers and along Long Island Sound, and with 250 miles of shoreline, oyster farming became a major industry during colonial times. Farming for wild oysters was so popular that by 1750, the General Assembly allowed shore towns to regulate shellfishing. New Haven voters passed a law in 1762 prohibiting oystering from May through August, when they were spawning, to allow them time to mature and reproduce. By 1858, 250 schooners were importing 2 million bushels to New Haven’s oyster shops, where they were then shipped inland. While Connecticut saw the same decline in the 20th century as other states did, today Connecticut aquaculture (farming aquatic plants and animals) is one of the United States’ fastest-growing agricultural industries, with big beds in Mystic, New Haven, Bridgeport, and Norwalk. At regional farmers’ markets, there is an abundance of vegetable and fruits in the warmer months from this fertile valley, and seafood from clams to quahogs year-round.
Serves 2
This simple dish takes advantage of the clams you’ve just dug (or bought) and becomes supper with salad and grilled garlic crostini. Chouriço is a smoked Portuguese sausage that is mild and fat (like a thick hot dog) — not to be confused with the squat, spicy Mexican sausage called chorizo.
Serves 2
Serves 4–6
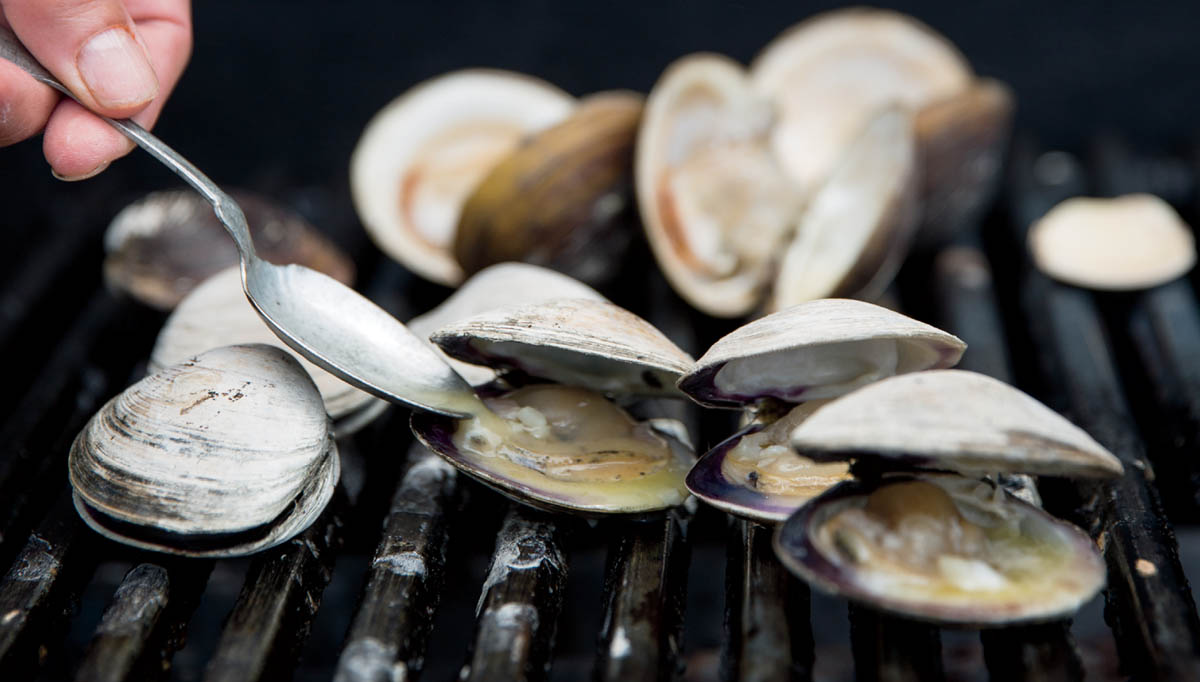
With a briny, buttery perfection, grilled littlenecks are an ideal outdoor summer appetizer. You can serve them with hot sauce (I’ve always said anything salt can do sauce can do better), though it’s not necessary.
You don’t need much more than a sense of adventure:
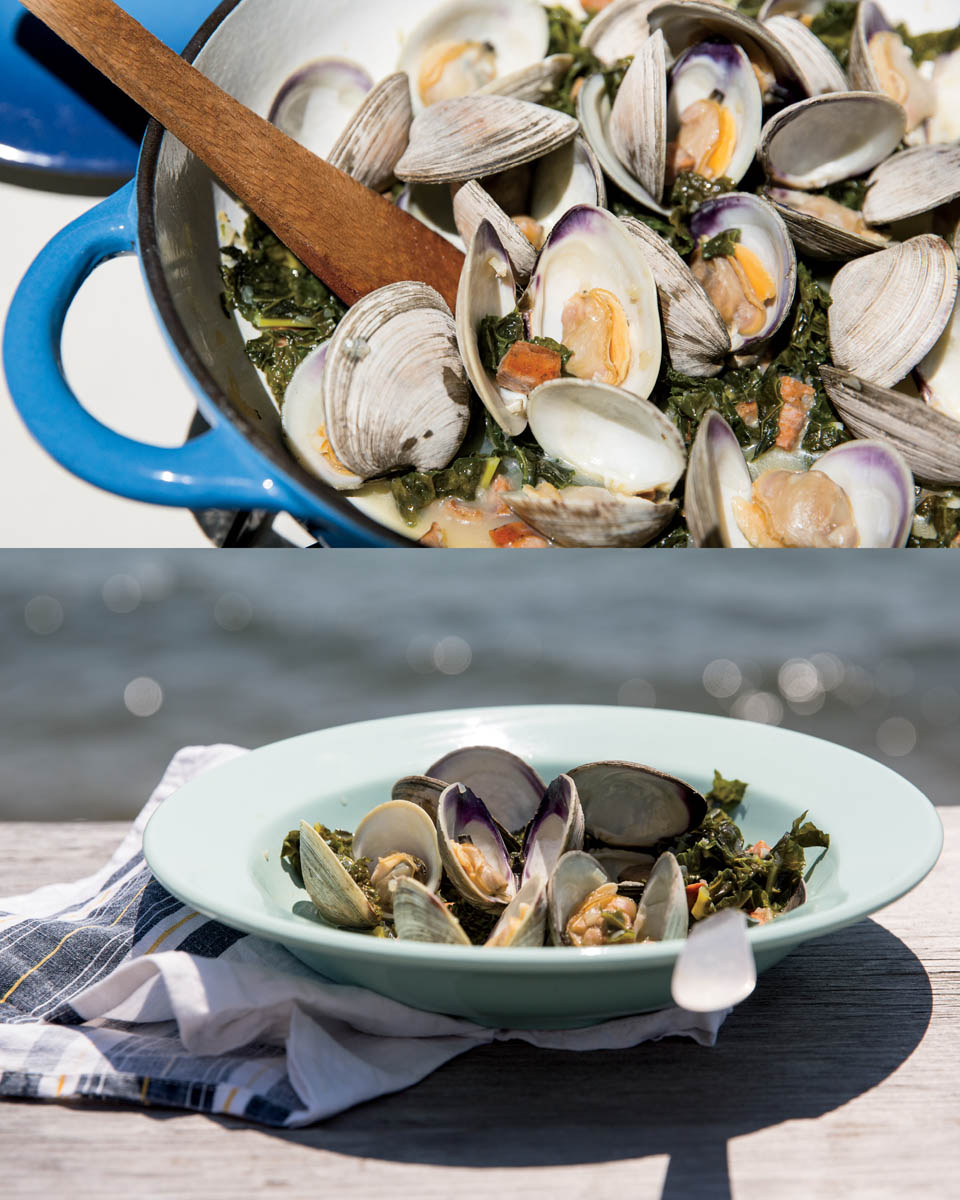
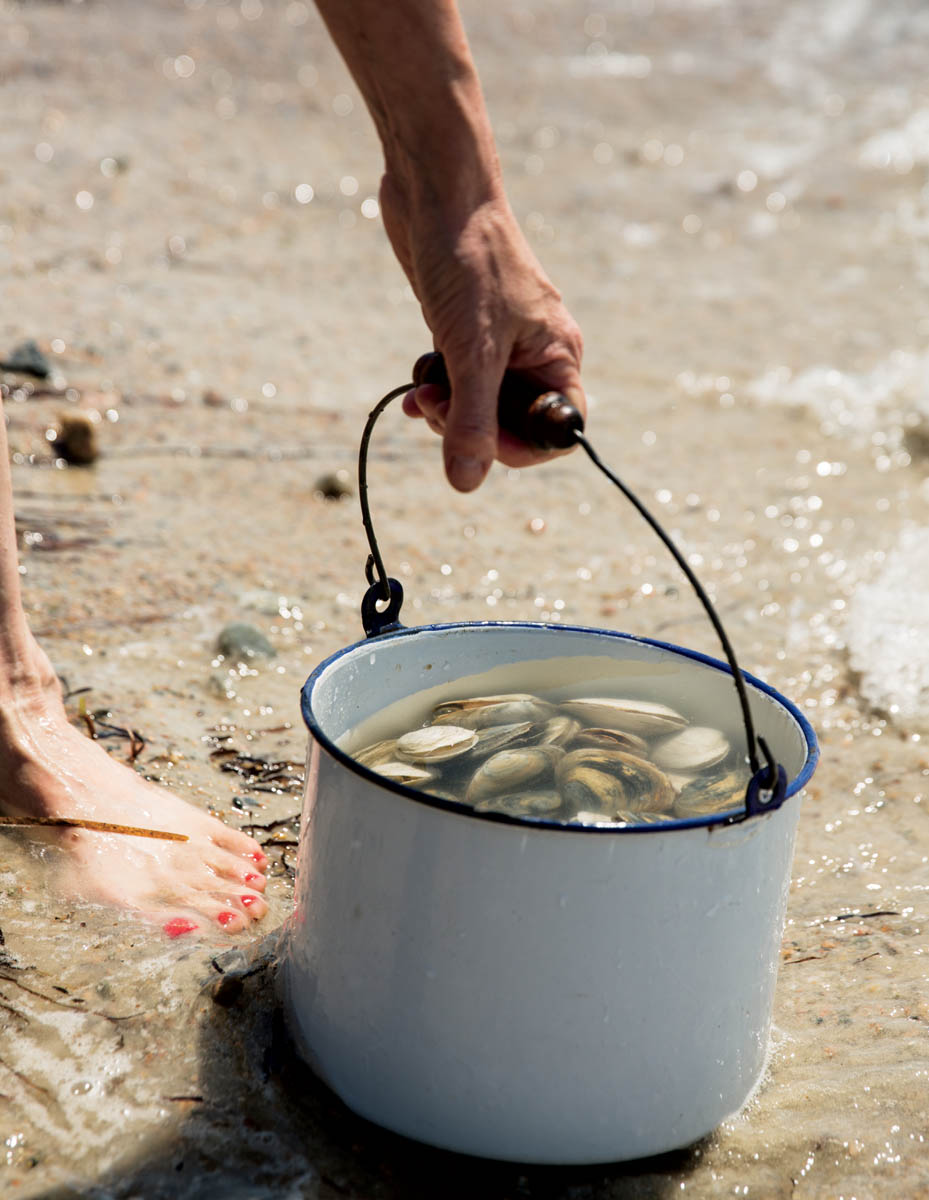
Once you’ve dug the clams, now what? First, discard any that are opened. Hard-shell clams just need to be rinsed off before cooking or serving, but soft-shell clams (steamers) should be rinsed several times under cold water, then immersed in a seawater or salted water (a tablespoon of salt for every quart) for at least an hour to remove any sediment before cooking.
(If you’re not cooking for a few hours, it’s convenient to leave them in a bucket of salt water in a cool place for up to eight hours. If the water gets murky, feel free to change it — the clams are simply discharging their sand and grit. Don’t keep clams submerged in water for an extended period. If you aren’t cooking until the next day, store in the refrigerator or on a bed of ice in a cooler.)
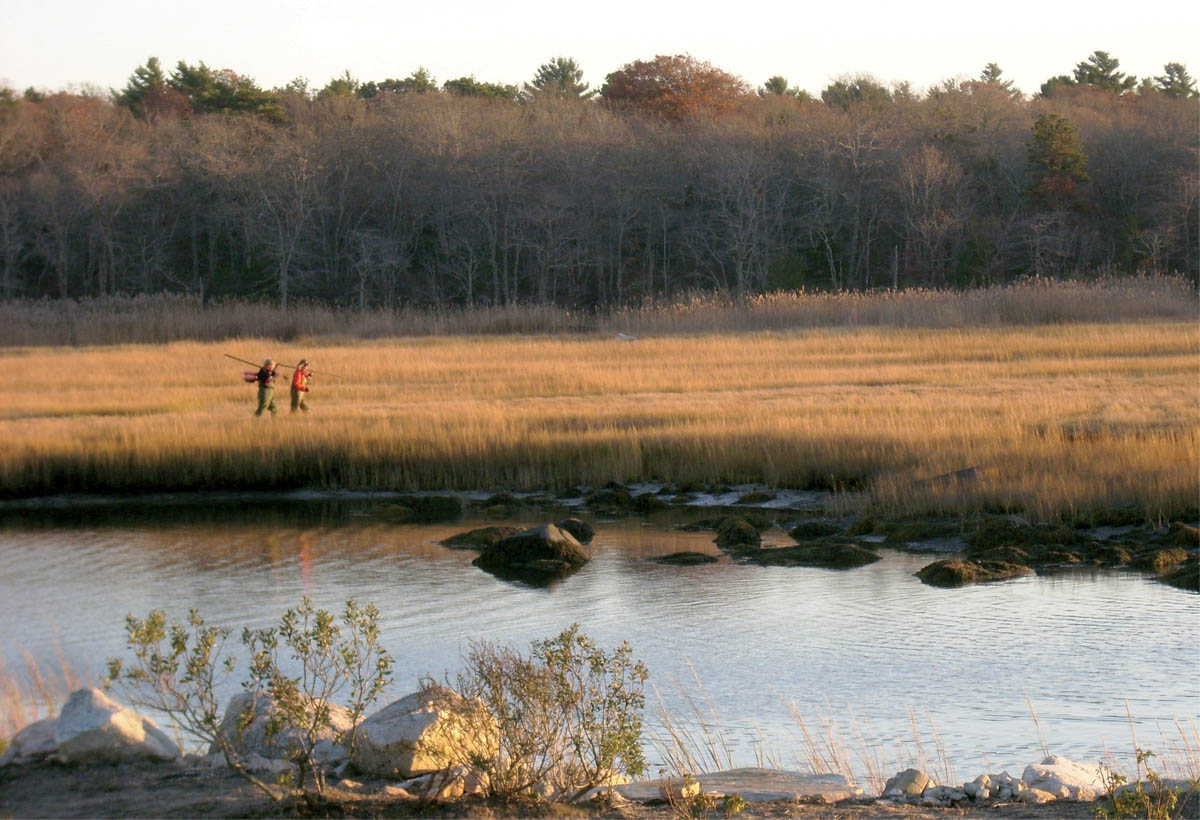
A bad day of clamming is still a great day. It’s you, the wind, the water, maybe a friend, and intense digging. It’s clams squirting back at you when you least expect it. Your bathing suit gets filthy (because you ultimately have to sit down) and your nails are ruined, but who cares. It’s solitary. It’s camaraderie; some of the best conversations you’ll have with girlfriends, parents, boyfriends, and kids. There’s something timeless about a vast stretch of untouched beach, the sun beating down on your back (or the rain coming). Silence. Memories of childhood. The wind. The tide. The harsh colors, the squinting in the sun. You can feel the history in the soil you dig, the remembrance of Native Americans and ancestors past. Once you’re finished, and savor the clams that night with butter, you tell your tales and can’t wait to get back out there.
Serves 4
Like a favorite song, this is an old standard — an easy, go-to recipe for a cozy winter’s night by the fire, remembering the sea. This recipe also provides a good opportunity to experiment with razor clams.
Serves 4 (appetizer) or 2 (main course)
Shellfish can be steamed or poached with beer, wine, or water. Adding aromatics to the liquid — garlic, shallots, fresh parsley, rosemary, thyme, bay leaf — enhances the flavor. This dish is delicious with or without Romesco sauce.
Makes 2 cups
When I had Romesco sauce for the first time, I was shocked — why had no one told me about this Spanish sauce? Like a pungent red-pepper pesto, Romesco is creamy, nutty, and versatile, a traditional sauce that’s making a comeback in restaurants nationwide. Swirl it into seafood stews, spoon it over vegetables, or use it to dress simply prepared fish. Made with roasted red peppers, garlic, and nuts, it can be served over almost anything. In this version, there’s a whisper of heat in your throat from the cayenne. If you like a bit more tingle, double the amount.
Serves 4–6
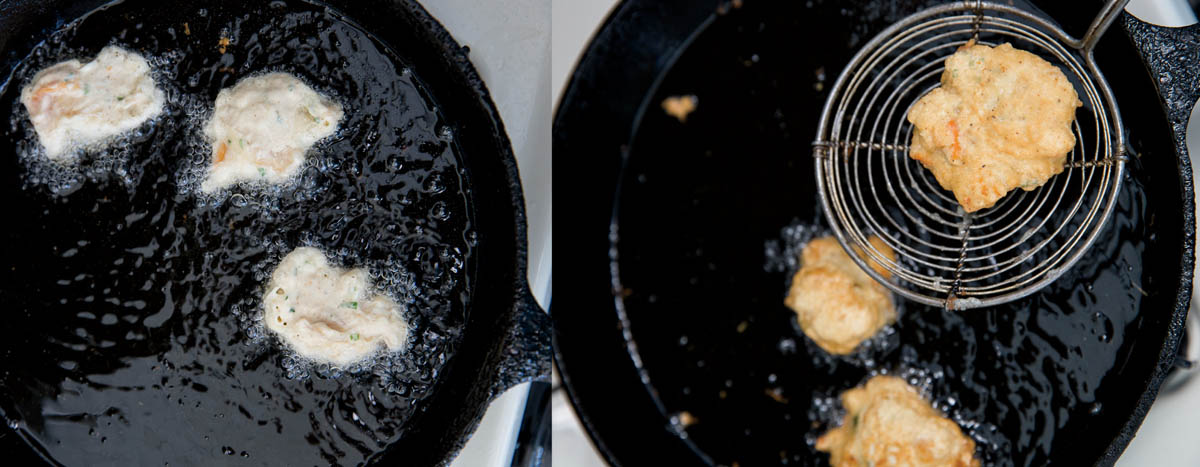
A masterful street food, Rhode Island clam fritters (aka clam cakes) aren’t cakes at all — the best are briny Southern hush puppies. Think clam beignet; crispy and golden brown on the outside, pillowy and light inside, with savory bits of chewy minced clams and steam rising from the first bite.
I was introduced to them as a counter girl at the Kool Kone in Wareham on Route 6, a tired, narrow strip of road that once was the main drag from New York to Cape Cod. (“Is this the way to Wareham?” the old yaw goes. “I don’t know, ma’am, but they look all right to me.”) My first week on the job, making an ice cream sundae, I spilled a gallon bucket of walnuts on the filthy floor. In tears, I apologized to my bosses, an elderly couple who worked like dogs all summer (he was the jokester at the fryolator, she was the bad cop at the window tending the girls), then packed up their motor home and drove to Florida for the winter. “Don’t worry,” she said, chewing spearmint gum between her front teeth, “You’ll rinse them, dry them off, and put them back in the bucket.”
Serve the clam cakes with Tabasco sauce, lemon, and tartar or rémoulade sauce. They refry well the next day, too: just pop them in hot oil for a minute or two.

Serves 4 as an appetizer
This is a forthright recipe for a summer appetizer or fall lunch. Serve on a bed of Boston lettuce.
Serves 4
This recipe is all about summer. Outdoors. On the deck. White wine. Beer. Pandora. Barefoot. The tomato sauce simmering gently with the juice of fresh clams, garlic, and olive oil. Eat it for a first course, or main course, or the next morning for breakfast. Served over pasta, just call it red clam sauce.
In college in the 1940s, my mother and her four sisters waitressed summers on Nantucket, and one evening she was sure she was waiting on Fred Astaire. She asked him, and the man demurred, saying he was often mistaken for the famous actor. When he left, she and her sister Patty were on a smoke break out in the alley, watching him depart. Down the street, he launched into a dance routine from “You’ll Never Get Rich,” then looked over his shoulder and smiled back at them before walking away.
Serves 4–6
Back when pickle makers weren’t cool, and vintage meant grapes, you could get stuffies at The Blue Flame, a dive bar near the water in Onset. Stuffed quahogs, fondly known as “stuffies,” are a specialty in southeastern Massachusetts and Rhode Island. Typically a mixture of breadcrumbs, Tabasco sauce, minced onions, celery, peppers, quahogs, and Portuguese sausage, there are nearly as many stuffing recipes as there are locals. When I’m at the beach, I make them at least once a week, quahogging at low tide with friends and then cooking them up before dinner.
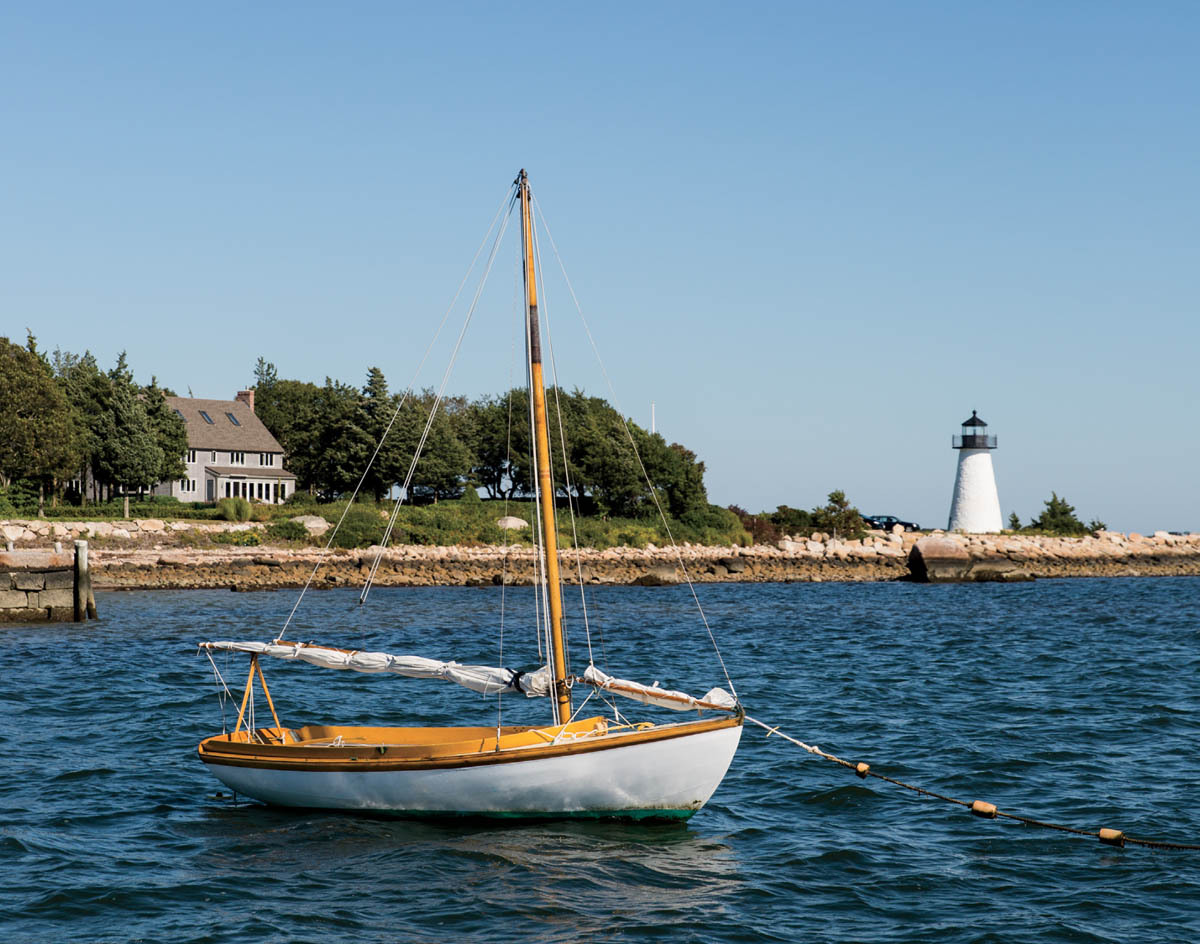
Men who love the sea inevitably work their way up to a serious boat, and my father’s first was a Herreshoff.
Though I was only four, I still remember it, a 21-foot Islander with a narrow beam and beautiful lines. He bought it with his friend Chuck Russell and they kept in the Weymouth Back River at the South Shore Yacht Club. Built in the U.K. in 1953, it was designed by Sidney Herreshoff, son of Captain Nathanael Herreshoff, from Bristol, Rhode Island, who started building boats in 1878 with his brother John. The Herreshoff brothers designed and built racing sloops that won five America’s Cups, and Nat Herreshoff (“the Wizard of Bristol”) is considered one of the greatest boat designers of all time. (Incidentally: in 1851, Britain challenged the U.S. to a 53-mile yacht race. When America’s schooner, called America, won by 8 minutes, Britain accused the U.S. of cheating. America was declared the winner, and the regatta was renamed America’s Cup. The U.S. went on to win the race for 132 years, until Australia won in 1983. Every single winning America’s Cup boat from 1893 to 1934 was built in the Herreshoff boatyard.)
Our boat was named Queequeg, after the cannibal harpooner full of derring-do in Moby-Dick, and my father won a slew of races in that boat just 20 miles from New Bedford, where Queequeg became fast friends with a wandering sailor called Ishmael.
Once, my mother had an argument on the boat with my father’s friend Chuck (sort of a know-it-all physicist, but a smart guy whose creds were emboldened by the fact that he’d worked on the Manhattan Project), and she got so steamed up that she drew an imaginary line down the center of the boat, told him the port side was hers, the starboard was his, and not to cross the line. My father ended up laughing so hard that she cracked up laughing, too, and they all made up. They were like that.
Serves 6–8
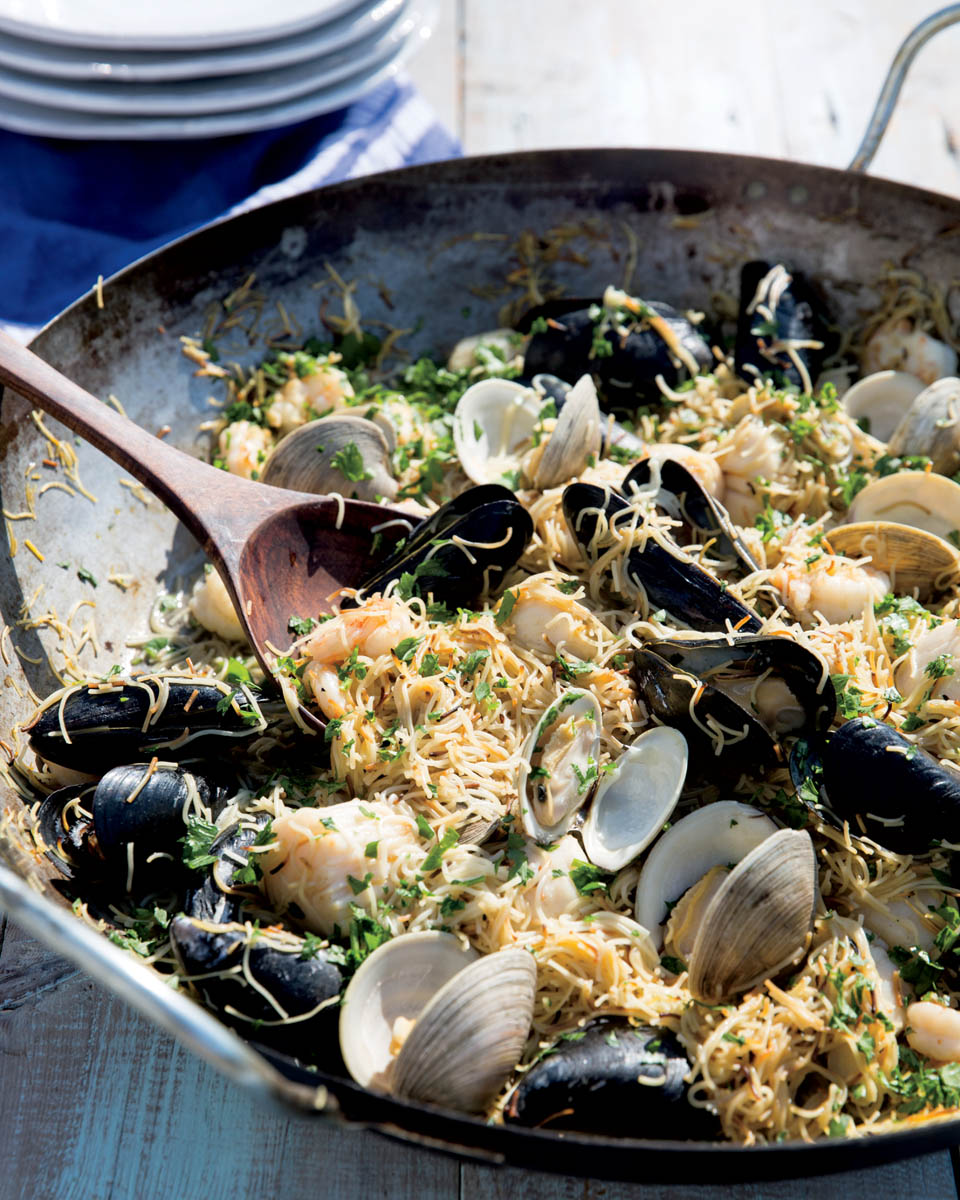
Paella (“pan” in Spanish) is a saffron-colored rice dish enhanced with seafood or meat. Since the 1920s, Spaniards in the Valencia region have substituted thin noodles for rice and called it fideua (FID-a-wah), from the Catalan word for noodle: fideu. While there are many variations, it is often made with white-fleshed fish and shellfish; in this version, shellfish gives the nutty-flavored pasta the briny flavor of the sea. Annatto seeds flavor and color the oil, lending the pasta its brick-colored hue.
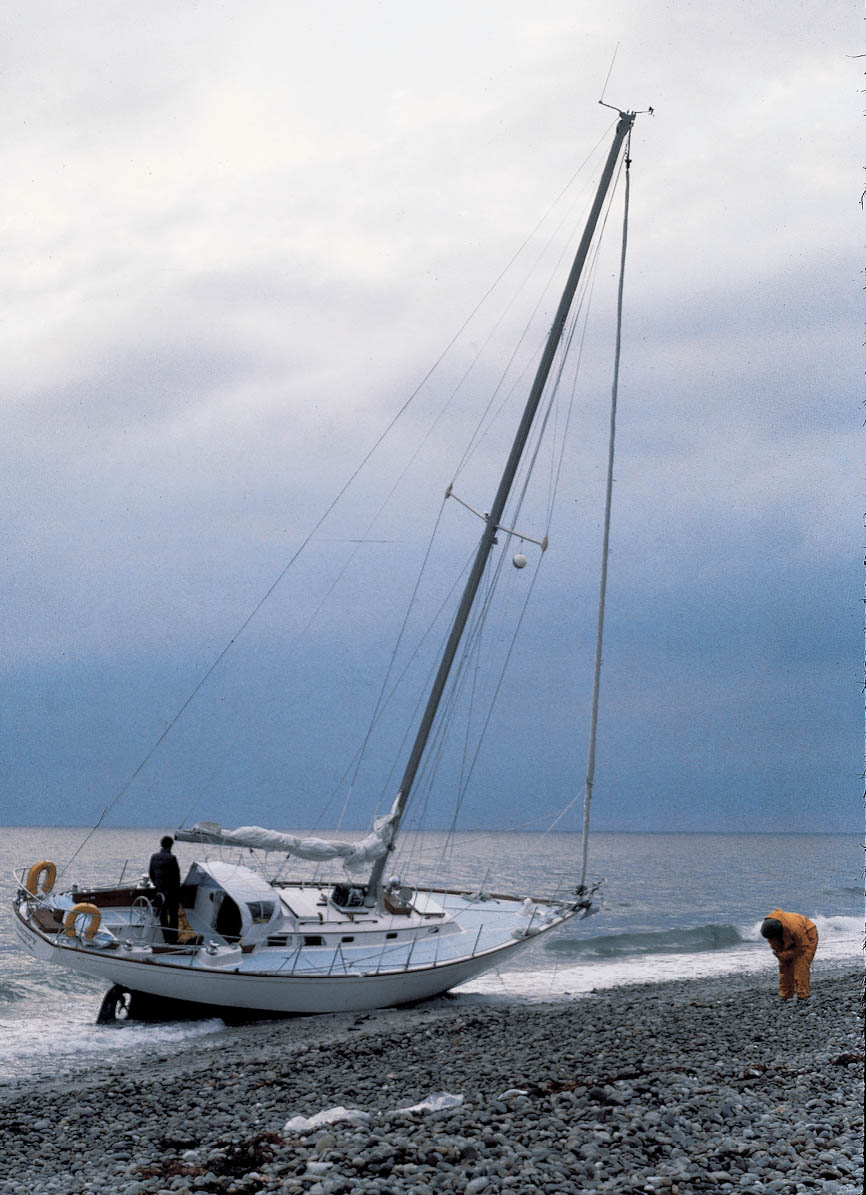
On my first boat delivery from Southwest Harbor, Maine, to Virgin Gorda, we were cruising down the Atlantic coast on a beautiful 40-foot Hinckley sloop on an October night. We gave the city lights of Boston a wide berth on the leeward rail, sailing south toward Plymouth and the Cape Cod Canal, which would deposit us into Buzzards Bay, then Narragansett Bay by dawn. We’d spent the afternoon shucking clams on deck, and Liz, the cook, had made some clam chowder, which was simmering on the gimbaled stove.
The night was a little cloudy, but we could see a beacon of light that we thought were the lights marking the canal. These were the days before GPS, when sailors steered by nautical charts and parallel rules. We realized our error too late; moments after we heard the crashing surf we slammed onto Duxbury Beach, where Myles Standish had settled over 300 years before. It was high tide, though by the time we organized ourselves and the Coast Guard was alerted, the tide had gone out. We spent an embarrassing night high and dry on Duxbury Beach, awaiting the morning tide when the Coast Guard, with the help of the tidal tow, could pull us off the beach. Our nerves shot, we cracked open a few beers and enjoyed the clams.
Serves 6 as an appetizer
Thirty miles south of Cape Cod, Nantucket (Algonquin for “faraway land”) is one of those places where you can squint your eyes and think you’re living in the late 18th century. The island is so primly intact that it was designated a national historic landmark district by the National Park Service in 1966. Descendants of Tristram Coffin (one of the early colonial settlers), my mother’s family still had reunions on the island with hundreds of Coffins (people were dying to get in when I was young).
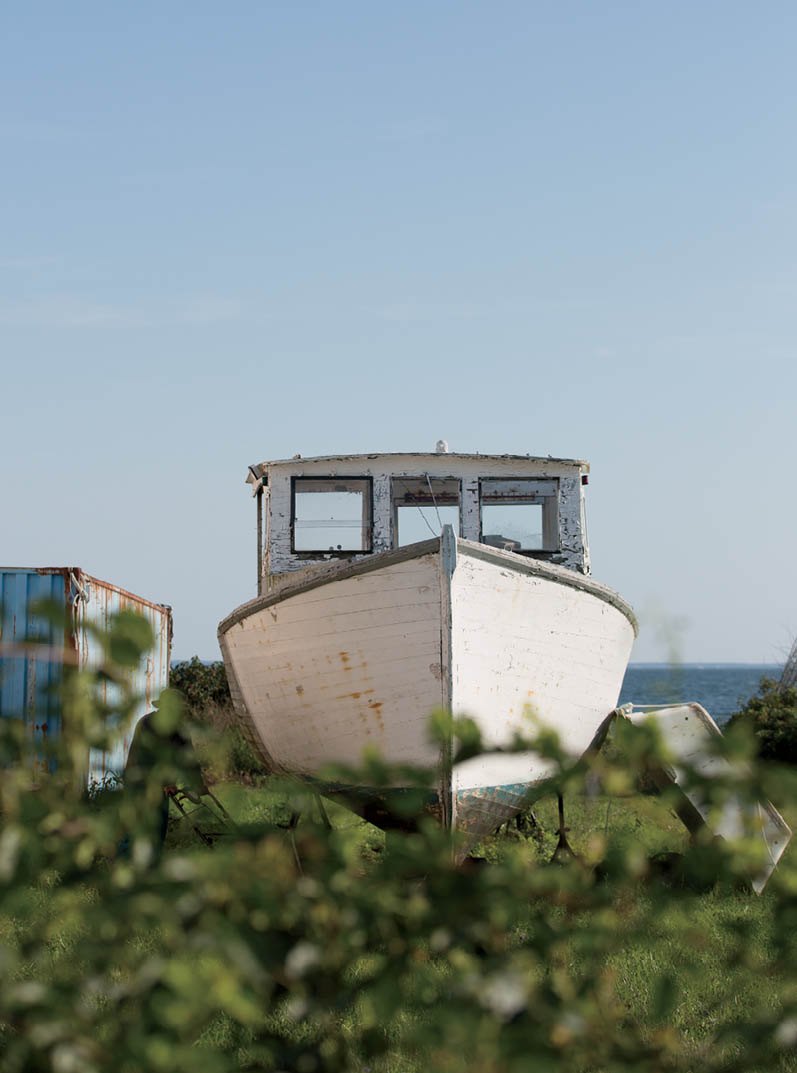
I think it’s the boats. In the water. Out of the water. In gas station parking lots. In front yards. In side yards. In driveways. Towed down Main Street. Stopping traffic. Slowing traffic. Shrinkwrapped. Cradled. Gleaming. Painted. Rusty. Peeling. Soggy. Bobbing. Rocking. Standing at attention. As much a part of the landscape as the ebb and flow of the tides. It’s definitely the boats.
Serves 6
On Sunday nights in the summer, Uncle Jack would bring home a bushel of steamers, and we’d steam them up and sit around the round table and eat them — nothing else — for dinner, dipping the drippy morsels into hot broth then melted butter. Afterwards we’d sip the broth, which tasted of the sea. The brininess of the clams combined with hot butter is intoxicating. It’s all you need for a real taste of New England.

Melt 2 tablespoons butter in the bottom of the pot and sauté 2 cloves minced garlic. Add the clams and enough white wine or vermouth to steam them in 1⁄2 inch of liquid, plus a tablespoon of fresh chopped parsley. Cover with lid, bring to a boil, and steam the clams as described in step 1. Serve the clams in their juices with hot, crusty bread.
Serves 4 as an appetizer
Sometimes you just want honest food. No fuss. Steamed littlenecks with garlic, butter, and wine are about as delicious as it gets, and as simple as it sounds. Serve with wine and hot, crusty bread for sopping.
“The Shoreman does not claim to be a philosopher . . . . He believes, however, that affairs would be settled more quickly if all men had an opportunity to dig a few clams.”
— Haydn Sanborn Pearson, “Sea Flavor,” 1948
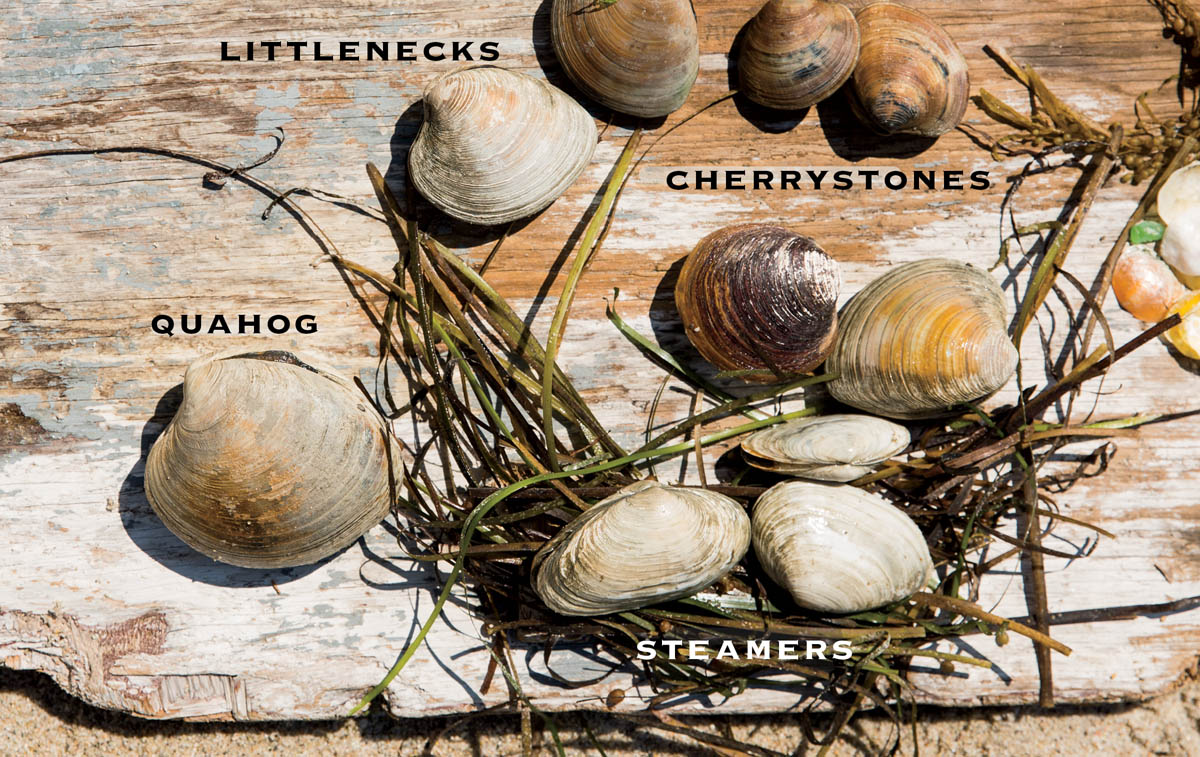
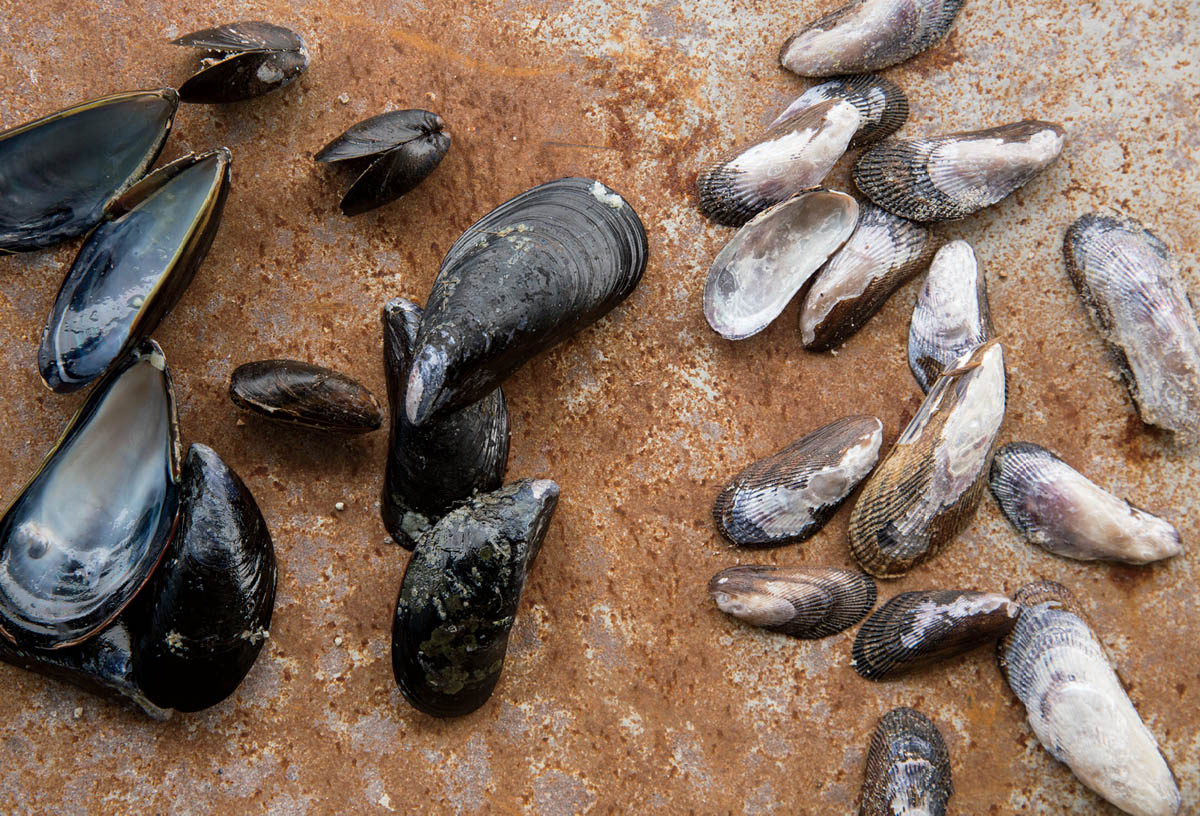
It can be confusing. Clam is a term given to a number of different species of shellfish called bivalves.
Atlantic hard-shell clams are distinguished by size. The largest hard-shell clams are called quahogs and were used to make wampum by Native Americans. They are usually too tough to eat raw, but are great in chowders and stuffed. Cherrystone clams (2 to 3 inches in diameter) are tasty steamed or grilled, or delicious served raw on the half shell. Littlenecks (1 to 2 inches) are tender and juicy, excellent raw, steamed, or cooked. (Mahogany clams are small, hard-shell quahogs similar in size to littlenecks. They are harvested in the deep waters of Maine.)
Hard-shell clams differ from soft-shell clams — aka steamers, Ipswich clams, piss clams (you’ll see why), long-neck clams, or fried clams — which are always served cooked. Their shells are brittle (if you squeeze hard they’ll break), and their neck sticks out when they are out of the water. You’ll find them in saltwater sandbars and mudflats. They live in the sand just below the surface, and at low tide they squirt water and leave a little hole behind in the wet sand when you walk by. When you see them squirt (sometimes you can pound along the wet sand and cause them to squirt), you have to dig like mad to get them.
A razor clam is a sharp-edged “soft-shell” clam whose shape bears resemblance to a straight-edge razor. Like a steamer, the shell won’t close completely when out of water. Eaten cooked, razor clams are considered a delicacy, which cracks me up, since we used to chase them into their holes on the beach at low tide.
Clams should always be alive and closed up tight when purchased and cooked. If the shell is open, tap it — if the clam’s alive, it will clam up. If not, discard it. Store on ice or in the refrigerator. Don’t put clams in a plastic bag, since they need to breathe.
Makes 1 pizza (serves 4)
On a small street not far from New Haven’s waterfront, a simple Italian pizzeria has been turning out “tomato pies” for almost a hundred years. In the 1920s, Frank Pepe used a coal fire to give his pies their famous crisp, chewy crust. His nephew would shuck the fresh clams he’d collected on the shore and sell them on the half shell. Someone got the brilliant idea to put them on the pizza, and this pizza was born. Today Frank Pepe’s sells only pizza, and one of their specialties is White Clam Pizza. They get fresh whole clams delivered daily (if the shipment doesn’t come in, they don’t serve the pizza) and one guy’s job is just to shuck clams. This adaption is based on Frank’s recipe.
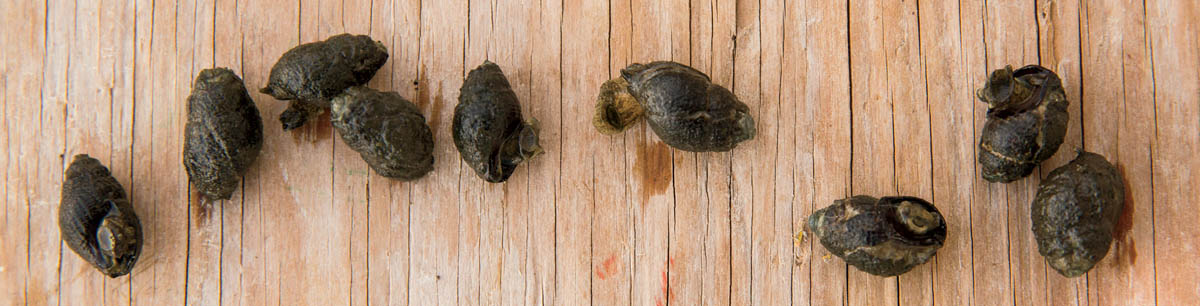
Pull up a patch of wet seaweed near the water line on a rocky tidal beach and you’ll probably find periwinkles, those cute spiraling shore snails that close up their hatch and retreat into their shell when you lift them off a rock they’ve been clinging to. Tiny, tasty periwinkles. Simply put them in a pot of boiling water with salt and cook for 7 minutes. Drain them, remove the meat with a lobster pick or toothpick, and eat them. Some people bring the mouth of the shell to their lips and suck; you’ll get a rush of briny juices, then you can scoop out the flesh with a lobster pick. What fun to sit around, drinking beer, sucking winkles. You can also broil them with garlic butter like their fancy French cousin, escargot.
Largely overlooked — somewhere below pigeon on the popularity scale— winkles are sweet and easy to find, plus you don’t need a permit to collect them. Native to Europe, periwinkles were brought to Halifax, Nova Scotia, in the 1850s as ballast aboard ships, and from there migrated south along the Atlantic seaboard.
Serves 4 as an appetizer
When we collected whelks in our buckets as kids, it never occurred to us that they were edible. Mostly I enjoyed playing with their dried egg casings — the spiraling rattling hoses that we called “mermaid’s necklaces.” Tasting like a cross between a steamer and a mussel, whelks are a sea snail (a gastropod) that’s netted on Nantucket Sound, Vineyard Sound, and Buzzards Bay. They’re often mislabeled conchs, which are close cousins. Whelks are carnivores that grow in temperate zones, whereas conchs (those white spiral shells you find on Caribbean beaches) are herbivores that grow in tropical waters.
In New England, more than a few fishermen turned to conching, as some of them call it, as cod and haddock became difficult to fish. On Martha’s Vineyard, where fishermen landed over a million pounds of whelks in 2012, whelks have become a lucrative export.
Several years ago we spent a few weeks on Mount Desert Island, staying in Pretty Marsh. One day, we canoed around Bartlett Island, owned by the Rockefellers, and came across a tiny island — a speck on the chart — whose small circular shore was literally covered with mussels. There were so many mussels I was sure cockles weren’t far behind, nor Molly Malone.
My kids thought I was nuts, but we returned to the island every day, buckets in hand, and picked enough to feast on. Everyone else got pretty sick of mussels, but to me it was a bonanza. That’s the thing about seafood: it’s best when it’s fresh, and it won’t get any better than it is right now. It begs to be eaten.

Serves 4 (appetizer) oR 2 (main course)
Like other bivalves, mussels are filter feeders that cleanse the water they reside in, stocking up on valuable omega-3 fatty acids from algae along the way. Steamed mussels can be enjoyed any number of ways — cooked with wine and celery, served in a broth of garlic and tomatoes as they do in Spain, or steamed in beer as you might find in Charlevoix, along the St. Lawrence River. Years ago I visited a café in Charlevoix that served only mussels, pommes frites, and beer, with multiple options in each category; I was in heaven. This is an earthy, rustic dish; you really don’t need utensils. Garlic toast sops up the juices.
Serves 4
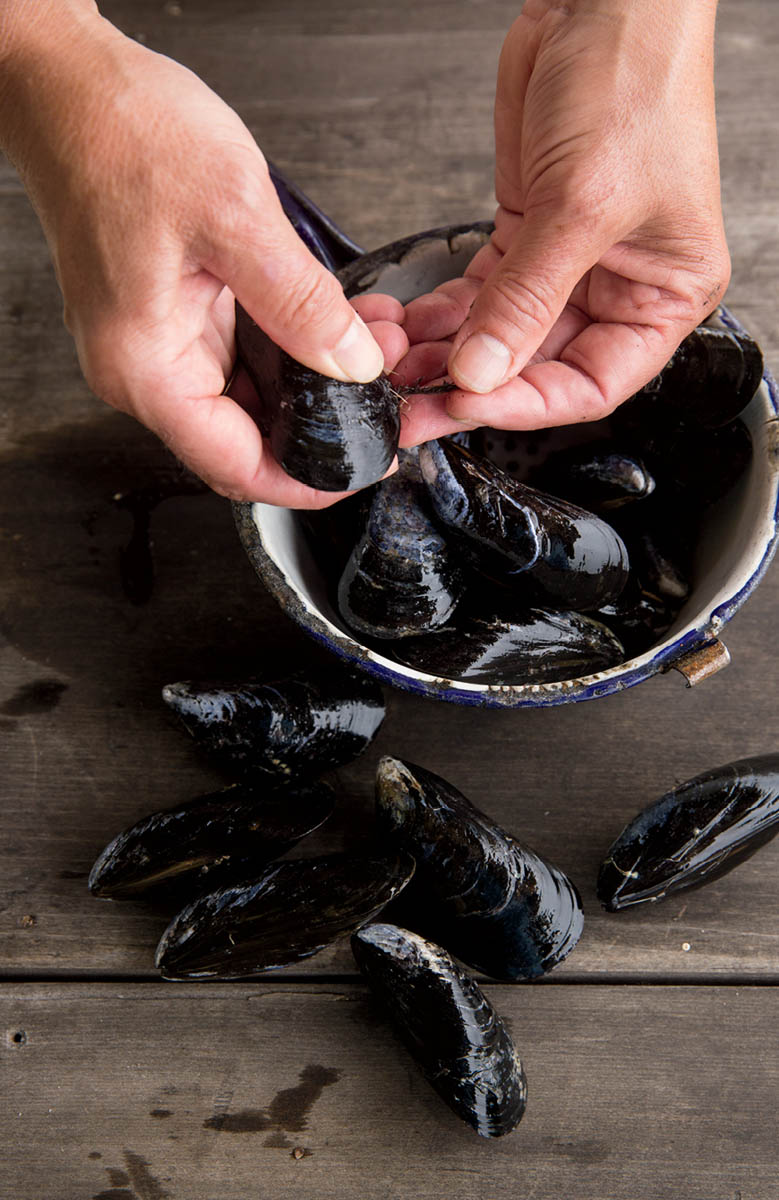
We’ve come a long way since fishermen used mussels for live bait. Cooked extensively in Europe (Julia Child became a big fan in France), mussels have now become fashionable in the U.S., for good reason: easy to gather, these onyx gems are sweet and rich-tasting, high in protein, and a good source of vitamin C, folate, potassium, zinc, iron, phosphorus, and manganese. And did I mention vitamin B12?
In New England, there are two types of mussels: blue and ribbed. With its blue-black shell and violet interior, the delicious northern blue mussel is found in eastern American waters north of the 35th parallel. Grown in Atlantic waters, they’re what you’ll find at a seaside fish market, and if you’re lucky, in the wild, growing in clusters.
But they may not be there the next time you visit — mussel beds are targets for starfish and eider duck predators, and can be wiped out by storms. There used to be a huge natural mussel bed off Nantucket — until one winter a series of storms hit, winds blowing hard from the east all winter long, and one last storm smothered the bed.
Ribbed mussels are similar to blue mussels, but the shell is corrugated and more triangular. You’ll find them clinging in shallow waters to clumps of mud at low tide in the mudflats. Ribbed mussels are critical to the health of a salt marsh, and often are rich in organic bacteria. They’re also not as plump as blue mussels (which have been in deeper waters eating their hearts out). While not poisonous, they are not as tasty, and not often eaten by people.
According to the Cape Cod Commercial Fishermen’s Alliance (their logo is “Small Boats — Big Ideas”), fishing for wild mussels is one of the last wild shellfish operations on the Cape and the Vineyard, with guys going out in small skiffs year-round, landing almost 800 pounds last year. Many mussels today sold in the U.S. are cultivated, with farmed fishing considered largely sustainable and environmentally friendly since shellfish filter water. From Sakonnet Point in Rhode Island to Penobscot Bay in Maine, some mussel farmers have also gone into bottom culture, leasing ocean floor and dropping mesh bags containing mussel seeds that hang nearly 30 feet below the water’s surface. As the mussels grow, the bags deteriorate and they attach to a line.
Today, the United States imports 90 percent of the mussels sold. In Prince Edward Island, with its rural and fishing communities, mussel farming is second only to tourism (aquaculture farms on PEI exported $20 million of blue mussels to the U.S. last year), and many small New England fishermen and organizations are pointing to them as an example of what is possible in developing more offshore farms.
Serves 4 (appetizer) or 2 (main course)
At Cape Cod’s elbow, where tidal flats blur the distinction between land and sea, men can fix up an old skiff, get a license, and make a living shellfishing. For decades, the Chatham Shellfish Company bought steamers, conchs, and mussels right from the fishermen. Some of the company’s old shanties at the bend of the Oyster River are still there, the wooden planks crusty with the white chalk from scores of oyster shells.
Serves 4
In this Italian classic, you can substitute clams for the mussels, or other types of mushrooms for the shiitakes.

Serves 8
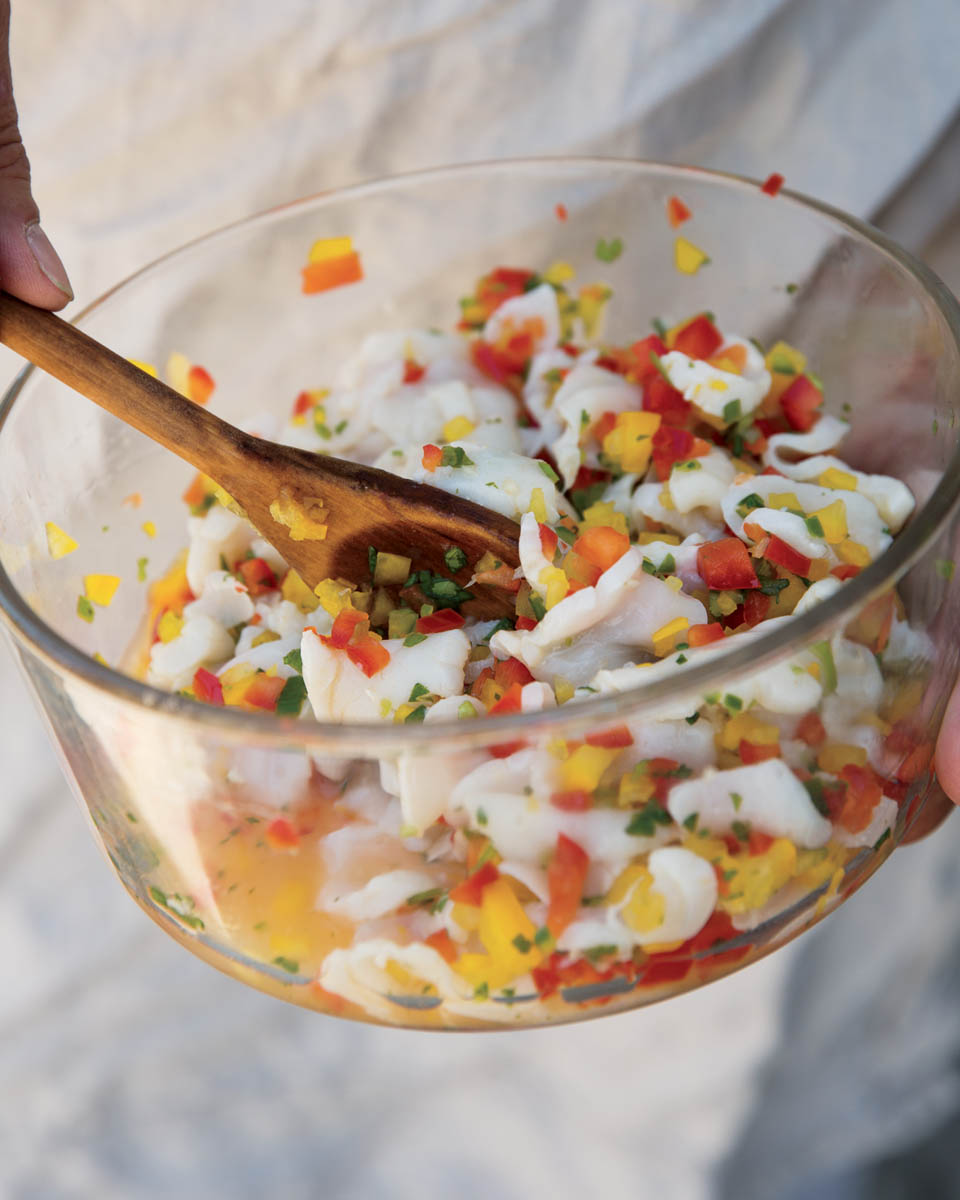
Ceviche is a Peruvian style of “cooking” seafood in citrus juice that probably started on the beach, when fishermen cut up their fresh catch and squirted lime juice over it. You needn’t confine yourself to sea scallops — bay scallops work well, too, as do tuna and salmon. Just be sure to use extremely fresh scallops, and marinate them at least 30 minutes (for a “rarer” ceviche) and up to 3 hours (for one that is “fully cooked”), keeping the ceviche in the refrigerator until ready to serve.
You can present it in a bowl with tortilla or plaintain chips for a casual party, on a small bed of watercress or baby arugula for an appetizer, or in a stemmed martini or champagne glass for a special occasion such as New Year’s Eve.
The captain of a whaling ship had to be in charge. Nantucketers called a good captain — someone who was self-confident, didn’t waver on decisions, was decisive, and loved killing whales — a “fishy man.” “Fishy to the backbone” was the ultimate compliment a Nantucketer could receive. Sounds like a great recipe title.
Serves 2
The size of large pearls, bay scallops are perfect for this centuries-old Peruvian method of “cooking” fish by marinating it in citrus juice.
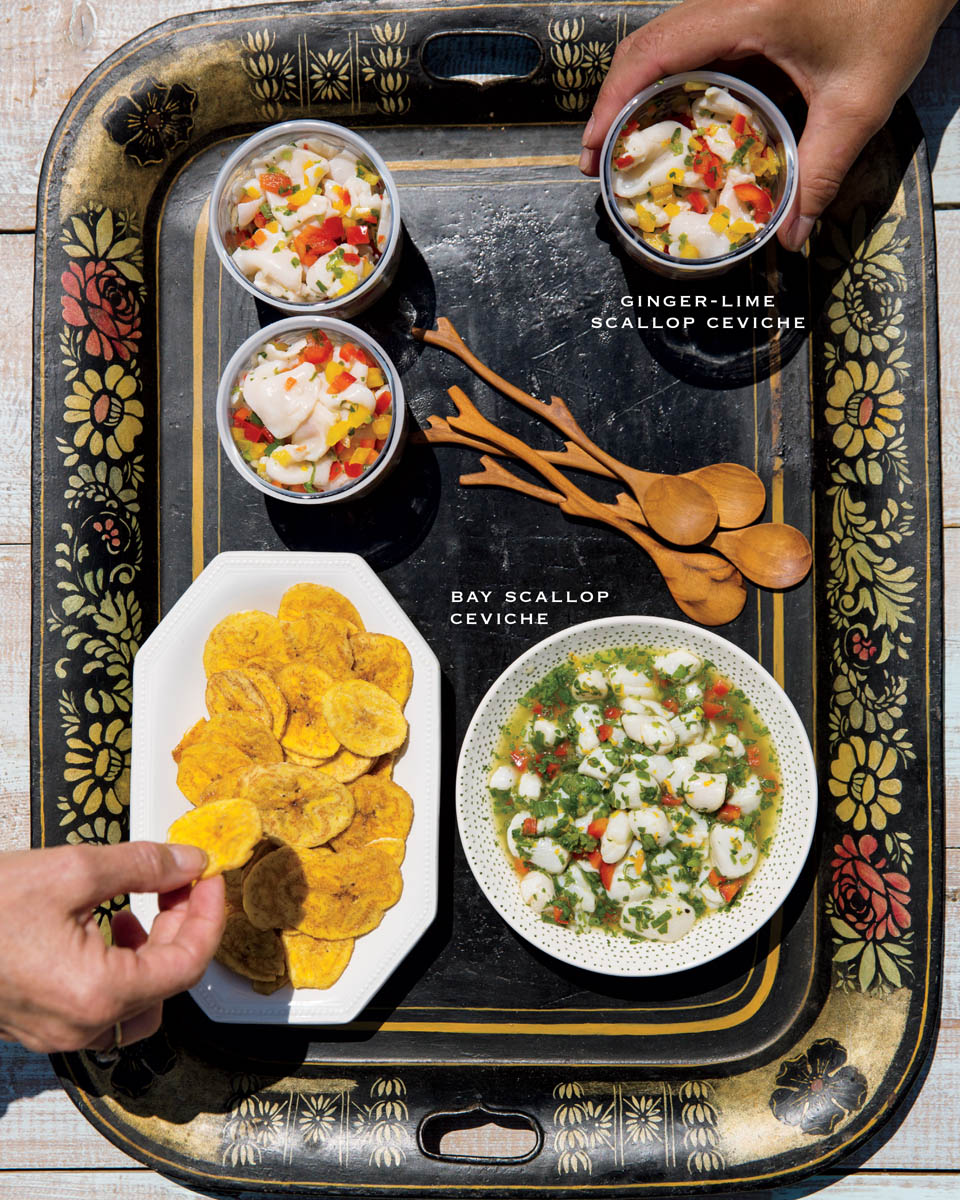
While sea scallops are the size of a half dollar, bay scallops are the size of a dime — a magnificent pearl stud earring. Fresh from local waters and cooked simply to accentuate the subtle, sweet, nutty flavor, bay scallops are sublime.
The bay scallop season is in full swing from November to April, although with eelgrass beds sensitive to pollution, the scallops aren’t as prevalent anymore. But you’ll find wild scallop beds on Buzzards Bay, the Vineyard, Nantucket, and the outer Cape. November 1 is opening day on the outer Cape; in Chatham, the inshore shallows are crowded with small boats hauling drags, trying not to bump into each other’s lines and the winter sticks (moorings).
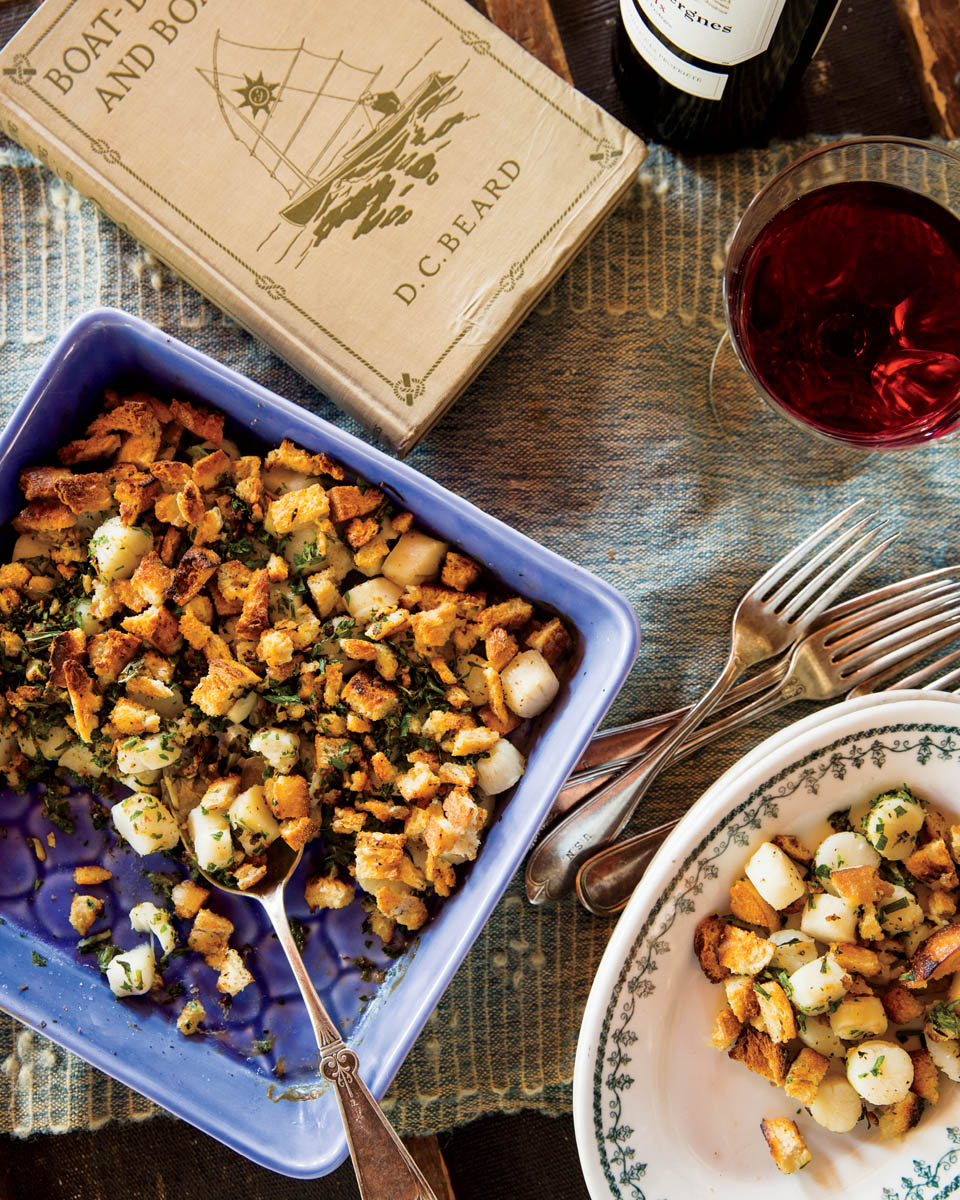
Unlike clams or mussels, scallops can’t hold their shells closed, so it’s important to shuck them quickly, before they lose moisture and die.
Serves 4
If you have any leftover baked scallops, lightly bind them with a white sauce, and you have a delicious crêpe filling.
My parents gave up sailing in their mid-seventies, primarily because my mother was worried about one of them falling overboard. After my mother passed away, my father said what the heck, and at age 78 went out and bought a honey of a boat, a Herreshoff 121⁄2, also known as a Buzzards Bay Boy’s Boat. It was his last of 32 boats over a lifetime, and what a boat; designed by the Wizard of Bristol (see Old Salts) in 1912 for the afternoon chop of Buzzards Bay, it’s arguably one of the prettiest small sailing boats of all time. He’d sail her in Mattapoisett Harbor and out on Buzzards Bay, deftly bringing Felicity up to the mooring under sail with no motor, just like he’d done with boats for almost 80 years.