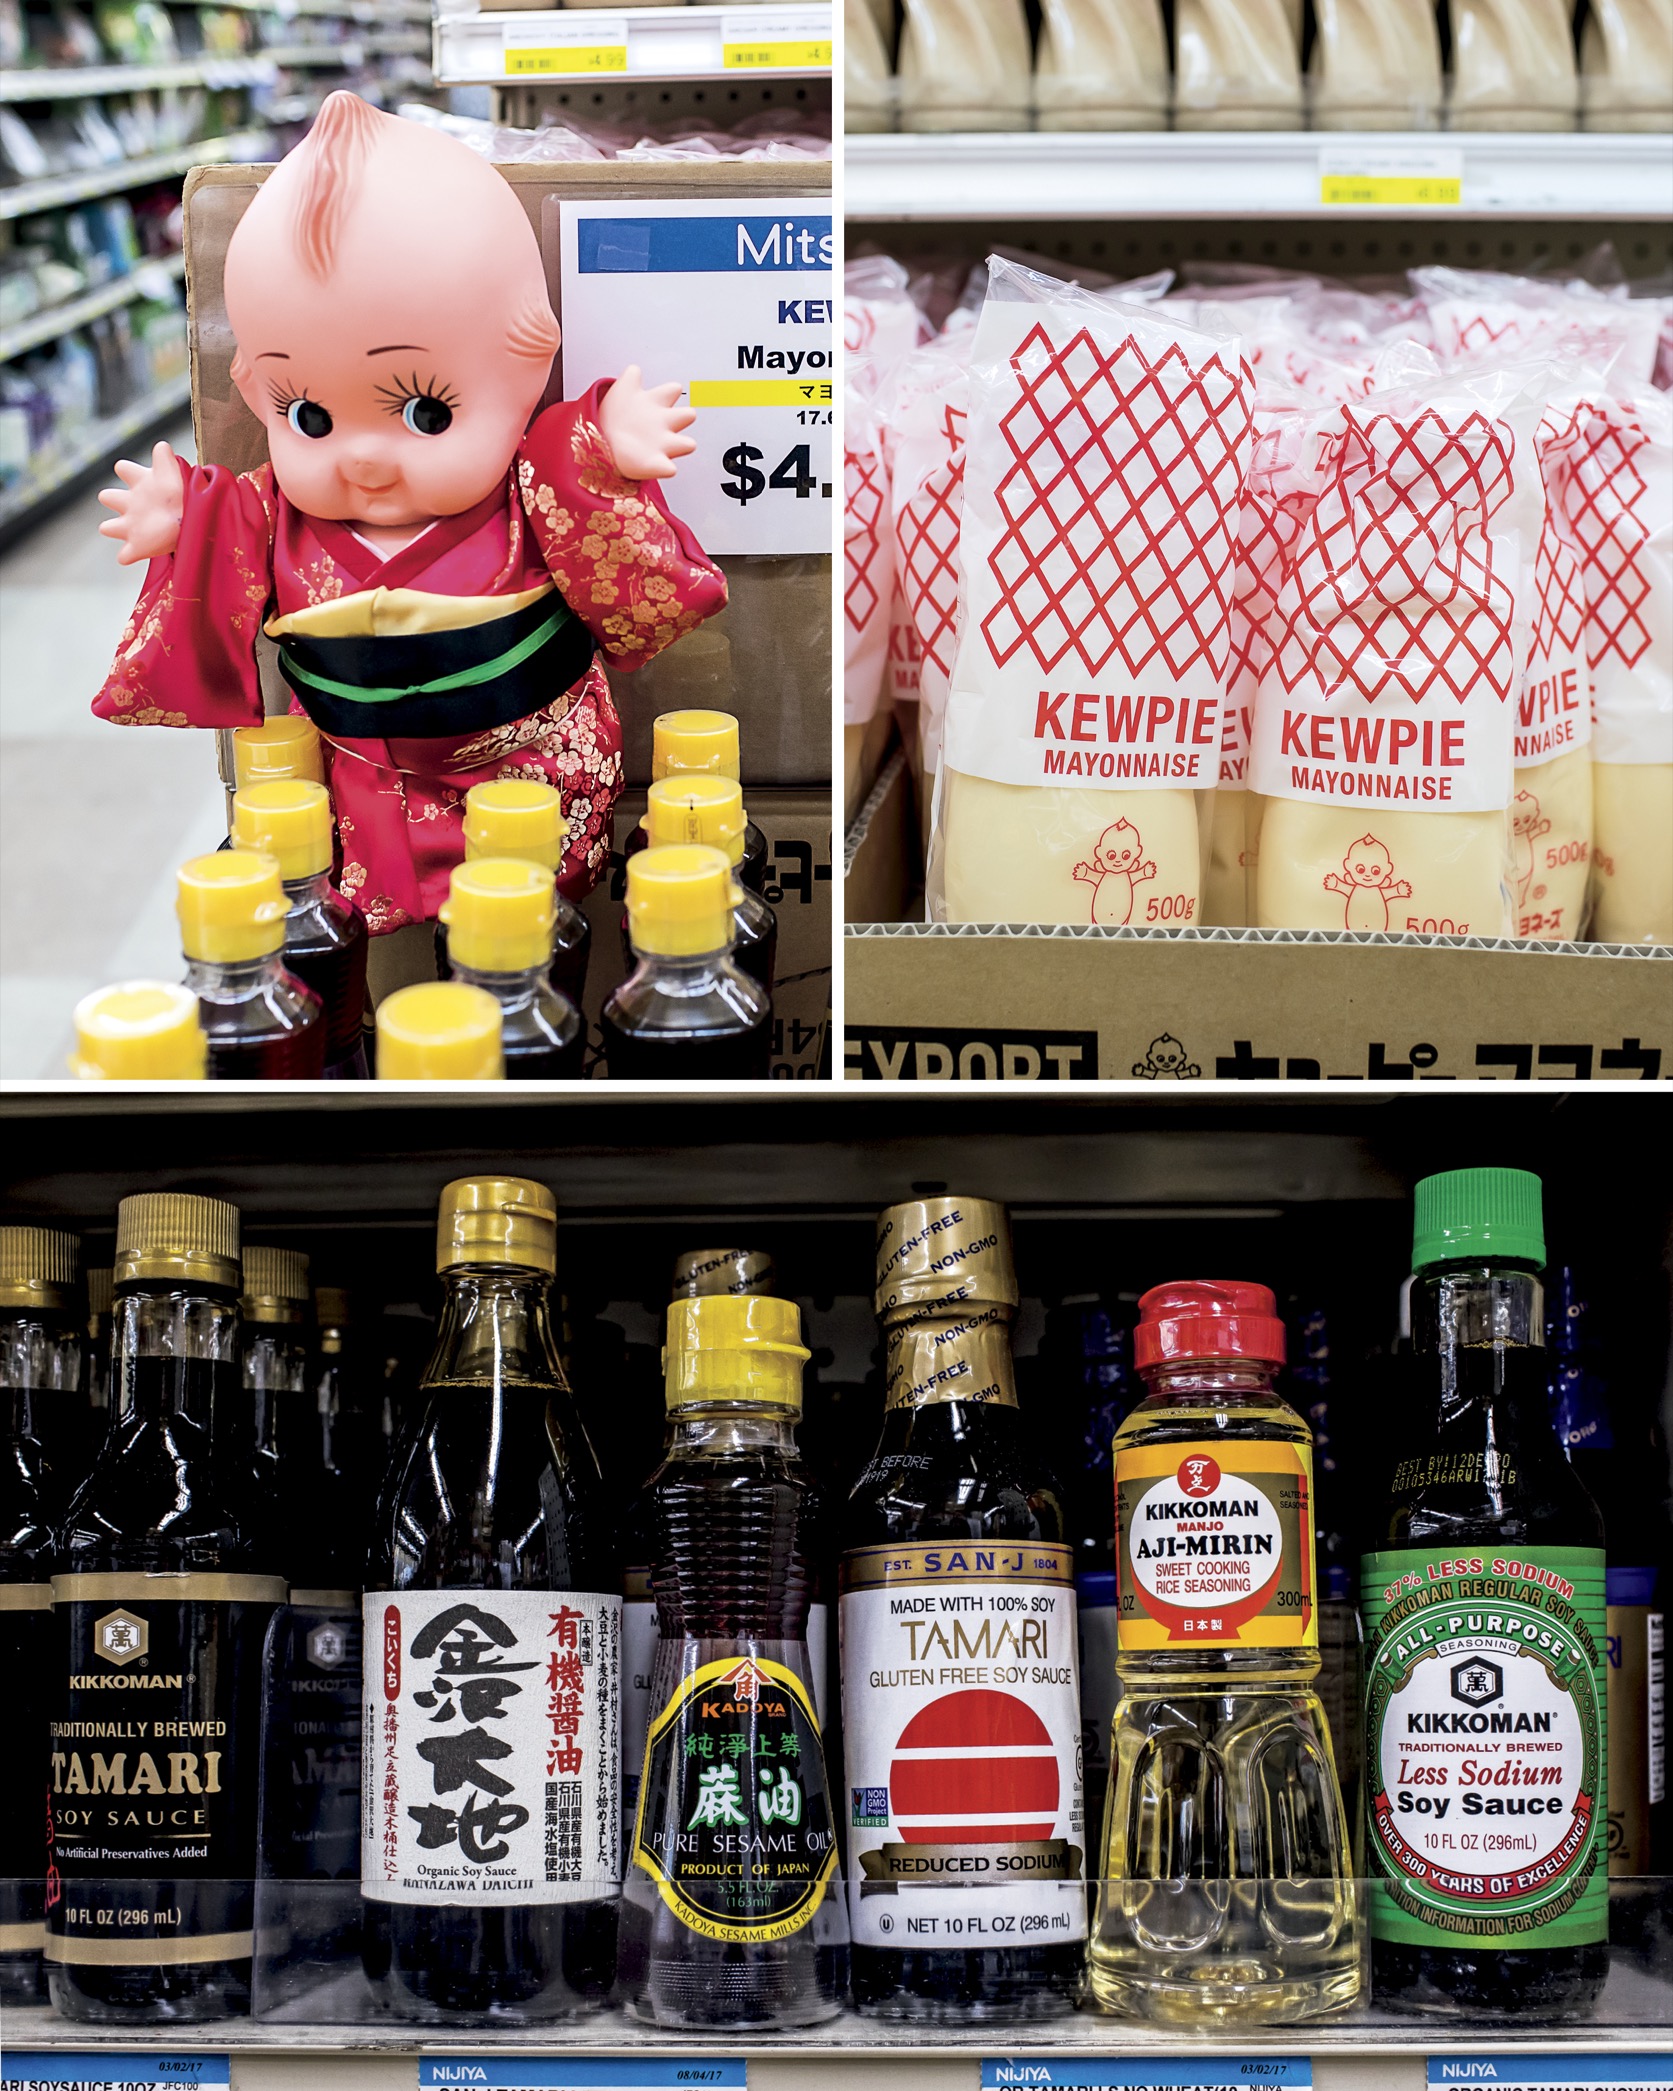
You are about to fall down the rabbit hole of ramen. Ramen is one of those foods that is riddled with mystery and strange confines. When I began this journey to learn how to make ramen in 2012, there were only bits of information here and there online about how to actually make the entire dish. It’s even harder to define, as you are about to find out. These methods go against anything you may have learned about stock and broth to date. The secrets of ramen have been closely guarded since the boom began in Japan in the 1950s. My goal with this book is to present ramen making in as clear a manner as possible. It may not be easy, but it is systematic—a layering process that you can learn. The elements stand alone but work and play together.
Treat this book like a novel at first: curl up in bed with it, and then plot your plan. I know it’s difficult to read a whole cookbook all the way through, but ramen is not just a recipe; it’s a cuisine. There’s a philosophy around each method and element and how you marry them together. It can be really delicate or really intense. And it’s not a one-recipe dish; it’s a multiple-recipe dish. You could jump straight to stocks, but in order to really know ramen, you need the complete picture, because every little piece plays a valuable role.
The ingredients are simple—bones + water—but the way you prepare them is everything. You are going to work with new ingredients that can be hard to find, but your old pal Amazon is going to make this part fun and easy. I am even going to give you different ways to use these new ingredients to add to your overall cooking arsenal.
Depending on what you’re serving, you can prepare some of the elements weeks in advance or days in advance. I will encourage you to master the basics and then create, not just imitate. Ramen is a really fun canvas.
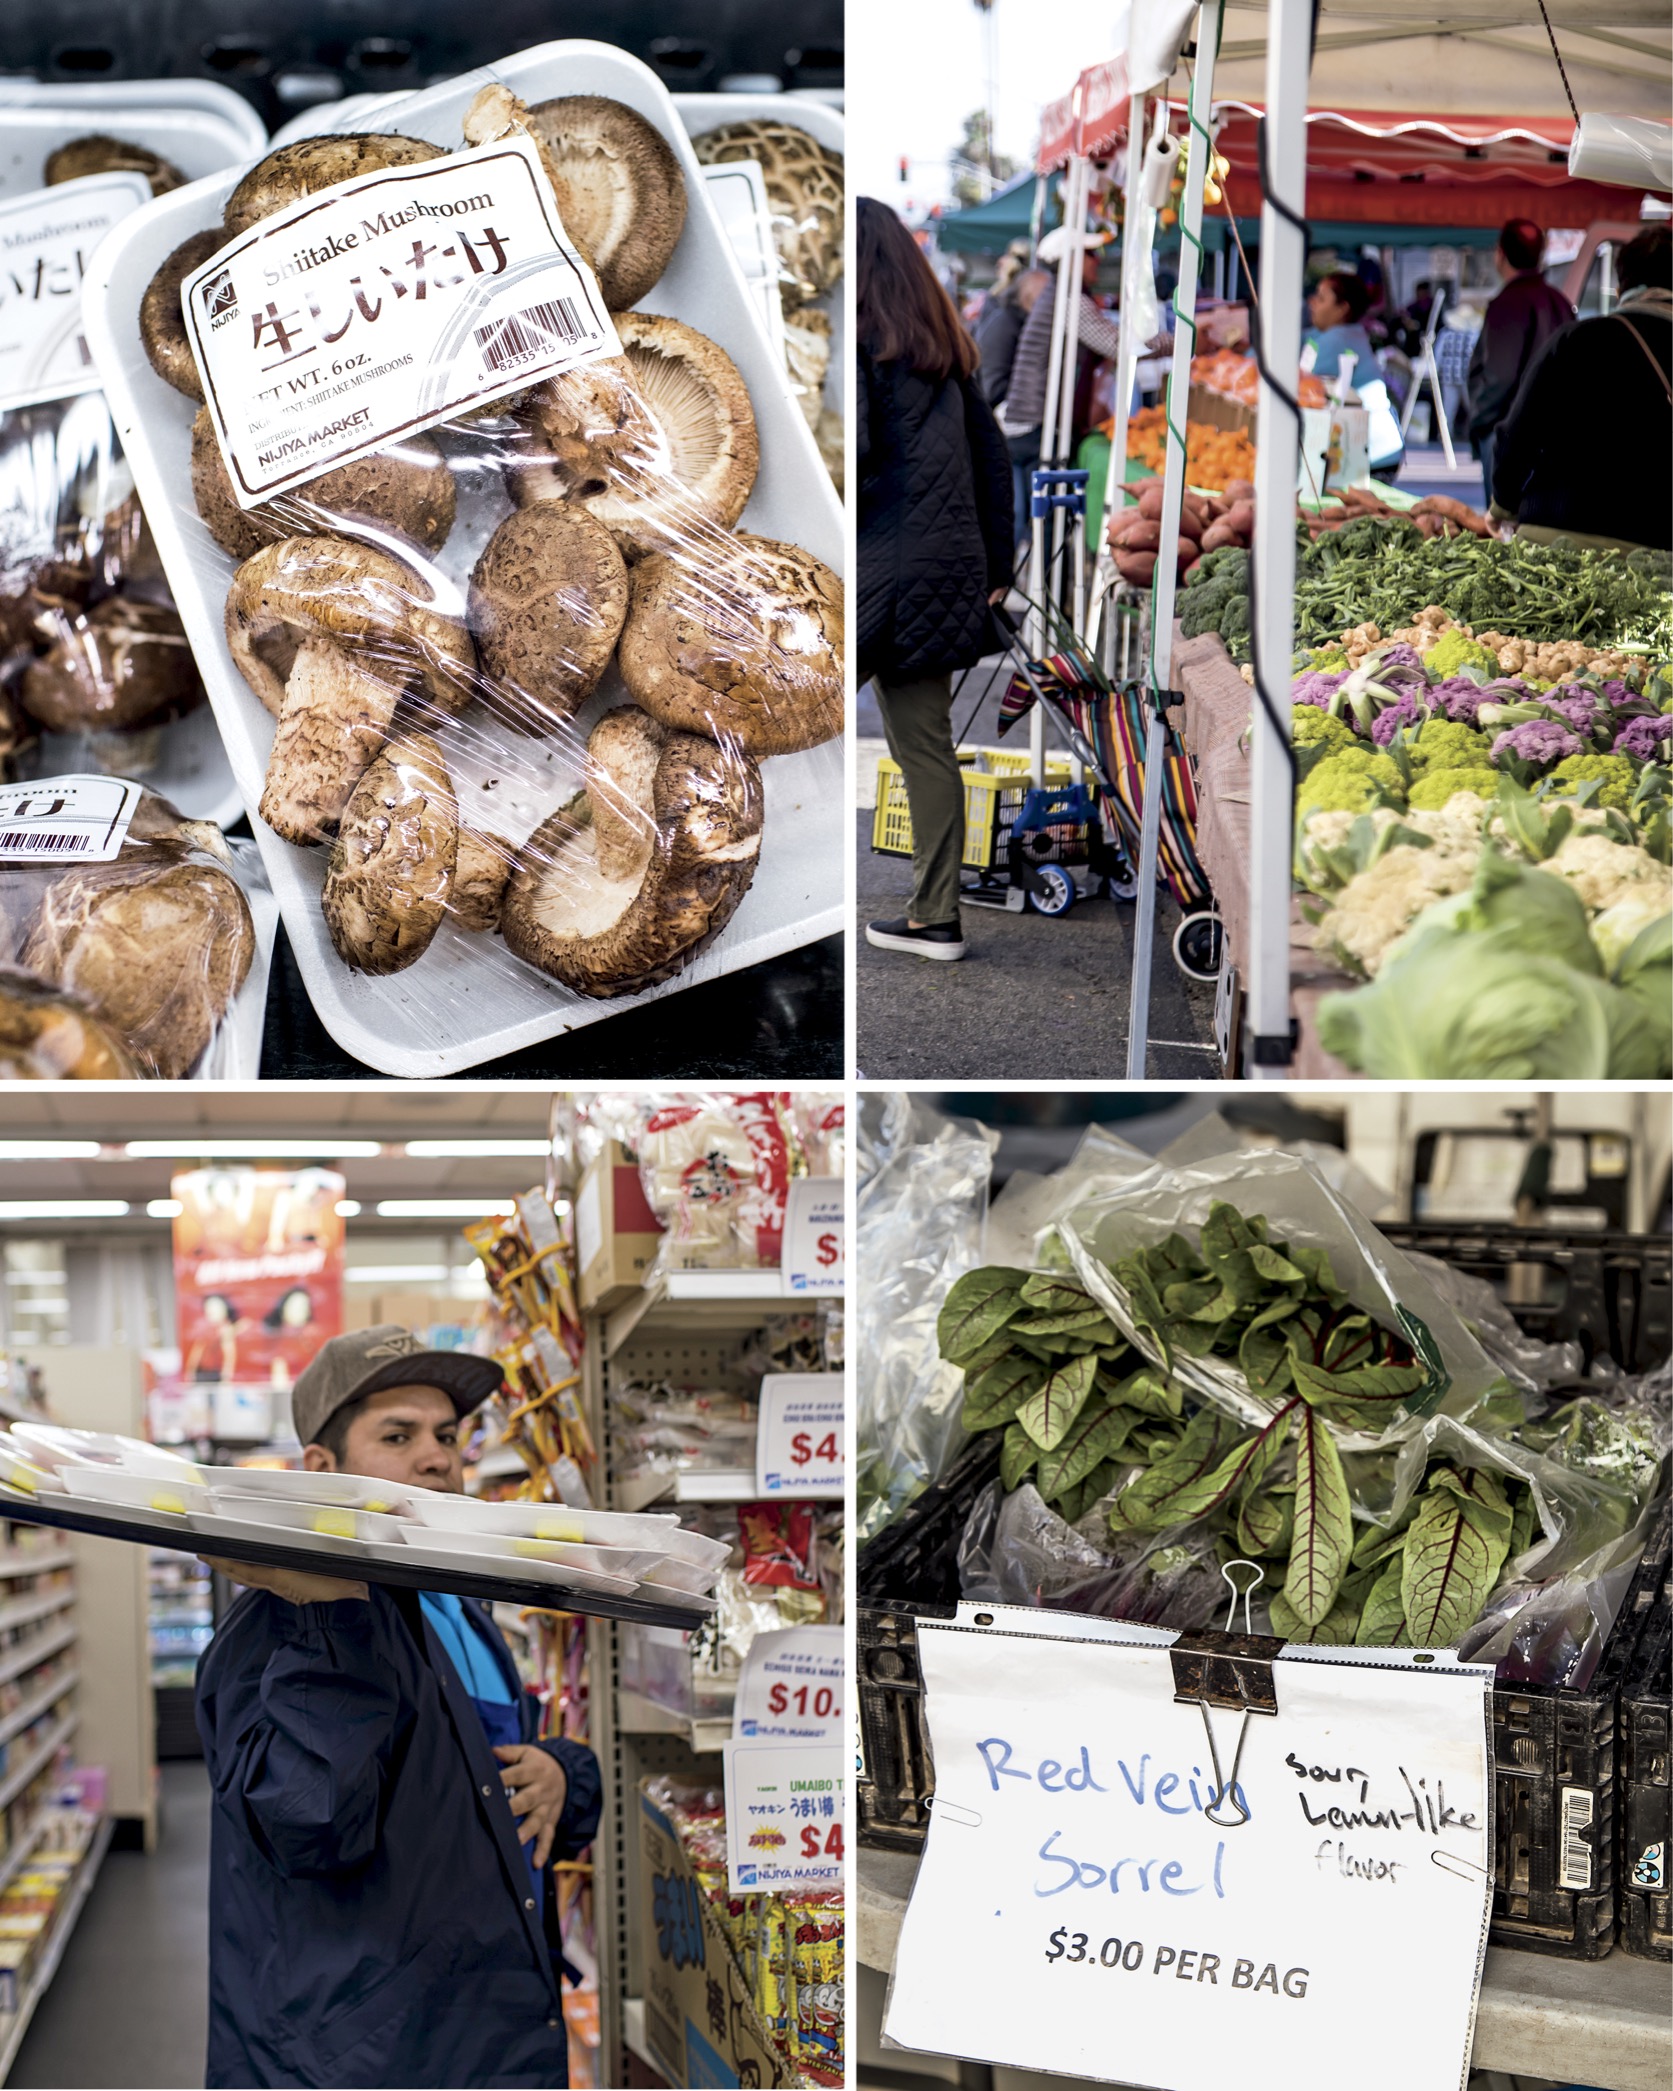
Once you understand the elements, the possibilities are endless, and you will start to look at creating a bowl of ramen the way I do. For example, this morning I went to the market in Chinatown in New York City. The first things I saw were beautiful whole chickens, so I started there. Next thing I was thinking about was, What flavor do I want my ramen? What style do I want to make, a clear broth or a cloudy broth? What elements do I need from here? Shoyu today, I thought, so I purchased soy sauce, then the dashi—and then I checked out the vegetables. I saw some nice greens to put on top and a duck egg. I observed a guy bringing in fresh pork and I thought about doing a meatball and saw another guy with fresh duck and thought, Alternatively, I will make a chintan broth, shoyu flavored, topped with seared duck breast and duck egg, Atjima-style.
You really can walk through the grocery store or market and progressively build your bowl of ramen. The tare, which is the concentrated seasoning you will use to flavor each bowl, is the epicenter. Then there’s the stock, protein, oil, and seasoning. My thought process often goes something like this: If it’s spring and still chilly out but I want something light and fresh, I might make a chintan. If I want it to have a little bit more flavor, I’ll make a shoyu for it. And then I’ll add seasonal spring vegetables, like turnips or turnip greens, which are phenomenal in ramen. My protein could be almost anything. There’s the traditional chashu, rolled pork belly, or, for something a little cleaner, I might do grilled shrimp—which is not very traditional at all.
It’s all dictated by the seasons and what’s available around you. Maybe your butcher doesn’t have pork bones that day, maybe he has beef bones, or maybe your skills are up to making a chicken and beef ramen. In the summertime I might still want soup, but I want a completely different flavor profile, as I go more for hot spice in the heat than I do in cold weather. Hearty miso and Sapporo-style ramen come from Hokkaido, the coldest part of Japan, so that appeals to me in the wintertime.
Animal Bones
It all begins with what kinds of bones you can get. You can certainly set out on a mission to make tonkotsu, but if you can’t find the right pork bones, it’s moot. Find a butcher or meat counter who will work with you, because you will be making an unusual request, and you may have to call in advance, depending on where you live. In the case of pork, you’re going to need them to cut your bones smaller, allowing you to extract all the marrow. It is a waste of time to try to make these broths unless you have the proper base. Chicken is a lot easier and more accessible, so I advise starting there. The method is also a more delicate and sensible way to make a stock. Once you get a feeling for that, then the intensity of making a marrow stock (a paitan) is going to come more naturally to you, especially if you’re going with the stovetop method, as it’s a long process.
Broth Style
The second decision is what style to make your broth. Will it be chintan (clear soup) or paitan (white soup)? I’m providing the traditional basics here, but you can make either style with any bones—or combination of bones. It’s the second flavor layer for your ramen.
I highly recommend committing time in advance to simply make the stock. If it comes out nicely, freeze it, and then you can move on to the other elements.
Ramen Styles
The third decision is what ramen style to use. There are a plethora of styles, as the regional variations have grown well past a few hundred, and after you master the basics, you will undoubtedly create your own style. I cover the main styles in depth later in the book (see this page). Style and flavor can kind of mean the same thing in ramen, which can be a bit confusing. But as you learn more and play with them more, you will begin to understand their relationship. Tokyo-style shoyu, for example, can be a lighter style, with more emphasis on the bright flavor of the soy; that’s the star of the show. But shoyu can also be a flavor; for example, in Wakayama-style there is a tonkotsu broth with shoyu tare, which represents the “flavor.”
Flavors
Stock is important, but it is the tare that sets ramen chefs apart. The tares I am teaching you are purposely very simple to allow for your own improvisation. It’s all about what you’re in the mood for. I believe that the bowl to master first is shoyu, because it encapsulates all the most delicate pieces of making ramen. Tori chintan (clear chicken broth) is the hardest broth to master (I know you are thinking, What? I already make this broth all the time. Sure you do, but not like this). The tare is simple to make, but to build this bowl you must understand umami. There’s nowhere to hide with that bowl. This is where you will master the balancing act of umami. The essence of ramen, to those who make it, is balance. If you have too much of one thing, it overpowers and throws it all off. But one salt level does not suit all. One flavor, one style does not suit all palates. Your flavor guide might be to re-create a bowl of ramen that you’ve eaten a hundred times and love. There’s good, bad, and revelatory ramen, but honestly I find that people gravitate toward what they’ve eaten the most. There’s no right or wrong, just what your palate likes.
Noodles
One of the first things people ask me is, “Do you make your own ramen noodles?” . . . But they have no idea what goes into that process! One of the keys to making outstanding ramen noodles is having the best flour, milled to perfection. Most U.S. wheat is superior, but the Japanese technology for milling is well beyond American mills, and it makes the noodle smooth. While it requires only three ingredients, the ramen noodle–making process can be ruined simply through a few extra drops of water (ramen noodles are very low moisture) and must be made with a large machine, making it very difficult to integrate into a ramen shop. It is perhaps a bridge I will cross in the future, but right now I put my noodles in the hands of the experts.
But if you are an avid ramen eater who has eaten ramen in various parts of the world, you’ll have noticed that there are a variety of different ramen noodles. In my world and in ramen shops it’s possible to get very specialized with noodle type, based on the bowl we’re making. But I can source my varieties on a commercial level. You’ll need to work with what you can find in your Asian market or what fresh noodles you can order. I’m going to teach you how to match your noodles to your broth with the help of my good friends at Sun Noodle.
Toppings
Your final decision for your bowl is what toppings you’d like to feature. Simple is always better. You will have spent a lot of time on your broth and flavor; they are the stars of the show, but the toppings play a wonderful supporting role. Let the main elements stand for themselves; don’t overcrowd the bowl. Every single thing that you put in that bowl is going to change the flavor. Sometimes egg and rolled and braised pork belly, aka chashu and scallion, are enough.
Pantry
The ramen pantry can feel intimidating and specialized, but like all amazing ingredients, once you become familiar with them you will use them in other ways. Spend a little time here and the recipes will seem familiar.
WATER
One might not think that water is special, but when making something as simple and pure as stock with two ingredients, water makes up over half the equation. Much of the water that comes from our faucets is rife with unwanted chlorine and minerals like calcium that can really mess with your flavors. You have options here, from a home filter like a Brita, to going all the way and getting reverse osmosis water at the health food store. At the end of the day, clean water will yield a clean stock with no aftertaste. Tap water can sometimes yield a metallic aftertaste that fights with some of the fermented and dried-fish flavors. It can go so far as to taste like licking the inside of an aluminum can. Yuck. This also pertains to using aluminum pots (see this page).
SHOYU
Known in America as soy sauce, standard Japanese shoyu (I use Kikkoman, seriously!) is well rounded, while the Chinese version is more intense. I tend to cook with Chinese dark and light soy sauce, and make my tare from Japanese shoyu. If you are really interested in understanding the differences, buy small bottles of all three and taste them side by side; then you can decide what flavor profiles you prefer. There’s also a fourth: white soy sauce. It’s very expensive when using in volume, but if you have some on hand and really like the flavor, try it. In this book, I reference only the Kikkoman style of shoyu, but don’t be afraid to play around with the others. Now, if you have access to high-end shoyu, by all means play around with it. Shoyus are deep and complex and rarely do they taste alike. There are entire books dedicated to this topic.
MISO
You will find insane variations of miso in a good Japanese grocery store, but for these recipes I use simple yellow miso. But don’t be afraid to try different types and styles of miso in your tare. When I sub a new ingredient, I make a small batch to see if I like it. Some have dashi built in (conveniently, they usually have a picture of a fish on the label); some have more kombu built in.
DASHI
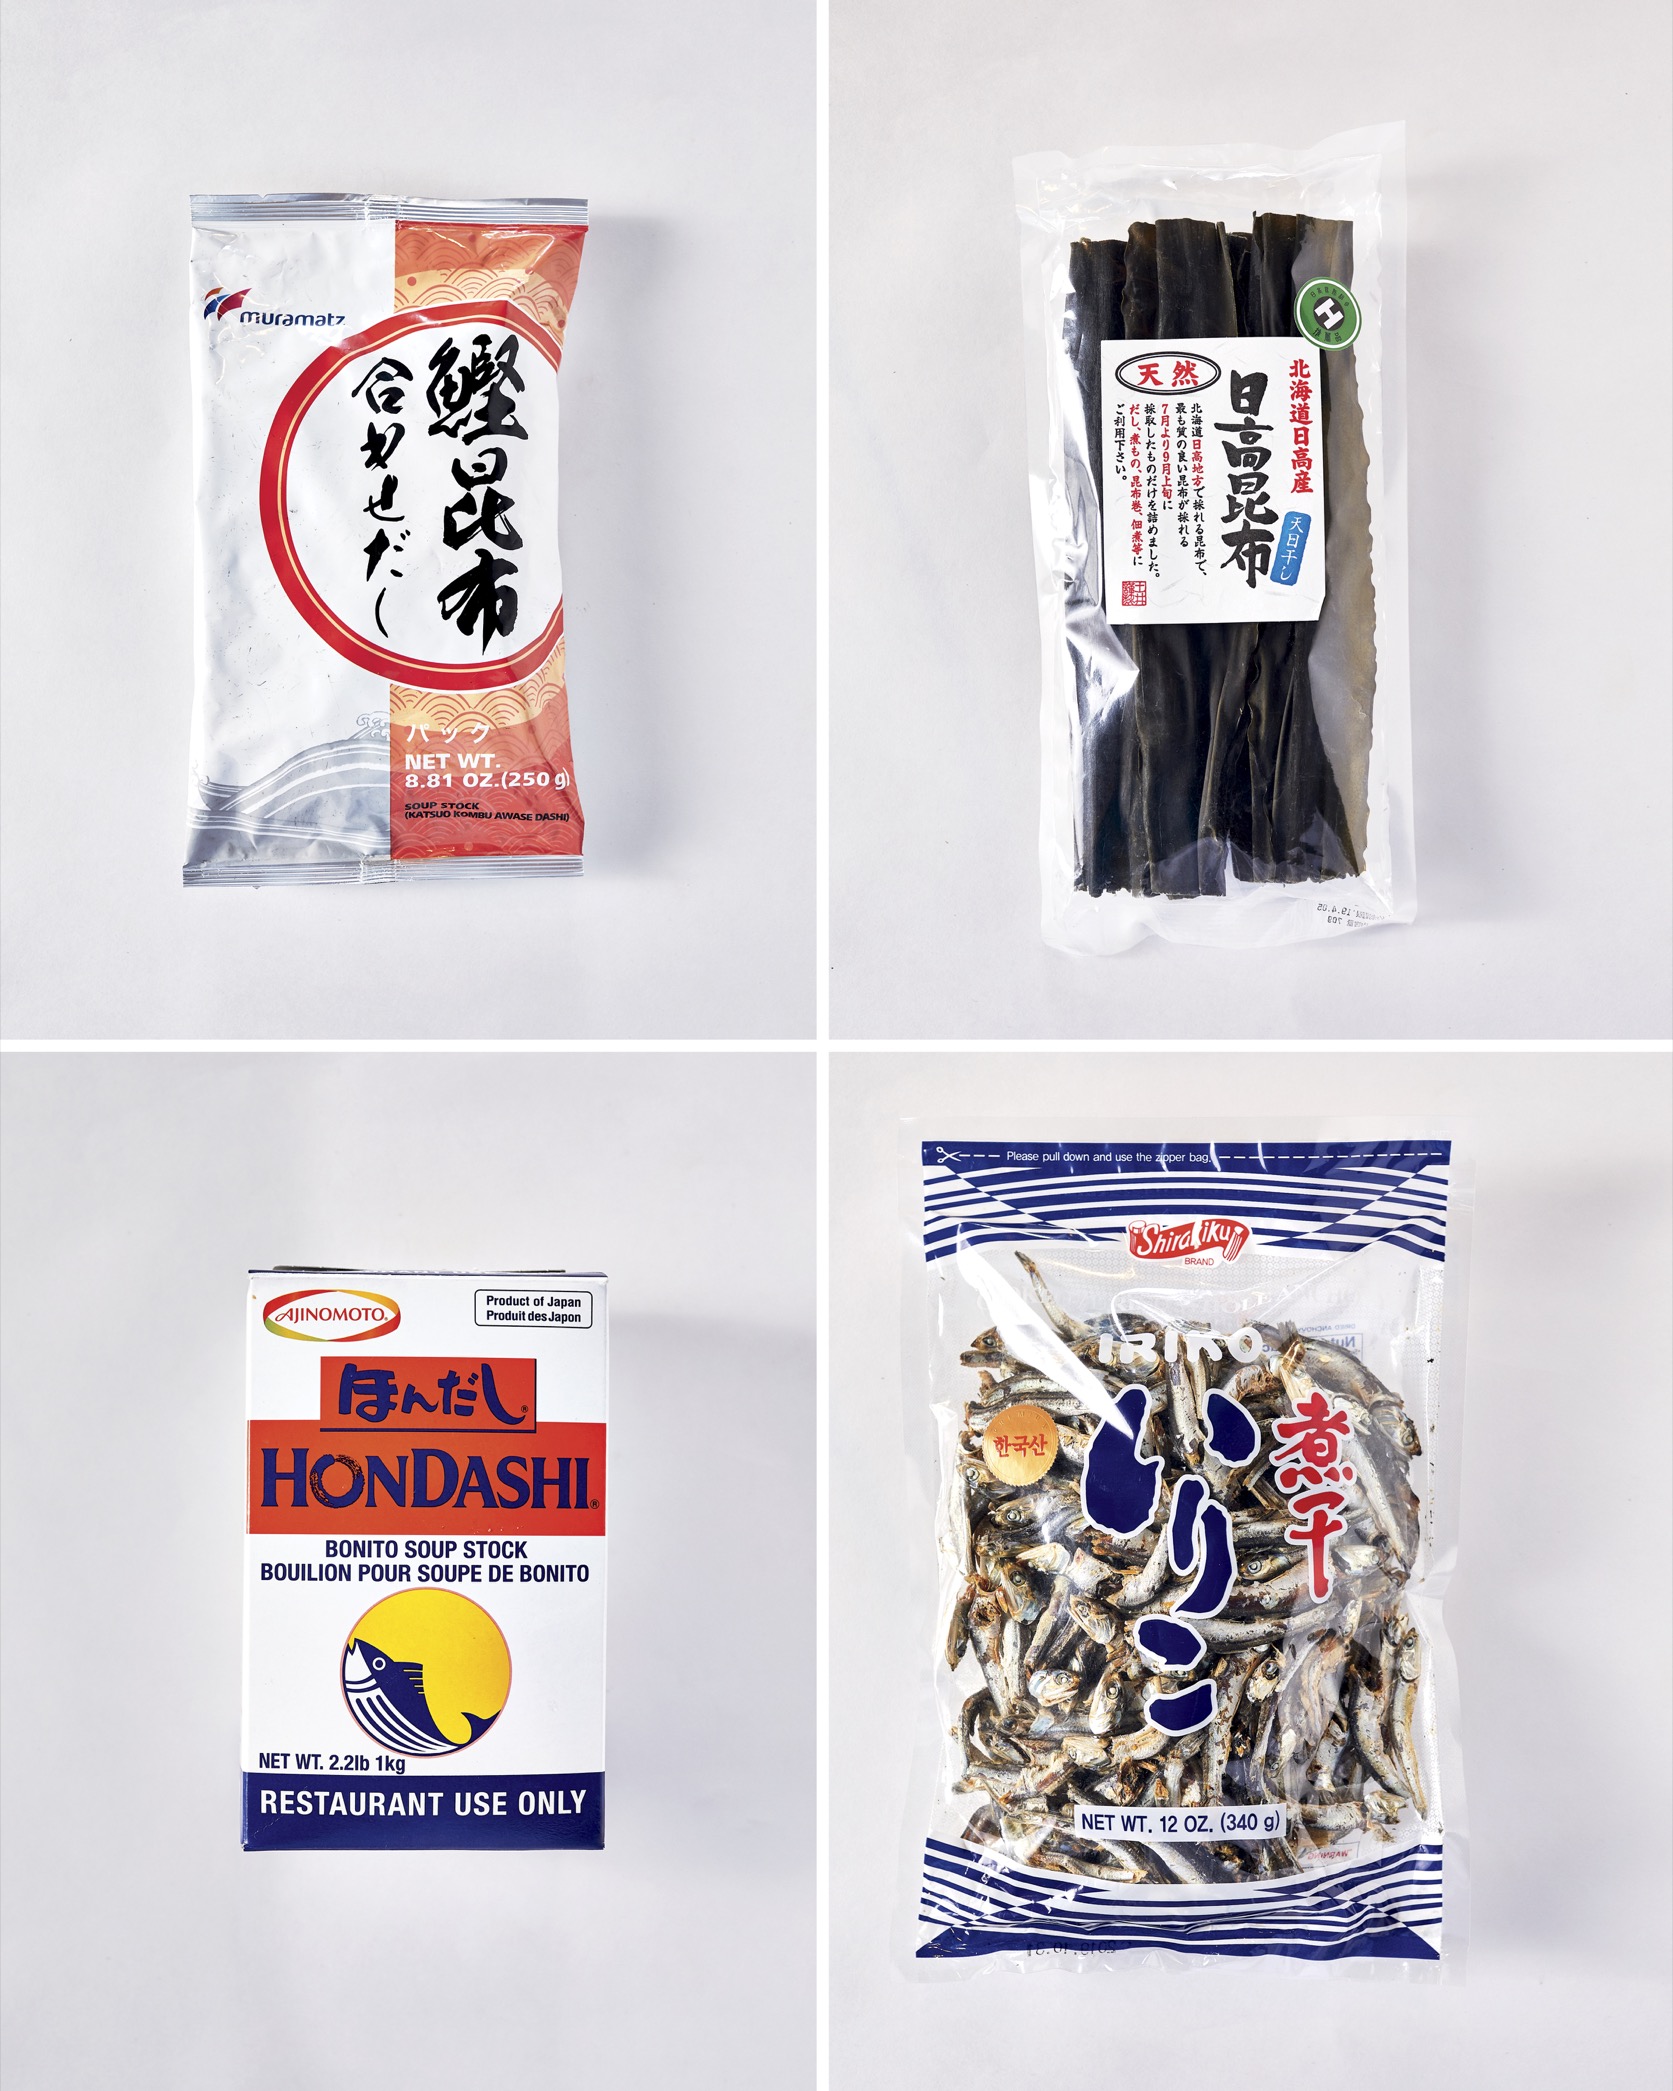
I call this “sea stock,” as we are taking the combination of water, kombu, and dried fish and heating it gently to make strangely flavorless stock. But dashi is the epitome of umami, because on its own, it doesn’t taste like much, but when added to a chicken stock, for example, the dashi enhances the flavor of the stock (or just about anything else you add it to; think miso soup). There are many methods and recipes for dashi, but I prefer to use dashi packets, which look like tea bags that you steep in the water to make my dashi. It’s not cheating; it’s actually very smart. Buy the highest-quality Japanese dashi packets that you can find. I buy awase dashi made by Maruhachi, which has a perfect combination of dried fish and seaweed. Steep according to instructions for perfect dashi every time. Some packs have more MSG than others. I prefer the cleanest I can get, as it’s better to add a little MSG at the end of the program than early in the game, for fear of overseasoning. Be a purist when it comes to dashi, play around with different types of dashi or of seaweed, but don’t feel bad using instant Japanese dashi, too. They are still way superior to the instant products we have in America. These ingredients have traveled a really long way to get here, so to put them in this state first is not a bad thing. Just as I am giving you license to use MSG in small amounts, instant dashi can be umami insurance. For the first big batch you make at home, make four different kinds of dashi, and when you assemble your bowls, make it four different kinds of ways. I’ll say it again—it is a matter of taste; there is no right or wrong.
HONDASHI/MSG
Made by Ajinomoto, the first company to make MSG, HonDashi is freeze-dried dashi with MSG. It’s an amazing tool in the kitchen. Like many things, don’t abuse it, but it can help get you to umami in a way salt cannot. If you have a stock in which you’re using dashi, you can add a bit of HonDashi and you’re guaranteed umami. It’s an insurance policy. For example, if you’re serving a large group something like a thick, fatty, dense paitan and you want to ensure that your flavor profile stays the same in all the bowls, HonDashi is going to be your best friend.
SEAWEED
Kombu is the main type of seaweed that we use in ramen making. It comes in really large leaves. If it’s kept in a pantry, well wrapped, it will keep for years. It may seem that you can cut a corner here, but it’s important to buy the highest quality you can find. However, it’s hard to know what is good quality and what isn’t. I recommend Emerald Cove, which sells Pacific kombu, or if you are shopping in an Asian store, look for the largest leaf you can find.
DRIED FISH
There are so many different kinds of dried fish, but for the purposes of this book, we will use these three:
Niboshi
It will sometimes say anchovies and sometimes say sardines on the package, so don’t get confused. Niboshi gives you the strongest of fish flavors. If you really want to smell the ocean, you will like it.
Katsuobushi (“katsuo”)
The second dried fish we will use is tuna/bonito flakes, or katsuobushi, also called katsuo. I use it for aroma. The flakes are very thin—the thinner the flake, the larger the surface area, and this brings the strongest smokiness to the situation.
Sababushi (“saba”)
The second cousin to katsuobushi is sababushi, or mackerel. It’s less popular and less strong than katsuobushi but is also used for aroma. I call for both in my Cold-Brewed Dashi, but you can substitute katsuobushi and you will be fine if you can’t find it.
SALT
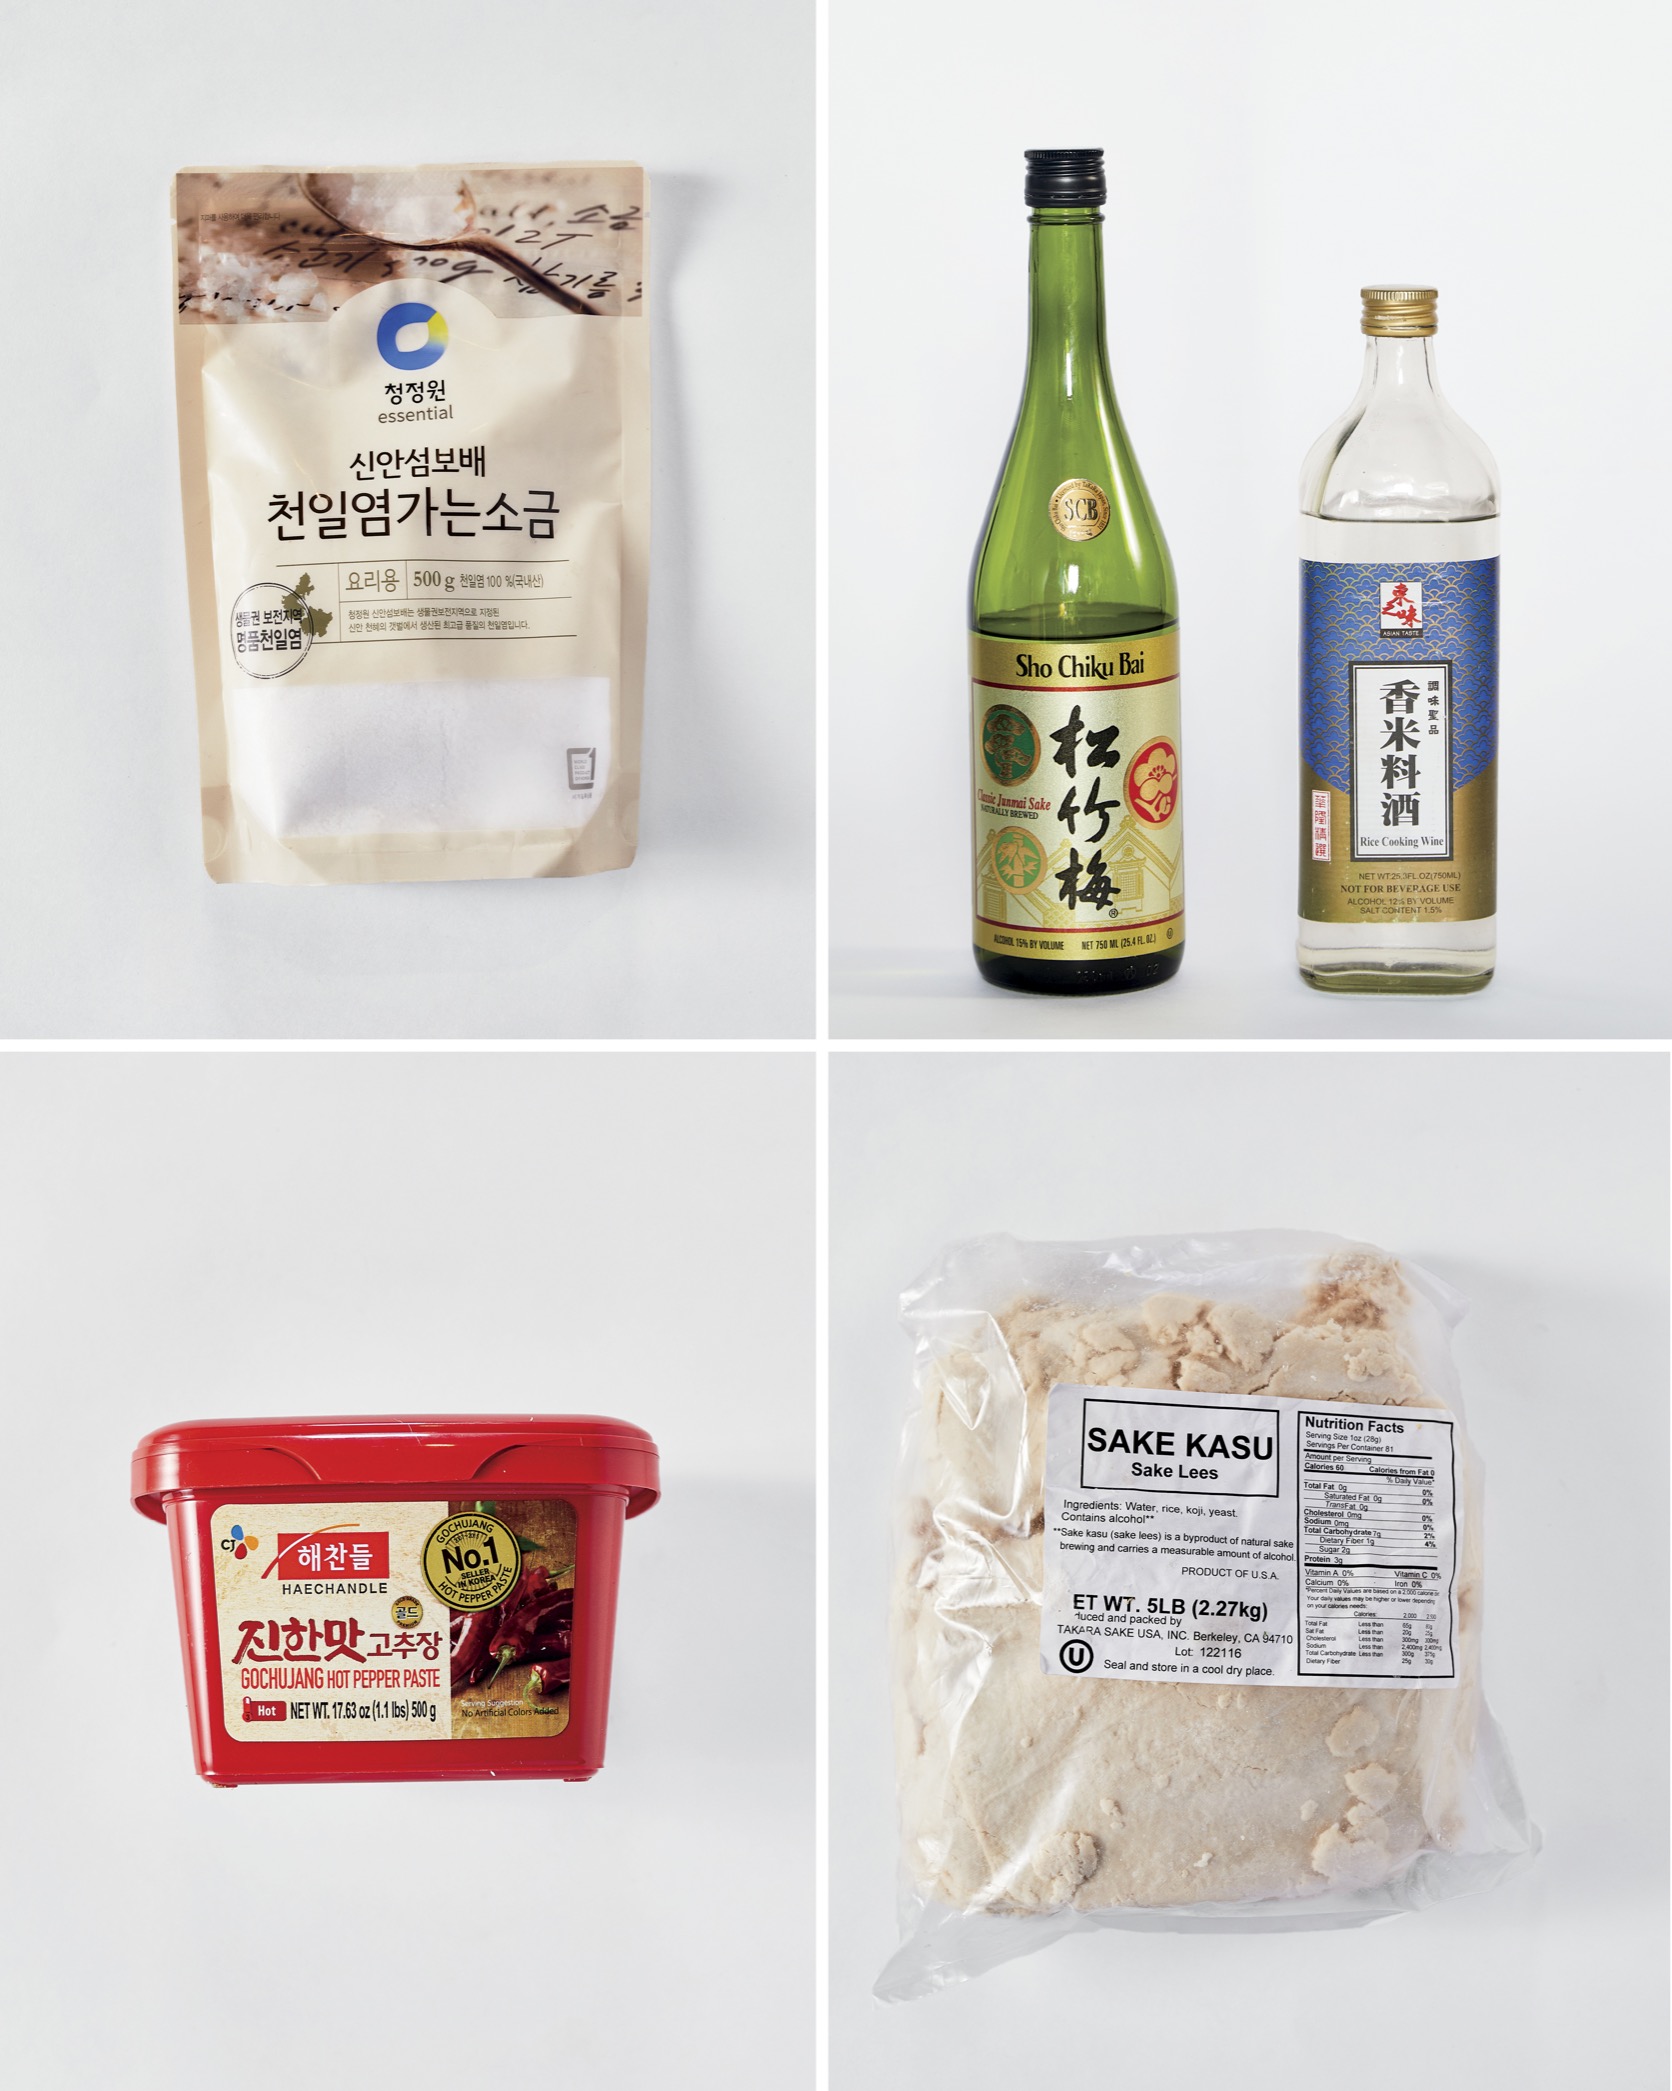
It’s simple—not every salt is created equal, and certain salts perform better in certain situations. In my ramen shop I use 100 percent kosher salt, but I use many different salts at home. The most reliable salt to use is Diamond Crystal kosher salt, and all the recipes in this book are measured using this salt. Believe it or not, Morton kosher salt in the same volume will give you a much stronger, saltier taste. Kosher salt is the most common, affordable, and consistent when it comes to seasoning a broth. Sometimes I use Maldon salt in a tare for the brightness of the salt, but it’s very expensive. It’s simply up to you and your taste, but you have to pay attention to the dilution, which is why I prefer fine Korean salt when cooking at home. It’s like talcum powder with beautiful dilution, which is what you need for a fatty stock to provide an even flavor. Kosher salt adds salinity but not that brightness. Do not use iodized salt, only sea salt or kosher salt. Iodized salt lends a metallic flavor that does not work well in the ramen world.
WHITE PEPPER
White pepper is very prevalent in ramen, for color and presentation, but it also plays well against the fattiness and saltiness. You will see white pepper in any traditional ramen shop; it’s always offered. But whether you use it is a matter of taste.
MIRIN
Mirin is a seasoned cooking wine that’s important for braising your proteins and building your tare. It’s a building block. It has the consistency of a light syrup or a fortified wine; it’s the sugar delivery system for your flavor profile—that’s why it’s great for dressings.
SSM (SOY SAKE MIRIN)
I keep SSM, which is equal parts soy, sake, and mirin, in my refrigerator all the time. I can make anything from braised pork to ponzu or build a tare or make a soy egg with it. It’s great in a pinch. My daughter sautéed mushrooms in it the other day, and it was delicious.
SAKE
When cooking with wine, the better the wine, the better the sauce, but this rule does not apply to sake. Buy the cheapest sake you can find for cooking, as it’s merely there to create balance, not for flavor or depth. Drink your good sake, cook with the cheaper stuff.
SUGAR
Sugar is to be used only for balance in very small portions. You won’t see it called for often in this book, but let’s be clear: Ramen is about balance.
GARLIC
Garlic plays a lot of different roles in ramen but not in the way you might think. It’s not used in stock and it’s rarely used in braising the meats. It’s used raw when added to a ramen or in the crunchy, fried form of garlic chips.
GINGER
Generally speaking, ginger adds another layer of flavor for your stock or it’s used as a mirepoix for meat and proteins. I also like to add a bit of grated ginger to the top of ramen for an extra kick. I remember the first time I studied with Naka, I noticed that he kept his ginger wrapped in wet paper towels in a ziplock bag on the countertop, at room temperature. When he unwrapped it I could see that the skin was almost translucent—because he’d hydrated it. He told me to chop it thin and stopped me from peeling it. Keeping your ginger hydrated is really important for flavor delivery.
SESAME
I buy untoasted, raw sesame seeds because I think freshly toasted sesame adds an incredible layer of flavor—it smells so good. Sometimes I make a compound of Maldon salt with toasted sesame that is partially ground in my mortar. It’s a nice way to top off a bowl. One-quarter of the ramen bowls I’ll teach you will call for sesame seeds, so don’t be afraid to buy a lot. You may want to make your own sesame paste, in which case toasting them right before you make the paste will be important, as toasting releases the oils. Buy raw and toast for potency.
SESAME OIL
Sesame oil can be used alone or combined with other oils to make a compound oil for drizzling on top of ramen or for making Rayu.
GOCHUJANG
Gochujang is a traditional fermented chile paste from Korea. It has a lot of depth, the right amount of heat, and can be used for a lot of things. We mix it with miso in the shop to make our spicy miso tare and we mix it with other fermented chiles to make what we call a spice bomb, which can be added to pretty much any ramen to give it heat and spice.
SHIO KOJI
Shio koji is a mixture of fermented rice and salt. It looks a bit like pureed rice porridge, and it contains enzymes that work with proteins to tenderize and enhance umami flavors and add a slight sweetness as they break down starches. It’s umami central—and the most well-rounded salt you will ever put in your mouth. I use it for pickling and to enhance dressings, marinades, and proteins. One of my favorite tricks is to take the gnarliest piece of beef I can find, put this on it to marinate for twenty-four hours, then sear it in a pan . . . It tastes like it has ten pounds of butter on it; the meat tastes like Wagyu. You will blow all your friends away when you cook with shio koji, either as a marinade, in a sauce, or as a seasoning—and you can start with my recipe for Koji Chicken Breast.
SAKE KASU
Sake kasu is the lees left over after sake production. In other words, it’s derived from the rice after fermentation, when the sake is strained off. You’ll see the magic that happens when you use it as a seasoning; it makes for incredibly well-balanced flavors.
Equipment
This is our guide to equipment. I, like you, always bristle a little at this section because I don’t want to buy any more stuff for my kitchen. I will help you weigh the pros and cons.
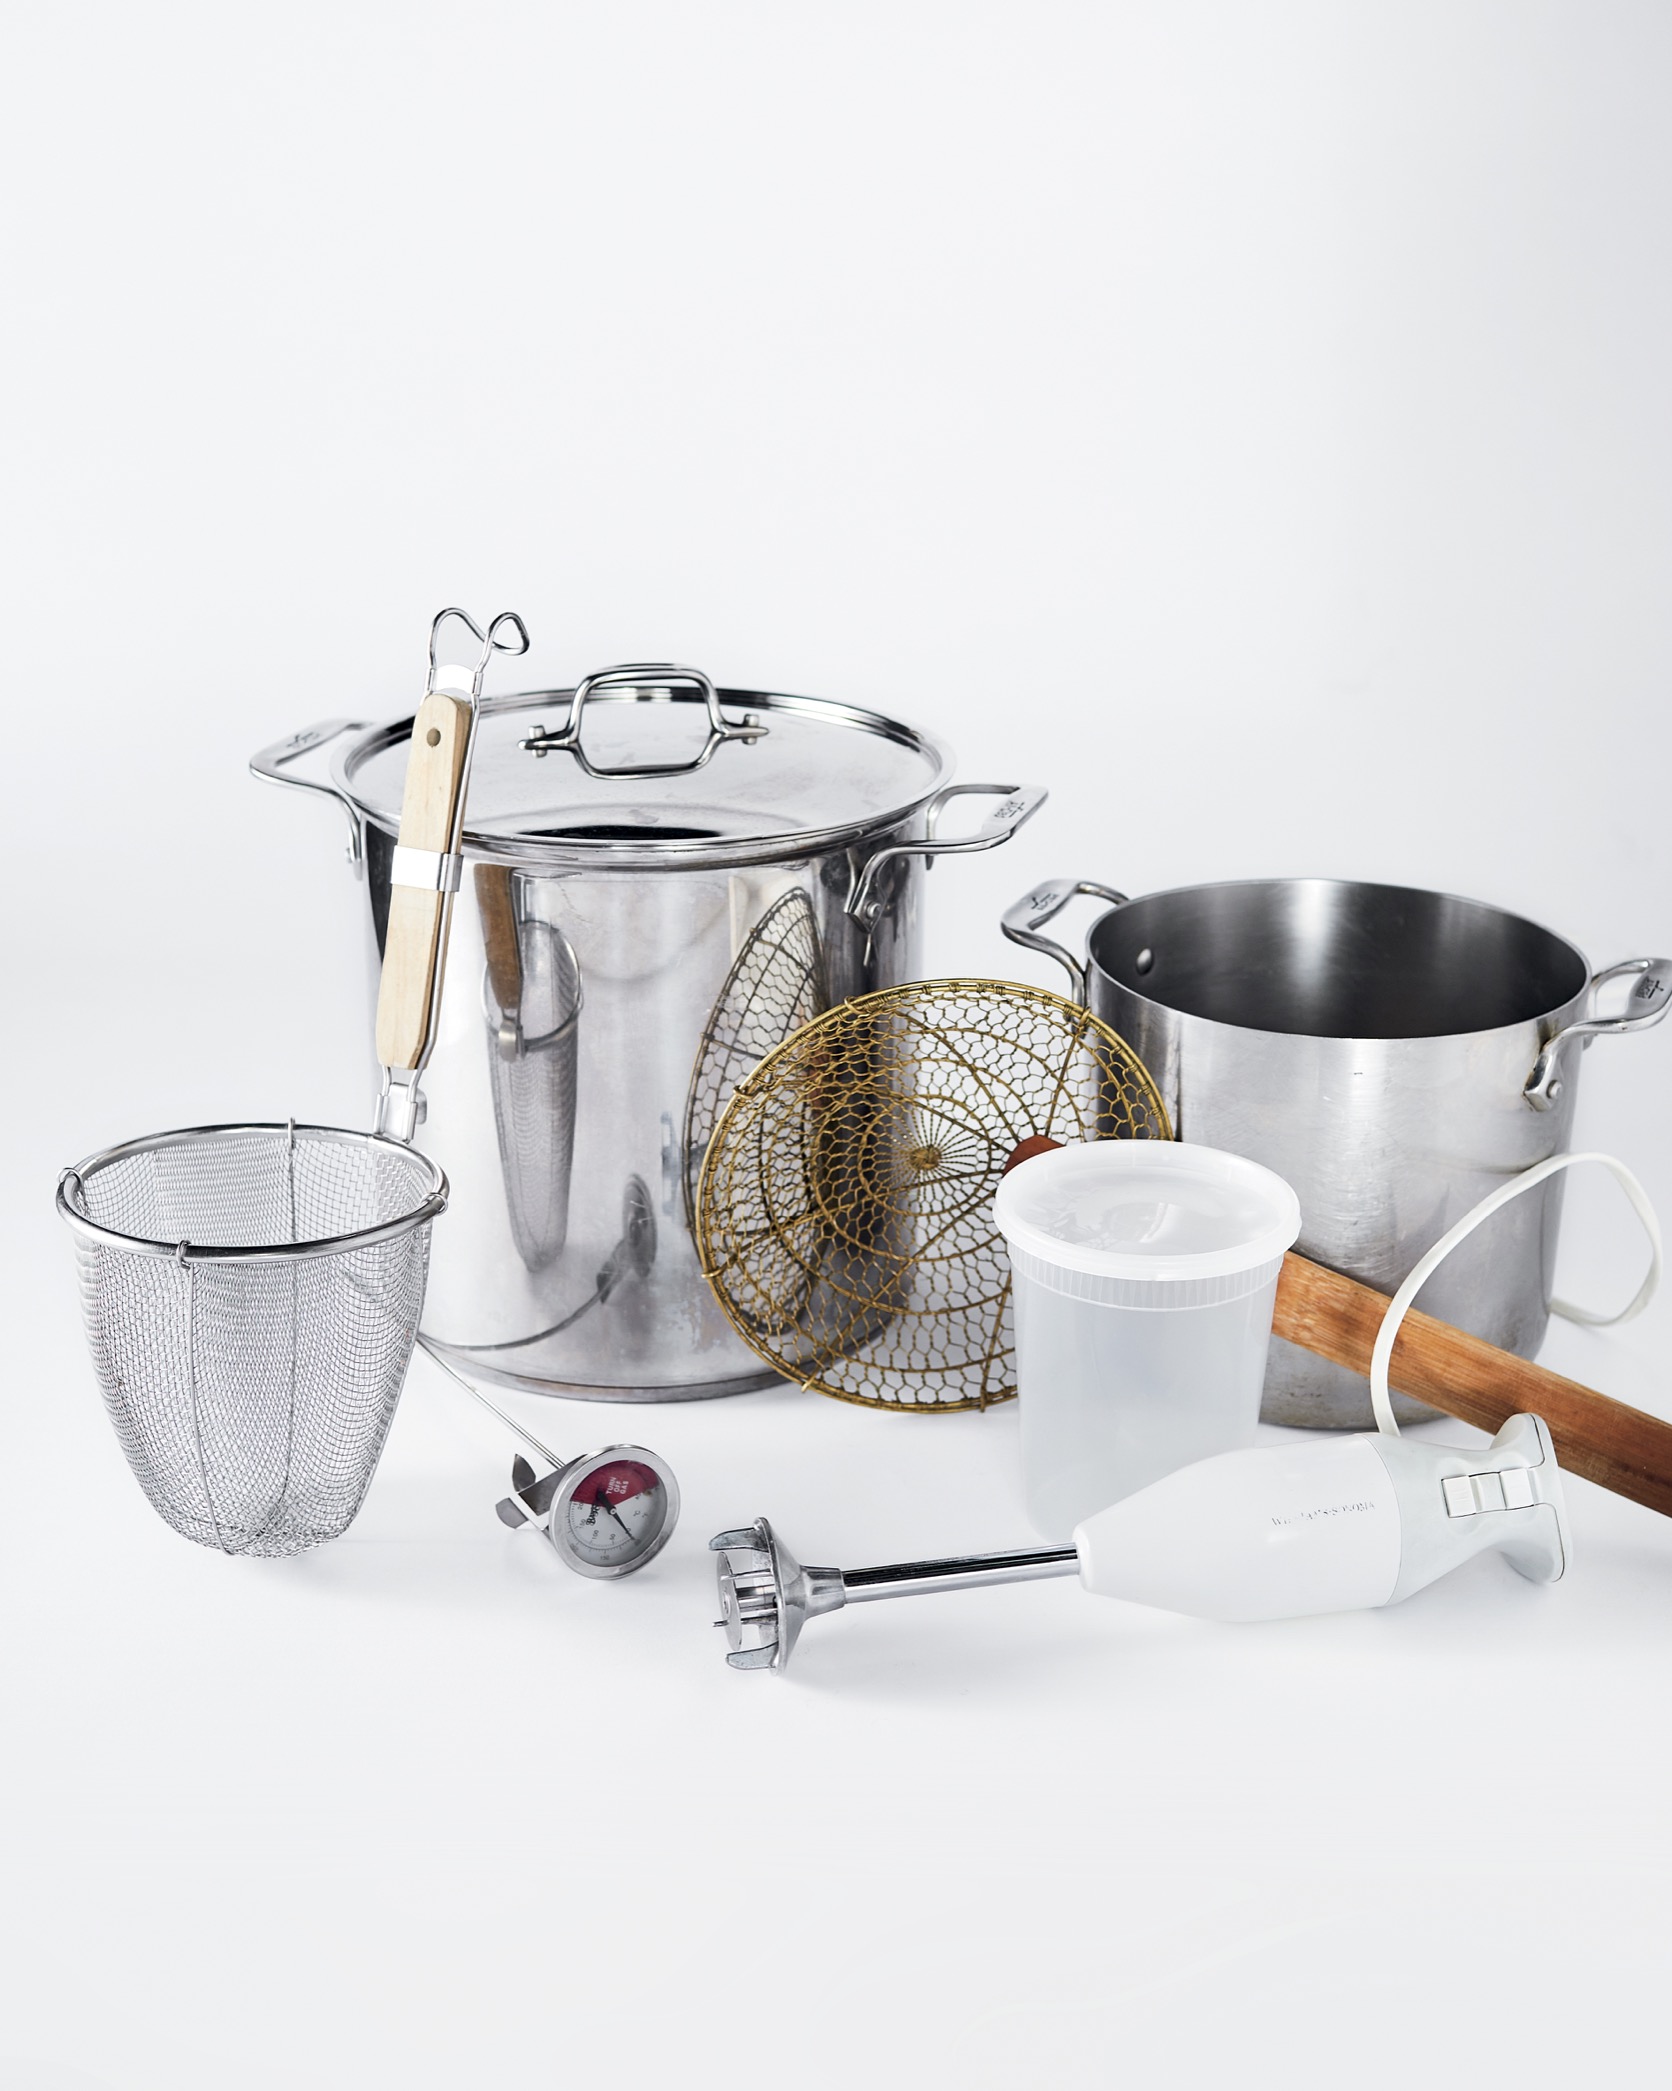
STOCKPOT
Now look at that—they call it a STOCKpot because it’s going to cook food for a long time. So it must have a HEAVY (thick) bottom and it should be stainless steel. Let me explain.
Heavy Bottom
Don’t burn the stock! Once you master my chicken stock, you will realize that you have been burning chicken stock your whole life (I had been), so the thick bottom is going to help give your pot the type of even heat it needs to cook steadily.
Stainless Steel
Aluminum is not your friend. I know it’s cheap, but it’s going to leach chemicals into your beautiful stock, maybe even prevent that golden color, and possibly react by creating a weird aftertaste.
ELECTRIC PRESSURE COOKER
This is the one and only piece of equipment in my house I could not live without. I cannot recommend this investment more for making ramen broth and for a million other things. Why have a slow cooker when you can have a pressure cooker? Using a pressure cooker is a hands-off method of making stock that provides really consistent results (all other elements being the same). The big bonus here is the lack of oxygen in the cooking process. There is a consistent and controlled outcome every time. Your chicken stock will have a deep golden color that you just don’t get from the stovetop. It’s impressive, and I personally always go with this method at home. You are not a slacker if you use a pressure cooker—you are smart and you will be revered for your golden chicken broth—but let them think you slaved.
A word to those scarred by the memory of an exploding pressure cooker. The new ones are electric with locked lids, 100 percent safe and foolproof when their tops are secured (and they won’t allow you to cook unless the top is secure). You hear steam for a few minutes and then it’s silent. No rattling or whistling to knock your nerves. You may have seen the Instant Pot ads and Pinterest madness. It’s worth every accolade, but any electric pressure cooker will do.
TEMPERATURE GAUGE
Nothing fancy, just a temperature gauge that allows you to check the temperature. Some of these stocks should never be above 190°F. In the ramen shop, we use ones that affix to the side of the pot.
Tabelog, the popular website for restaurant listings in Japan, cites that there are over 51,000 ramen shops in the entire country, and 21,000 of those are in Tokyo. For reference, there are 24,000 restaurants in all of New York City.
REFRACTOMETER
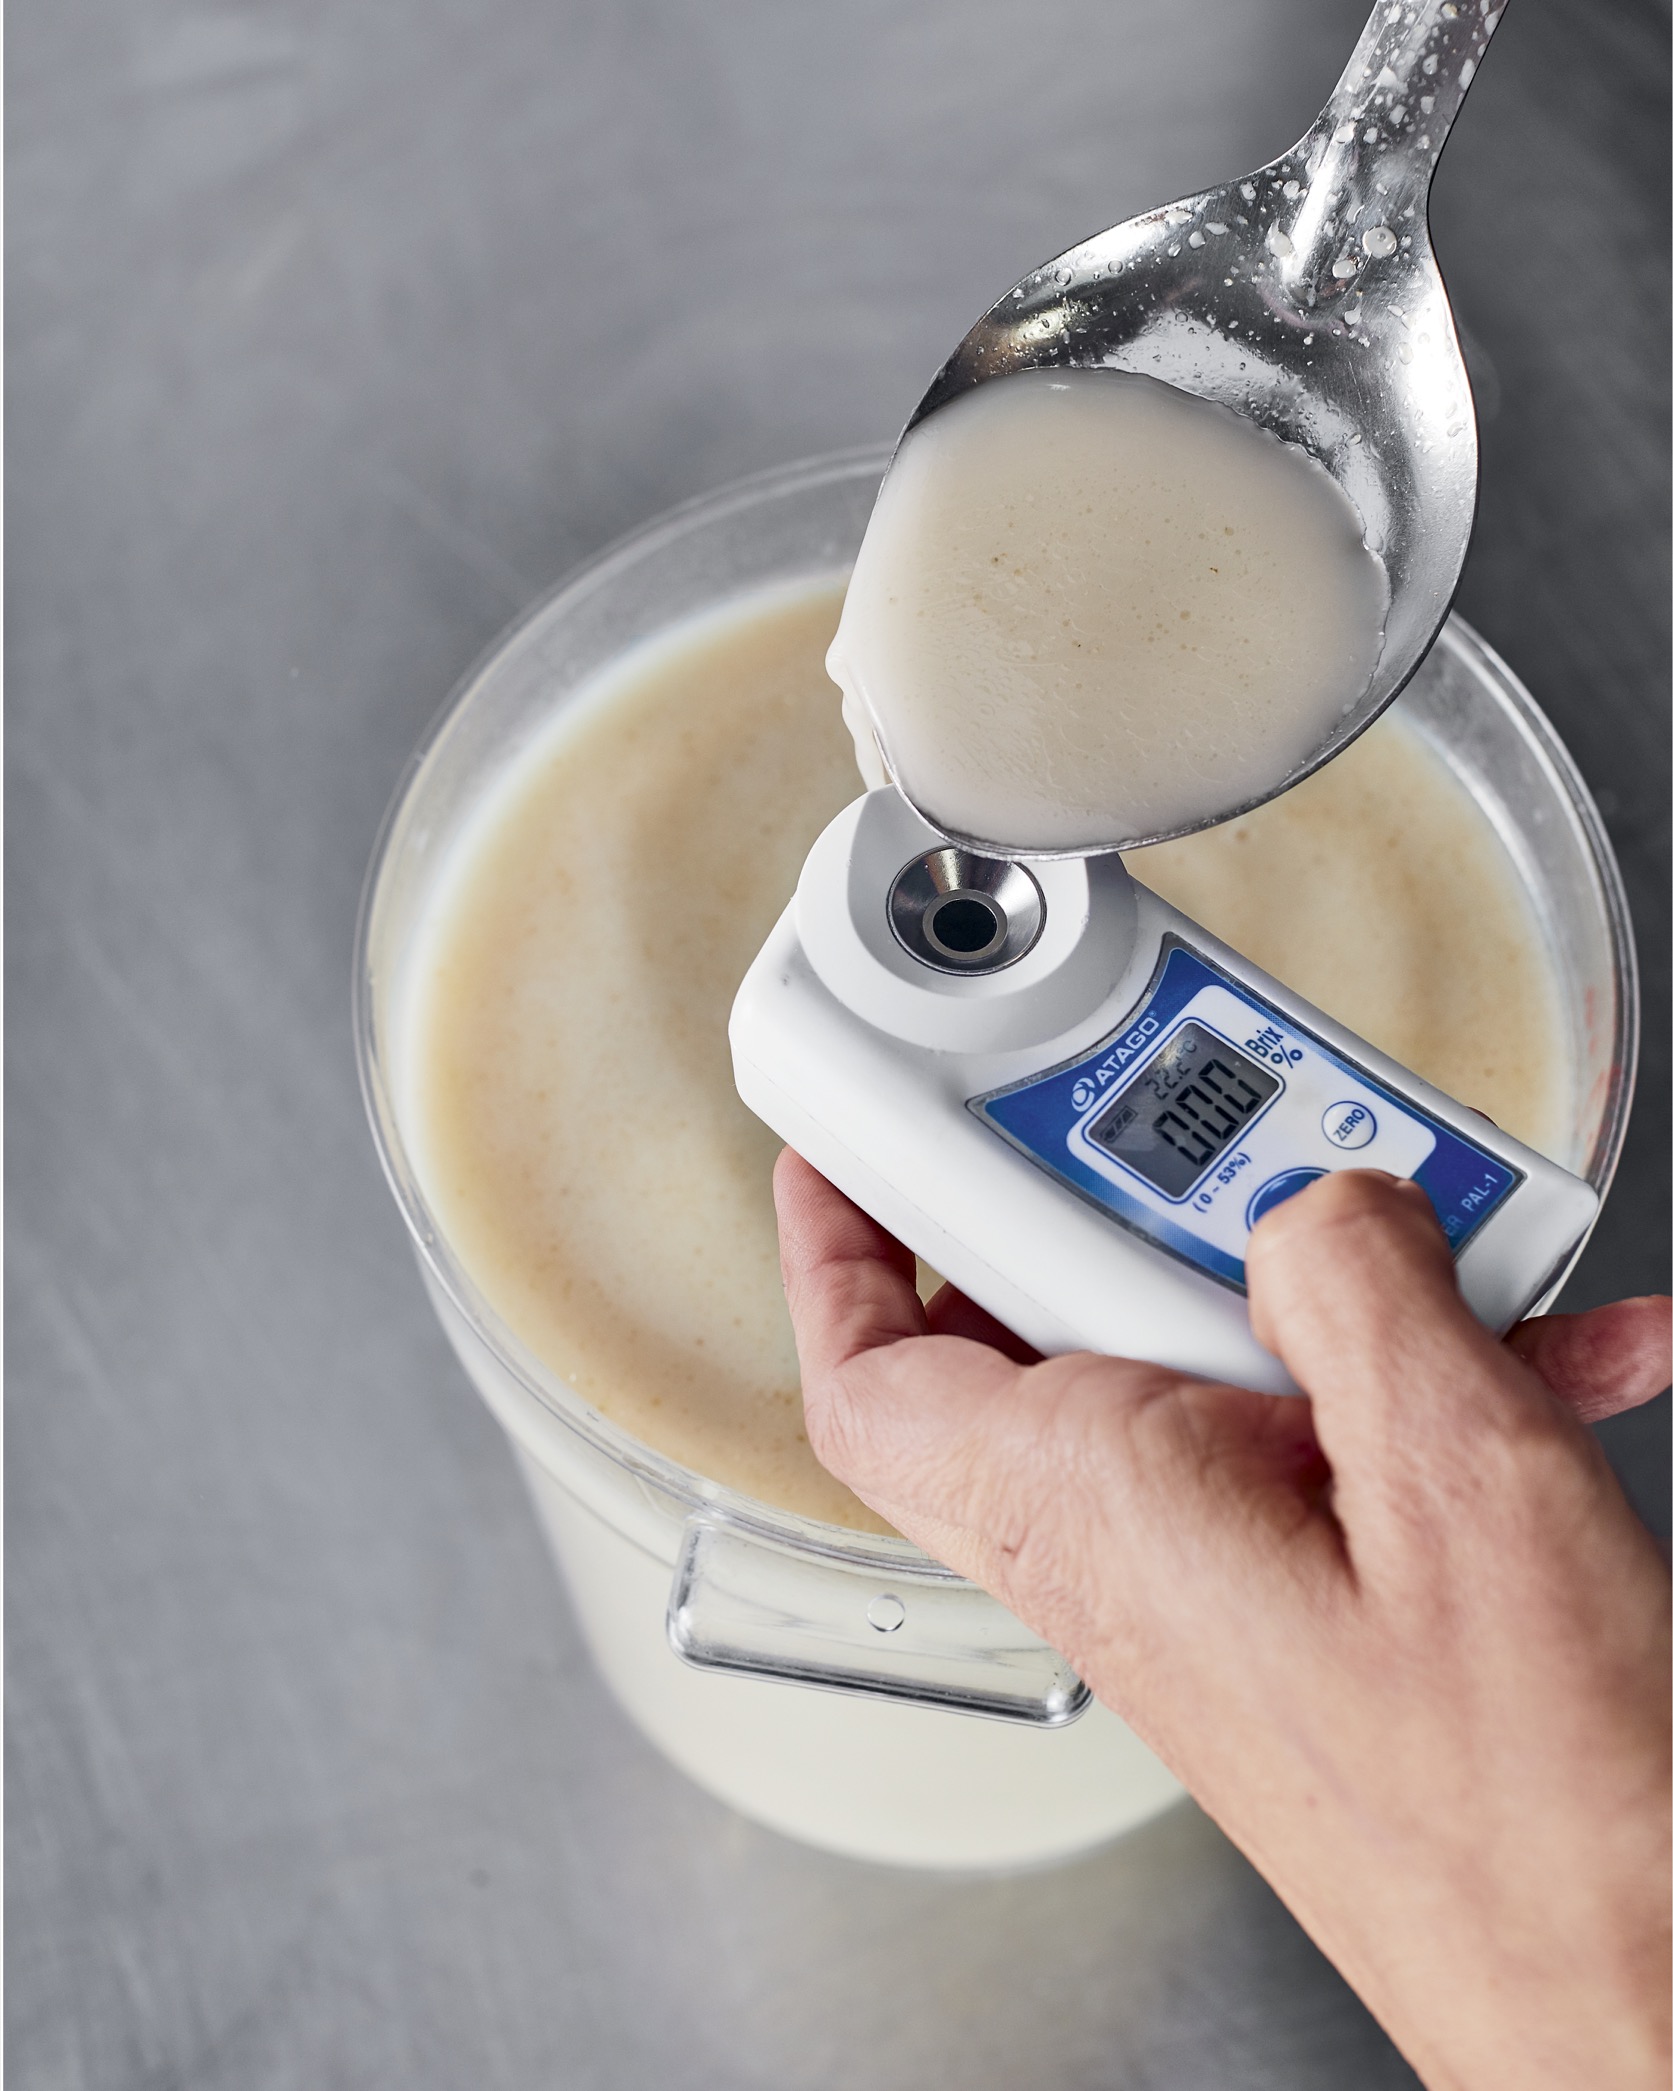
Not necessary but really fun. I will give you license: After your twentieth batch of stock, if you’ve taken it that far and you still want to keep going, then pony up three hundred dollars for one of these. I love this tool because it measures the viscosity (liquid thickness) of the stock and tells you when your stock is ready to be pulled off the stove. When used correctly, the refractometer is kind of addicting. This tool will give you the ability to precisely measure one against the other and become a legit ramen master. Not sure if that twenty-five-dollar chicken was worth the money? This will help you decide. The refractometer measures by Brix. One of the great hallmarks of a bowl of ramen is its viscosity. You may like your ramen at a 4, and someone else might like it at a 6. It can help you establish individuality with your ramen. Your stock is not based completely on just flavor; your pork stock will be complete only when the marrow is released, the collagen is melted, and the calcium is leached from bones. It may stay at a 6 for hours, then all of a sudden go to an 8 because that final bit of calcium creates the viscosity that you’re looking for. It’s these markers the refractometer helps you find and learn. You can find them online or at a brewer’s store, for beer making.
FINE-MESH STRAINER OR CHINOIS
This is vital for straining broths. Cheesecloth placed in a large strainer works as well.
FOOD-GRADE PLASTIC OR GLASS CONTAINERS
For storing soup in the refrigerator. I suggest glass for stock. If you only have plastic, make sure it’s food-grade and only for stock. Your stock will be hot enough to melt plastic.
IMMERSION (HAND) BLENDER OR WHISK
One of the secrets no one tells you: Your favorite ramen shop uses one of these (they just don’t show you) to emulsify the stock. It took me four years to uncover that one!
Where to Buy
Planning ahead is key here; it will make the process less annoying. Try these sources in this order.
1. JAPANESE GROCERY STORE
This is the apex and where you will find all that you need for your ramen: a Japanese-owned grocery store. Hit the internet to find one in your city. A good local market will have dried fish, miso, noodles, sake kasu, shio koji, dashi packets—the works—because these are all normal cooking items for the Japanese.
Recent statistics show that over a hundred billion servings of instant ramen are consumed worldwide each year.
2. ASIAN GROCERY
Large international markets will have some of what you need but not all. You will have to utilize the internet as well to get the more specialty items.
3. GROCERY STORE
You will find vegetables and proteins here but hardly any of the specialty items, though bones may be available here.
4. ONLINE
Almost all your dry goods can be found online. Amazon has a good selection, but the Rakuten Global Market can help as well—it’s worth checking out, but note that some of the English translations are not exact. I have found all the dried fish, shio koji, and sake kasu here as well.
Document the Process
It’s important. The key to making great ramen is to keep doing it, and take notes on each batch so that you can make comparisons. As a home cook, I tend to wing it a lot, kitchen sink it, cook with whatever I have, but when it comes to ramen, I take very detailed notes so that I can continue to hone in on what I prefer. For example, maybe I have a batch of chicken stock where I’ve used whole chickens (minus the breasts) as opposed to carcasses or cages. Which yielded a richer stock, and which tasted better? My notes reveal all. As I noted earlier, you can construct a bowl as you walk through the store, but after you make it, you will want to leave yourself notes for the next time. You might discover it’s worth the fifteen-minute drive across town for that amazing chicken.
