DOUBLE LEAVENING AT WORK
PANCAKES
Pancakes are easy but they can be heavy if you don’t get them just right. Minimal mixing is important (see concept 41), but the real key is the use of leaveners. What makes this tricky is the use of acidic buttermilk, which reacts with the leaveners to produce bubbles in the batter. Buttermilk can give pancakes great flavor and light, fluffy texture. But if the formula isn’t just right, pancakes can be a disaster.
BEST BUTTERMILK PANCAKES
MAKES SIXTEEN 4-INCH PANCAKES, SERVING 4 TO 6
The pancakes can be cooked on an electric griddle. Set the griddle temperature to 350 degrees and cook as directed. The test kitchen prefers a lower-protein all-purpose flour like Gold Medal or Pillsbury for this recipe. If you use an all-purpose flour with a higher protein content, like King Arthur, you will need to add an extra tablespoon or two of buttermilk. Serve with warm maple syrup.
|
2
|
cups (10 ounces) all-purpose flour
|
|
2
|
tablespoons sugar
|
|
1
|
teaspoon baking powder
|
|
½
|
teaspoon baking soda
|
|
½
|
teaspoon salt
|
|
2
|
cups buttermilk
|
|
¼
|
cup sour cream
|
|
2
|
large eggs
|
|
3
|
tablespoons unsalted butter, melted and cooled
|
|
1–2
|
teaspoons vegetable oil
|
1. Adjust oven rack to middle position and heat oven to 200 degrees. Spray wire rack set in rimmed baking sheet with vegetable oil spray; place in oven. Whisk flour, sugar, baking powder, baking soda, and salt together in medium bowl. In second medium bowl, whisk together buttermilk, sour cream, eggs, and melted butter. Make well in center of dry ingredients and pour in wet ingredients; gently stir until just combined (batter should remain lumpy, with few streaks of flour). Do not overmix. Let batter sit for 10 minutes before cooking.
2. Heat 1 teaspoon oil in 12-inch nonstick skillet over medium heat until shimmering. Using paper towels, carefully wipe out oil, leaving thin film of oil on bottom and sides of pan. Using ¼-cup measure, portion batter into pan in 4 places. Cook until edges are set, first side is golden brown, and bubbles on surface are just beginning to break, 2 to 3 minutes. Using thin, wide spatula, flip pancakes and continue to cook until second side is golden brown, 1 to 2 minutes longer. Serve pancakes immediately, or transfer to wire rack in preheated oven. Repeat with remaining batter, using remaining oil as necessary.
 WHY THIS RECIPE WORKS
Too often, buttermilk pancakes lack true tang, and they rarely have the light and fluffy texture we desire. We wanted buttermilk pancakes with a slightly crisp, golden crust surrounding a fluffy, tender center with just enough structure to withstand a good dousing of maple syrup. We achieve this with a sour cream substitution, the use of two leaveners, and some techniques to keep the pancakes nice and tender.
START WITH BUTTERMILK When our forebears set out to make pancakes enriched with the sweet tang of buttermilk, they had a built-in advantage: real buttermilk. Instead of using the thinly flavored liquid processed from skim milk and cultured bacteria that passes for buttermilk today, earlier Americans turned to the fat-flecked byproduct of churning cream into butter. The switch from churned buttermilk to cultured buttermilk accounts for the lack of true tang in most modern-day buttermilk pancakes. We have to use other methods to obtain tang.
SUPPLEMENT WITH SOUR CREAM We wanted more tang in our pancakes, but using more buttermilk didn’t work. More buttermilk means a greater concentration of acid in the mix, which in turn causes the baking soda to bubble too rapidly. The result: pancakes that overinflate when they first cook, then collapse like popped balloons, becoming dense and wet by the time they hit the plate. A little sour cream, on the other hand, adds a ton of flavor but doesn’t radically affect the consistency of the batter. With the extra fat from the sour cream, we found it best to trim butter back to just 3 tablespoons.
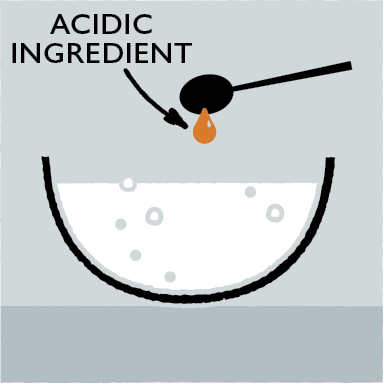
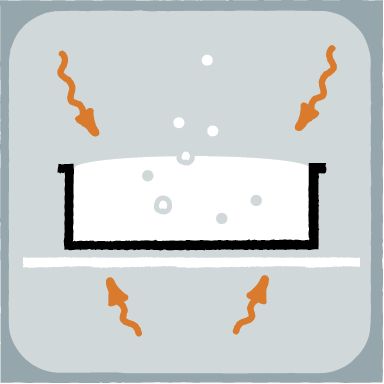
USE TWO LEAVENERS Both baking soda and powder are essential in our pancakes. Baking soda responds to the acid in the buttermilk, producing carbon dioxide gas that aerates the pancakes, while baking powder reacts to the heat of the pan to release more carbon dioxide. Baking soda likewise helps us to get a nice brown color on the pancakes, boosting flavor through the Maillard reaction.
KEEP IT TENDER Three techniques help us to get our pancakes as tender as possible. First, we use a lower-protein all-purpose flour like Gold Medal or Pillsbury (see “Flour 101”). Second, we fold the batter very minimally (see concept 41). And finally, we let the batter rest for 10 minutes before cooking. Why? Even with minimal mixing, some gluten develops in the pancake batter. During a 10-minute rest, the gluten relaxes and the end result is tender pancakes. Don’t worry that the leavening will dissipate. Remember that baking powder is double acting and will provide plenty of lift when the batter hits the hot pan.
MULTIGRAIN PANCAKES
MAKES SIXTEEN 4-INCH PANCAKES, SERVING 4 TO 6
The pancakes can be cooked on an electric griddle. Set the griddle temperature to 350 degrees and cook as directed. Familia brand no-sugar-added muesli is the best choice for this recipe. If you can’t find Familia, look for Alpen or any no-sugar-added muesli. (If you can’t find muesli without sugar, muesli with sugar added will work; reduce the brown sugar in the recipe to 1 tablespoon.) Mix the batter first and then heat the pan. Letting the batter sit while the pan heats will give the dry ingredients time to absorb the wet ingredients; otherwise, the batter will be runny. Serve with maple syrup or Apple, Cranberry, and Pecan Topping (recipe follows).
|
2
|
cups whole milk
|
|
4
|
teaspoons lemon juice
|
|
1¼
|
cups (6 ounces) plus 3 tablespoons no-sugar-added muesli
|
|
¾
|
cup (3¾ ounces) all-purpose flour
|
|
½
|
cup (2¾ ounces) whole-wheat flour
|
|
2
|
tablespoons packed brown sugar
|
|
2¼
|
teaspoons baking powder
|
|
½
|
teaspoon baking soda
|
|
½
|
teaspoon salt
|
|
2
|
large eggs
|
|
3
|
tablespoons unsalted butter, melted and cooled
|
|
¾
|
teaspoon vanilla extract
|
|
1–2
|
teaspoons vegetable oil
|
1. Adjust oven rack to middle position and heat oven to 200 degrees. Spray wire rack set in rimmed baking sheet with vegetable oil spray; place in oven. Whisk milk and lemon juice together in large measuring cup; set aside while preparing other ingredients.
2. Process 1¼ cups muesli in food processor until finely ground, 2 to 2½ minutes; transfer to large bowl. Add remaining 3 tablespoons unground muesli, all-purpose flour, whole-wheat flour, sugar, baking powder, baking soda, and salt; whisk to combine.
3. Add eggs, melted butter, and vanilla to milk mixture and whisk until combined. Make well in center of dry ingredients; pour in milk mixture and whisk very gently until just combined (batter should remain lumpy with few streaks of flour). Do not overmix. Allow batter to sit while pan heats.
4. Heat 1 teaspoon oil in 12-inch nonstick skillet over medium heat until shimmering. Using paper towels, carefully wipe pan, leaving thin film of oil on bottom and sides of pan. Using ¼-cup measure, portion batter into pan in 4 places. Cook until small bubbles begin to appear evenly over surface, 2 to 3 minutes. Using thin, wide spatula, flip pancakes and cook until second side is golden brown, 1½ to 2 minutes longer. Serve pancakes immediately or transfer to wire rack in preheated oven. Repeat with remaining batter, using remaining oil as necessary.
APPLE, CRANBERRY, AND PECAN TOPPING
SERVES 4 TO 6
We prefer semifirm apples, such as Fuji, Gala, or Braeburn, for this topping. Avoid very tart apples, such as Granny Smith, and soft varieties like McIntosh.
|
3½
|
tablespoons unsalted butter, chilled
|
|
1¼
|
pounds apples, peeled, cored, and cut into ½-inch pieces
|
|
|
Pinch salt
|
|
1
|
cup apple cider
|
|
½
|
cup dried cranberries
|
|
½
|
cup maple syrup
|
|
1
|
teaspoon lemon juice
|
|
½
|
teaspoon vanilla extract
|
|
¾
|
cup pecans, toasted and chopped coarse
|
Melt 1½ tablespoons butter in 12-inch skillet over medium-high heat. Add apples and salt; cook, stirring occasionally, until softened and browned, 7 to 9 minutes. Stir in cider and cranberries; cook until liquid has almost evaporated, 6 to 8 minutes. Stir in maple syrup and cook until thickened, 4 to 5 minutes. Add remaining 2 tablespoons butter, lemon juice, and vanilla; whisk until sauce is smooth. Serve with toasted nuts.
 WHY THIS RECIPE WORKS
Bland, dense, and gummy, most multigrain pancakes are more about appeasing your diet than pleasing your palate. We wanted flavorful, fluffy, and healthful flapjacks. After testing lots of grains, we found that muesli had all the ingredients and flavor we wanted in one convenient package—raw whole oats, wheat germ, rye, barley, toasted nuts, and dried fruit. But pancakes made with whole muesli are too chewy and gummy. We solve this problem by converting muesli into a flour and combining it with some other flour options, as well as using two leaveners.
MOCK BUTTERMILK When testing our multigrain pancakes, we found that using buttermilk made them taste too sour, impinging on the flavor of our grains. But if we did away with the buttermilk entirely, we would have to rethink our leaveners. (After all, baking soda needs acid to react.) But what if we simply used a less acidic-tasting blend of milk and lemon juice? That turned out to be the answer. The milk and lemon juice mixture makes for a surprisingly cleaner, richer-tasting pancake with an even lighter texture.
MAKE INSTANT MULTIGRAIN FLOUR Some multigrain pancake recipes load up on unprocessed grains—great for flavor but bad for texture. To avoid gummy, chewy pancakes, we make our own multigrain “flour” by processing store-bought muesli cereal in a food processor. To give our pancakes a subtle hint of that hearty whole-grain texture, we add a few tablespoons of unprocessed muesli to the batter, too.
USE TWO LEAVENERS Many chemically leavened pancake recipes include both baking powder and soda—especially when they’re bulked up with heavy grains. The combination makes for fail-safe leavening and thorough browning. (After all, baking soda is a browning agent.)
LET THE BATTER REST To get light, fluffy pancakes, it’s important to let the batter rest while the pan heats (a full five minutes). The flour needs this time to absorb all the liquid, thus ensuring that the batter sets up properly. Skip this step and the pancakes will run together in the pan and cook up flat, not to mention misshapen. Properly rested batter will maintain its shape when poured into the pan and will produce tall and fluffy pancakes.
DOUBLE LEAVENING AT WORK
BISCUITS
While most biscuits require working cold fat into the flour (see concept 43), you can make biscuits by the quick-bread method: Simply combine melted butter with buttermilk and then add this liquid mixture to the dry mixture.
EASY BUTTERMILK DROP BISCUITS
MAKES 12 BISCUITS
A ¼-cup portion scoop can be used to portion the batter. To refresh day-old biscuits, heat them in a 300-degree oven for 10 minutes.
|
2
|
cups (10 ounces) all-purpose flour
|
|
2
|
teaspoons baking powder
|
|
½
|
teaspoon baking soda
|
|
1
|
teaspoon sugar
|
|
¾
|
teaspoon salt
|
|
1
|
cup buttermilk, chilled
|
|
8
|
tablespoons unsalted butter, melted and cooled slightly, plus 2 tablespoons melted
|
1. Adjust oven rack to middle position and heat oven to 475 degrees. Line rimmed baking sheet with parchment paper. Whisk flour, baking powder, baking soda, sugar, and salt together in large bowl. Combine buttermilk and 8 tablespoons melted butter in medium bowl, stirring until butter forms small clumps.
2. Add buttermilk mixture to flour mixture and stir with rubber spatula until just incorporated and batter pulls away from sides of bowl. Using greased ¼-cup dry measure and working quickly, scoop level amount of batter and drop onto prepared baking sheet (biscuits should measure about 2¼ inches in diameter and 1¼ inches high). Repeat with remaining batter, spacing biscuits about 1½ inches apart. Bake until tops are golden brown and crisp, 12 to 14 minutes.
3. Brush biscuit tops with remaining 2 tablespoons melted butter. Transfer to wire rack and let cool for 5 minutes before serving.
 WHY THIS RECIPE WORKS
We wanted a drop biscuit recipe that would offer a no-nonsense alternative to traditional rolled biscuits, with the same tenderness and buttery flavor. Too many drop biscuits are dense, gummy, and doughy or lean and dry; we wanted a biscuit that could be easily broken apart and eaten piece by buttery piece. Proper leavening and, surprisingly, lumpy butter turned out to be the secret.
USE REGULAR ALL-PURPOSE You don’t want a super-soft flour here. Since the dough is not kneaded or rolled, you actually want a little gluten for the structure of your biscuits, and all-purpose flour has more protein than softer flours (see “Flour 101”).
PICK BUTTERMILK Buttermilk provides much-needed flavor in such a basic biscuit recipe. But it does more. Adding buttermilk allows us to likewise add baking soda (along with baking powder). The baking soda reacts with the acid in the buttermilk and gives the biscuits a crisper, browner exterior and fluffier middle.
CLUMP THE BUTTER Usually, properly combining melted butter with buttermilk (or any liquid) requires that both ingredients be at just the right temperature; if they aren’t, the melted butter clumps in the cold buttermilk. Since this is supposed to be an easy recipe, we simply use lumpy buttermilk. This may look like a mistake, but it actually mimics the chunks of fat in a classic biscuit recipe (see concept 43). The result is a surprisingly better biscuit, slightly higher and with better texture. It turns out that the water in the lumps of butter turn to steam in the oven, helping create additional height.
DOUBLE LEAVENING AT WORK
COOKIES
Cookies seem so simple. Even kids can make them, right? Wrong. As it turns out, cookie recipes are complex chemical formulas with little room for error. And the simpler the cookie, the bigger the challenge. Texture is the most challenging part of any cookie recipe and is especially important in simple cookies, such as sugar cookies, where there aren’t big flavors that might otherwise hide textural imperfections. Understanding how to use baking powder and baking soda is the key to getting texture right in many cookies.
CHEWY SUGAR COOKIES
MAKES ABOUT 24 COOKIES
The final dough will be slightly softer than most cookie dough. For best results, handle the dough as briefly and gently as possible when shaping the cookies. Overworking the dough will result in flatter cookies.
|
2¼
|
cups (11¼ ounces) all-purpose flour
|
|
1
|
teaspoon baking powder
|
|
½
|
teaspoon baking soda
|
|
½
|
teaspoon salt
|
|
1½
|
cups (10½ ounces) plus 1⁄3 cup (21⁄3 ounces) sugar
|
|
2
|
ounces cream cheese, cut into 8 pieces
|
|
6
|
tablespoons unsalted butter, melted and still warm
|
|
1⁄3
|
cup vegetable oil
|
|
1
|
large egg
|
|
1
|
tablespoon whole milk
|
|
2
|
teaspoons vanilla extract
|
1. Adjust oven rack to middle position and heat oven to 350 degrees. Line 2 baking sheets with parchment paper. Whisk flour, baking powder, baking soda, and salt together in medium bowl. Set aside.
2. Place 1½ cups sugar and cream cheese in large bowl. Place remaining 1⁄3 cup sugar in shallow dish and set aside. Pour warm butter over sugar and cream cheese and whisk to combine (some small lumps of cream cheese will remain but will smooth out later). Whisk in oil until incorporated. Add egg, milk, and vanilla; continue to whisk until smooth. Add flour mixture and mix with rubber spatula until soft, homogeneous dough forms.
3. Working with 2 tablespoons of dough at a time, roll into balls. Working in batches, roll half of dough balls in sugar to coat and set on prepared baking sheet; repeat with remaining dough balls. Using bottom of greased measuring cup, flatten dough balls until 2 inches in diameter. Sprinkle tops of cookies evenly with sugar remaining in shallow dish, using 2 teaspoons for each baking sheet. (Discard remaining sugar.)
4. Bake 1 sheet at a time until edges of cookies are set and beginning to brown, 11 to 13 minutes, rotating baking sheet halfway through baking. Let cookies cool on baking sheet for 5 minutes; transfer cookies to wire rack and let cool to room temperature.
CHEWY CHAI-SPICE SUGAR COOKIES
Add ¼ teaspoon ground cinnamon, ¼ teaspoon ground ginger, ¼ teaspoon ground cardamom, ¼ teaspoon ground cloves, and pinch pepper to sugar and cream cheese mixture and reduce vanilla to 1 teaspoon.
CHEWY COCONUT-LIME SUGAR COOKIES
Whisk ½ cup sweetened shredded coconut, chopped fine, into flour mixture in step 1. Add 1 teaspoon finely grated lime zest to sugar and cream cheese mixture and substitute 1 tablespoon lime juice for vanilla.
CHEWY HAZELNUT–BROWNED BUTTER SUGAR COOKIES
Add ¼ cup finely chopped toasted hazelnuts to sugar and cream cheese mixture. Instead of melting butter, heat it in 10-inch skillet over medium-high heat until melted, about 2 minutes. Continue to cook, swirling pan constantly, until butter is dark golden brown and has nutty aroma, 1 to 3 minutes. Immediately pour butter over sugar and cream cheese mixture and proceed with recipe as directed, increasing milk to 2 tablespoons and omitting vanilla.
 WHY THIS RECIPE WORKS
Traditional recipes for sugar cookies require obsessive attention to detail. The butter must be at precisely the right temperature and it must be creamed to the proper degree of airiness. Slight variations in measures can result in cookies that spread or become brittle and hard upon cooling. We didn’t want a cookie that depended on such a finicky process; we wanted an approachable recipe for great sugar cookies that anyone could make anytime. We melted the butter so our sugar cookie dough could easily be mixed together with a spoon—no more fussy creaming. Replacing a portion of the melted butter with vegetable oil ensured a chewy cookie without affecting flavor. And incorporating an unusual addition, cream cheese, into the cookie dough kept our cookies tender, while the slight tang of the cream cheese made for a rich, not-too-sweet flavor.
MANAGE THE FATS The key to chewy texture is all in the fat. For optimal chew, a recipe must contain saturated and unsaturated fat in approximately a 1:3 ratio. When combined, the two types of fat molecules form a sturdier crystalline structure that requires more force to bite through than the structure formed from a high proportion of saturated fats. This is why we couldn’t develop a recipe that called for butter alone (as many of them do). Butter is predominantly—but not entirely—saturated fat, and an all-butter cookie actually contains approximately 2 parts saturated fat to 1 part unsaturated fat. For optimal chew, we needed to reverse this ratio and then some. This is why we add oil to our recipe, just enough to fix the fat ratio without affecting flavor.
MELT THE BUTTER Because we are using less butter, we melt it rather than cream it. This does three things. First, it eliminates one of the trickier aspects of baking sugar cookies: ensuring that the solid butter is just the right temperature. Second, melted butter aids in our quest for chewiness. When liquefied, the small amount of water in butter mixes with the flour to form gluten, which makes for chewier cookies. Finally, with creaming out of the equation, we no longer need to pull out our stand mixer. We can make these cookies completely by hand.
USE CREAM CHEESE Cream cheese enriches the dough’s flavor without adding moisture like other tangy dairy products. Cream cheese contains less than one-third the amount of overall fat of vegetable oil, but most of it is saturated. A modest 2 ounces of cream cheese did not markedly impact the chewy texture of the cookies.
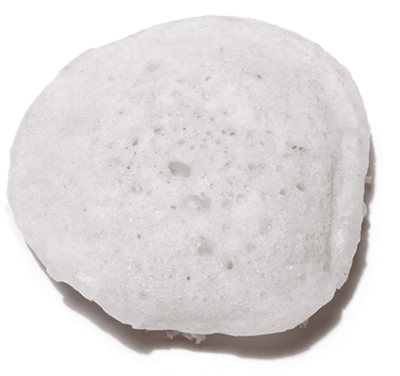
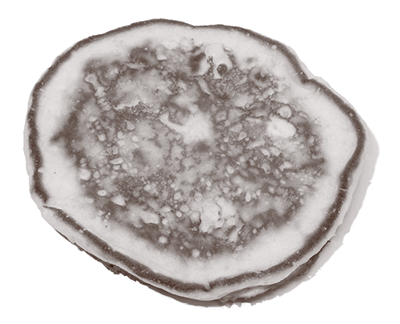
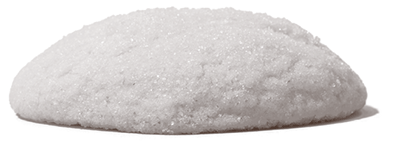
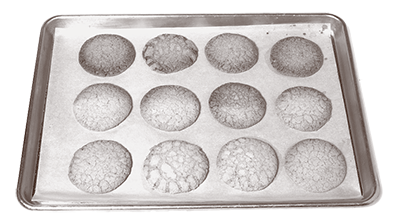
ADD BAKING SODA Cream cheese doesn’t just add flavor. It adds acidity. And this allows us to add baking soda. As long as there’s an acidic ingredient present, baking soda has all sorts of special powers, including the ability to solve the cookies’ other two pesky problems: a slightly humped shape and not enough crackle. Just ½ teaspoon produces cookies that look as good as they taste. (See “Dynamic Duo: Baking Powder + Baking Soda”).
THIN AND CRISPY OATMEAL COOKIES
MAKES ABOUT 24 COOKIES
Do not use instant or quick oats in this recipe.
|
1
|
cup (5 ounces) all-purpose flour
|
|
¾
|
teaspoon baking powder
|
|
½
|
teaspoon baking soda
|
|
½
|
teaspoon salt
|
|
14
|
tablespoons unsalted butter, softened but still cool (60 degrees)
|
|
1
|
cup (7 ounces) granulated sugar
|
|
¼
|
cup packed (1¾ ounces) light brown sugar
|
|
1
|
large egg
|
|
1
|
teaspoon vanilla extract
|
|
2½
|
cups (7½ ounces) old-fashioned rolled oats
|
1. Adjust oven rack to middle position and heat oven to 350 degrees. Line 3 baking sheets with parchment paper. Whisk flour, baking powder, baking soda, and salt together in medium bowl; set aside.
2. Using stand mixer fitted with paddle, beat butter, granulated sugar, and brown sugar at medium-low speed until just combined, about 20 seconds. Increase speed to medium and continue to beat until light and fluffy, about 1 minute longer, scraping down bowl as needed. Add egg and vanilla and beat on medium-low until fully incorporated, about 30 seconds, scraping down bowl as needed. Reduce speed to low, add flour mixture, and mix until just incorporated and smooth, about 10 seconds. With mixer still running on low, gradually add oats and mix until well incorporated, about 20 seconds. Give dough final stir to ensure that no flour pockets remain and ingredients are evenly distributed.
3. Working with 2 tablespoons of dough at a time, roll into balls and place 2½ inches apart on prepared baking sheets. Using fingertips, gently press each dough ball to ¾-inch thickness.
4. Bake 1 sheet at a time until cookies are deep golden brown, edges are crisp, and centers yield to slight pressure when pressed, 13 to 16 minutes, rotating baking sheet halfway through baking. Transfer baking sheet to wire rack and let cookies cool completely.
THIN AND CRISPY COCONUT-OATMEAL COOKIES
Decrease oats to 2 cups and add 1½ cups sweetened shredded coconut to batter with oats.
THIN AND CRISPY ORANGE-ALMOND OATMEAL COOKIES
Beat 2 teaspoons grated orange zest with butter and sugars. Decrease oats to 2 cups and add 1 cup coarsely chopped toasted almonds to batter with oats.
SALTY THIN AND CRISPY OATMEAL COOKIES
We prefer the texture and flavor of a coarse-grained sea salt, such as Maldon or fleur de sel, but kosher salt can be used. If using kosher salt, reduce the amount sprinkled over the cookies to ¼ teaspoon.
Reduce amount of salt in dough to ¼ teaspoon. Lightly sprinkle ½ teaspoon coarse sea salt evenly over flattened dough balls before baking.
 WHY THIS RECIPE WORKS
Thin and crispy oatmeal cookies can be irresistible—crunchy and delicate, these cookies really let the flavor of the oats take center stage. But the usual ingredients that give thick, chewy oatmeal cookies great texture—generous amounts of sugar and butter, a high ratio of oats to flour, a modest amount of leavener, eggs, raisins, and nuts—won’t all fit in a thin, crispy cookie. We wanted to adjust the standard ingredients to create a crisp, delicate cookie in which the simple flavor of buttery oats really stands out. Scaling back the sugar and fine-tuning our leavening did the trick.
GO WITH OLD-FASHIONED Whole hulled oats are called groats. After being heated to inhibit rancidity, they are further processed, according to the particular style. Steel-cut oats are groats sliced into three or four pieces by steel blades. Old-fashioned or rolled oats are groats steamed and rolled flat or flaked. Quick oats are steel-cut oats steamed and rolled to one third (or less) the thickness of regular rolled oats. And instant oats are very finely cut groats that are rapidly cooked and rolled flat.
When baking, we prefer to use old-fashioned oats for the best texture and flavor. Quick oats can be used in many recipes, in a pinch; their flavor is weaker and the texture of the baked good might be slightly less chewy. We don’t recommend baking with instant oats—they are very bland and their powdery texture can negatively impact many baked goods. And never bake with steel-cut oats. The results in anything from scones to cookies can be like aquarium gravel. Steel-cut oats do make a great breakfast, however.
CREAM THE BUTTER Creaming the butter, rather than melting it, tends to make a crisper cookie. When solid butter is mixed with sugar, air is incorporated into the mixture and held there by the crystals of solid fat. This is especially true when they’re mixed on medium speed until light and fluffy. This extra air allows the cookies to dry faster in the oven, producing crispier cookies (see concept 46). Limiting the sugar also helps with crispness (the greater the amount of sugar, the chewier the cookie). Using all granulated sugar makes the cookies hard and crunchy, with a one-dimensional, overly sweet flavor. Using light brown sugar in place of some of the granulated aids in the flavor—with subtle caramel notes—without compromising texture.
SPREAD EVEN If the cookies don’t spread evenly, the edges end up thinner and crisper than the center, which is thicker and chewier. We wanted to create a dough that would spread evenly, but a liquid-y dough baked up too thin, like lace cookies. We found that using two leaveners, and plenty of each, helped. During baking, large carbon dioxide bubbles created by the baking soda and baking powder (upped from our traditional recipe) caused the cookies to puff up, collapse, and spread out, producing the thin, flat cookies we were looking for.
PRESS, THEN BAKE Pressing the dough balls flat encourages an even spread. Baking the cookies all the way through until they are fully set and evenly browned from center to edge makes them crisp throughout but not tough.
