
Designed by Barbara Benson
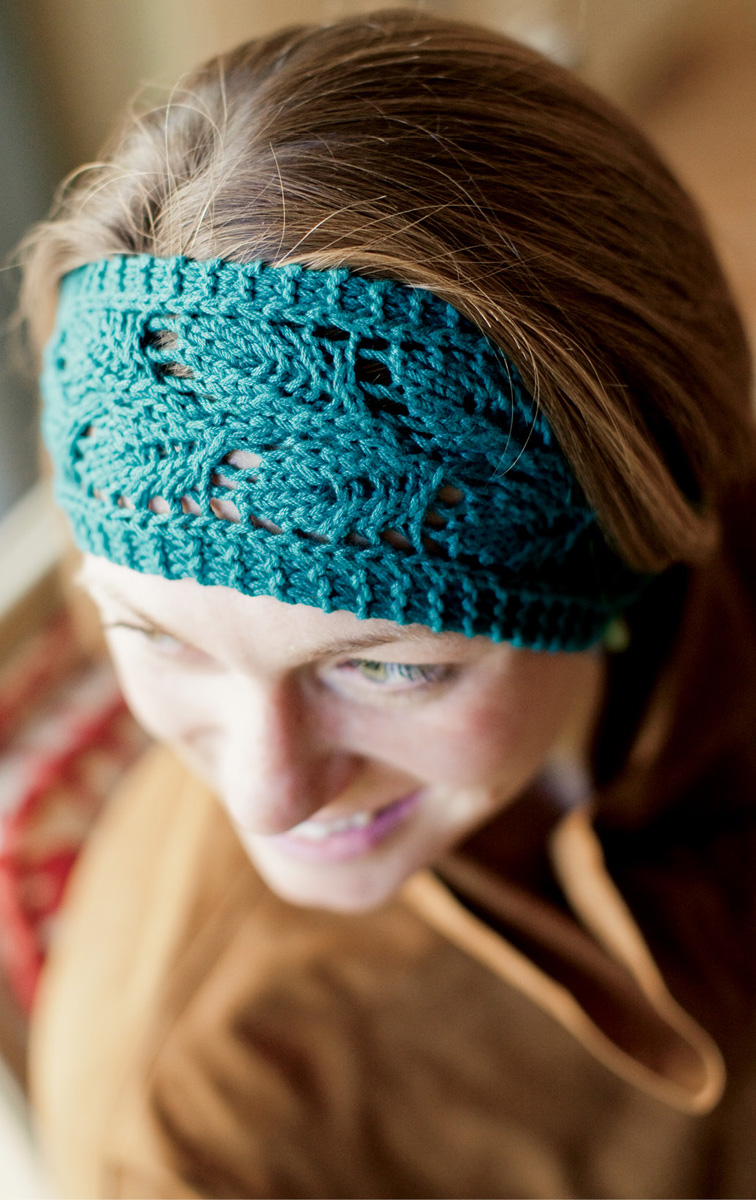
A light and lacy cotton headband can be the perfect accessory on a warm summer day. Knitted in cotton, this one tapers to a narrow strip at the back and joins end to end with a button closure, making it comfortable as well as practical.
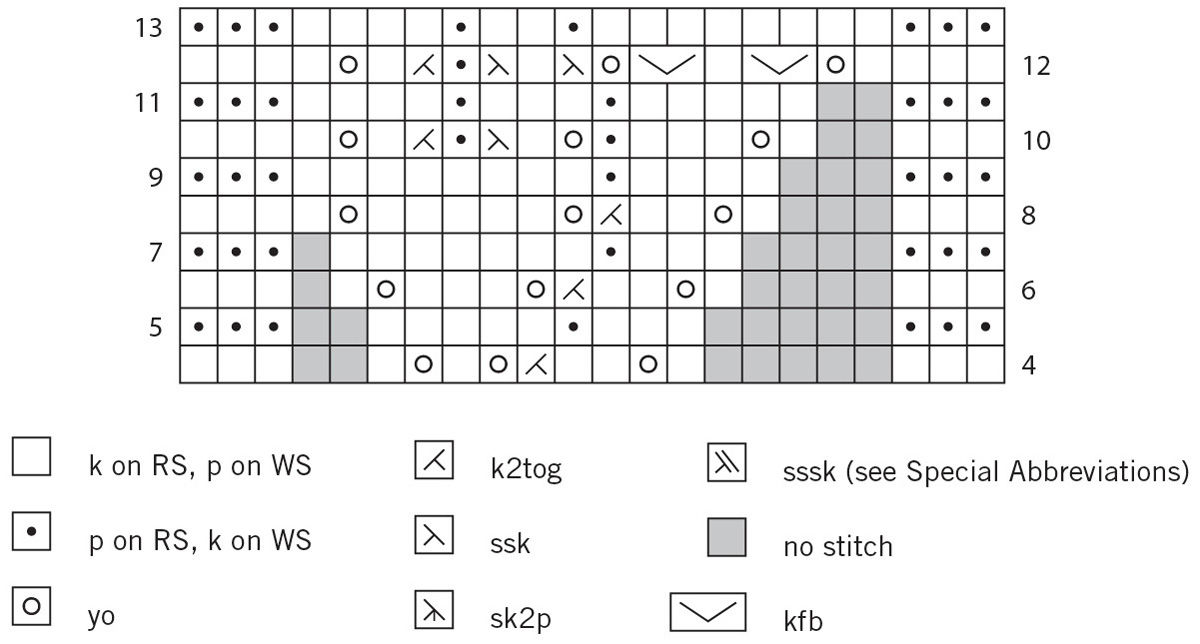
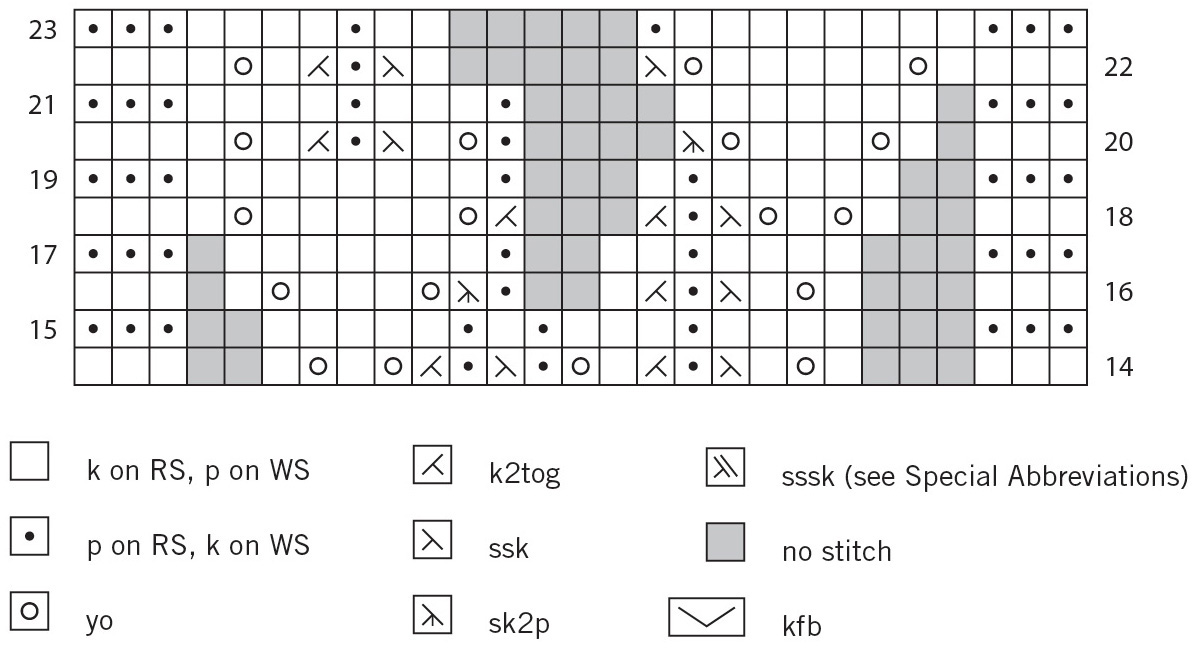
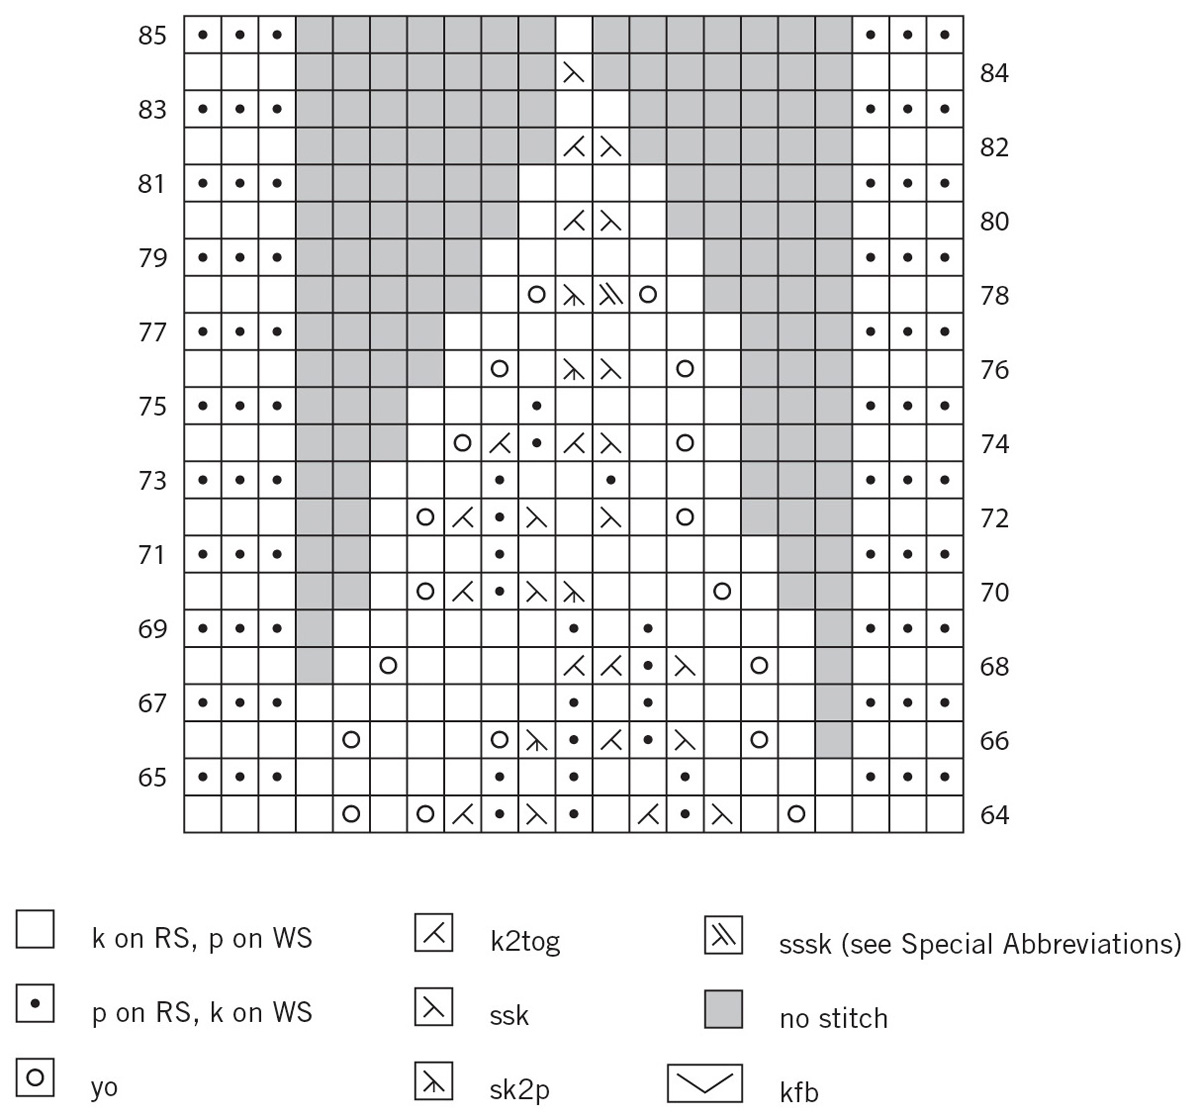
Note: Chart B begins with 22 stitches, decreases to 21 stitches for Rows 16 and 17, then increases back to 22 stitches for Rows 18–23.
Designed by Kirsti Johanson
Lucy Steele from Jane Austen’s Sense and Sensibility is the inspiration for these bags. The larger bag features I-cord handles and can be used as a small tote. The smaller bag has a satin ribbon closure and can be used as a dresser bag.
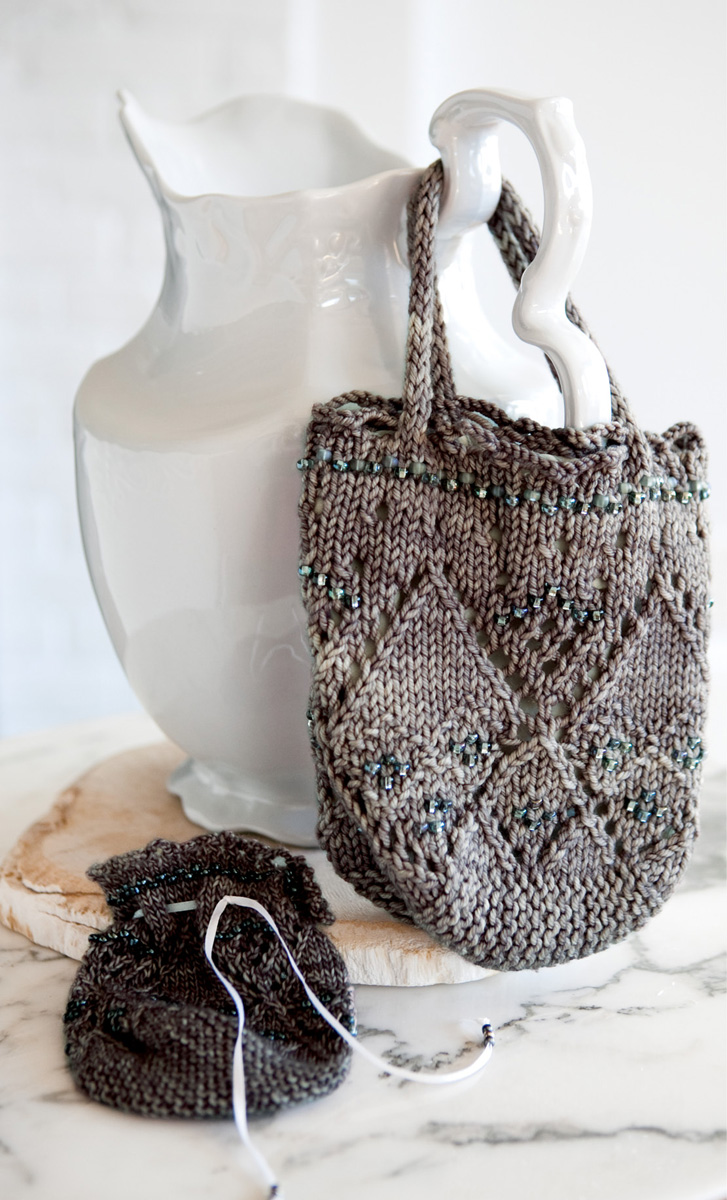
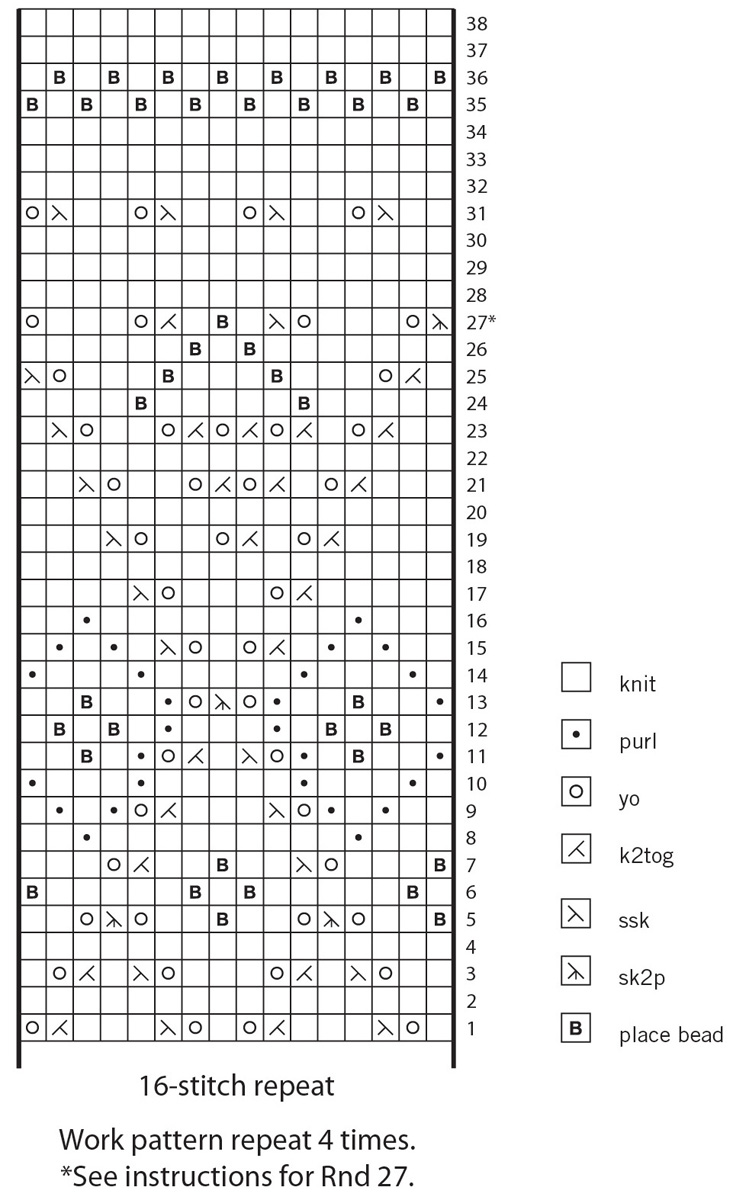
Place Bead: Slide a bead onto the crochet hook, remove next stitch from left-hand needle with the crochet hook, push the bead down onto the stitch, return stitch to left-hand needle, then work the beaded stitch in pattern.
Note: Both bags are worked according to the same instructions; the different yarn and needles determine the finished size.
You now have 64 stitches total: 16 stitches each on four needles.
Designed by Jenise Reid
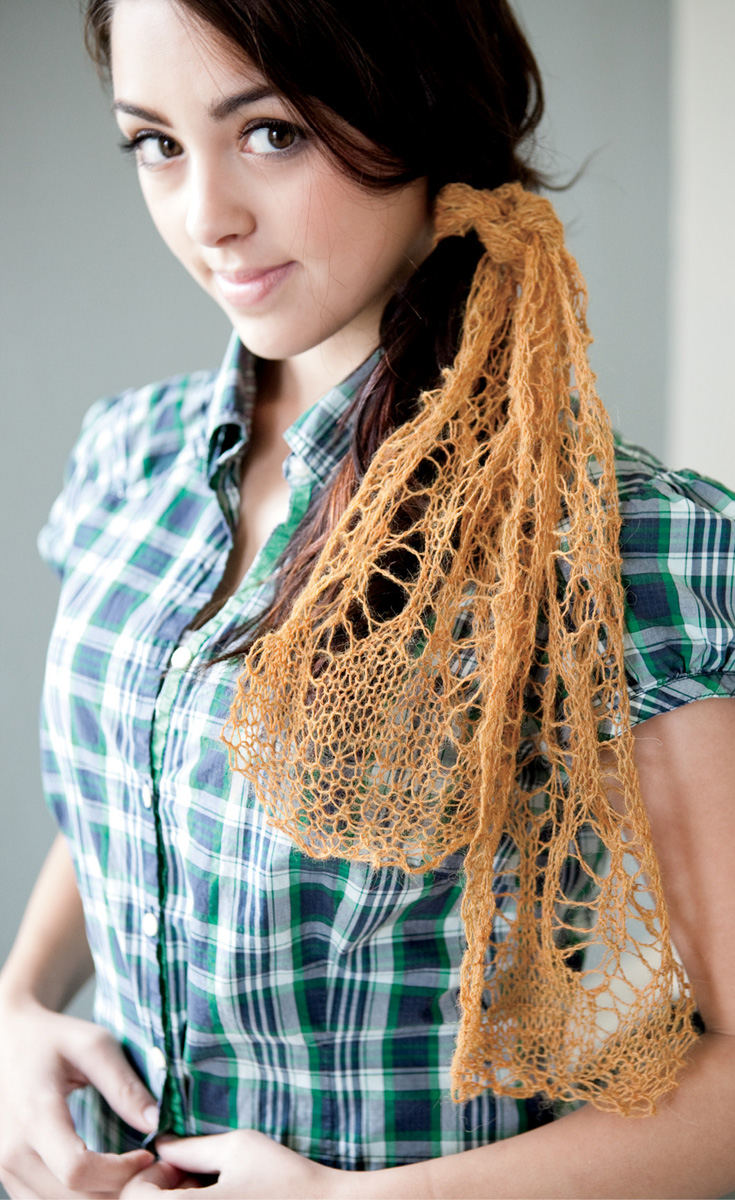
Here’s a great example of working with fine lace-weight yarn on large needles — the result is very light and airy. Use this tie on your ponytail, wear it tied as a headband, or wear it around your neck as a scarf. Anything goes.

Designed by Laura H. Turnbull
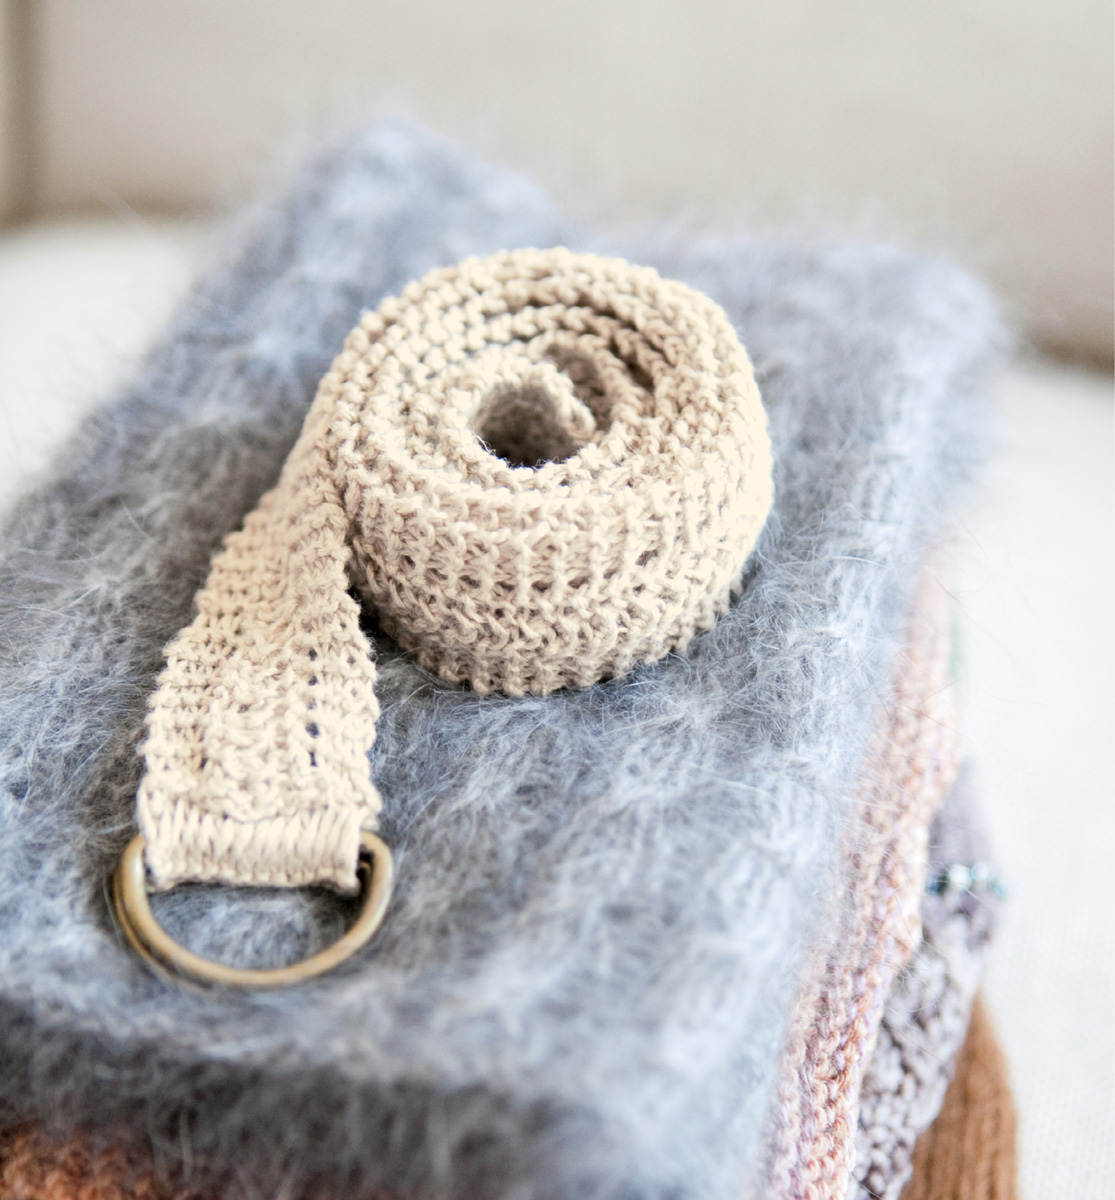
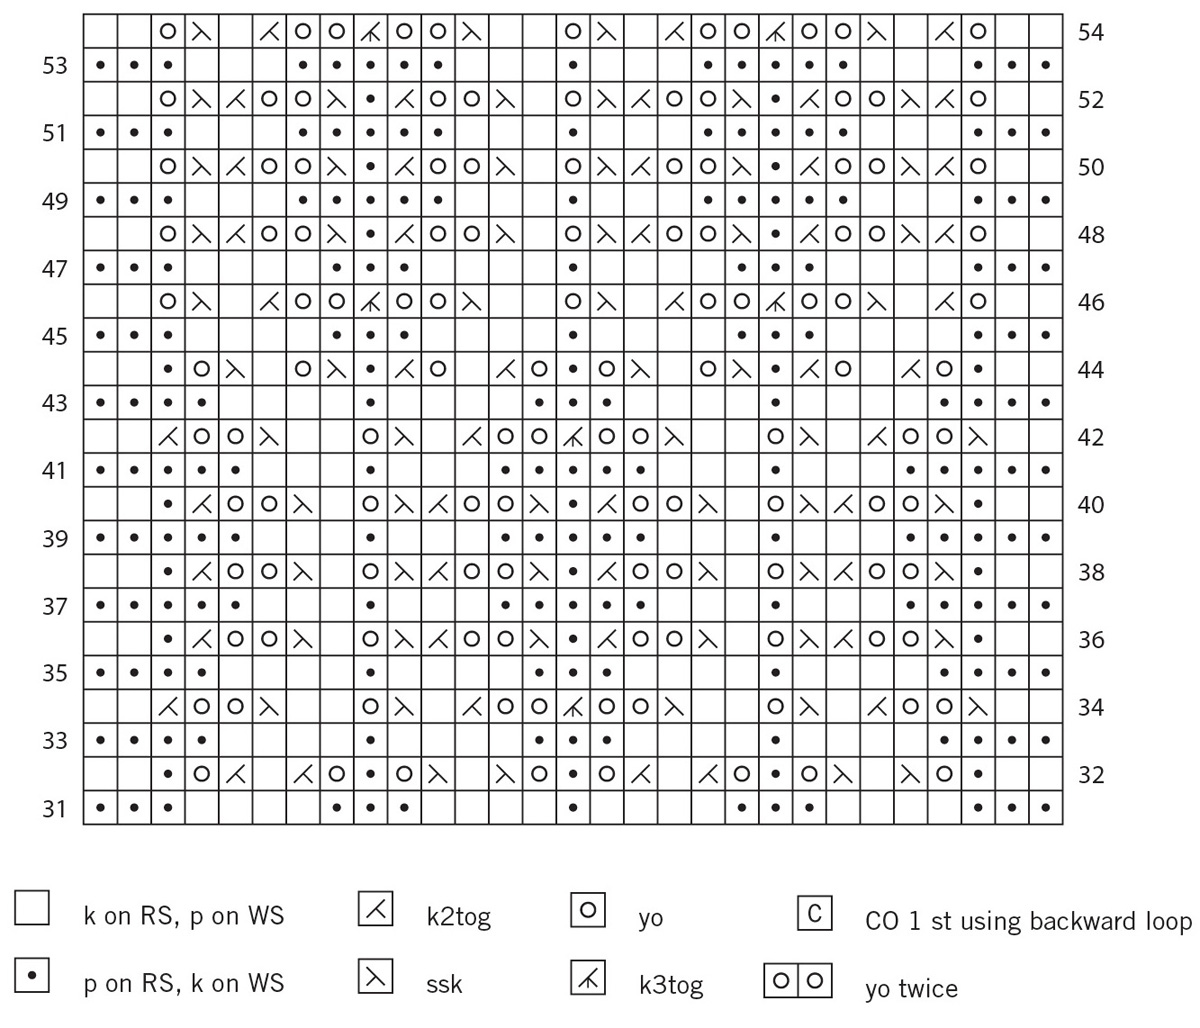
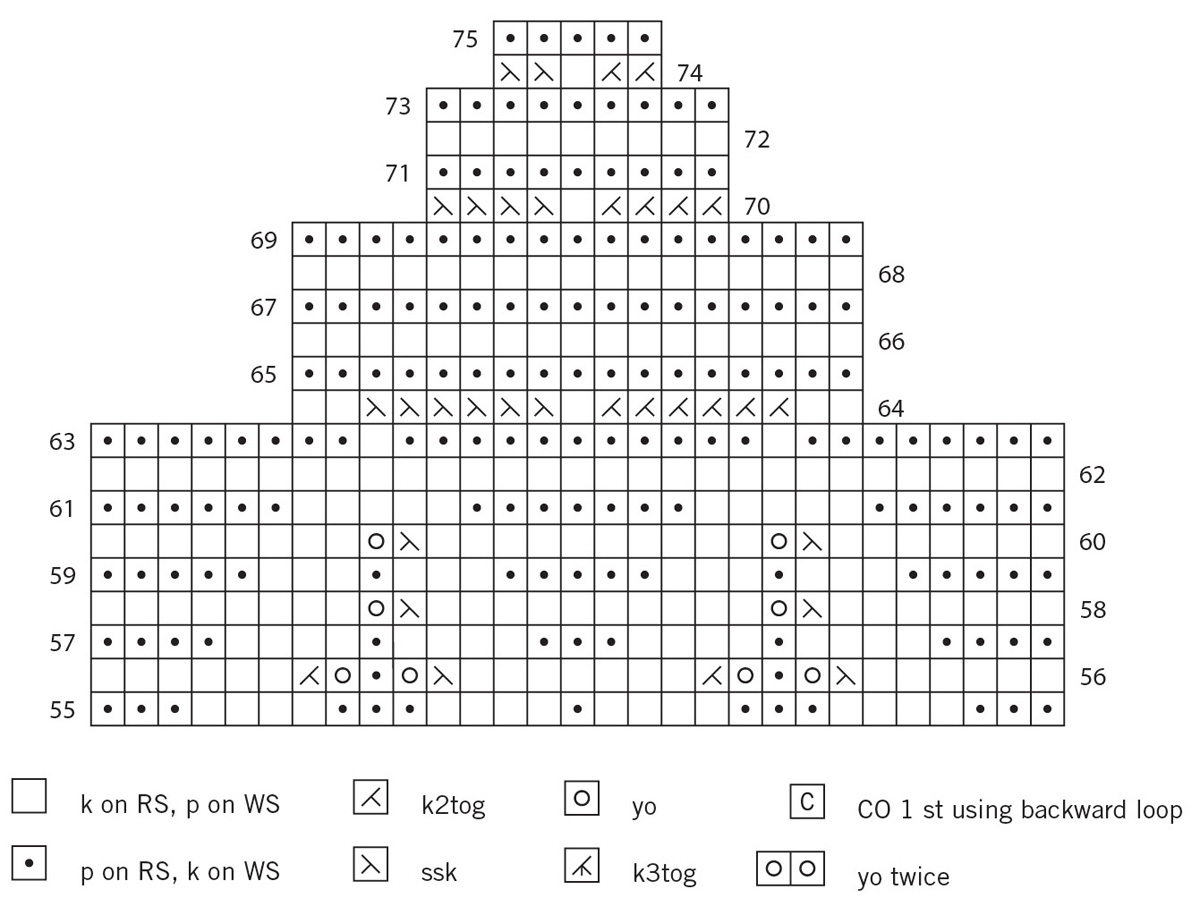
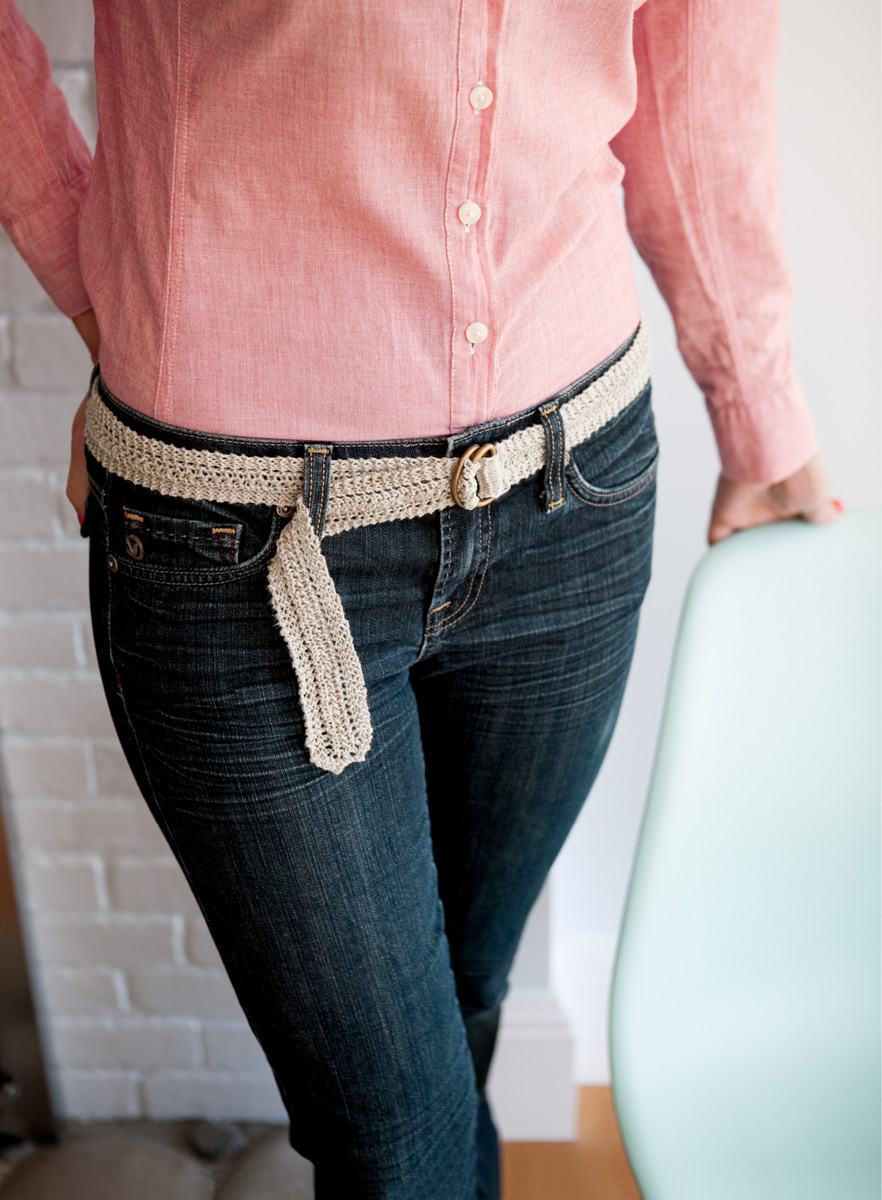
Pair this linen belt with your favorite tank dress for a lovely summer outfit or wear it with your favorite jeans. Knit with a simple two-row repeating lace pattern, it works up quickly — you may want to knit several in different colors.
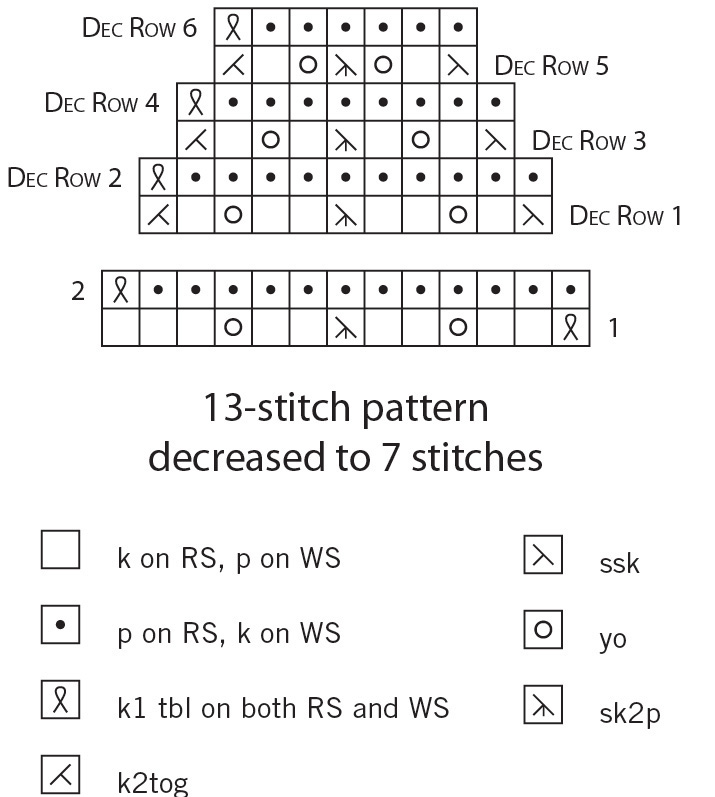
Row 1 (RS): K1 tbl, k2, yo, k2, sk2p, k2, yo, k3.
Row 2 (WS): K1 tbl, knit to end of row.
Repeat Rows 1 and 2 for pattern.
Designed by Marina Orry
Around the house or around town, these lacy ribs will keep your legs nice and warm. The simple lace rib pattern makes these a great project for beginning lace knitters.
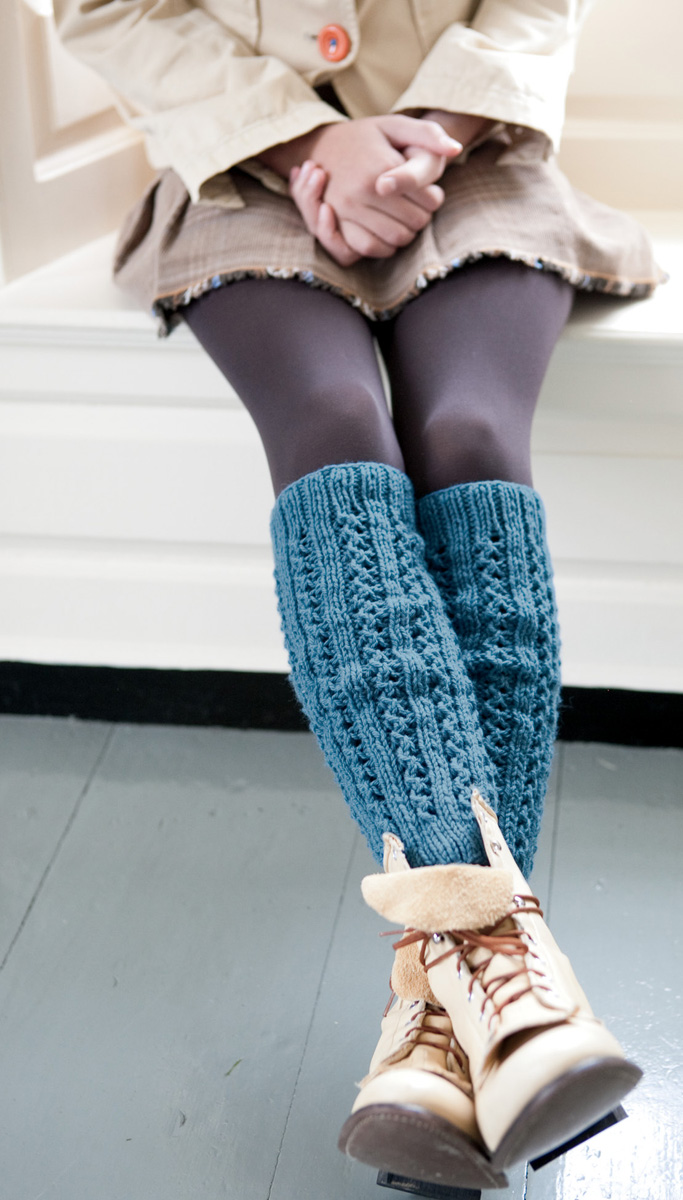
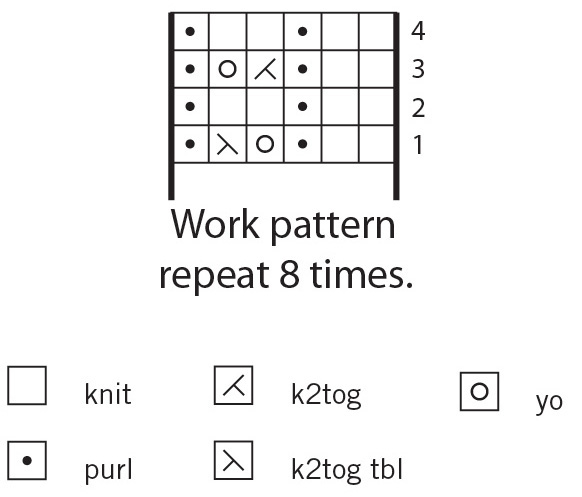
Round 1: *K2, p1, yo, k2tog tbl, p1; repeat from * to end of round.
Round 2: *K2, p1; repeat from * to end of round.
Round 3: *K2, p1, k2tog, yo, p1; repeat from * to end of round.
Round 4: Repeat Round 2.
Repeat Rounds 1–4 for pattern.
Designed by Nancy Miller
A choker that Nancy’s daughter wears inspired her to knit this jewelry set, made to showcase beautiful beads and her favorite shade of green. The hemp fiber will wear in like your favorite pair of jeans.


Designed by Kim Cameron
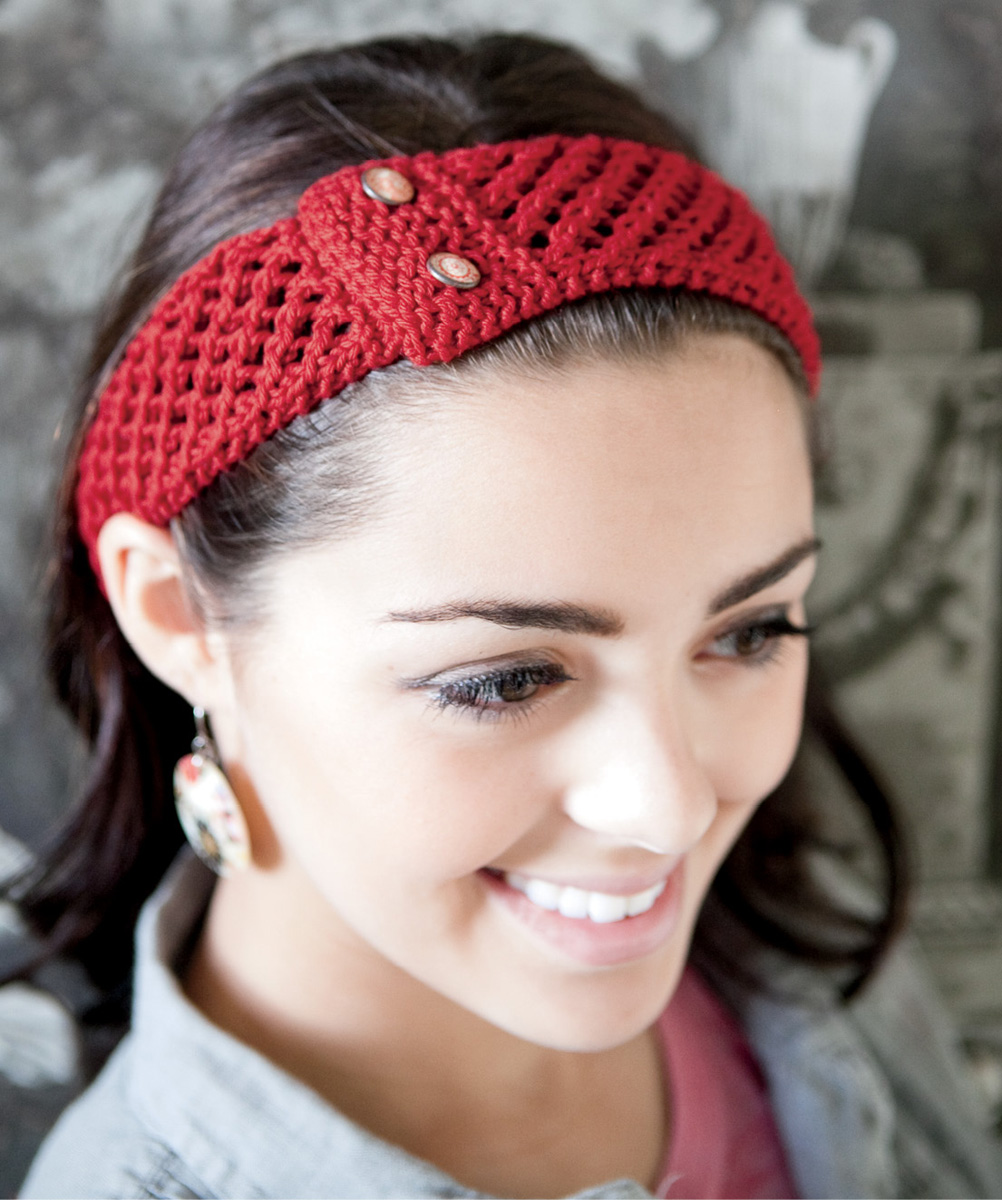
These three headbands are great projects for a beginner; they also make a quick and easy gift for more experienced lace knitters. One skein made all three designs shown here.

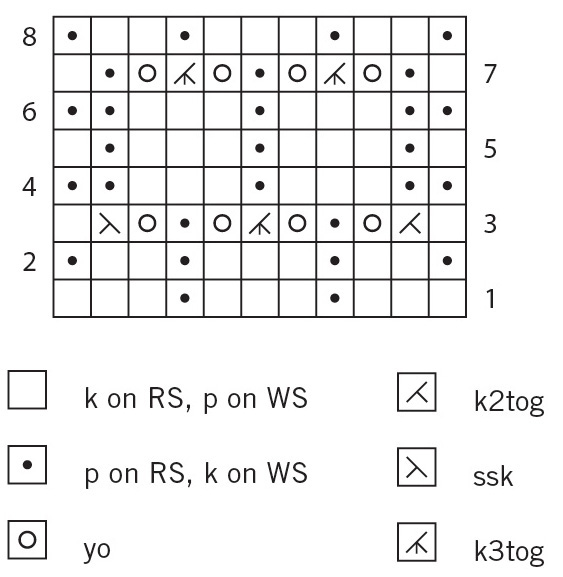
Row 1 (RS): (K3, p1) twice, k3.
Row 2 (WS): K1, p2, k1, p3, k1, p2, k1.
Row 3: K1, k2tog, yo, p1, yo, k3tog, yo, p1, yo, k2tog, k1.
Row 4: K2, p3, k1, p3, k2.
Row 5: K1, (p1, k3) twice, p1, k1.
Row 6: K2, p3, k1, p3, k2.
Row 7: K1, p1, yo, k3tog, yo, p1, yo, k3tog, yo, p1, k1.
Row 8: K1, p2, k1, p3, k1, p2, k1.
Repeat Rows 1–8 for pattern.
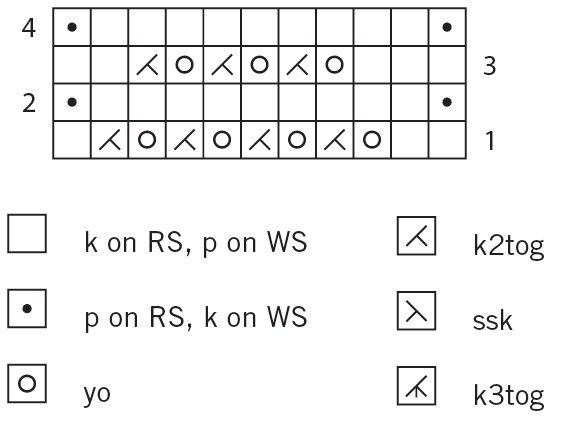
Row 1 (RS): K2, (yo, k2tog) four times, k1.
Row 2 (WS): K1, purl to last stitch, k1.
Row 3: K3, (yo, k2tog) three times, k2.
Row 4: K1, purl to last stitch, k1.
Repeat Rows 1–4 for pattern.
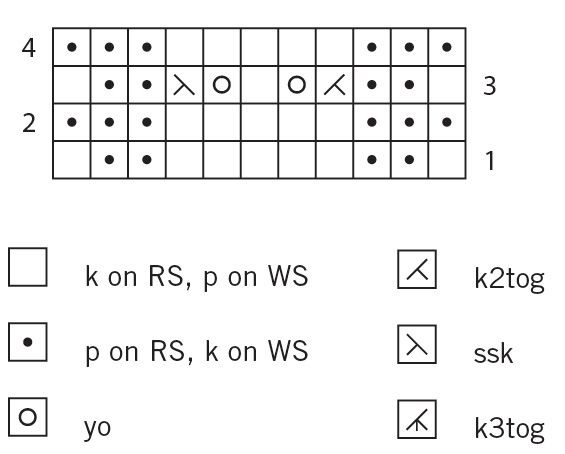
Row 1 (RS): K1, p2, k5, p2, k1.
Row 2 (WS): K3, p5, k3.
Row 3: K1, p2, k2tog, yo, k1, yo, ssk, p2, k1.
Row 4: K3, p5, k3.
Repeat Rows 1–4 for pattern.
The combination of cotton-blend yarn and a lace pattern gives these headbands a tendency to stretch. Keep this in mind when you determine the length of your headband.
Note: You can create an adjustable headband by repeating Rows 5–12 to make an extra set of buttonholes.
Designed by Sara Delaney
Here’s one for the crocheters among us. This stylish round-bottom purse has vintage appeal, and it’s worked in an easy-to-remember two-row lace pattern. You can completely change the look with the lining color and button choice.

Slender Bobble: *Yo, insert hook into stitch, yo and draw up a loop, yo and pull through 2 loops, repeat from * once more, yo and pull through all 3 loops on hook.
Single Crochet around Handle: Hold circular handle behind the work, with the top of the circle even with the stitch to be joined. Insert hook into the stitch and then into the circle; bring the yarn over the top of the circle from the front to back, yo and draw a loop through both the circle and stitch; bring the yarn over the top of the circle from back to front, yo and pull through 2 loops on hook.

To make your purse even more useful, consider adding pockets to the lining. Simply cut squares or rectangles to the desired pocket sizes and sew them to the right side of the lining fabric before you join the ends to form a cylinder. You can add buttons, snaps, or Velcro to keep the pockets closed if desired.