CHAPTER 5
Fun Festival Hip Pack
LET’S START PROGRAMMING WITH THE ADAFRUIT CIRCUIT PLAYGROUND EXPRESS MICROCONTROLLER board and Microsoft’s browser-based visual programming environment MakeCode. we’ll also 3D print a decorative cover for the board, sew the hip pack in your choice of fabrics, and put it all together so that your pack reacts to music and sound.
What You Will Learn
In this chapter, you will learn how to
 Create a sound-reactive light-up festival hip pack using visual block programming
Files You Will Need
 Hip pack pattern: hipPackPattern.svg
 Circuit Playground cover 3D model: cpxCover.stl
 MakeCode program: cpxFestival.uf2
Tools You Will Need
 Sewing machine and sewing tools
 Computer with browser
 USB Micro B cable
 3D printer (optional)
Materials You Will Need
 ¼ yard of woven fashion fabric (Novelty prints or metallics are recommended.)
 ¼ yard of woven lining fabric
 12-inch sew-on hook and loop fastener tape (Velcro)
 1½ yards of 1 inch wide belting or webbing for belt (This is a long, adjustable length for an average adult, you may need more or less depending on your waist measurement.)
 1-inch parachute buckle
 Adafruit Circuit Playground Express (Product ID 3333, www.adafruit.com)
 AAA battery pack (Product ID 727, www.adafruit.com)
 AAA batteries
 For 3D-printed cover: Polylactic acid (PLA) filament in natural or light translucent colors or transparent flexible filaments
 No-sew option: Purchased hip or waist pack
The Circuit Playground Express is a great learning board with 10 built-in addressable light-emitting diodes (LEDs) and packed with sensors. It is easy to program in three different ways, and extra lights can be added by sewing them on with conductive thread or soldering them to the board with wire. MakeCode is a web-based editor with colored blocks that you can drag and drop into the workspace to construct a program. An interactive simulator provides instant feedback on how the program is running without having to run the program on a microcontroller board. You can learn how to use MakeCode through the tutorials and projects at https://makecode.com/.
Figure 5.1 Materials for constructing the hip pack and the Circuit Playground Express board.
Step 1: Program the Circuit Playground Express
Adafruit has developed extensive guides and tutorials for the Circuit Playground Express. If your board isn’t working as expected or you want to learn more, start with the guide at https://learn.adafruit.com/adafruit-circuit-playground-express/overview.
1. To get you started, we’ve made a sound-activated light-up program for you to use with your Circuit Playground Express. Download the cpxFestival.uf2 file from the book’s website to use in this project, or make your own in MakeCode (https://makecode.com) and save it as a .uf2 file (Figure 5.2).
Figure 5.2 Sound-activated lights programmed using Microsoft’s MakeCode.
2. Before you plug in your board, you might have to install a driver. If you have a computer running Windows, you will need a driver; if you are running a Mac or Linux, you will not need to install a driver. To install the driver, go to https://learn.adafruit.com/adafruit-circuit-playground-express/adafruit2-windows-driver-installation. Download and run the installer.
3. Connect your computer with the Circuit Playground Express using a data sync USB Micro B cable. Some USB cables only charge devices, so try a different cable if you are not getting any results.
4. Press the Reset button once to enter Bootloader mode. You may need to double-press Reset if this is your first time using MakeCode with your Circuit Playground Express.
5. All the LEDs should briefly turn red and then turn green, and the status LED should pulse red. Your computer will have a new removable drive called CPLAYBOOT.
6. Find the cpxFestival.uf2 file and copy/paste or drag and drop it to the CPLAYBOOT drive.
7. The status LED on the board will blink while the file is transferring. Once it’s done transferring your file, the board will automatically reset and start running your code.
8. You can now unplug your Circuit Playground Express from the computer, and it will keep running the program.
Step 2: 3D Print the Circuit Playground Express Cover
A 3D-printed decorative cover will take your project to the next level and beautifully diffuse the LEDs on the Circuit Playground Express. Natural-colored or light-colored translucent PLA, such as yellow or amber, is recommended for the LEDs to look best. Translucent flexible filaments or glow-in-the-dark PLA also may make a great cover.
1. Download the model file: cpxCover.stl.
2. Load the model into Cura for slicing, and use these print settings: 10 percent infill, with supports, and no build adhesion.
3. Load the translucent filament, and start your 3D printer according to the operating instructions. Print!
Step 3: Make the Pack
As you sew the bag, remember to backtack at the start and stop of each seam to lock the stitches in place. If you make a mistake, use your seam ripper to undo the stitches and try again.
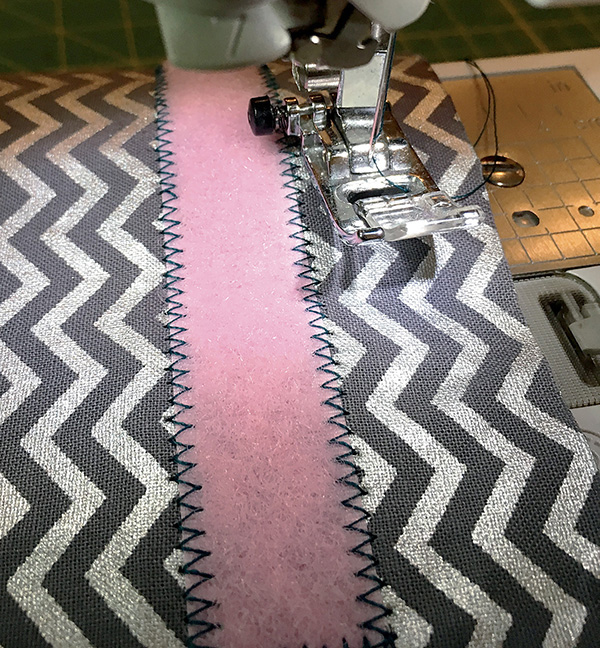
1. Cut Velcro into two 6-inch-piece sets. Then, using a straight stitch or zigzag stitch, sew the hook and loop tape to the pattern pieces, where they are marked: (1) hook side below the fold line in the pocket piece, (2) loop side in a matching position on the lower half on the right side of the front piece, (3) hook side at the top of the right side on one lining piece, and (4) loop side at the top of the matching top of the right side of the other lining piece (Figure 5.3).
Figure 5.3 Sew the hook and loop tape on the lining pieces, front section, and pocket.
2. Fold the pocket piece in half, wrong sides together with the fold at the top and the corners at the bottom, and press.
3. Line up the pocket piece with the right side of the front piece, and secure them together using the sewn-on hook and loop tape (Figure 5.4). This is now the front section.
Figure 5.4 Pocket piece attached to the front with the hook and loop tape.
4. Cut belting into two pieces measuring 1 yard and ½ yard.
5. Line up one end of the belting to the right side of the back section, and pin it ½ inch from the top edge. Sew along the edge to attach the belting to the right side of the back section. Sew over this stitching again to help secure the belt even more (Figure 5.5). Pin the other half of the belting to the right side of the back section, and sew along edge. Then sew it again along the same stitching line for a more secure attachment.
Figure 5.5 Pin and then securely sew the belting to the right side of the hip pack back section.
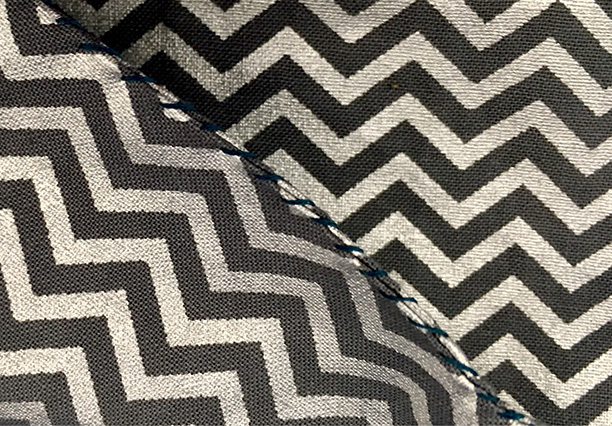
6. Place the front and back sections together, and pin them along sides and bottom edge. The belt will be sandwiched inside, pull the belt parts through the open top edge so that they don’t get caught in your sewing by mistake. Sew along the sides and bottom, removing pins as you sew (Figure 5.6). Turn the bag right side out and press with an iron.
Figure 5.6 Sew the front and back sections together along the sides and bottom, keeping the belt out of the way.
7. Pin the lining section right sides together, and sew them along the sides. Sew the bottom edge keeping a 4-inch section open in order to turn the bag later (Figure 5.7).
Figure 5.7 Sew along the sides and bottom of the lining, keeping the bottom center open.
8. Slip the lining over the right-side-out outer bag, and with the right sides together, pin the lining to the bag. The belt should be in between the lining and the bag.
9. Stitch all the way around the upper edge of the lining and bag (Figure 5.8).
Figure 5.8 Pin and then stitch around the upper edge of the bag and lining.
10. Turn the lining right-side out by pulling the outer bag back down through the opening. Once the bag is out, turn the open edges at the bottom of the lining ½ inch inside, and whipstitch them together so that the lining seam is closed (Figure 5.9).
Figure 5.9 After turning the bag out through opening, whipstitch the lining bottom closed.
11. Put the lining inside the bag. The belt pieces should now be on the sides of the bag.
12. On one loose end of the belt, fold the belting over ¼ inch, then fold it again ¼ inch, and sew the folded edge down with a zigzag or a straight stitch to neaten the edges so that they don’t unravel. Push the neatened edge of the belt through one side of the parachute buckle. Repeat this step with the other side of the belting and the second half of the parachute buckle (Figure 5.10).
Figure 5.10 Insert each end of the belting into one side of the parachute buckle, then sew each end with a neat hem.
Step 4: Bring It All Together
1. Using regular sewing thread, whipstitch the Circuit Playground Express through four of the large connection pads to your pack. Use several stitches, but do not completely cover the copper connections of the pad (Figure 5.11). If you decide to build on your project, you want to leave some room for wire or conductive thread to connect.
Figure 5.11 Whipstitch the Circuit Playground Express board to the hip pack.
2. Use regular sewing thread to whipstitch the 3D-printed decorative cover to the pack over the Circuit Playground Express.
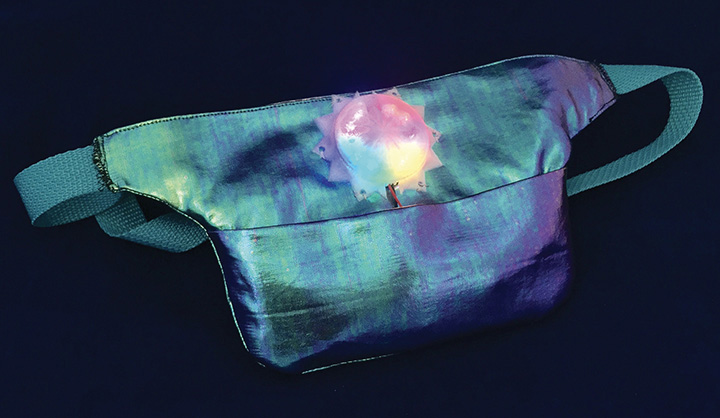
3. Attach the battery pack, and tuck it inside the front pocket! Turn it on, and have some fun (Figure 5.12)!
Figure 5.12 The hip pack ready for festival fun.


