The most productive food plants you can grow are fruit trees — something you already know if you have mature fruit trees on your property. If you have no trees or not enough, the right fruit trees will add beauty and value to your land, and they will keep you well stocked with organically grown fruits for year-round eating.
Not that fruit trees are always a sure thing. Modern disease-resistant varieties take a little of the worry out of growing fruit trees, but unless you live in an ideal fruit-growing climate, expect the unexpected where tree fruits are concerned. Late frosts frequently kill the fertilized blossoms of species that bloom early, resulting in fruitless years, and sometimes fruit trees drop their fruit for no apparent reason. Fair enough, because in most years the harvest from mature trees will be measured in bushels, and you will have more than enough delicious homegrown fruit to put by and share.
The following fruit tree groups have their own profiles starting here: apples; cherries; pears and Asian pears; and plums, peaches, and nectarines. When the right cultivars are grown in hospitable climates and given attentive care, each of these fruits stands a good chance of producing quality crops under organic management. And because they bear at different times of year — for example, cherries ripen in early summer, followed by summer plums, peaches, and nectarines, and apples and pears in the fall — it’s a nice base group for a self-sufficient homestead.
Where should you start? When your purpose is to fill your pantry, make it a priority to select and plant apples and pears, which are easier to grow organically compared to other tree fruits. They become kitchen mainstays because they can be dried, canned, frozen, or fermented into wine.
The “stone” fruits — cherries, plums, and peaches — bear earlier, but they are more likely to run into problems with pests and diseases. However, all of the stone fruits can be purchased grafted onto dwarfing rootstocks. It’s easier to monitor dwarf trees for problems and to use organic sprays or traps to keep the trees healthy.
Although some varieties of some tree fruits are described as “self-fertile,” pollination and fruit set are generally enhanced when two trees of the same species are grown together. When planning space, think in terms of compatible pairs.
Next, consider ripening times — cherries and plums will be but a memory when the first apples ripen. Let your tastes and climate guide you as you select trees. Five or six trees you decide you cannot do without is a good place to start. Fruit trees require ongoing care, and taking on too many may not leave you time to attend to proper pruning and maintenance. It is better to succeed with a few fruit trees than to fail with many.
If growing fruit trees is but a dream for you, you can still become rich in canning-quality fruit by helping friends or neighbors with their harvest. Picking and sorting apples is hard work, and most tree owners are happy to share imperfect fruits that need to be attended to quickly in exchange for a few hours of work.
When: Set out new trees in mid-spring, after the soil has thawed and the whole world is emerging from dormancy.
Where: Choose a sunny, well-drained site that is not in a low spot where frost is likely to linger in spring.
Planting: Clear away weeds and grasses, and dig a planting hole that is twice the size of the rootball of the tree. If you can choose between sizes, buy a big tree, ideally 5 to 6 feet tall. Set the tree in the prepared hole, and backfill soil as needed to plant the tree at the same depth it grew at the nursery. Make sure the graft union, which looks like a swollen area on the main trunk, is high enough so that it will never be covered by soil or mulch. Water well, then finish filling the hole.
Err on the side of safety by installing a trunk guard made of spiral plastic or fine mesh hardware cloth. A trunk guard protects newly planted trees from insects, rodents, sunscald, and physical injuries that often happen with mowers and string trimmers. Finally, stake the tree to hold it steady in the wind, and mulch the root zone with wood chips, sawdust, or other slow-rotting mulch that makes poor mouse housing.
Maintenance: One year after planting, remove the stakes and trunk guard from the tree. On a dry day, paint the trunk with white latex paint to protect it from winter injury. Sand added to the paint may deter nibbling by rabbits and voles. For the first 10 years, fertilize fruit trees annually in early spring by scratching a balanced organic fertilizer into the soil surface (follow application rates on the product’s label). After that, fruit trees have such extensive roots that they can usually forage for themselves, but they may need deep watering during dry periods.
Caring for established trees: The fruit tree year starts in late winter, when the trees are dormant but days have begun to lengthen. Get out on mild days to trim off dead wood and knock down mummies (shriveled fruit from last year), studying each tree for its pruning needs. The goal of pruning fruit trees is to manage limb structure so that come summer, each leaf and fruit will be bathed in light and fresh air. The ideal branching pattern varies with species, and some apples and pears can be pruned into wall-hugging espaliers to save space. Begin pruning fruit trees to shape them in their first year, and then prune annually in late winter, before the buds swell. With mature trees, aim to remove up to 20 percent of the limbs to sculpt an open canopy. Pruning a little too much questionable growth is better than removing too little.
You can mulch beneath trees with wood chips or sawdust, which looks nice and reduces the chances that the trunks will be injured by lawn mowers or string trimmers. Or let the ground become colonized by a mixture of grasses and clovers, which should be mowed only every 2 to 3 weeks. Lush vegetation that is cut high provides habitat for ground beetles and other active predators that help control fruit pests that spend part of their life cycle in the ground.
Thinning fruits: Many fruit trees set too much fruit in good years, with many fruits in clusters and few spaced 3 inches apart, so the excess should be thinned using a small pair of scissors. Thinning helps to prevent alternate bearing, in which trees fall into the habit of bearing every other year. Wait until the green fruits grow to the size of a dime, and shake a few limbs to see if the tree shows signs of shedding excess fruits on its own (sometimes they do). If the tree insists on holding far too many closely spaced fruits, clip off the smallest ones and those that are misshapen or show blemishes. Then do your best to thin fruits to at least 3 inches apart.
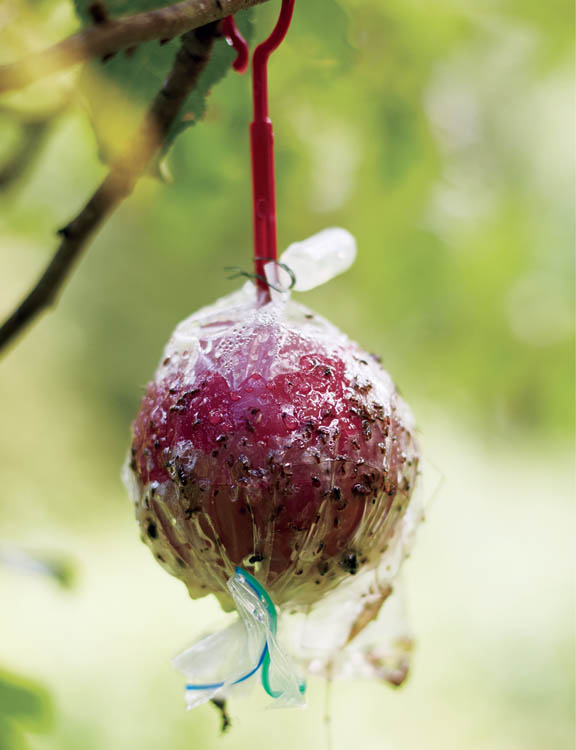
Apple Maggot Trap. From apple maggots to cherry fruit flies and peach tree borers, many small insects that injure fruits can be monitored or controlled with the right traps. When you have only a few trees and notice recurrent pest problems, the right traps can quickly help turn things around. Here, a small vial of pheromone lure attracts apple maggot adults to a fake red apple covered with sticky glue. Covering the trap with a plastic bag makes it reusable.
Citrus fruits (Citrus hybrids), including kumquats, Satsuma or mandarin oranges, and ‘Meyer’ lemons, are among the easiest fruit trees to grow organically in Zones 8b to 10. Fragrant oils in citrus leaves and rinds provide protection from pests, but citrus fruit can’t take much cold. The hardiest of them — ‘Owari’ satsuma, ‘Nagami’ kumquat, and ‘Meyer’ lemon — may occasionally need to be covered with blankets on cold nights, but winter harvests of homegrown citrus fruits are worth the trouble.
(Malus domestica)
3 or 4 dwarf, or 2 or 3 standard
Climate specific based on chill hours and disease-resistance needs
Dry, freeze, juice, can, or ferment
Everybody eats apples, and if we all ate one organically grown apple a day, we would certainly be healthier for it. Growing your own apples calls for patience and dedicated effort, but it is well worth the work.
As with all fruit trees, you never know what the harvest will be from your apple trees. In a good year, you may easily accumulate a year’s supply of applesauce, juice, jelly, and chewy dried apples, but in other years you will be lucky to make two pies. Be prepared to forgive these hardworking trees, and trust that they have their reasons for taking a rest. Even in years when they don’t make a crop, apples serve as well-behaved landscape trees that offer fragrant flowers in spring and cooling shade in summer.
The flavor of many apples improves after a couple of weeks in refrigerated storage, so you can take your time preserving them using several different methods. Blemished apples that need immediate attention can be canned as applesauce, or you can pare and freeze them for processing later. Apples dry beautifully, and they can be fermented into a light white wine or kicky apple cider.

Once you have settled on a couple of disease-resistant varieties, you will need to choose between dwarf trees, which have been grafted onto special rootstocks that keep the trees small, at 15 feet or less, or full-size trees, which are grafted onto rootstocks chosen only for added vigor. Sometimes semi-dwarfs (larger than dwarfs and smaller than full-size trees) are available on special rootstocks. Dwarf apples are best for small properties and are easier to care for, but semi-dwarfs and standards make better long-lived landscape trees, and in good years they will bury you in fruit.
The choice is yours, and you can mix things up if you like. When planning a mixed orchard, I suggest including a couple of dwarf apples and one standard tree. Keep in mind that the harvest times for traditional and Asian pears overlap with apples, so in the interest of delicious diversity, save space in your planting plans (and preservation time in your kitchen) for pears.
When choosing apple trees to grow, your first concern should be finding cultivars with strong resistance to common apple diseases, including apple scab, fire blight, cedar-apple rust, and powdery mildew. You will also need to check a variety’s cold-chilling requirements to make sure it is a good fit for your climate. For example, you would need a low-chill variety rated at only 400 chill hours in some parts of the South, but in the North, 1,400 chill hours might be a better match. Your Cooperative Extension Service can provide you with a list of apple varieties that are locally adapted and offer various forms of disease resistance.
Next, look at ripening times. Early-ripening summer apples are nice to have, but they store under refrigeration for only a few weeks, so you may need to process them at the same time you are coping with the year’s crop of tomatoes and peppers. Apples that ripen in September and October are better candidates for extended cold storage, which gives you more time to get them preserved. And this is true: a couple of weeks of post-harvest chilling in the basement or fridge improves the flavor and juiciness of many mid- and late-season apples.
If you have a couple of productive trees, you will probably preserve your apples in numerous ways — including freezing, drying, juicing, and water-bath or steam canning as jelly, chutney, spiced rings, or applesauce. Some apples are better for specific uses, but you will need to experiment with the apples available to you to discover their preservation secrets. For example, my Rome-type apple is the best one for drying, but another tree with Macintosh background makes better applesauce. For juicing and wine making, my favorite is a nameless, decades-old tree that grows in a neighbor’s yard and bears small yellow apples.
Where: These adaptable, long-lived trees need a sunny, well-drained site with slightly acidic to near neutral soil. Newly planted apple trees often need to be protected from deer and drought. Wood chip mulch is often useful for maintaining soil moisture for young apples.
Maintenance: Apple trees need attentive pruning every year. Prune young trees to shape them, and prune older trees to remove “suckers” and tall branches that are hard to pick. When managing established, vigorous semi-dwarf apple trees, expect to remove 10 to 20 percent of the tree’s canopy every year. The best time to prune is early spring, at the same time that yellow forsythias bloom.

Clusters of closely spaced apples ripen unevenly and give pests a place to hide. Start thinning clusters by removing the smallest fruits when they are the size of a quarter.
In addition to the routine care described in Caring for established trees, apples must be protected from cedar-apple rust, which is hosted by junipers and cedars. These landscape shrubs and trees can give rise to outbreaks that cause orange spots and galls on apple leaves, which can seriously weaken the trees.
Most apples need to be thinned, and all trees should be monitored for apple maggots (the larvae of a small black fly) and codling moths (a moth larvae that tunnels into fruits). Pheromone-baited sticky traps are available for both pests.
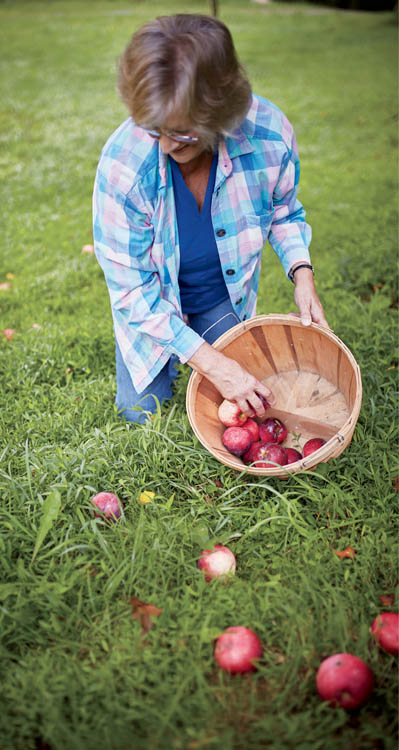
Apples that fall to the ground often attract yellow jackets and other stinging insects. Prevent unpleasant encounters by picking up fallen fruit with a gloved hand in the cool of the morning.
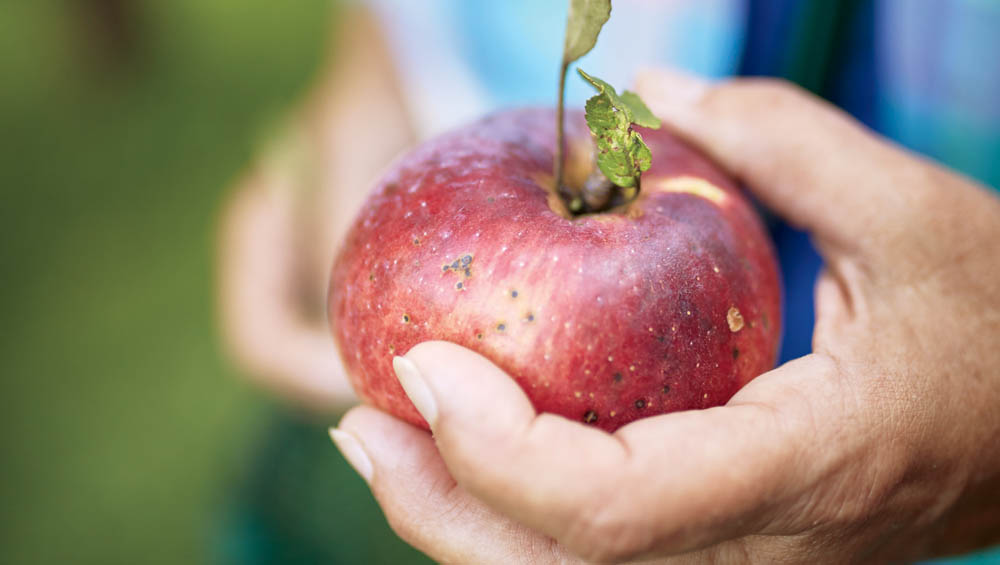
When: There are several ways to judge the ripeness of apples. Pick a sample fruit in which the “under-color” in the palest areas has changed from green to yellow. This is hard to spot in some varieties, so cut the fruit in half to look at the seeds and the starry halo around them. In an underripe apple, the seeds will be light brown and the halo will be green. Ripe apples have dark brown seeds, and the halo changes from green to cream. With some varieties, you won’t have to guess; the trees start dropping their fruit when the apples are ready.
How: To pick apples, you will need an orchard ladder, a long-handled fruit picker, and an apron or bag for the collected fruit. On the ground, you will need three baskets, boxes, or other containers — one for perfect fruits, one for slightly bruised and blemished ones, and one for the culls. Working with a helper is always a good idea where ladders are involved, and a helper makes apple picking go faster, too.
Immediately move your harvested apples to a cool place like a basement or the coolest room in your house. Next, sort through your best apples, wiping each one with a damp cloth, and set aside any imperfect fruits — those with bruises or worm holes — and preserve as soon as possible. If the weather is warm, store your perfect apples in perforated plastic bags in the refrigerator. In cooler weather, you can keep apples in a chilly basement or outdoors in coolers kept in the shade. Flawless apples can be stored in the refrigerator for 3 months or more. They do best in loosely closed plastic bags.

Underripe apples have blond seeds, and you can see a green halo around the seed cavity. Ripe apples have dark seeds and no green halo.
Apples can be preserved in numerous ways, including drying, freezing, juicing, and water-bath canning as jelly, chutney, chunks, or applesauce. Below I will walk you through how apple processing proceeds at my house. Try a couple of new projects each year, and you will gradually learn which apple products your family likes best.
Sour, barely mature apples blown to the ground in storms are naturally high in pectin, so early green apples are often preferred for making jelly. You can add frozen blackberries, raspberries, or grapes to the pot to change the color and flavor of your mostly-apple jelly.
As the harvest picks up, use the bruised fruits (with bad parts cut away) to freeze enough cinnamon-spiced apples to use in pies and cakes. For this use, it is best to simmer peeled, sliced apples in a spiced syrup until done, about 5 minutes, and then freeze them when they are cool.
Sour, barely mature apples blown to the ground in storms are naturally high in pectin, so early green apples are often preferred for making jelly.
Each time you pare a quantity of apples — or pears or stone fruits, for that matter — for a preservation project, simmer the leftover cores and fleshy trimmings in water, then strain and chill the resulting liquid. Thick with natural pectins, apple “nectar” can be drunk straight up or sweetened to taste with sugar, honey, or stevia. As long as you have room in the freezer, freeze your excess nectar in clean canning jars or freezer jars filled three-fourths full to allow room for expansion.
Apples are among the few dried foods that taste good without being rehydrated, and they are easy to cook with, too. Some people steam blanch 1⁄2-inch-thick apple slices before drying them, which gives you the kind of soft, chewy apple bits you get in processed foods. But apples that are dried raw are quite good, and if using organically grown apples, you can leave the peels on for added fiber and nutrition. To dry a batch of apples, first prepare a big bowl with acidified water (see Preventing Discoloration in Fruit). In a second, smaller bowl, place a small amount of brown sugar and “apple pie” spices. As you pare the apples, place them in the acidified water. Drain, then toss the slices with the sugar and spices. Dry apples until leathery, and store them in airtight containers in your freezer. If you need small pieces of apple for a recipe, use scissors or kitchen shears to cut your dried apples to size.
Apples are considered a “dry” fruit because they contain little juice compared to, say, blackberries or peaches. But apples will give up a modest amount of juice. Using the most efficient do-it-yourself equipment (an apple mill that shreds the apples into pieces, after which the pieces are pressed to push out the juice), a bushel of apples will produce just over 3 gallons of juice.
Use a mill and press. In many communities, you can network to get access to an apple mill and press, and crude but effective home-built models go back hundreds of years. Once pressed, raw apple juice must be immediately consumed (with gusto!), frozen, fermented into cider or wine, or heated to the point of sterilization and canned. In the latter case, you should add a dash of lemon juice (per pint) to make sure the canned product is adequately acidic.
Freeze. Lacking the use of an apple mill and press, you can pare washed apples into chunks, removing only the cores and bad places, and freeze them in large freezer bags. When thawed, sufficient tissues will have broken down to create a flow of juice. If you transfer frozen and thawed apple pieces to a jelly bag, massage it with your hands to break up the pieces, and patiently twist and push to coax out the juice, you can obtain great gulps of fresh, raw apple juice from frozen apples. The browned thawed apple gook left behind is worth a quick simmer in water kicked with cinnamon or other spices. Strained and sipped warm, you have a refreshing apple toddy.
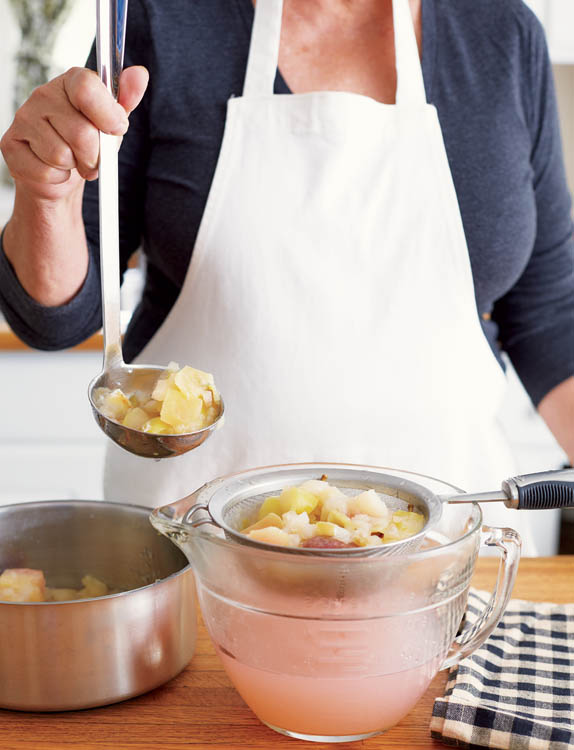
Steam. A final option is to steam the juice from your apples, which requires a three-section basket steamer. Clean apples that have been trimmed to remove rot spots can go into the steaming basket whole, but it takes a while for the juice to flow (40 minutes to 1 hour). After the juice is collected, the steamed apples can be put through a food mill or sieve to make a smooth applesauce.
Apple products from applesauce to jelly can be canned in a water-bath or steam canner as long as they are slightly acidified from citric acid, lemon juice, vinegar, or a high concentration of sugar.
Sweetened preserves. Low-sugar pectins work great with apples, so you can make cinnamon-apple chunks in light syrup or low-sugar jellies using half the sugar present in commercial products. Not that all sugar is bad. I think a small amount of sugar gives applesauce a sheen and helps counterbalance the bitterness of cinnamon and other spices, and in some recipes, such as apple chutneys, a sharp balance between sugar and vinegar is what makes the concept work.
Applesauce. To make a smooth applesauce or apple butter, cook the apples long enough to soften them, about 10 minutes, then put them through the same type of manual food mill used for tomatoes. To make chunky applesauce, peel and core the apples before cooking them in just enough water to steam the pieces.
Flavored ketchup. The natural runniness of homemade tomato ketchup can be remedied by including about one-third applesauce in your ketchup. Applesauce, puréed jalapeños, and mature green tomatoes make a delicious green ketchup, too.
Spiced apples. Apples studded with cloves and preserved in a vinegar brine are another of many possibilities for preserving apples in canning jars.
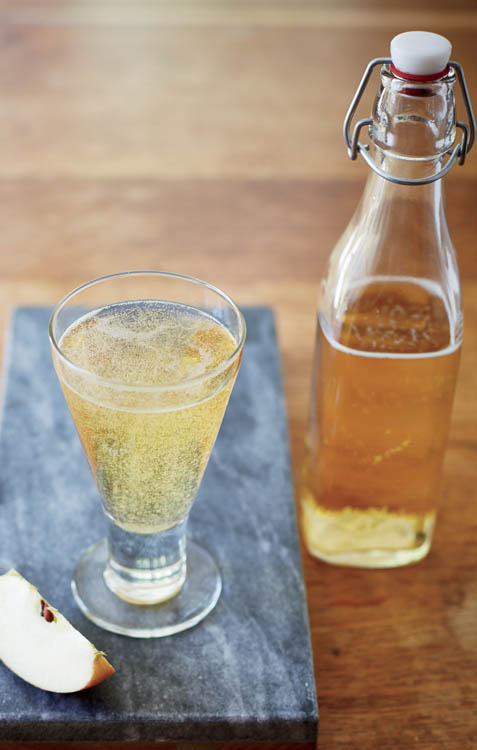
Apple cider and apple wine are easy to make with homegrown apples. Historically, hard apple cider is made by allowing the natural sugars in raw apple juice to ferment into alcohol, using the natural yeasts present on apples. Depending on the sweetness of the apples used, a natural cider will yield a beverage that is 4 to 6 percent alcohol. In the old days, this naturally made cider was kept in a cool cellar until it was consumed. I suggest making a faster-starting, more predictable version by gently heating the juice to 130°F (55°C) to kill most wild yeasts and bacteria, and then using a champagne yeast to ferment the juice.
If you add sugar, honey, or a mixture of the two to apple juice and then ferment it, you can make a very nice cider or white wine. Cider has a lower alcohol content compared to wine, so it is not as stable after bottling. See Making Wine from Fruits for information on making your own wine. Or skip the juice-making altogether and make wine from chopped apples enclosed in a fermentation bag. Either fresh or frozen apples are fine, and berries such as blackberries or raspberries can be added to vary the wine’s color, aroma, and flavor. Apple wine ferments somewhat slowly, and you’ll need to rack it several times before it is still, clear, and ready to bottle; I figure on 8 months from start to bottling. After bottling, apple wine needs to age for at least 1 year, but it is worth the wait.
(Prunus avium and P. cerasus)
1 standard tree or 2 dwarf trees
Sweet cherries for Zones 5 to 7 include ‘Stella’ and ‘Lapins’; sour cherries for Zones 3 to 8 include ‘Montmorency’ and ‘North Star’
Freeze, dry, or can
Cherry trees are breathtaking when they are in bloom, and juicy, sun-ripened cherries are so packed with antioxidants and other nutrients that they almost qualify as medicine. If other gardeners in your area successfully grow cherries, put them on your planting list. The earliest-bearing of all fruit trees, cherries ripen in early summer, when there is plenty of time to harvest and store them.
The freezing process tenderizes cherries, and even cherries that are to be dried benefit from being frozen first. Freezing also helps cherries release their nutrient-rich juice, a delight to drink in early summer. Dried cherries are delicious by themselves, or you can use them in baked goods and cooked cereals.
There are two types of cherries to consider for your garden: sweet and sour. Most fresh cherries sold in supermarkets are sweet cherries (Prunus avium), while most dried and canned cherries are tart or sour cherries (P. cerasus). Sour cherries often contain as much sugar as sweet cherries, but they have more acids that contribute to their tart taste. Instead of putting flavor first, consider these horticultural differences between the types:
Sweet cherries have problems with extreme cold and heat, so they grow best in Zones 5 to 7, which is a rather limited geographical range. Most varieties are not self-fertile, so you need two trees, and sweet cherries bloom so early that the fruit is often nipped back by late freezes. Even on dwarfing rootstocks, sweet cherries grow 15 to 20 feet tall.
Sour cherries can take more cold and heat, with some varieties hardy to Zone 3 and a few are capable of prospering in Zone 8. Most sour cherries are self-fertile, and their extended bloom time gives them a better chance of producing a crop in years with cold spring weather. Dwarf forms can easily be kept to 12 feet tall, making them easy to maintain.

Sour cherries often contain as much sugar as sweet cherries, but they have more acids that contribute to their tart taste.
A single standard cherry tree would be a valuable addition to any landscape, but a pair of dwarf trees will be easier to maintain. At full maturity, a standard cherry can easily produce 150 pounds of fruit, while a mature dwarf tree can be expected to produce between 30 and 40 pounds of cherries in a good year.
Where: Site selection is crucial to growing good cherries, which need fertile, well-drained soil with a near-neutral pH. Cherries also need regular water, so plant them within easy reach of your hose. Planting cherries close to your house makes it easier to keep an eye on young trees, which need close monitoring during the first few years after planting.
Maintenance: Cherries are at high risk for developing trunk issues, so avoid any small scrape or cut to the main trunk. Instead of using a rigid trunk guard, wrap the trunk of newly planted trees with mosquito netting or window screening to deter borers and protect it from injury. If you do see oozing holes in your cherry tree’s trunk, poke a needle in the hole to kill the borer or beetle responsible for the damage.
Brown rot. A fungal disease called brown rot causes cherry fruits to become covered with brown fuzz just as they ripen. Pruning to keep the tree open to sun and fresh air is your best defense; commercial growers use intensive fungicide sprays to manage this disease.
Fruit flies and birds. Cherries that have little worms inside have been visited by cherry fruit flies. Sticky traps can help monitor and control this pest. As cherries approach ripeness, most gardeners need to protect their crops from birds with bird netting or tulle covers, held in place with clothespins.
When: Pick cherries in the cool of the morning.
How: Dwarf trees can be picked by hand, but to harvest cherries from a large tree, spread tarps or sheets on the ground, and shake the limbs to make the ripe fruit drop. Historically, this was done by the child in the house most adept at climbing trees.
Lay the harvested cherries out in shallow boxes or bins in the shade, or place them in a cooler with a couple of frozen water bottles that have been wrapped in kitchen towels. Gently rinse cherries clean with cold water and pat dry. Keep chilled in perforated plastic bags, and preserve within 2 days.
If you own a productive cherry tree, you need a plunge-powered cherry stoner. Once the stones (pits) have been removed, you can freeze, dry, or process your cherries into preserves or syrup.
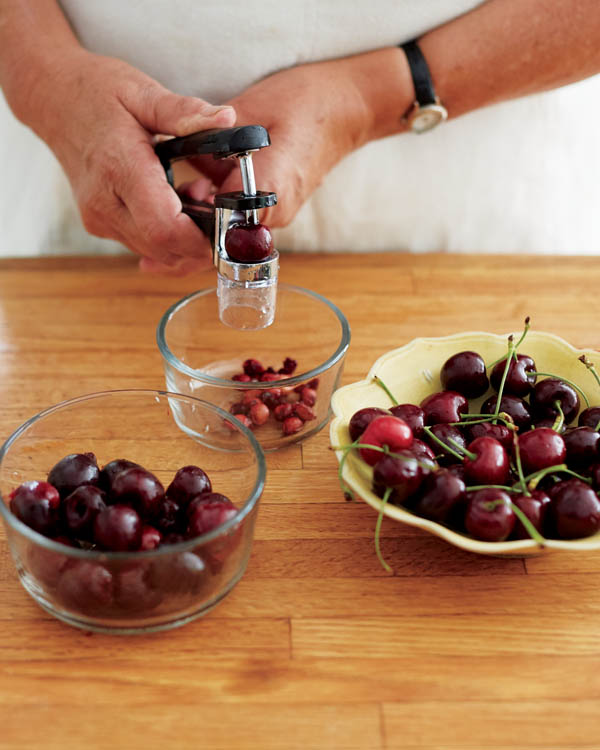
A cherry pitter makes fast work of preparing cherries for eating fresh, cooking, or food preservation projects.
Freeze. If you’re short on time, simply freeze your pitted cherries. When you want to make wine, juice, or jelly later, thaw some cherries and you’re ready to go. If you plan to make smoothies or decorate plates with some of your cherries, freeze them on a cookie sheet and transfer to bags when they are frozen hard so they won’t stick together.
Dry. To prepare cherries for drying, freeze and thaw them to tenderize the fruit. Squeeze the thawed cherries slightly to remove excess juice before placing them in the dehydrator. Be sure to save the juice for drinking. Cherries are best when dried only to the leathery stage, so store dried cherries in the freezer. Dried cherries are great for baking as well as eating out of hand, or you can rehydrate them and add them to sauces or smoothies.

Cherries dry better and are more tender when they are frozen first.
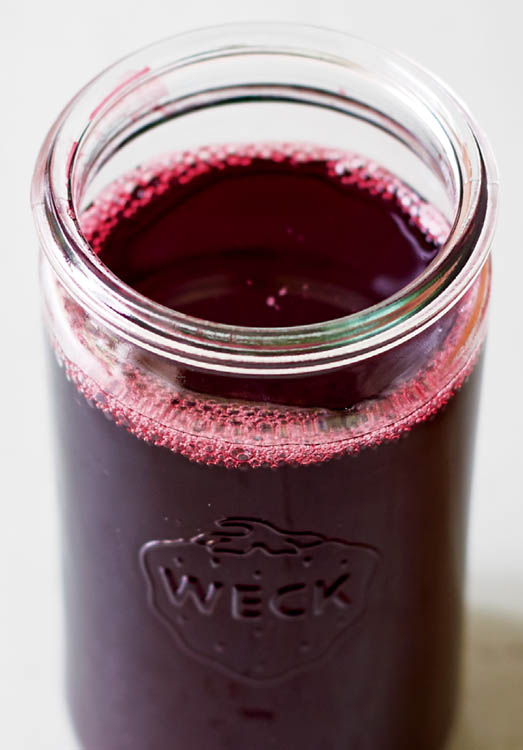
You can enjoy super-nutritious cherry juice on its own or combine it with other fruit juices.
(Pyrus species and hybrids)
1 or 2 trees
‘Moonglow’ and ‘Potomac’ pears, and ‘Shinko’ Asian pear
Dry, can or freeze
Of all the fruit trees brought from Europe and planted by American colonists more than 300 years ago, the lone survivor is a pear. Capable of bearing for decades, pear trees also adapt to a wide range of climates.
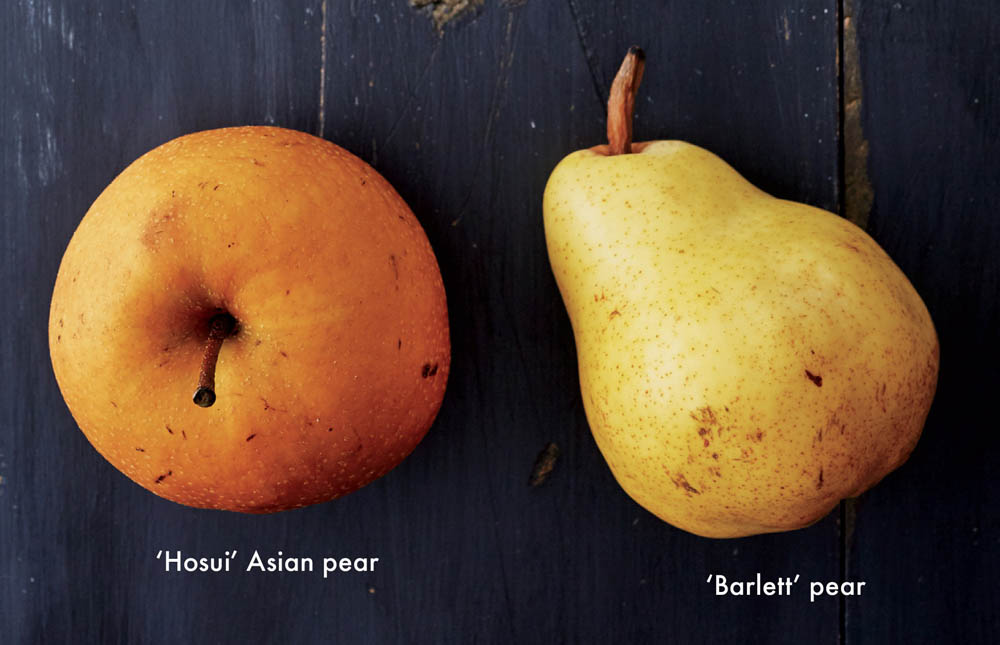
There are two types of pears: European (common) and Asian. The best common pears grow into standard-size trees, at least 30 feet tall and wide, but many Asian pears are semi-dwarf by nature, topping out at 12 to 20 feet. Pears are not quite as cold-tolerant as apples, with cold hardiness ending in Zone 4 for common pears and Zone 5 for Asian pears, but low-chill varieties of both types are available for warmer climates. Pears are premier fruits for canning, and perfect fruits can be held for months in the refrigerator. Once you have apples, next you need pears.
Common and Asian pears differ in taste and texture, and both are easy fruit trees to grow organically. I prefer traditional pears for canning, but dried Asian pears are like candy — it’s hard to stop eating them.
Another big difference becomes clear at harvest time. Many pears must be picked just shy of ripe and allowed to ripen in a cool place for weeks or even months. Asian pears must be allowed to dangle from the tree until they fall into your hand, be refrigerated immediately, and kept refrigerated at all times.
When choosing which varieties to plant, look for those with good resistance to fire blight, a bacterial disease that is very common in moist climates. The number of chill hours required for good fruit production also varies with cultivar. Your Cooperative Extension Service can provide you with a list of pear varieties that are locally adapted and offer resistance to fire blight or other diseases.
I prefer traditional pears for canning, but dried Asian pears are like candy — it’s hard to stop eating them.
Where: Pears need a sunny site with good air circulation so their leaves dry quickly after rains. Soil that is well drained with a pH between 6.0 and 6.5 is ideal, but pears are pretty adaptable plants. Be patient with little trees, because they are slow growers. Mulch them with wood chips to control weeds and keep the soil moist.
Maintenance: You will need to prune young pear trees to shape them, but once pear trees mature they need less pruning compared to other fruit trees. In late winter, remove branches damaged by winter weather or disease along with weak, twiggy growth.
Pear trees that sidestep fire blight and are protected from browsing deer are usually slow but steady growers. Be patient and resist the urge to over-fertilize trees planted in a good site to make them grow faster. Shoots on young trees should grow 14 to 20 inches each year.
You may occasionally see the same insect pests that bother apples in pears, including apple maggots and codling moths. Usually only a few fruits are compromised, so additional controls are not needed. Pears that fall to the ground often attract yellow jackets and other stinging insects. Prevent unpleasant encounters by picking up fallen fruit with a gloved hand in the cool of the morning.
Most (but not all) pears are self-fertile, so you may need only one tree. Still, I suggest starting out with two trees of each type, and taking out any weaklings later if nature does not do it for you. In abundant years, it is easy to trade pears for other things, because everybody likes pears.
With common pears, the best time for harvest varies among varieties. Fruits from most varieties are best when “mature green” — a full-size pear that is still green but with a yellowish undertone and dark seeds inside. Most trees begin dropping a few fruits when the majority of them are ready to pick. Still, it may take two or three harvesting sessions to gather all the pears from a mature pear tree.
As with apples, sort pears as you pick them and immediately begin treating the perfect ones like refrigerated jewels. Every week or so, bring out a few of your perfect common pears and let them ripen at room temperatures. These are your fresh eating pears. Meanwhile, keep imperfect pears in a cooler kept chilled with frozen water bottles, and get them canned or frozen as quickly as possible.
Asian pears must be allowed to fully ripen on the tree. If you must tug to pull them from the branch, they are not ready. Ripe Asian pears will release if you rock them upward in an open hand. Refrigerate Asian pears immediately, and keep them chilled at all times. Preserve blemished fruits within a few days.

Popular pear types including D’Anjou (shown here) and Bartlett are picked at the mature green stage and allowed to ripen slowly, under cool conditions.
The best way to preserve common pears is to can them in a light syrup, and the best way to preserve Asian pears is to dry them. If you have time for neither and are staring down a bushel of blemished pears, cut off the good parts and throw them in a freezer bag. When time permits, you can press out some fresh juice or ferment the pear chunks into wine.
Canning. Canning pears is quite straightforward — peel and pare ripe pears, soak the pieces in an acidic solution (see Preventing Discoloration in Fruit), then drain and add to a pot. Add just enough water to the pot to cover the pieces halfway, then slowly heat the pears to a gentle simmer. Add spices and sugar to taste, and a generous spritz of lemon juice, and pack the simmering mixture into hot canning jars. Process in a steam or water-bath canner for 20 minutes. To thicken pear syrup without adding a lot of sugar, use a small amount of a low-sugar pectin product (about one-fourth of the standard measurement) and follow the mixing procedures on the package.
Drying. It is not necessary to peel Asian pears before cutting them into 1⁄4-inch-thick pieces for drying. Do drop them into an acidic solution to prevent browning, but don’t bother with sugar or spices — the concentrated sugars in dried Asian pears make them as sweet as raisins. Use scissors or kitchen shears to cut dried Asian pear pieces into raisin-size tidbits, and use them as raisin substitutes in recipes.

Dried Asian pears
(Prunus species and hybrids)
Two trees
Climate specific based on chill hours and disease-resistance needs
Freeze, can, dry, or ferment
Plums, peaches, and nectarines are all variations of the Prunus species, which includes cherries. Cherries ripen so early that they often escape problems with pests and diseases, while the later-ripening stone fruits are sitting ducks for numerous insect pests and brown rot, the fungal disease that turns fruits into fuzzy mummies just as they ripen. When grown organically, plums, peaches, and nectarines are boom-or-bust producers, blessing you with huge crops some years and giving you nothing in others.
Here are some things to keep in mind when deciding which of these fruit trees you might include in your home plantings.
Plums (Prunus species and hybrids) tend to produce fruit erratically because plum trees often lose their crop to late freezes or disease, but this is less of a problem in warm climates where spring freezes are not usually very severe. Best adapted in Zones 4 to 8, plum trees produce heavy crops of juicy fruits, which vary in color from light green to dark purple. In some areas, selected native species, such as beach plums in the Northeast or sand plums in the Midwest, may make the best homestead plums.
Cultivated plums are placed in two groups:
Because European plums spend more time on the tree, they are more likely to have bad things happen to them. Five minutes of hail that leaves tiny pock marks in the softening fruits is all it takes to lose a crop to insects or disease. This is less likely to happen with improved varieties of Japanese plums, which ripen before disease pressure becomes severe. Several varieties developed at Auburn University in Alabama provide some resistance to several common diseases.
Peaches and nectarines (P. persica) are on everyone’s want list, but growing these fruit trees organically requires an excellent site, preventive pest management, and luck. More than other fruit trees, peach and nectarine trees need deep soil with no compacted subsoil or hardpan. Peaches and nectarines are best adapted to Zones 5 to 8, but specialized varieties can be grown in colder or warmer climates. For example, ‘Reliance’ peach and ‘Hardired’ nectarine are known for their cold hardiness, while ‘Florda Glo’ peach or ‘Suncoast’ nectarine are adapted to semi-tropical climates.
In all climates, peaches are known for being short-lived trees. Cold injury or wood-boring insects often cause peach and nectarine trees to decline at a young age, so you should plan to add new trees to your collection every few years.
A common disease called bacterial leaf spot can seriously weaken peaches and nectarines, but genetic resistance is available in several peach varieties and in one or two nectarines. And while most peaches are susceptible to brown rot, a few varieties provide some resistance. Your Cooperative Extension Service can provide you with a list of disease-resistant peach and nectarine varieties that are known to grow well in your area.
Planting: Follow the instructions for planting cherries when siting and setting out new trees. Rich, well-drained soil with a pH between 6.0 and 6.5 is ideal. Fertilize young trees with a balanced organic fertilizer in early summer and again in early fall.
Maintenance: Most Prunus trees need aggressive pruning in late winter to remove damaged wood and open the centers of the trees to sun and fresh air. It is better to prune too much than too little. To prevent disease during the season, many organic growers use a biofungicide based on Bacillus subtilis as a primary defensive measure. In fall, rake up leaves and gather up fallen fruits and compost them to interrupt the life cycles of several common diseases.
When: When you notice a few fruits falling to the ground, the harvest is usually imminent. Peaches, plums, and nectarines usually ripen all at once, within a 10-day period. Pick fruit in the cool of the morning, and set aside and compost fruits with issues that make them unusable.
How: Handle fruits as gently as eggs. Immediately chill the fruit in coolers or a refrigerator. Sort through the chilled fruits, and keep the perfect ones refrigerated to delay final ripening. Keep others in a cool place indoors, arranged in shallow boxes, until you can process them for long-term storage. Fully ripe plums keep best in the refrigerator.
Pick fruit in the cool of the morning, handling fruits as gently as eggs.
Plums, peaches, and nectarines can be frozen, dried, fermented, or canned as preserves or fruit butter.
Frozen. Peach preserves are the pride of many cooks, but you can freeze peaches and nectarines if you don’t have time to can them. To remove skins, dip fruits in boiling water for 30 seconds or so. As you pare the fruits, drop the halves or slices into an acidic solution to prevent discoloration (see Preventing Discoloration in Fruit). Drain, pack into freezer containers, and sprinkle with a little sugar, which tenderizes the fruit and protects its color.
Dried. Ripe peaches and nectarines contain so much moisture that they are slow to dry, and the long drying times increase chances that the fruit will darken to brown. Be sure to use a strong acidic solution to pre-condition slices being prepared for drying. Dry only until leathery, and store in the freezer.
Plums are surprisingly easy to dry. Use a sharp serrated knife to cut away the two rounded “cheeks” from each plum, and dip the pieces in an acidic solution to prevent discoloration. Arrange skin side down in a dehydrator, and dry until leathery. Simmer the pits with remaining flesh attached in a little water to make a drinkable fruit nectar as described in Make Fruit Nectar.
Canned. Peaches make elegant preserves or jam, and you can preserve whole or pitted plums by canning them in a light syrup. Peach or plum butter is delicious, too.
Wine. Plums make a spunky wine that can be drunk when rather young. Cut up plums as if you were drying them, and freeze the pieces until you are ready to make wine.
Purée. The day after harvest, when you have a quantity of bruised fruit that needs attention, a food mill can save the day. Simmer the washed, trimmed fruit for a few minutes to soften it, and then mill it into a purée. For use in smoothies, freeze the purée in ice cube trays. Use larger freezer containers if you plan to use the purée later to make a fruit butter or dry into a fruit leather.
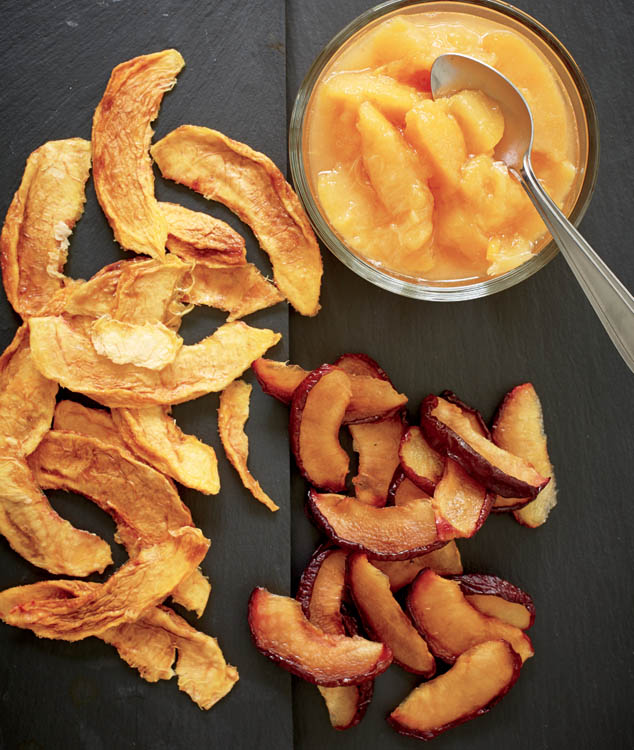
Peach preserves capture summer in a jar, or you can dry ripe plums (bottom) or peaches (left) to eat as healthy snacks.
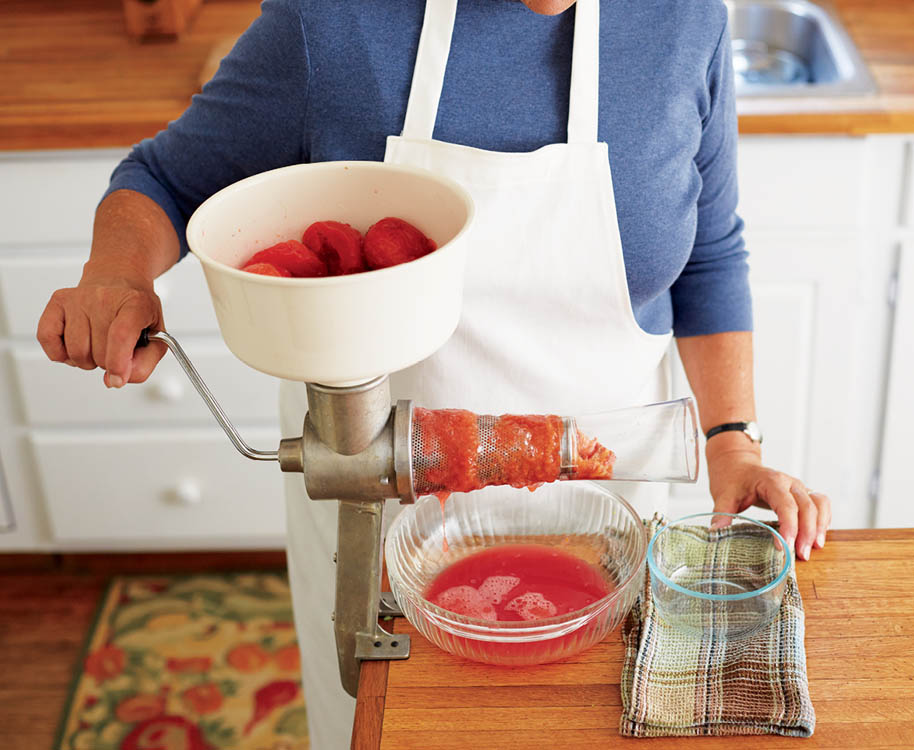
The skins and stones from cooked, cooled plums are removed by a food mill. The purée can be frozen or used to make dried fruit leather.

