CHAPTER 2
Hydration and Vitamins
Once you have found the place with the right illumination for your plant to thrive, it is time to decide when and how much to water your plant. Watering too much or too little is the number-one killer of plants, and deciding at what point a plant needs water seems to baffle many. Prevalent also is the misconception that giving your plants fertilizer will solve every problem. While it is an important factor to consider when caring for your plants, blue powder isn’t the miracle cure it has been touted to be. Let’s dive in and dispel the myths surrounding these two important factors to raising a healthy plant. It isn’t as complicated as you think to determine when and how to water and fertilize your houseplants.
HYDRATING YOUR PLANT
A problem that arises when deciding when and how to water is that the labels that come with plants are often misunderstood.
BEFORE FOLLOWING THE label, consider factors that influence how the plant takes up water. For example, the label may advise you to give your plant a cup of water every week, but what those directions do not consider is the weather—maybe your area is going through a cold or cloudy spell, and your plant hasn’t been thirsty lately. Or, if you placed the plant in a space with less light than it needs, it may need less water than what the label calls for. Use the label only as a starting point and not as a set-in-stone rule.
Instead of watering your plant on a schedule, as is often recommended, I suggest you check your plant on a schedule. When you use an air conditioner in the summer or heat in the fall, it lowers the humidity in your home, drying out your plant faster; during these times, your plant may need more water for a short time while it adjusts to the new environmental conditions. As noted above, a week of cloudy days and cooler weather will decrease the amount of water a plant uses at that time. Conversely, a week of sunny, hot days will increase the water your plant will use. Consider these factors as you check your plant and decide whether to add water.
When to Water
There are a few different ways to check for your plant’s water needs. Many people swear by a moisture meter, which has a probe that is inserted into the potting medium and sends a reading to the moisture indicator, letting you know whether it is wet or dry. However, sometimes the reading can be incorrect, affected by the salt content of the potting medium usually present from fertilizer residue. An alternative is lifting your plant’s container after watering to get a feel for its weight after it is well hydrated. When you check it the next week, lift it again to see if you can feel a difference in the weight of the plant. If it feels significantly lighter, it is most likely time to water again. If the weight feels the same or a little less, do not add any water.
I can often tell if a plant needs water just by looking at it. Plants that need water are usually a lighter green than their normal color—this is especially true of ferns. This way of reading your plants comes only after working with plants for a long time.
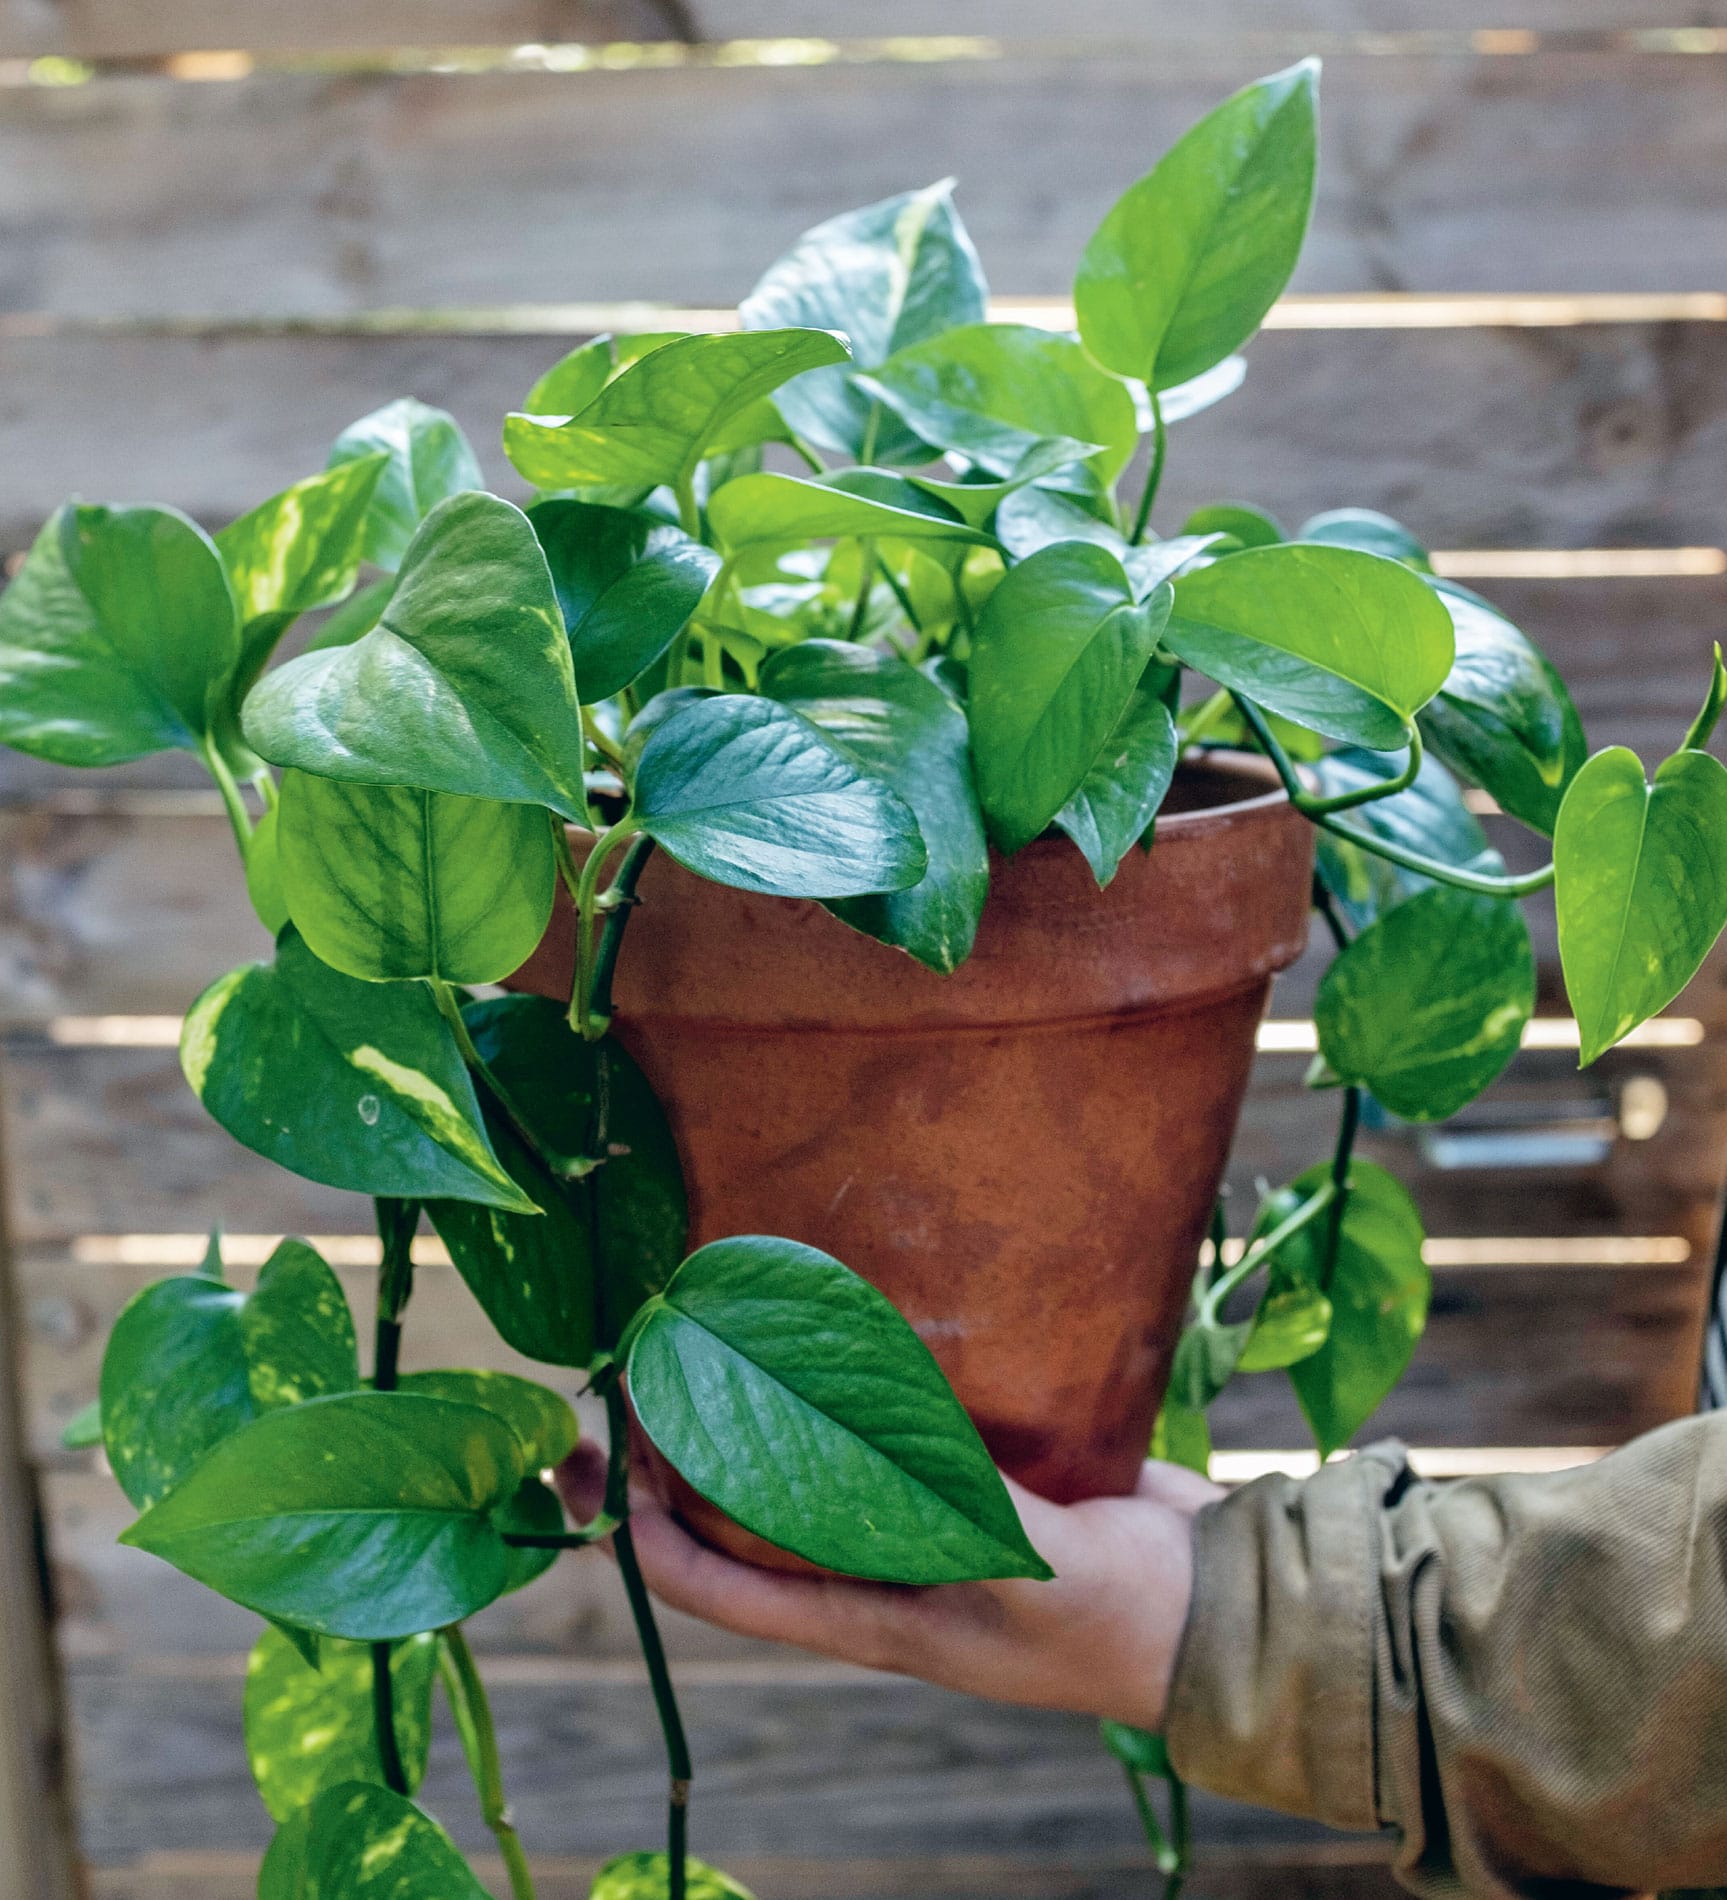
If you are uncertain how to decide if your plant needs water, lift the container after watering your plant to feel its weight. When you lift it again and it feels much lighter, you will know it needs water.
If you find your plant is wilted, it may be a sign the plant is dry. However, check the potting medium before adding water, as wilting can also indicate your plant is too wet. If a plant has been allowed to dry and wilt, it may have damaged the roots to the point that they have died off and may no longer be able to take up water, so the plant wilts just as if the roots had rotted from overwatering. You may be tempted to water the plant after seeing it react this way, but adding more water will not help the plant at this point—the roots that died from drying out will start rotting in the now-overly saturated medium, and your plant will most likely not recover.
If you remove your plant from the pot and discover that it has been overwatered and the roots are black and mushy—and, I warn you, probably extremely smelly—is there hope? If your plant still seems to have life in its green parts, there may be a chance to save the plant. Wash the remaining potting medium off the roots and see if any healthy roots remain. Cut the mushy, dead roots off and replant your plant in fresh potting medium. Many plants will recover from an occasional wilting, reacting only by losing a leaf or two, but this method should not be used as an indicator that your plant needs water on a regular basis.
The best way to decide whether a plant needs water is simply to stick your finger into the potting medium. If you feel moisture at your first or second knuckle, it is not necessary to add water. If it is dry, give it a drink. That said, when you have a plant in a large, deep pot, checking just the top couple of inches may not be a good indicator of its moisture level, as the potting medium may be dry on top but still quite moist in the lower part of the container. Check the potting medium further down in the pot with a long dowel or stick. Push it into the medium as far as you can and hold it there shortly, similar to sticking a toothpick into a cake to check for unbaked batter; if there is moisture or wet potting medium on the tip of the stick, hold off watering. Water when the dowel is barely moist and never let it completely dry out.
How Much to Water
You’ve established that your plant needs water, but how much? If it is a cactus or other succulent, you just need to give it a thimbleful, right? I used to think so, fearing that I would overwater it. Or, if the plant is a big drinker, you can leave it standing in water, right? The answer to both of those questions is no. You should give water to any plant, no matter the variety, the same way: until water runs out the bottom of the pot from the drainage hole.
The key to this watering practice is the amount of time that passes before you water again. A cactus or other succulent may not need water again for months, yet a fern or peace lily may need water again in a few days. A plant should stand in water in the saucer for no more than 30 minutes to make sure it has absorbed as much water as it needs. If there is any left in the saucer at that time, dump it out. If your plant is too large to move, use a turkey baster to remove any excess moisture from the saucer.
Top Watering
Top watering is the most common method for watering plants, and it simply means pouring water onto the potting medium at the top of the container. When top-watering your plant, make sure to water all the way around the container, rather than in the same spot each time—this is especially important in large containers. Water needs to reach all of the plant’s roots; by watering in only one small area, roots in other parts of the pot may dry out too much and die. Your plant may suffer even though you feel you’ve been adequately watering, because water was not delivered to every part of the plant’s root system.
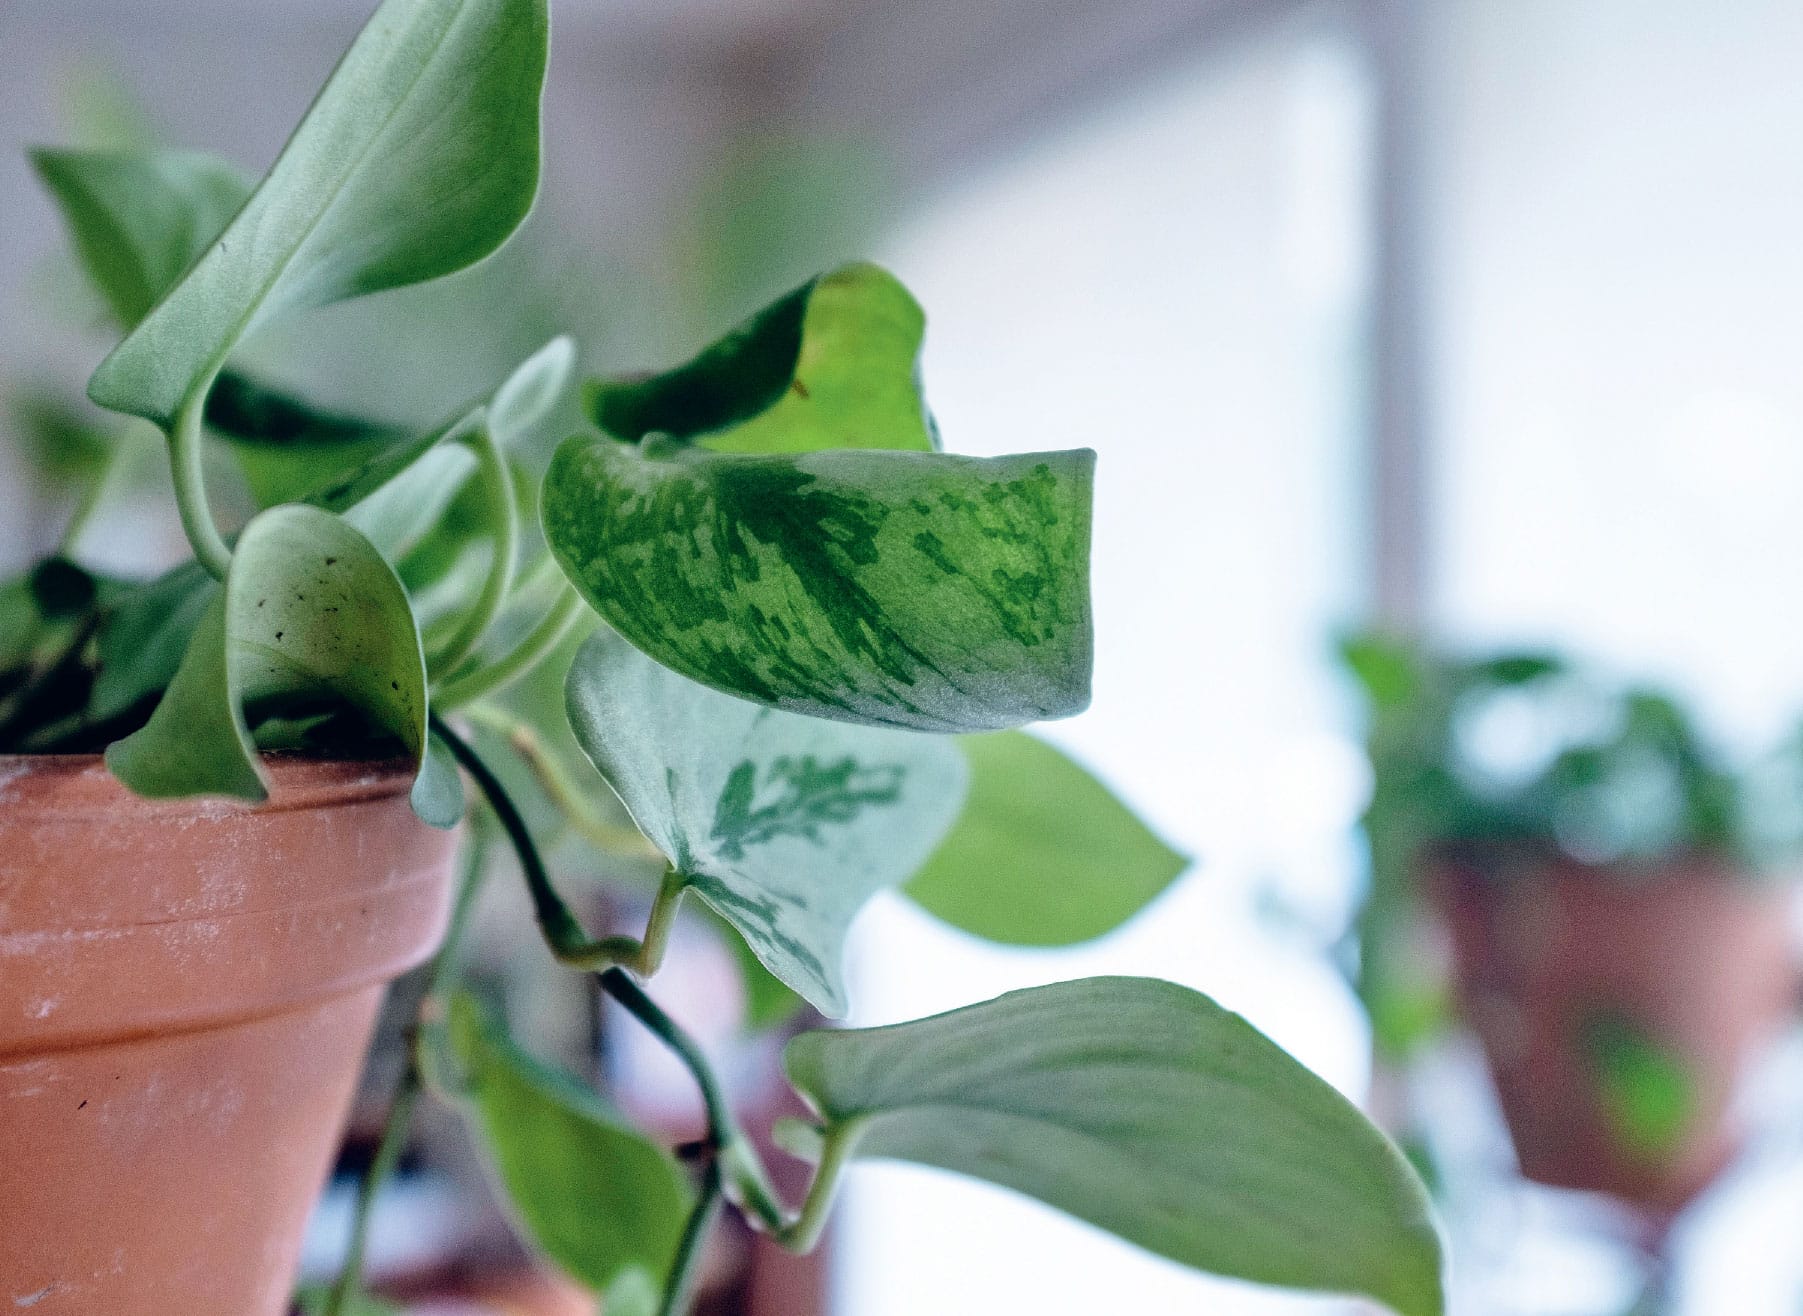
This scindapsus is showing signs of wilting from being too dry, as its leaves are starting to curl. After being watered, the leaves should straighten out.
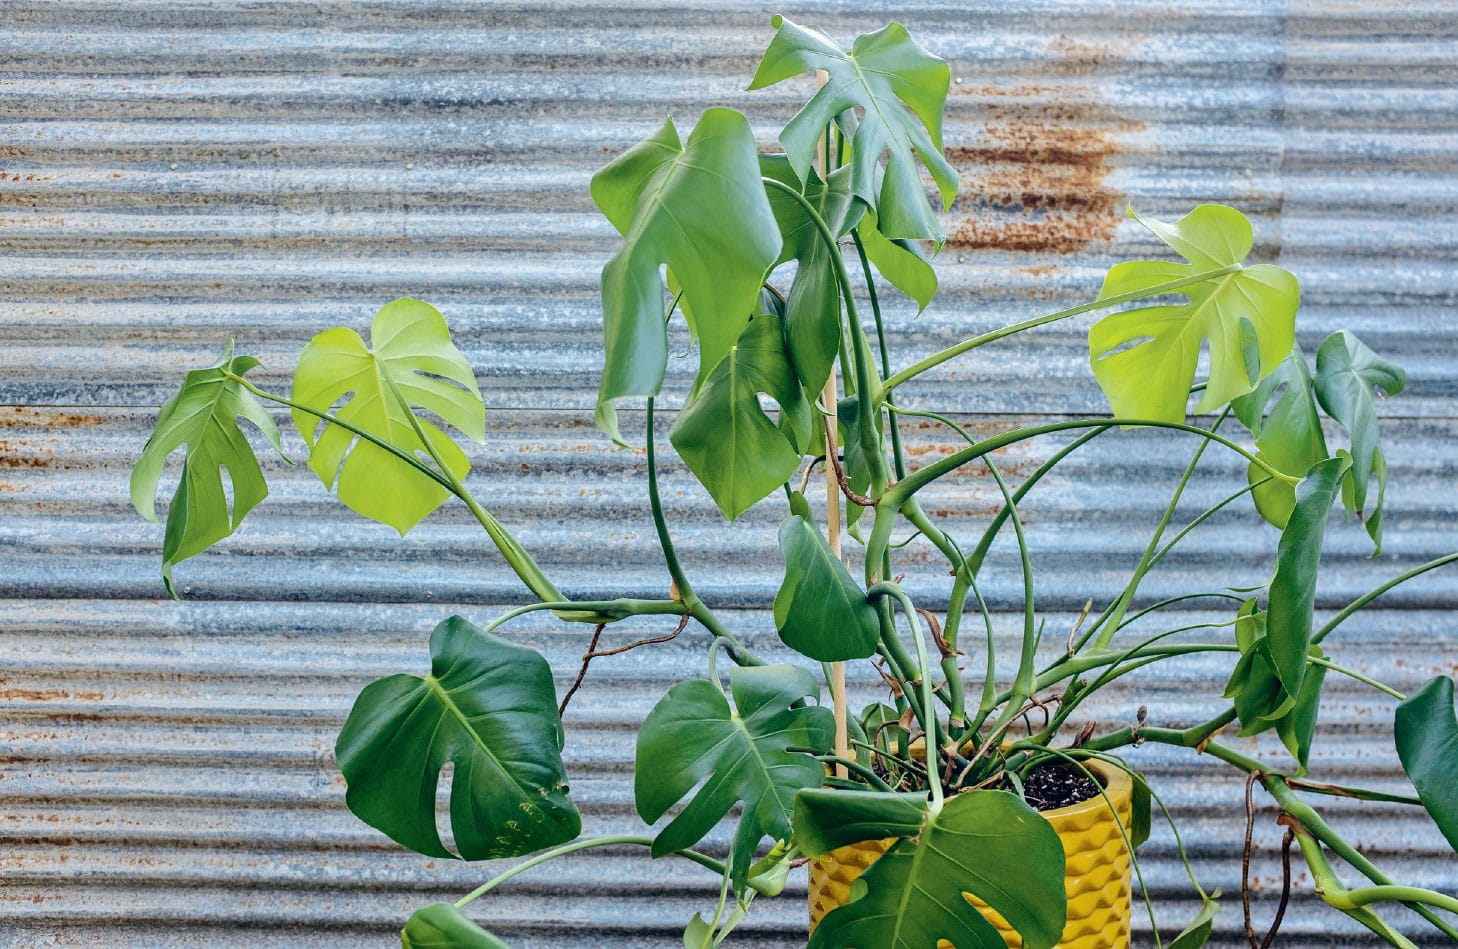
The drooping leaves of this monstera are a good indicator that the plant is in need of water. After being watered, the leaves should perk back up.
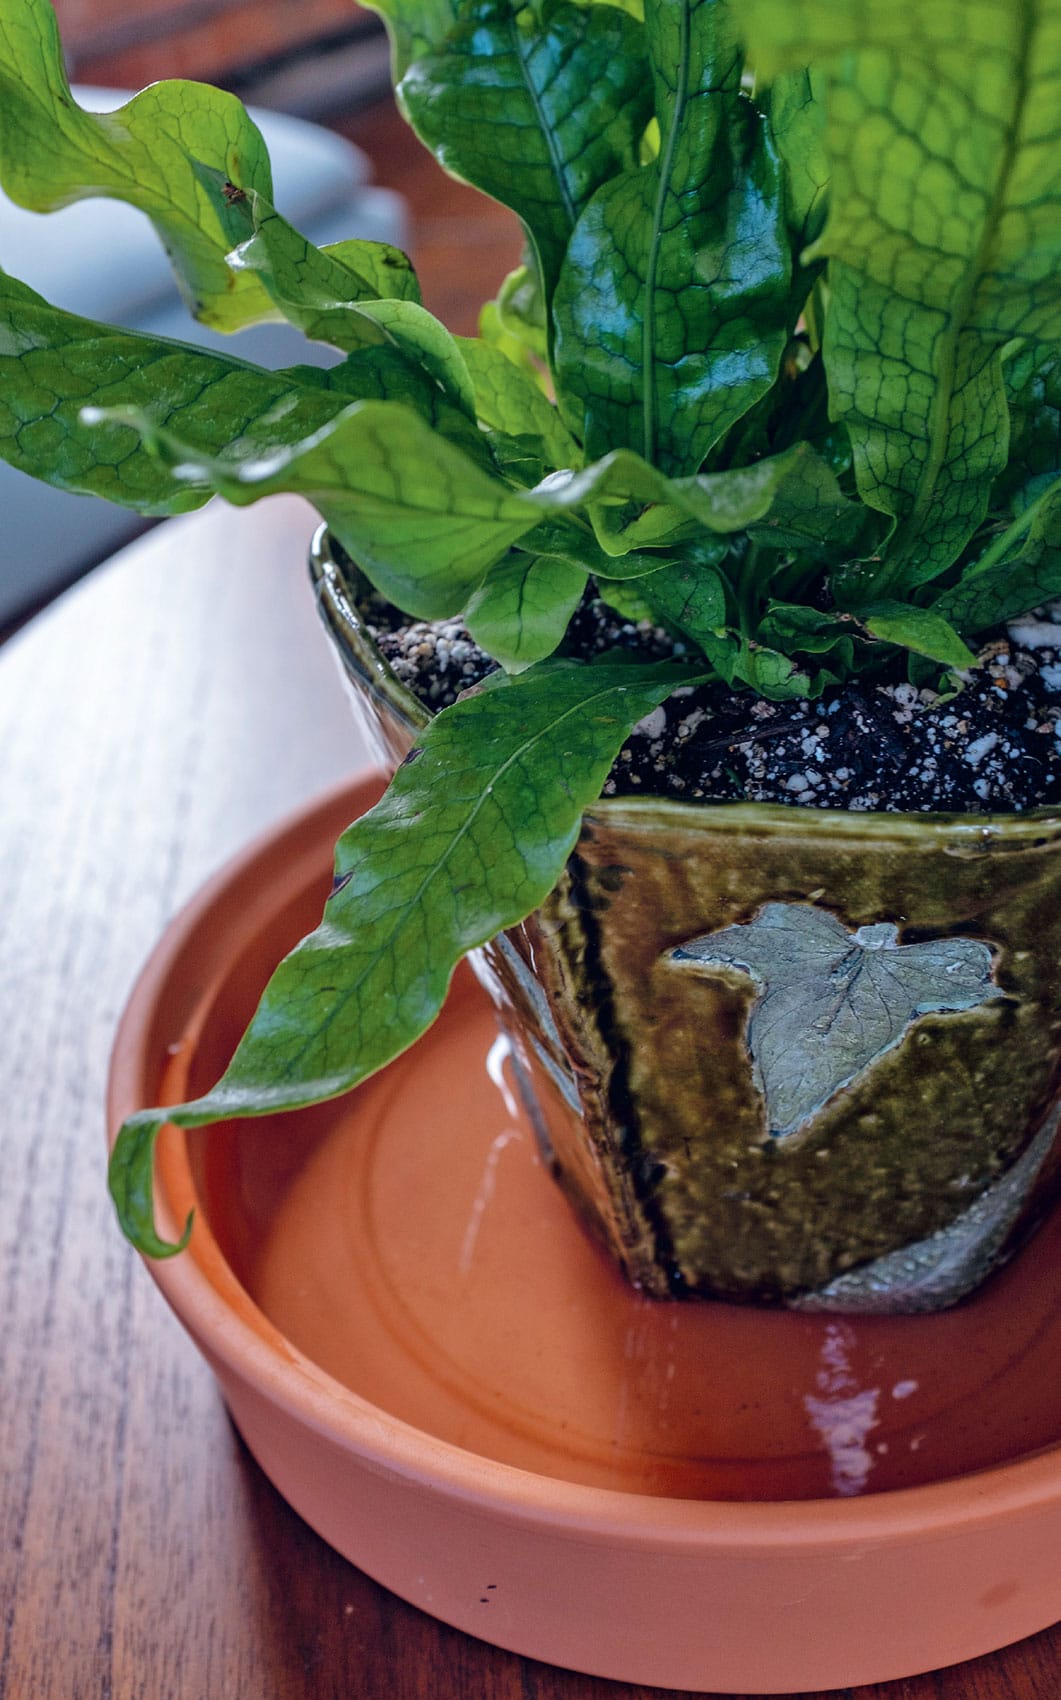
If a plant has been allowed to dry out extensively, the potting medium may draw away from the sides of the pot. Immersing the plant in water or bottom watering will allow the plant to take up water and rehydrate the medium.
Bottom Watering
Some people like to water their plants from the bottom by adding water to the saucer and letting the plant soak it up. You’ll know this process is complete when the top of the potting medium becomes moist; if it doesn’t, add more water to the saucer until it does. This method guarantees all areas of the container are hydrated because you can see the moisture reach all the way through the potting medium. After the plant has taken up all the water it needs, remove the excess. Do not leave water standing in the saucer for an extended length of time, assuming it will eventually soak it all up into the root system.
Bottom watering works well, but if you add fertilizer to the water, eventually there will be a buildup of fertilizer salts, which can be harmful to the plant. Once a month, flush the soil from the top to remove the excess salts. Run water through the plant, as you would when top watering, allowing the excess to run out the drainage holes and flushing out any unwanted substances.
Immersion
Quite often the potting medium used by growers when producing houseplants consists mainly of peat moss, which pulls away from the sides of the container when the potting medium dries out completely. When this happens, water runs down the sides of the pot outside the potting medium instead of soaking into it. The water will then drain out the bottom of the pot, not wetting the potting medium at all. To rewet the medium, immerse it in a container of water. You may have to weigh plastic pots down with something heavy or else they will float. Immersion watering should cause the potting medium to swell and fill the pot again. If it does not expand back to the edge of the container, it may be time to repot the plant using a different potting medium or add some medium to the fill the gap between the original medium and the container.
Vacation Watering
If you travel from home for a week or more at a time, it may be necessary to find a way to keep your plants watered while you are gone. If you have a friend or family member you can trust to follow directions and take care of your plants, that is usually the best choice. Or you could get creative: try placing your plant next to a sink full of water and running a string or shoelace from the sink into the potting medium of your plant—the water will wick up the string into your plant, keeping it moist. You could also cover your plants with a clear plastic bag, such as a dry-cleaning sleeve, to keep the humidity high and help your plants stay hydrated. Use dowels or sticks to hold the plastic up and away from the foliage, like a small greenhouse. Move your plants back from the window or light source while you are gone, so they are receiving less light, thus using less water.
Every plant is unique and has different water needs. Consider the weather conditions and time of year, as well as any other surroundings that may affect how much water your plant needs at that time. Keeping your plant well hydrated, neither under- nor overwatered, can often seem daunting. But if you remember to check your plant often and pay attention to the signs it is presenting, you will find watering is an easy and enjoyable task.
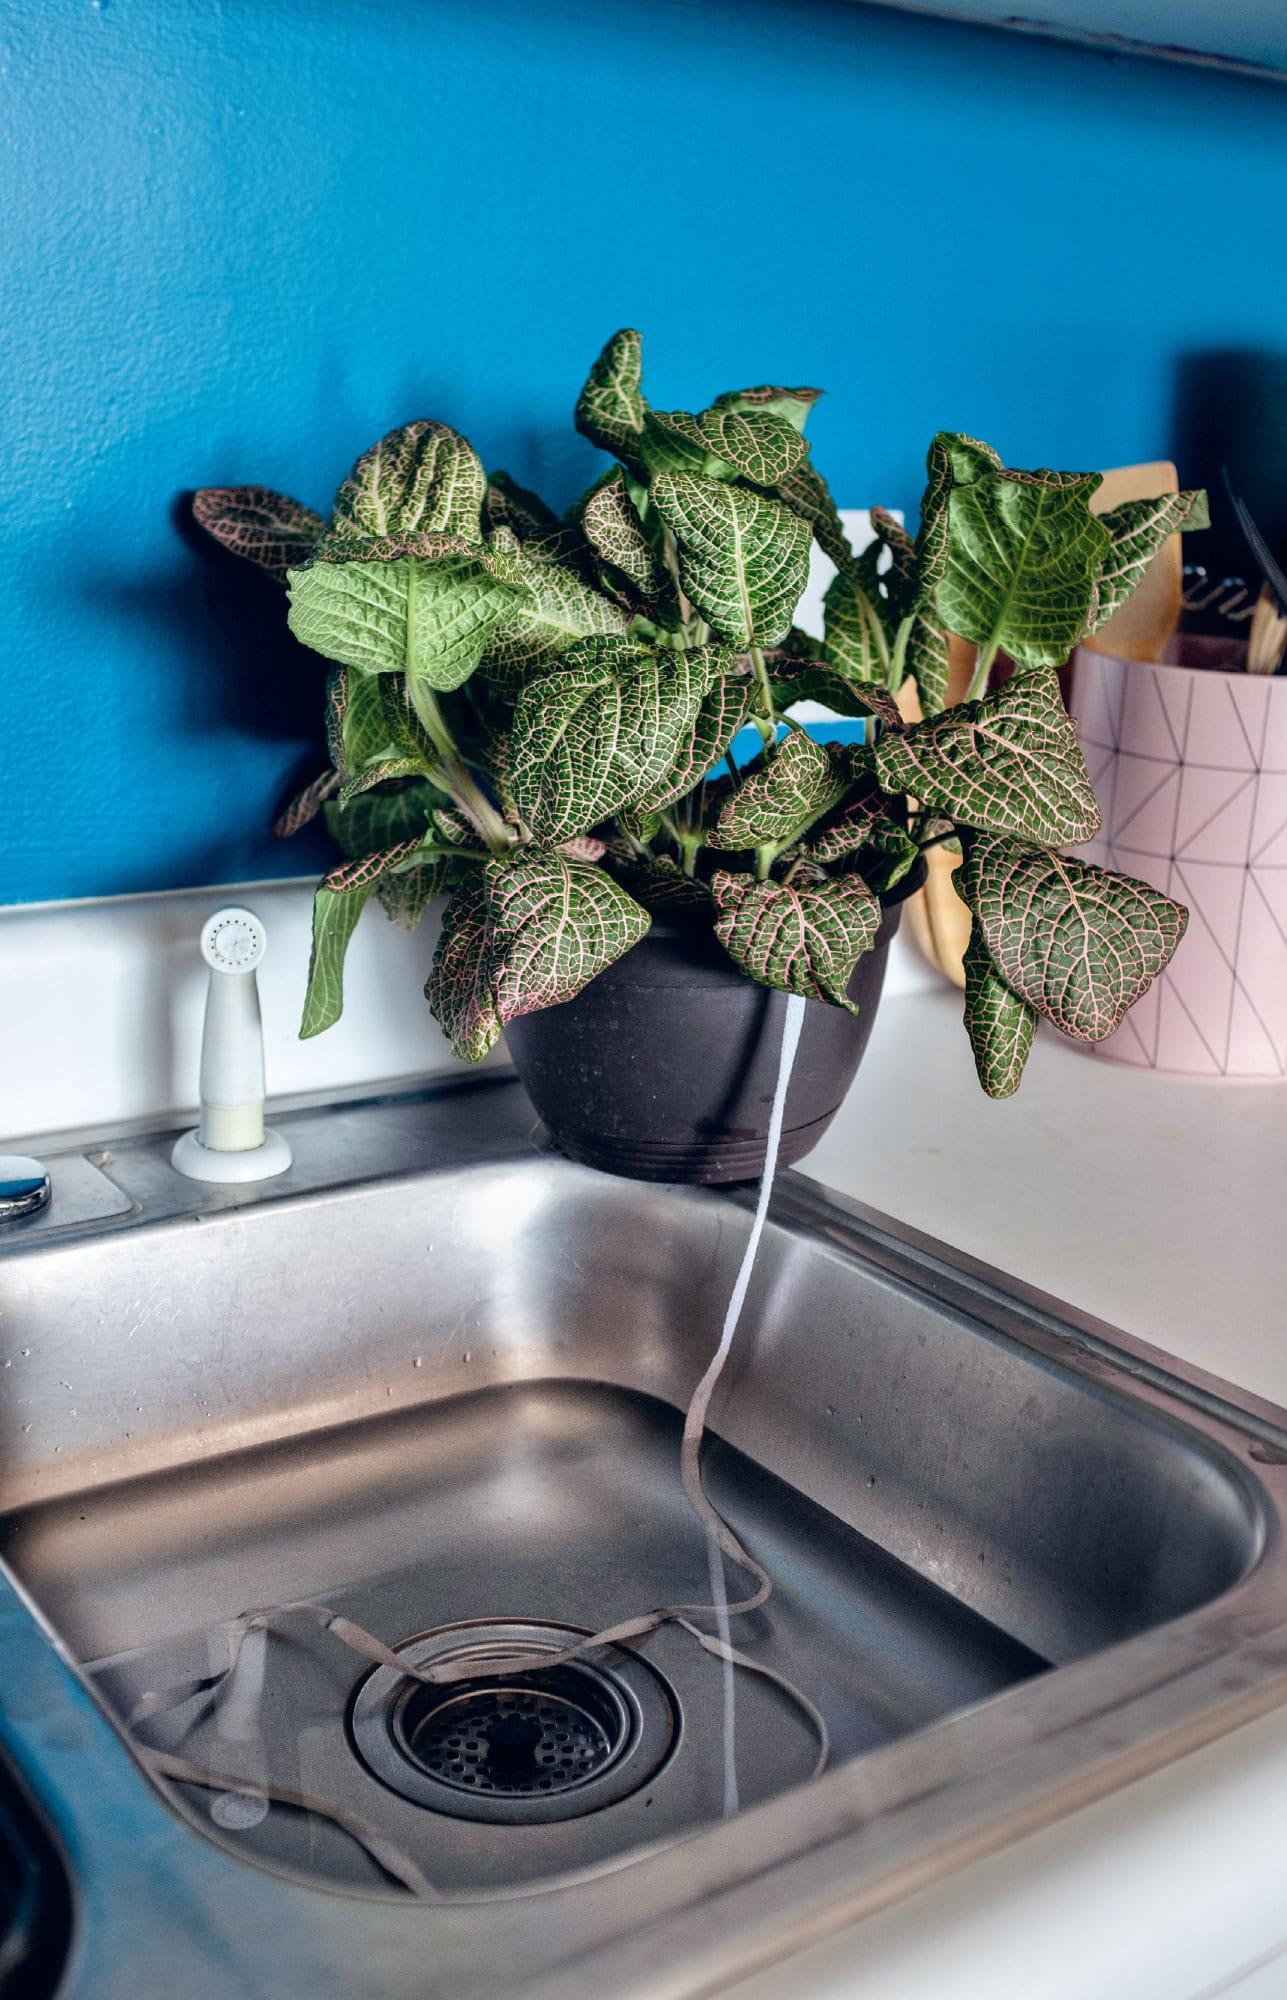
When you go on vacation, wick-watering your plant is a good way to keep it hydrated. Insert one end of a string or shoelace into the potting medium and place the other end into a sink of water. The water will wick up the string into the medium, keeping it moist.
FERTILIZING YOUR PLANT (A SHOT IN THE ARM)
Light is the food source for your plants.
MANY ASSUME THAT when a plant is given fertilizer, it is being “fed,” but I view fertilizing my plants like taking a daily vitamin—but unlike humans, plants do not need fertilizer on a daily basis.
Often it is recommended to fertilize your plants once a month. That suggestion goes along with the belief that you should also water your plants once a week, whether or not they need it. The proper rule of thumb is to fertilize your plants every fourth watering, thus the once-a-month ideology. In reality, the fourth watering may occur more or less frequently than once a month, depending on the plant, its container, whether the roots fill the container, the weather, and time of year.
I suggest that, instead of giving your plant full-strength fertilizer every fourth watering, you use a 1/8- to 1/4-strength formula every time you water. That way your plant is benefitting from a steady supply of nutrients instead of one large dose all at once.
Which fertilizer you use is completely up to you. When you purchase fertilizer, you will notice three numbers displayed prominently on the container. These indicate which macronutrients the fertilizer contains and in what percentages. Some gardeners think of these numbers as representing “up, down, and all around.” The first represents nitrogen (N), the nutrient beneficial to the green, or “up,” part of the plant; it assists your plant when putting out new growth. The middle number represents phosphorus (P), which helps the plant form strong roots (“down”) and helps flowering plants grow brighter, bigger, and longer-lasting flowers. Fertilizer does not make the plant bloom, though—the only thing that does this is the correct amount of light. The last number represents potassium (K), which is beneficial for the “all-around” health of the plant. It helps the plant resist disease and assists it with drought and cold tolerance. A container of fertilizer with the numbers 20-20-20, for example, is made up of 20 percent nitrogen, 20 percent phosphorus, and 20 percent potassium. The other 40 percent of fertilizer consists of smaller amounts of micronutrients and filler of some kind that holds the formula together in a digestible format for the plant.
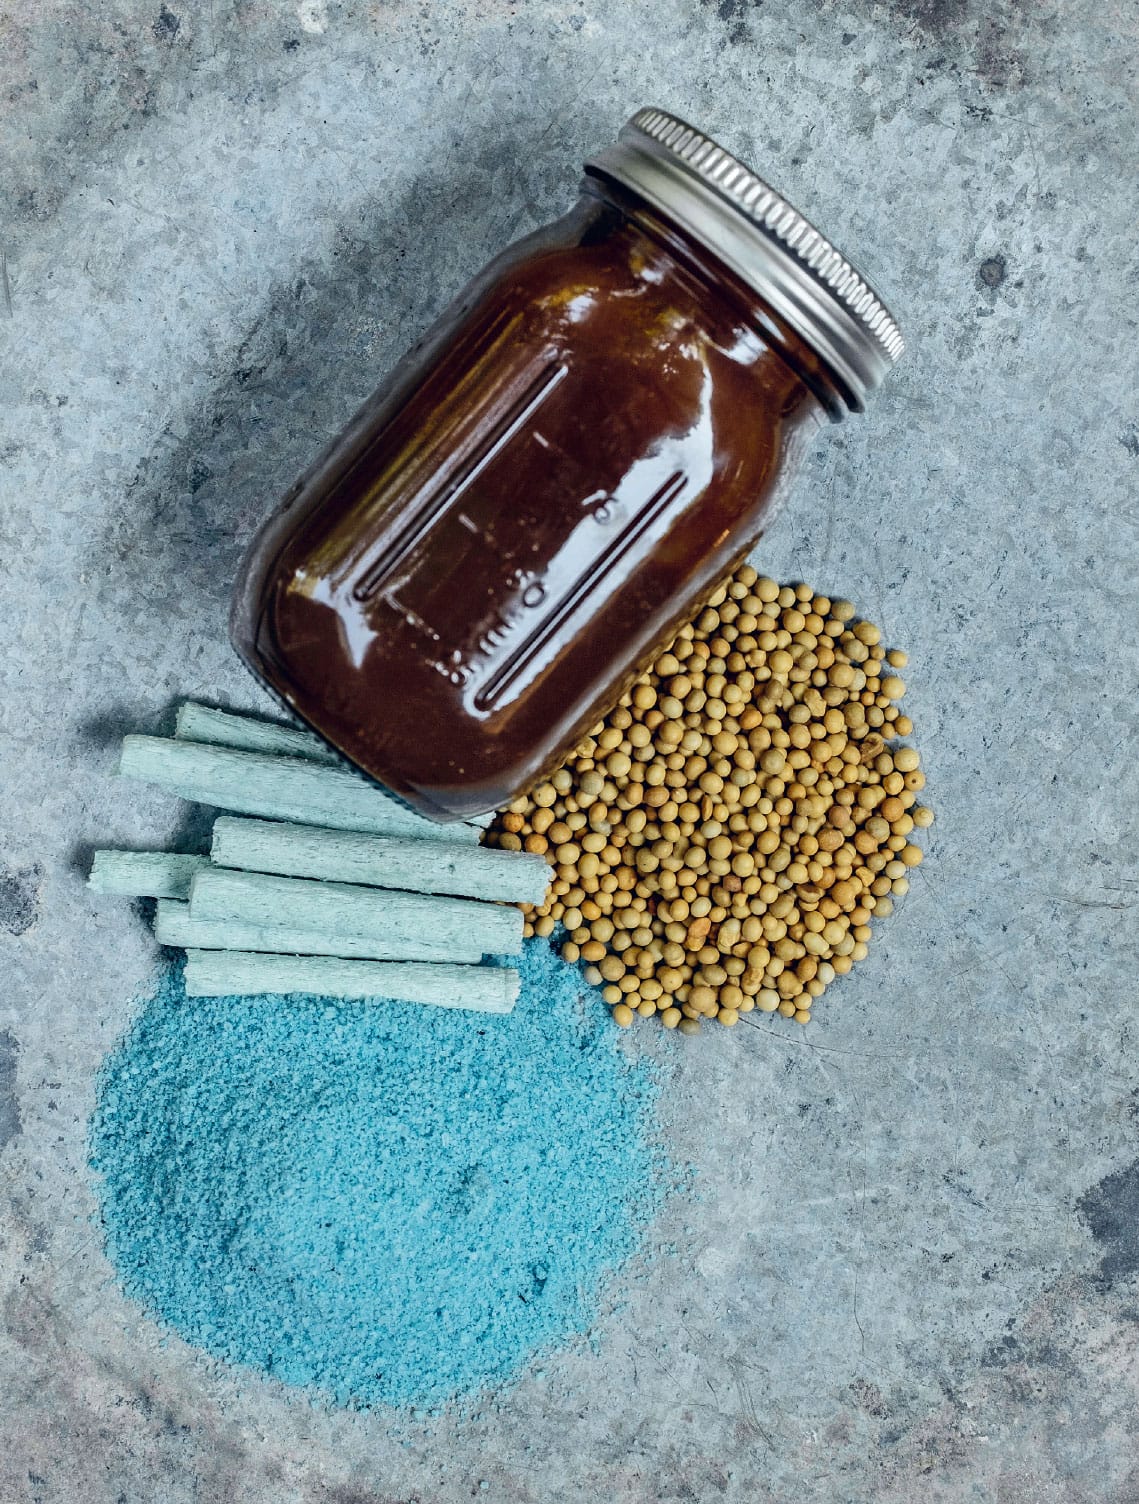
There are many forms and kinds of fertilizers to choose from, including organic and nonorganic types. Clockwise from the top: liquid fish emulsion, slow-release granules, water-soluble blue crystals, and slow-release sticks.
Types of Fertilizer
There are two types of fertilizer to choose from—organic and nonorganic (synthetic). Both have their pros and cons, and both are beneficial to your plant’s health when applied properly.
We’ll discuss the nonorganic forms first. These deliver nutrients to the plant quickly, but if too much is applied, it will burn leaves and can affect the entire plant. Probably the best-known nonorganic fertilizer is the synthetic blue crystal form that is measured in a scoop and then poured in water, where it dissolves and turns the water blue. This is called water-soluble fertilizer. It is easy to use and find, which makes it a popular option.
Nonorganic fertilizer also comes in concentrated liquids that can be added to water to produce the right strength and granular forms that are applied to the potting medium and dissolve when water is added to it. Another type of fertilizer is most likely already in your plant when you buy it—a slow-release fertilizer in the form of small, round beads. They are colored (most commonly blue, green, or cream) so they are easy to see when applied by the plant growers. These small beads are encapsulated in a coating that dissolves slowly when the plant is watered, releasing a small amount of fertilizer. These are also called continuous-feed fertilizers, as they last for up to three months in the potting medium, continuously releasing fertilizer in small amounts to your plants. If you buy a plant and can see the fertilizer beads, it may not be necessary to add fertilizer for a few months.
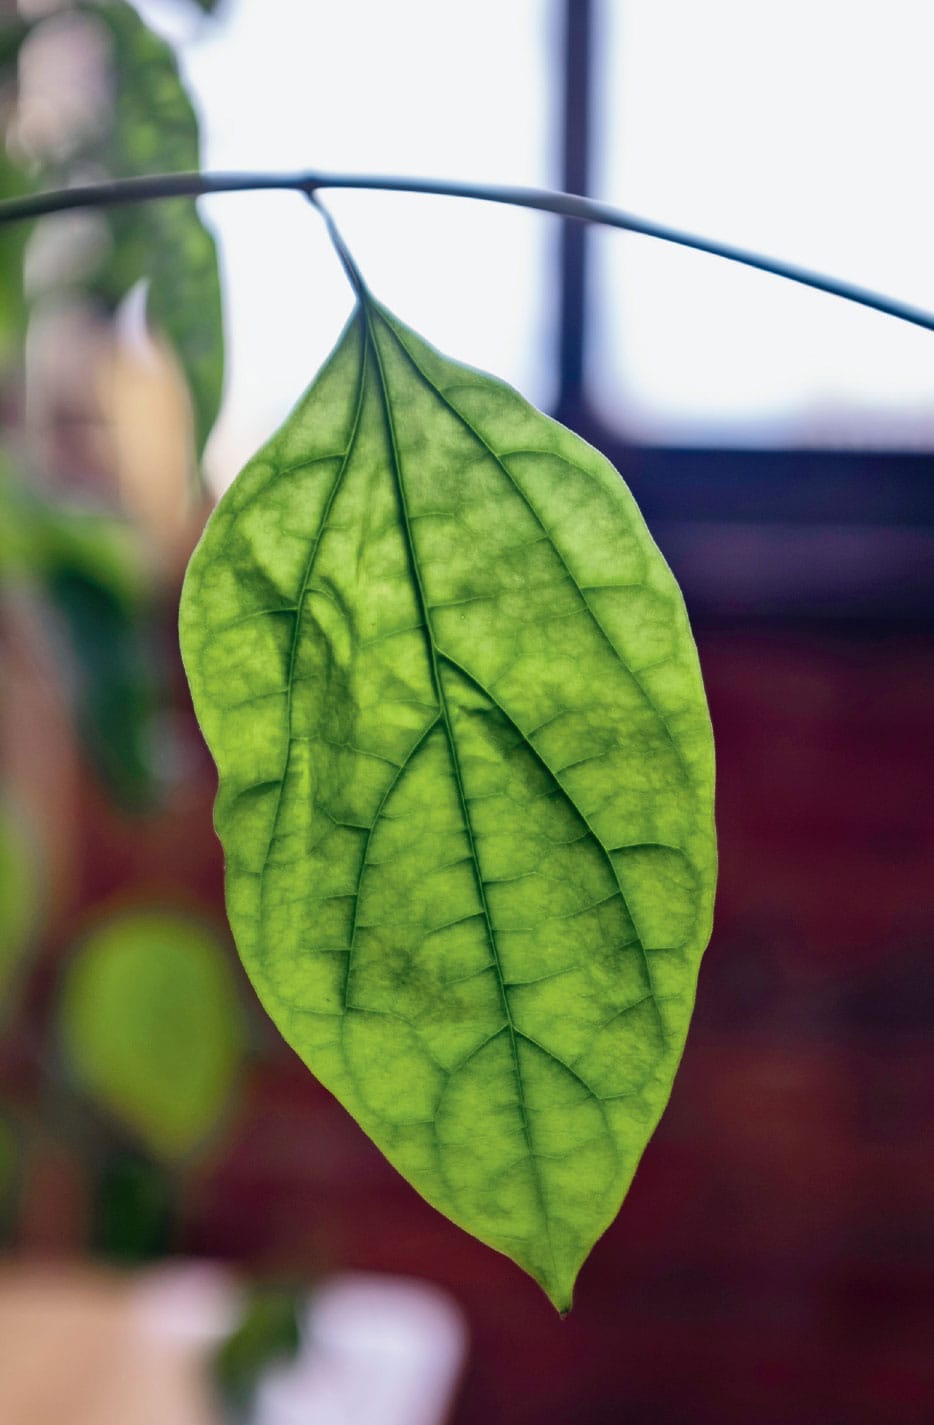
If your leaf is pale with dark veins, as in this picture, or is dark with pale veins, it may need to be fertilized, as it has a nutrient deficiency.
Slow-release fertilizer also comes in small stick forms for houseplants. These are pushed into the potting medium at equal intervals around the container edge, the size of the pot determining how many sticks are used. However, as this concentrates the fertilizer in one area, it may damage nearby roots and not reach the entire rootball.
The other type of fertilizer is organic, meaning it is derived from the remains of living organisms. Organic fertilizers release nutrients slowly to the plants. Fish emulsion is a popular form that may be combined with kelp meal, blood meal, and worm castings. Organic fertilizers break down slowly and are less likely to burn your plants if they are overapplied or if residue is left on the surface of a leaf.
You may try a few fertilizers before you find the one that works best for your plants. There are also fertilizers for specific plants, such as for cacti and other succulents and for African violets. These aren’t necessary to use for those plants but are formulated to have the correct percentage of each nutrient for that particular plant family, so they eliminate some of the guesswork in choosing a fertilizer.
When & How Much to Fertilize
How often should you fertilize? As mentioned shown here, you can do so every fourth watering using a full-strength formula or every time you water using a 1/8- to 1/4-strength formula. However, because houseplants grow indoors, I don’t recommend using full-strength fertilizer. Never assume that more is better and apply more fertilizer than the package calls for.
You should also be fertilizing only during the time of year your plant is actively growing—from approximately March through September, depending on the part of the country you live in. As soon as you see new growth on your plant in the spring, begin your fertilizer regime. When the days get shorter in the fall, forgo fertilizing until spring. Plant growth slows down when the days are shorter, so they do not need added nutrients and may not use them if you add fertilizer.
Additionally, too much fertilizer applied to your plant can severely damage or possibly kill it. Usually, overfertilizing burns the plant, meaning parts of it may turn black and die. If only a section of an overfertilized plant dies, you may be able to flush the potting medium with water to wash the excess fertilizer out. Hopefully, your plant will recover.
If you have an ailing plant, it is tempting to reach for the fertilizer, thinking you are helping it, but a weak plant should not be fertilized. Instead, find out what the problem is and decide on a course of action. If your plant has many yellow leaves or spots on the leaves, or if it seems to be losing vigor, it may be time to reconsider the location where you have it placed. It may need more light or a different watering regime. It may have fungus or disease that needs to be treated. Take a picture or a leaf of the plant to a garden center and the experts there should be able to help you determine what your plant needs. Remove any yellow leaves—they will not turn green again.
If your plant’s leaves are all a lighter green than they should be with darker green veins, or darker green with light veins, your plant may indeed need a boost of fertilizer, as this indicates it is missing nutrients it needs to keep its leaves green.
The key to keeping your plants healthy and looking good is paying attention to them. If they are left to languish in a corner, treated simply as part of the décor rather than a living thing, don’t be surprised when problems arise. Plastic plants may be better in those spots if you want something there just for the aesthetic. Give your plants the correct light, water, and fertilizer and you will be amazed at how good they look!
CLIMATE & ATMOSPHERE
Our plants come to live with us after leaving growing facilities that have near-perfect conditions.
THE ONLY JOB the plant nursery had was to keep the plant as healthy and beautiful as possible for retail sale, giving it the optimum amount of water, fertilizer, and care. Then the plants are shipped north and are brought to our homes, where we attempt to take care of them to the best of our ability as well. Still, we don’t have the optimum conditions they want. Let’s talk about some of those conditions and how we can improve them.
Temperature
Plants are usually grown in climates much warmer than we are accustomed to. Indoors, however, they are usually comfortable in the temperatures we are comfortable in—between 60° and 75°F. If you turn your thermometer down at night, you are making your plants comfortable as well; they prefer a drop in temperature at night of approximately 10°F.
Humidity
Our homes in the winter can feel like the Sahara Desert to both our skin and our plants. Most houseplants hail from the tropical regions of the world, where humidity levels are as much as 80 to 90 percent. In our heated homes in the winter, however, humidity could be as low as 20 percent. Plants do better when they have sufficient humidity. How can we accomplish this?
Many people turn to a handheld mister, yet a mister only temporarily raises the humidity. Misters can also leave excess water on the leaves, which can contribute to the conditions needed for a disease to begin. Adding a humidifier to your furnace or plant area would be ideal. If that isn’t possible, group your plants together to raise the humidity around them.
If you have only a few plants that wouldn’t do well in the same light situation, you can raise the humidity by placing your plants on a pebble tray. Use a saucer larger than the one your plant is standing on and fill it with small pebbles. Add water to the saucer so that it just comes to the top of the pebbles, then set your plant saucer and pot on top. You can set the pot directly on the pebbles as long as the plant is not standing in water. As the water evaporates from the pebbles, it will rise into the air around the plant, adding humidity. Keep the pebble saucer filled with water for best results.
Air Circulation
Air circulation may seem like a weird thing to talk about inside your home, but stagnant air is not conducive to your plants’ health. Moving air helps keep bugs at bay, strengthens the stems of your plants, and keeps leaves dry, which minimizes the chances of a disease developing. Open a window occasionally or add an electric fan to your plant area. A small amount of moving air will help keep your plant healthy.
The healthiest plants are kept well watered, in humid spaces, and given a shot in the arm on a regular basis. A healthy plant is better able to ward off insects and disease; one that does not have consistent care is more likely to attract mites or insects and develop disease. The goal is to have a plant that is easy to take care of, looks healthy, and adds beauty to your home. Providing the right conditions goes a long way toward ensuring you have a healthy, attractive plant for many years to come.
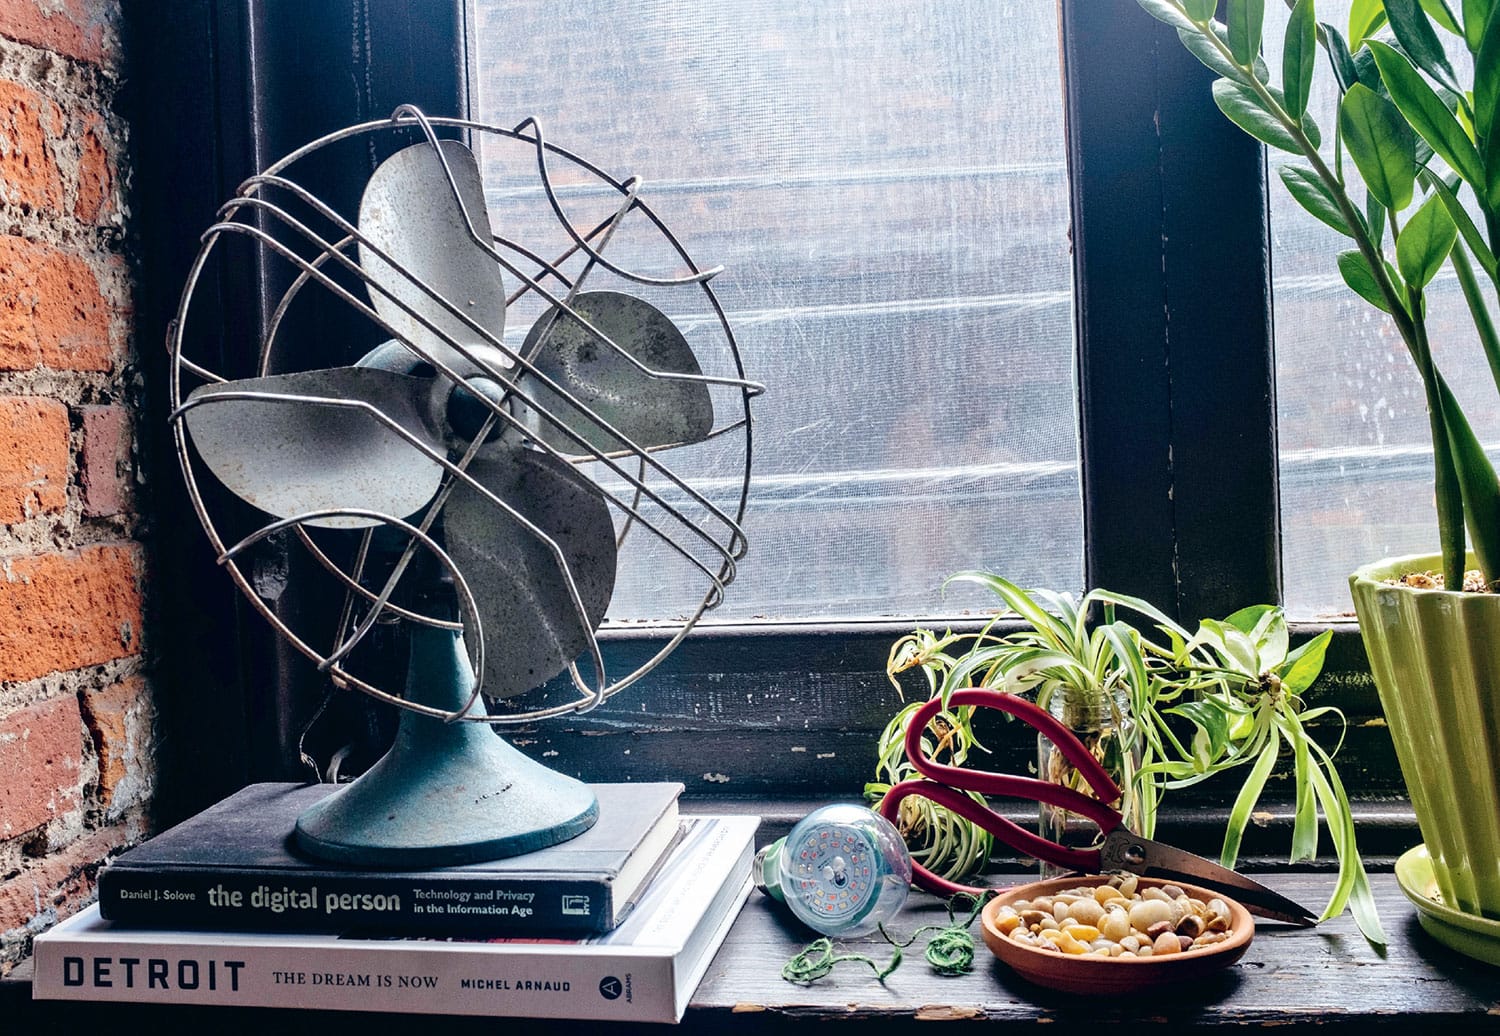
It can be helpful to have a fan for air circulation, as plants do not appreciate stagnant air. Clippers are invaluable for trimming unruly plants, twine is perfect for tying up leaning plants, and pebble trays are very important when trying to elevate humidity levels.
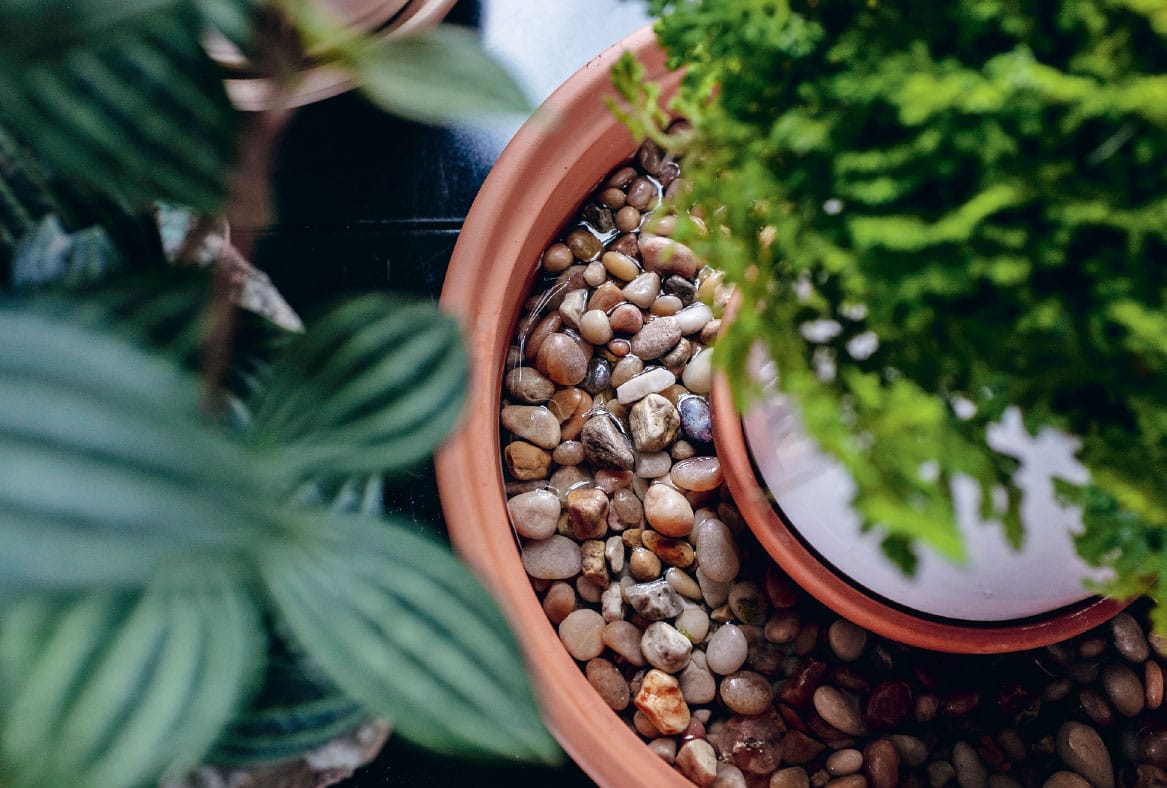
To keep the humidity high around your plants, place them on pebble trays that are filled with water. Make sure your plants aren’t standing in the water, though, to avoid rot.
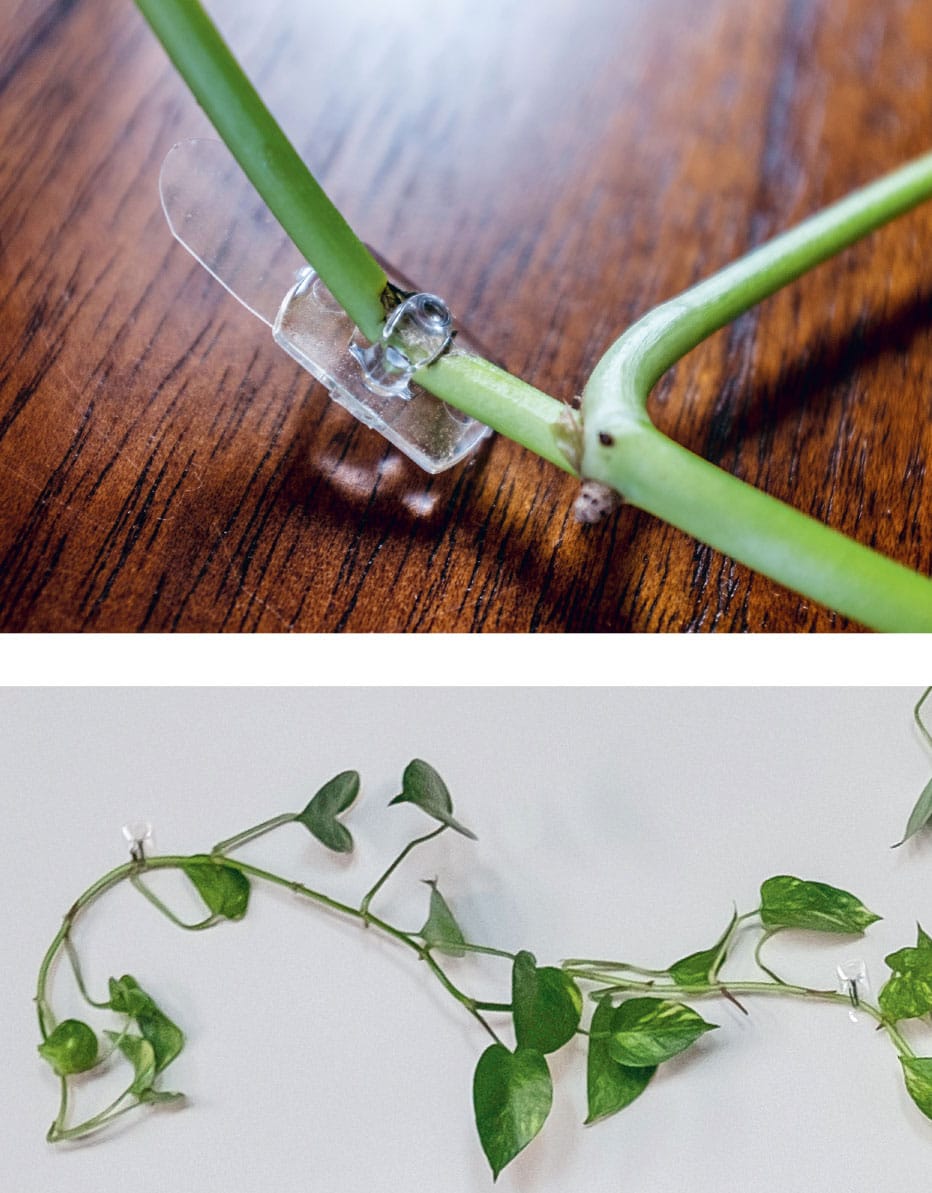
Adhesive hooks are a perfect solution to help train a plant around a window or up a wall. But be sure the strip is large enough to accommodate the plant’s future growth, or else the hooks may harm the plant. Check the plant often to prevent this damage from occurring.
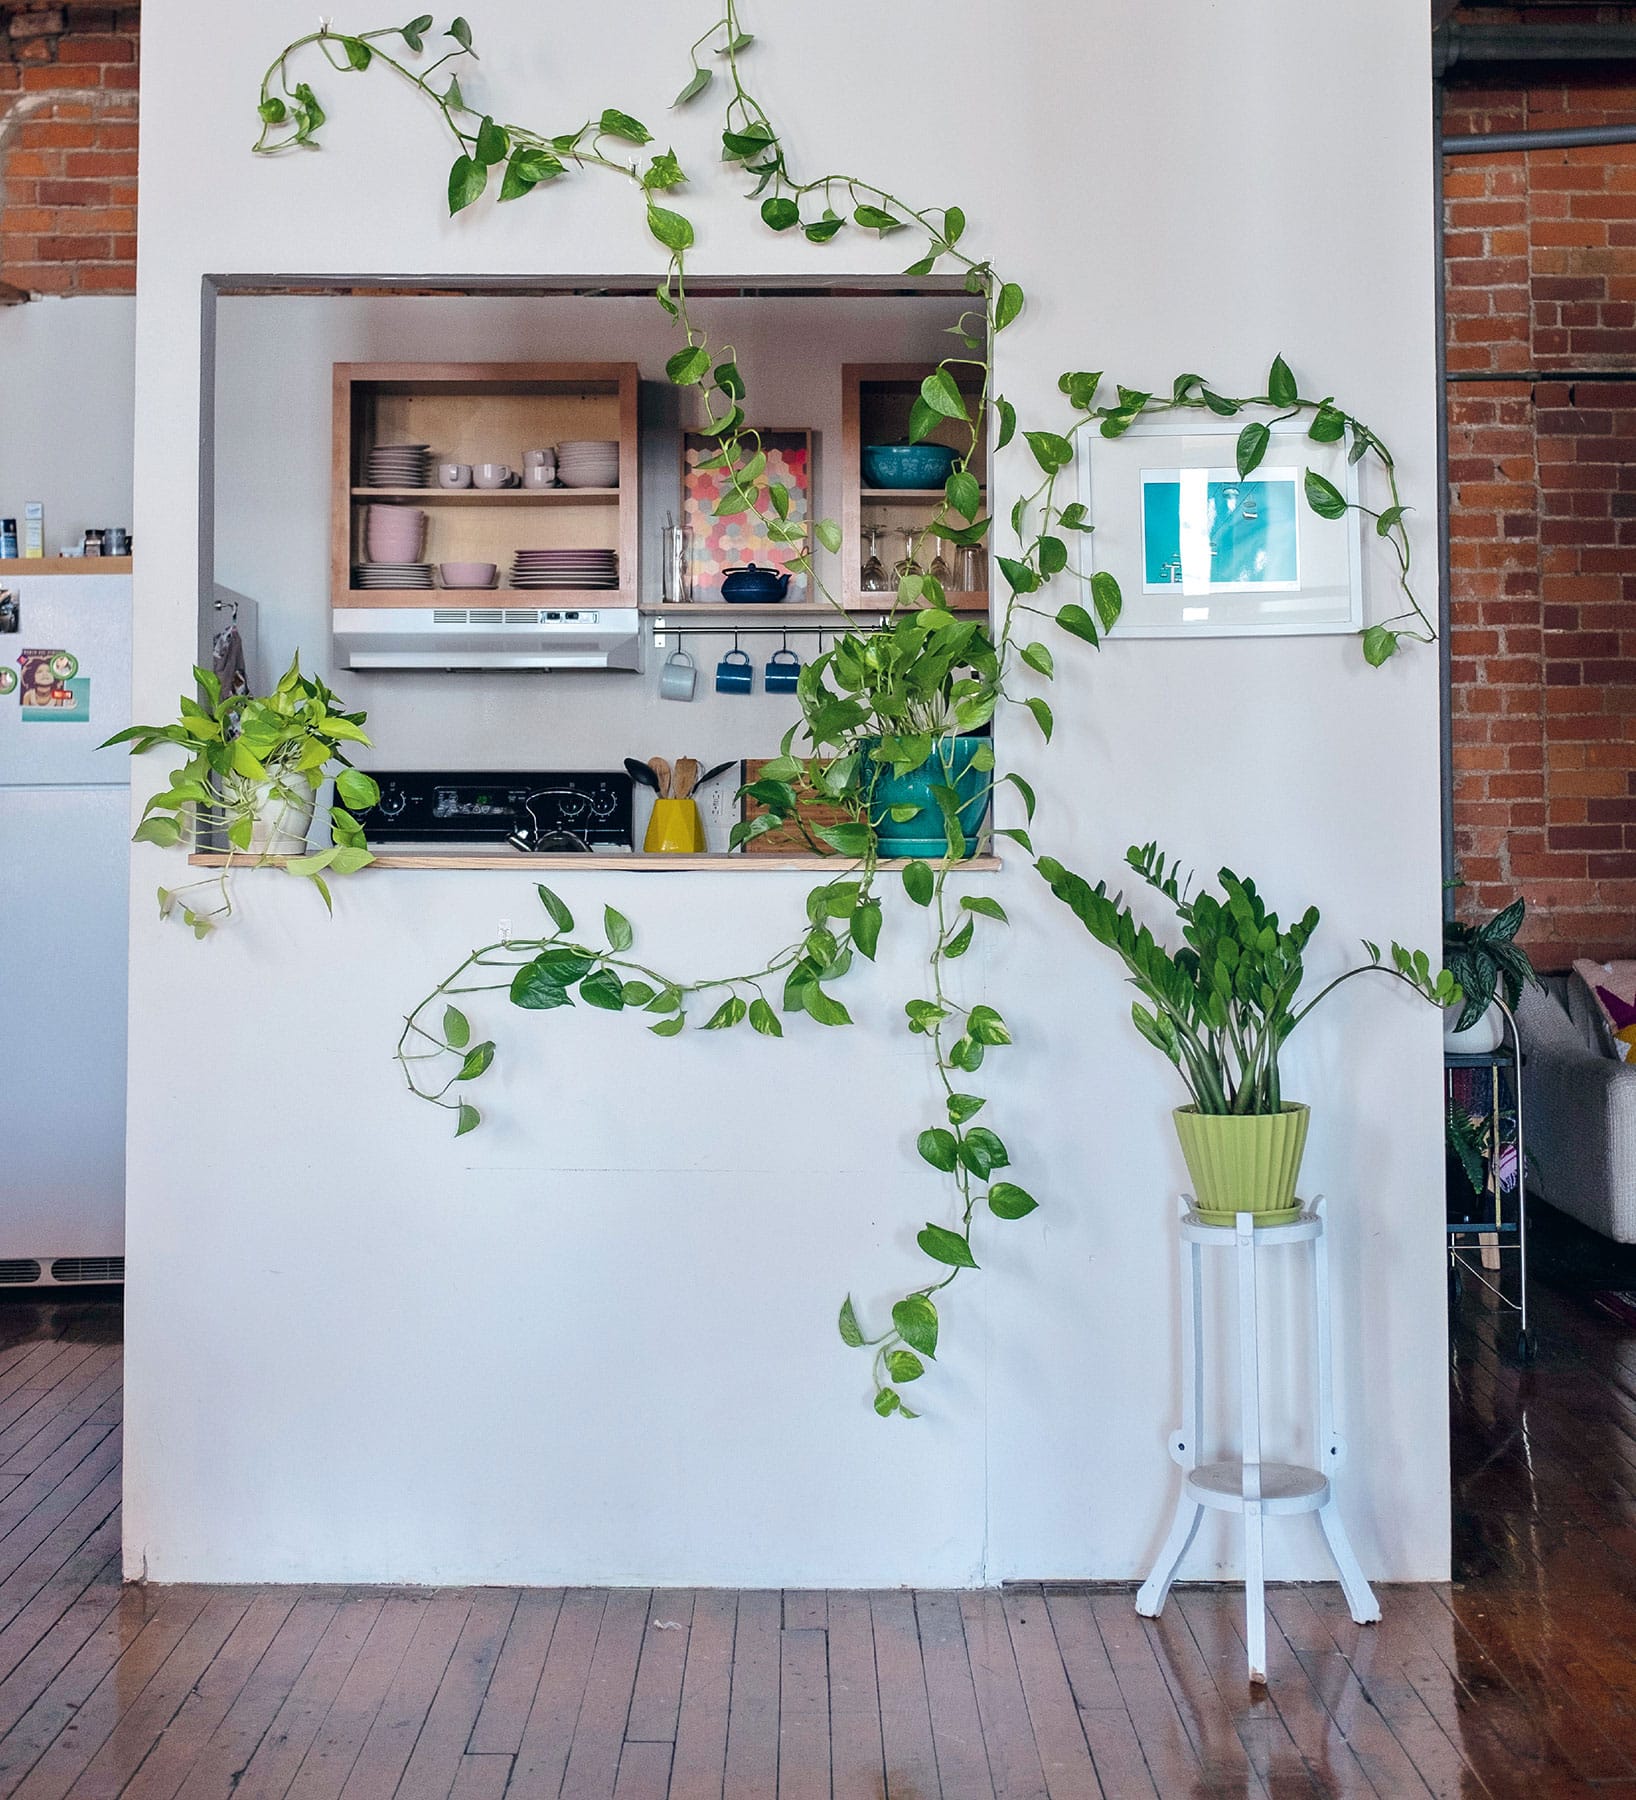
If you have a window you would like to frame with vines, use small nails—or adhesive hooks, if you are renting or don’t want to damage your walls—to rest the stems where you want them to climb.