Change your log properties so that they see the whole picture.
From a security point of view, logs are one of the most important assets contained on a server. After all, without logs, how will you know if or when someone has gained access to your machine? Therefore, it is imperative that your logs not miss a beat. If you’re trying to track down the source of an incident, having missing log entries is not much better than having no logs at all.
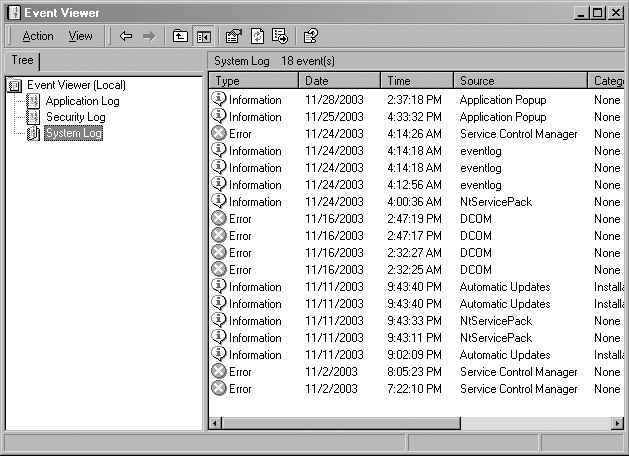
One common problem is that the maximum log size is set too low; depending on the version of Windows, the default can be as measly as 512 KB. To change this, go to the Administrative Tools control panel and open the Event Viewer. You should see the screen shown in Figure 2-5.
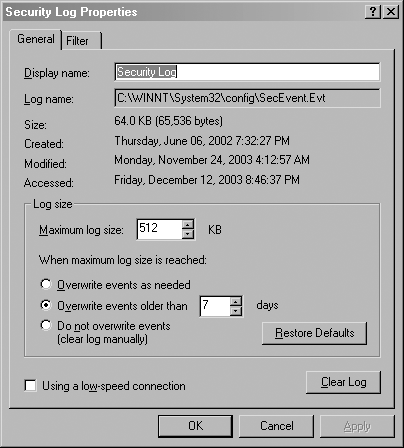
Right-click one of the log files in the left pane of the Event Viewer window and select the Properties menu item to bring up the Security Log Properties dialog, shown in Figure 2-6.
Now, locate the text input box with the label “Maximum log size.” You can type in the new maximum size directly, or you can use the arrows next to the text box to change the value. What size is appropriate depends on how often you want to review and archive your logs. Anything above 1 MB is good. However, keep in mind that while having very large log files won’t inherently slow down the machine, it can slow down the Event Viewer when you’re trying to view the logs.
While you’re here, you may also want to change the behavior for when the log file reaches its maximum size. By default, it will start overwriting log entries that are older than seven days with newer log entries. It is recommended that you change this value to something higher—say, 31 days. Alternatively, you can elect not to have entries overwritten automatically at all, in which case you’ll need to clear the log manually.

