Use strong encryption with Mozilla’s Thunderbird to protect your email from electronic eavesdroppers.
With the growth of the Internet, email has become ubiquitous. You would have to look very hard to find anyone that uses a computer but doesn’t have an email address. However, as with any form of interpersonal communication, certain information shared between parties might be of a sensitive nature. Because of this, it’s a wonder that most email is sent as unencrypted clear-text.
One way to get started easily with encrypted email is to use the Mozilla Foundation’s Thunderbird email client (http://www.mozilla.com/thunderbird/) with the Enigmail extension (http://enigmail.mozdev.org). This extension enables Thunderbird to integrate strong encryption almost seamlessly by using powerful public-key encryption based on the OpenPGP standard.
Of course, the first thing you’ll need to do, if you haven’t already, is install Thunderbird and configure it to access your email account. The next step is to download
GnuPG for Windows (http://www.gnupg.org/download/index.html). Once you’ve done that, launch the installer and follow the prompts presented by the installation wizard until it has completed installation.
Then, download the Enigmail extension (http://enigmail.mozdev.org/download.html) by right-clicking and saving it.
Warning
If you’re running Firefox and don’t choose to save the extension, Firefox will incorrectly attempt to install it as a Firefox extension.
After you’ve done that, start Thunderbird, go to the Tools menu, and click Extensions. You should now see a window like the one shown in Figure 3-11.
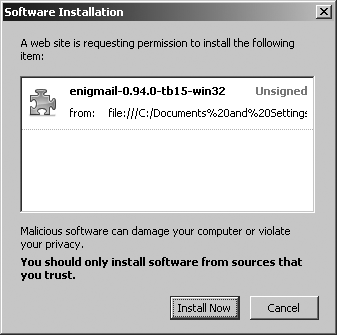
Click the Install button to open a file-selection dialog. Locate the file you just downloaded and click Open. You’ll be presented with a dialog like the one shown in Figure 3-12.
Click Install Now, and you should see Enigmail listed in the Extensions window.
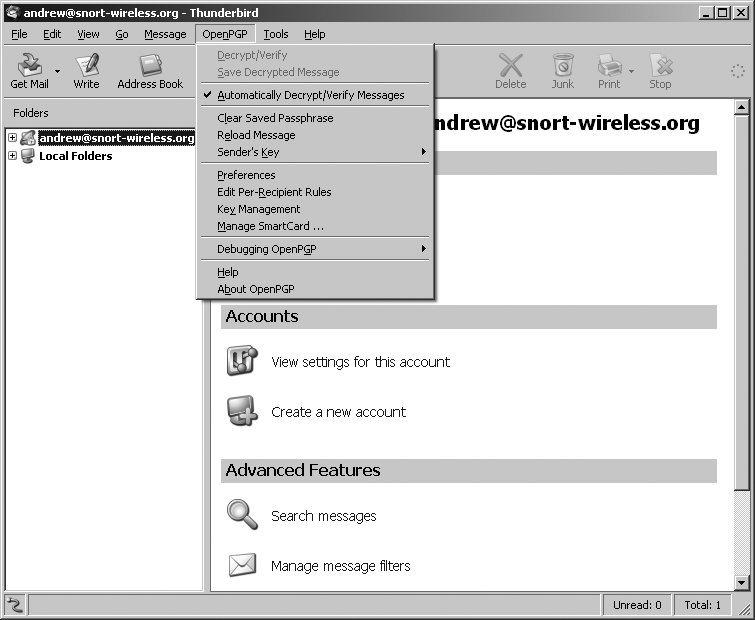
To load the extension, restart Thunderbird. You should now see a new OpenPGP menu, as shown in Figure 3-13.
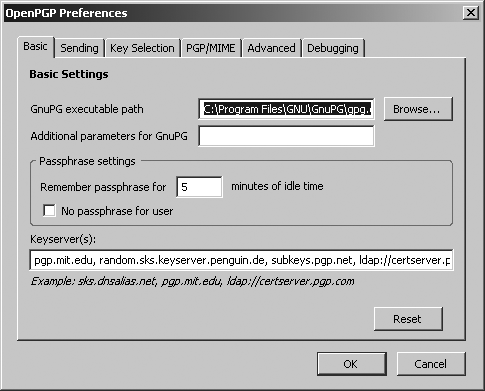
Now you need to tell Enigmail where to find the GnuPG installation. Open the OpenPGP menu and choose Preferences. You should now see the dialog box shown in Figure 3-14.
Click the Browse button next to the “GnuPG executable path” item, locate the gpg executable (e.g., C:\Program Files\GNU\GnuPG\gpg.exe), and click OK.
Now, you’ll need to provide Enigmail with a public/private key pair. The public key is what others use to send encrypted email to you. Data encrypted with your public key can only be decrypted with your private key. Likewise, you can sign an email by encrypting it with your private key, so that others can decrypt it only with your public key. Since only you know your private key, this assures the receiver that the email is truly from you.
When using Enigmail you have the choice of importing an existing key pair or generating a new one.
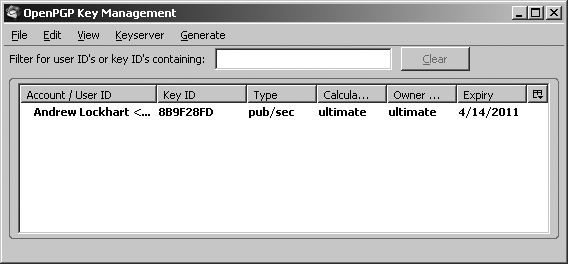
To import an existing key pair, open the OpenPGP menu and choose Key Management to bring up the window shown in Figure 3-15.
Choose File→Import Keys From File and locate your key files in the file dialog that appears. After you import the key, you should see it listed in the key management window.
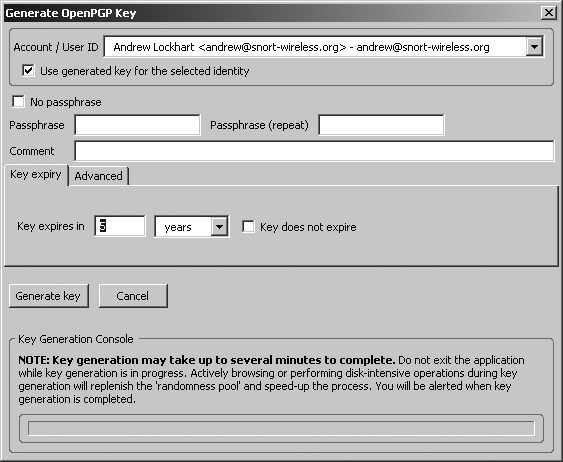
If you need to generate a new key, go to the OpenPGP menu and choose Key Management. In the key management window, select Generate→New Key Pair. After doing so, you should see the dialog box shown in Figure 3-16.
In this menu, enter a password to protect your private key and indicate how long the key should be valid before it expires. Once you’re done setting your password and expiration info, click the “Generate key” button. After the key is generated, it should appear in the list of keys displayed in the OpenPGP Key Management window.
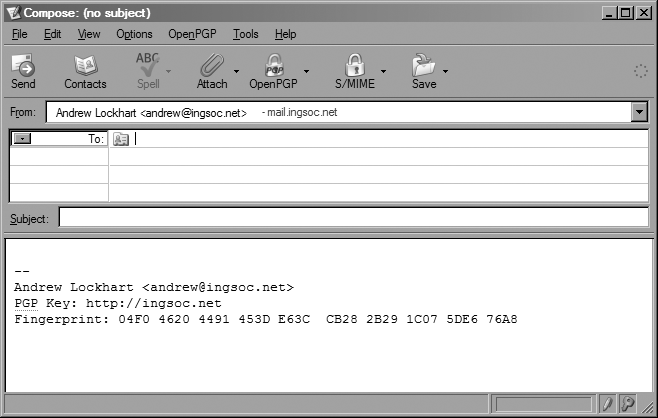
You should now see an OpenPGP menu, as shown in Figure 3-17, when composing messages.
Sign messages by clicking OpenPGP→Sign Message and encrypt messages by clicking OpenPGP→Encrypt Message. Before sending an encrypted message to someone, you’ll need to import that person’s public key into your keyring. You can do this by following the same method for importing your own public and private key pair (i.e., clicking File→Import Keys From File in the key management window). After you’ve imported the public key for the recipient, it will automatically be used for encrypting the message when you send it.
When receiving encrypted mail, all you need to do is click on the message and Thunderbird will prompt you for your private key’s password. After accepting your password, it will display the unencrypted message for you.

