Use SnortCenter’s easy-to-use web interface to manage your NIDS sensors.
Managing
an IDS sensor and keeping track of the alerts it generates can be a daunting task, and it’s even more difficult when you’re dealing with multiple sensors. One way to unify all your IDS-management tasks into a single application is to use SnortCenter
(http://sourceforge.net/projects/snortcenter2/), a management system for Snort.
SnortCenter is comprised of a web-based console and sensor agents that run on each machine in your NIDS infrastructure. It lets you unify all of your management and monitoring duties into one program, which can help you get your work done quickly. SnortCenter has its own user authentication scheme, and it supports encrypted communication between the web-based management console and the individual sensor agents. This enables you to update multiple sensors with new Snort rules or create new rules of your own and push them to your sensors securely.
SnortCenter also allows you to start and stop your sensors remotely through its management interface. To help you monitor the alerts from your sensors, SnortCenter can integrate with BASE [Hack #107].
To set up SnortCenter, you’ll first need to install the management console on a web server that has both PHP support and access to a MySQL database server where SnortCenter can store its configuration database. To install the management console, download the distribution from its SourceForge project page and unpack it:
# tar xfz snortcenter-console-3-31-05.tar.gz
This will create a directory containing SnortCenter’s PHP scripts, graphics, and SQL schemas. Now, copy the contents of the directory to a suitable location within your web server’s document root using commands like the following:
#cp -R snortcenter-release /var/www/html#mv snortcenter-release snortcenter
To enable SnortCenter to communicate with your database, you’ll also need to install
ADODB (http://adodb.sourceforge.net), a PHP package that provides database abstraction functionality. After you’ve downloaded the ADODB code, unpack it to a location where CGI scripts can access it.
Next, install curl (http://curl.haxx.se). Download the source distribution and unpack it. Run ./configure && make, and then become root and run make
install. (Alternatively, curl might be available with your operating system: Red Hat has a curl RPM, and *BSD includes it in the ports tree.)
After that’s out of the way, you’ll need to edit SnortCenter’s config.php file (e.g., /var/www/html/snortcenter/config.php) and change these variables to similar values that fit your situation:
$DBlib_path = "../../adodb/";
$curl_path = "/usr/bin";
$DBtype = "mysql";
$DB_dbname   = "SNORTCENTER";
$DB_host     = "localhost";
$DB_port     = "";
$DB_user     = "snortcenter";
$DB_password = "snortcenterpass";
$hidden_key_num =1823701983719312;
This configuration tells SnortCenter to look for the ADODB code in the adodb directory two directory levels above the one containing SnortCenter. In addition, it tells SnortCenter to connect to a MySQL database called SNORTCENTER that is running on the local machine as the user snortcenter with the password snortcenterpass.
Since it is connecting to a MySQL server on the local machine, there is no need to specify a port. If you want to connect to a database running on another system, you should specify 3389, which is the default port used by MySQL. Set $hidden_key_num to a random number. It is used to make sure only your console can talk to your SnortCenter agents, and vice-versa.
After you’re done editing config.php, you’ll need to create the database and user you specified and set the proper password:
$mysql -u root -p mysqlEnter password: Welcome to the MySQL monitor. Commands end with ; or \g. Your MySQL connection id is 72 to server version: 4.1.16 Type 'help;' or '\h' for help. Type '\c' to clear the buffer. mysql>create database SNORTCENTER;Query OK, 1 row affected (0.01 sec) mysql>GRANT SELECT,INSERT,UPDATE,DELETE ON SNORTCENTER.* TO \snortcenter@localhost IDENTIFIED BY 'snortcenterpass';Query OK, 0 rows affected (0.00 sec) mysql>FLUSH PRIVILEGES;Query OK, 0 rows affected (0.02 sec) mysql>exitBye
Then, create the database tables:
$ mysql -u root -p SNORTCENTER < snortcenter_db.mysql
Now, use your web browser to load the URL corresponding to where you installed it. The first time SnortCenter loads, it will connect to the database that you specified and create the required database tables. After the page has loaded, you should see something similar to Figure 11-5.

The page should refresh after a few moments and you should see the login page shown in Figure 11-6.

Enter the default login/password admin/change and then click the Login button. You should see a page similar to Figure 11-7.

Now that you know that the management console has been installed successfully, you can move on to installing the agent. But first, you should change the password for the admin account. Choose Admin→User Administration→View Users to bring up the user listing page shown in Figure 11-8.

Clicking the icon to the left of the username should bring you to a page similar to Figure 11-9, where you can edit the admin account’s information (including the password).

Now you can go on to set up your sensor agents (really, I’m serious this time).
SnortCenter’s sensor agents are written in
Perl and require the Net::SSLeay module to communicate with the management console through a secure channel. If you have Perl’s CPAN module installed, you can install Net::SSLeay easily by running the following command:
# perl -MCPAN -e "install Net::SSLeay"
To install the sensor code, you’ll first need to unpack it:
# tar xfz /tmp/snortcenter-agent-v1.0-RC1.tar.gz
This will create a directory called sensor containing all of the sensor agent code. Copy that directory to a suitable permanent location. For example:
# cp -R sensor /usr/local/snortcenter
Finally, run the sensor agent’s setup script:
# sh setup.sh
****************************************************************************
*  Welcome to the SnortCenter Sensor Agent setup script, version 1.0 RC1  *
****************************************************************************

Installing Sensor in /usr/local/snortcenter ...

****************************************************************************
The Sensor Agent uses separate directories for configuration files and log files.
Unless you want to place them in another directory, you can just accept the defaults.

Config file directory [/usr/local/snortcenter/conf]:
This script will prompt you for several pieces of information, such as the sensor agent’s configuration file and log directories, the full path to the perl binary (e.g., /usr/bin/perl), and the location of your snort binary and rules. It will also ask you questions about your operating system, what port and IP address you want the sensor agent to listen on (the default is TCP port 2525), and what IP addresses are allowed to connect to the agent (e.g., the IP address of the SnortCenter console).
You’ll be asked to set a login and password that the management console will use for logging into the agent, and during the setup process a self-signed certificate will be copied to conf/sensor.pem for the agent to use when communicating with the console. Alternatively, you can create a signed certificate [Hack #69] and use that. Once the certificate is in place, open conf/miniserv.conf and change the line that says ssl=0 to say ssl=1.
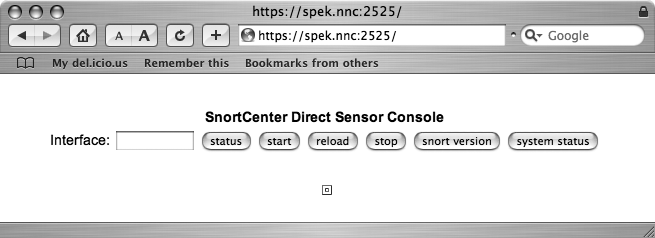
After SnortCenter has prompted you for all the information it needs, it will start the sensor agent on the port and IP address specified in the configuration file. You can now test out the sensor agent by accessing it with your web browser (be sure to use https instead of http).
After entering the login information contained in the setup script, you should see the direct console page shown in Figure 11-10.
Now, you can go back to the main management console and add the sensor to it. Log in and select Add Sensor from the Sensor Console menu. You should see the dialog shown in Figure 11-11.

Fill in the information you used when running the setup script and click the Save button. When the next page loads, the sensor you just added should appear in the sensor list. You can push a basic configuration to the sensor by opening the Admin menu, selecting the Import/Update Rules item, and choosing Update from Internet.
Go back to the sensor list by clicking View Sensors in the Sensor Consoles menu, and then click the Push hyperlink for the sensor. To start Snort on that particular sensor, click the Start link. After Snort has started on the sensor, SnortCenter’s sensor list should look similar to Figure 11-12.

You can now configure your sensor by using the Sensor Config and Resources menus. Once you’ve created a configuration you’re satisfied with, you can push it to your sensor(s) by going back to the sensor list and selecting Push.