Successful tomato growing is not difficult and there are many ways to do it successfully. It is, however, more involved than planting a six-pack of marigold seedlings around the front mailbox (though just how much more involved depends upon your goals). This chapter will lead you through many options, from very simple to more complex, and will help you choose your own particular journey.
Start planning your garden in the winter, as the seed catalogs begin to arrive in the mail. Good planning up front is a significant step toward ensuring a successful garden. The level of detail in the garden plan is up to each gardener. After the initial round of planning, you may want to consider what comes next. For example, those with longer growing seasons may consider a midsummer planting in order to extend the harvest. If you have a relatively short growing season for tomatoes, careful planning to ensure that the plants are hitting their stride during the optimal temperatures is most important.
One of your first planning decisions is whether to buy seedlings or start your own from seed. If you have the time, space, and desire to start your own seed, your tomato options are endless, in terms of both which tomatoes and the source of the seeds. Though starting with seedlings means your options are far more limited, the good news is that each year brings a wider selection of available varieties. You must consider whether the options for purchased seedlings will satisfy your needs, and whether you’re willing to take on the task of starting the tomatoes from seed.
There is, of course, great satisfaction in producing your crops by starting from seed. The period between starting the seed and planting out the seedling is filled with drama, impatience, and anticipation, as well as unanticipated surprises. Though all of that is eliminated if you choose to purchase seedlings, for the vast majority of gardeners the true joy comes during harvest and consumption. My intent is not to favor one path or the other but to provide adequate guidance to help you succeed no matter which path you choose.
One of the most difficult parts of planning to start from seed is simply selecting from among the incredible array of available varieties. There are many good sources for tomato seeds, the main ones being seed catalogs (from both the major players and the smaller specialty companies), various Internet sources (eBay, Craigslist, online-only companies, tomato and garden discussion group message forums), seed sharing organizations (the most significant of which is the Seed Savers Exchange in the U.S.), and racks at all sorts of retail outlets, as well as trades with other gardening friends.
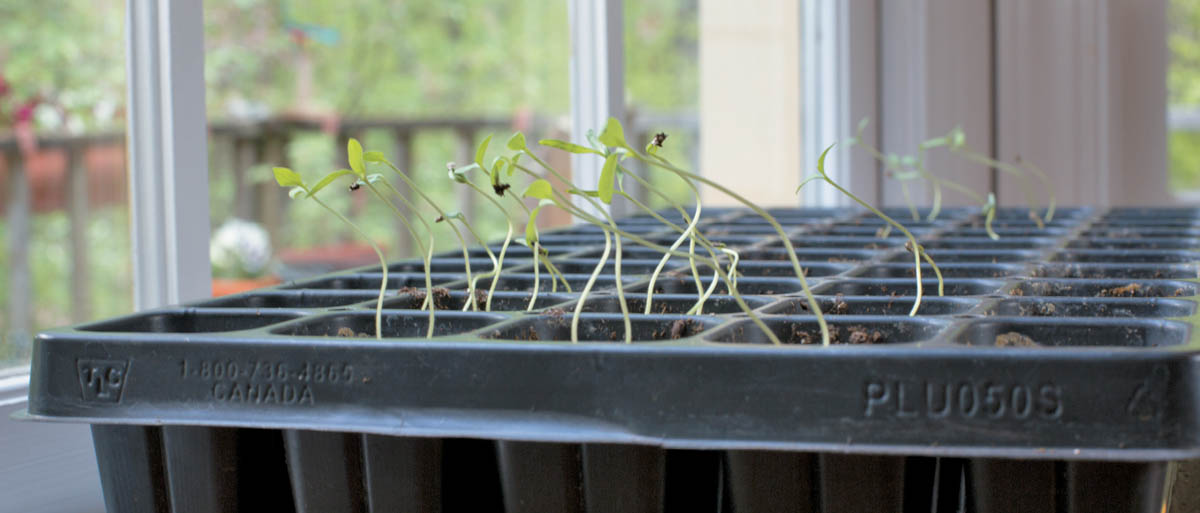
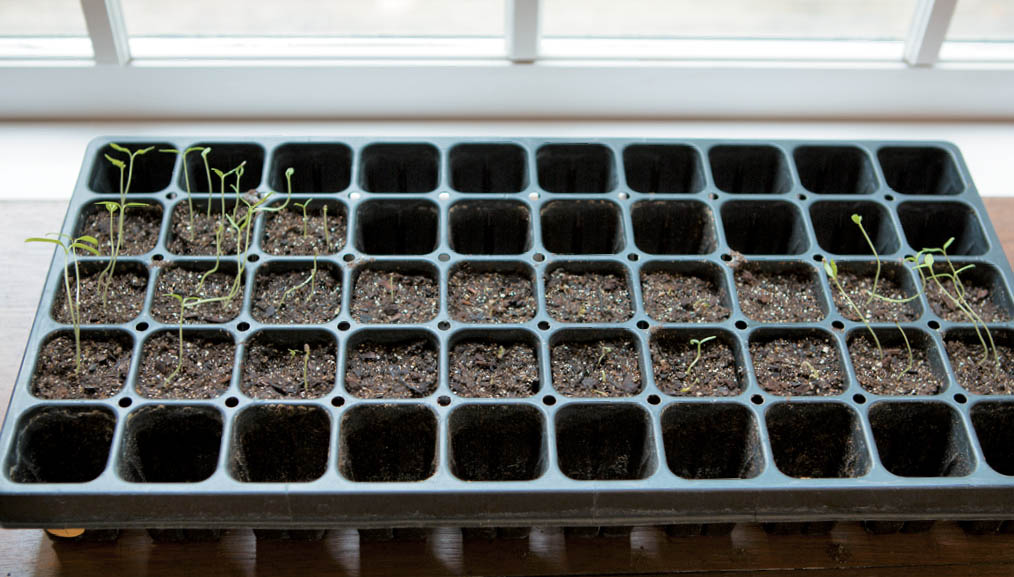
Thick planting of tomato seeds is a great way to produce lots of plants in a very small space. Adequate light is critical to proper growth, and shop lights hung so that the bulbs are within a few inches of the top of the growth will result in vigorous, stocky seedlings.
It’s important to have confidence in your seed source. The recent popularity of heirloom vegetables and seed saving is both a blessing and a curse. In order to create specific buzz and elevate sales, some heirloom tomato stories end up being fabricated or embellished to the point of utter inaccuracy. Often, labels such as “hand selected” or “organic” are simply an excuse for the supplier to ask ridiculous prices for a tiny quantity of seeds. Do some research before purchasing from the many smaller, newer tomato seed sources to ensure that you are dealing with reputable companies providing reliable information. In Resources and Sources, I’ve included a list of the tomato seed suppliers I recommend, based on many years of research and personal experience.
Some gardeners lack the confidence to start their own tomato seedlings. My goal as a supplier of seedlings has always been to teach our customers so well that we will eventually put ourselves out of business. The main thing I’ve learned from years of gardening with our own seed-started seedlings is how easy it really is. But I’ve also learned that some steps are absolutely critical to success. Each season, a handful of our customers bring us the same story. They ordered a lot of seeds and got them going, and then disaster struck at some point, so they ended up buying seedlings from us. I hope that after reading through this chapter, you will have the confidence and information to provide for yourself all of the healthy seedlings you need for a great tomato garden.
The main factors for success in tomato seed starting are:
Perhaps the most important planning consideration is deciding when to start tomato seeds. In Regional Growing Tips, you will find data collected from tomato enthusiasts across North America that describe timing of seed starting, transplanting, and final planting out into the garden. My own guideline (which I call the “one-month rule”) is to work backward from the plant-out date, which is typically when you can be sure there will be no more frost. If I plan to plant seedlings into the garden on May 1, the young seedlings are transplanted from small cells to larger pots on April 1, which means that my seeds are started on March 1. This timing works well for me here in USDA Zone 8.
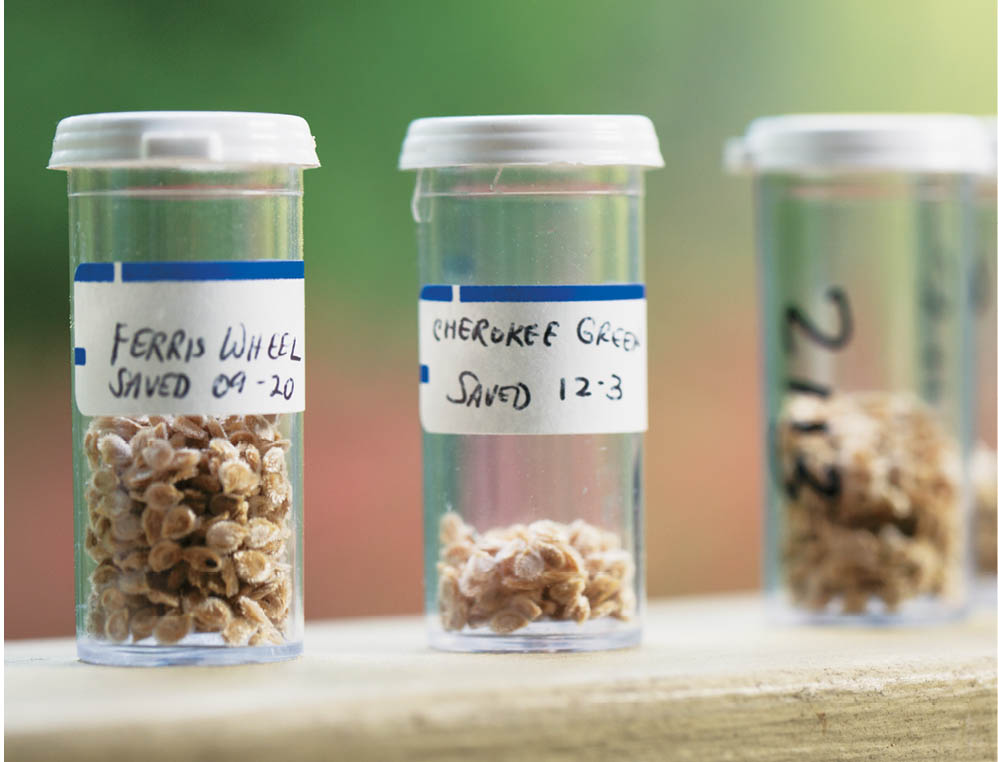
Start with seeds that have been stored properly or purchased (or bartered) from a reputable vendor, seed saver, or fellow gardener. If the saved seeds are older than 10 years, you may want to plant more than you normally would.
In the world of cooking, they say the secret to a great recipe is the quality of the ingredients. The same applies for starting seeds: success relies heavily on the quality of the material into which the seeds are planted. In my experience, the very best material to use is a sterile soilless mix that moistens easily and stays fluffy. The main components of a good seed-starting mix are peat moss, perlite, bark ash, and dolomitic limestone, typically with a trace of starter fertilizer and a wetting agent. Inexpensive bags of heavy garden soil — or worse, your own garden soil (especially if it is heavy with high clay content, hence poorly draining and slow to dry) — are an invitation to disaster. Soil from your garden could also be infected with fungal, bacterial, or viral organisms that can lead to problems all along the way, from early damping-off of young seedlings (caused by a soilborne fungus) to infection of plants with diseases such as fusarium wilt. Also, your newly sprouted seedlings will be much happier if the tender, developing root system is growing in a medium that is porous, so that oxygen uptake can occur. Seedlings can quickly drown in heavy, waterlogged soil. This is not the place to skimp on quality, since it is the very beginning of your season’s garden.

A freely draining planting mix, such as a commercial soilless mix amended with compost, is perfect for growing tomatoes in containers. The fact that such plants will never become waterlogged is offset by a need to water vigilantly when the plants get big and weather becomes hot.
The options are endless for containers to hold your precious planting medium and emerging seedlings. Any container that can drain from the bottom will work, including cleaned-out yogurt containers, various-size plant pots, flats with cells of various sizes, and egg cartons. The key is cleanliness, since dirty containers can easily introduce disease. If you are using pots from previous years, soak them briefly in a solution of 1 part household bleach to 9 parts water, or a dilute trisodium phosphate (TSP) solution.
Light. Direct light (whether artificial or from the sun) is not essential for germinating tomato seeds. Once the seedlings emerge, light becomes critical. If it is the best that you can manage, a sunny window will provide adequate light for young tomato seedlings. Be sure to turn them once a day to counteract the process of stretching toward the sun (phototropism). Note that even disciplined turning won’t prevent the seedlings from becoming leggy, so adjust your seed- starting timing so that a move toward hardening off and outdoor sun can soon follow.
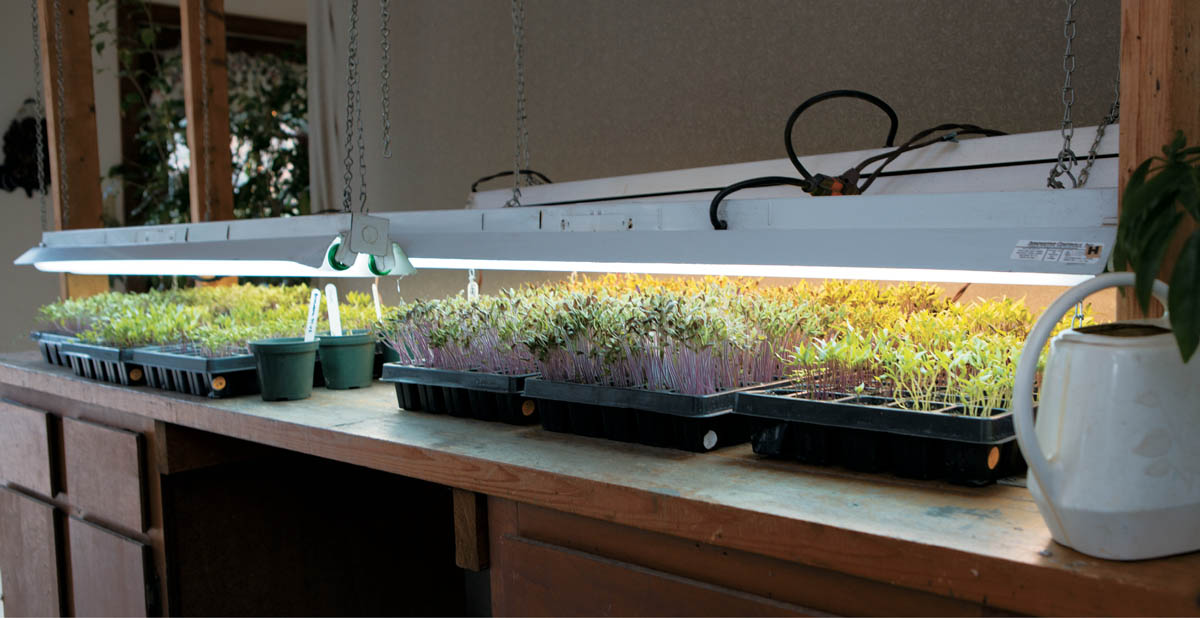
However, if possible, the best way to give seedlings enough light is a simple, inexpensive shop light fitted with fluorescent tubes, which can be suspended just above the tops of the seedlings and raised or lowered as needed. Plants need rest time, so be sure to turn off the lights at night. I run my grow lights from approximately 8 a.m. until 10 p.m., but there is no magic to these exact times; the lights are on when I am awake and are turned off when I head to bed.
Temperature. Soil temperature between 70 and 80°F will ensure good germination. One useful tool here is a heat mat, which keeps seed flats at a constantly warm temperature. Using a heat mat really speeds things up; my tomato seeds normally germinate within 3 to 4 days when I use one. The mats also help mediate temperature swings that may occur in your seed-starting location.
Moisture. Even soil moisture is also important. A mix that’s too wet will promote disease and is likely to result in the seedlings damping-off soon after they germinate. If the mix is too dry, the tiny seedlings won’t receive enough water to live and they’ll quickly shrivel and die. Placing a tent, dome, or other loose material over the flats of emerging seeds can help with moisture retention, but I find it important to remove it occasionally to allow for adequate air flow during germination, and permanently once the majority of seeds germinate.
Site. As far as where to carry out the seed-starting process, consider the light, temperature, and moisture needs and see what works for you. I start my seeds on a table in my office, in front of a south-facing window. Other gardeners put the flats on top of a refrigerator or near a clothes dryer to provide warmth. Once the seedlings germinate, strong light, from either the sun in front of a window or grow lights, is essential; more detail is provided in Seed Starting, Step by Step.
It is important to consistently monitor the conditions and progress of your seed-starting setup. If you have a good setup with appropriate materials, you’ll be able to grow seedlings well with check-ins every few days before seedlings emerge. Following that, daily examination will help ward off trouble if it starts.
Young tomato seedlings are very sensitive to cold temperature. The act of conditioning seedlings over time from tender and vulnerable to robust and strong is called hardening off. Tomato seedlings should never be moved from the warm indoors under grow lights directly to the final garden or container location without taking them through the gradual hardening-off process.
I harden off seedlings at two different points: before transplanting, when they are still in their small growing cells, and following transplanting into individual containers. The reasons for each of these steps are different. The initial hardening off, when the seedlings are still very small and tender, is to get them into direct sunlight as soon as possible to promote stocky growth and minimize stretching toward the sun (which results in leggy seedlings). The second hardening off is to allow seedlings to recover from the root damage associated with transplanting and is more about keeping them out of direct sunlight for a few days until the water-drawing ability of the roots recovers. Allowing newly transplanted seedlings to recover outdoors in the shade, or in a cool garage, for at least a couple of days will lessen the shock of the transplanting process. See Transplanting, Step by Step for more details.
One important fact about tomato seeds that is not widely known is their longevity. In my experience, tomato seeds, whether purchased (hence a new crop) or freshly saved, when kept dry and away from temperature and humidity extremes, will germinate well for a minimum of 10 years. I find that even at 14 years old, enough seeds will germinate to produce decent plants. Something seems to happen between 14 and 16 years that renders the seeds mostly or completely dead or dormant. I mention this here because tomato seeds often comes in packets with at least 20, and often up to 200. Knowing that the seeds will be good for some years is comforting, and if you are not crazy about the variety after trying it out, the remaining seeds can be shared or traded with other gardeners.
Water well. Be sure that the planting mix has adequate moisture; newly emerged seedlings have shallow roots and can dry out quickly. Let the surface of the planting mix dry out between waterings, but watch for plants that start to wilt — a sure sign that watering is needed at once.
There are two ways to water flats or containers of young seedlings. The first is to place the containers into a larger container that holds water, and allow the water to be absorbed through the bottom drainage holes (this is often called bottom watering). Alternatively, you can water carefully from above, using a watering can with a narrow neck, ensuring that the foliage doesn’t get wet.
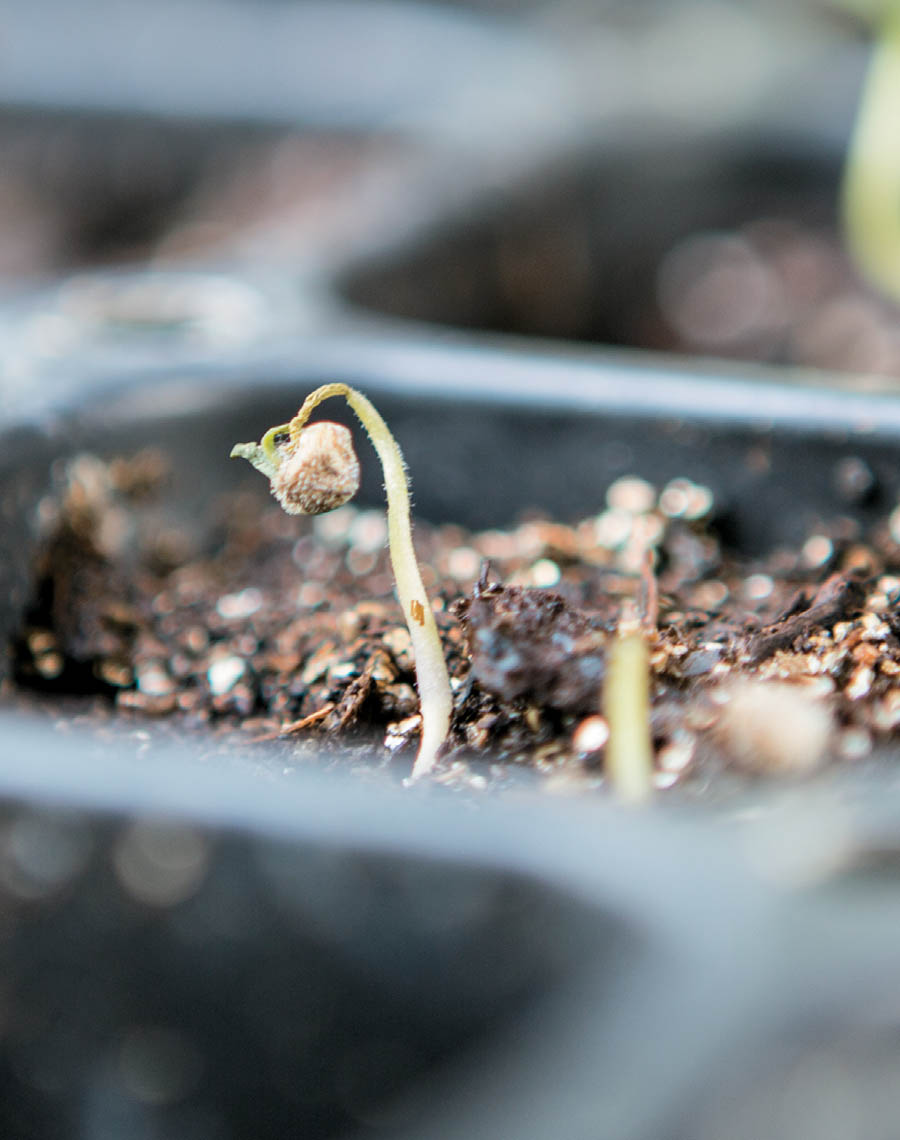
Watch for “helmet head.” If seedlings emerge with the seed coat still attached, spray them with a bit of water each day to soften the seed coat. If you can carefully remove it with your fingernails without damaging the growing tip, do so. In some cases, the helmet head will not release and will strangle the seedling; this happens most often with very old tomato seed.
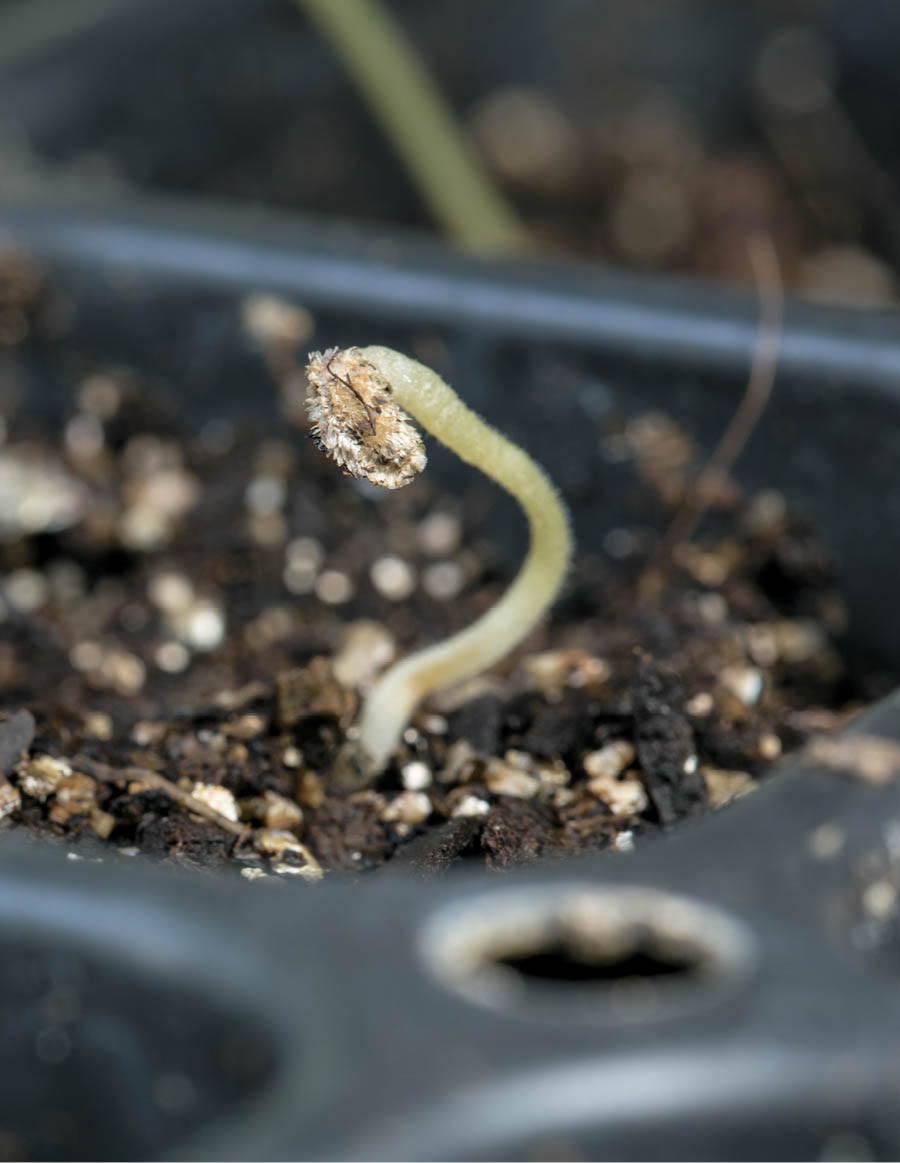
A stubbornly stuck seed coat, as shown here, is known as “helmet head.” This is most often seen when germinating seedlings become too dry or the seed was old.
Look out for damping-off. The main issue faced by seed starters is damping-off of very young tender seedlings. Damping-off happens when various types of fungi attack the seedling stem near the soil line or just a bit higher up. The stem pinches off the flow of water and nutrients to the top of the plant. The spores that become fungi that cause damping-off may be present in the containers (if reused), growing mix, water, or air. Using new containers and new, sterile seed-starting medium will go a long way in minimizing damping-off. Since I’ve standardized the method outlined in detail in this chapter, I see essentially no damping-off issues, even when starting more than 5,000 seedlings each year.
To prevent damping-off of seedlings (a fungal condition, as shown above), thoroughly clean all seed-starting equipment in a 10% bleach solution and provide adequate air circulation after seeds have germinated.
No fertilizer needed. Please note that I haven’t mentioned feeding or fertilizing newly emerged seedlings. Mother Nature packs everything needed into a seed for successful germination under appropriate conditions. Beyond that, proper growing mix has sufficient starter food to sustain vigorous early growth. Water, air circulation, and good light exposure, preferably real sunlight, as early as possible, in appropriate temperatures seem to take care of the needs of the young seedlings just fine.
Start the move outdoors. Once the seedlings have developed true leaves between and above the two cotyledon leaves, start looking for days when the weather is well above freezing. Ease the developing plants into the sun outdoors, paying attention to watering needs. Of course, this is strongly dependent on your planting zone. It is not uncommon for enthusiastic (read “impatient”) gardeners to get things going too soon and find themselves with rapidly growing tomato seedlings indoors and inhospitable temperatures outdoors!
Weather will affect the apparent quality of seedlings, though damage is typically temporary. Very young, tender seedlings do not do well in high winds, especially if accompanied by heavy rain, before they are fully hardened off. And, of course, the enemy of tomato seedlings, and any young plant, for that matter, is frost. Any indication that seedlings (even hardened ones) could experience temperatures at or below 32°F calls for a hasty move to safety. Loose covering with a very light air- and water-permeable material, such as floating row cover or Reemay, will typically provide a few degrees of protection.
Of course, most gardeners have small gardens and have no need for hundreds of seedlings of dozens of varieties. My own plantings were quite small and limited until we decided to sell heirloom tomato seedlings at the Raleigh State Farmers Market some years ago. Without a greenhouse, we had to come up with a seed-starting method that allowed production of a large quantity of tomato seedlings of many varieties in a very small space.
Over the years, I’ve devised a dense planting procedure that works very well. I have no doubt that variations on the dense planting method have been used for decades by commercial ventures as well as creative home gardeners. Though best for those who wish to start a lot of plants, the principles can be applied on a much smaller scale. The informative video of this method that I made and posted online has received many views and positive feedback.
The method involves planting up to 50 seeds in small cells. The most useful vehicle I’ve found for starting tomato seeds in this manner are the 50-cell, rigid, plastic plug flats with cells that are 11⁄2 inches square. The entire flat has dimensions of 1 by 2 feet. Following germination, the seedlings can be easily separated and transplanted into individual pots with nearly 100 percent success. Though the production of up to 2,500 tomato seedlings in a very small space may sound far-fetched, you can trust me, as this is the seed-starting method that I’ve used for the past 15 years with consistent success.

Up to 50 seedlings can be successfully grown in cells no larger than a few square inches. Dense plantings like this one need to be watered much more frequently, however.
There is subtle variation in the appearance of young seedlings of certain different tomato varieties. Paste or heart-shaped tomatoes typically have significantly narrower foliage and weaker central stems that have an increased tendency to topple over. I’ve noticed that they are the least happy varieties in dealing with cold, windy, wet weather when very young. Sun Gold, the wonderful orange hybrid cherry tomato, shows its dislike for early cool, wet weather by looking just plain unhappy and weak, often with brownish foliage spots, until the weather warms up and growth becomes vigorous. A very few older beefsteak types, most notably Kellogg’s Breakfast, and certain heart-shaped varieties such as Yellow Oxheart quickly develop browning and drying on the cotyledons and new growth that looks alarming but vanishes once the seedlings are transplanted and growing in full sun. The issue, which some have named tomato seedling “crud,” appears to be genetic, since the particular varieties that develop crud are afflicted from every seed source from which I’ve obtained such varieties. It could be that certain types are less able to deal with low-light situations, and this could be related to the nutritional needs or processes of the variety. What I do notice is those varieties that are crud-prone end up being some of the most rampant and vigorously growing varieties in my garden.

If you used a seed-starting method that results in one plant per growing area (whether using flats of cells, peat pots, yogurt containers, pots, or some other container), transplanting is not absolutely necessary, as long as that single seedling is hardened off and ready for planting into the garden when the weather is right. Transplanting is a necessity for me because I use the dense planting technique.
Regardless of which method you used to start your seeds, though, most gardeners believe that there are benefits to transplanting seedlings. When you take a flat of leggy seedlings stretching toward the sun and plant them deeply into individual pots, roots will form all along the buried stems. Not only does this process correct legginess and create stockier seedlings, but the stronger root system will also enable the plants to better cope with the elements when they’re planted out to the garden. Remember that early spring often involves unsettled weather, including some cold, wind-driven rain. Leggy tomato plants with weak, floppy stems could experience damage, including breakage, in such conditions, but the stocky seedlings that result from the initial transplant will handle the uneven weather far better.
When my seedlings approach 2 to 3 inches in height and have well-developed true leaves, I separate them and transplant each seedling into its own pot. I’ve successfully transplanted seedlings even prior to true leaf appearance. This is often the first point at which I can confirm leaf shape in my seedlings and spot any surprises. I consider transplanting to be an essential part of the life cycle of my plants, and it helps them to develop the robustness and strong roots they will need to thrive in the coming growing season. With practice, it can be done quite quickly and effectively, with few, if any, failures.
The transplanting step is another place where using high-quality, light, fluffy soilless mix pays off handsomely. The same soilless mix can be used for both seed starting and transplanting. You will find that the closely planted, intertwined seedlings come apart very easily, with minimal breakage of roots. But you will also discover that some roots will break off, at no real detriment to the health and survival of the seedlings.
Once all of the seedlings from a cell are transplanted, I record the number and confirm the leaf type (noting any leaf types that are unexpected, such as potato-leaf seedlings in a regular-leaf variety), which allows for calculation of a germination percentage, if desired.
I typically have extra seedlings that are smaller than the ones I just transplanted. Rather than toss them, I fill a single pot with dry mix and gently push them into the mix, gathering them into bunches of two to five seedlings, if needed, to fit them all in. By treating straggler seedlings this way, even the smallest seedlings, over time, will grow into fully productive, full-sized plants. My pots of extra seedlings become my backup plants, and will require an additional transplanting step once they’re large enough.
Freshly transplanted seedlings need time to recover from the disturbance that they just experienced. Putting out newly transplanted seedlings — even if well watered — into full sun leads to significant loss, because the slightly damaged root systems can’t pull sufficient water into the seedlings to compensate for the hot, drying sun. However, after just two or three days of allowing the seedlings to rest and recover on my garage floor, they are ready to be moved into the sun. I do watch them carefully for the first week and ensure that they are well watered. The seedlings will go through a period when they don’t seem to grow very much at all, especially if the nighttime temperatures are cool (in the 40°F range). During this period, most of the progress is happening with the roots, in the soil and out of sight. A few nice warm, calm days and mild nights will trigger very rapid growth, eventually leading to lovely-looking, healthy, and vigorously growing seedlings.
For many heirloom tomato enthusiasts, it is the delightful story of the creation of Mortgage Lifter that captures the imagination. Considering how many tomatoes are now available, it may be surprising to realize that only a small percentage of them have well-documented historical information. We know quite a bit about Mortgage Lifter because its creator was around to discuss exactly what he did to make such a wonderful tomato. It is the story of Marshall Cletis Byles of Logan, West Virginia, and it takes place in the early 1930s.
With absolutely no experience breeding or growing tomatoes, Mr. Byles had a goal of developing the largest, most delicious tomato possible. His unorthodox breeding technique involved using German Johnson, Beefsteak, and unknown Italian and English tomato varieties as his starting point. He planted the tomatoes in a circle, with German Johnson in the middle, surrounded by several of each of the other three varieties. With a baby syringe, he applied pollen from the edge varieties onto flowers of the central German Johnson. Saving seeds from tomatoes that formed from the cross-pollinated German Johnson blossoms, he repeated the process above for several years, and once he was happy with his results, he sold plants for a dollar each, thereby paying off his $6,000 mortgage in six years; people came from hundreds of miles to purchase the plants as news spread of their excellence.
Mr. Byles shared the seeds of Mortgage Lifter with the Southern Exposure Seed Exchange, which was the first seed company to make them widely available, labeled with the full name Radiator Charlie’s Mortgage Lifter (“Radiator Charlie’s” is dropped in most seed catalogs today). Though this is the story we know of for Radiator Charlie’s Mortgage Lifter, it is possible that such a name was also used for similarly large, pink, sweet varieties; the SSE lists some that appear to predate the creativity of Mr. Byles.
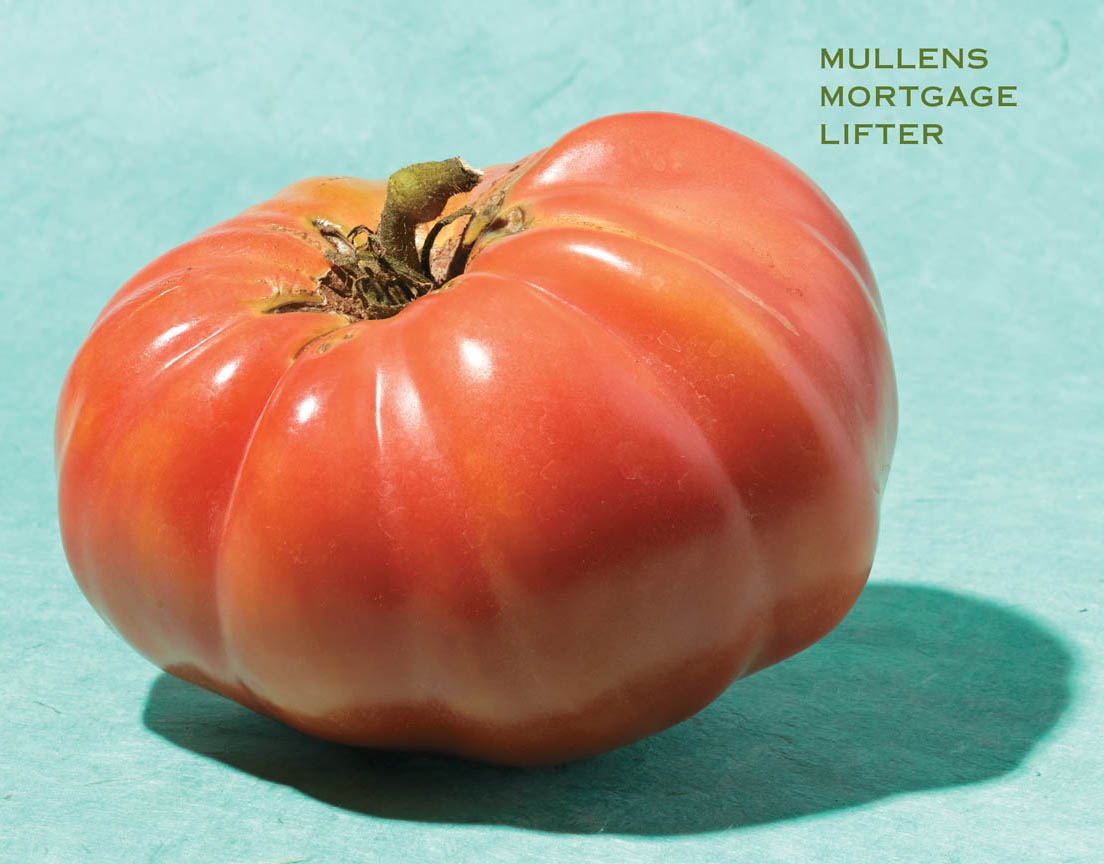
A number of “strains” or regional versions of Mortgage Lifter arose through the years. Two that I regularly grow are from James Halladay of Fairview, Pennsylvania, and from Charlotte Mullens of Summersville, West Virginia, who tells me that hers is the favored variety of her parents. Mr. Halladay notes that his “strain” was developed in the 1920s or 1930s and was obtained from the area of Ashland, Kentucky/Huntington, West Virginia, where it has been grown for several generations. This seems to indicate that other gardeners used the name “Mortgage Lifter” for their own slicer tomatoes.
From the different strains I’ve grown, the results have been essentially identical. The rather weak, spindly-looking seedlings develop into huge, vigorous plants that are highly branched. The tomatoes that form from the often large, marigold-shaped flowers are oblate, pink, and very large, growing easily to 2 pounds or more. Best of all, they share a sweet, intense, delightful flavor.
There are many reasons to start with seedlings, rather than starting your own seed. If you didn’t plan ahead, don’t have the desired seeds in hand, have germination issues with the seed, or don’t have space or time, you’ll want to purchase tomato seedlings for your garden. Fortunately, the popularity of heirloom tomatoes has done wonders for the availability of seedlings, whether from seed companies, small seedling suppliers, or local farmers’ markets.
The advantages of using pre-started seedlings (purchased locally or through mail order or shared from gardening friends) generally focus on convenience, space constraints, and timing. Starting tomatoes from seed requires up-front planning, selecting and purchasing of seeds, and an appropriate space in which to grow the seeds. And packets of seeds often provide far more seeds for a variety than are required.
By eliminating the steps and materials involved in starting your own seed, planting your garden with purchased tomato seedlings could end up being more cost-effective. By obtaining just the number of plants you need, you avoid the conundrum of what to do with the numerous excess seedlings that often result from overly ambitious gardeners starting too many plants of too many varieties. You also avoid the annual angst of trying to nurture self-started seedlings along in a healthy state in the typically unsettled late winter and early spring weather.

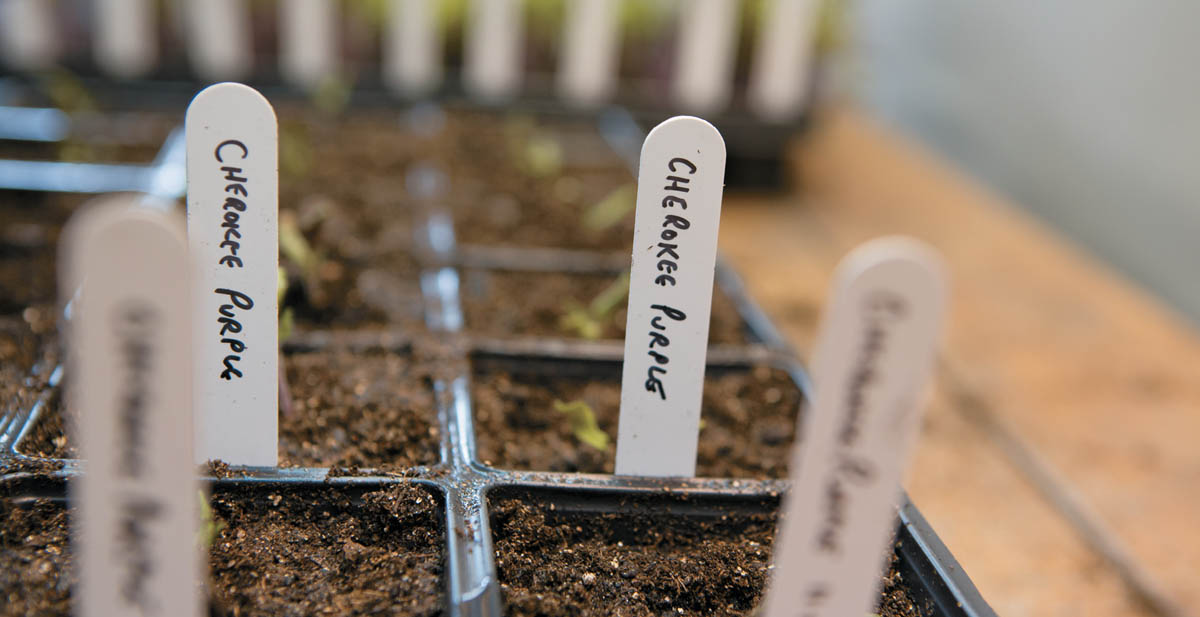
An easy way to create additional plants is by rooting suckers or side shoots of healthy plants. This cutting of Cherokee Purple rooted quickly in a glass of water.
If you do choose to plant your garden with purchased tomato seedlings, it is important to know the various risks. Tomato seedlings are quite tender and there is always the chance that mail-order plants will not arrive in good condition. The cost of seedlings, when compared to seeds, is significantly higher, especially when considering shipping costs. And, of course, you’ll have a much narrower selection of tomato varieties if you buy seedlings than you would if you started them yourself.
If you purchase seedlings locally, you might still encounter plants that have been mishandled, underwatered, or infected with diseases. Seedlings that are greenhouse-grown may not have been hardened off properly. (On this note, larger is not necessarily better, as smaller, well-hardened seedlings will adapt more quickly to being planted out than leggy, less-hardened specimens.) It is important to watch for seedlings that have been only recently transplanted and have yet to develop an effective root system in the container.
Finally, there is always a chance that the tomatoes you end up with are not what you expected (this is a possibility with seeds, too). One of the inevitable downsides to the popularity of heirloom tomatoes is that not all the vendors that have cropped up recently take care to ensure the accuracy of their seed sources. This just reinforces the importance of seed-saving organizations and those avid heirloom variety guardians, for whom historical and genetic accuracy is paramount.
When shopping for seedlings, be sure to ask questions to determine the vendor’s level of experience and familiarity with the varieties offered. Fortunately, good planting practices following seedling purchase will result in eventual success in all cases, save misidentified or diseased plants.
When buying seedlings, be sure to avoid seedlings that:
Gardening takes and handsomely repays the efforts put into it throughout the season, and everyone should aim for the best start possible to their season. Starting with substandard, unhealthy plants will only bring disappointment and frustration.
Once you have decided where you will purchase your seedlings and which varieties to purchase, all that is necessary is to decide when you want your plants to arrive in order to meet the appropriate plant-out date for your climate.
That said, to have the healthiest, most productive tomato plants throughout the growing season, you will need a few basic requirements, no matter where you live: ample sunlight, an appropriate temperature range, a suitable growing medium (soil or potting mix), good drainage, sufficient water, a support system, and a source of nutrition. We’ll talk about all that in the next chapter.

When buying a large seedling, be sure to find one like this — one that isn’t crowded in its container and has healthy-looking foliage, a sturdy stem, and no flowers.
A very recent phenomenon is the creation of grafted tomato plants. In such plants, the growing top of a favored (but not necessarily disease-resistant) variety, such as Cherokee Purple or Brandywine, is grafted onto a rootstock that is disease resistant. The idea is that when such a specimen is planted into diseased soil, the chances of survival are increased because the disease is unable to enter the plant through the root system.
It’s unclear what the grafting phenomenon will mean for home tomato growing going forward. In the United States, where tomato grafting is still in its infancy, there are strong supporters, converts, and true believers alongside yet-to-be-convinced skeptics. Reported benefits of grafting are quite stunning, including significantly increased yields, greater plant health, and flowering and fruit set under less-than-ideal conditions, combined with equivalent or superior flavor. Some think of grafting as the most important advance in tomato culture in nearly a century. The jury is out, but it sure does sound promising.
Some of the grafting caveats include the considerably increased cost of grafted plants (compared to the negligible cost of growing your own ungrafted variety from seed), the care needed in growing the plant (the top of the plant that defines the variety, above the graft line, cannot be allowed to set roots), and the possibility of the specific targeted diseases you wish to avoid being replaced by other unanticipated diseases. Also, any disease spread by passing chewing insects, or by being splashed onto the foliage of the top growth, can potentially take hold and affect the plant as if it were a normal, ungrafted specimen.
My annual garden plans always start just after Christmas with some serious thought about what I want to grow that season. Because I have a huge tomato seed collection, my varieties (which now number over 3,000) are broken down into options for our seedling sales, those that need to be grown out to ensure viability (typically before they reach 10 years of age), new varieties that people have sent to me over the years but have yet to be grown, the must-grow favorites, and, perhaps, new varieties that catch my eye perusing the seed catalogs or the SSE yearbook.
Though it’s certainly not for everyone, working on various tomato projects can be quite fun and really bring some mystery and excitement into the garden. Examples could be focusing on particular colors, comparative trials of newly released varieties, or growing out something unexpected that arose in previous gardens. I always find myself including bits and pieces of several small projects in each year’s garden. This is admittedly a bit over the top, but tomato growing, especially with the plethora of heirlooms available, can become quite addictive, and gardens can expand rapidly from year to year. But garden planning should be simple and enjoyable, inspiring a foundation of enthusiasm and energy that will carry through all the stages of the growing season ahead.
The winter days used to plan the garden are useful for setting up a system for record keeping or tracking garden results. The level of detail in such a system should be appropriate for your efforts and goals. The options range from no system at all (buy plants, plant them, care for them, harvest) to an extensive record of data and information that can be used for future gardens. I start each season with a fresh spiral-bound notebook, which serves as my garden diary, planning guide, and place to write information as the season progresses. In my notebook, I draw diagrams showing the intended location of plants, which helps me to assess reasonable spacing requirements. At the same time, I start a fresh worksheet on my laptop where I record all of the information I collect during the season, such as dates for planting and harvest of the first ripe tomato, fruit color, flavor, size, and shape. (If you do find yourself keeping track of your efforts on the computer, be sure that your data is backed up.)
The value of the garden log is in the ability to understand the duration of the key steps along the way. In reviewing the data, you can improve each gardening season by ensuring that you are starting the right activities on the most reasonable dates based on your past experiences. This is how I developed The One-Month Rule, which I use to estimate the schedule for key activities from seed planting to setting the seedlings into the garden.
Having a garden log is also valuable if you experience the unexpected. For example, what if a Cherokee Purple tomato plant that you grew from your saved seed produces red tomatoes instead of purple ones? By looking at garden maps, it may be possible to determine what went wrong, simply by identifying possible varieties the bees used to make the unexpected hybrid you are now growing.


Before I discovered the joy of Brandywine, Polish took a revered place in my garden for its productivity, beauty, and superb, richly flavored, wonderfully textured tomatoes. With the benefit of being a bit less temperamental from season to season than Brandywine, this large, pink beefsteak-type tomato is a regular in our annual gardens, and it is truly a tomato that has everything going for it.


A better option is to set the seedlings in a cool spot, such as a garage, under grow lights (fluorescent tubes of any kind). Suspend the lights just over (within an inch) of the tops of the plants, raising them as the seedlings grow. Keep the lights on during the daytime and off at night. The combination of strong light and cool conditions will help the plants develop healthy, stocky stems.