
Daily, our eating turns nature into culture, transforming the body of the world into our bodies and minds.
—Michael Pollan, The Omnivore’s Dilemma
Being pregnant with my first child made a huge impact on the evolution of my cooking. I’d gone through the stage of making challenging and complicated recipes; I’d become conscious of the value of fresh, locally grown produce and knew the importance of organic and humanely raised livestock. But it wasn’t until I read Michael Pollan’s The Omnivore’s Dilemma that I fully understood the consequences of what we put into our bodies. I became acutely aware that everything I ate was also my baby’s nutrition, which felt like a huge responsibility, and the more I read, the more concerned I became.
Pollan’s lists of artificial ingredients had me obsessed with reading labels. I spent hours in the supermarket, as if it were the library, taking things off the shelf, studying the unpronounceable contents, and putting them back on the shelf. Over the next few months, I arrived at the checkout counter with an ever-diminishing amount of packaged goods in my basket.
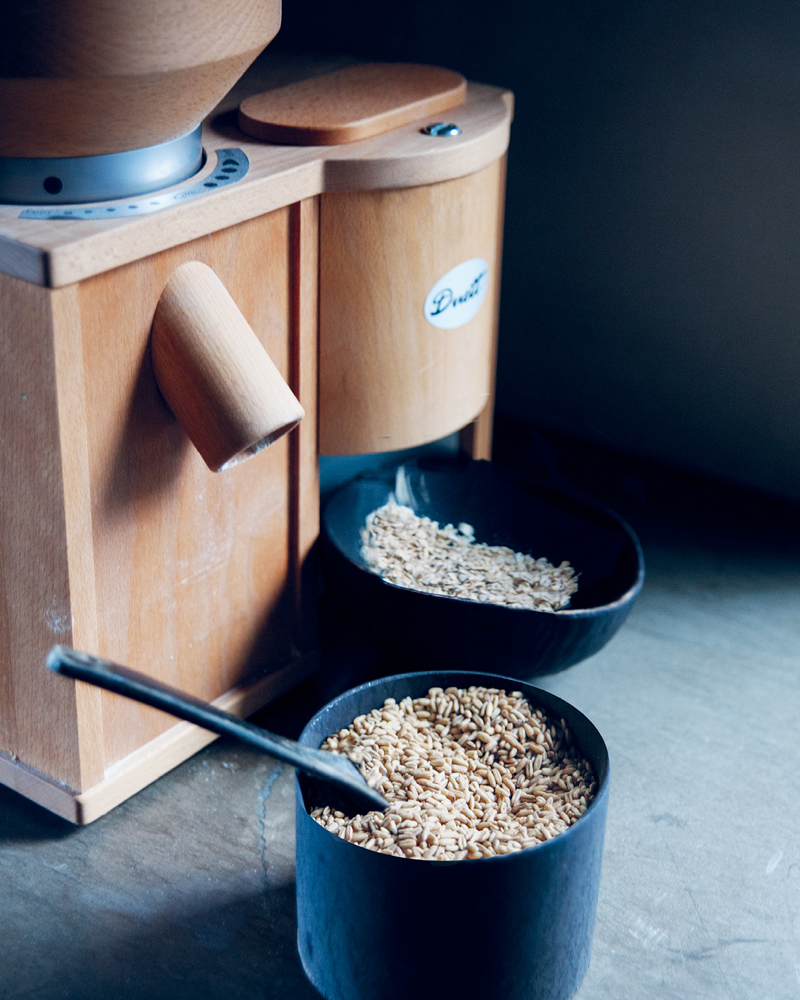
I learned how commercial flours are mass-produced—how they are genetically manipulated, sprayed with chemicals, and stripped of their most nutritious elements. Then I researched milling my own grain and bought my first flour mill so I could make baby cereal and teething biscuits. My next challenge was to replace my husband Chad’s favorite Grape-Nuts cereal with a healthier version. This mix is called Ilona’s Crunch (see recipe), and we’ve been eating it ever since.
The value that is added by milling your own grains is amazing, from cost and flavor to uniqueness and nutritional value. When bought in bulk, home-milled grains are cheaper than store-bought flour. And because each grain is different, you can work with all kinds of flour. Commercial flour is dull compared to the fresh flavor of home-milled flour. I have also learned to soak grains prior to cooking them, a process that makes them easier to digest and improves the absorption of minerals into our systems (see “Soaking Grains”).
The flour mill is my favorite piece of kitchen equipment; I use it to mill grains for bread, baked treats, homemade breakfast cereal, and tarts, and I flake oat groats for Home-Milled Oatmeal (see recipe) or Birchermüesli (see recipe). Once I incorporated milling into my daily routine, it became an integral part of my kitchen work. Grinding grain is a simple process that takes only a few extra minutes; you’ll notice the difference when you use this flour to make Hearty Bread (see recipe), Ancient Grain Pancakes (see recipe), Corn Bread (see recipe), and Waffle Cones (see recipe).
I make the majority of our meals, treats, and snacks from scratch. It’s a state of mind now, and I could never go back, yet sometimes I wonder if my kids are missing out on some typical childhood experiences, like eating Oreos or taking trips to Dunkin’ Donuts. But when Hendrix comes home from school lamenting the junk-food lunches of some of his classmates, I know that he likes his healthy lunch.
I’ve always tried to make cooking and eating into a special experience for my kids, and I hope my enthusiasm has rubbed off on them. As soon as Hendrix was old enough, Chad and I involved him in finding and picking fresh food, and cooking is something we do together as a family. By the time Liloo was born, our rituals had become habit, and picking food and cooking at home seems to come naturally to her, as if she has an instinctive connection to how nature will sustain her.
But we also have to realize that nature is under siege as humans cultivate more and more land to support their growing needs. For instance, many more people are gluten intolerant now, and research has found that this exponential rise is linked to the increased use of pesticides, crop stimulants, and genetically modified seeds. It is worth buying organic grain with a non-GMO heritage instead of supermarket products made from flour whose origins are unclear. Bread, cookies, croutons, cereal, crackers, and all other baked goods that are made from scratch with home-milled grains may lead the way to more sustainable living. If we can all teach our children this way of life, one that integrates nature on every level, we can change the perception of food, reduce our “foodprint,” and make the planet a healthier place.
To find fresh grains, first try to locate a local grain supplier. If there is no grain supplier or mill in your area, see Resources.


I learned from Sally Fallon, author of Nourishing Traditions, how to soak grains prior to cooking them. Soaking helps to neutralize the grains’ antinutrients, which makes the grains easier to digest and improves the absorption of minerals. (Antinutrients are components such as phytic acid and enzyme inhibitors that, even in healthy foods, interfere with nutrient absorption.) In most recipes, I add the soaking time for the milled flour. However, I always try to have some soaked grains on hand for making cookies, tart doughs, or bread. Here are some guidelines for soaking grains.
Place the grains in a bowl. Cover with water and stir in 1 tablespoon of acidic solution (apple cider vinegar, lemon juice, or whey). Cover the bowl with a dish towel and let the grains soak for 12 hours, at room temperature, then drain.
To dry the grains using your oven, preheat the oven to the lowest possible setting. Line a baking pan with parchment paper and spread the grains on it. Bake until the grains are completely dry, 6 to 8 hours, depending on the temperature of the oven. To use a dehydrator, dry the grains at 145°F until completely dry, about 12 hours.
Place the grains in sealed containers and store in the refrigerator for up to 6 months or in the freezer for up to 1 year.

This breakfast cereal is the result of a challenge by my husband to create a healthy alternative to Grape-Nuts, which he used to eat every morning. After much experimenting and adjusting, I finally had him try this recipe. He loved it and named it after me, and now this cereal is our breakfast staple. It uses several whole grains, each with its own health benefits. The combination of the grains and legumes makes it a nutritional superfood; it gets its crunch from being baked with molasses.
Serve with milk and top with fruit, raisins, and nuts, or eat as a trail mix combined with nuts and dried fruit.
Makes about 12 servings
1⅔ cups oat groats
1⅓ cups hard red winter wheat berries, spelt, or farro
⅓ cup amaranth
⅓ cup lentils
⅓ cup barley
⅓ cup buckwheat groats
¼ cup dried corn kernels
2¼ cups buttermilk (see Note)
⅓ cup date syrup or raw honey
¼ cup dark molasses
Dash of vanilla extract
2 teaspoons baking soda
1 teaspoon fine sea salt
Special Equipment
Flour mill (optional)
If you have a flour mill, grind the oat groats, wheat berries, amaranth, lentils, barley, buckwheat, and corn to a coarse flour texture. Combine the milled grains in a large bowl with the buttermilk.
If using a blender, combine the grains, legumes, and buttermilk all at once and blend until the mixture is smooth and thick, about 3 minutes. Pour into a large bowl.
Cover the bowl and let the batter soak overnight at room temperature.
In the morning, preheat the oven to 250°F.
Combine the date syrup, molasses, and vanilla in a small bowl and add to the buttermilk mixture. Mix thoroughly with a large spoon. Add the baking soda and salt and mix well.
Line a baking sheet with parchment paper and spread out the mixture. Bake until the mixture sticks together and can be torn into pieces, approximately 1 hour.
When the crunch is cool enough to handle, break it apart with your hands into bite-sized pieces. Return the pan to the oven and bake until the pieces are dry and crunchy, another 30 minutes. Store in an airtight container for up to 1 month at room temperature or for up to 4 months in the refrigerator.
In a couple of recipes in this chapter, I soak grains overnight in buttermilk to soften them. Real buttermilk is the liquid left over from making butter. Buttermilk is acidic and helps to break down the antinutrients in grains, making them easier to digest and improving the absorption of minerals. It also has a great effect on the final taste, adding complexity and depth. Look for real buttermilk at health food stores and farmers markets. Avoid imitation buttermilk, which is really just low-fat milk with cultures and thickening agents added to it.

To grind your own flour, the first thing you need is a good mill. After much research, I bought the Komo Mill Duet (see Resources). It isn’t cheap ($400 to $1,000, depending on specifications), but I use it almost every day—and since it’s made from wood, it looks pretty sitting on my kitchen counter. I’ve also tried the Family Grain Mill, which costs between $150 and $550. It’s easy to assemble and clean and it doesn’t take up much space.
Once you own a mill, you’ll discover that not only is the milling process fun, but it’s also satisfying to know how healthy grinding your own grain is. You’ll find it convenient and economical to buy grains in bulk, either directly from a local farm or online. I buy 40-pound bags and store them in large airtight buckets to keep out bugs and moisture. For easy access, I keep large mason jars, labeled by grain, in my pantry. When I need a particular grain, I simply pour the grain into the mill chute and grind it into fresh flour. The benefits of milling your own flour are numerous, but here are a few.
Cost: Grinding flour is more economical than buying it already ground, since grains are cheaper than flour—especially when purchased in bulk.
Flavor: The authentic flavor of home-milled flour is much more distinct than the bland taste of commercial flour.
Health: The germ has been removed from commercially ground flours. This part of the grain contains healthy, nutritious oils. It is removed to extend the shelf life of the grain/flour, which would otherwise go rancid within a day or so once the grain is milled.
Variety: Once you start buying your own grain, you’ll find many different varieties, each with its own unique taste and health benefit. By grinding your own grains, and even mixing them, you can create flours that you may not find commercially.
When my son, Hendrix, turned six months old and it was time for his first solid meals, I bought a grain mill. Making him freshly milled oat flour for oatmeal made me realize how much better it tasted then the store-bought oatmeal I used to eat. The oatmeal came out creamy and light, with a hint of sweetness. So I bought a flaker attachment for my mill and started making rolled oats from oat groats.
If you are not going to flake your own oatmeal, buy organic steel-cut oats from a health food store. They are the least processed oat cereal and are a healthy alternative to flaking your own. Soaking the oatmeal overnight will make it cook faster and be easier to digest.
Serves 4
1 cup home-flaked oat groats (see here) or steel-cut oats
1 teaspoon lemon juice (or vinegar, yogurt, whey, or kefir)
Pinch of fine sea salt
Stewed Pears (see recipe) or Slow-Cooked Applesauce (see recipe), for serving
Special Equipment
Flour mill
Mix the flaked oats with 2 cups warm water and the lemon juice in a small pot. (If using steel-cut oats, add 3 cups water.) Cover and leave at room temperature overnight.
In the morning, add the salt and bring the oats to a gentle boil over medium-high heat, stirring frequently, until the oatmeal is creamy and most of the liquid has evaporated, about 5 minutes for rolled oats and 12 minutes for steel-cut oats.
Serve topped with stewed pears or applesauce.
Add some grated fresh apple or pear to the cooking oatmeal together with some raisins or dates to sweeten it. Serve with milk or yogurt. As an extra treat I sometimes top it with a little maple syrup, too.

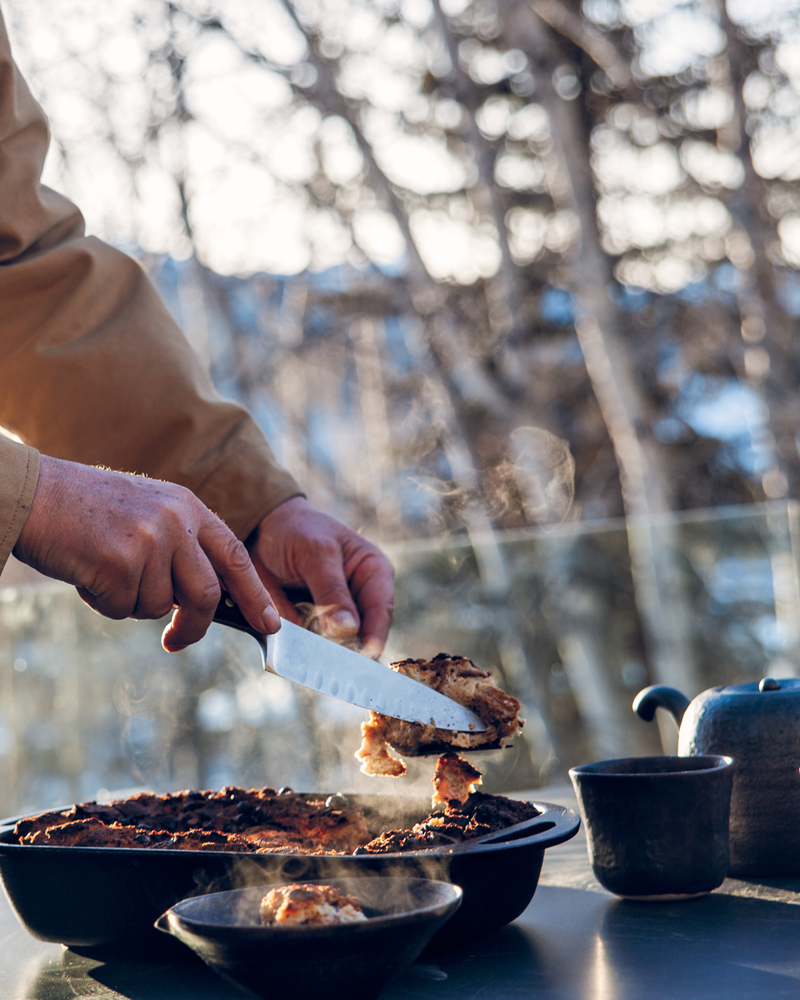
Baked oatmeal has a texture similar to that of a chewy oat cookie, and stuffing this mixture into the middle of a cored apple gives it an entirely new character. The sweet flavor of the baked apple infuses the oatmeal, making it wonderfully moist. These apples are great as an after-school treat, but I always make extra to have for breakfast the next morning.
Serves 6
1 cup home-flaked oat groats (see here) or old-fashioned rolled oats
2 tablespoons light brown sugar
½ cup chopped walnuts
¼ cup raisins
1½ teaspoons ground cinnamon
1 teaspoon baking powder
¼ teaspoon fine sea salt
1⅓ cups milk (ideally raw or nonhomogenized grass-fed)
½ teaspoon vanilla extract
1 large pasture-raised egg
1 tablespoon unsalted melted butter
6 large apples, such as Honeycrisp
Preheat the oven to 325°F. Line a 9-by-13-inch baking dish with parchment paper.
Combine the oats, brown sugar, walnuts, raisins, cinnamon, baking powder, and salt in a medium bowl. Mix well.
Combine the milk, vanilla, and egg in another bowl and blend well. Add the liquid mixture to the oat mixture, along with the melted butter. Mix well with a large spoon. The mixture will be very liquid.
Using a paring knife, cut off the top part of the apple with the stem and reserve the tops. Push a paring knife or an apple corer through the apple and cut around the core, leaving the bottom ½ inch of the apples intact. If necessary, use a small spoon to dig out the remaining core. Make the holes about 1 inch wide.
Place the apples on the prepared baking pan. Spoon the oatmeal mixture into the apple cavities, filling them to the top. If you have leftover oat mixture, you can bake it in a small baking dish.
Bake until the tops of the apples are golden and the oats are set, about 40 minutes. Serve warm or at room temperature. Store leftover apples covered in the refrigerator for up to 3 days.


Birchermüesli got its name from Maximilian Bircher-Benner, a Swiss physician who was looking for a healthy breakfast for his patients more than a hundred years ago. Muesli endures as a typical Swiss breakfast food, and I’ve been eating it my entire life. My recipe is pretty traditional, but since it’s made at home, it has a higher nutritional value than the processed muesli that comes in a box. Soaking the grains and dried fruit overnight gives a chewy consistency and improves the absorption of this nutrient-dense breakfast.
Serves 4 (makes 3 cups)
1 cup home-flaked oat groats (see here) or old-fashioned rolled oats
¼ cup home-flaked rye berries (see here) or rye flakes
¼ cup raisins
3 tablespoons unsweetened dried blueberries
3 tablespoons dried dates, cut into pieces
¼ cup almonds, chopped
2 tablespoons raw, unsalted sunflower or pumpkin seeds
1 cup freshly squeezed orange juice
1 cup plain yogurt
Fresh fruit, crushed almonds, and extra milk or yogurt, for serving
Combine the oats, rye flakes, raisins, blueberries, dates, almonds, and seeds in a medium bowl.
Add the orange juice and yogurt. Cover and soak overnight in the refrigerator.
In the morning, stir the mixture and serve it topped with fresh fruit, crushed almonds, and extra milk or yogurt. Leftovers can be kept in the refrigerator for up to 3 days.


Using whole grains in these pancakes instead of all-purpose flour gives the nutritional value a big boost. The farro and lentils give them a robust earthy taste, while the oats lend a little sweetness. For a milder flavor, you can omit the lentils and increase the oat groats to ⅔ cup.
I usually make this recipe using my flour mill, but on a visit to my in-laws, I discovered that it can be made with an old-fashioned blender, too.
Serve these just like any other pancakes: top with butter and maple syrup or slices of fresh fruit.
Serves 4 to 6
1⅓ cups farro or spelt berries
⅓ cup lentils
⅓ cup oat groats
2½ cups buttermilk
2 eggs, lightly beaten
2 tablespoons maple syrup, plus more for serving
1 tablespoon butter, melted, plus more for serving
1 teaspoon baking powder
1 teaspoon fine sea salt
½ teaspoon baking soda
1 pear, diced (optional)
1 cup almonds, chopped (optional)
Coconut oil or ghee (see recipe), for frying
Special Equipment
Flour mill (optional)
If using a flour mill, grind the farro or spelt, lentils, and oats. Combine the milled grains with the buttermilk in a large bowl.
If using a blender, combine the farro or spelt, lentils, oats, and buttermilk in a blender and blend until the mixture is smooth and thick, about 3 minutes.
Cover and let the batter soak overnight at room temperature.
In the morning, combine the eggs, maple syrup, and melted butter in a small bowl. Mix into the flour mixture.
Combine the baking powder, salt, and baking soda in a separate bowl. Add to the flour mixture and mix well with a large spoon.
Fold in the pear and almonds, if using.
Heat a large skillet or griddle on high and coat with coconut oil or ghee. Pour ⅓ cup of the batter into the pan and repeat to make as many as you can fit into the skillet or on the griddle. This batter will not be as runny as the usual pancake batter; use a spoon to spread it out a bit.
Cook until small bubbles appear on the surface, 2 to 3 minutes. Flip the pancakes and cook until golden brown, another 2 to 3 minutes. Repeat with the remaining batter. Serve the pancakes immediately or place them in the oven on a baking sheet in a single layer at 200°F.
Serve topped with butter and maple syrup. Leftovers can be kept covered in the refrigerator for up to 2 days.


Corn bread can trace its humble beginnings back to indigenous Indians, who would later introduce it to America’s earliest European settlers. Nowadays it endures as an iconic part of Southern cooking. Made with freshly milled yellow dent corn, which is high in flavor and nutrition, and sweet fresh corn, this corn bread is delicious.
Makes 1 large loaf
1¾ cups cornmeal
½ cup home-milled soft white wheat flour (see here) or organic whole wheat pastry flour (see Resources)
1½ cups buttermilk (ideally raw or nonhomogenized grass-fed)
½ cup milk (ideally raw or nonhomogenized grass-fed)
2 large pasture-raised eggs, beaten
1 teaspoon baking powder
1 teaspoon baking soda
1 teaspoon fine sea salt
1 tablespoon unsalted butter, at room temperature, plus more for the skillet
2 ears fresh corn, kernels removed
Special Equipment
Flour mill
Combine the cornmeal, flour, and buttermilk in a large bowl. Cover with a large plate or a dish towel and soak on the counter overnight.
Place a 10-inch cast-iron skillet in a cold oven and preheat to 420°F.
Add the milk and eggs to the soaked flour and mix well with a large spoon.
Combine the baking powder, baking soda, and salt in a small bowl and add to the flour mixture. Mix well.
Heat a small skillet over medium-high heat. Once it’s hot, coat with butter and add the corn kernels. Sauté for 2 minutes. Slightly mash the corn with a potato masher or the back of a fork and add it to the flour mixture.
Remove the pan from the oven and coat it with the 1 tablespoon butter.
Pour the batter into the hot skillet and bake. After 30 minutes, check for doneness: a knife inserted into the center should come out clean and the top should be golden. Corn bread can be kept covered at room temperature for up to 1 day, in the refrigerator for up to 5 days, or in the freezer for up to 2 months.

Making your own bread for the first time is probably one of the most rewarding experiences ever. I love the process of baking bread. From choosing and grinding the grains to mixing it and watching it rise, every step connects you to an ancient ritual. This recipe creates a rustic loaf that has a good crust and a hearty flavor, thanks to the combination of spelt or farro flour and rye flour.
Soaking the flour overnight eliminates the need to knead the dough, rendering this a very easy recipe to make with no more than 10 minutes of active time.
Makes 1 large loaf
2¾ cups home-milled farro flour (see here) or 2 cups organic spelt flour (see Resources), plus more for the work surface and ½ cup to coat the dish towel
¾ cup rye flour
1¼ teaspoons fine sea salt
½ teaspoon instant yeast
Optional additions (see Variations)
Special Equipment
Flour mill
In a large bowl, mix together the flours, salt, and yeast. Add 1½ cups plus 1 tablespoon cold water and stir together well with a large spoon. (See Note if you want to bake only half the recipe at a time.) Cover the bowl loosely with a dish towel and let the dough sit at room temperature for at least 12 hours.
After 12 hours, transfer the dough to a floured surface. If you are making any of the variations, fold those ingredients into the dough now. Stretch and fold the dough a few times. The texture will be a bit sticky, so wet your hands with some water or oil. Let the dough rest for 10 minutes, then cover it with a dish towel coated with ½ cup farro or spelt flour and let it rise at room temperature for 2 hours.
If your oven has a setting high enough to preheat a baking stone (see Resources), place the baking stone on the bottom of the oven; otherwise, place the stone on a rack set in the middle of the oven. You can use a stainless steel baking sheet if you do not have a baking stone. Preheat the oven to 500°F.
Fifteen minutes before baking the bread, lower the oven temperature to 450°F.
Unwrap the dough, shape it into a round, and carefully transfer it to a pizza peel or flat baking sheet coated with flour. Slide it onto the baking stone in the oven.
Bake until the bread has a rich brown crust, about 40 minutes. Remove from the oven and let cool for 15 minutes before slicing. Wrap leftover bread in a large soft kitchen towel or brown paper bag and keep it at room temperature for up to 3 days (see Note).
Any of these options is great mixed into the dough.
2 tablespoons finely chopped fresh rosemary
½ cup roughly chopped pitted Kalamata olives
1 cup coarsely chopped raisins
1 cup roughly chopped pecans
1 cup coarsely chopped cranberries
1 cup roughly chopped walnuts
This bread is so delicious right out of the oven that you and your family will probably gobble it all up. But if you won’t use a full loaf within 2 days, it is best to divide the dough into two bowls after combining the flour with the yeast and water. Cover the portion you will bake with a towel and leave it on the counter for at least 12 hours. Place the other batch in the refrigerator for up to 4 days. If you are baking half a loaf, the baking time will be shorter, about 30 minutes.


A tart crust is a good vehicle for tasting the nuances of different flours. It’s a great way to see how flours can differ in texture, too. This recipe uses spelt or farro flour, which produces a firm, hearty crust. In the variations, I list other flour combinations so you can experiment. Use this tart dough with the Zucchini Tart (see recipe) or Tomato Tart (see recipe).
Makes dough for one 11- to 12-inch tart
1¾ cups home-milled farro flour (see here) or 1 cup organic spelt flour (see Resources), plus more for shaping the crust
1 teaspoon chopped fresh rosemary
½ teaspoon fine sea salt
¼ cup extra-virgin olive oil
2 tablespoons unsalted butter at room temperature
3 tablespoons white wine
Combine the flour, rosemary, and salt in a large bowl. Add the olive oil and butter and mix together by hand until the dough has the consistency of wet sand. Add the wine and mix together. If the dough is too dry and does not come together, add a little water.
Knead the dough by hand inside the bowl for a few minutes until it comes together as a ball. Cover with plastic and refrigerate for at least 30 minutes or overnight.
To fill and bake the tart, follow the directions for the Zucchini Tart or Tomato Tart.
If you mill your own flour, you can experiment with various grains in place of the farro. Here are some of my favorite combinations.
1⅛ cups oat flour and ¾ cup farro flour
This combination produces a flaky crust with a mellow taste.
1 cup buckwheat flour and ¾ cup soft white wheat flour
The buckwheat gives the crust a nutty taste.
½ cup farro flour, ½ cup barley flour, and ¾ cup lentil flour plus 7 tablespoons additional water
This mix makes a hearty, firm crust.

The ratio of butter to olive oil creates a delicious buttery taste and flaky texture, while the olive oil keeps it light. This tart dough is great as the base for the Peach Tart (see recipe).
Makes one 10-inch tart crust
1 cup oat flour
1¾ cups home-milled soft white wheat flour (see here) or 1 cup organic whole wheat pastry flour (see Resources)
½ teaspoon fine sea salt
¼ cup extra-virgin olive oil
2 tablespoons unsalted butter, at room temperature
2 tablespoons raw honey
Combine the flours and salt in a large bowl. Add the olive oil and butter and mix together by hand until the dough has the consistency of wet sand. Add the honey and mix with a wooden spoon. If the dough is too dry and does not come together, add a little water.
Knead the dough inside the bowl for a few minutes until it comes together to form a ball. Cover with plastic and refrigerate for at least 30 minutes or overnight.
To fill and bake the tart, follow the directions for the Peach Tart.
Bread pudding might well be one of the most universal desserts as it usually incorporates leftover bread—something we all have on hand more often than not. There are endless variations on the recipe, and it’s generally a seasonless treat, but adding vanilla and cinnamon makes it a comforting dish on a cold, wintry day. I often make this recipe with the leftover bread used to accompany a cheese fondue since the cubes are the perfect size and texture for absorbing the custard sauce.
Serves 4
4 cups 1-inch cubes of stale bread (crusty sourdough or French bread works great)
2 cups whole milk (ideally raw or nonhomogenized grass-fed)
¼ cup raisins
¼ cup raw honey
2 large pasture-raised eggs, beaten
1 teaspoon ground cinnamon
½ teaspoon fine sea salt
¼ teaspoon grated nutmeg
1 tablespoon bourbon or rum (optional)
1½ teaspoons vanilla extract or 1 vanilla bean, split in half lengthwise
1 tablespoon butter, melted, plus more for the baking dish
1 tablespoon organic cane sugar
1 tablespoon cinnamon
In a large bowl, combine the bread cubes, milk, raisins, honey, eggs, cinnamon, salt, nutmeg, and bourbon, if using. Add the vanilla. (If using a vanilla bean, scrape the seeds into the bowl and discard the bean.) Mix. Let the bread soak for about 1 hour at room temperature.
Preheat the oven to 350°F. Coat a 9-by-13-inch baking dish with butter.
Combine the sugar and cinnamon in a small bowl.
Transfer the bread cube mixture to the prepared baking dish. Brush the top of the bread with the melted butter and sprinkle the sugar and cinnamon mixture on top.
Bake until the custard is set and a golden brown crust has formed, about 45 minutes. Let stand for 15 minutes at room temperature, then serve. Leftovers can be kept covered in the refrigerator for up to 2 days.

This extra-large chocolate chip cookie comes out of the oven all crisp around the edges and gooey in the center and is just sweet enough. You can serve it warm and top it with a couple of scoops of vanilla ice cream, or let it cool, break it into pieces, and serve it as individual cookies.
Makes one 10-inch cookie or about 30 individual cookies
8 tablespoons (1 stick) butter, at room temperature, plus more for greasing the pan
½ cup packed light brown sugar
2 teaspoons organic cane sugar
2 large pasture-raised eggs, lightly beaten
2 tablespoons milk (ideally raw or nonhomogenized grass-fed)
1½ teaspoons vanilla extract
2 cups home-milled soft white wheat flour (see here) or organic whole wheat pastry flour (see Resources)
¼ cup oat flour
1 teaspoon fine sea salt
¾ teaspoon baking soda
1½ cups chopped dark chocolate, 65% cacao or higher
1½ cups almonds or walnuts, crushed
In a large bowl, use a wooden spoon to cream the butter and sugars together just until smooth. Add the eggs, milk, and vanilla and mix until well incorporated.
Combine the flours, salt, and baking soda in another bowl and gradually stir the dry ingredients into the butter mixture. Fold in the chocolate and almonds.
Butter a 10-inch cast-iron skillet or cake pan. Spread the cookie dough mixture in the pan. Refrigerate for at least 1 hour.
Preheat the oven to 350°F.
Bake until the cookie is golden brown, about 25 minutes. Let stand for 10 minutes and serve. Leftovers can be stored in an airtight container for up to 4 days.
You can adjust the preparation method to make individual chocolate chip cookies: Line a baking sheet with parchment paper. Form rounded tablespoon-sized balls of dough and place on the baking sheet about 3 inches apart. Refrigerate for at least 1 hour or overnight. Bake at 350°F. After 10 minutes, press the cookies flat with a spatula and bake until golden brown, about 5 minutes more. Let stand for 10 minutes before serving.

This quick bread makes good use of those bananas that are orphaned in your fruit bowl, slowly turning dark. Overripe bananas are perfect for banana bread, so don’t let them go to waste. The farro, spelt, and oat mixture adds intensity to the flavor of this banana bread, as do the buttermilk and cinnamon.
Makes 1 large loaf
2 cups home-milled farro flour (see here) or 1¾ cups organic spelt flour (see Resources)
½ cup oat flour
1½ cups buttermilk (ideally raw or nonhomogenized grass-fed)
3 tablespoons butter, at room temperature, plus more for greasing the pan
3 ripe bananas
3 tablespoons raw honey
2 large pasture-raised eggs, lightly beaten
1½ teaspoons baking soda
1 teaspoon ground cinnamon
½ teaspoon fine sea salt
1½ cups chopped pecans or walnuts
Mix the flours and buttermilk in a large bowl. Cover and let soak on the counter overnight.
In the morning, preheat the oven to 350°F. Grease a 10-by-5-inch loaf pan.
Use a fork to mash the butter in a medium bowl. Mash the bananas into the butter. Add the honey and eggs and mix well.
Combine the baking soda, cinnamon, and salt in a small bowl.
Add the banana mixture to the flour mixture. Stir until just combined. Add the baking soda mixture and stir briefly. Carefully fold in the nuts.
Pour the batter into the prepared pan. Bake for 40 minutes, reduce the temperature to 325°F, and bake until golden brown, about another 30 minutes. A toothpick should come out clean when inserted into the center of the loaf. Let cool completely before slicing and serving.

Ice cream is the first symbolic taste of summer. Eating the cool treat on a fresh warm cone makes a most delicious dessert even more enjoyable.
You can use a waffle cone iron to produce flat disks that you then wrap around a cone. However, if you don’t have a waffle cone iron, you can still make the cones by simply using a sauté pan.
Makes about 8 cones
¼ cup pasture-raised egg whites (from about 2 large eggs)
⅓ cup organic cane sugar
½ cup home-milled soft white wheat flour (see here) or organic whole wheat pastry flour (see Resources)
2 tablespoons butter, melted
2 tablespoons whole milk
½ teaspoon vanilla extract
⅛ teaspoon fine sea salt
Special Equipment
Waffle cone iron
Mix the egg whites and sugar together in a medium bowl.
Add the flour, butter, milk, vanilla, and salt, and blend well.
Spoon ¼ cup of the batter into the center of the preheated waffle cone iron and spread it out evenly using a spatula. Cook until golden brown, about 1 minute. Remove the wafer and quickly roll it around the cone-shaped mold (sold together with the waffle cone iron).
You can use a skillet instead of a waffle cone iron: Lightly grease a small skillet and heat over medium heat. Spoon ¼ cup of the batter into the center of the pan. Tilt the skillet in a circular motion so the batter covers the pan. Cook for about 3 minutes, then flip the waffle with a spatula. Cook until golden brown on both sides, about 3 minutes more, then quickly roll around a cone-shaped mold letting the sides overlap. Squeeze the tip closed so ice cream will not drip through it (if you don’t have a cone mold, roll a piece of cardboard into a cone shape, tape together well, and use that).
Place the shaped cones on a rack to cool and crisp. The cones are best fresh, but they can be stored for up to 1 week in an airtight container at room temperature.

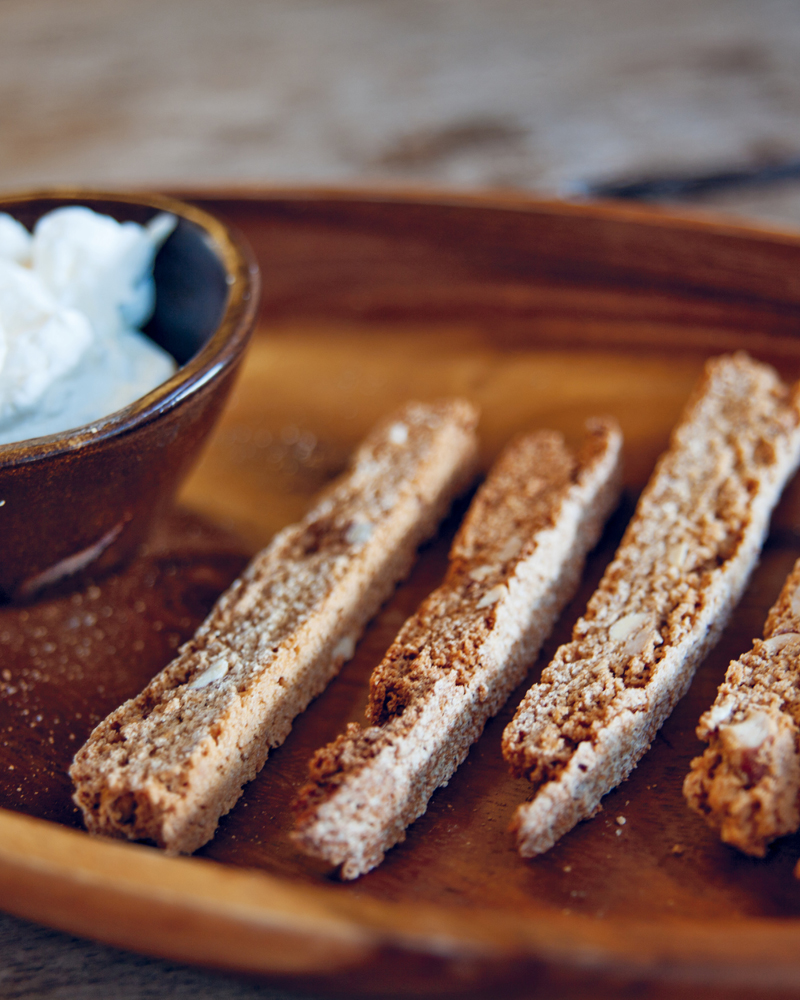
Biscotti cookies are twice baked—you first bake the dough in one piece until it is dry, then slice it into smaller cookies and bake again. This process produces a crunchy cookie that is great for dipping into coffee, tea, hot cocoa, or a dessert wine like vin santo. You can also serve biscotti with Zabaglione (see recipe).
If you store biscotti in an airtight container, they will keep forever, and they make great snacks to take on camping and hiking trips.
Makes about 20
2 cups home-milled soft white wheat flour (see here) or 1½ cups organic whole wheat pastry flour (see Resources)
3 large pasture-raised eggs, lightly beaten
1 cup whole almonds, coarsely chopped
½ cup organic cane sugar
2 teaspoons vanilla extract
1 teaspoon baking powder
1 teaspoon ground anise seeds
1 teaspoon orange zest
½ teaspoon ground cinnamon
⅛ teaspoon fine sea salt
Preheat the oven to 300°F. Line a baking sheet with parchment paper.
In a large bowl, combine the flour, eggs, almonds, sugar, vanilla, baking powder, anise seeds, orange zest, cinnamon, and salt and mix with a wooden spoon until the ingredients are well combined.
On the prepared baking sheet, shape the dough into a rectangle roughly 5 by 10 inches and about ¾ inch thick.
Bake until the dough is dry and firm, 25 to 30 minutes.
Cut the dough into slices about 1 by 4 inches. Bake again on one side until crunchy, about 8 minutes. Turn the cookies over and bake for another 8 minutes. Let them cool on a wire rack. As they cool, they will become even more crunchy.


