Deck Materials & Tools

Constructing a deck requires a variety of building materials, and this chapter will introduce you to them. You’ll need forms, concrete and gravel for making footings, treated posts and framing lumber for the deck’s undercarriage, an assortment of connective hardware and fasteners, flashing supplies, decking, and materials for building railings and stairs. Get ready to make some long shopping lists! You may also want to acquaint yourself with the deck-building section of your local home center before you start your deck project. That way, you’ll be able to find what you need quickly and easily when you really need it.
If you’re a seasoned do-it-yourselfer or woodworker, you may already own most of the hand and power tools you’ll need for building a deck. You’ll also need a few masonry tools. Be sure to review the specialty tools (pages 54 and 55) that you may want to rent for your deck project. They may save you considerable time and effort.
In this chapter:
▪ Footings & Structural Lumber
▪ Flashing
▪ Footings
 Footings & Structural Lumber
Generally, pressure-treated lumber is the preferred choice for deck posts, beams, and joist framing. It offers good resistance to decay and insect infestation, it’s widely available in most parts of the country and it’s a cheaper alternative to other rot-resistant wood species such as cedar or redwood. Treated lumber is milled in 4 × 4, 4 × 6, and 6 × 6 sizes for posts. Larger dimensions are available by special order. You’ll need 2 × treated lumber for beams and joists. Joists are usually 2 × 8 or larger. If your deck is particularly large or designed with oversized spans, you may need to use engineered beams instead of building beams from treated lumber. Make sure your engineered beams are rated for exterior use.
Select the flattest structural lumber you can find, free of splits, checks, and large loose knots. To prevent warping, stack and store it in a dry place or cover it with a tarp until you need it. Check the grade stamps or the stapled tags on your pressure-treated posts; they should be approved to a level of .40 retention for ground contact.
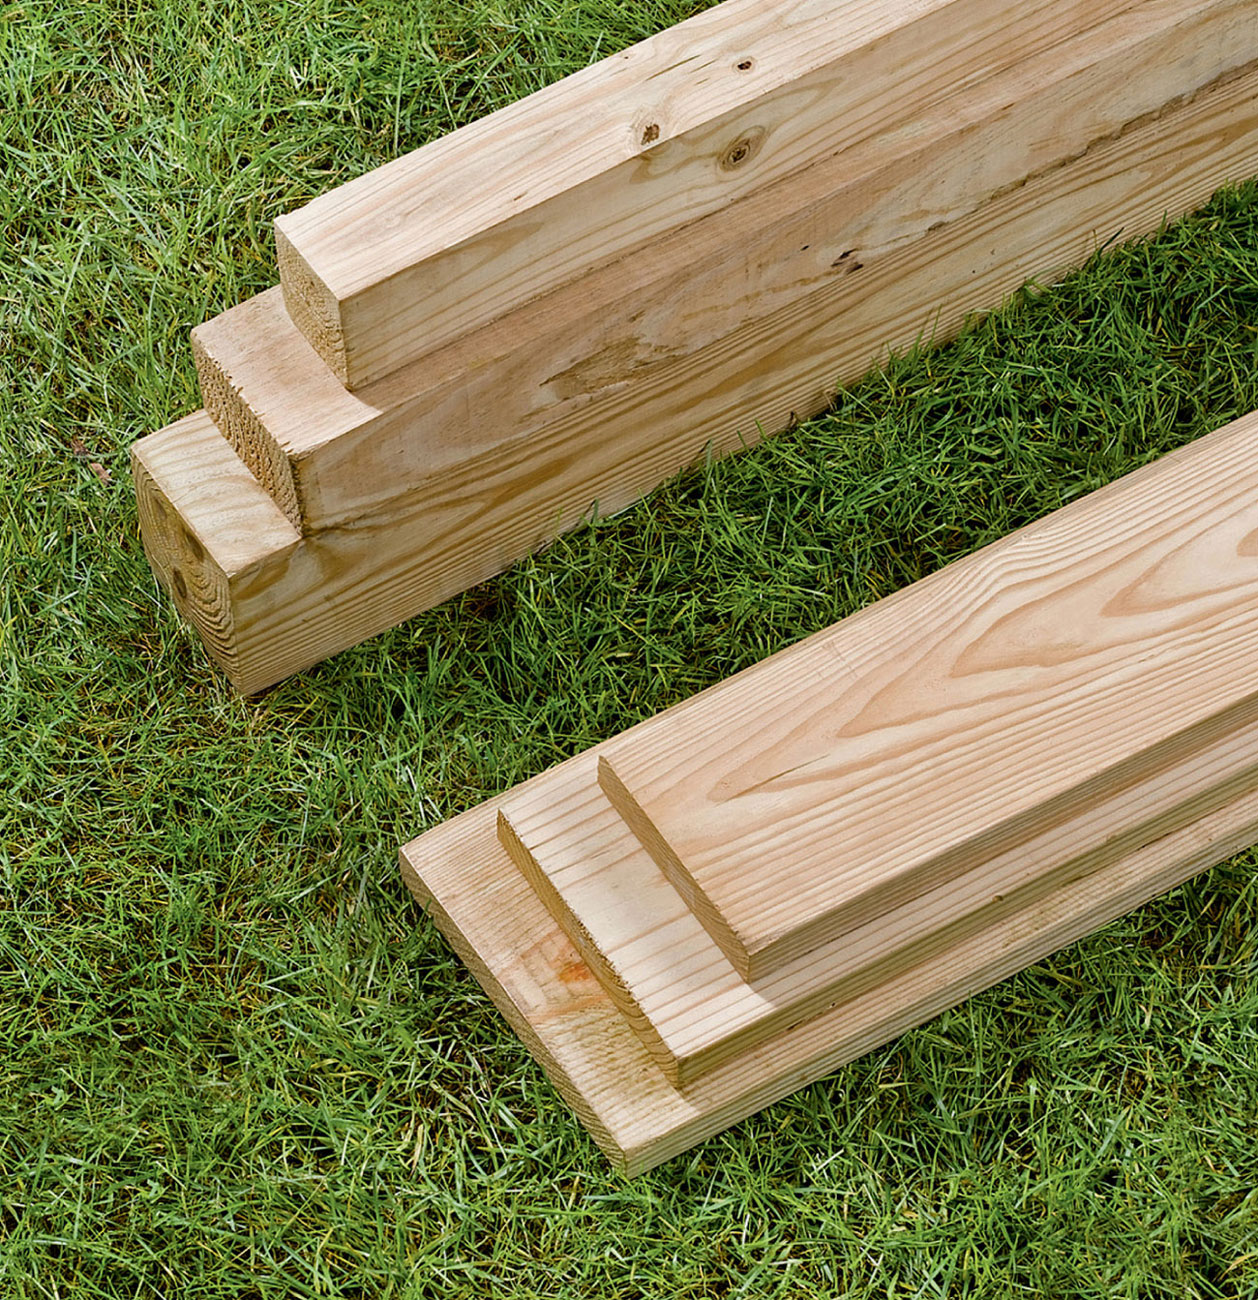
Treated lumber is available in common nominal sizes for use as deck beams and joists. Choose the clearest, flattest boards you can find, free of checks and splits. Use the correct post size for the deck you are building: 4 × 4s and 4 × 6s are still acceptable for railing and stair construction, but they do not meet requirements for deck posts. You’ll need 6 × 6 or larger lumber for this purpose.
 Lumber for Building Decks
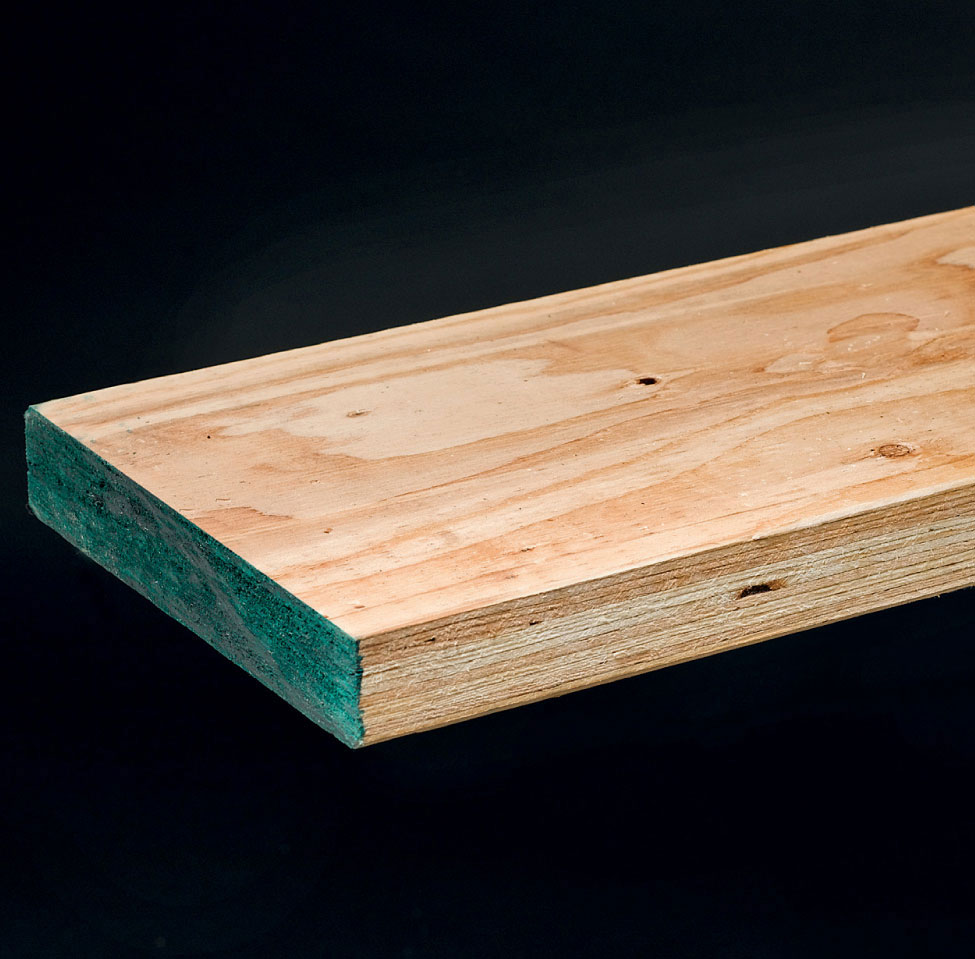
Engineered beams that are rated for exterior use are a sturdy alternative to beams made from 2 × lumber. They may be required if you are building a large deck with expansive or unusual spans. Your building inspector will help you make this determination.
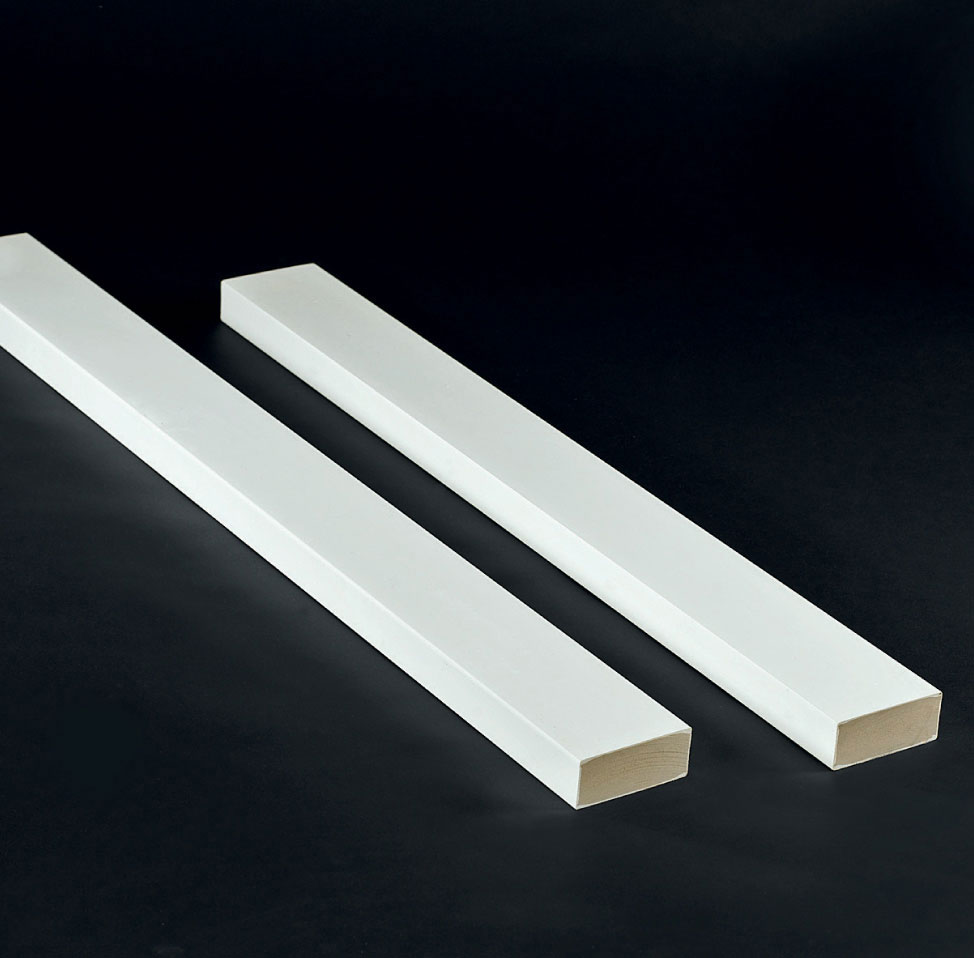
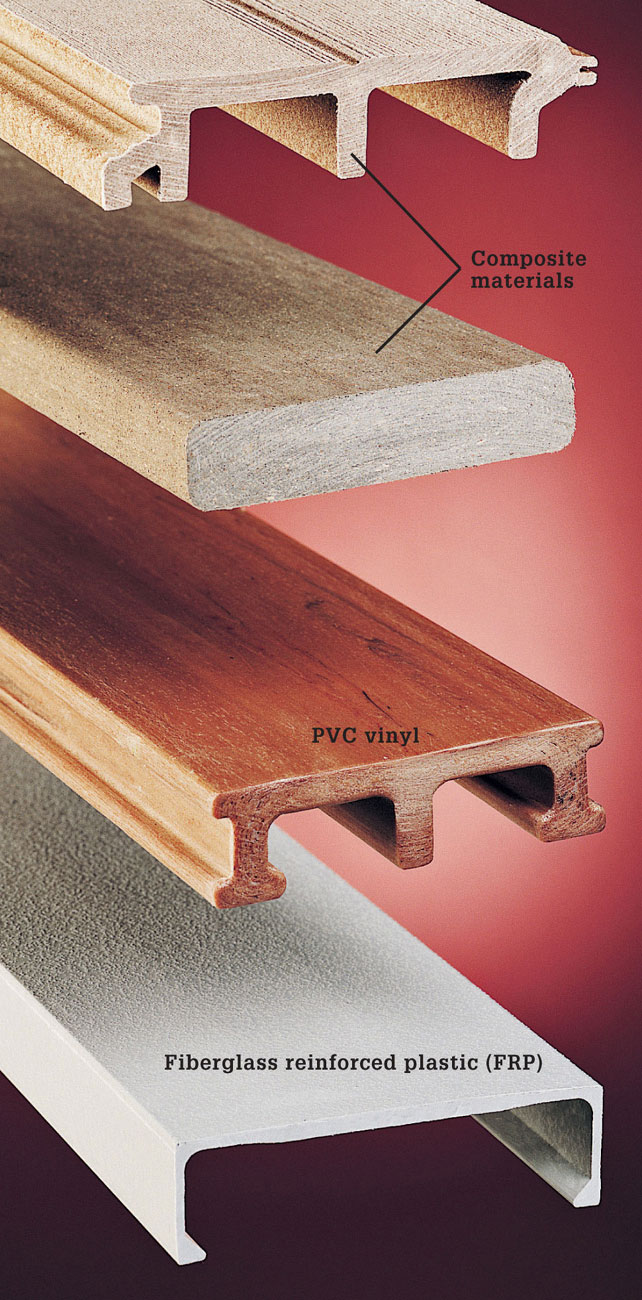
Composite lumber is widely used for non-structural purposes such as decking, skirting, and railing. Made from sawdust, recycled plastic, and binders, composite lumber is available in solid, hollow, and other profiles.
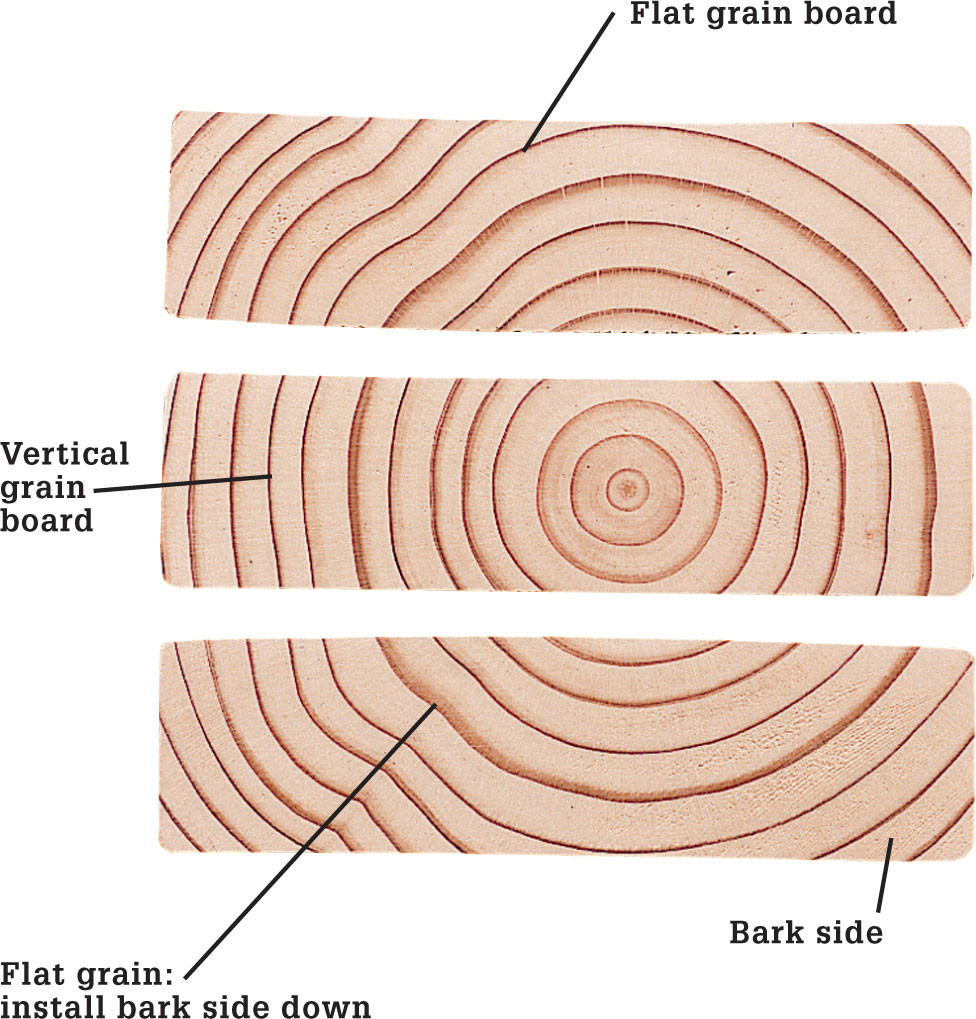
Check end grain of decking boards. Boards with flat grain tend to “cup,” and can trap standing water if not installed properly. Research studies indicate that flat grain boards cup toward the bark side (not away from it, as was previously thought in the industry), and they should be installed so the bark side faces down.
 Wood Decking
Wood continues to be the most popular choice among decking materials, due in large part to price. Pressure-treated decking remains the least expensive deck option, but other types of hardwoods and softwoods feature unique grain pattern and coloring that makes them consistently desirable. Wood of all types is easy to work with, and most softwoods take stain or paint well, allowing you to alter the appearance almost at will.
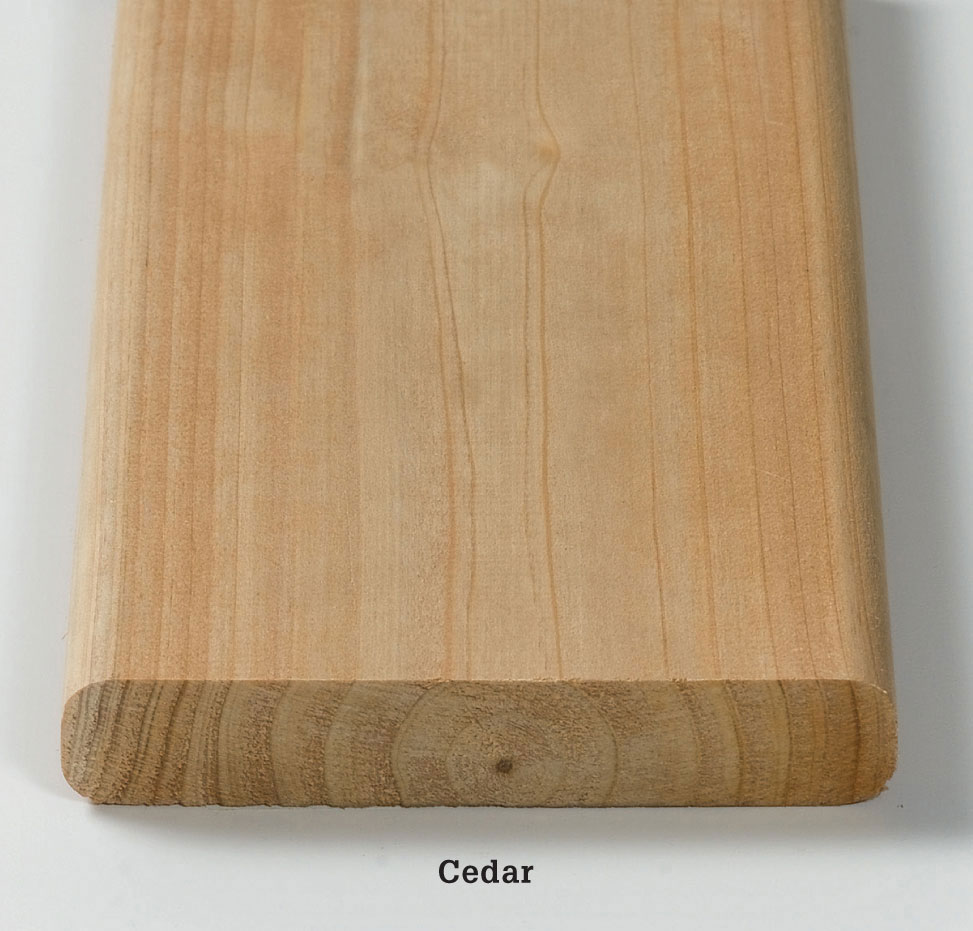
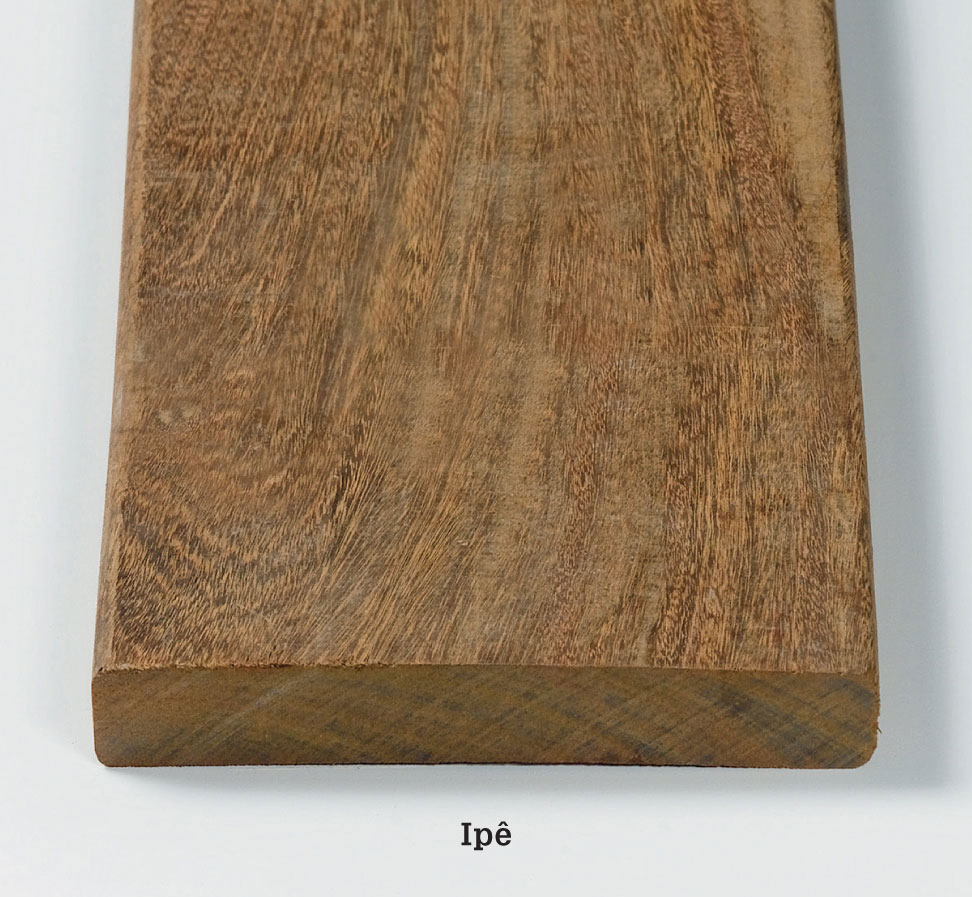
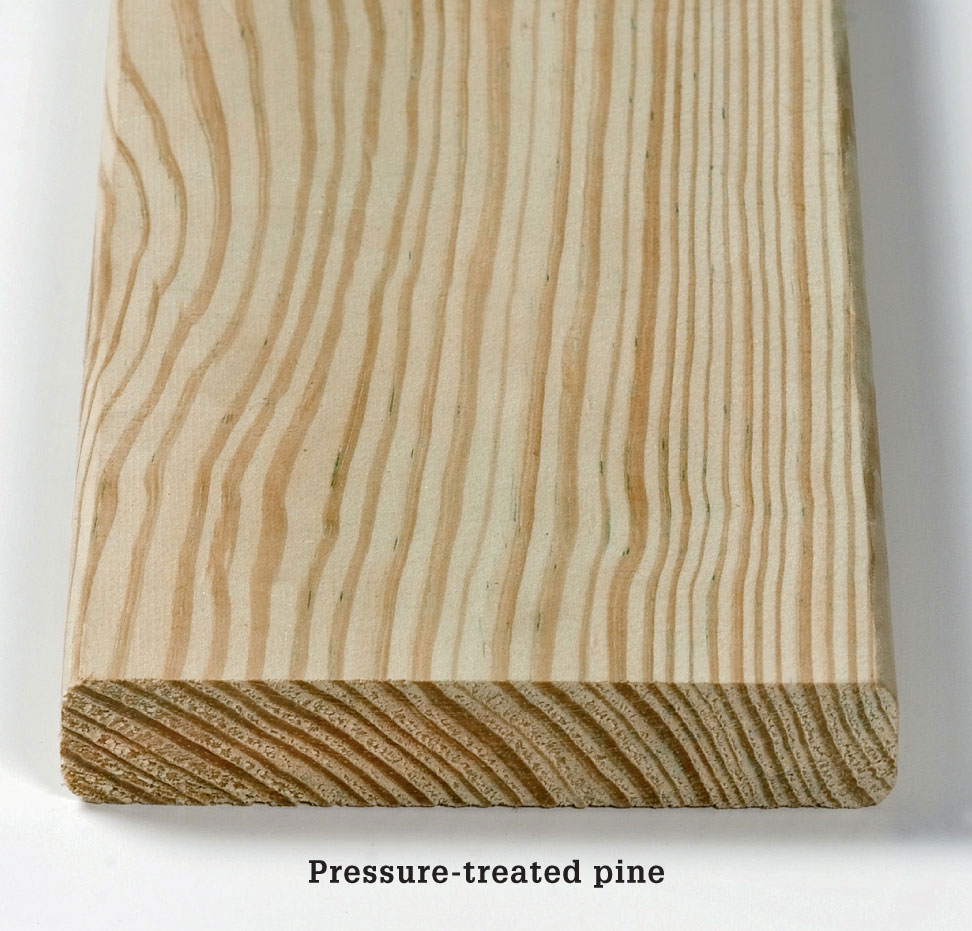
The two most popular choices for wood decking are pressure-treated and cedar. Depending on where you live, you may have other options as well. Redwood may still be available if you live on the West Coast, and cypress is common in the South. Redwood, cypress, and cedar are naturally resistant to decay and insects, which makes them excellent choices for decking. You can apply finish if you like, or leave them unfinished and they’ll weather to a silvery gray color in a few years. If cost is less important than quality, you might consider covering your deck with mahogany, ipê, or any of several other exotic hardwoods grouped under the term “ironwood”—so-called because their cell structures are so dense the woods will sink in water.
For pressure-treated or cedar decking, you’ll have to select a thickness that works for your budget and design. One option is to use 2 × lumber. It will span wider joist spacing without flexing, but generally 2 × lumber is made from lower-grade material that may contain more natural defects. Another choice is to use 5/4 decking, pronounced “five quarter.” Its actual dry thickness is 1 inch and the edges are radiused to help minimize splinters. Often, 5/4 lumber is clearer than 2 × lumber, but it’s not as stiff. You may need to space your joists more closely with 5/4 decking. Either way, you can commonly find 2 × or 5/4 decking in lengths up to 16 or even 20 ft. at most home centers.
 Wood Decking
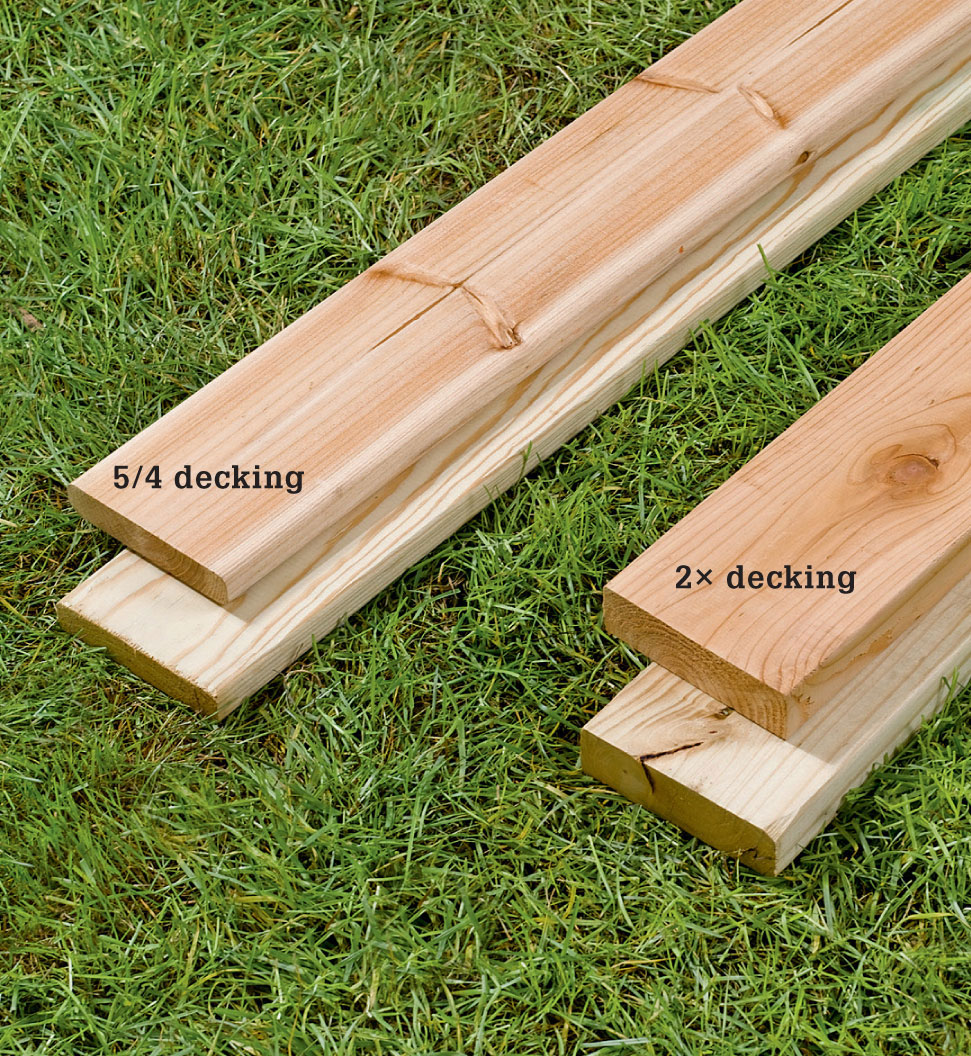
Both 2 × and 5/4 lumber are suitable for use as decking. However, 5/4 will generally be of higher quality, and the radiused edges prevent splintering—an important consideration for bare feet or if you have young children.
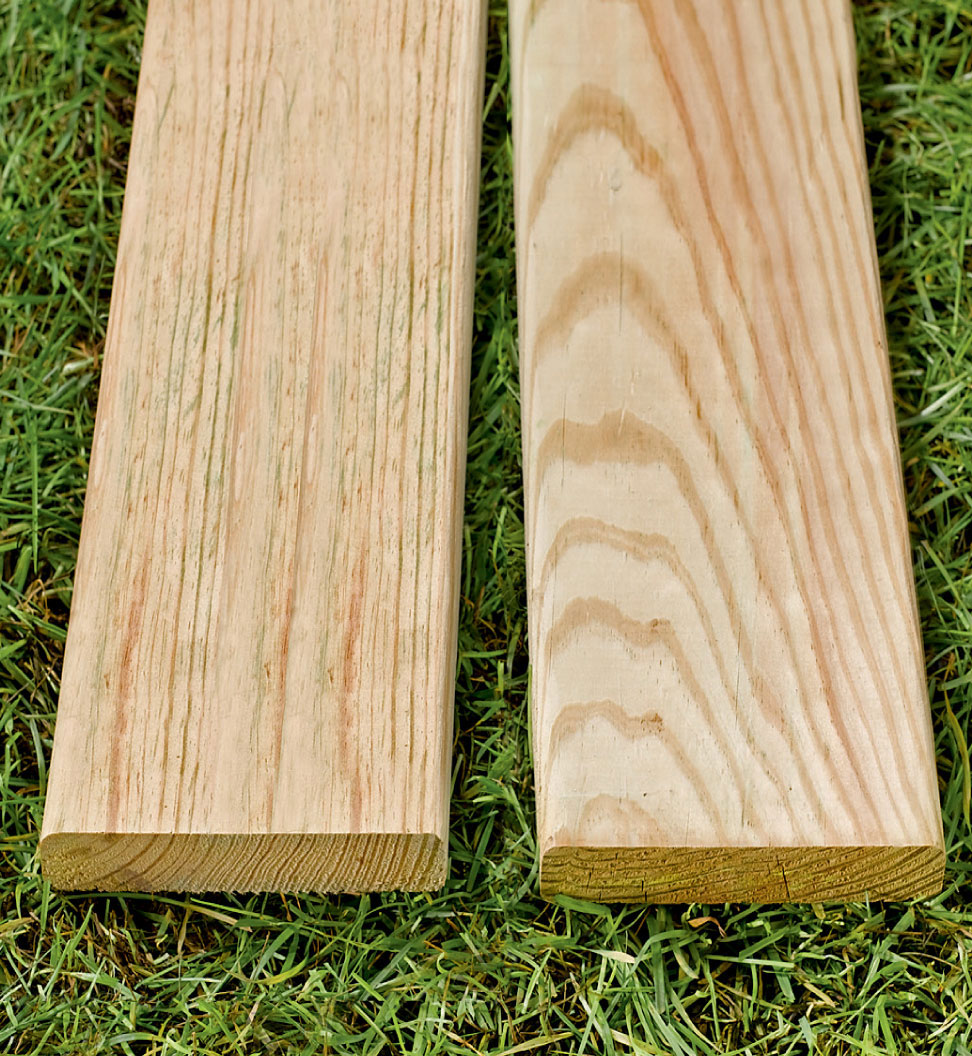
If you hand-select each of your deck boards, look for pieces with vertical grain pattern (left in photo). They’ll be less inclined to cup and warp than flat-grain lumber (right), but the wood tends to be significantly heavier.
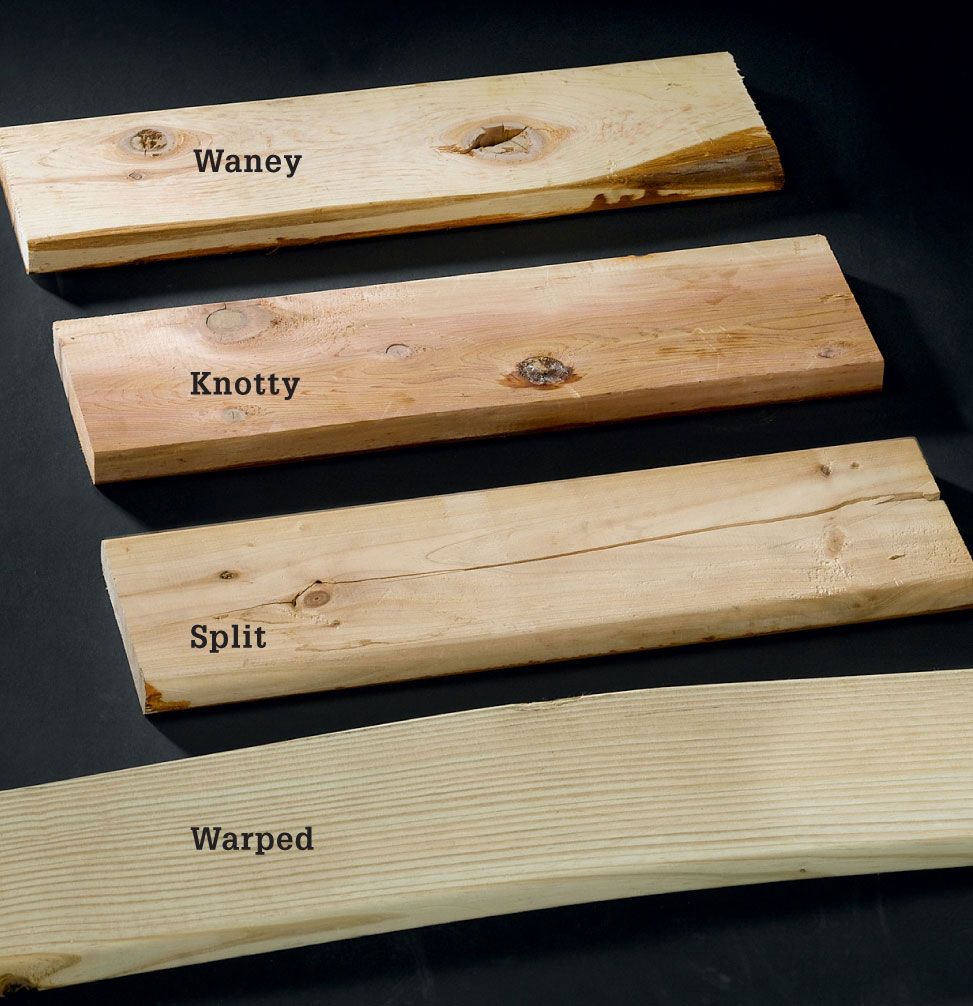
Be picky about the quality of the decking you buy. Natural defects in the wood could make the piece harder to install or deteriorate prematurely. Watch for soft pockets of sap in the wood. Sap will get sticky in warm weather, and the resin can bleed through wood finishes, leaving brown stains.
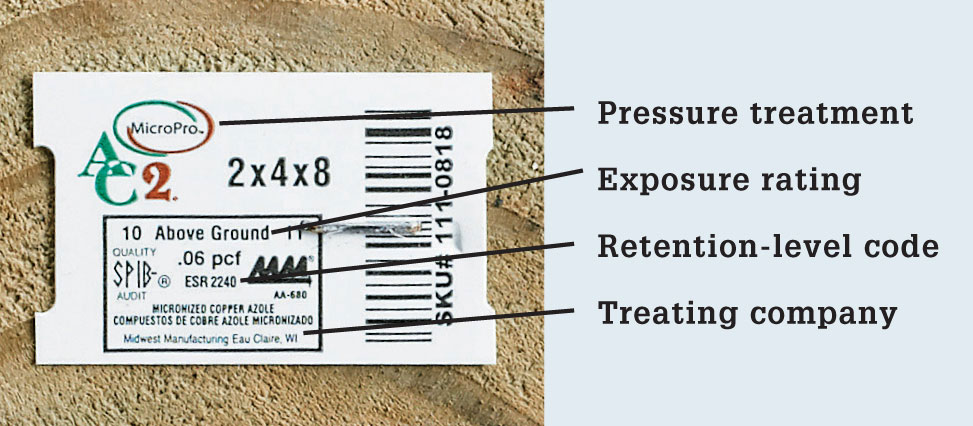
Pressure-treated lumber stamps list the type of preservative and the chemical retention level, as well as the exposure rating and the name and location of the treating company.
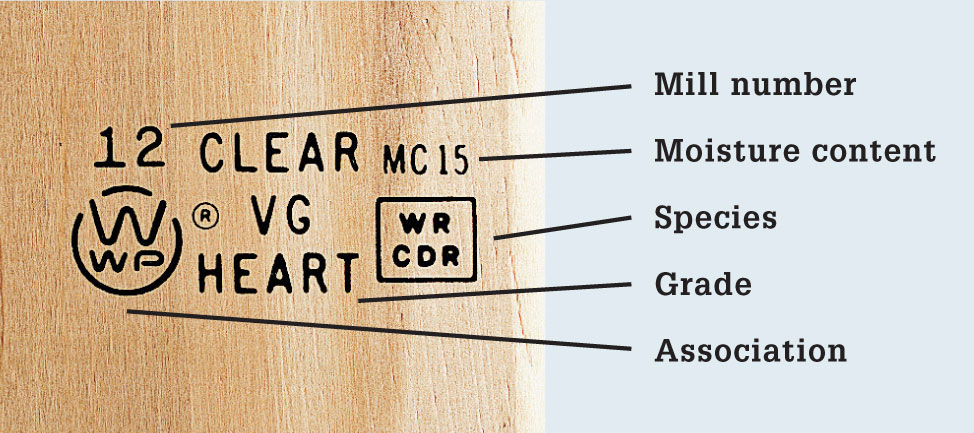
Cedar grade stamps list the mill number, moisture content, species, lumber grade, and membership association. Western red cedar (WRC) or incense cedar (INC) for decks should be heartwood (HEART) with a maximum moisture content of 15% (MC15).
 Non-wood Decking
Decking made from non-wood materials such as composite lumber and PVC has taken over a large share of the decking market in recent years. Composite decking has only been around for a few decades, but it’s a compelling option to consider for your deck. Most forms of composite decking are made from a blend of post-consumer plastic waste and wood pulp or non-wood fibers. The plastic component—polyethylene or polypropylene—makes the material impervious to rotting, and insects don’t like it. Unlike solid wood, it has no grain, so it won’t splinter or crack, and there are no knots or natural defects to cut away. Other formulations of synthetic decking contain no wood at all. These are made from polyethylene, PVC, polystyrene, or fiberglass blends. Composite decking comes with impressive warranties, which may last from 10 years to a lifetime, depending on the product. Some warranties are transferable from one homeowner to the next.
When composite lumber first hit the market, it didn’t look anything like wood, and color choices were limited. Now, it’s available in a range of wood textures and colors. Most products are non-toxic, easy to cut, drill, and fasten, and do not require finishing. Maintenance is usually limited to an occasional cleaning or spot removal. However, composite decking is more flexible than wood, so you may need to use closer joist spacing in your deck design. It’s also heavier than wood and generally more expensive.
Surface patterns and textures of composite decking range from virtually smooth to intricate wood grain styles. Patterns and textures vary by manufacturer, but many offer varieties that convincingly mimic species of wood.
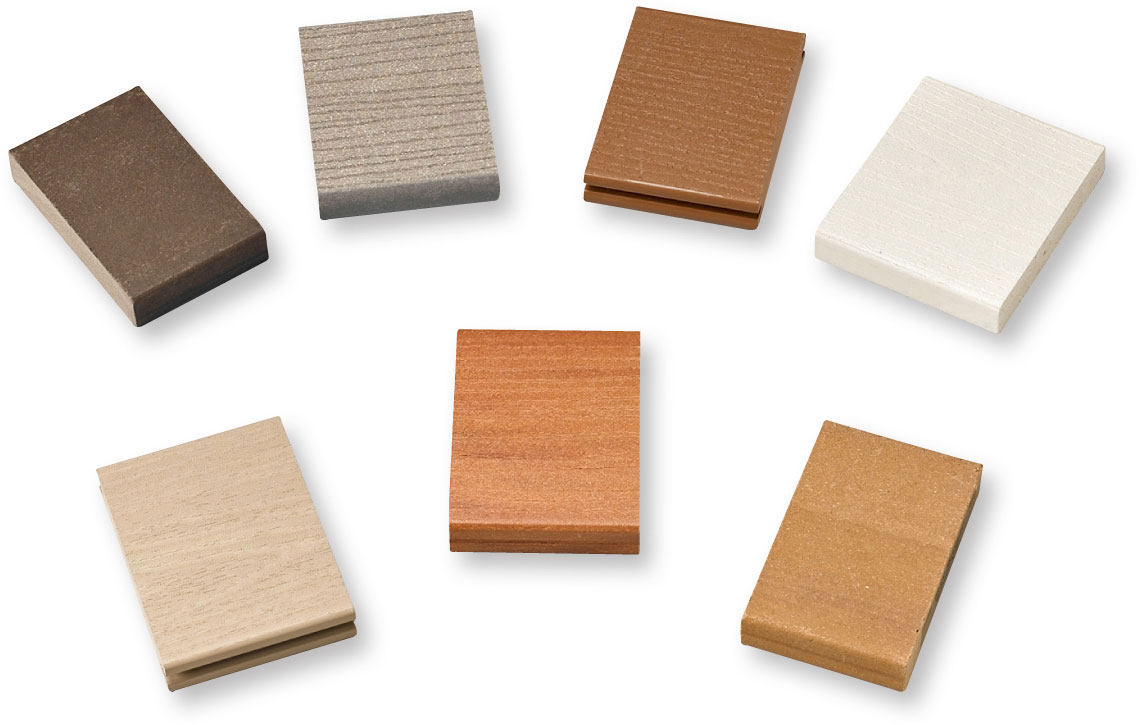
Composite decking colors cover the spectrum of wood tones, plus grays and white. The color is continuous throughout the material, but exposure to strong, direct sunlight may cause the surface color to fade.

While composite decking can be fastened down conventionally with screws, you may be able to use various edge-fastening systems instead to avoid driving screws through the board faces. For more on these options, see pages 136 to 139.
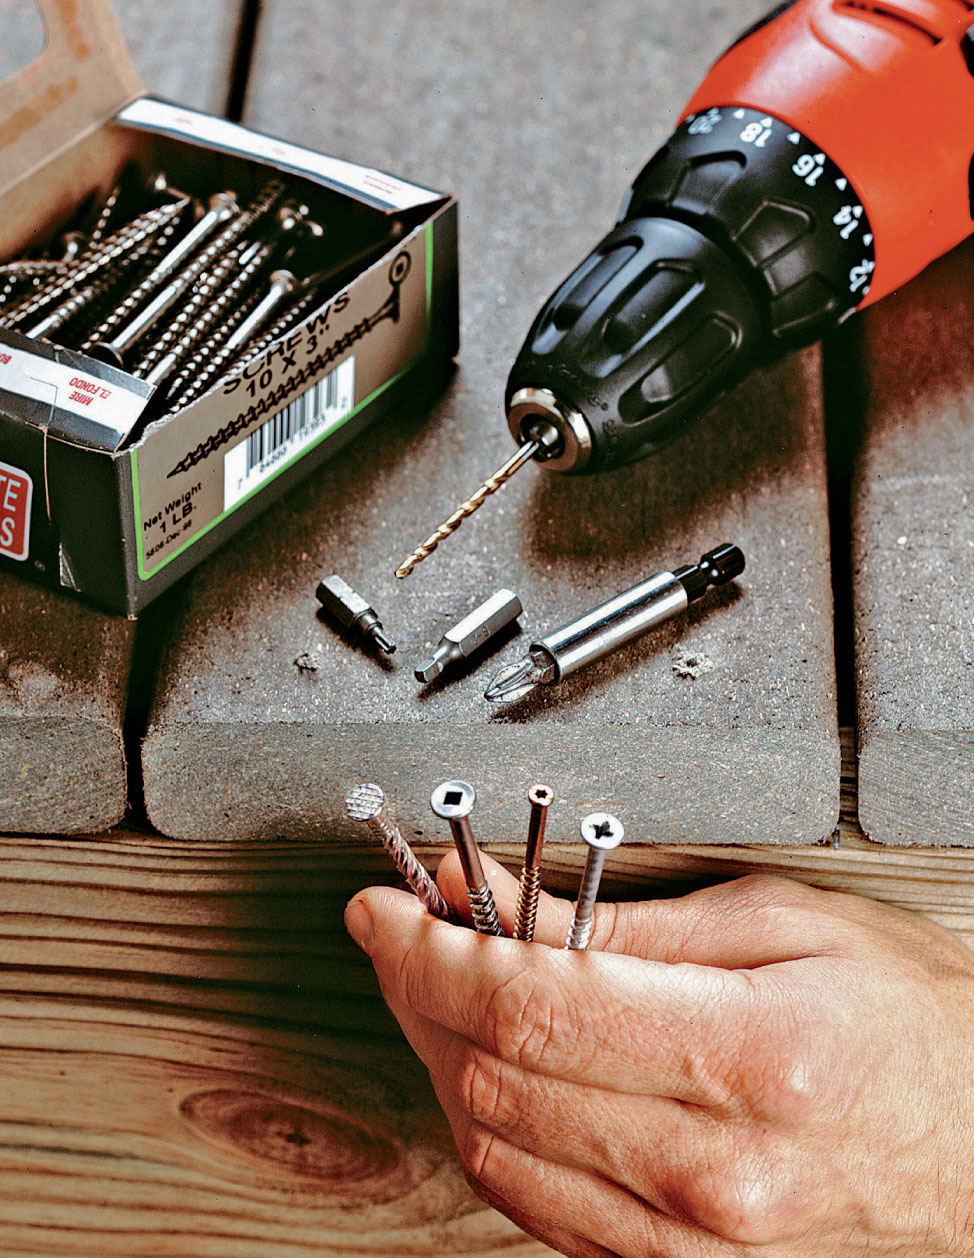
Composite and other non-wood decking often requires special fasteners that are designed to reduce “mushrooming” that occurs when the decking material bulges up around the screwhead. Pilot holes are recommended for some types as well.
 Fasteners & Hardware
Certain structural connections of your deck will require the use of lag screws, through bolts, and concrete anchors to withstand the heavy loads and sheer forces applied to a deck. Attaching ledger boards to your home’s band joist, fastening beams to posts, or anchoring posts to concrete footings are all areas where you’ll need to step up to larger fasteners and anchors. Be sure to use hot-dipped galvanized or stainless steel hardware to prevent rusting or corrosion from pressure-treating chemicals. Building codes require that you install a washer beneath the heads of lag screws or bolts and another washer before attaching nuts. Washers prevent fasteners from tearing through wood and secure hardware under stress.
Another fastening option to consider is high-strength epoxy, applied from a syringe. If you are fastening deck posts or ledger boards to cured concrete, the epoxy will bond a threaded rod permanently in place without needing an additional metal anchor.
Here is an overview of the anchoring fasteners you may need for your project.
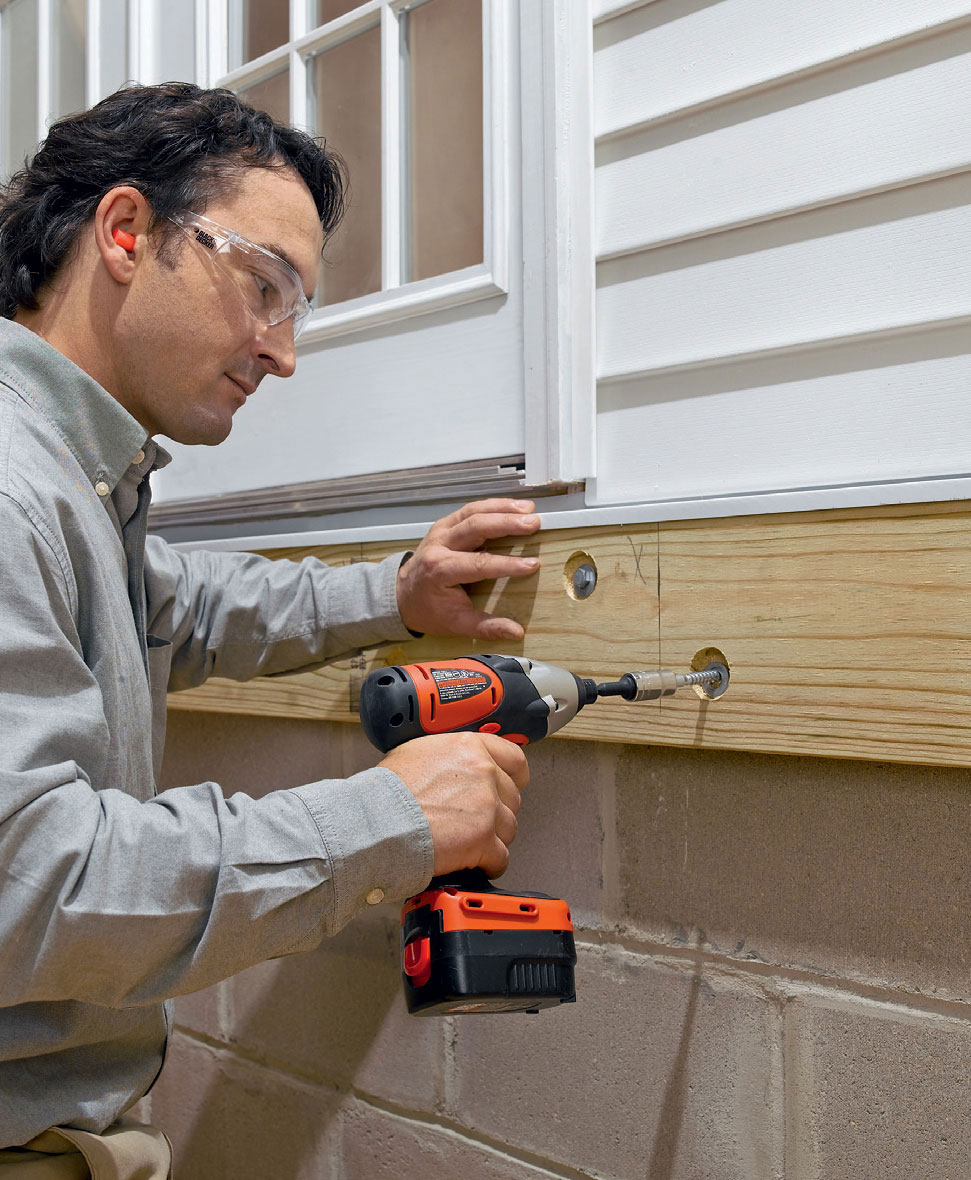
Galvanized or stainless steel lag bolts and washers are the correct fasteners for installing ledgers to the band joist of a house. You can also use them for making other wood-to-wood connections.
 Anchoring Fasteners
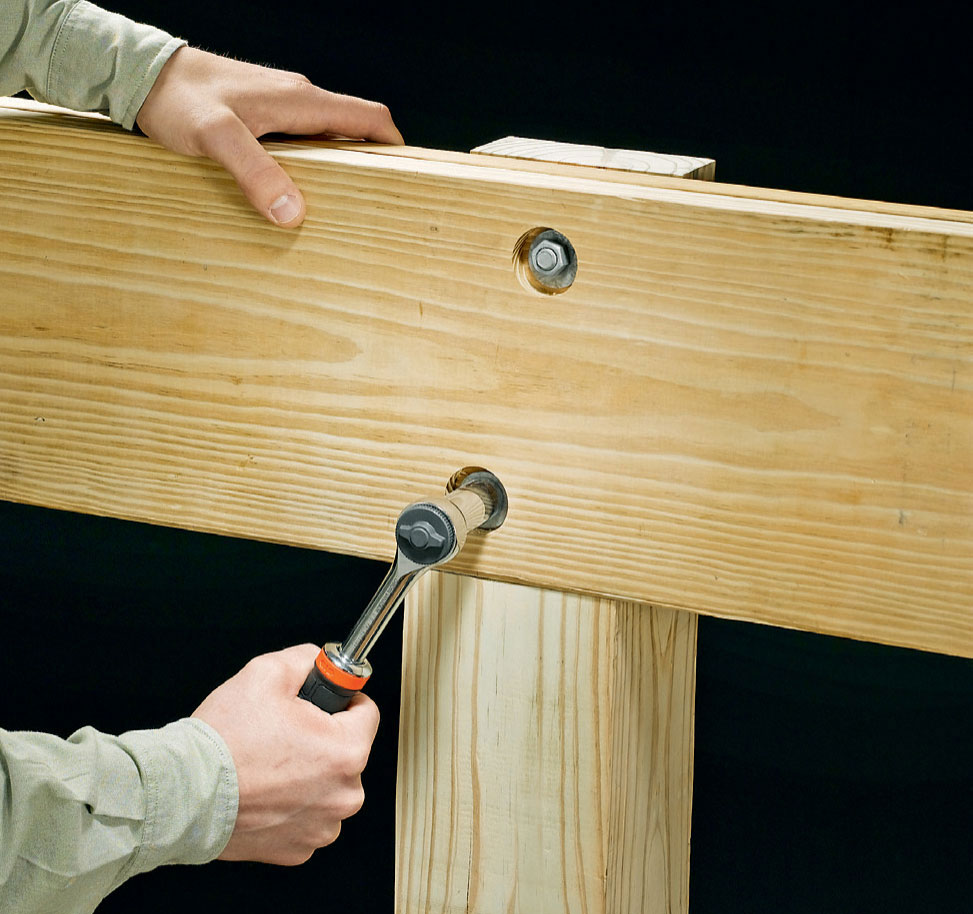
Use 1/2"-diameter or larger through bolts, washers, and nuts for fastening beams to posts or railing posts to joists. They should be galvanized or made of stainless steel for corrosion resistance.

J-bolts, embedded in the wet concrete of deck footings, provide a secure connection for attaching concrete footings to metal connecting hardware.
Wedge or sleeve anchors draw a wedge through a hollow sleeve, expanding it to form a tight fit in solid concrete. A nut and threaded end hold the ledger boards in place.
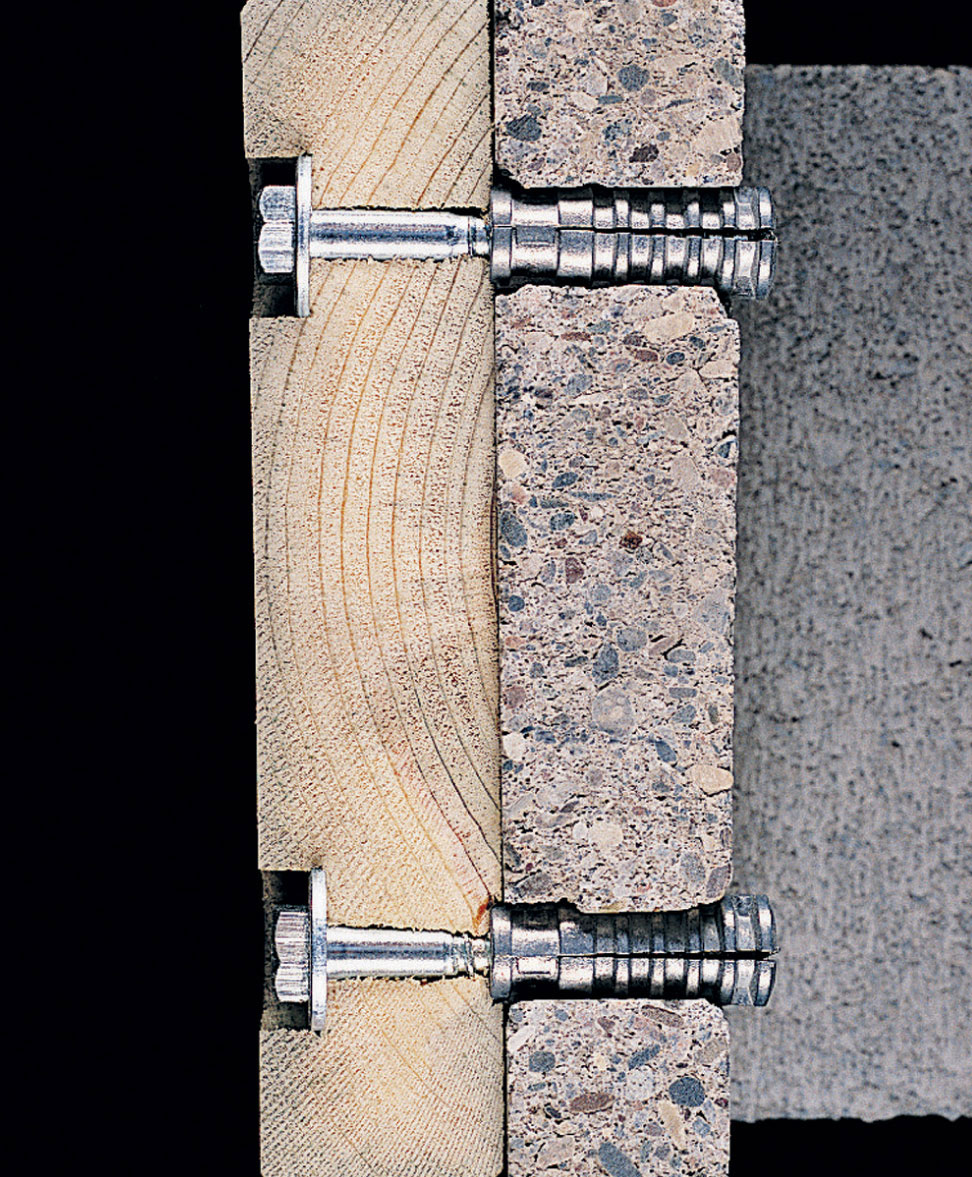
Soft metal shield anchors expand when lag screws are driven into them. They make suitable connections in either solid concrete or hollow block foundations.

A bolt driven through the foundation from the inside can be fitted with a washer and bolt to secure the ledger.
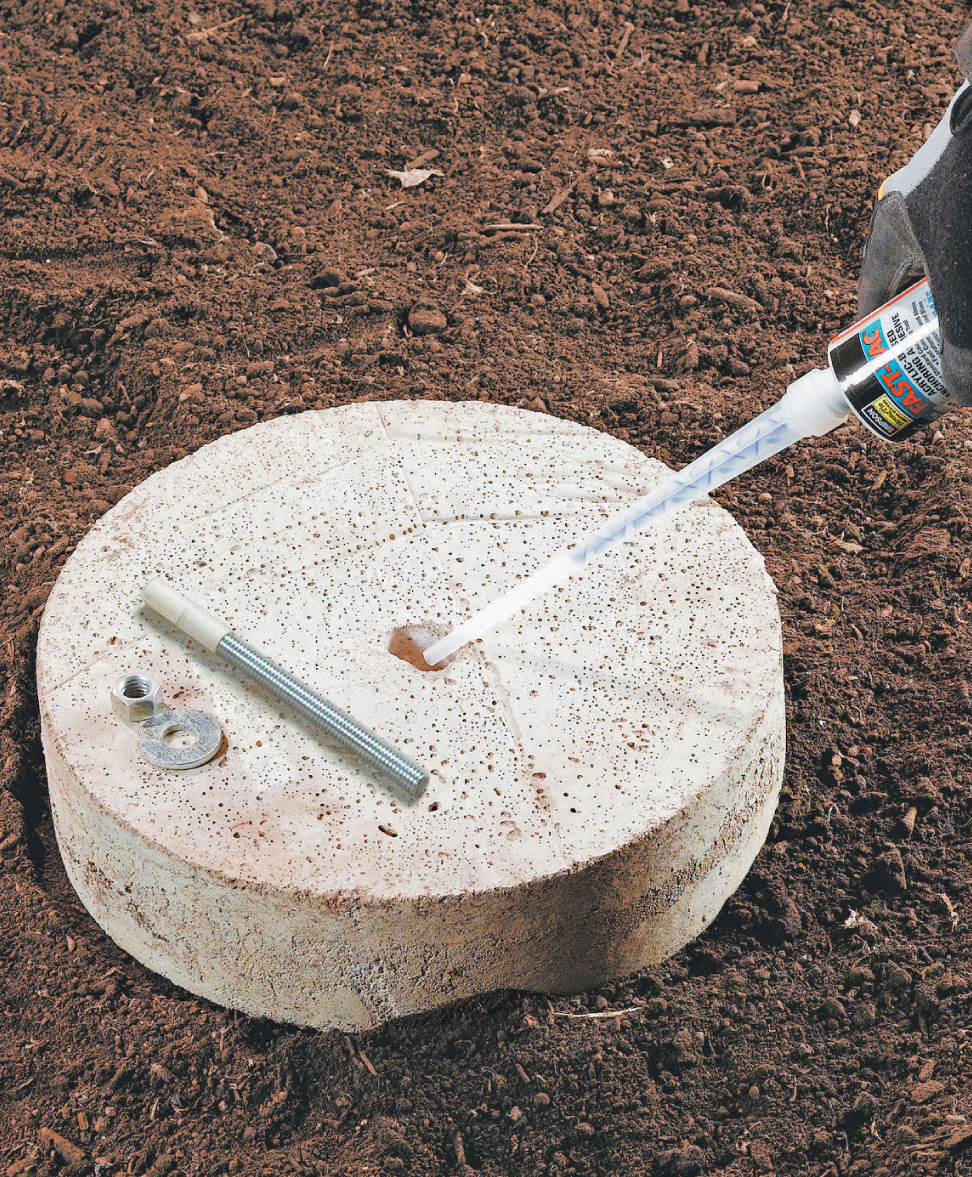
High strength epoxy and threaded rod are good options for attaching metal connecting hardware to concrete footings.
 Metal Connecting Hardware
Sheet-metal connecting hardware comes in assorted shapes and styles. It is used to create strong wood-to-wood or wood-to-concrete joints quickly and easily. For instance, metal post anchors not only provide a simple way to attach posts and footings, they also create space between the two surfaces so post ends stay dry. Joist hangers are a fast way to hang long, heavy joists accurately. Post beam caps, T-straps, and angled joist hangers are ideal solutions for building stacked joints or when space doesn’t allow you access to drive screws or nails from behind the joint.
Make sure to buy hot-dipped galvanized or stainless steel connecting hardware. Some styles are designed for interior use only and do not have adequate corrosion protection. The product label should identify whether or not the hardware is suitable for pressure-treated wood and outdoor use. Use joist hanger nails made from the same material as the hardware.
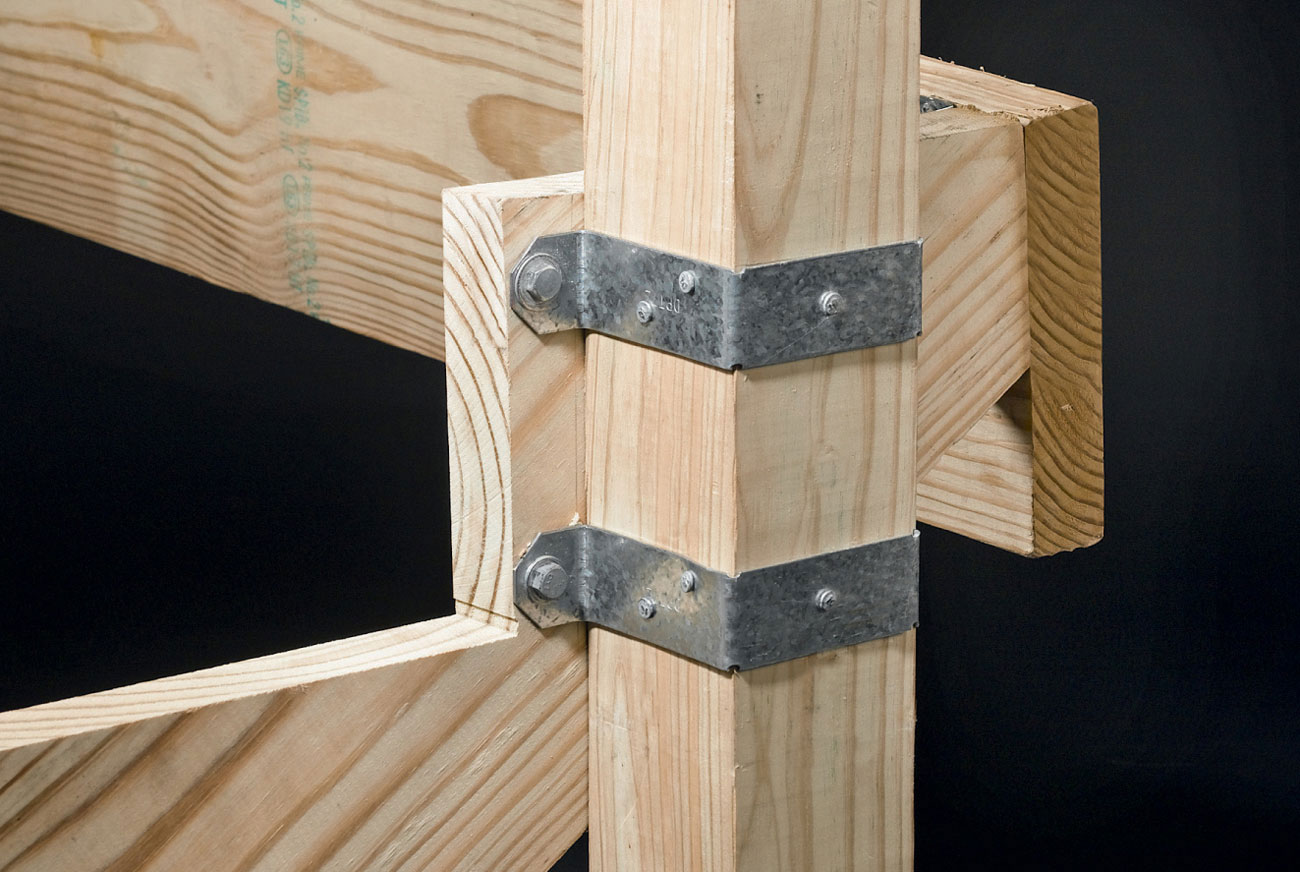
Deck post ties fasten stair or railing posts to stringers or joists without through bolts. Hardware is manufactured in 2 × 4 and 4 × 4 size options.
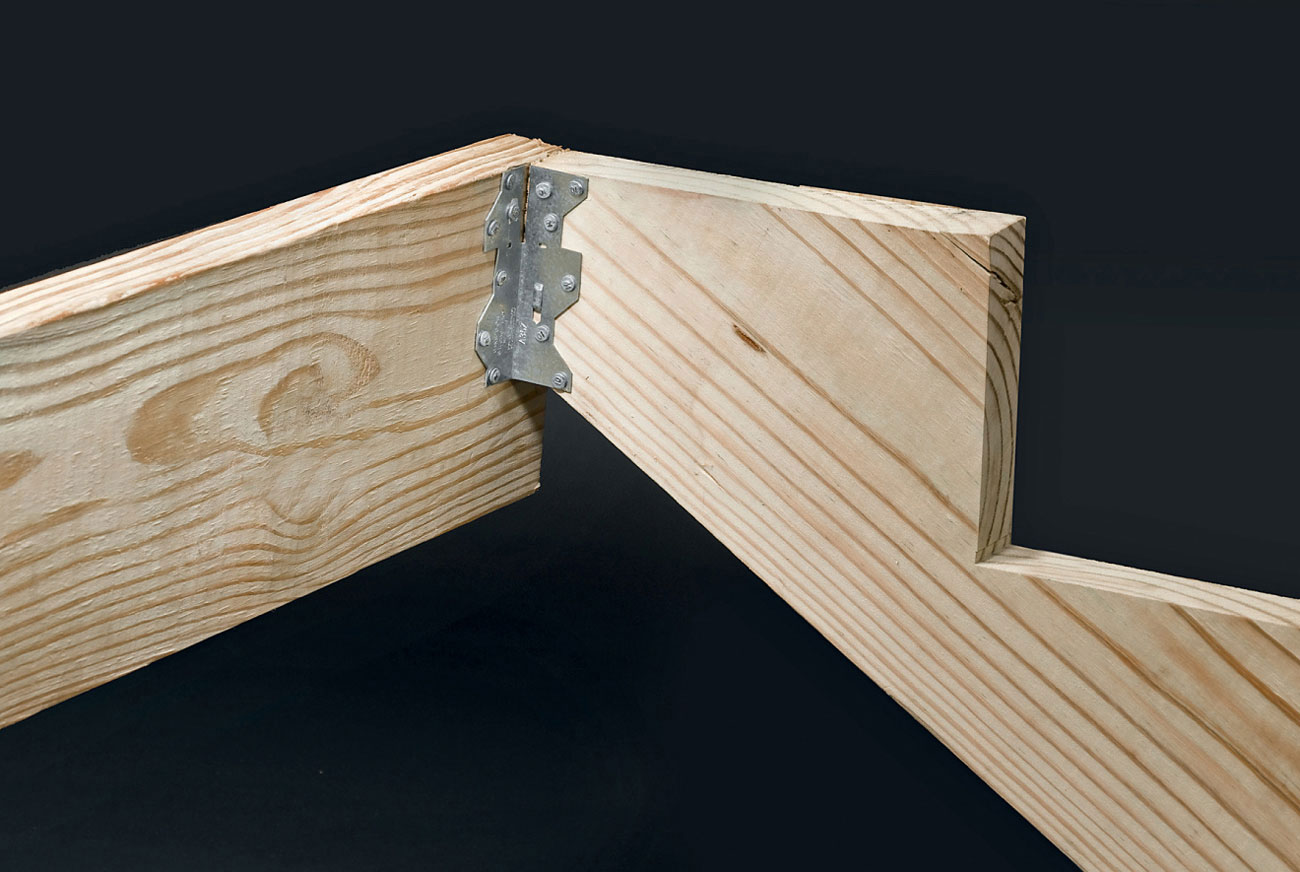
Framing anchors can be used to fasten rim joists together at corners or make other right-angle attachments, such as stair stringers to rim joists.
 Hanger Hardware for Decks
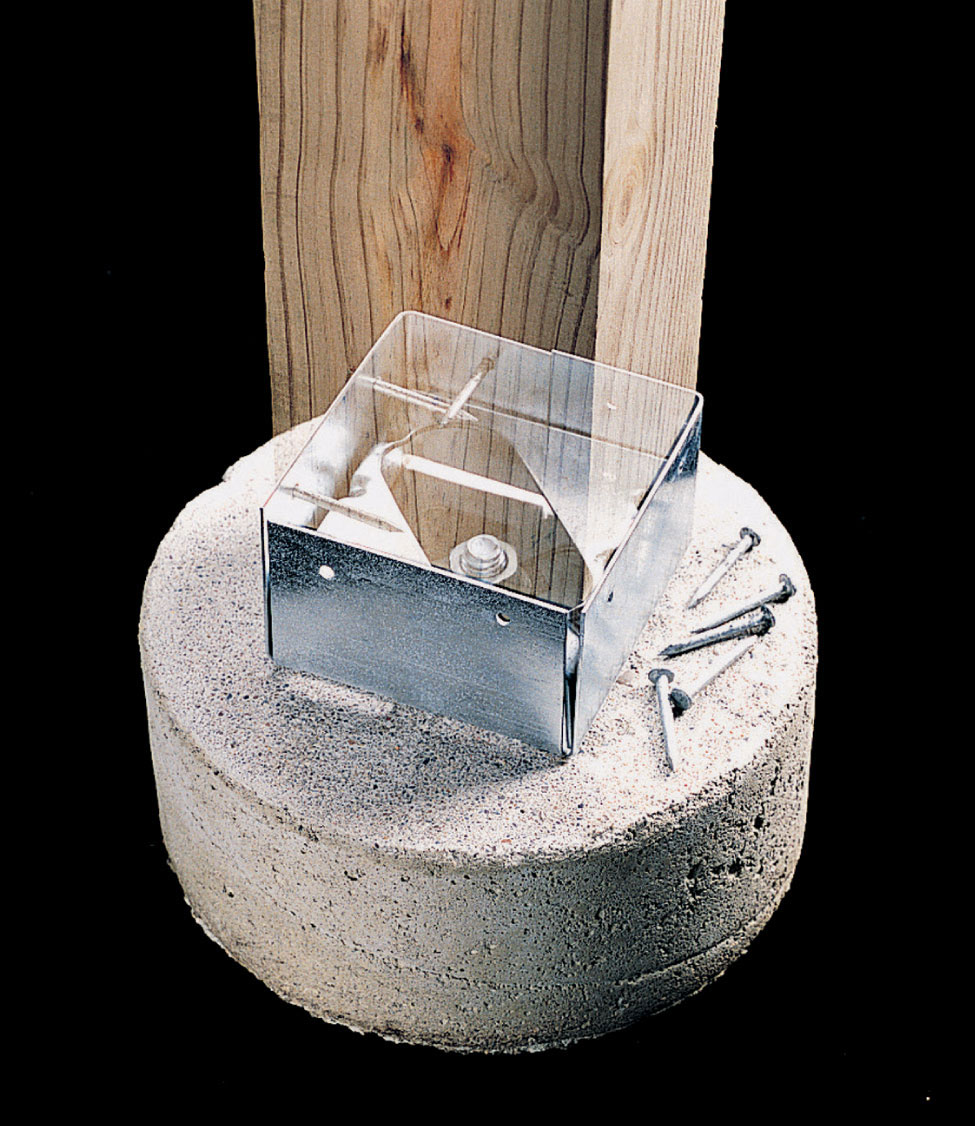
Post anchors hold deck posts in place, and raise the base of the posts to help prevent water from entering the end grain of the post.
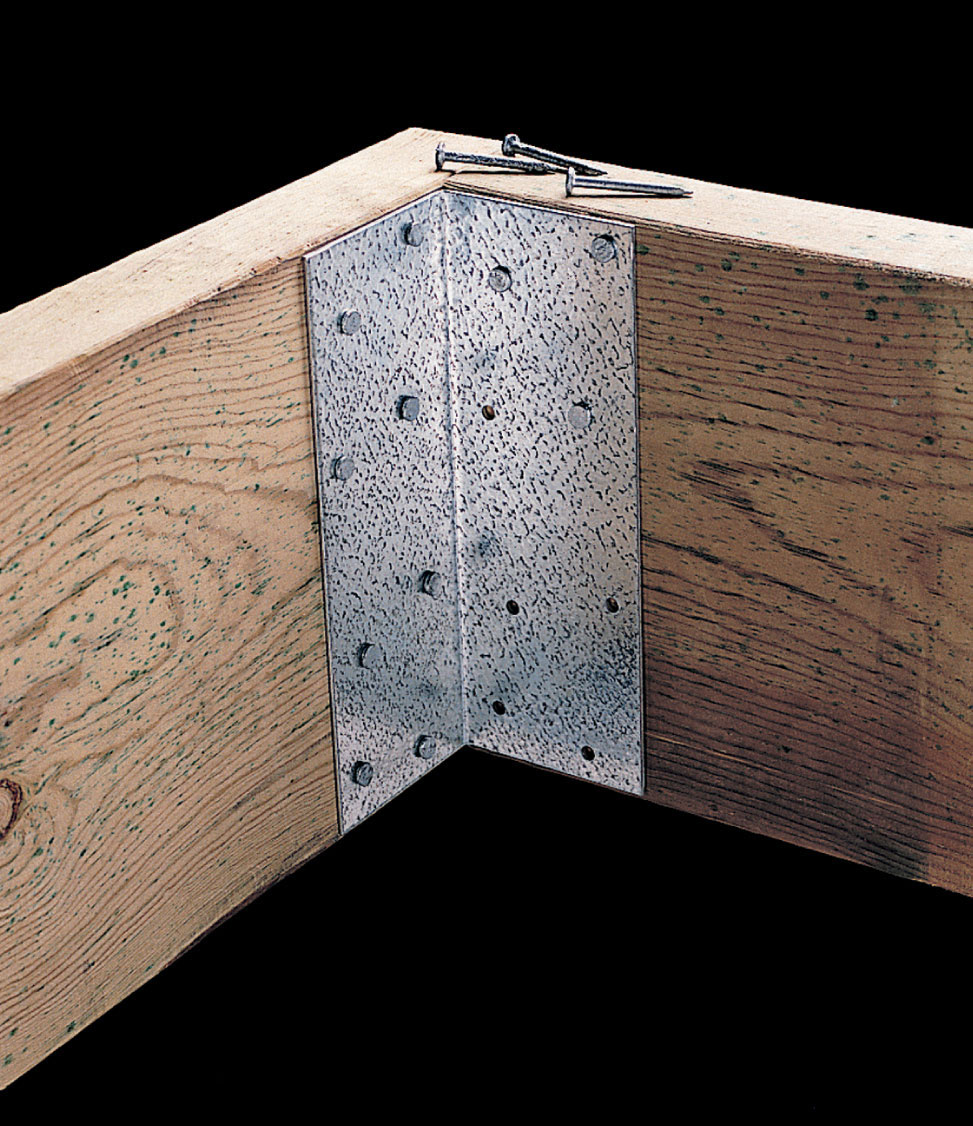
Angle brackets help reinforce header and outside joists. Angle brackets are also used to attach stair stringers to the deck.
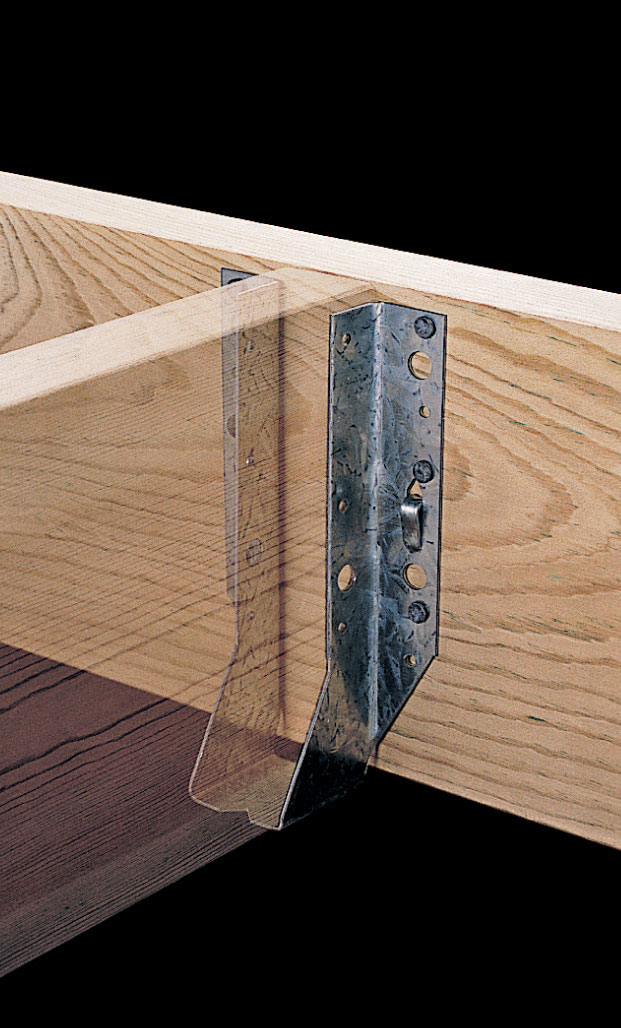
Joist hangers are used to attach joists to the ledger and header joist. Double hangers are used when decking patterns require a double-width joist.
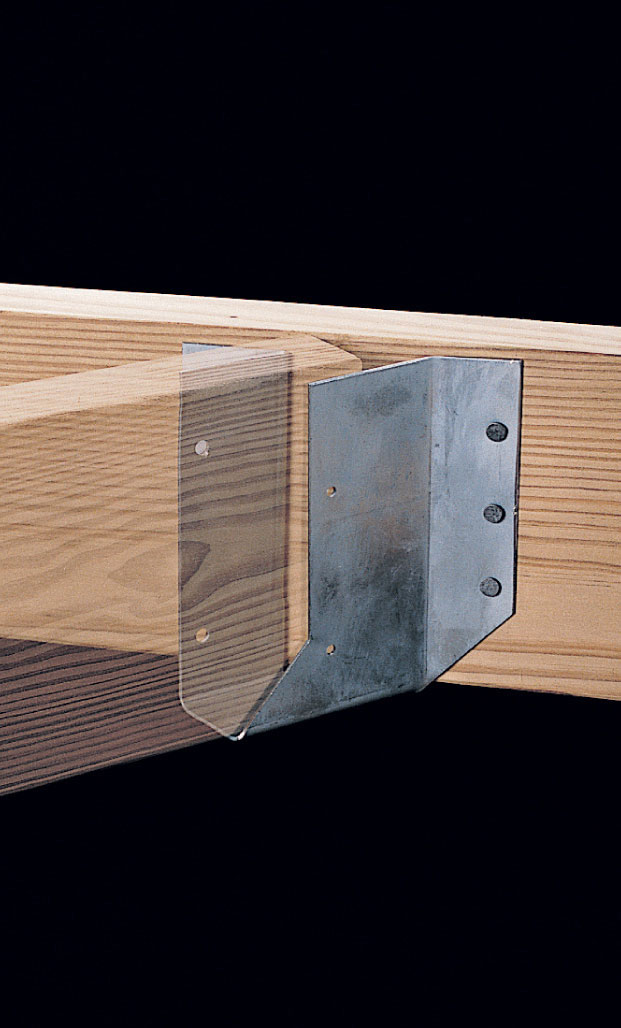
Angled joist hangers are used to frame decks that have unusual angles or decking patterns.
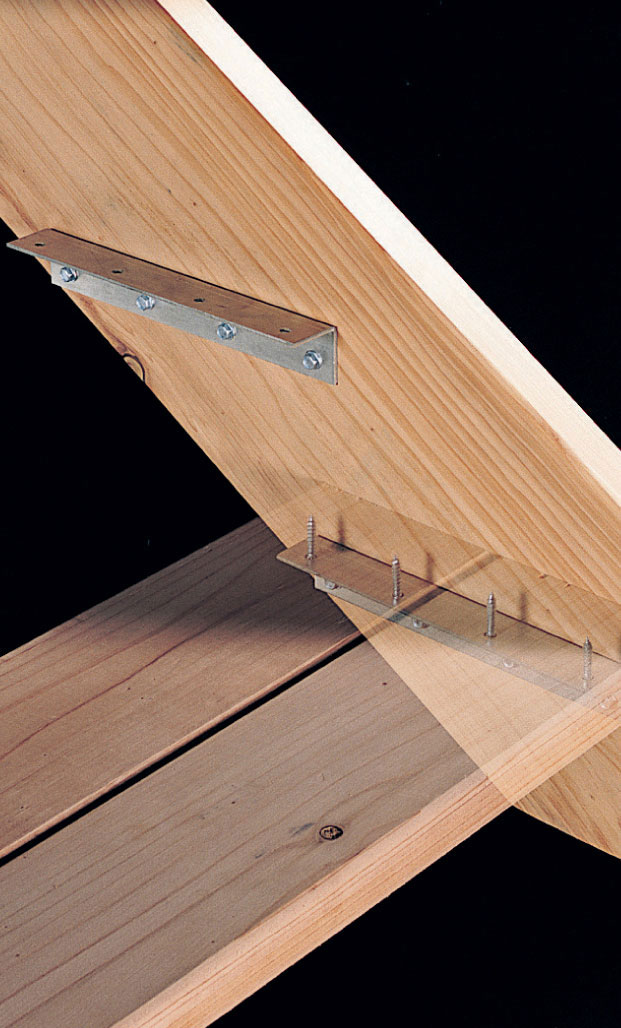
Stair cleats support the treads of deck steps. Cleats are attached to stair stringers with 1/4 × 1 1/4" galvanized lag screws.

H-fit rafter ties attach 2 × joists or rafters to the top of a beam between beam ends.
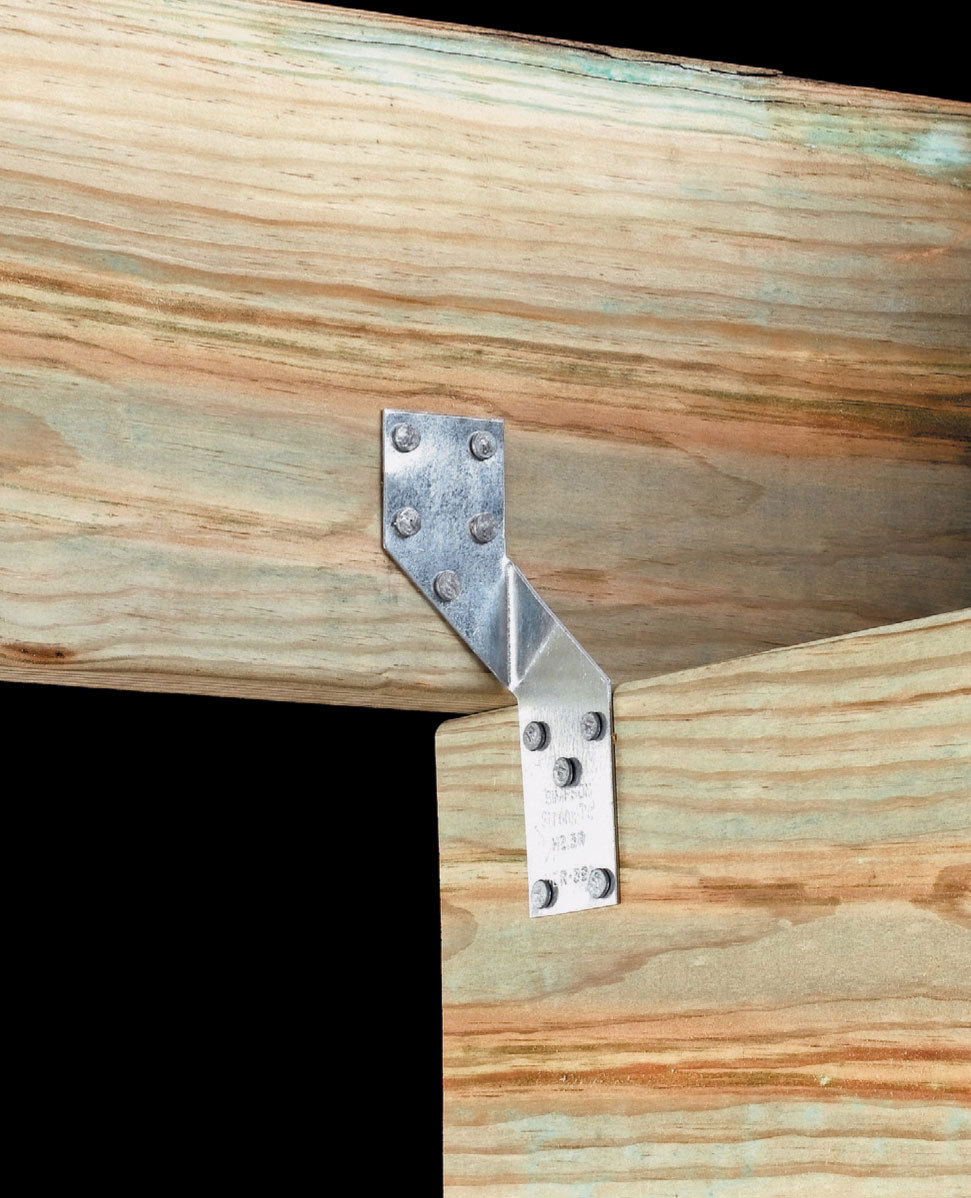
Seismic ties attach 2 × joists or rafters to the top of a beam at its ends.
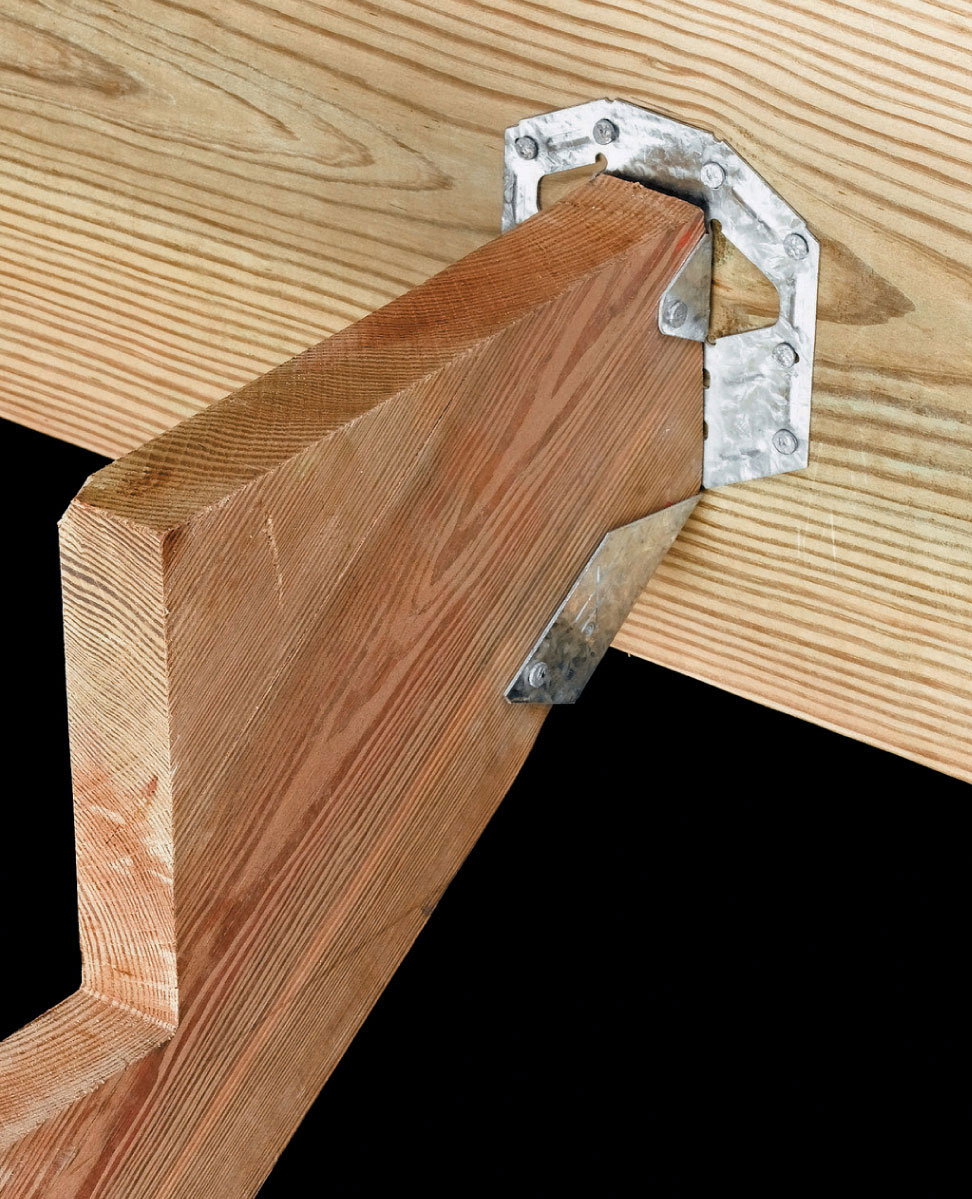
Skewable joist hangers attach 2 × lumber, such as stair stringers, to the face of framing at an adjustable angle.
Skewable angle brackets reinforce framing connections at angles other than 90 degrees or at beam ends where 45-degree joist hangers won’t fit.
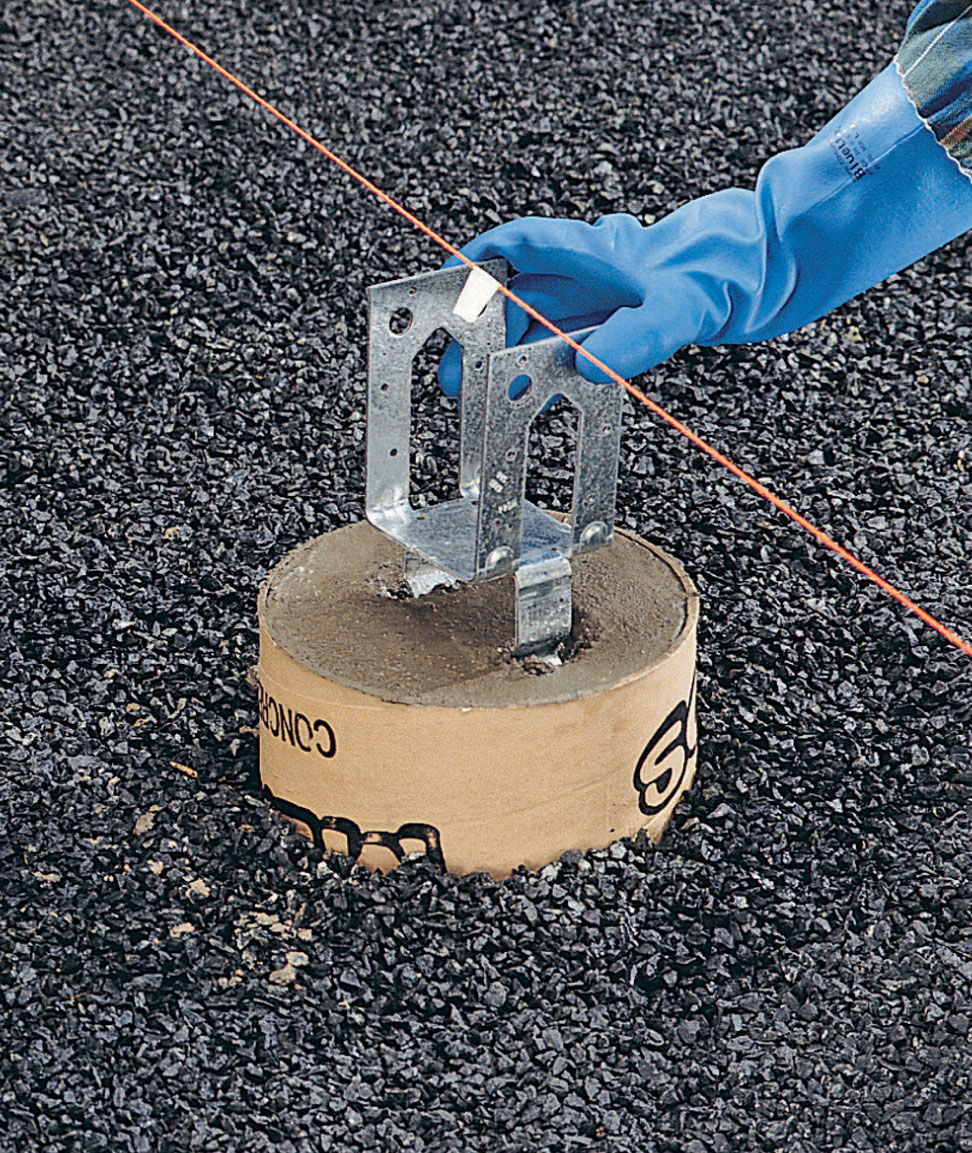
Direct-bearing footing connectors attach beams directly to footings on low profile decks.
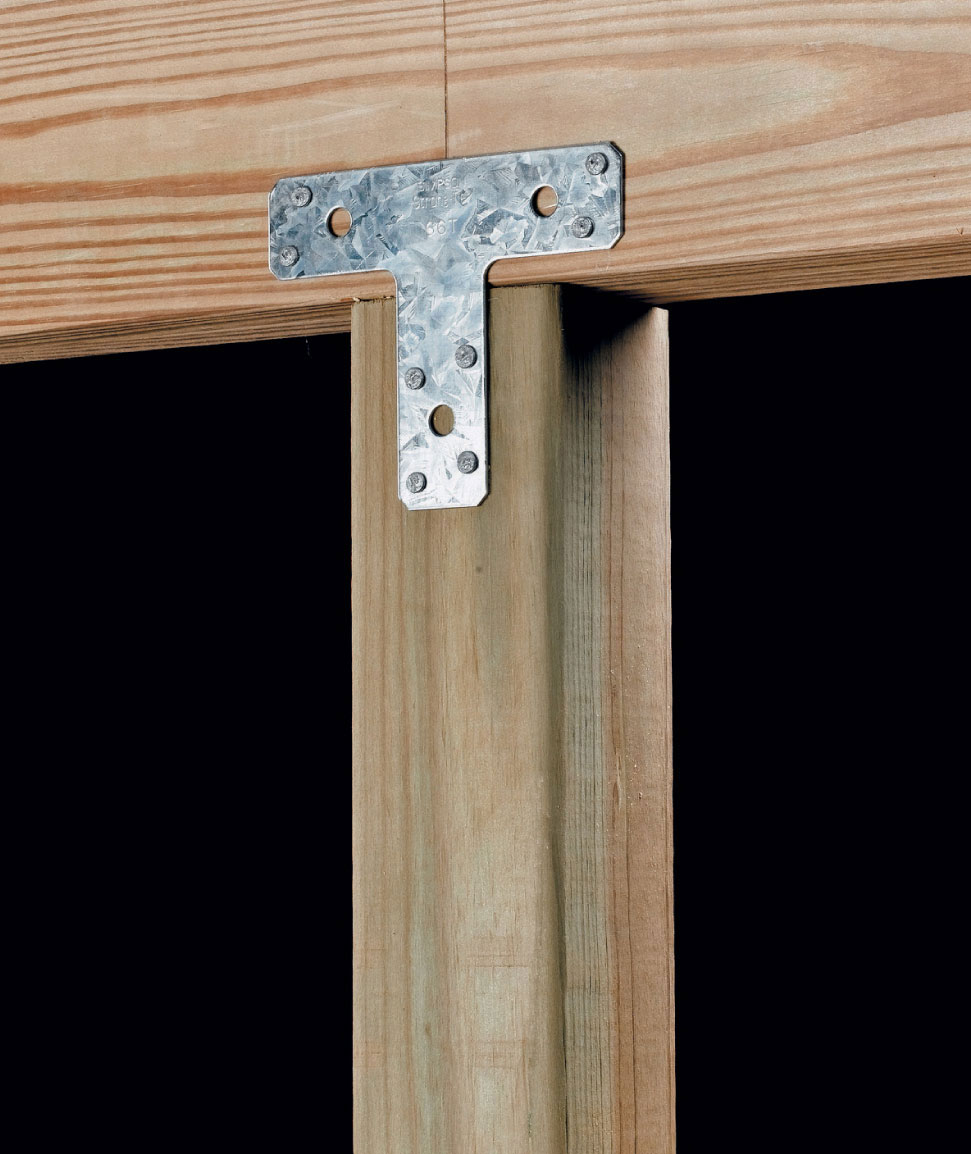
T-straps reinforce the connection between beam and post, particularly on long beams requiring spliced construction. Local building codes may also allow their use in place of post caps.
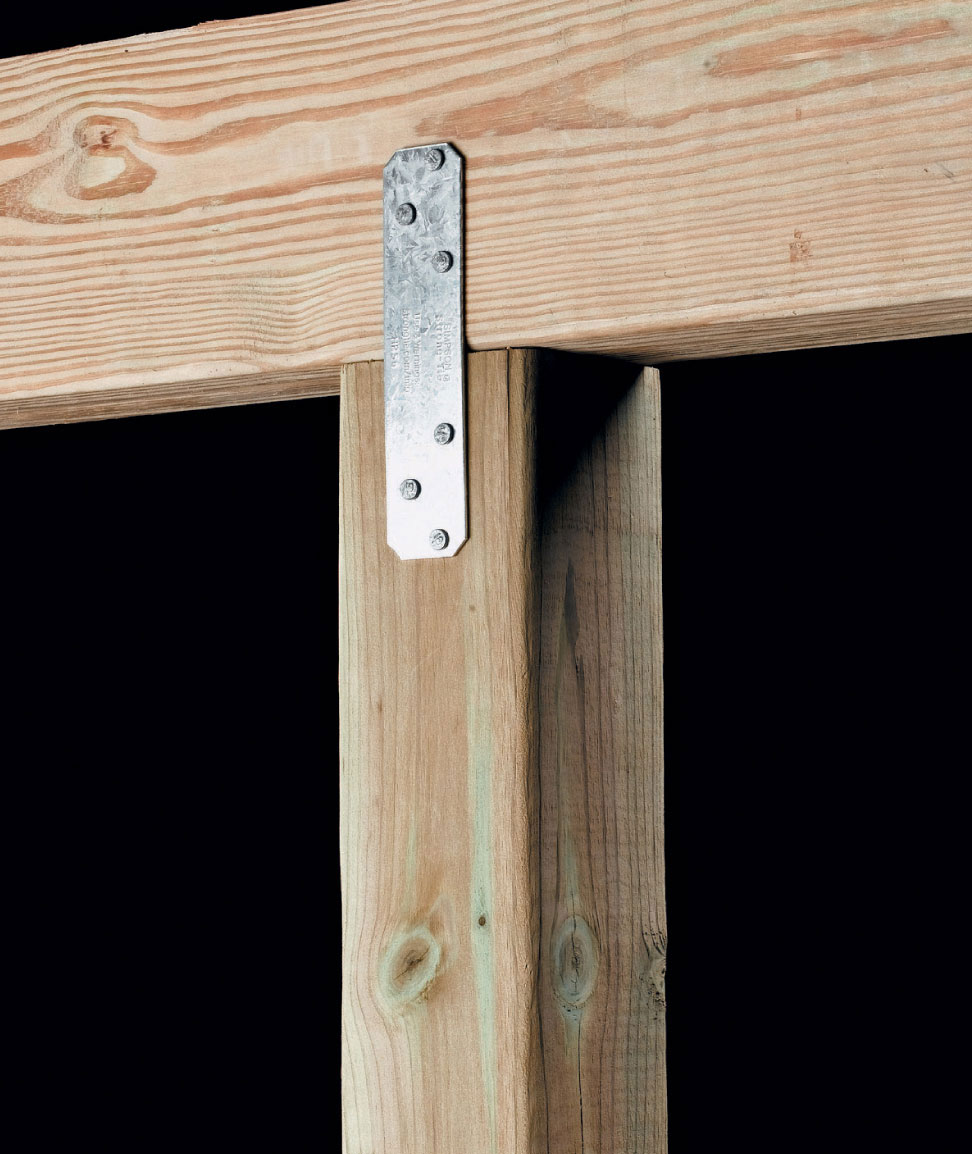
Strapping plates, also known as nailing plates or mending plates, are useful for a variety of reinforcement applications.
 Screws & Nails
When you attach the beams and joists of your deck, and probably the decking as well, you’ll need a collection of screws and/or nails to get these jobs done. It may not seem like screw and nail technology would ever change all that much, but in fact there are many new products available for making these essential connections. If you build your deck from pressure-treated lumber, be sure to use stainless, hot-dipped galvanized, or specially coated fasteners that are approved for use with the more corrosive ACQ and CBA wood preservatives. Spiral or ring-shank nails will offer better holding power than smooth nails. Use screws with auger tips and self-drilling heads to avoid drilling pilot holes. Some screws are specially designed for installing composite decking. They have a variable thread pattern that keeps the heads from mushrooming the surrounding material when driven flush.
If you are building a large deck, consider using a pneumatic nailer with collated nails instead of hand nailing. Collated screws are a faster way to lay deck boards than driving each screw individually. Here’s an overview of your fastener options.

Whether you are fastening framing together or installing deck boards, your screw options include stainless steel or galvanized. You can also buy screws with colored coatings formulated to resist corrosion from pressure-treated wood. Stainless or coated screws will prevent black staining that can occur on cedar.
 Screws & Nails for Decks
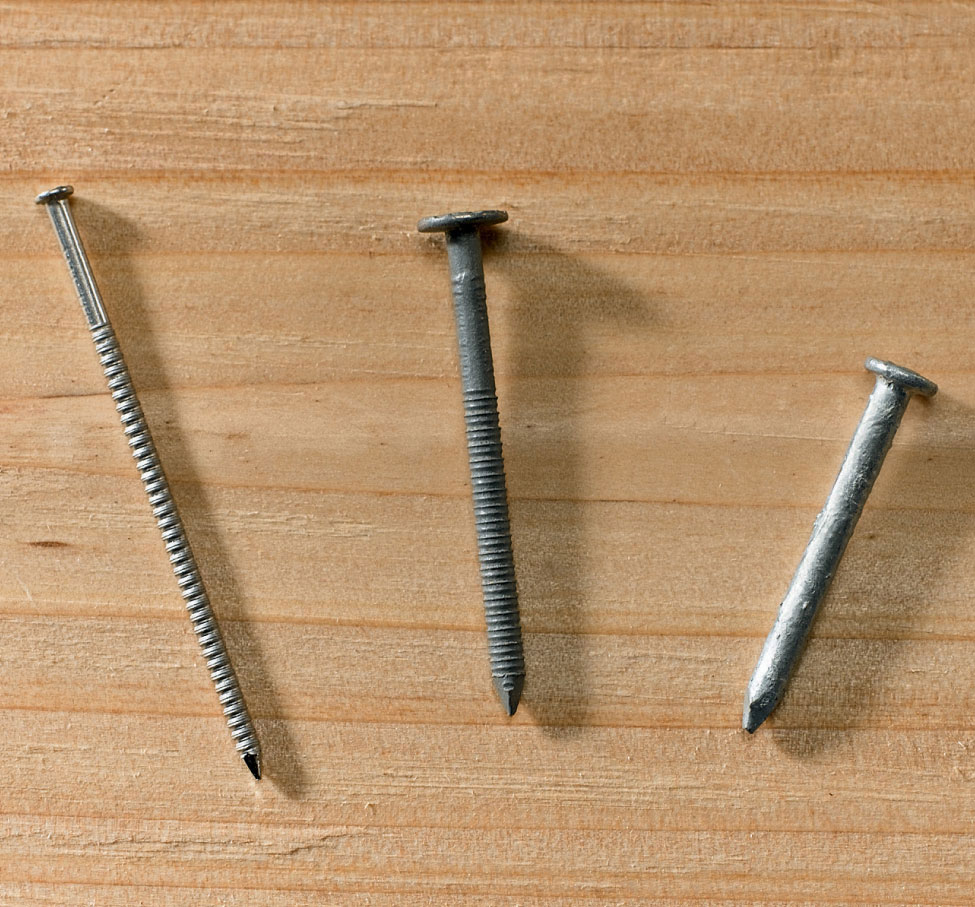
Use stainless steel or hot-dipped galvanized framing nails to assemble beams and joists. Install metal connector hardware with 8d or 10d hot-dipped galvanized metal connector nails.

For large deck projects, galvanized pneumatic nails or coated, collated screws are a faster way to fasten framing and decking than driving each nail or screw by hand.
Make sure your fasteners will resist the corrosive effects of today’s pressure-treating chemicals. Fastener manufacturers will usually provide this information on the product label.
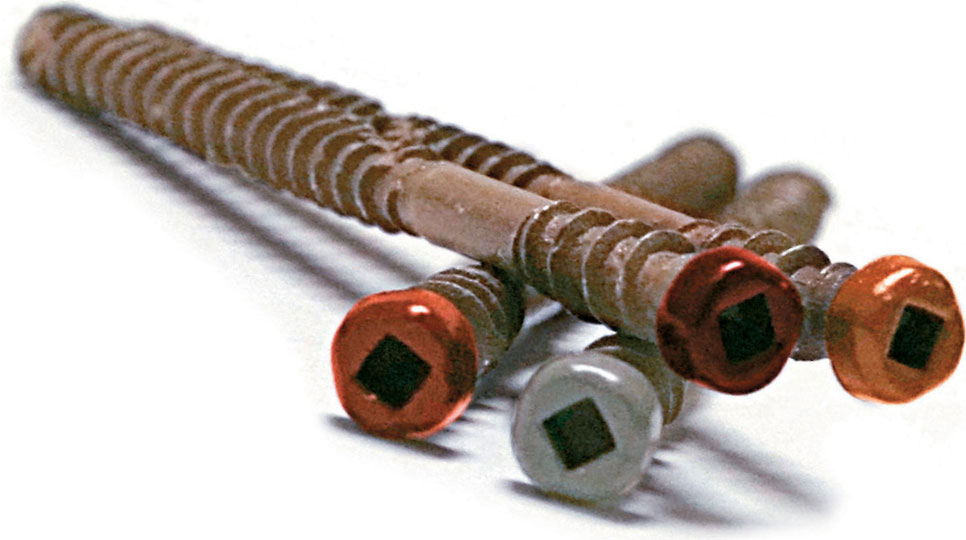
Many composite decking manufacturers supply special screw types that hold the material in place better than ordinary screws would, and that are colored to match the decking boards.
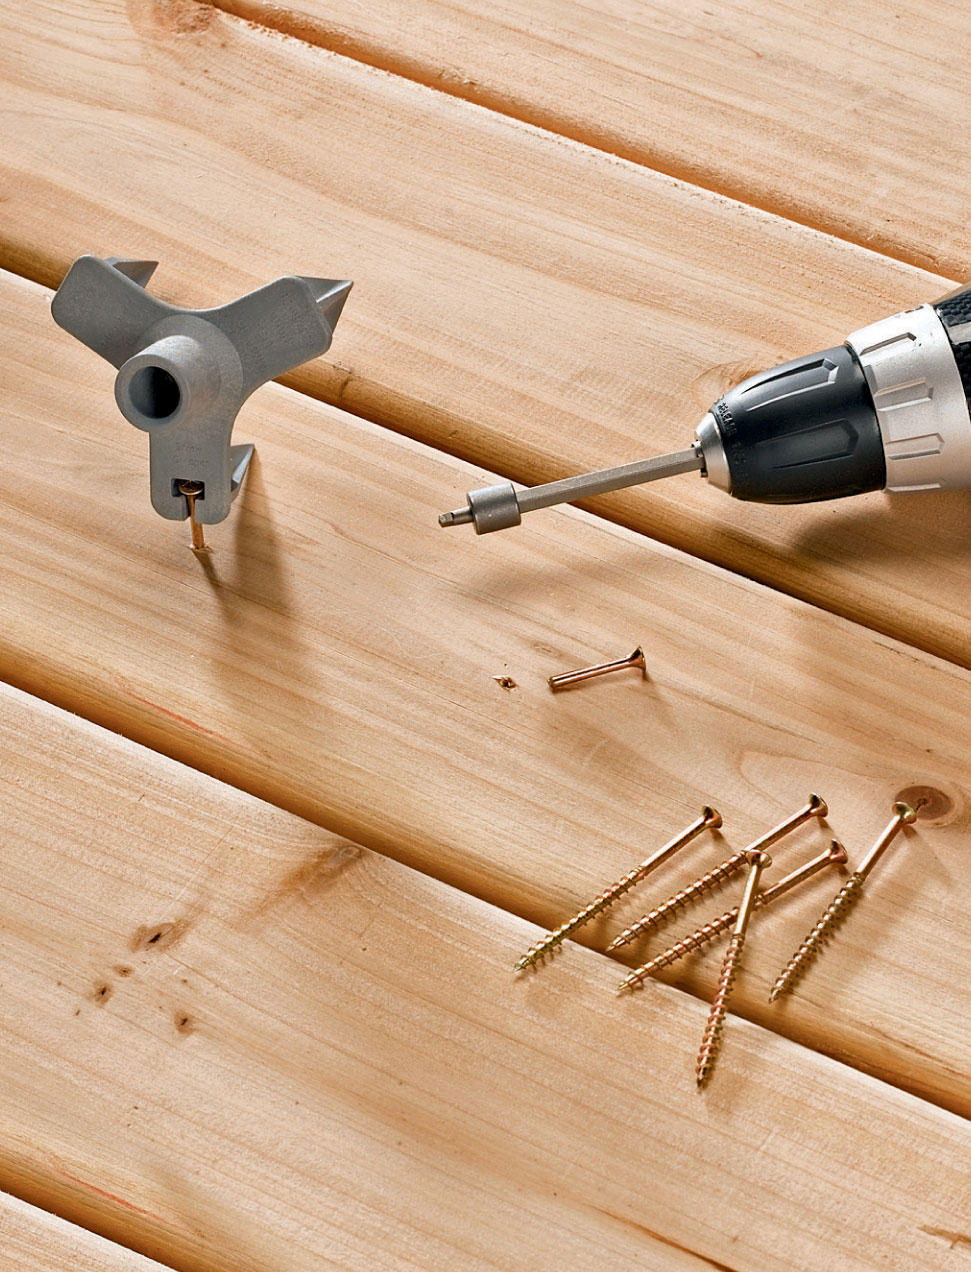
If you’d prefer not to see screwheads in your decking but still want to drive them from the surface, you can buy screws with snap-off heads. A special tool breaks the head off after the screw is driven. The resulting hole is much smaller than a screwhead.
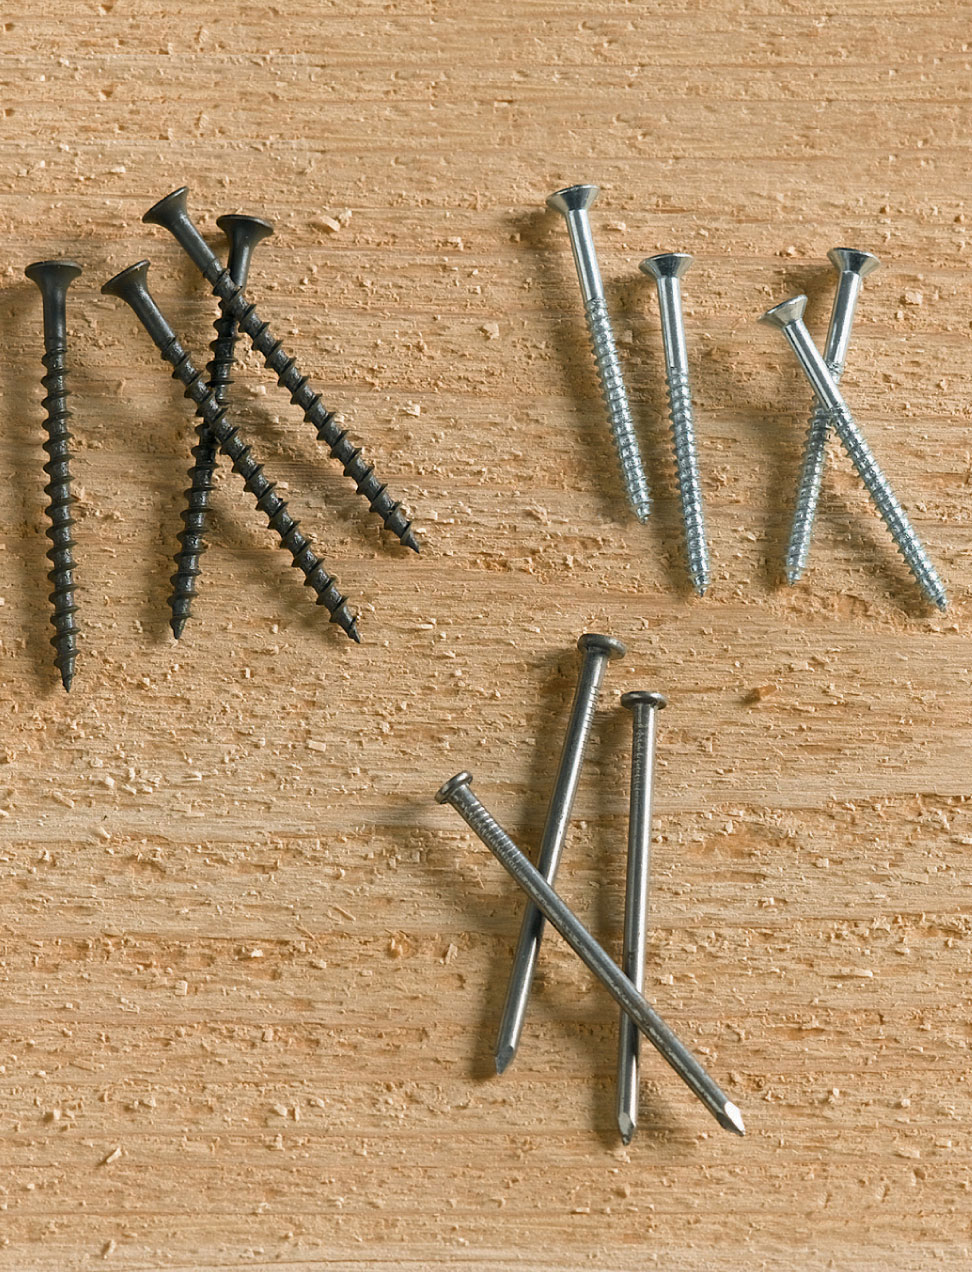
Choose your nails and screws carefully. Screws with “bright” or black-oxide coatings and uncoated nails will not stand up to exterior use or pressure-treating chemicals. Fasteners are as crucial to your deck’s long-term durability as the quality of the framing lumber or decking.
 Flashing
Building codes require that a deck’s ledger board be attached directly to wall sheathing and house framing, and that a corrosion-resistant flashing material be used at any junction between a deck ledger and a house. If your home is sided, you’ll need to remove the siding in the ledger board area before attaching the ledger to the house. Be sure to install 15# or 30# building paper or self-sealing, adhesive backed membrane behind the ledger to prevent moisture damage. Rotting in the area behind the ledger is one of the leading causes of premature deck deterioration. Flashing is particularly important if there’s no housewrap behind the siding. Once the ledger is in place, cap it with a piece of galvanized Z-flashing, tucked behind the siding, for added protection.
Although building codes don’t require it, you may also want to wrap the tops of beams and posts with self-sealing membrane to keep these areas dry and rot-free. Ledger flashing, self-sealing membrane, and building paper are available at most home centers and lumberyards. They’re little details that can make a big difference to the longevity of your deck.
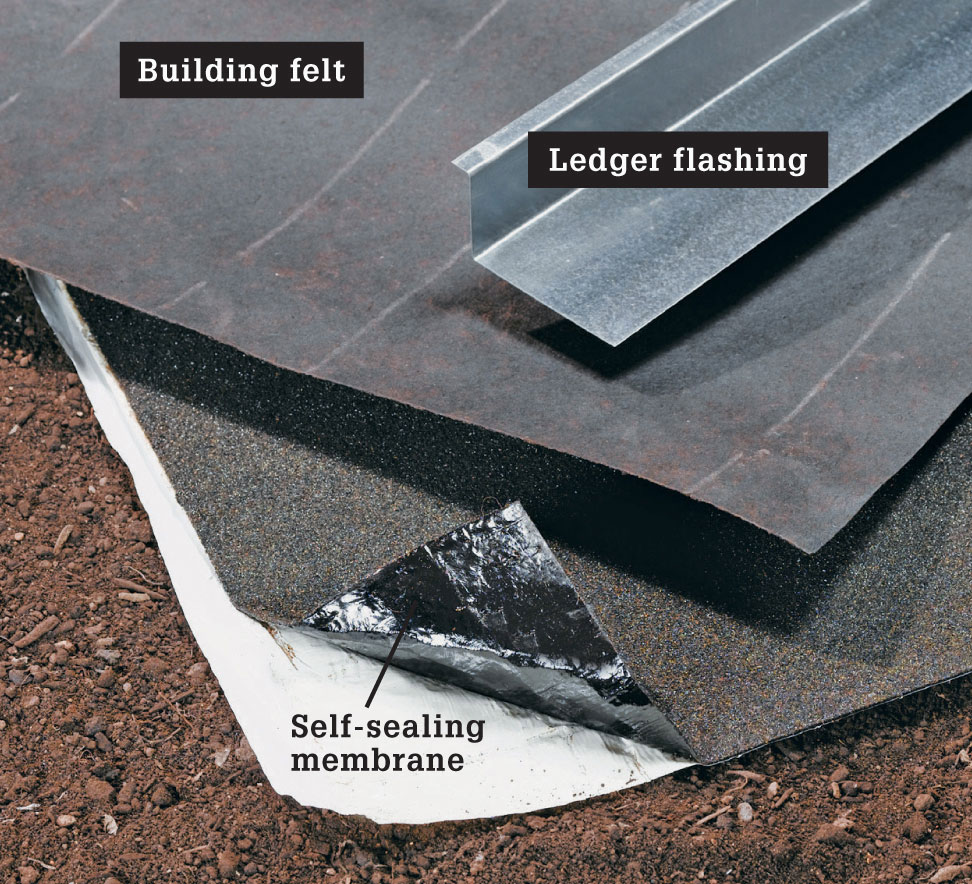
Building felt, also called building paper, is used behind house siding materials. Use it to replace felt damaged during a ledger installation. Ledger flashing, or Z-flashing, prevents moisture damage behind the deck ledger. Self-sealing membrane provides extra protection from moisture in damp climates or in areas where there is snow accumulation. It can be used over flashing or on top of beams and posts (see below left), and it self-seals around nails or screws that pierce it.
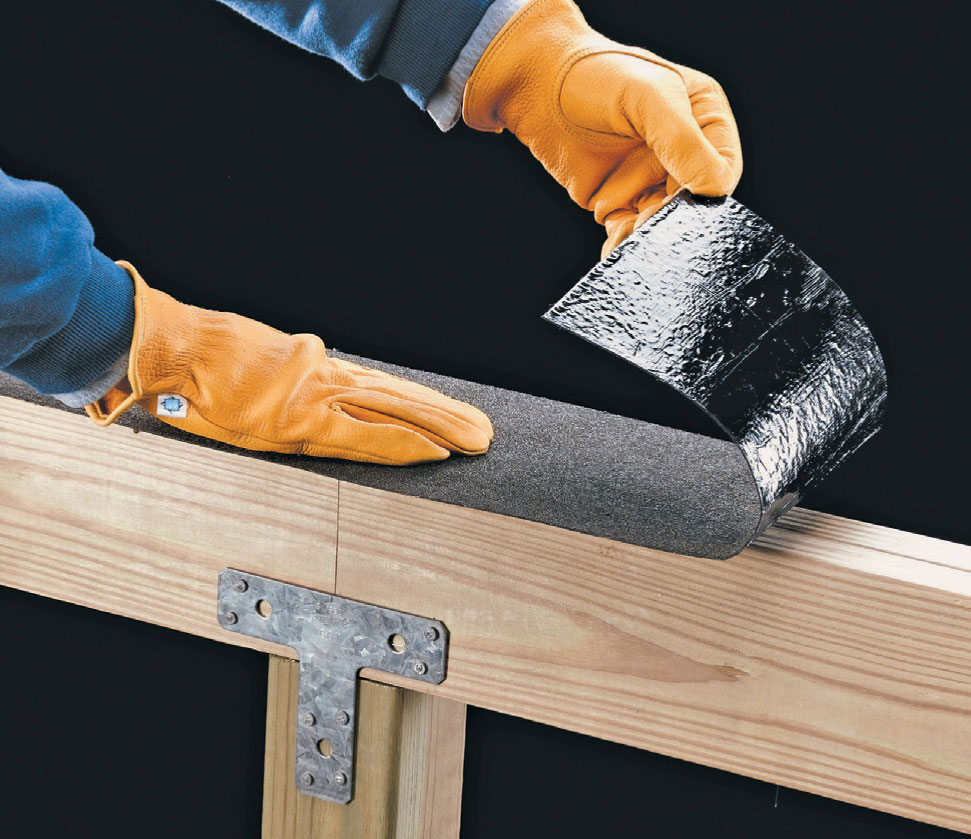
To apply self-sealing membrane, cut a piece to size and position it over the application area. Starting at one end, begin removing the thin plastic backing that protects the adhesive. Firmly press the membrane in place as you remove the backing, working along the installation area. To install long pieces of membrane, enlist the aid of a helper.

Install self-sealing membrane behind the ledger as extra protection from moisture. Apply the membrane over the house wrap or building felt, using the same method shown at left.
 Footings
Footings, which are also called piers, anchor a deck to the ground and create a stable foundation for the posts. They transfer the weight of the deck into the soil and prevent it from heaving upward in climates where the ground freezes. Generally, footings are made from long, hollow tubes of fiber-reinforced paper in several diameters. Once a tube footing is set into the ground below the frostline, you backfill around the outside with soil, tamp it down firmly, and fill with concrete. Metal connective hardware imbedded in the concrete will attach the footings permanently to the deck posts.
For soils that have a poor bearing capacity, or if you are building a particularly large deck, you can also buy plastic footing tubes with flared bases that bear heavier loads. Or, you can attach a flared footing to the bottom of a conventional tube. For low-profile decks that aren’t attached to a house, you may be able to use pre-cast concrete footings instead of buried piers. These footings simply rest on the surface of the soil.
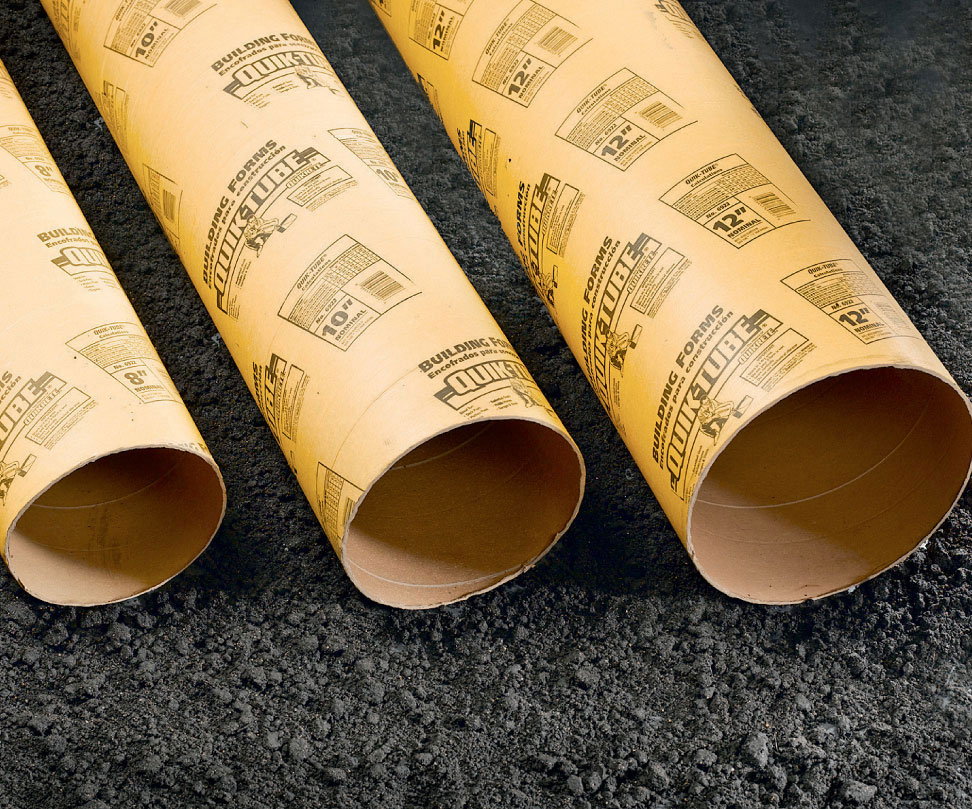
Lumberyards and building centers will stock hollow footing forms in various diameters. The diameter you need will depend on the size and weight of your deck. Your building official will help you determine the correct size when you apply for a building permit.
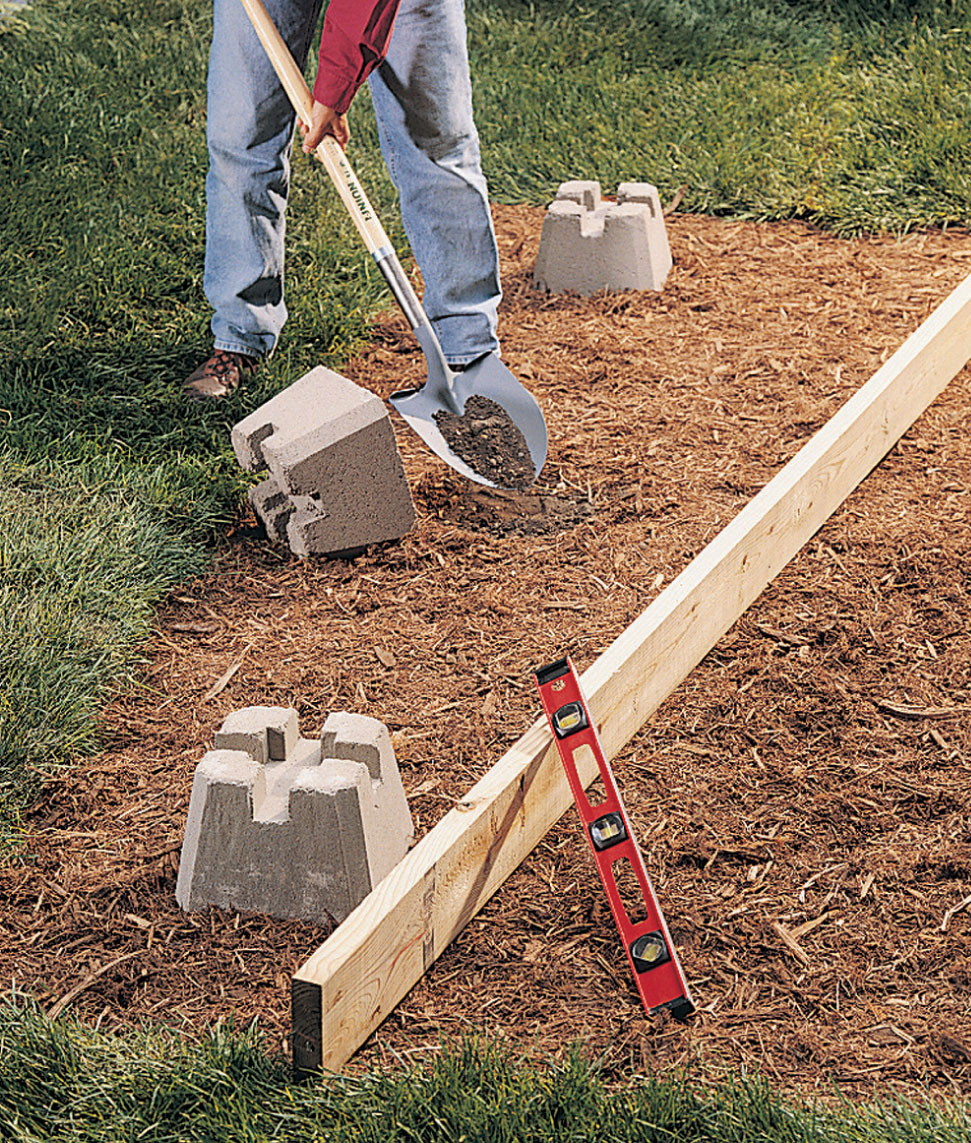
Pre-cast concrete footings are usually acceptable for building low-profile, freestanding decks. Notches on top of the pier are designed to hold joists without fasteners or other hardware.
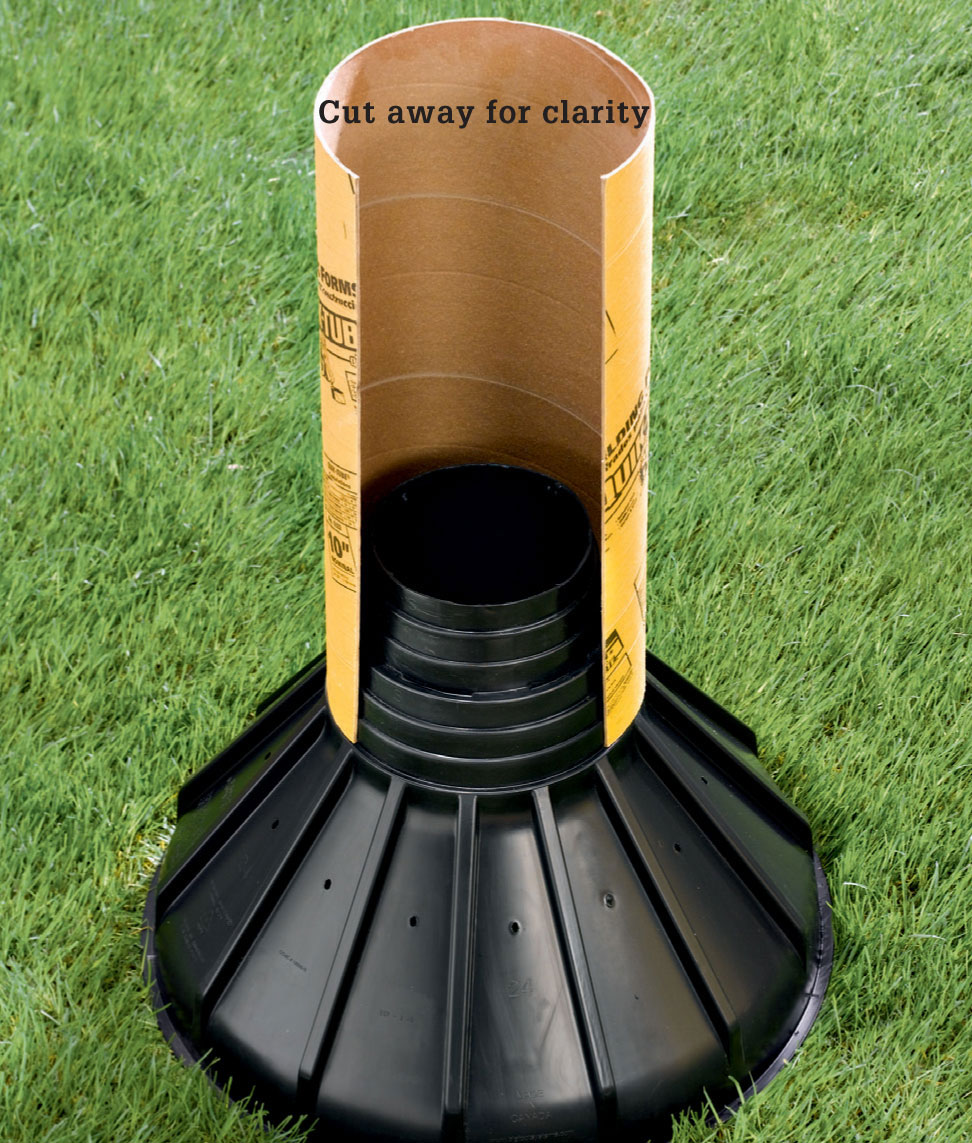
When building heavy decks or placing footings in unstable, loose soil, you may need to use piers with flared footings. Some styles are molded in one piece, or you can attach a flared footing to a conventional footing form with screws.
 Specialty Tools
A big deck project can be labor-intensive and time consuming. Certain specialized tools, such as a power auger, hammer drill, or collated screw gun, can speed tasks along and save you some of the sweat equity involved. But these tools can be expensive, and they’re hard to justify buying unless you plan to use them often. Renting them may be a better option. A wide assortment of tools, including the ones on these pages, are available at rental centers at a reasonable cost. Renting gives you an opportunity to try a tool that you’re considering buying or use and return a tool you would never consider buying.
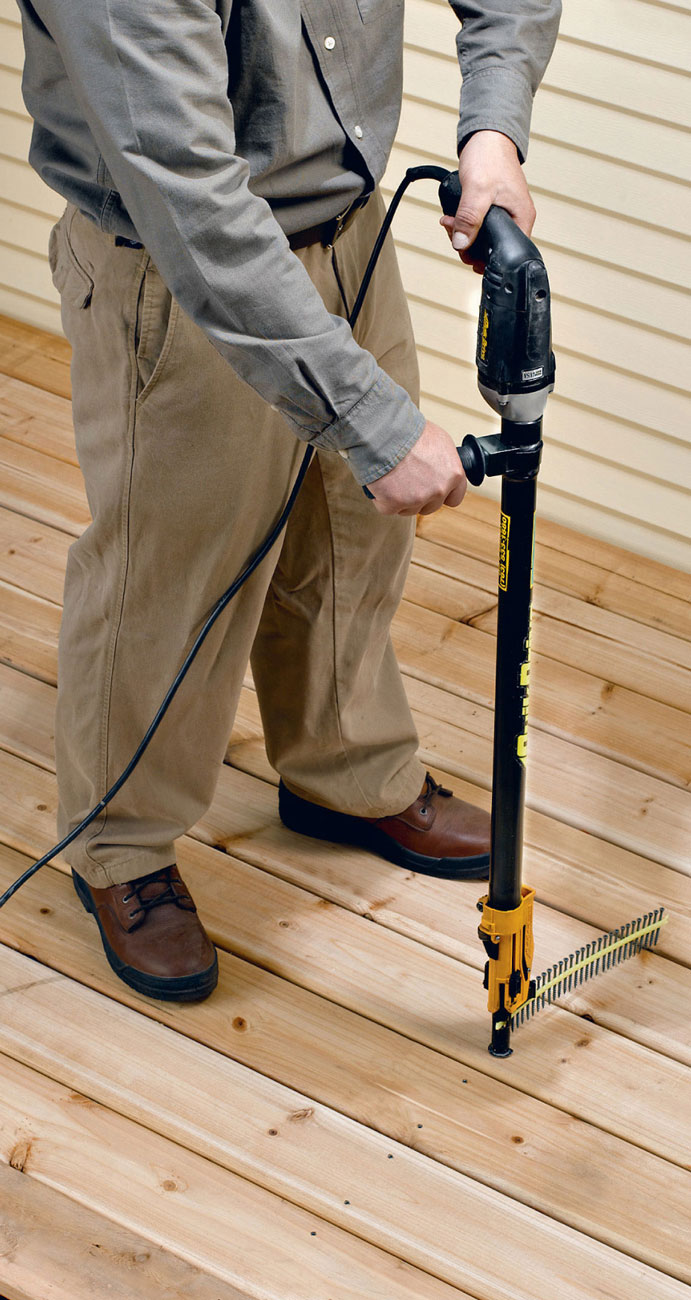
A collated screwgun speeds up the process of fastening decking to joists, and it can save wear and tear on your knees. These tools accept strips of exterior screws, and an advancing mechanism allows you to drive them one after the next without stopping. An adjustable clutch prevents the screws from being overdriven.
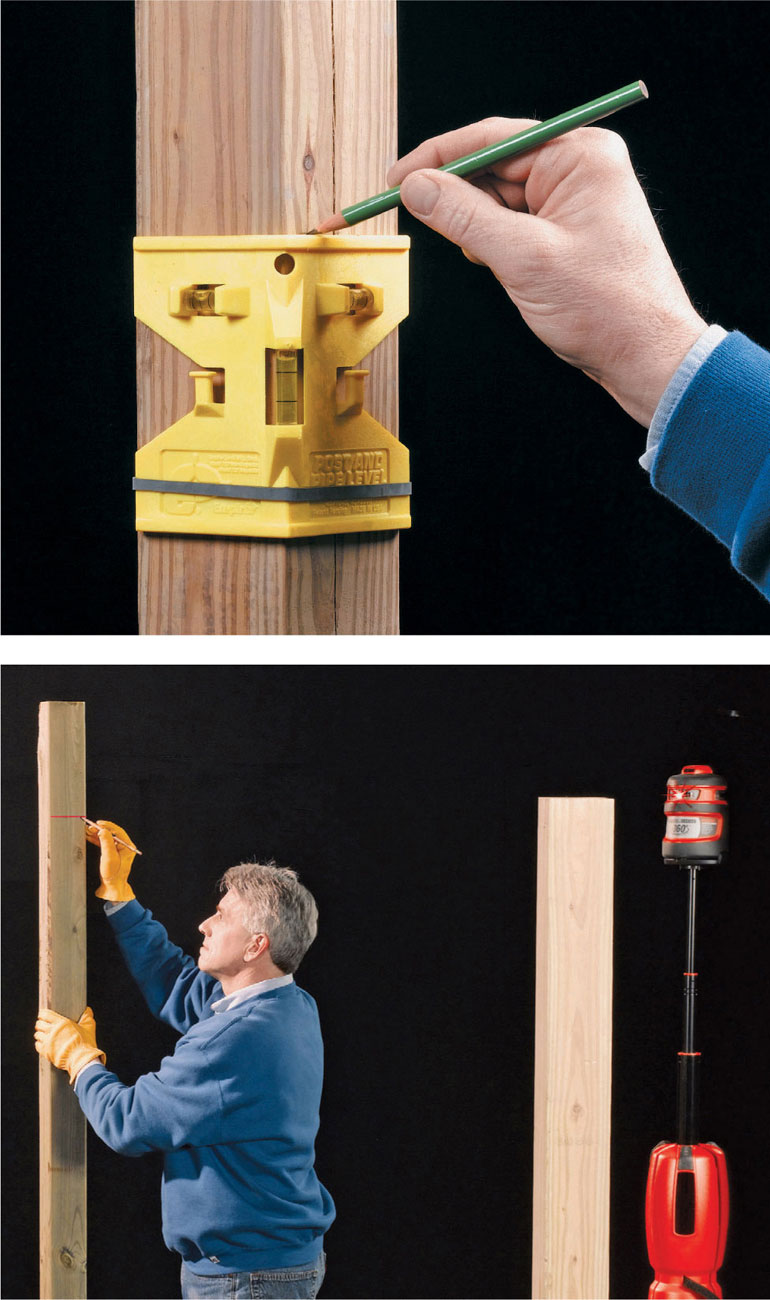
A laser level shines a continuous level line in a 360° plane. It’s useful for striking off uniform post heights without measuring. Deck platforms should be flat and level in all directions. Posts should be plumb and located squarely on their footings. In order to achieve level and plumb, you’ll probably need more than a carpenter’s level in your tool collection. Consider buying a post speed level (top) and a laser level. Post-speed levels fasten in place with a rubber band and have three spirit levels to help you adjust posts quickly and accurately. They’re handy for setting both deck and fence posts.
Hammer drills combine the usual rotary action with forward motion, similar to a tiny jackhammer. They make it much easier to drill large pilot holes in concrete or block walls for installing ledger board anchors.

If you have more than a few holes to dig for your deck footings, especially when they’re deep, rent a power auger. Both one-person and two-person models are available. A gas-powered engine drives the auger to excavate these holes quickly.
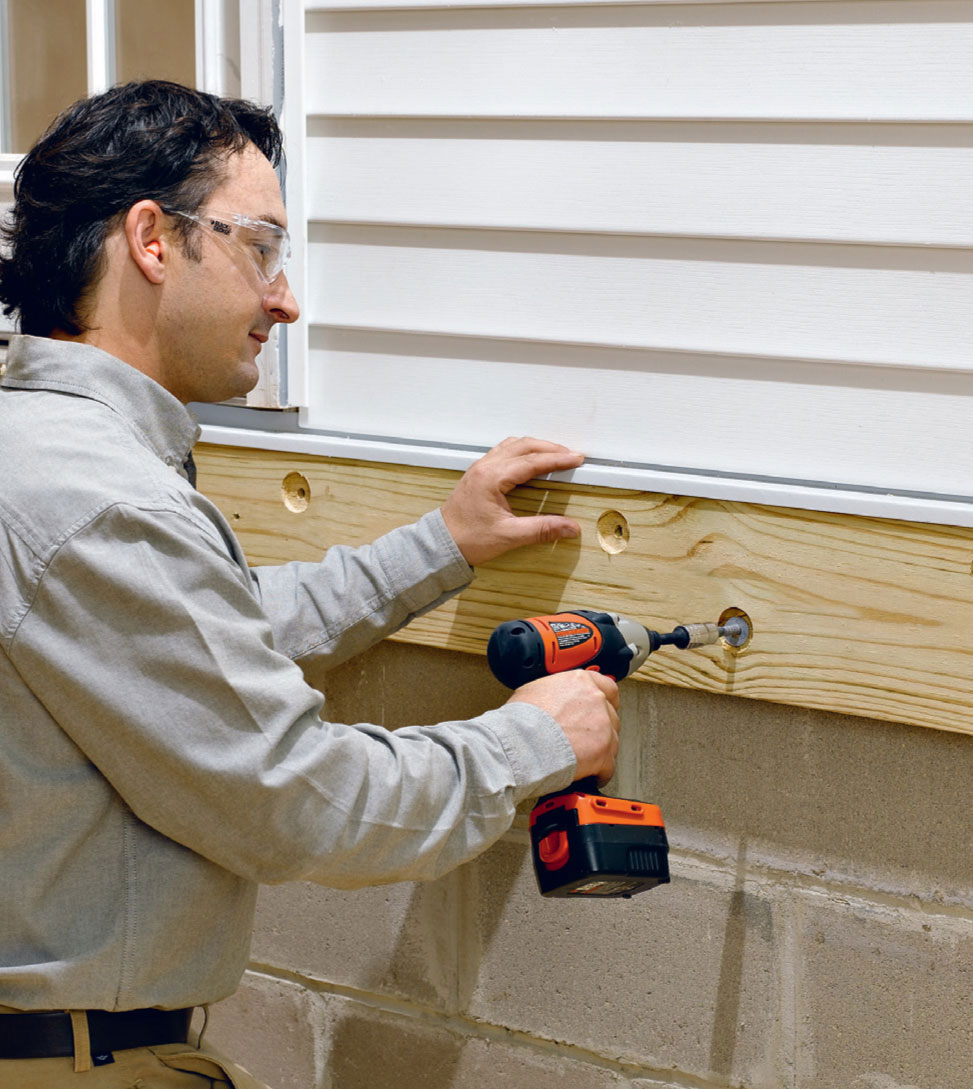
Cordless impact drivers can make quick work of laborious tasks like driving lag screws. Because they have a percussive motion as well as high-torque spinning motion, they leverage two forces at once. They are excellent for driving lag screws as well as deck screws.
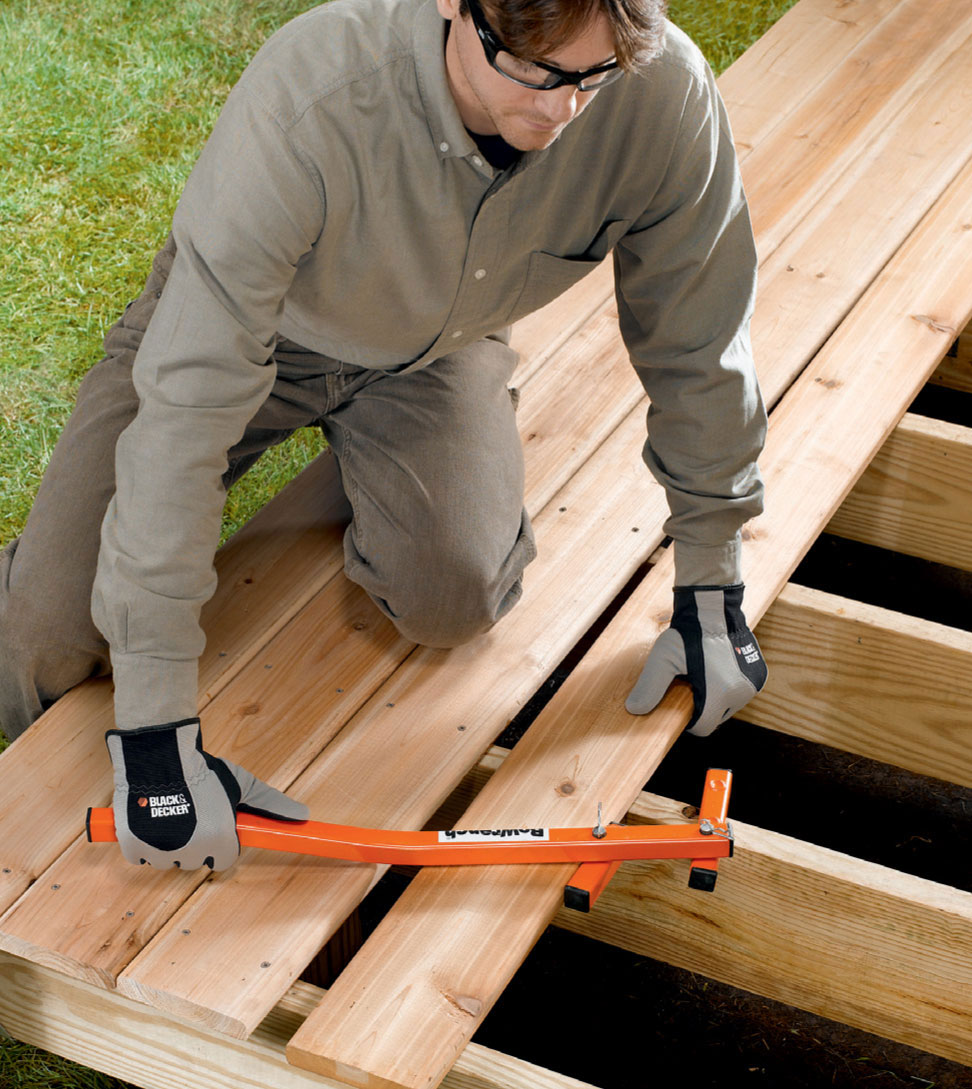
Tools for straightening deck boards are relatively inexpensive and can quickly pay for themselves by allowing you to install badly bowed boards.