Chapter 11: Adding Forms to Your Site
Many Web sites include forms to collect information. Sites use forms to allow users to register for accounts, purchase products, log in, change passwords, and much more. HTML provides a set of tags for creating these forms.
Create a Form
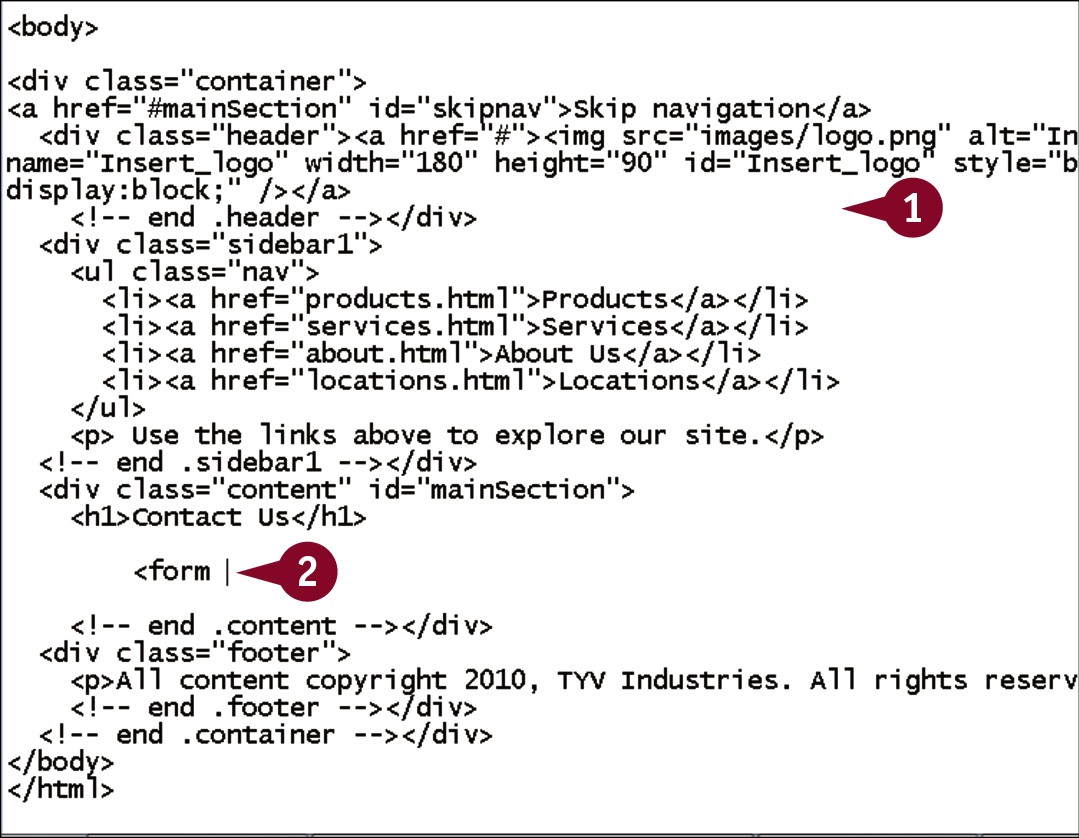
A form in HTML consists of a group of form controls wrapped in a <form> tag. The tag takes two common attributes: action and method. The value of action is a URL to a page that contains the code necessary to process the form’s data. The method attribute accepts one of two values. Setting the value to get instructs the browser to send the form’s data by appending it to the action’s URL, whereas the value post has the browser send the data as part of the background information it normally sends to the server.
Create a Form
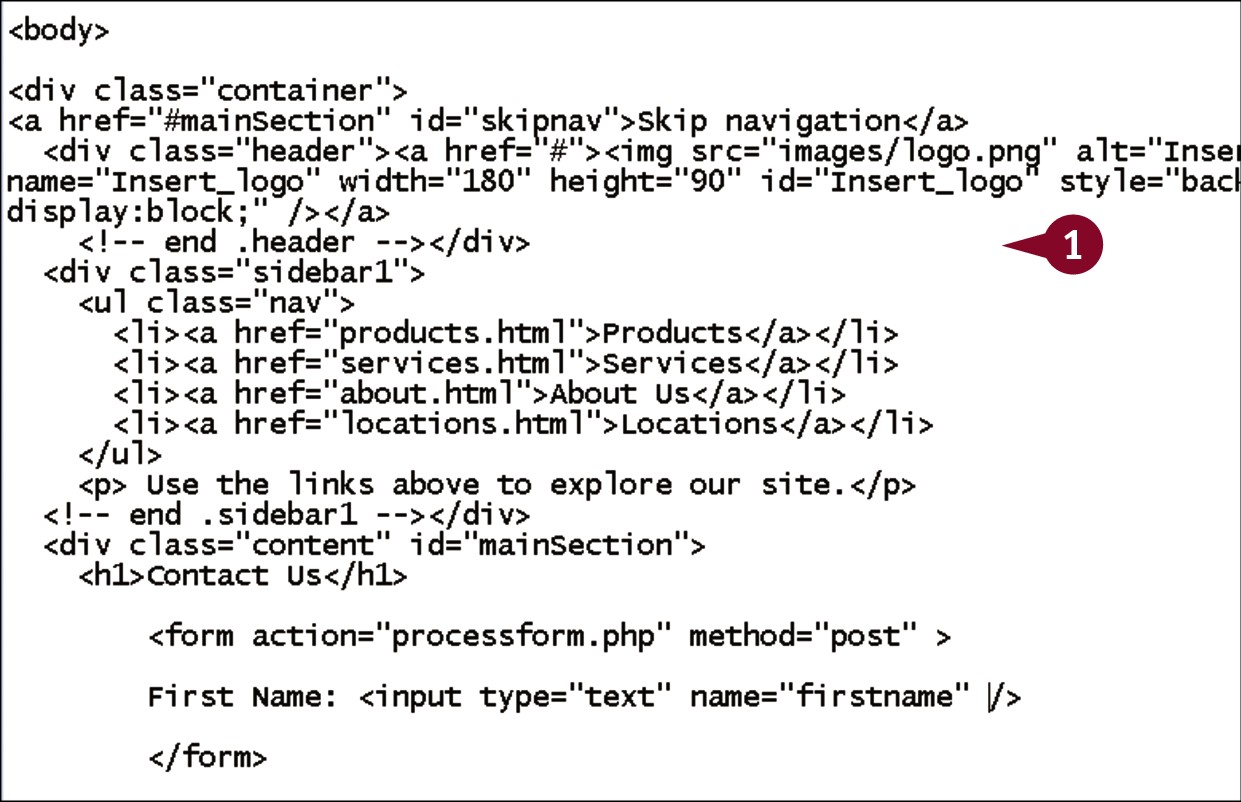
 In your editor, open a new or existing HTML document into which you want to add a form.
 Within the body, type <form.

 Type action=”?”, replacing ? with the path to the file that will process your form.
Note: See Chapter 12 for more information on writing scripts to process forms.
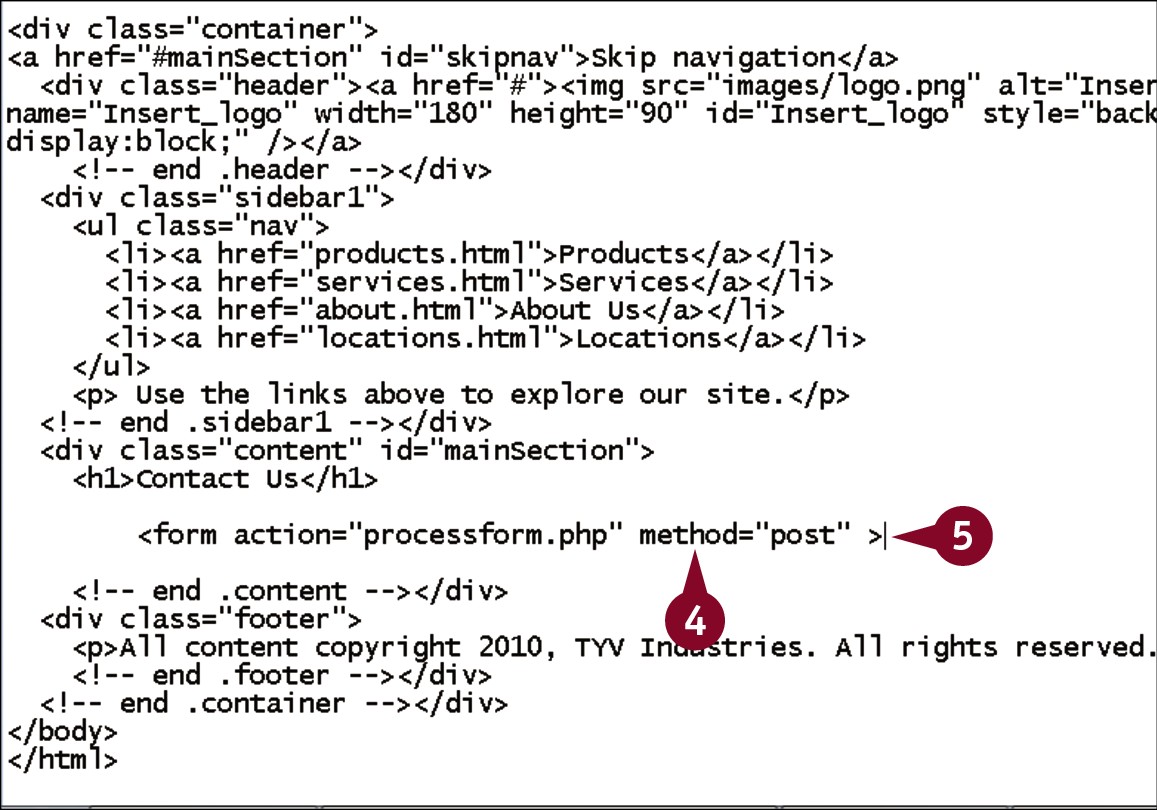
 Type method=”?”, replacing ? with either get or post.
 Type >.
 Press
Press  twice.
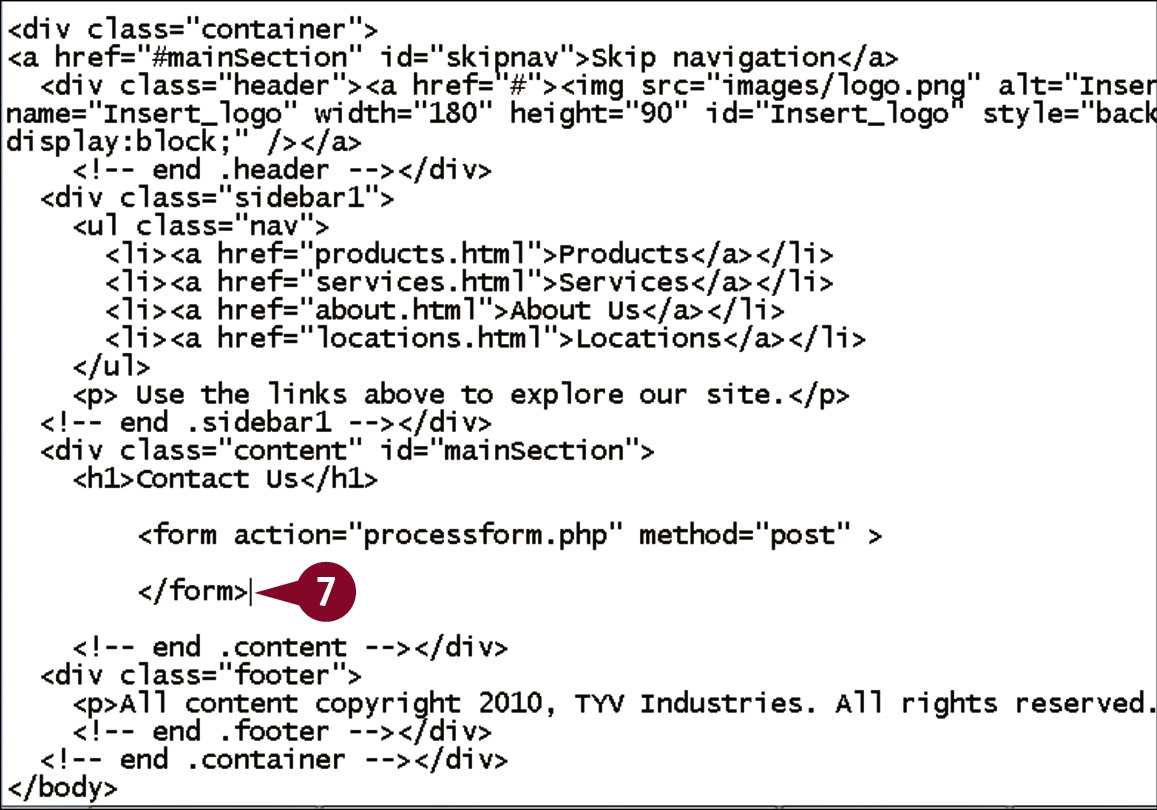
 Type </form>.
The form container is created on the page.
Add a Text Field
The most common form control by far is the single-line text field. You can add a text field to your page through the HTML <input> tag. As you will see, however, most of the form controls use that tag, so you also need to provide a type attribute, set to a value of text. Also required is a name attribute, the value of which is used by the server-side script in processing this field. The name attribute’s value should be a single, descriptive word that begins with a letter and contains only letters, numbers, and underscore characters.
Add a Text Field

In your editor, open an HTML document that contains a <form> tag.
Between the opening and closing form tags, type text as a label for the field.
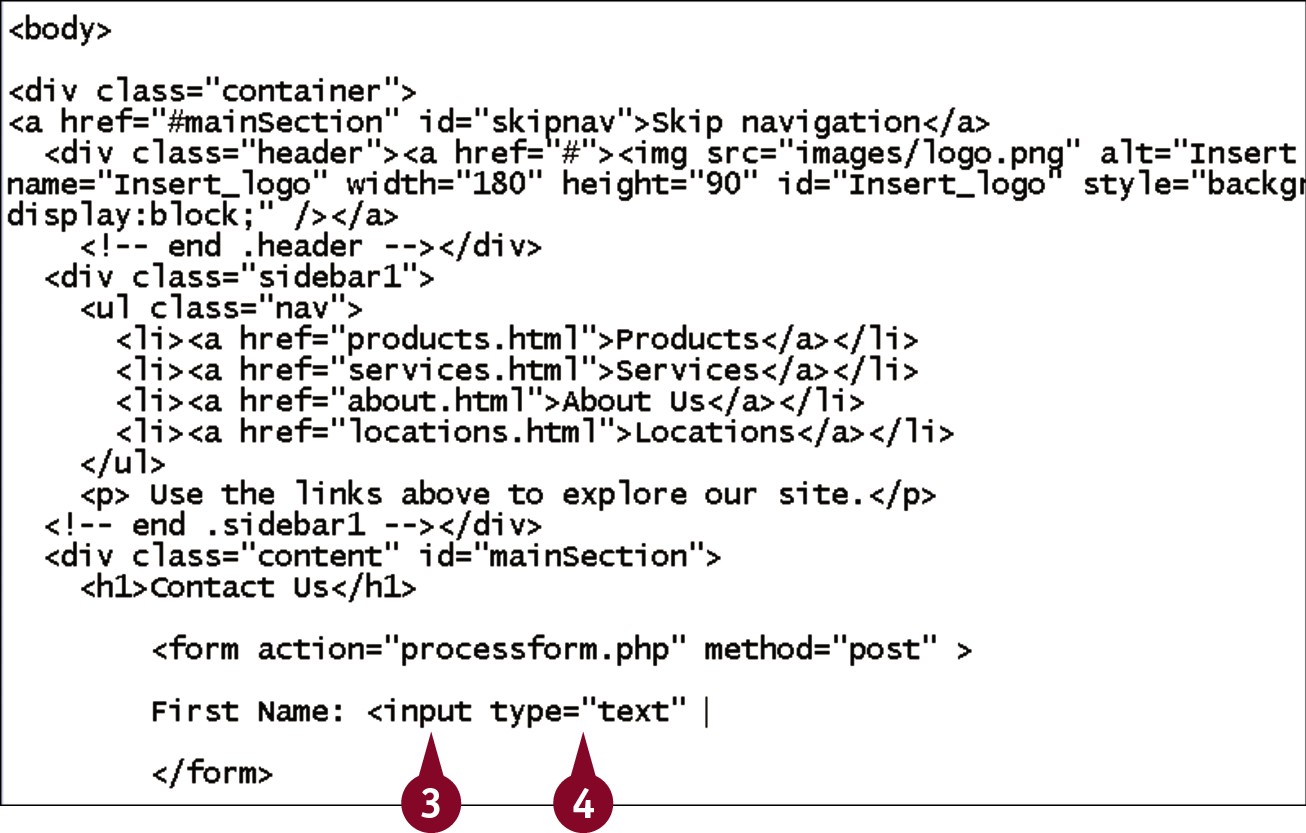
Type <input.
Type type=”text”.
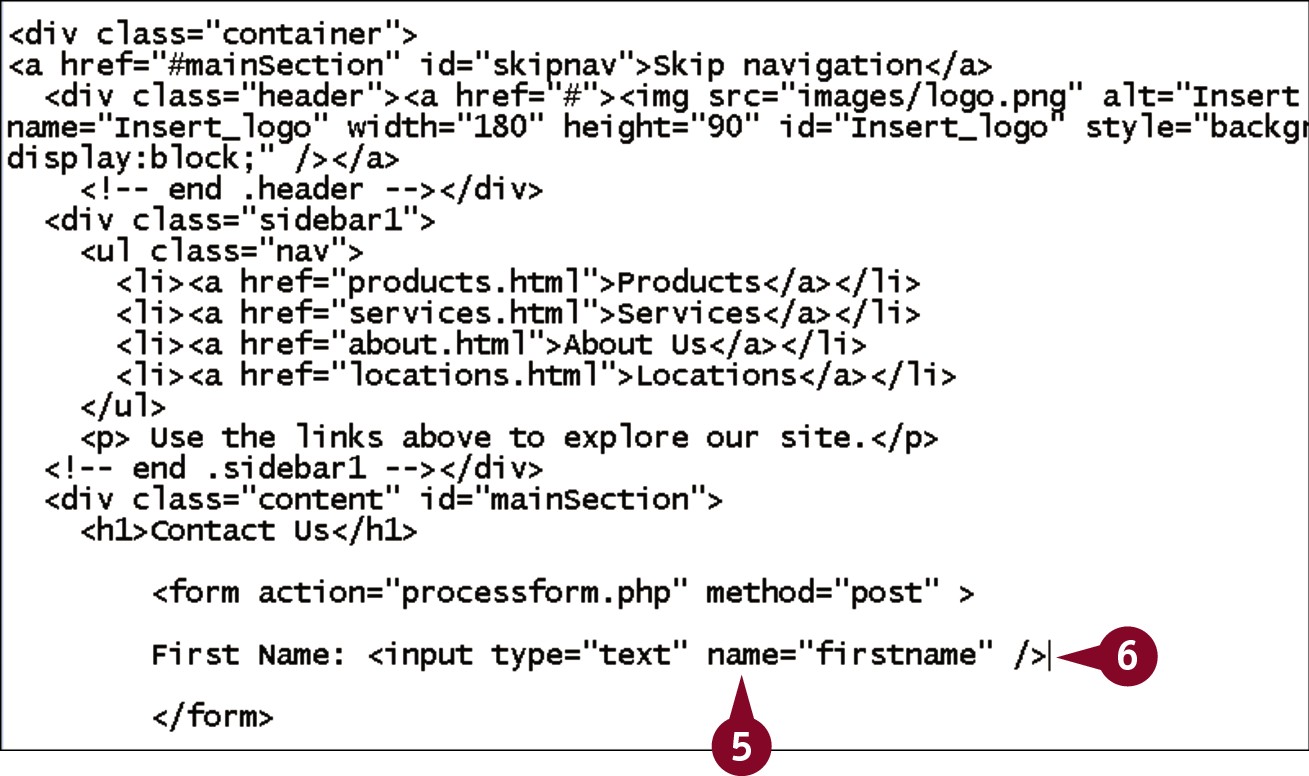
Type name=”?”, replacing ? with a name for the field.
Type />.
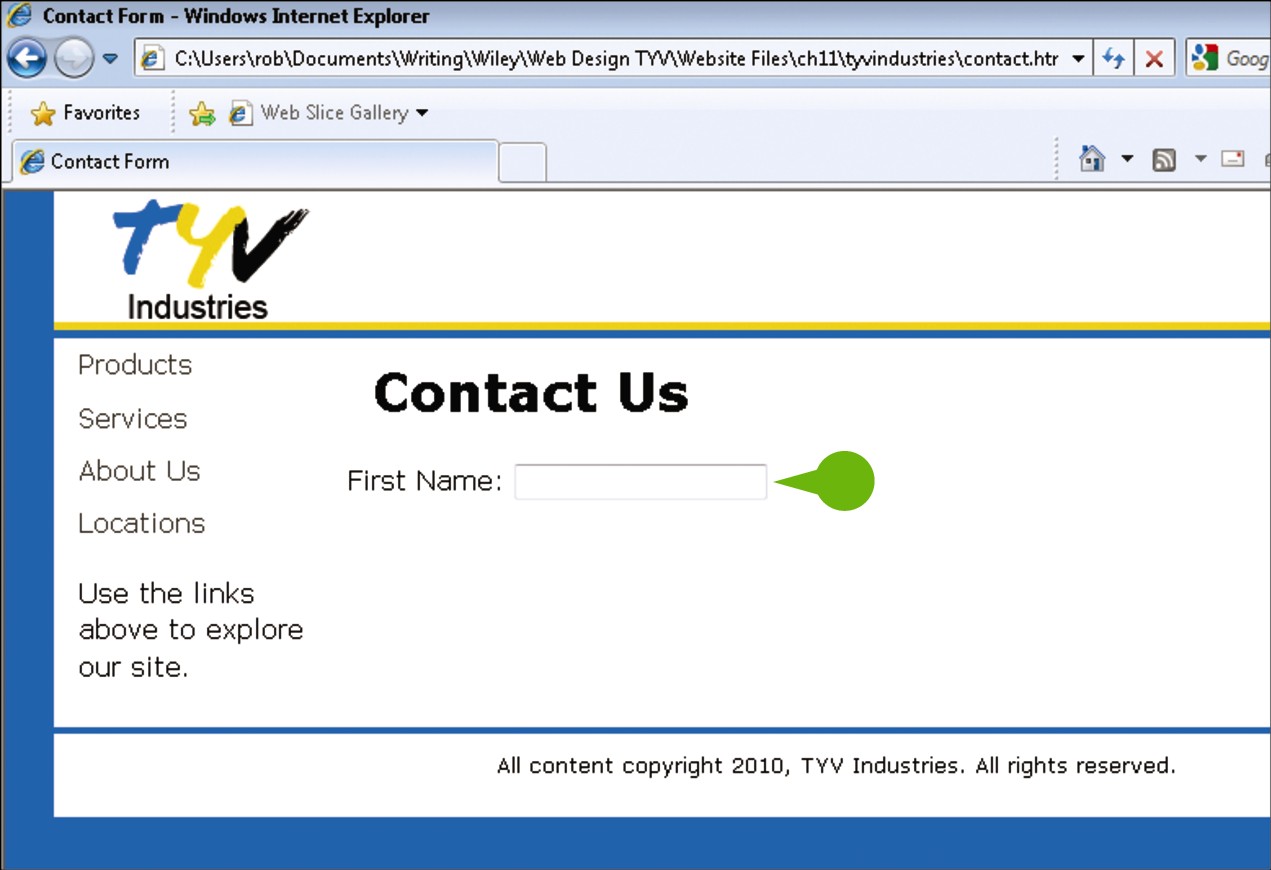
• The text field appears and is editable when the page is viewed in a browser.
Add a Label
While simple text placed next to the field can serve as a label for form fields, you should always wrap the text in an HTML <label> tag. The tag can either be wrapped around both the label text and the form field, or it can wrap around the text by itself. Either way, you should also add an ID attribute to the field, and a for attribute to the label, with a value set to the field’s ID. This creates a logical association between the field and the label, regardless of whether the label tags include the field or not.
Add a Label
In your editor, open an HTML page that contains a form tag set and at least one form control.
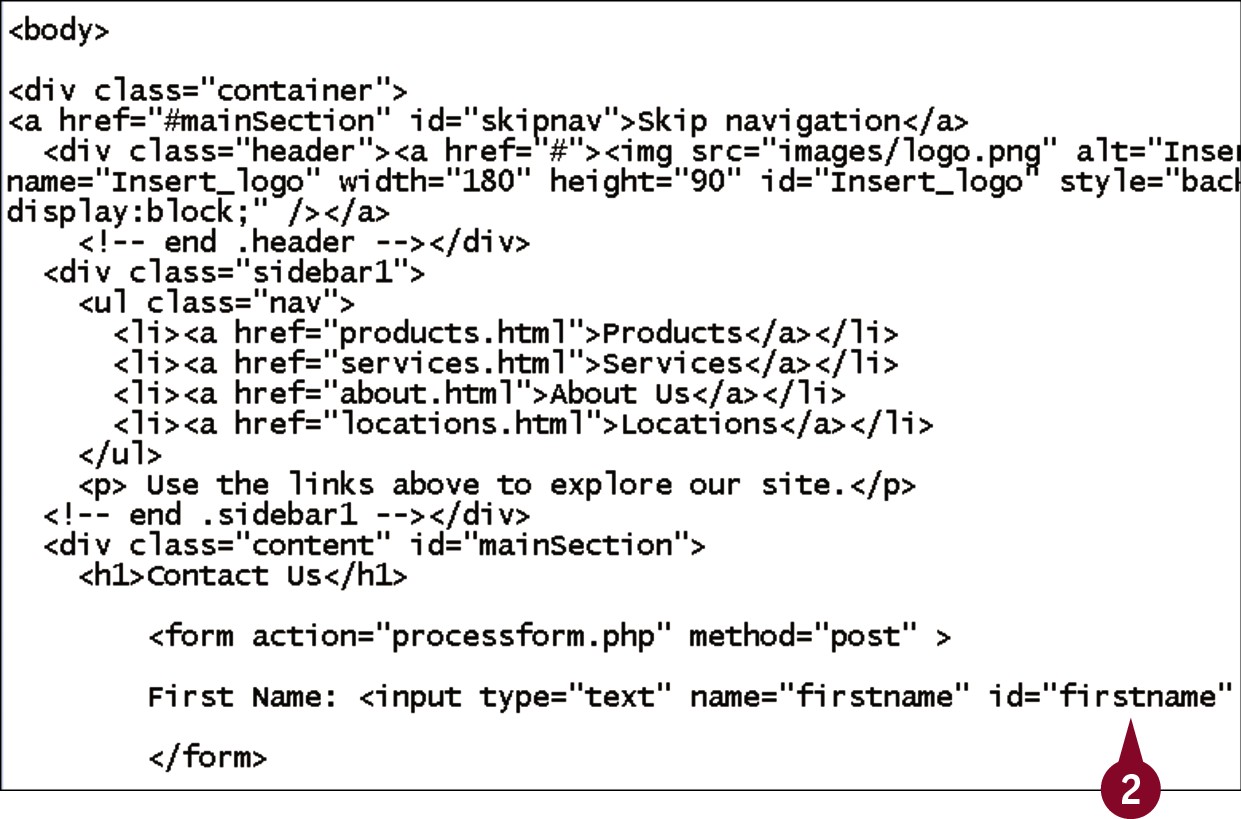
Within the field’s tag, type id=”?”, replacing ? with a descriptive identifier for the field.
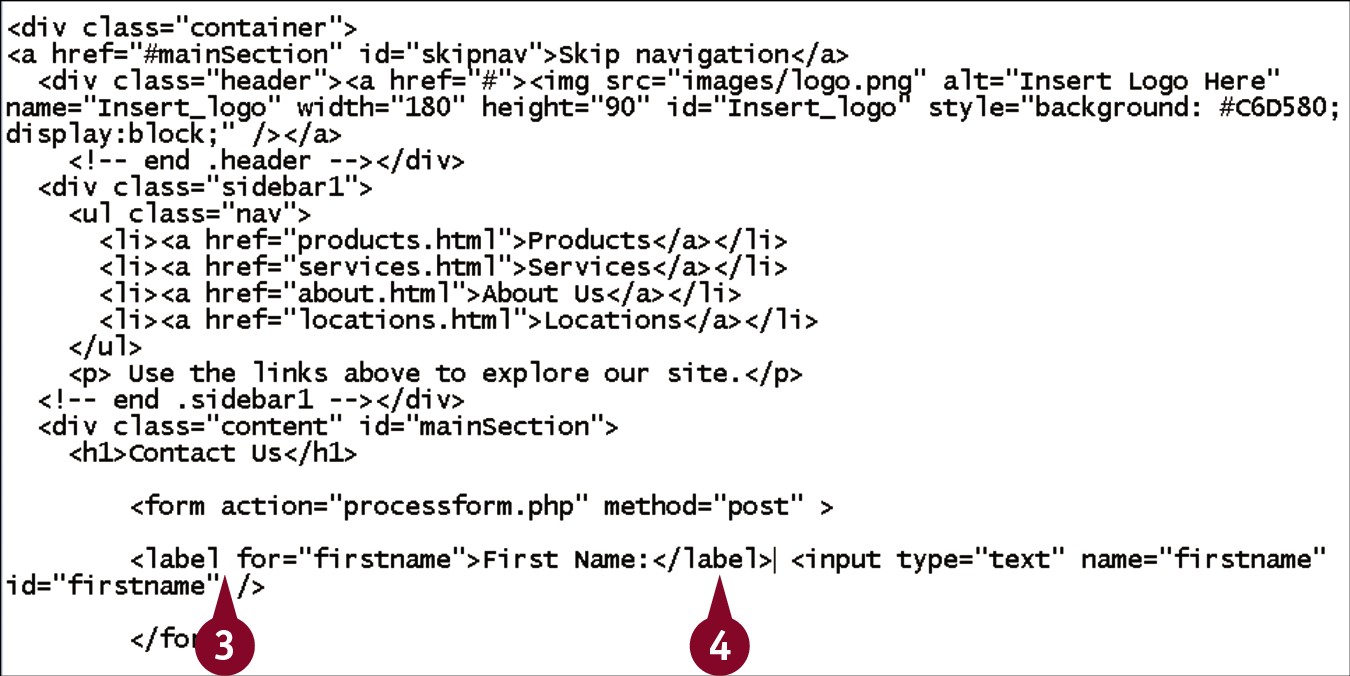
Before the text being used as the field’s label, type <label for=”?”>, replacing ? with the ID you used in Step 2.
After the label text, type </label>.
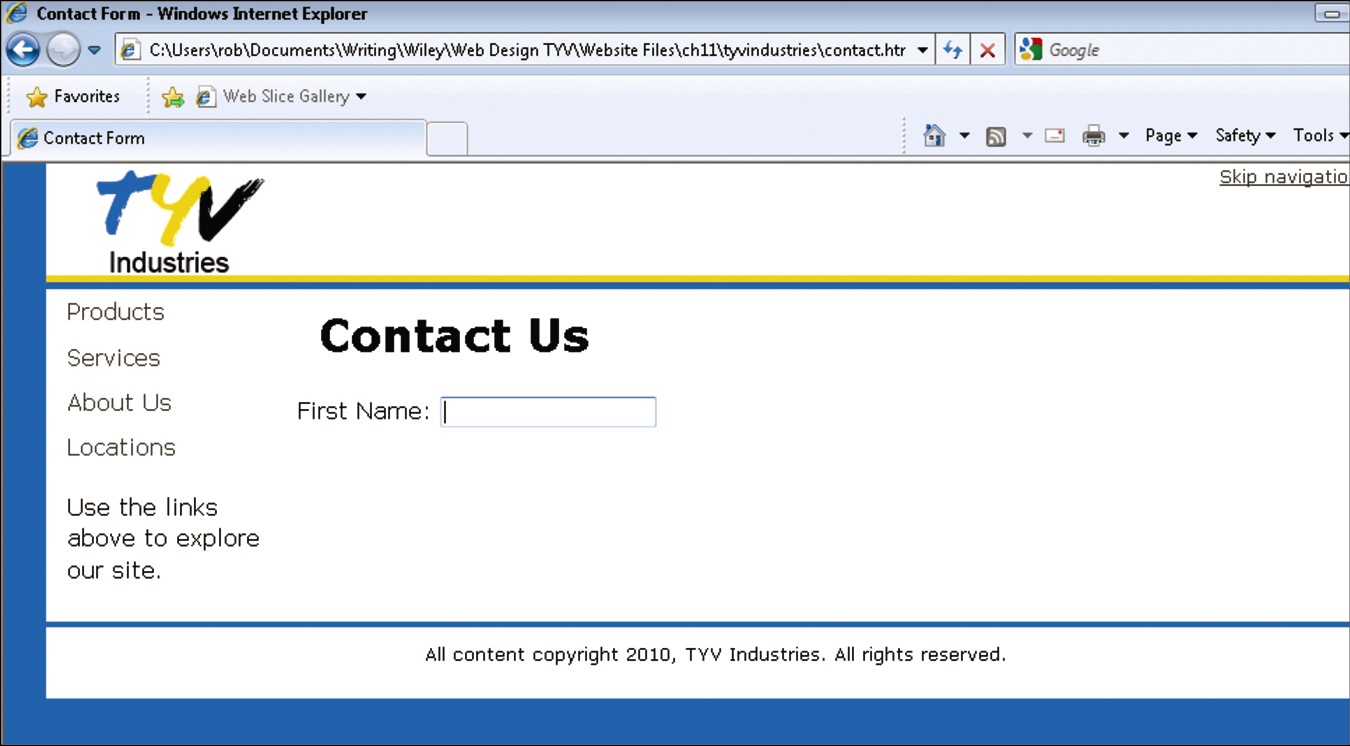
When viewed in the browser, the form appears as it did before.
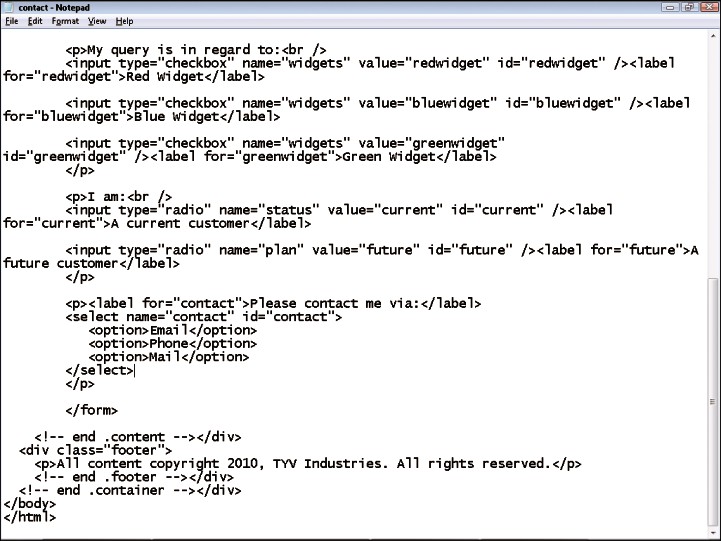
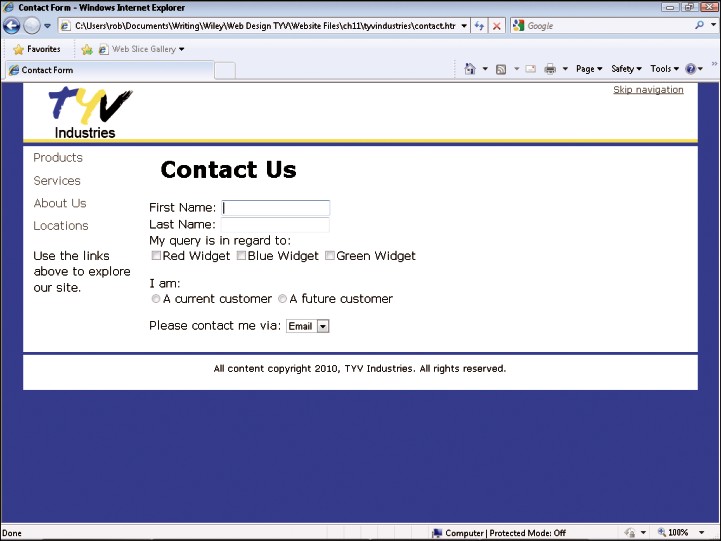
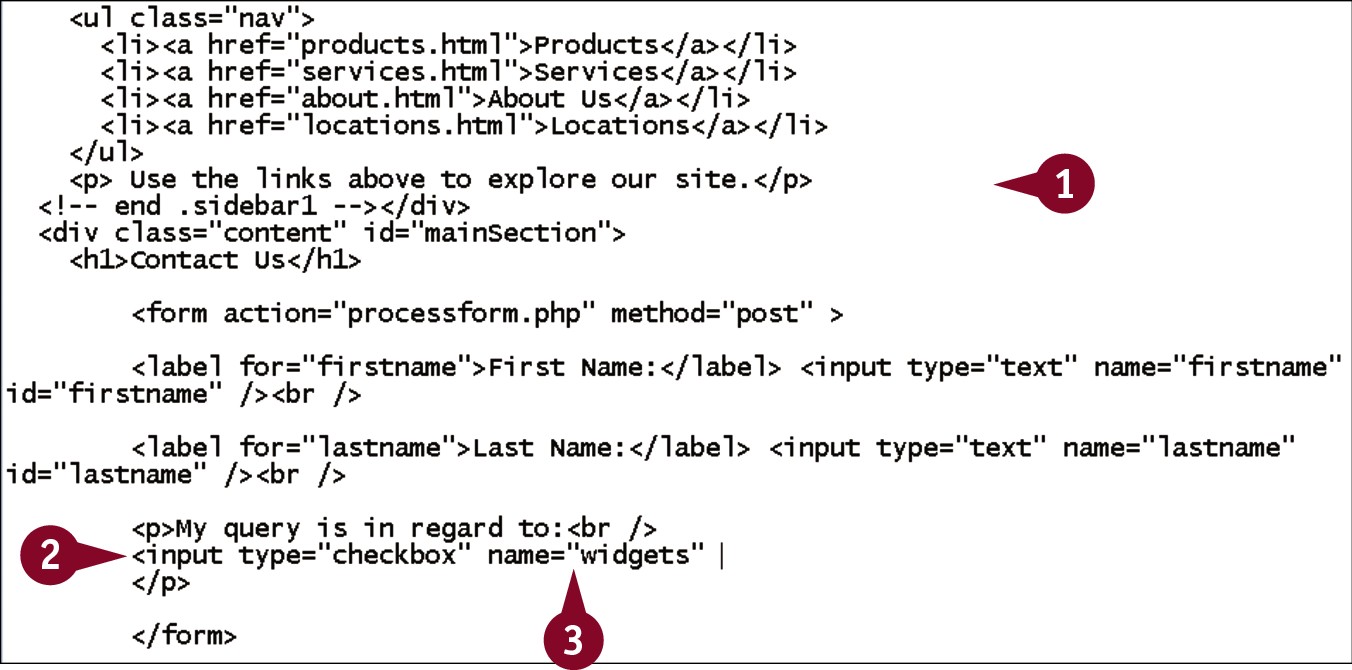
Add Check Boxes
Instead of having your users enter information, you can provide them with a set of choices. When you want to allow users to select from a group of choices, and allow them to potentially select more than one choice, you can use check boxes. In HTML, check boxes use the <input> tag, but with the type attribute set to checkbox. Like text fields, check boxes need a name attribute, but they also require a value. A set of check boxes should all have the same name, but different values. If you are using labels, each also needs a unique ID.
Add Check Boxes
In your editor, open an HTML page that contains a <form> tag set.
Type <input type=”checkbox”.
Type name=”?”, replacing ? with a descriptive name for the set of check boxes.
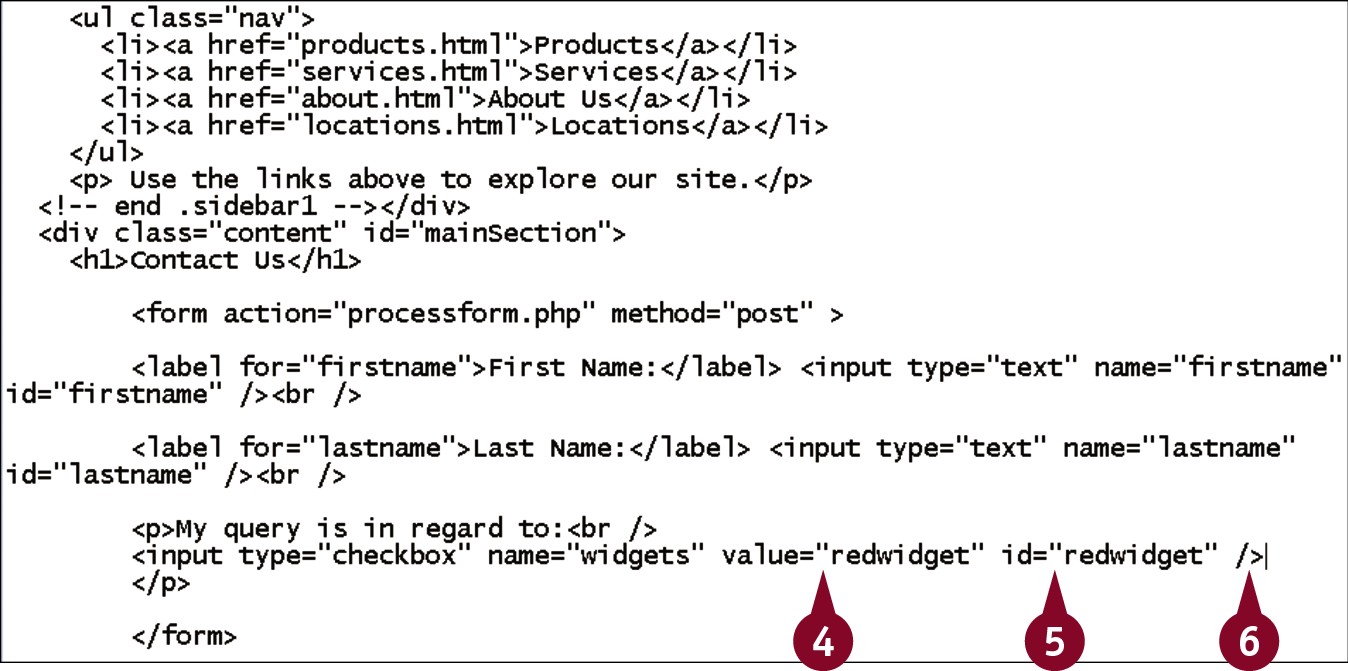
Type value=”?”, replacing ? with a value for this check box.
Type id=”?”, replacing ? with an appropriate ID value.
Type />.

Within the form, type <label for=”?”>, replacing ? with the ID you added in Step 5.
 Type label text and </label>.
 Repeat Steps 2 to 8 to add additional check boxes.
Note: Be sure that all of the name attributes are the same.
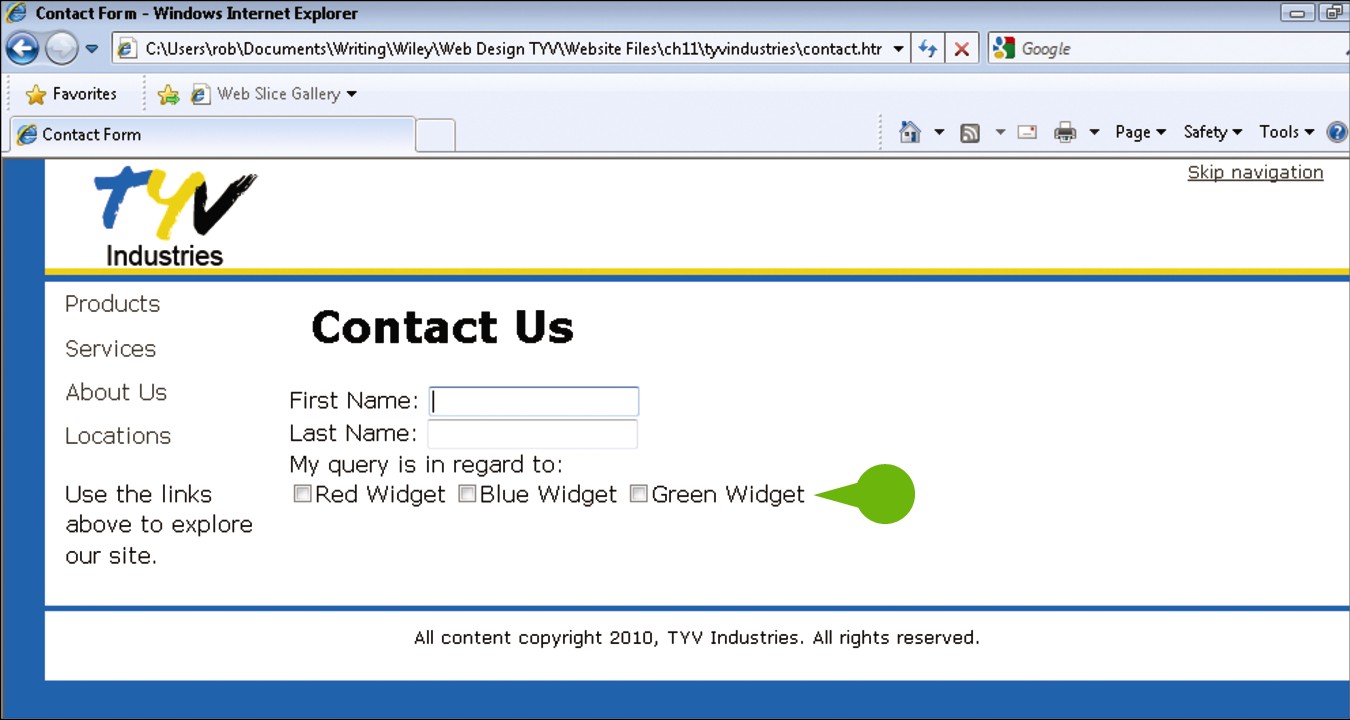
• When the page is viewed in the browser, the check boxes appear. Any or all of them may be selected at the same time.
Add Radio Buttons
A set of mutually exclusive options can be added to your page through radio buttons. In code, radio buttons and check boxes are almost identical: Both use the <input> tag, and both require name and value attributes. As with check boxes, a set of radio buttons need to all have the same name. The only difference is that the type value is now set to radio. Also, users can select as many check boxes as they want, but they can select only a single radio button within a group. As soon as a second button is chosen, the prior one deselects.
Add Radio Buttons

In your editor, open an HTML page that contains a form.
Type <input type=”radio”.
Type name=”?”, replacing ? with a descriptive name for the set of radio buttons.
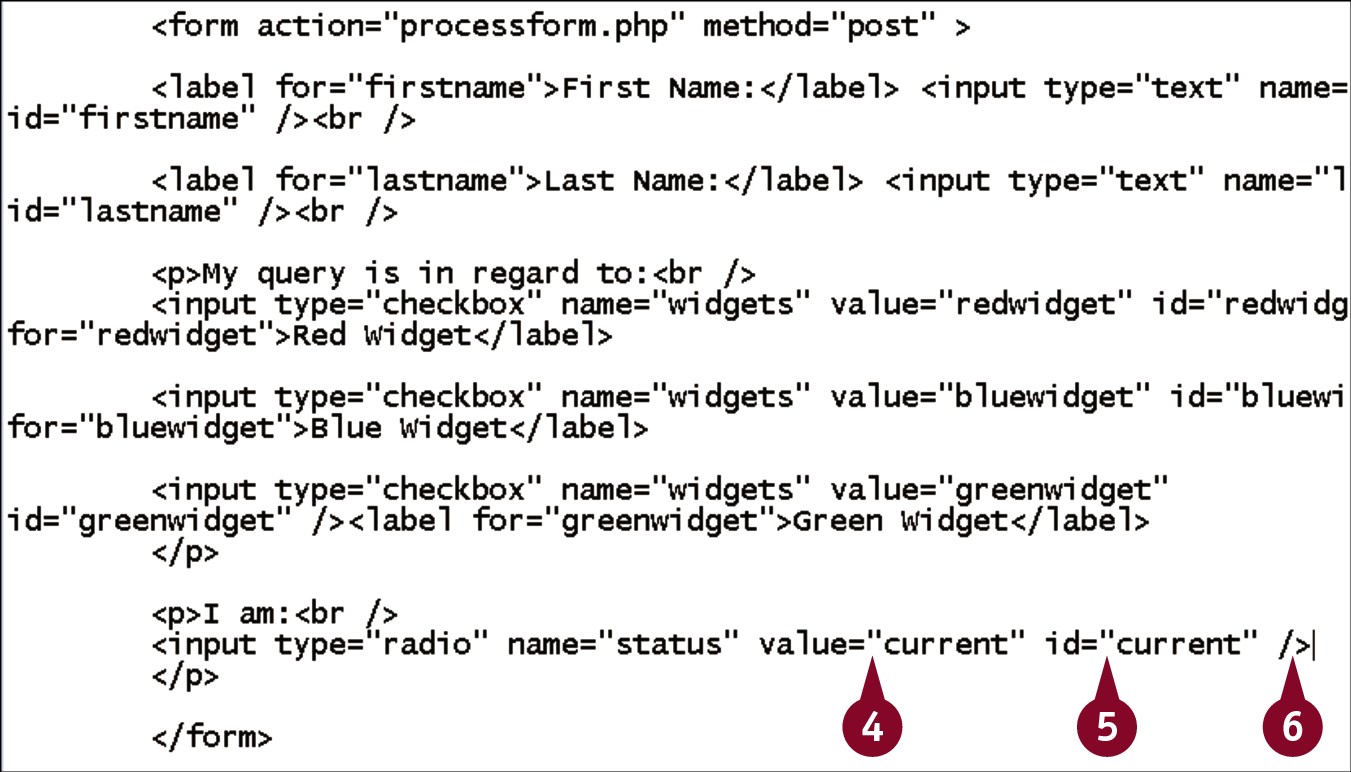
Type value=”?”, replacing ? with a value for this radio button.
Type id=”?”, replacing ? with an appropriate ID value.
Type />.
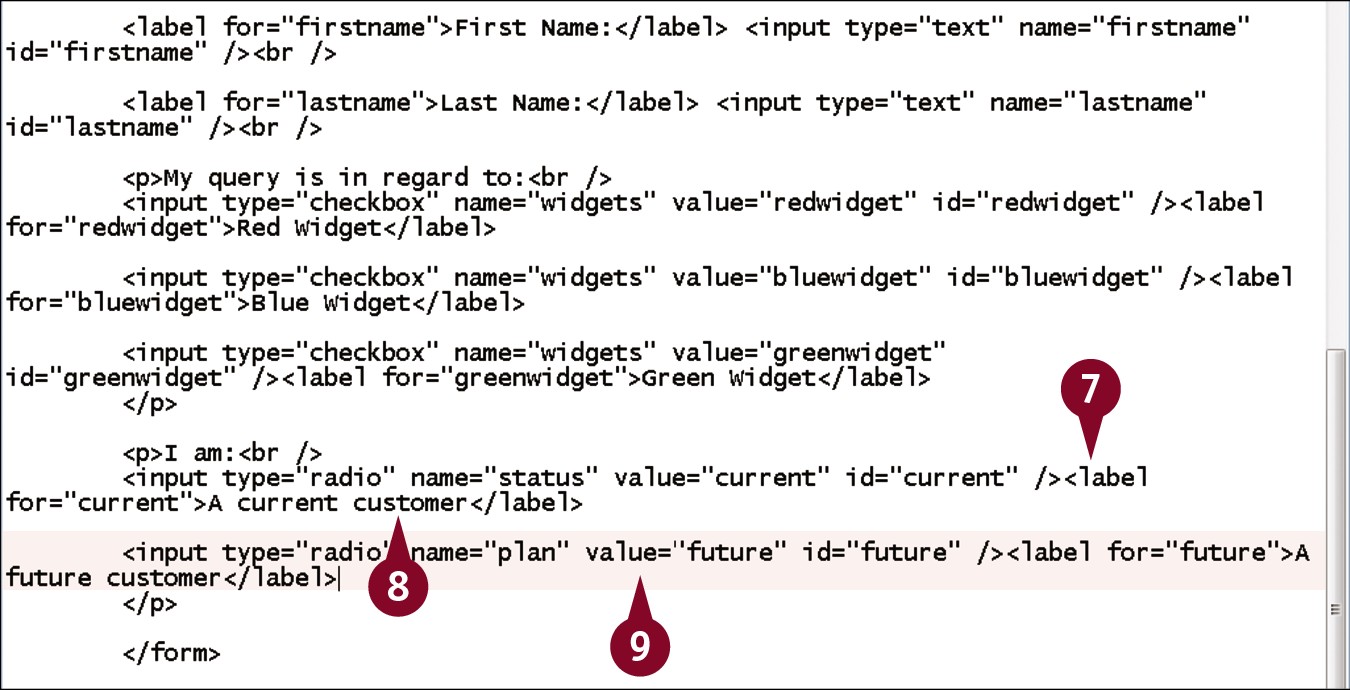
Within the form, type <label for=”?”>, replacing ? with the ID you used in Step 5.
Type label text and </label>.
Repeat Steps 2 to 8 to add additional radio buttons.
Note: Be sure that all of the name attributes are the same.
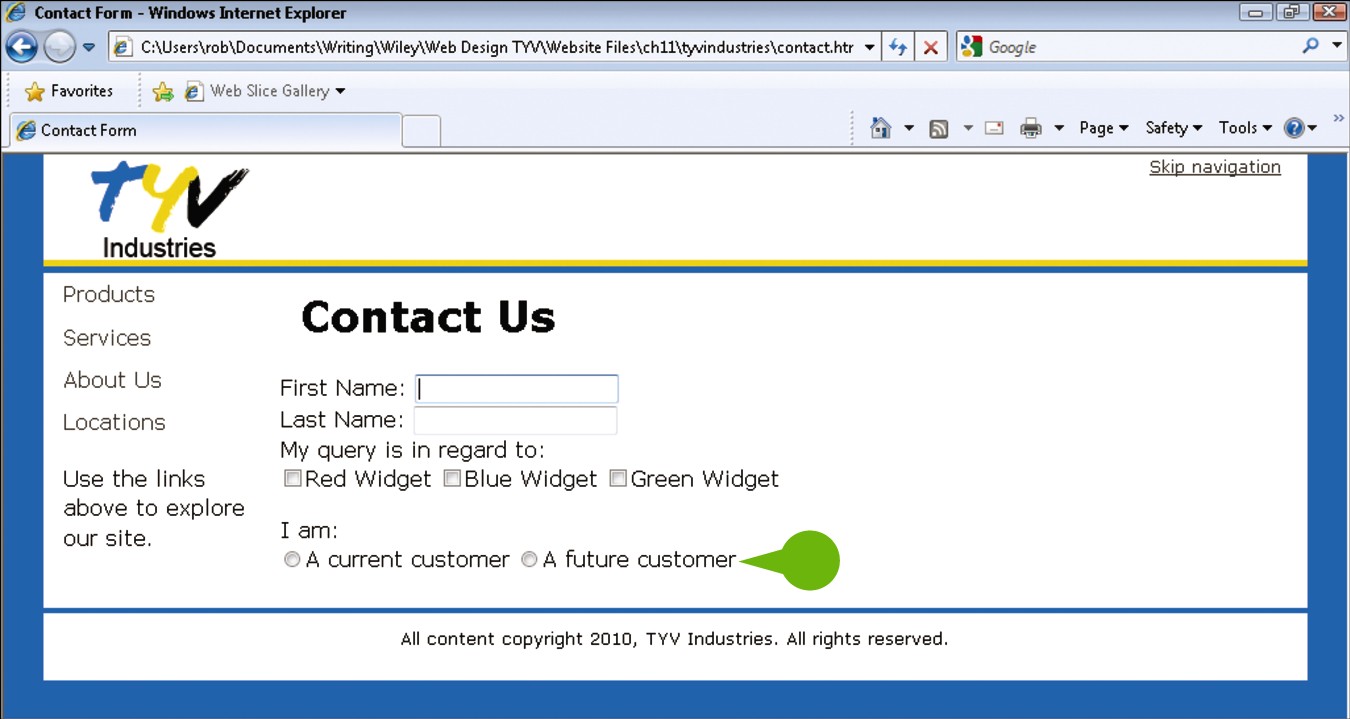
• When the page is viewed in the browser, the radio buttons appear. Only one of them may be selected at the same time.
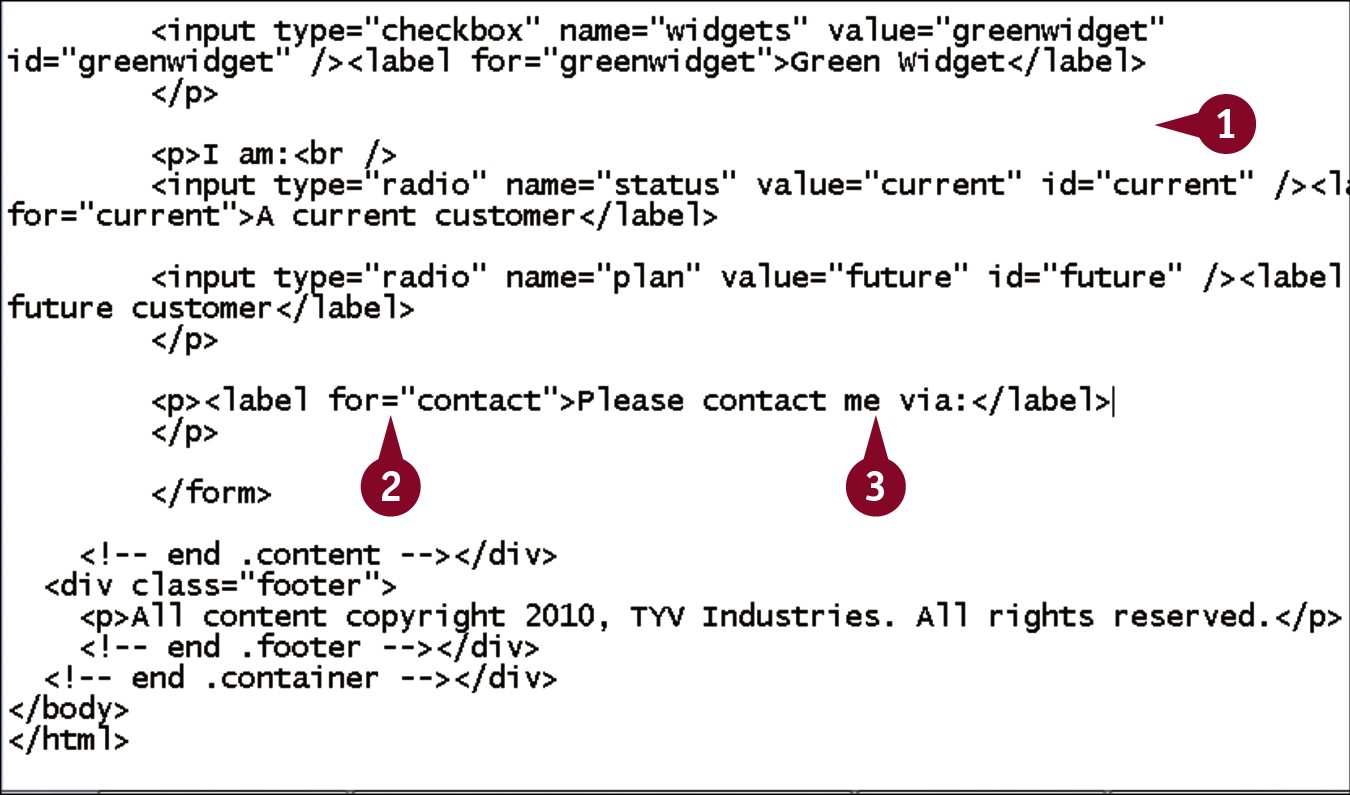
Create a Drop-Down List
You can create a drop-down list in HTML with a combination of the <select> tag and its child <option> tags. The <select> tag contains the name and, if necessary, the ID. Each choice within the drop-down is provided with an <option> tag. The text that appears in the list is simply the text within the <option> tag. If you want to have a slightly different value be submitted to the server from that which the user sees, you can optionally add a value attribute to the tag. A select list can contain as many options as you need.
Create a Drop-Down List
In your editor, open an HTML page that contains a form.
Within the form, type <label for=”?”>, replacing ? with the ID you plan to use for the list.
Type label text and </label>.
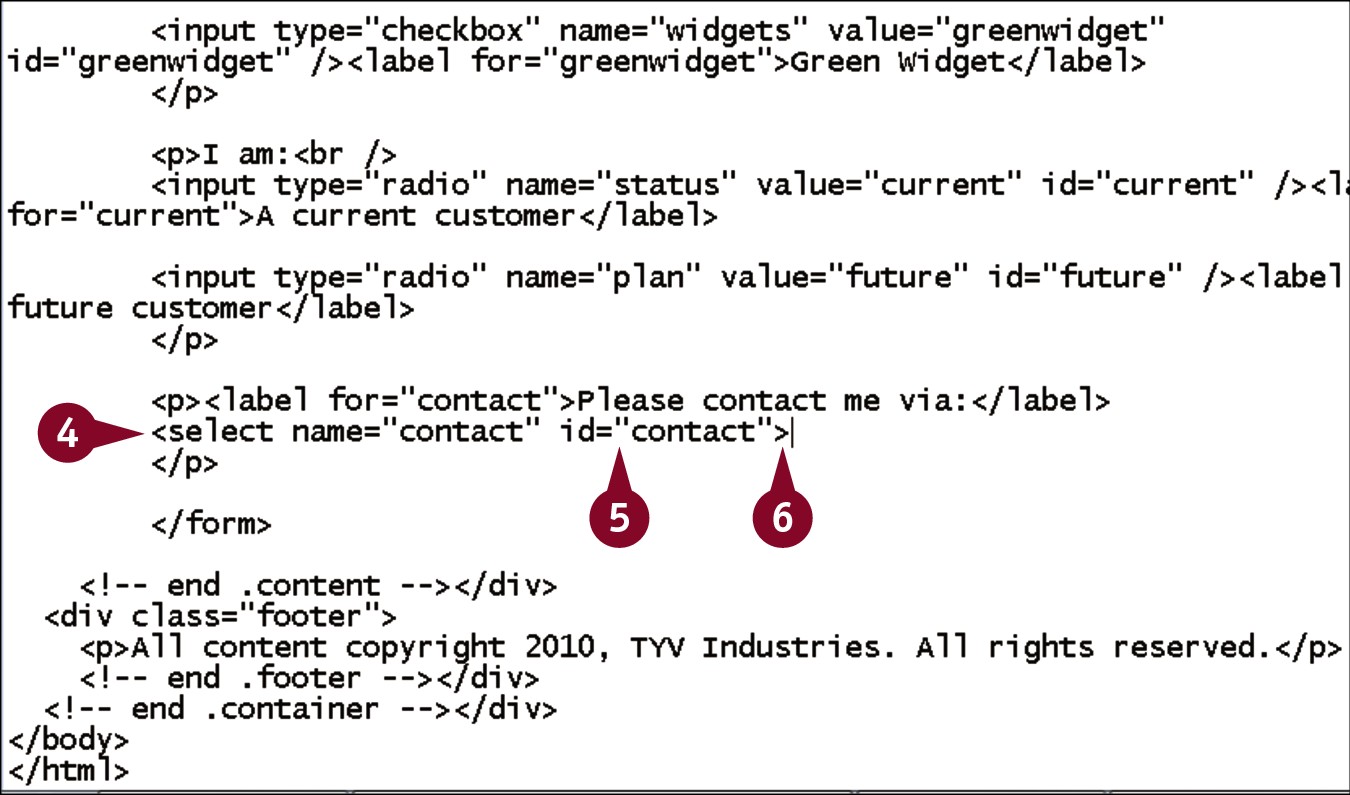
Type <select name=”?”, replacing ? with a descriptive name for the list.
Type id=”?”, replacing ? with the value you used for the attribute in Step 2.
Type >.
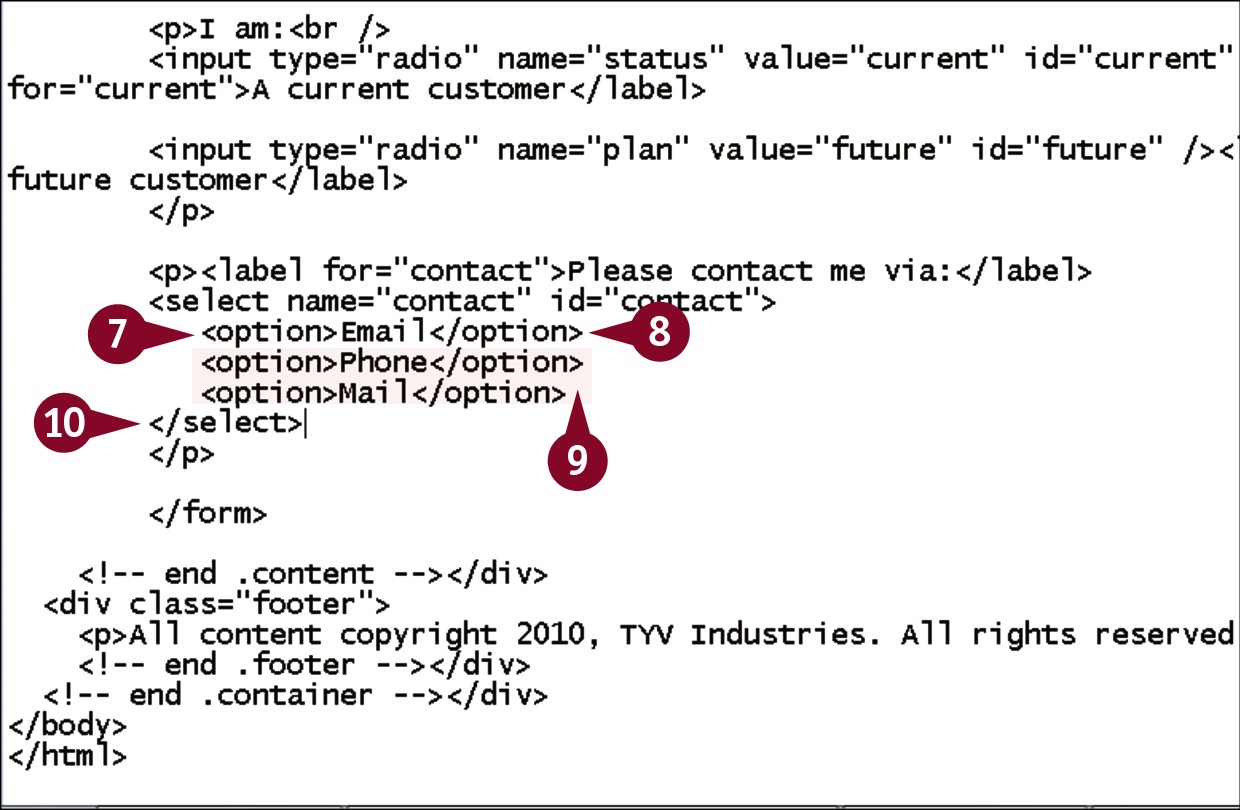
Type <option>.
Type the text to display in the list, followed by </option>.
Repeat Steps 7 and 8 to add additional options.
 Type </select>.
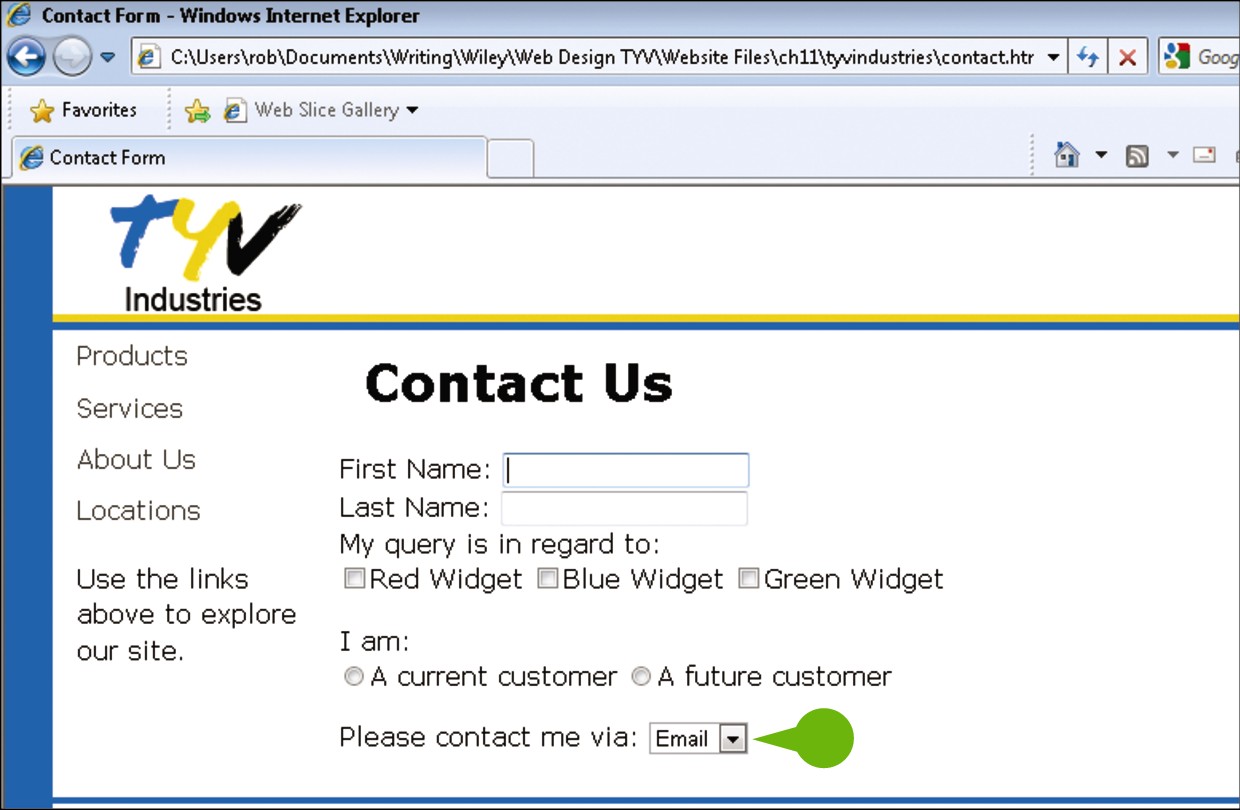
• When the page is viewed in the browser, the drop-down list appears in the form.
TIPS
Can I allow my user to select more than one option at a time?
Yes. You can add the multiple attribute to the <select> tag. In HTML, you simply type multiple; in XHTML, you need to write multiple=”multiple”. You can also add a size attribute, with a value set to the number of options you want to have the list show without scrolling.
How can I choose more than one option when I have the multiple attribute set?
You can press and hold  to select multiple contiguous options. For noncontiguous selection, you can press and hold
  on Windows or
  on a Mac. You should provide these instructions on your page for your users.
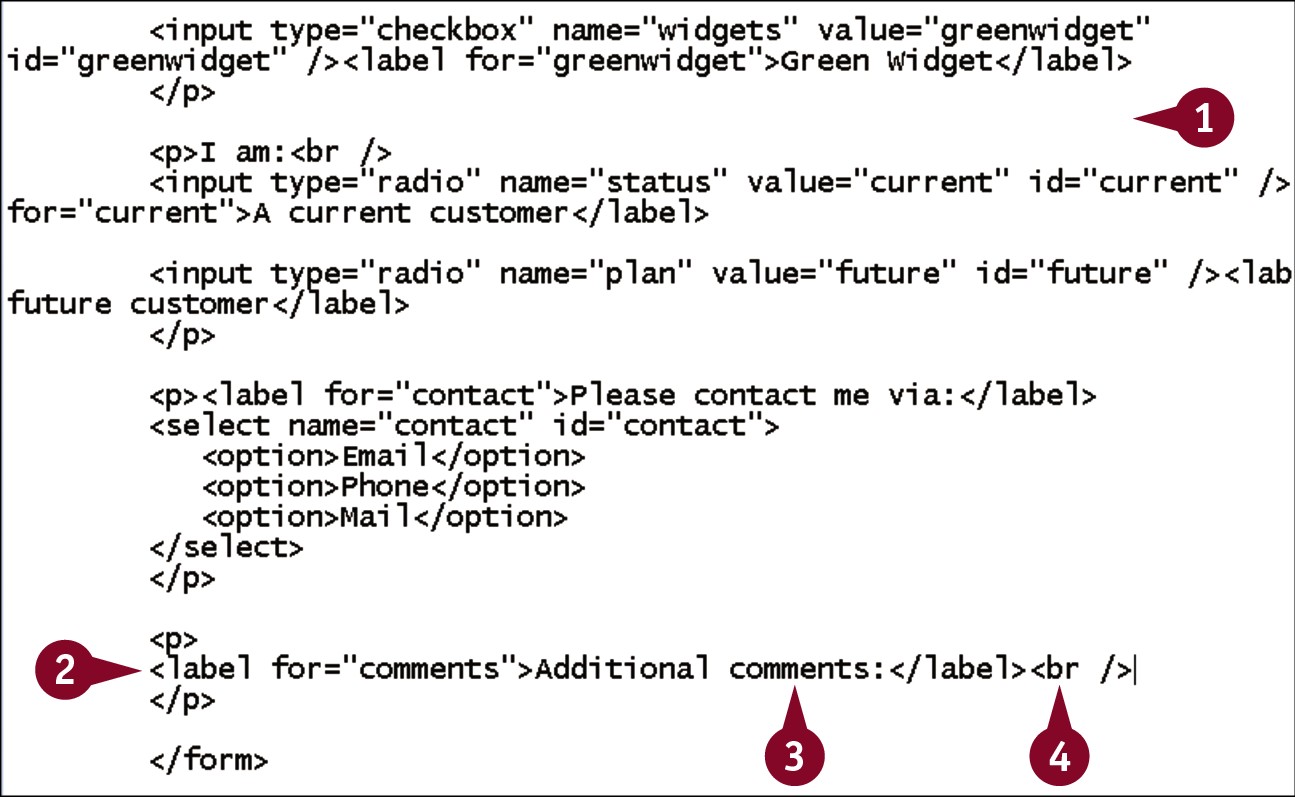
Insert a Text Area
HTML allows you to provide your user with the ability to enter large blocks of text with the <textarea> tag. Like every other form control, the tag has a required name attribute. The default display size of the field varies between browsers, but the tag also accepts rows and cols attributes to set the size, where the former sets the field’s height and the latter its width. The <textarea> tag is a container tag, and thus has a required closing tag. If you want to prepopulate the field with some default text, the text will appear between the opening and closing tags.
Insert a Text Area
In your editor, open an HTML page that contains a form.
Within the form, type <label for=”?”>, replacing ? with the ID you plan to use for the list.
Type label text and </label>.
Type <br />.
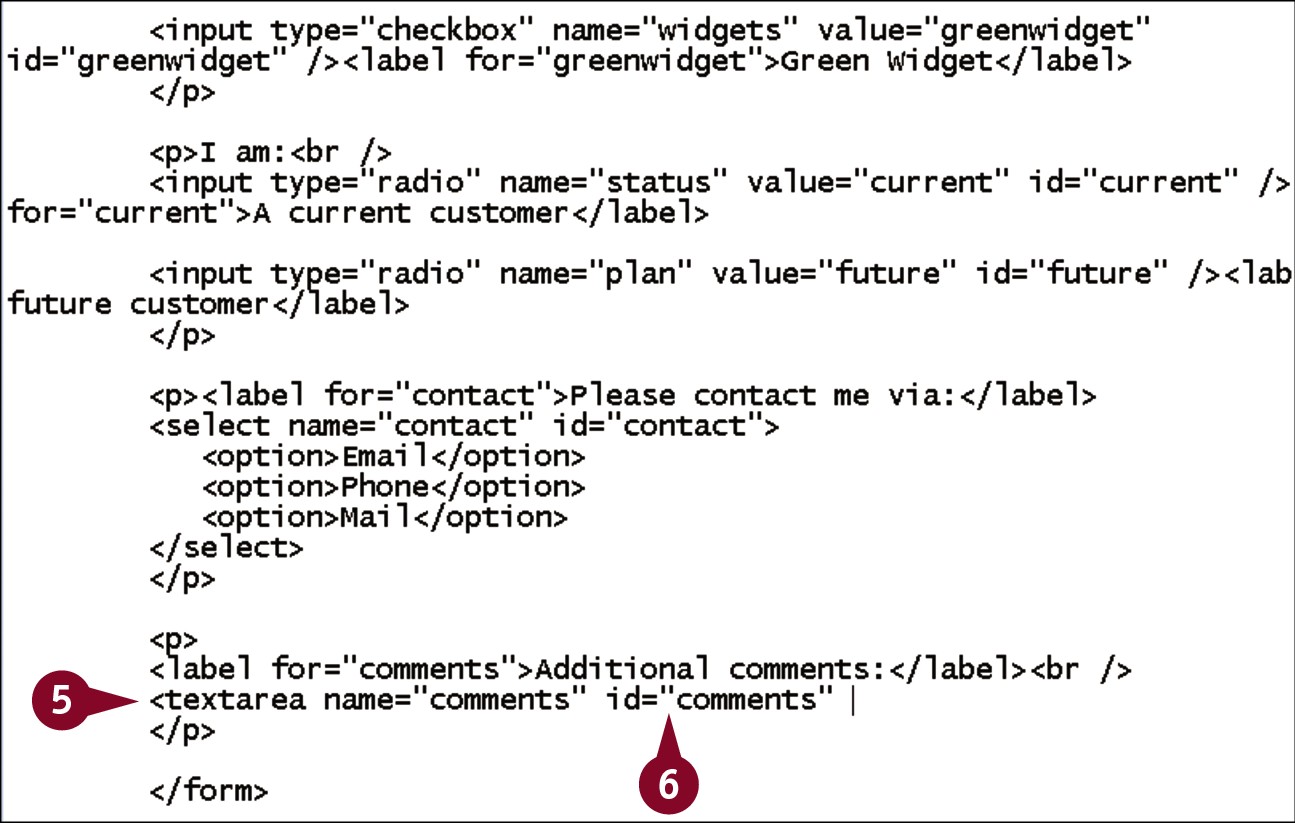
Type <textarea name=”?”, replacing ? with a descriptive name for the field.
Type id=”?”, replacing ? with the ID value you used in Step 2.
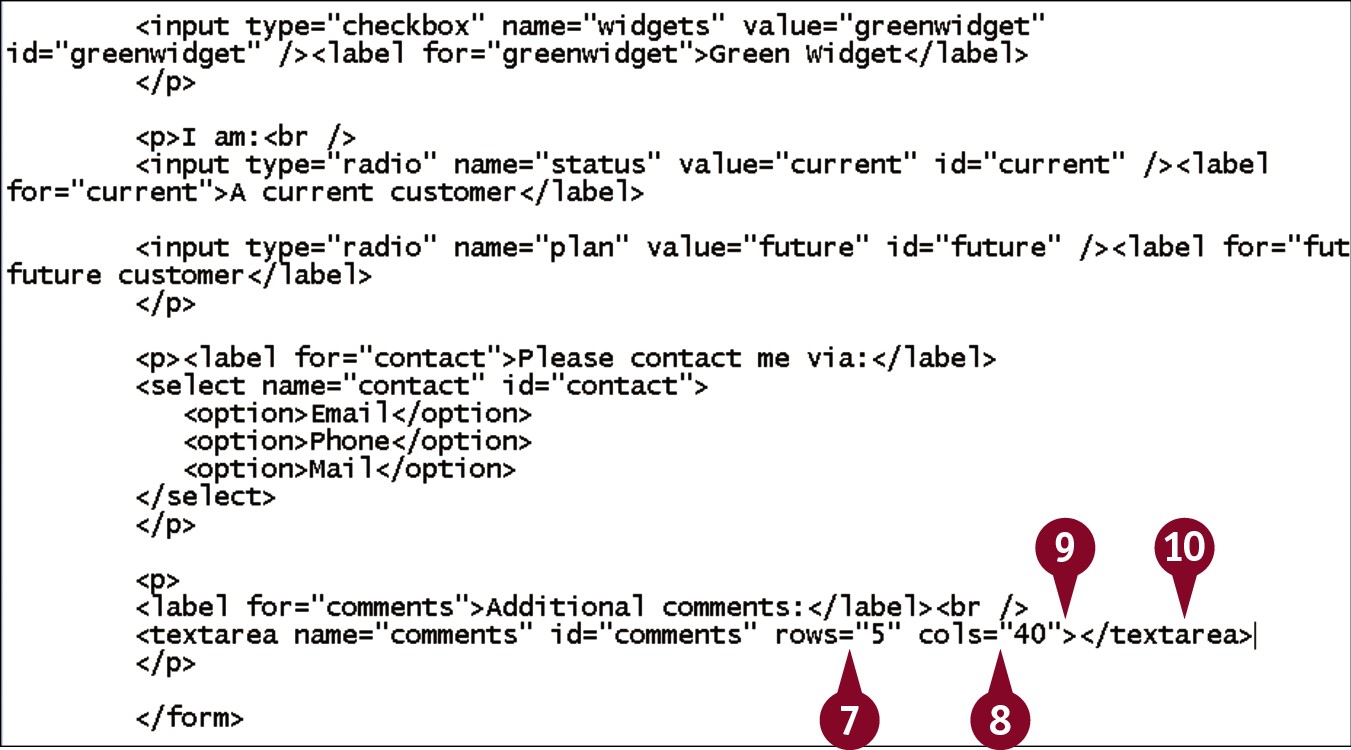
Type rows=”?”, replacing ? with a number for the height of the field.
Type cols=”?”, replacing ? with a number for the weight of the field.
Type >.
Type </textarea>.
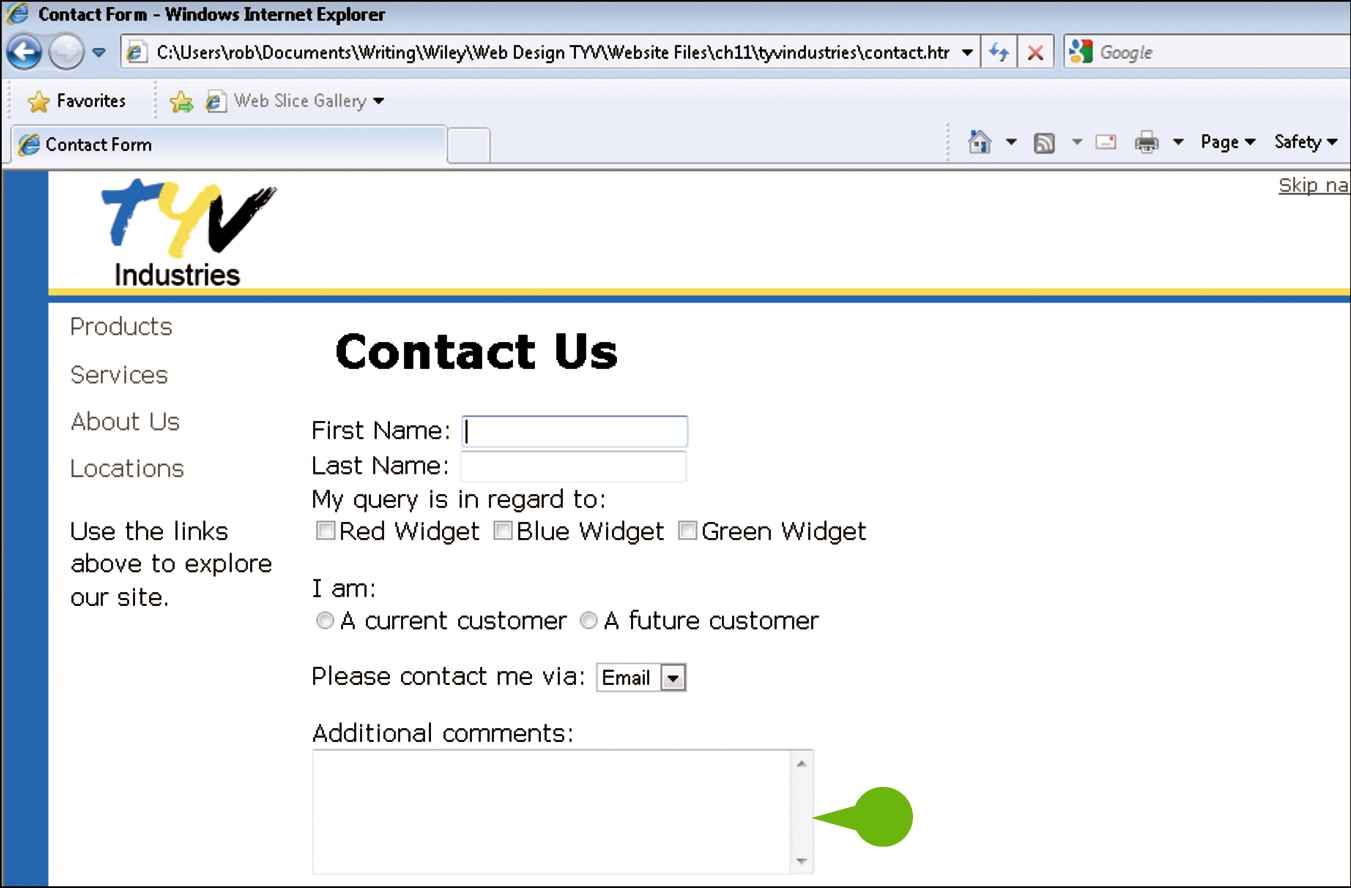
• When the page is viewed in a browser, the text area appears.
Add a Button to Your Form
In order to submit the data to a server, your user must click a button. HTML offers two methods by which a button can be added to the form. The first uses the <input> tag with a type attribute set to submit. The second uses the <button> tag, again with type set to submit. Both work the same, so the one you use is primarily up to you. The text that appears on the button varies between browsers, but you can add the value attribute to set it to text of your choosing.
Add a Button to Your Form
In your editor, open an HTML page that contains a form.
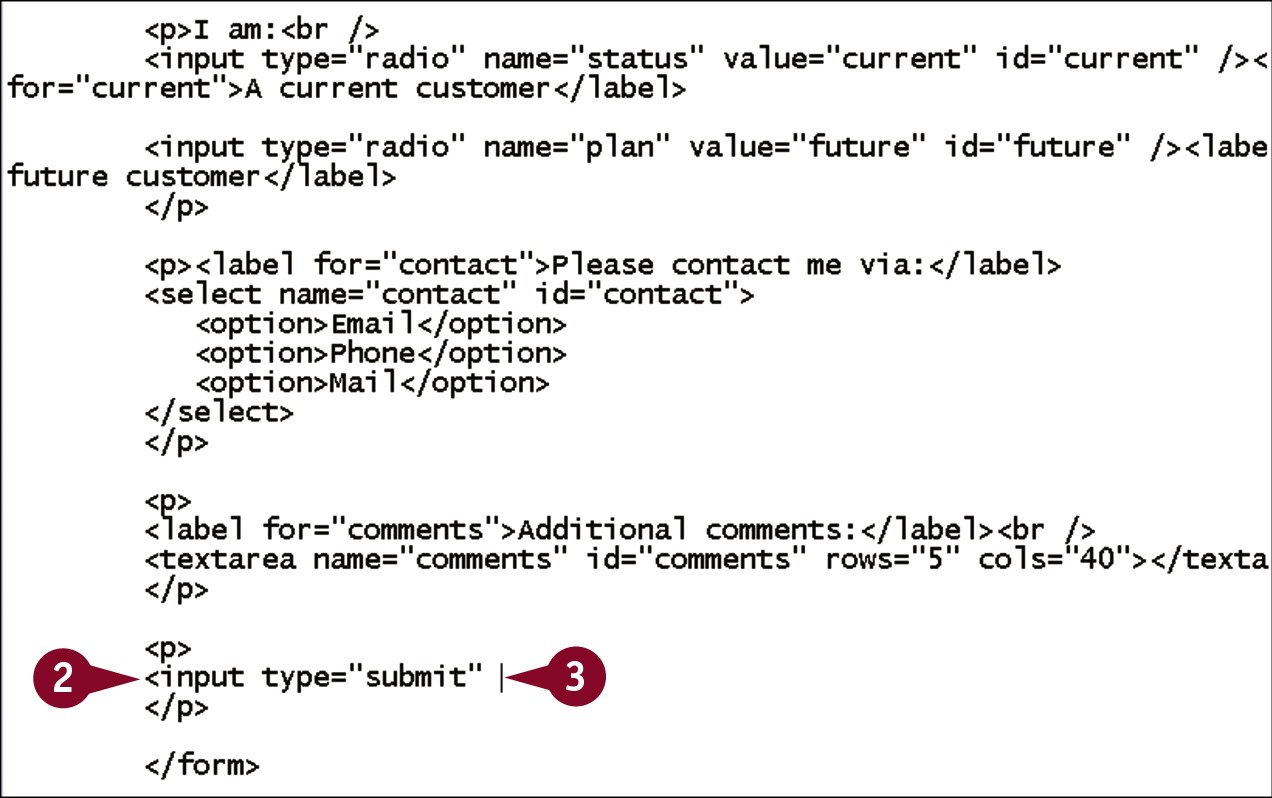
Type <input.
Type type=”submit”.

Type value=”?” />, replacing ? with the text you want to appear on the button.
• When you view the page in a browser, the button appears. If you click the button, the form’s data is submitted to the page specified in the <form> tag’s action.
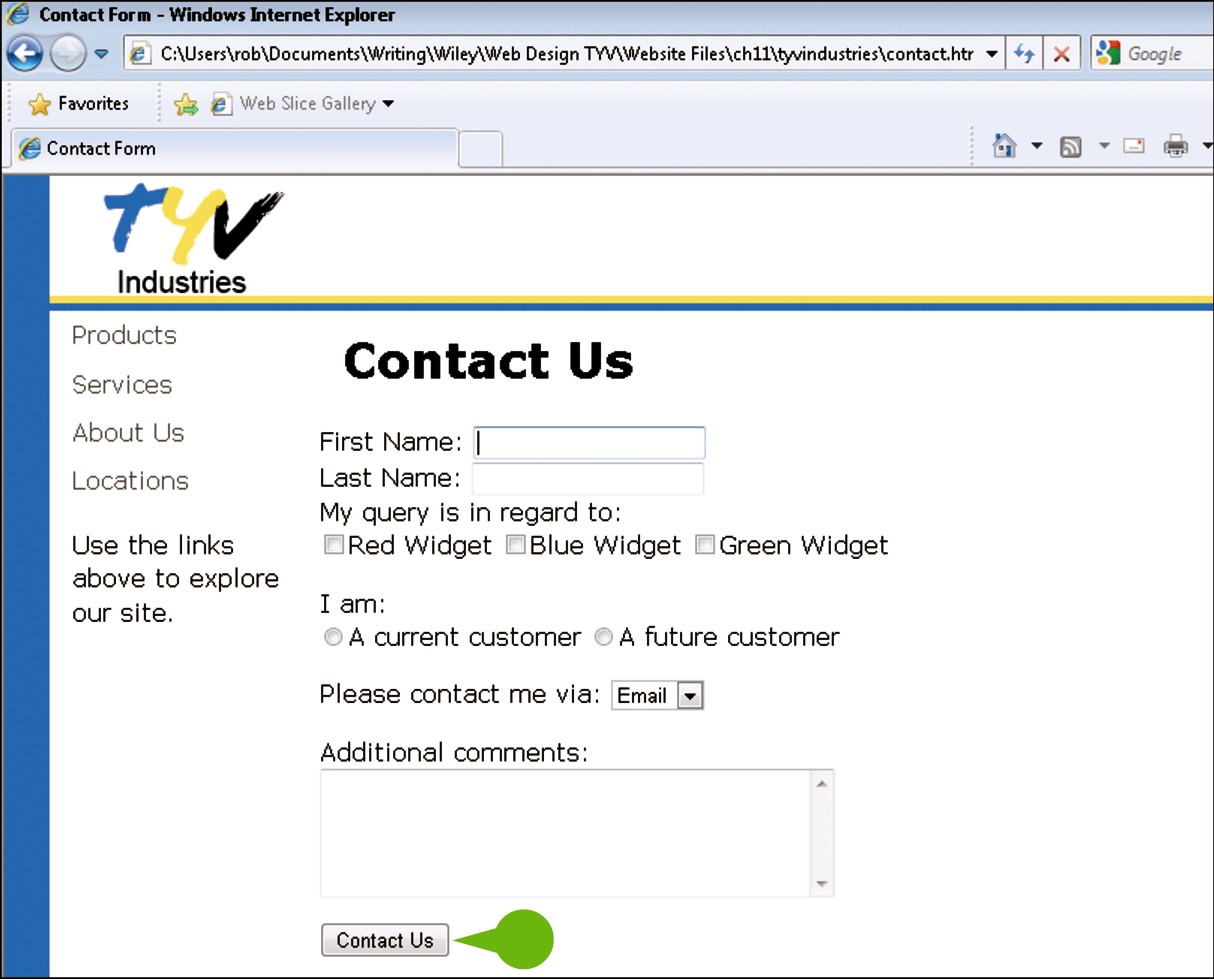
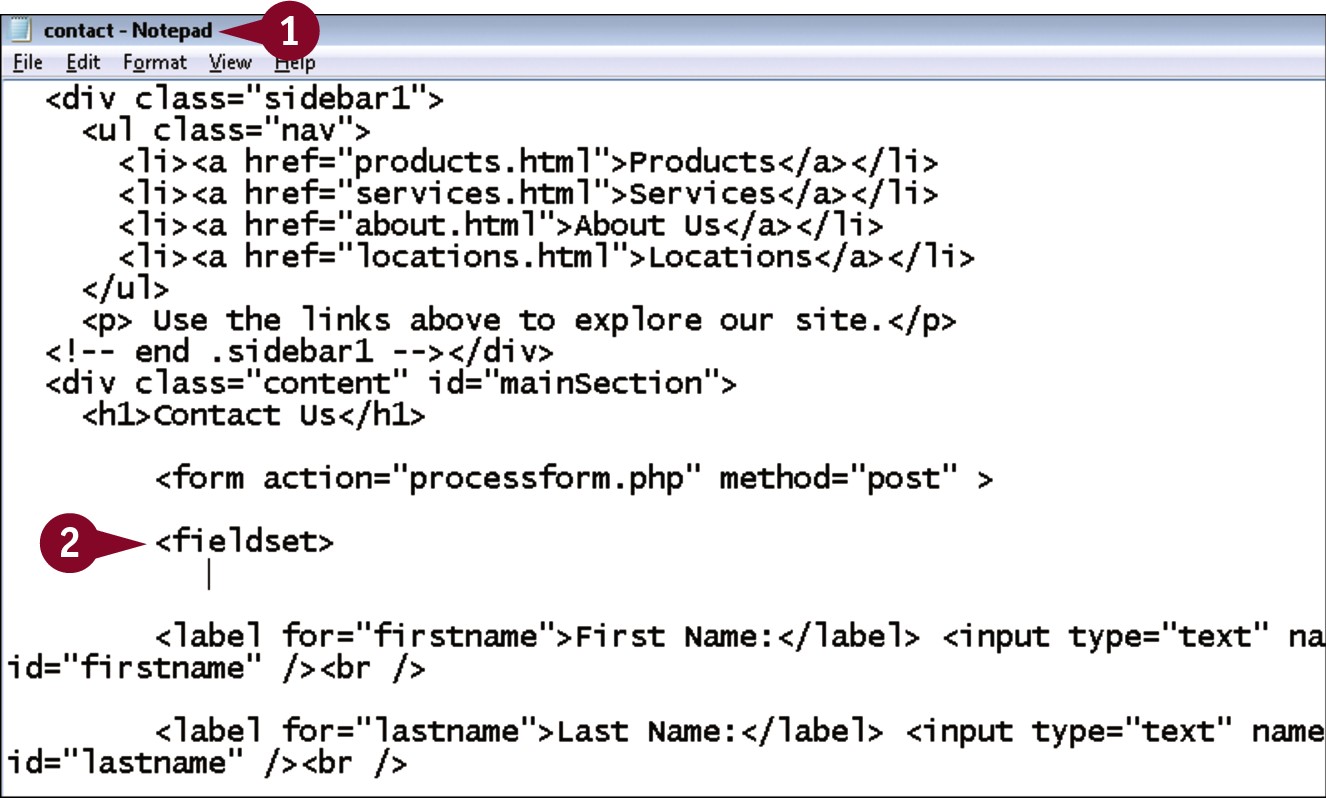
Group Related Form Elements
The HTML <fieldset> tag allows you to organize your form into logical groups of elements. Grouping elements allows you to provide a better layout for your users and may cause longer forms to look less overwhelming. Within a fieldset, you can nest a <legend> tag to add descriptive text about the set. The fieldset will appear as a border around its fields, and the legend will display in the top-left corner of the set. Fieldsets can be nested within other sets, so you can also use it to organize subgroups, such as sets of check boxes and radio buttons.
Group Related Form Elements
In your editor, open an HTML page that contains a form and form fields.
Within the form, type <fieldset>.
Press .
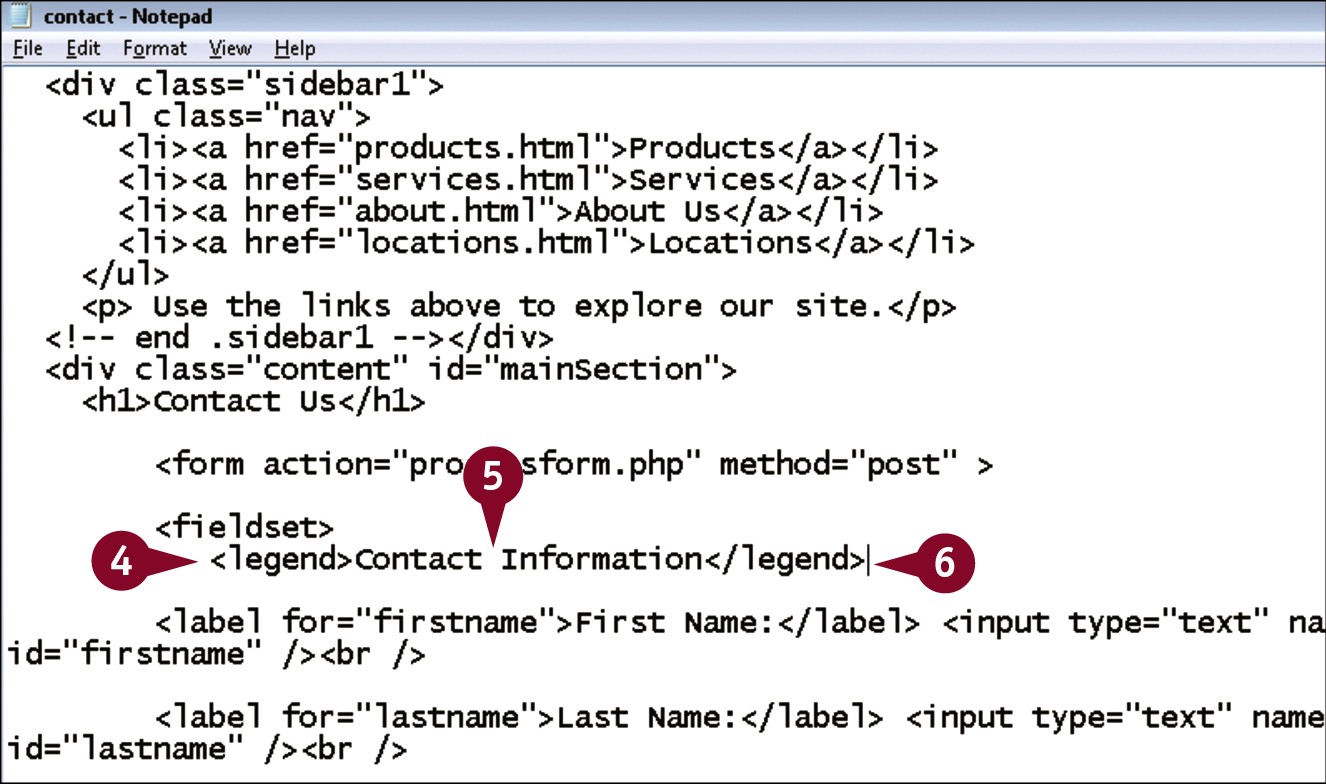
Type <legend>.
Type a descriptive legend for the set of fields.
Type </legend>.

After the final form field tag in the group, type </fieldset>.
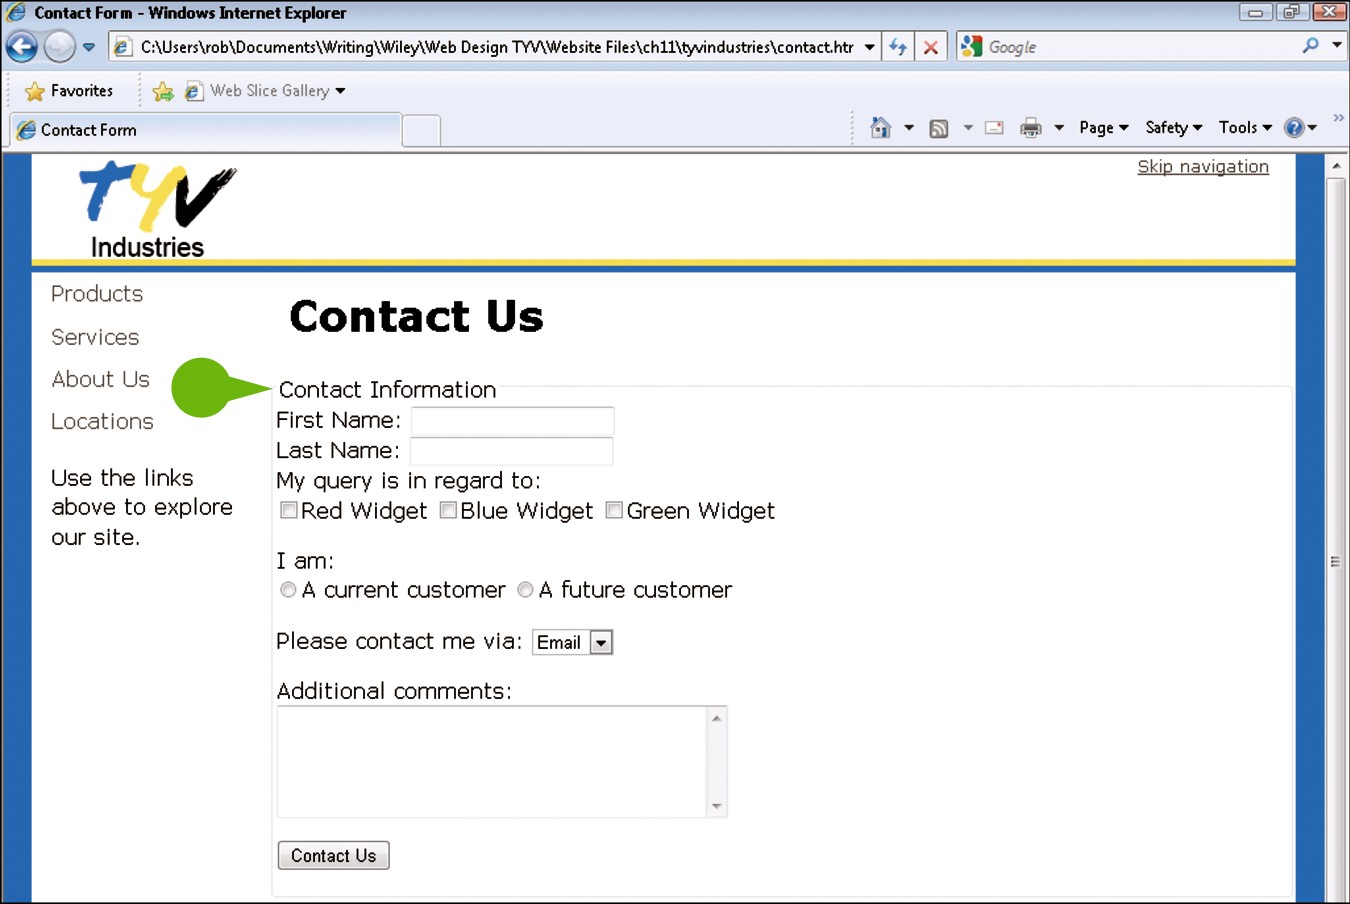
• When the page is viewed in a browser, the fieldset or fieldsets appear as borders around groups of fields. The legends appear in the top-left corners of the fieldsets.