In the previous chapter, I explain the basics of how to incorporate JavaScript code into a web page. If you read that chapter, you ran a couple of simple JavaScript programs, using the prompt() function for input and the alert() function for output. That was a great start, but the whole point of using JavaScript is to dynamically alter the data and/or appearance of web pages. This chapter explains how JavaScript interfaces with your web pages and shows you how to write JavaScript code to dynamically add, delete, or change content in your website.
Understanding the Document Object Model
In order for JavaScript to have access to the elements in your web page, it needs to know how to find them. The Document Object Model (DOM) provides a standard way of accessing objects placed within a web page. It creates a tree structure that contains every element, attribute, content text, and even CSS3 style contained within the web page. It treats each of these items as objects that the browser (or your program code) can manipulate. Finding any of these items is just a matter of walking through the tree with your JavaScript code.
The browser defines every web page as a set of DOM objects that the web page contains. Just as your family has a family tree that you can trace back to find relatives, every web page has its own DOM tree of the objects contained within the web page. With JavaScript, you can peruse through the DOM tree and make modifications along the way.
The Document Object Model tree
Every family tree has a head, and for the DOM tree, the head is the html element that starts out the web page. Just as parents have children, the html object in the DOM tree has two child objects: the head object and the body object, shown in Figure 2-1.
FIGURE 2-1: The html object and its two child objects.
The head and body elements in the HTML code are called child objects of the html object in the DOM tree. Because it comes first in the code, the head object is called the “first child object,” while the body object is the “last child object.” This terminology is important when working with DOM objects.
As you continue down the DOM tree, the browser places each object in the web page under its parent object. Let's take a look at a simple example of this principle. I’ll use this sample web page for the demo:
<!DOCTYPE html>
<html>
<head>
<title>Sample DOM web page</title>
</head>
<body>
<h1>This is the heading of the web page</h1>
<p>This is sample text</p>
</body>
</html>
From this sample HTML5 code, the browser creates DOM objects from each element, and places them in a DOM tree layout it keeps in memory, as shown in Figure 2-2.
In the example shown in Figure 2-2, the html object contains the two child objects — head and body — but now each of those objects has child objects as well. The head object contains just one child object, the title object. The title object also has one child object, which may seem odd at first glance, because the title object doesn't contain any additional objects.
One of the more confusing features of the DOM tree is how it handles text inside elements. It treats the text inside an element as a separate DOM object that has its own features. So, in this example, the title object contains a single child object, which is the text object for the title text.
The body object has two child objects. The h1 object is the first child of the body object, and it, too, contains a text child object. The p object is the last child of the body object, and it has a text object in it as well.
This simple example shows the basics of DOM. Working out the DOM tree for a large web page with lots of different types of elements can be complicated, but it uses the same principle. Fortunately, JavaScript has some features that help make things a little easier for you.
JavaScript and the Document Object Model
So far, you've seen that the browser breaks every web page down into a DOM tree of objects. The browser uses the DOM tree to keep track of all the HTML5 elements, their content, and the styles that appear on the web page. However, because JavaScript programs run in the browser (remember the whole client-side programming thing?), they have full access to the DOM tree created by the browser.
That means your JavaScript programs can interact directly with the DOM tree that the browser follows to create the web page. And not only that, but your JavaScript programs can add, change, and even remove objects in the DOM tree. As your JavaScript program modifies the DOM tree, the browser automatically updates the web page window with the new information. How cool is that? This is the key to client-side dynamic web programming.
Just like the DOM tree, JavaScript treats each element contained in a web page as an object. In JavaScript, objects have two features:
Properties: Properties define information about the object.
Methods: Methods are actions to take with the objects.
JavaScript assigns a special object named document to represent the entire web page DOM tree. You can reference many of the DOM objects directly from the document object, as well as add or remove objects. Table 2-1 lists some of the document properties available in JavaScript.
Returns an element object with the specified id value
getElementsByClassName(class)
Returns a list of elements with the specified class name
getElementsByTagname(tag)
Returns a list of elements of the specified element type
hasFocus()
Returns a true value if the web page has the window focus
write(text)
Sends the specified text to the web page
writeln(text)
Sends the specified text to the web page, followed by a new line character
Let's run a quick test to see how this works. Follow these steps to test using the write() method for a web page document:
Open your favorite text editor, program editor, or integrated development environment (IDE) package.
Enter the following code:
<!DOCTYPE html>
<html>
<head>
<title>DOM Test</title>
<script>
document.write("<h1>This is a test of the DOM</h1>");
</script>
</head>
<body>
</body>
</html>
Save the file asdomtest.htmlin theDocumentRootfolder for your web server.
If you're using XAMPP in Windows, that’s the c:\xampp\htdocs folder; for XAMPP in macOS, it’s /Applications/XAMPP/htdocs.
Open the XAMPP Control Panel and then start the Apache Web server.
Open your browser and enter the following URL:
http://localhost:8080/domtest.html
You may need to change the TCP port in the URL to match your Apache web server.
Close the browser.
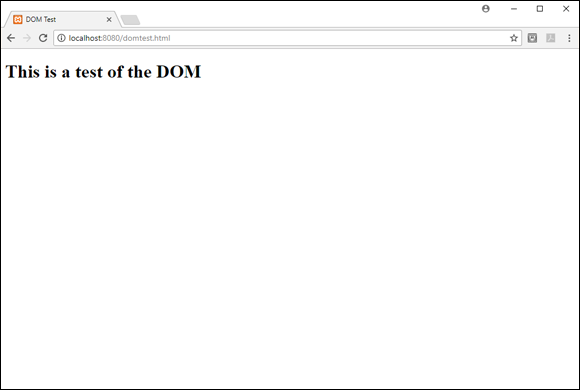
When you examine the code in the domtest.html file, you'll notice that there’s nothing in the body element, so you may not expect to see anything on the resulting web page. However, when you run the program, you should see the output shown in Figure 2-3.
FIGURE 2-3: The output from the domtest.html program.
The document.write() function runs the write() method from the document object to dynamically place the h1 element in the web page for us!
The write() method is an easy way to dynamically place text in the web page, but it can be somewhat dangerous to use. The write() method overwrites everything that was originally in the web page. In this example, I ran it from the head element, so it placed the output at the top of the web page, before any elements defined in the body element. However, if you use the write() function from within the body element, it'll remove any elements that were previously on the web page. I’ll show you some better methods for doing this later in this chapter.
Besides the document properties and methods, JavaScript also has properties and methods that apply to each element object in the document. The following sections detail how to use those properties and methods.
JavaScript DOM object properties
Now that you have access to the objects contained in the web page, you can use JavaScript to manipulate them. Each DOM object contains one or more properties that define the actual object. There are lots of object properties JavaScript uses with objects. Table 2-3 shows a list of the more popular JavaScript DOM object properties you’ll use.
Returns a list of the number of child objects the object has
childNodes
Returns a list of the object's child nodes, including text and comments
children
Returns a list of only the object’s child element object nodes
classList
Returns a list of the class name attributes of an object
className
Sets or returns the value of a class attribute of an object
firstChild
Returns the first child object for the object
id
Sets or returns the id value of the object
innerHTML
Sets or returns the HTML content of the object
lastChild
Returns the last child object for the object
nodeName
Returns the name of the object
nodeType
Returns the element type of the object
nodeValue
Sets or returns the value for the object
nextSibling
Returns the next object at the same level in the tree as the object
parentNode
Returns the parent object for the object
previousSibling
Returns the previous object at the same level in the tree as the object
style
Sets or returns the value of the style property for the object
Besides these standard properties, each attribute that you assign to an HTML5 element and each CSS style property that you apply to an element becomes an object property of the DOM object as well.
Follow these steps to experiment with accessing the DOM object properties for our sample web page:
Open your favorite text editor, program editor, or IDE package.
Enter the following code:
<!DOCTYPE html>
<html>
<head>
<title>Testing DOM properties</title>
</head>
<body>
<body>
<h1>This is the heading of the web page</h1>
<p>This is sample text</p> <br>
<button type="button" onclick="changeme('red')">Change background to red</button>
<button type="button" onclick="changeme('white')">Change background to white</button>
<script>
function changeme(color) {
document.body.style.backgroundColor = color;
}
</script>
</body>
</html>
Save the file asdomproperties.htmlin theDocumentRootfolder for your web server.
Open the XAMPP Control Panel and start the Apache web server if it's not already running.
Open your browser and enter the following URL:
http://localhost:8080/domproperties.html
You may need to change the TCP port to match your Apache web server.
Click the buttons to change the background color of the web page.
Close the browser window.
The domproperties.html code uses two buttons to trigger the changeme() function. (I talk more about how to do that in Book 3, Chapter 4.) The changeme() function uses the document.body object to reference the body element in the web page. It then uses the style object property to reference the CSS3 styles applied to the body element.
You may be wondering why the backgroundColor style property isn't background-color, because that’s how CSS3 defines that property. Unfortunately, the DOM standard doesn’t like using dashes in property names. So, instead, wherever there’s a dash in a CSS3 property name (such as in background-color), it removes the dash and capitalizes the first letter of the next word. That's how we get backgroundColor as the DOM property to change the background-color CSS3 property on the web page.
JavaScript DOM object methods
Besides properties, JavaScript objects also contain methods. The methods provide actions to interact with the object. You've already seen a demonstration of using the write() method of a DOM object in JavaScript. There are plenty more object methods for you to use in your JavaScript programs to help you retrieve information about the DOM objects, modify existing DOM objects, or even add new DOM objects to your web page. Table 2-4 shows some of the more popular DOM object methods that you’ll use.
Returns a true value if the object contains the specified object
focus()
Places the window focus on the object
getAttribute(attr)
Returns the value for the specified object attribute
getElementsByClassName(class)
Returns a list of objects with the specified class name
getElementsByTagName(tag)
Returns a list of objects with the specified tag name
hasAttribute(attr)
Returns true if the object contains the specified attribute
hasAttributes()
Returns true if the object contains any attributes
hasChildNodes()
Returns true of the object contains any child objects
insertBefore(object)
Inserts the specified object before the object
removeAttribute(attr)
Removes the specified attribute from the object
removeChild(object)
Removes the specified child object from the parent object
replaceChild(object)
Replaces the child object with the specified object
setAttribute(attr)
Sets the specified attribute of the object to the specified value
toString()
Converts the object to a string value
As you can see, there are quite a few different methods available for you to use when you reference a specific element in the web page. However, part of the problem with using JavaScript to dynamically change elements is finding them in the first place. The next section covers how to do that.
Finding Your Elements
As your web pages become more complicated, they'll contain dozens, hundreds, and possibly even thousands of different elements. Trying to find a specific element within that mess so you can dynamically change it can be a challenge.
There are basically two different ways to find a specific element buried within the HTML5 code in your web page:
Using a unique feature assigned to the element to jump directly to it
Walking the DOM tree to navigate your way down to the element's object from a specific point in the DOM tree
Both methods have their own pros and cons for using them. Obviously, if you can use a unique feature of an element (such as an id attribute) to reference a specific element that’s the easiest way to go. However, that’s not always possible, so it helps to know how to get there the hard way. The following sections describe how to use both methods for referencing element objects within the DOM tree.
Getting to the point
The easiest way to uniquely identify an element in your web page is to assign it a unique id attribute value. When you assign the id attribute to elements, you can then reference them in your JavaScript code by using the getElementById() method.
The getElementById() method returns a pointer to the DOM object with the specified id value. When you have the pointer to the element object, you can use any of the DOM object properties or methods to work with the element.
Follow these steps to test this out:
Open your favorite text editor, program editor, or IDE package.
Enter the following code:
<!DOCTYPE html>
<html>
<head>
<title>Finding an Element</title>
<script>
function changeit() {
var answer = prompt("Enter some new text");
var spot = document.getElementById("here");
spot.innerHTML = answer;
}
</script>
</head>
<body>
<h1>Trying to find an element</h1>
<button type="button" onclick="changeit()">
Click to change
</button>
<p id="here">This is the original text</p>
</body>
</html>
Save the file asfindtest.htmlin theDocumentRootfolder for your web server.
Start the Apache web server if it's not currently running.
Open your browser and enter the following URL:
http://localhost:8080/findtest.html
Note the text that appears in the web page below the button.
Click the button and then enter some new text at the prompt dialog box.
Click OK in the dialog box.
Note the text that now appears on the web page.
Close the browser window when you’re done playing.
The findtest.html code defines the changeit() JavaScript function in the head section. The changeit() function uses a prompt() function to retrieve some text from the site visitor and then attempts to replace the text in the p DOM object with the new text.
To do that, it uses the getElementById() document method to create a pointer to the p object in the web page, identified by the id attribute value of here. After it retrieves the pointer to the p object, it uses the innerHTML object property to change the text that appears inside the p object.
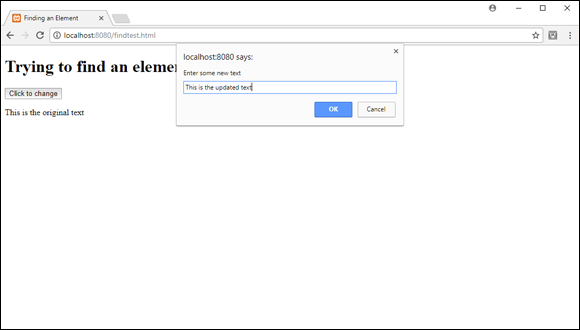
When you run the program, you should see the heading, the same text, and a button. When you click the button, a prompt dialog box should appear, prompting you to enter some text (see Figure 2-4).
FIGURE 2-4: The initial page and dialog box for the findtest.html web page.
Type some text and then click OK. The browser will automatically change the content of the p element to show the text you entered into the dialog box!
You can continue doing that for as long as you like. Each time you enter new text, it'll appear in the web page automatically!
Walking the tree
Finding the DOM object for a specific HTML5 element in the DOM tree by using its id attribute is the preferred method, but that’s not always available. Sometimes you need to find an element within the document to use as a base, and then use the element properties to find child and sibling objects:
Use the firstChild property to find the first element in a group.
Use the nextSibling property to find the related elements within the group.
You can then alternate between firstChild, lastChild, nextSibling, or previousSibling properties to work your way down to where you want to be in the DOM tree.
That can be tedious work, especially for large web pages. You need to be aware of exactly how all the elements appear and fit together in the web page.
Follow these steps to try this method out:
Open your favorite text editor, program editor, or IDE package.
Save the file aswalkingtest.htmlin theDocumentRootfolder for your Apache web server.
Start the Apache web server if it's not already running.
Open your browser and enter the following URL:
http://localhost:8080/walkingtest.html
Examine the items in the list.
Click the button.
Note the new items in the list.
Close the browser window when you’re done.
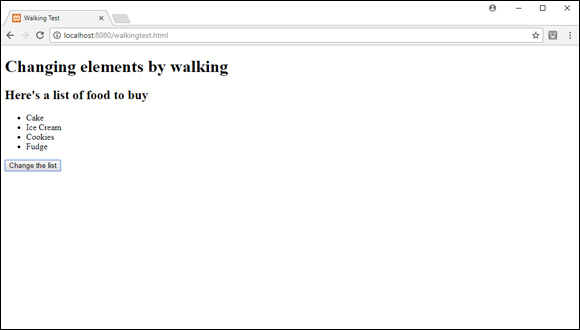
The walkingtest.html code defines an id attribute for the unordered list element, but each of the items within the list isn't uniquely identified. In order to reference them, the code uses the firstChild and nextSibling object property values to walk its way through the list of items. When you click the button, all the items in the list are replaced, as shown in Figure 2-5.
The code finds the ul object by using the id attribute value of the ul element. It assigns that object to the variable spot. Then the code can reference the individual list items based on that location in the DOM tree. The first child of the ul object is the first li object for the list. The firstChild property returns a pointer to that object, which the code stores in the item1 variable. Next, the code uses the nextSibling property of the item1 variable, which returns a pointer to the next item in the list and is stored in the item2 variable. That continues on, using the nextSibling property for each item to find the next item in the list. After the code retrieves pointers to all the list items, it uses the innerHTML property to change the text for each item.
Be careful how you create the list in the code. If you place each list item on a separate line, the code won't work! That's because the browser assigns any white space between elements as a text object in the DOM. So the nextSibling property will point to the new line character text object and not the next li object in the list! It’s important to remember that when working with the positional properties of objects.
Working with Document Object Model Form Data
When you use HTML5 forms in your web pages, you usually incorporate quite a few different elements — text boxes, text areas, check boxes, and radio buttons. Your JavaScript code can use the DOM tree objects to manipulate all these elements. The following sections show you how to use the DOM tree to work with different types of form elements.
Text boxes
Handling data in a text input element is a little different from what I did with the p element. Because the input element is a one-sided tag, there’s no innerHTML property to store the text that's inside the text box.
Instead, you need to use the value attribute of the object to read any text that may already be in the text box (whether placed there by the value attribute or typed by the site visitor). To do that, you use the value object property:
var textbox = document.getElementById("test");
var data = textbox.value;
You can also use the value property to write data to the text box. That code looks like this:
var textbox = document.getElementById("test");
var answer = prompt("Enter text to change");
textbox.value = answer;
This provides for an easy way to create a message area on your web page for displaying short messages, such as status messages. Just place a textbox input element near the bottom of the web page, and change the value property of it with any message you need to display.
There are also a few other DOM object properties associated with textbox objects that can come in handy. Table 2-5 shows the DOM textbox properties available.
Sets or retrieves the value of the autocomplete attribute
autofocus
Sets or retrieves whether the text box gets the window focus when the web page loads
defaultValue
Sets or retrieves the default value assigned to the text box
disabled
Sets or retrieves whether the text box is disabled in the form
form
Retrieves the parent form the text box belongs to
list
Retrieves the data list associated with the text box
maxLength
Sets or retrieves the maximum length of the text box
name
Sets or retrieves the name attribute for the text box
pattern
Sets or retrieves the pattern attribute for the text box
placeholder
Sets or retrieves the placeholder attribute for the text box
readOnly
Sets or retrieves whether the text box is read only
required
Sets or retrieves whether the text box is a required field in the form
size
Sets or retrieves the value of the size attribute for the text box
type
Retrieves the type of element the text box is
value
Sets or retrieves the value attribute for the text box
With these few properties, you have full control to dynamically modify any text box that appears on the web page.
Text areas
The textarea DOM object works similar to the textbox object. Instead of the innerHTML property, you use the value attribute to retrieve any text from the text area or place any new text into the text area.
There are a few other properties that are unique to the textarea object:
cols: Sets or retrieves the number of columns assigned to the text area
rows: Sets or retrieves the number of rows assigned to the text area
wrap: Sets or retrieves whether text can auto-wrap within the text area
As you can tell, you can dynamically change the size of the text area in a web page using JavaScript and the DOM object properties. That can create quite an effect as your site visitor is filling out the form.
Check boxes
The checkbox object is another oddity in the DOM. A check box in a form provides for a yes/no type of answer — either the visitor checks the check box or the box is unchecked. You can test for that condition using the DOM checked property:
var pizza = document.getElementById("pizzabox");
if (pizza.checked) {
alert("your pizza will be delivered shortly");
}
You can also set whether the check box is checked by assigning the property a true or false value:
pizza.checked = true;
Table 2-6 shows all the DOM object properties that are supported when using check boxes.
Sets or retrieves whether the check box gets the focus when the web page loads
checked
Sets or retrieves the state of the check box
defaultChecked
Retrieves the default state of the check box
defaultValue
Retrieves the default value assigned to the check box
disabled
Sets or retrieves whether the check box is disabled
form
Retrieves the parent form the check box belongs to
intermediate
Sets or retrieves the intermediate state of the check box
name
Sets or retrieves the name assigned to the check box element
required
Sets retrieves whether the check box must be checked before submitting the form
type
Retrieves the type of element the check box is
value
Sets or retrieves the value associated with the check box
That gives you full control over how the check boxes behave in your web page.
Radio buttons
Working with radio buttons is always a complicated matter. All the radio buttons in the same group use the same name property, so the browser can handle them as a group. Remember, only one radio button in the group can be selected at any time.
Handling data from a radio button requires using the checked and value object properties, just like the checkbox object. Because all the radio buttons use the same name, the value attribute is crucial in determining if you’re working with the correct radio button in the form.
 Getting acquainted with the Document Object Model

 The
The  You may be wondering why the