WALLS & CEILINGS
BASEMENTS: WET WALLS
Basement moisture can destroy your efforts to create functional living space. Over time, even small amounts of moisture can rot framing, turn wallboard to mush, and promote the growth of mold and mildew. Before proceeding with your basement project, you must deal with any moisture issues. The good news is that moisture problems can be resolved, often very easily.
Basement moisture appears in two forms: condensation and seepage. Condensation comes from airborne water vapor that turns to water when it contacts cold surfaces. Vapor sources include humid outdoor air, poorly ventilated appliances, damp walls, and water released from concrete. Seepage is water that enters the basement by infiltrating cracks in the foundation or by leeching through masonry, which is naturally porous. Often caused by ineffective exterior drainage, seepage comes from rain or groundwater that collects around the foundation or from a rising water table.
If you have a wet basement, you’ll see evidence of moisture problems. Typical signs include peeling paint, white residue on masonry (called efflorescence), mildew stains, sweaty windows and pipes, rusted appliance feet, rotted wood near the floor, buckled floor tile, and strong mildew odor.
To reduce condensation, run a high-capacity dehumidifier in the basement. Insulate cold-water pipes to prevent condensate drippage, and make sure your dryer and other appliances have vents running to the outside. Extending central air conditioning service to the basement can help reduce vapor during warm, humid months.
Crawlspaces can also promote condensation, as warm, moist air enters through vents and meets cooler interior air. Crawlspace ventilation is a source of ongoing debate, and there’s no universal method that applies to all climates. It’s best to ask the local building department for advice on this matter.
Solutions for preventing seepage range from simple do-it-yourself projects to expensive, professional jobs requiring excavation and foundation work. Since it’s often difficult to determine the source of seeping water, it makes sense to try some common cures before calling in professional help. If the simple measures outlined here don’t correct your moisture problems, you must consider more extensive action. Serious water problems are typically handled by installing footing drains or sump pump systems. Footing drains are installed around the foundation’s perimeter, near the footing, and they drain out to a distant area of the yard. These usually work in conjunction with waterproof coatings on the exterior side of the foundation walls. Sump systems use an interior underslab drainpipe to collect water in a pit, and water is ejected outside by an electric sump pump.
Installing a new drainage system is expensive and must be done properly. Adding a sump system involves breaking up the concrete floor along the basement’s perimeter, digging a trench, and laying a perforated drainpipe in a bed of gravel. After the sump pit is installed, the floor is patched with new concrete. Installing a footing drain is far more complicated. This involves digging out the foundation, installing gravel and drainpipe, and waterproofing the foundation walls. A footing drain is considered a last-resort measure.
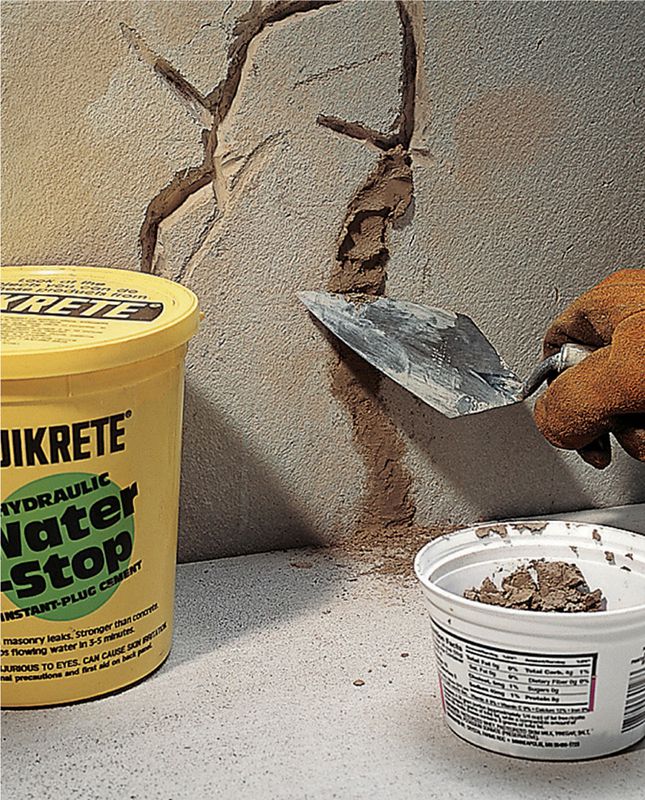
Repairing cracks restores the integrity of concrete foundation walls that leak, but it is often only a temporary fix. Selecting an appropriate repair product and doing careful preparation will make the repair more long lasting. A hydraulic concrete repair product like the one seen here is perfect for basement wall repair because it actually hardens from contact with water.
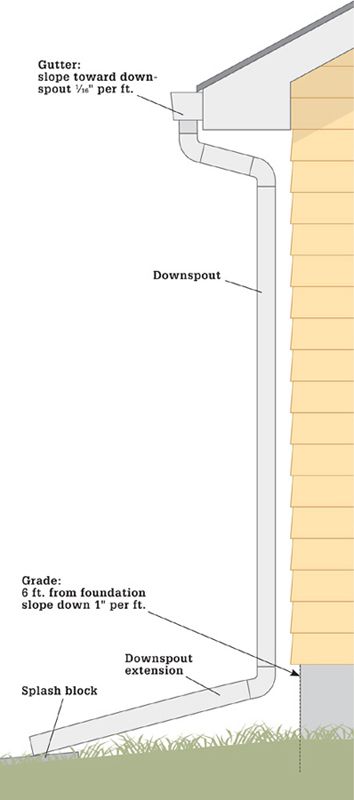
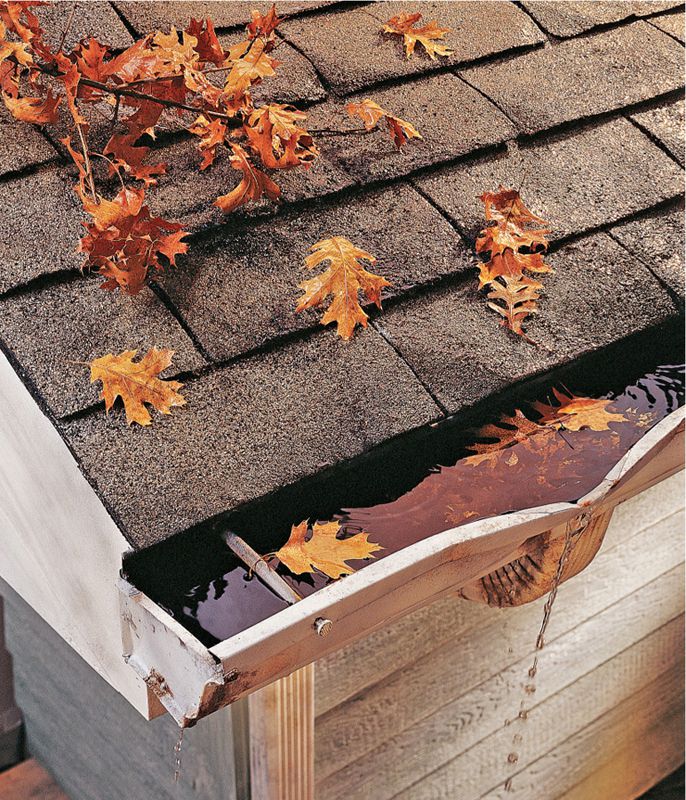
Improve your gutter system and foundation grade to prevent rainwater and snowmelt from flooding your basement. Keep gutters clean and straight. Make sure there’s a downspout for every 50 ft. of roof eave, and extend downspouts at least 8 ft. from the foundation. Build up the grade around the foundation so that it carries water away from the house.
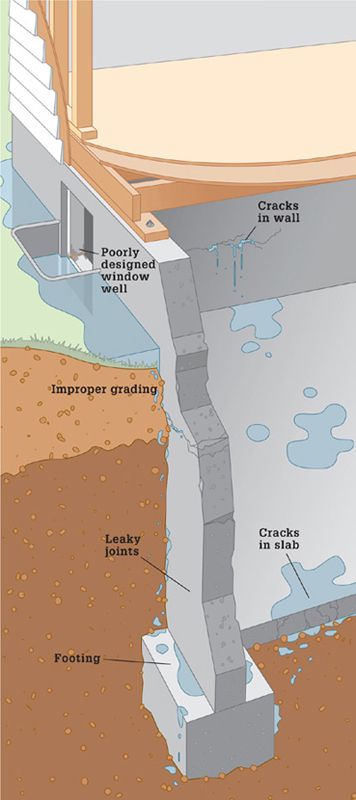
Common causes of basement moisture include improper grading around the foundation, inadequate or faulty gutter systems, condensation, cracks in foundation walls, leaky joints between structural elements, and poorly designed window wells. More extensive problems include large cracks in the foundation, damaged or missing drain tiles, a high water table, or the presence of underground streams. Often, a combination of factors is at fault.
 HOW TO SEAL CRACKS IN A FOUNDATION WALL
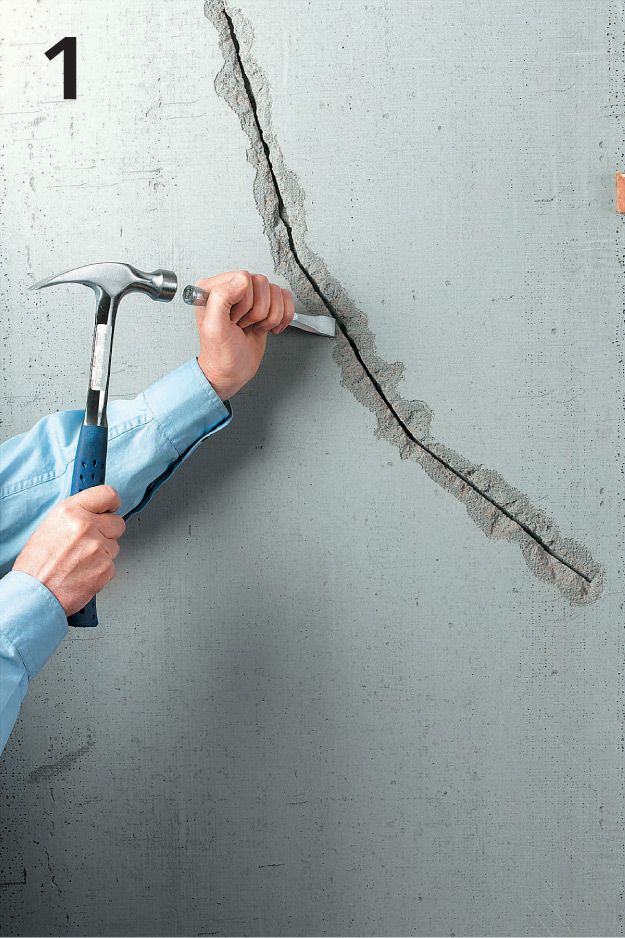
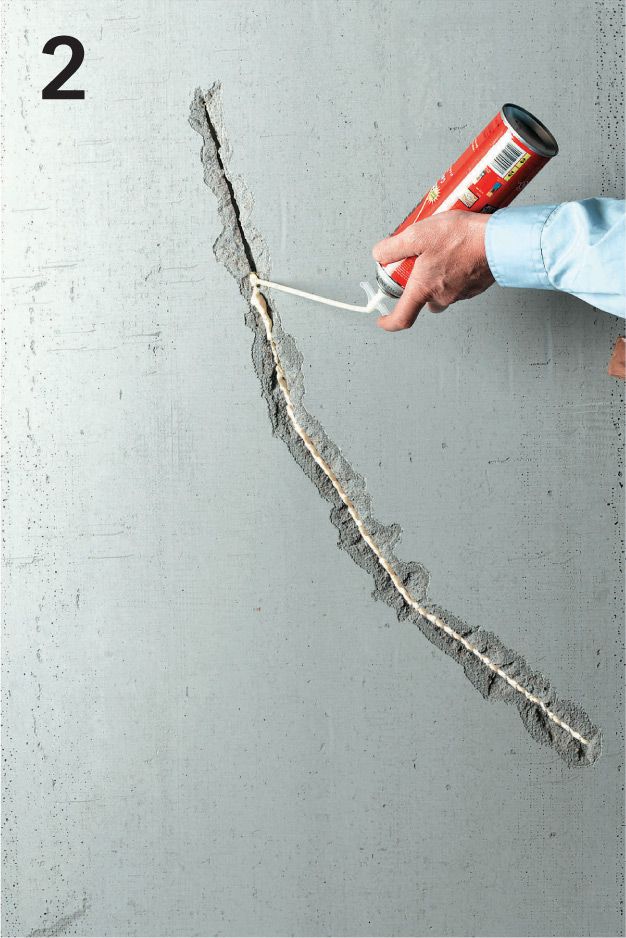
To repair a stable crack, chisel cut a keyhole cut that’s wider at the base then at the surface, and no more than 1/2" deep. Clean out the crack with a wire brush.
To help seal against moisture, fill the crack with expanding insulating foam, working from bottom to top.
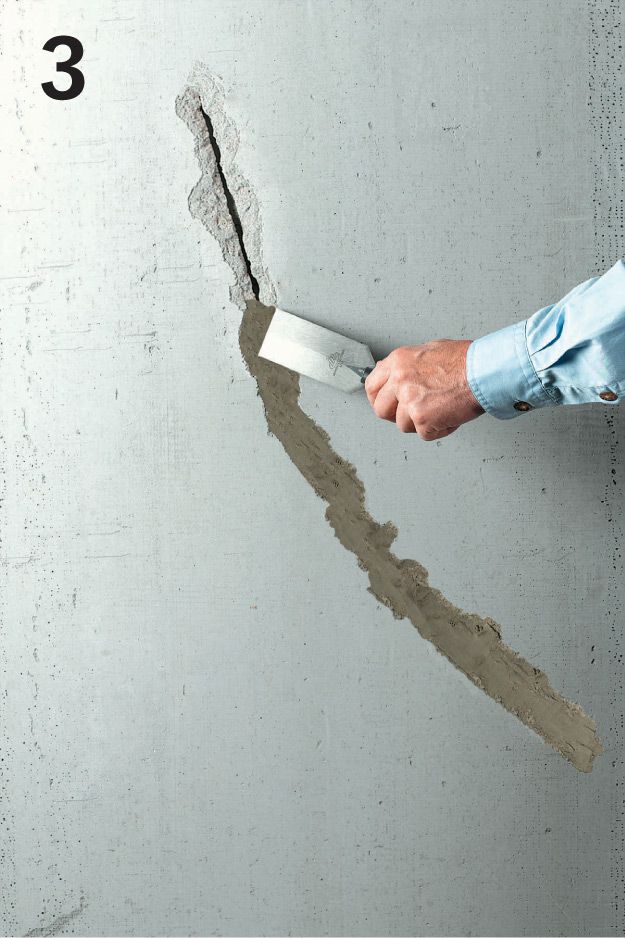
Mix hydraulic cement according to the manufacturer’s instructions, then trowel it into the crack, working from the bottom to top. Apply cement in layers no more than 1/4" thick, until the patch is slightly higher than the surrounding area. Feather cement with the trowel until it’s even with the surface. Allow to dry thoroughly.
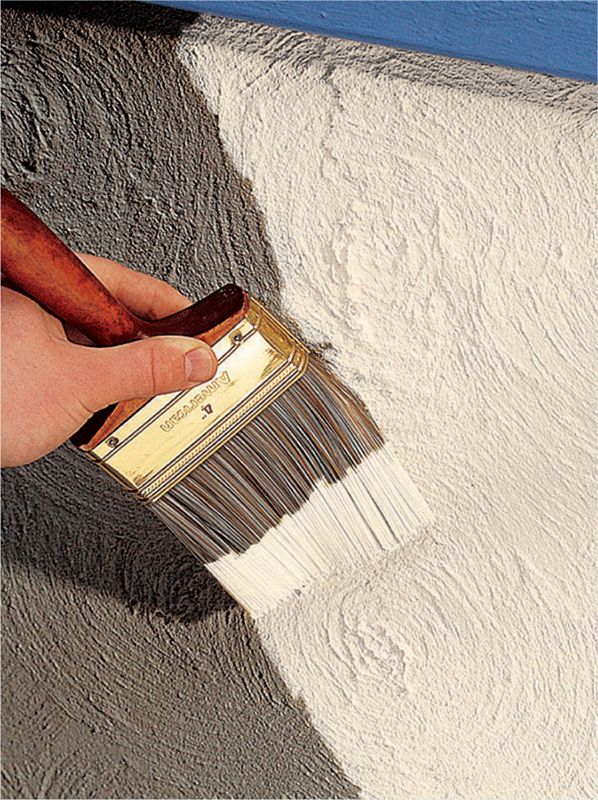
HOW TO SKIM-COAT A FOUNDATION WALL
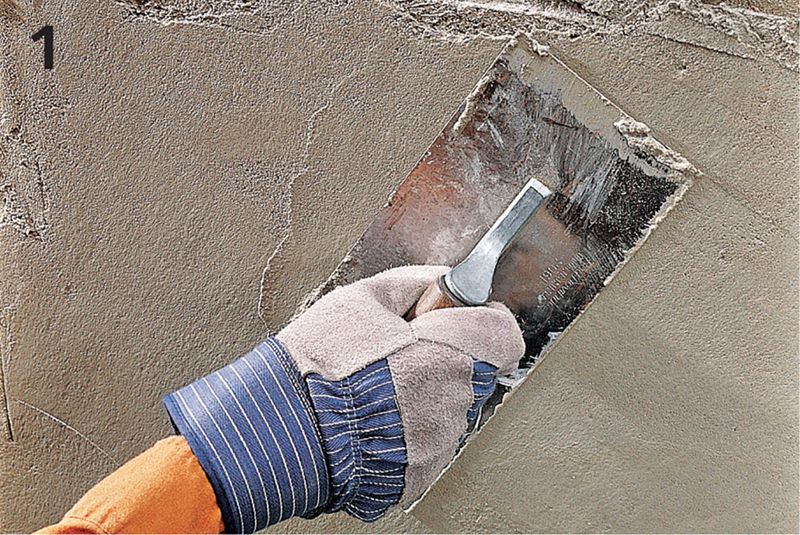
Resurface heavily cracked masonry walls with a water-resistant masonry coating such as surface bonding cement. Clean and dampen the walls according to the coating manufacturer’s instructions, then fill large cracks and holes with the coating. Finally, plaster a 1/4" layer of the coating on the walls using a square-end trowel. Specially formulated heavy-duty masonry coatings are available for very damp conditions.
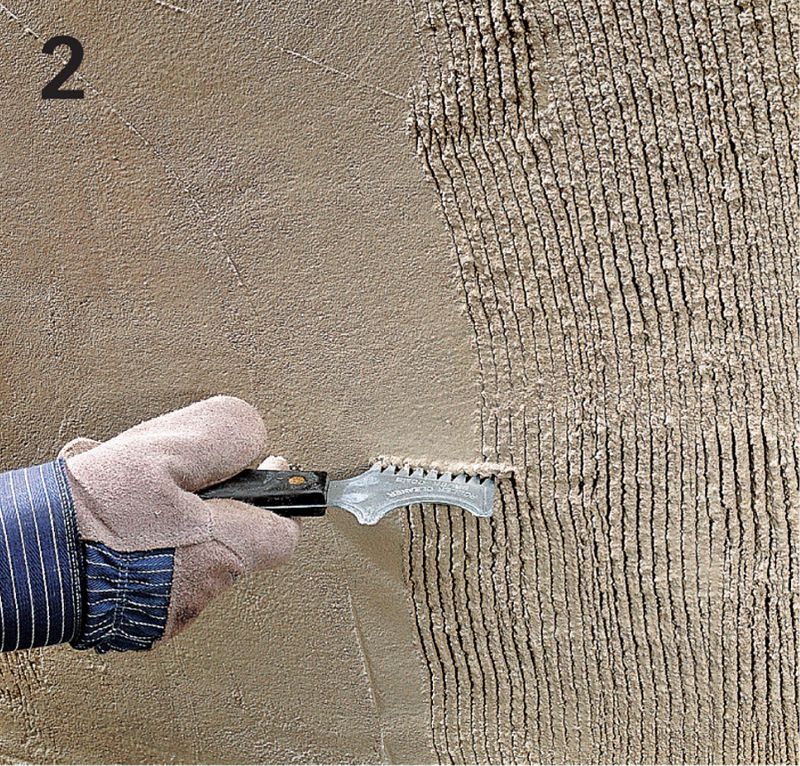
Scratch the surface with a paintbrush cleaner or a homemade scratching tool after the coating has set up for several hours. After 24 hours, apply a second, smooth coat. Mist the wall twice a day for three days as the coating cures.
PREVENTING MOISTURE IN BASEMENTS
Clean your gutters and patch any holes. Make sure the gutters slope toward the downspouts at about 1/16" per ft. Add downspout extensions and splash blocks to keep roof runoff at least 8 ft. away from the foundation.
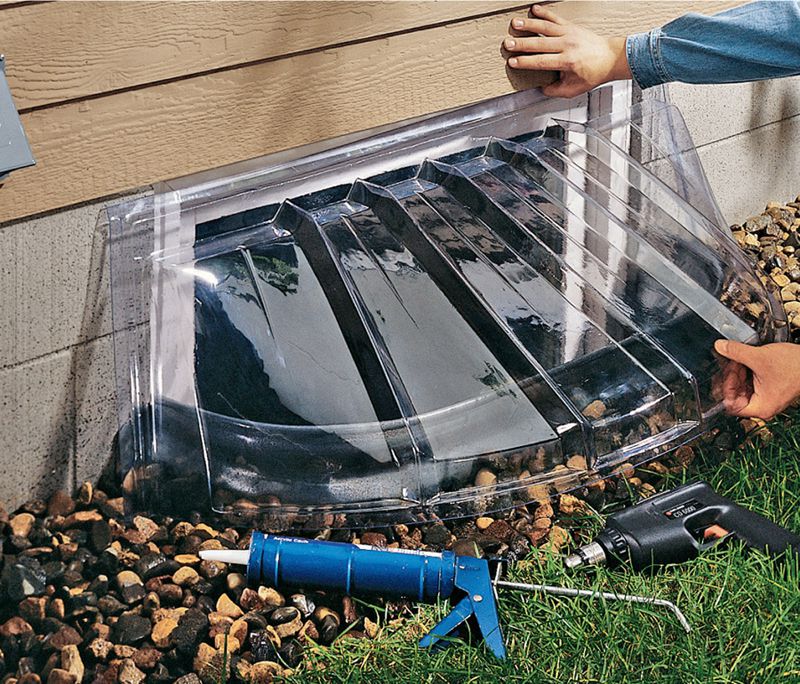
Cover window wells that will otherwise allow water into a basement. Covering them with removable plastic is the easiest way to keep them dry. Covers on egress window wells must be easily removed from inside (see pages 561 to 566). If you prefer to leave wells uncovered, add a gravel layer and a drain to the bottom of the well. Clean the well regularly to remove moisture-heavy debris.
DRAINAGE SOLUTION: HOW TO RE-GRADE
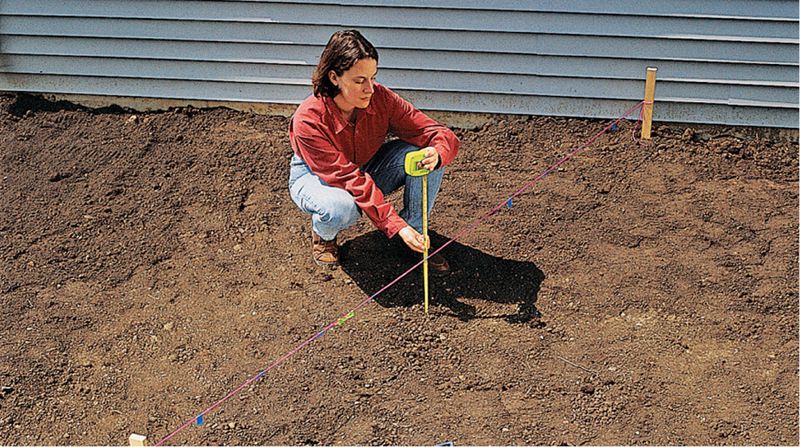
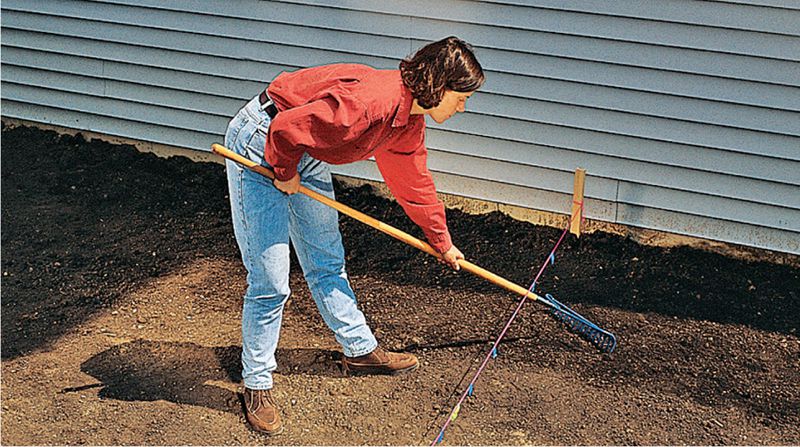
Establish the drainage slope. The yard around your house should slant away from the house at a minimum slope of 3/4" per ft. for at least 10 ft. Till the soil or add new soil around the house perimeter. Drive a wood stake next to the house and another 10 ft. out. Tie a level mason’s string between the stakes, and then move the string down at least 2 1/2" at the end away from the house, establishing your minimum slope.
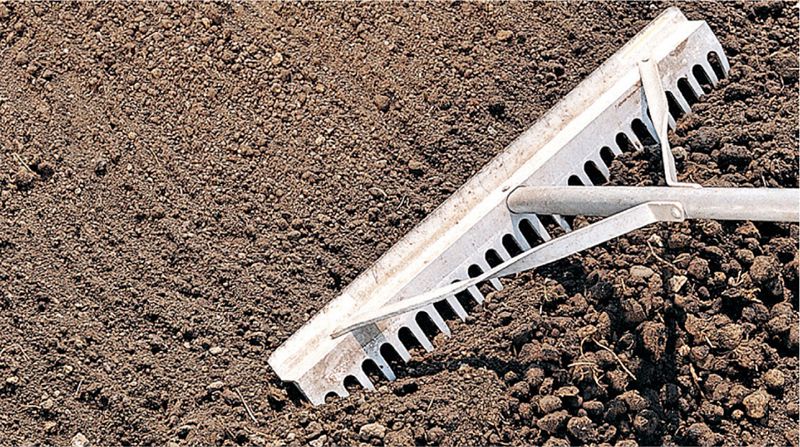
Redistribute the soil with a steel garden rake so the grade follows the slope line. Add topsoil at the high end if needed. Do not excavate near the end of the slope to accommodate the grade. The goal is to build up the yard to create runoff.
Use a grading rake to smooth out the soil so it slopes at an even rate. Drive additional stakes and tie off slope lines as necessary.
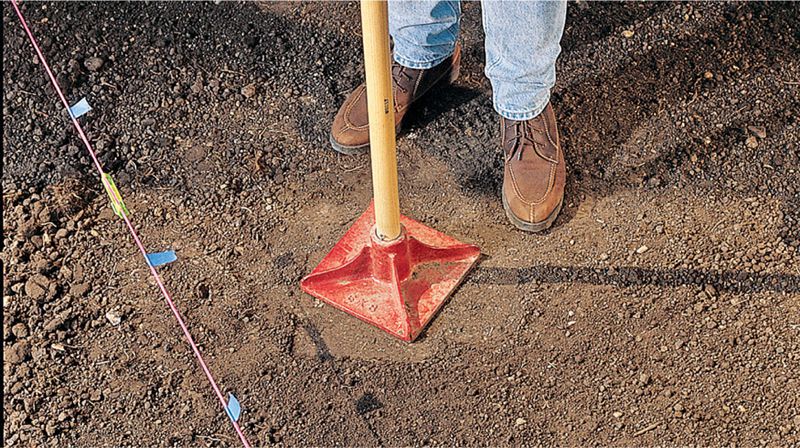
Tamp the soil with a hand tamper or plate compactor. Fill in any dips that occur with fresh dirt. Lay sod or plant grass or groundcover immediately.
DRAINAGE SOLUTION: HOW TO INSTALL A DRY WELL
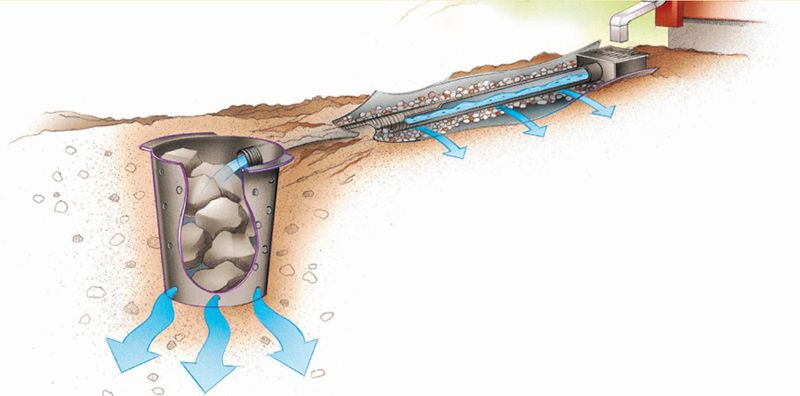
A dry well is a simple way to channel excess water out of low-lying or water-laden areas, such as the ground beneath a gutter downspout. A dry well system (see previous page) typically consists of a buried drain tile running from a catch basin positioned at the problem spot to a collection container some distance away.
A dry well system is easy to install and surprisingly inexpensive. In the project shown here, a perforated plastic drain tile carries water from a catch basin to a dry well fashioned from a plastic trash can that has been punctured, then filled with stone rubble. The runoff water percolates into the soil as it makes its way along the drainpipe and through the dry well.
The how-to steps of this project include digging the trench with a shovel. If the catch basin is a long distance from the problem area, you may want to rent a trencher to dig the trench quickly. Call local utility companies to mark the location of underground mechanicals before you start to dig.
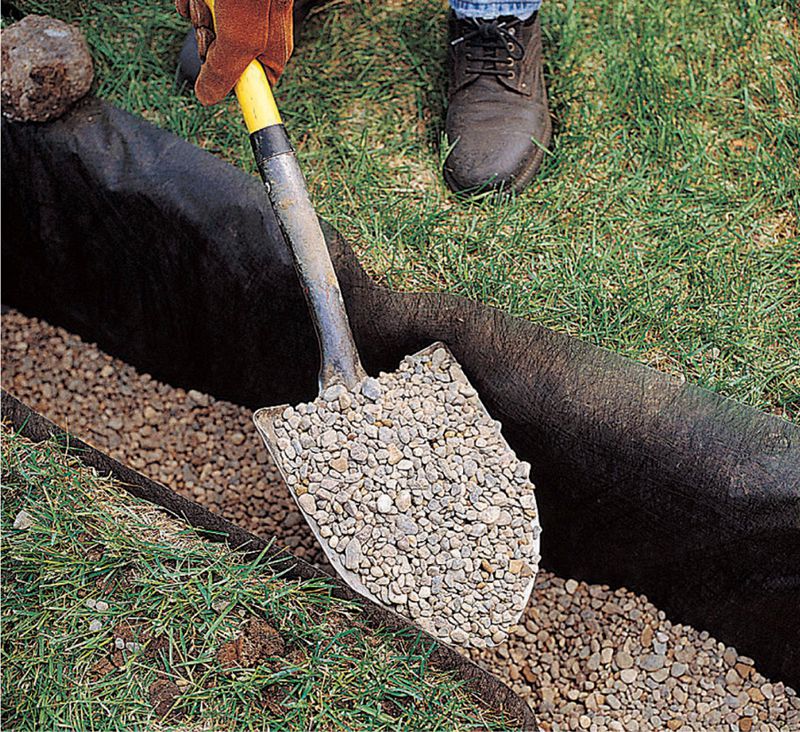
Dig a trench (10" wide,14" deep) from the area where the water collects to the catch basin location, sloping the trench 2" per 8 ft. Line the trench with landscape fabric and then add a 1" layer of gravel on top of the fabric.
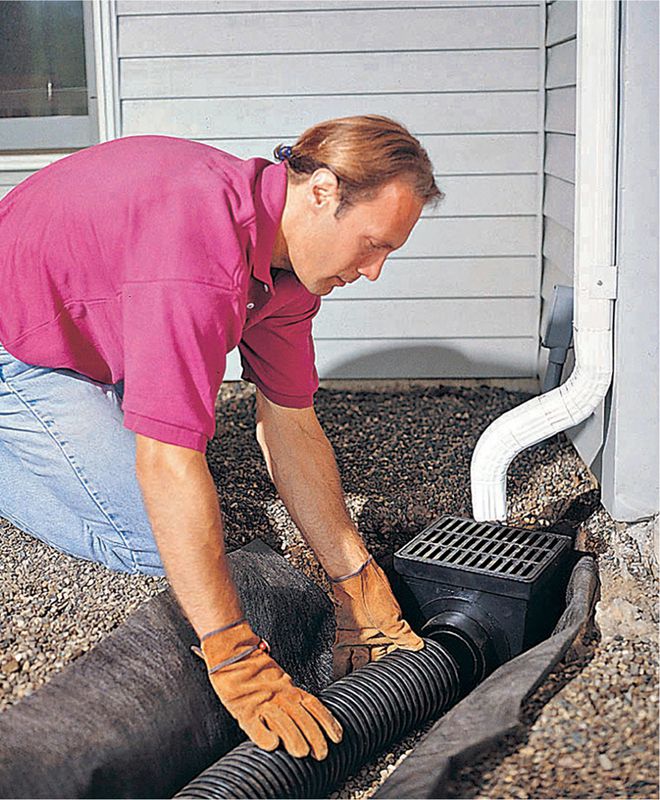
Set a length of perforated drain tile on the gravel running the full length of the trench. If the trench starts at a downspout, position a grated catch basin directly beneath the downspout and attach the end of the drain tile to the outlet port.
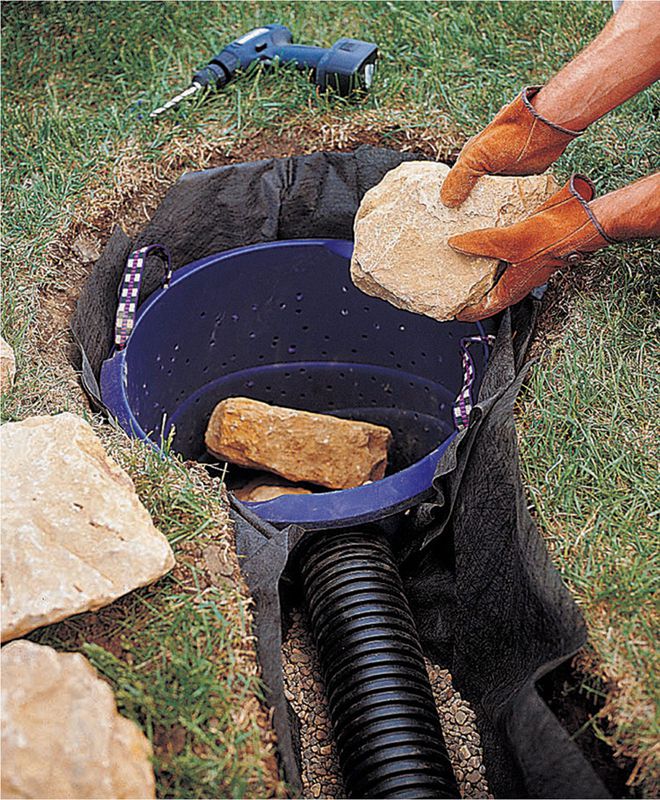
Install the dry well by digging a hole that’s big enough to hold a plastic trash can. Drill 1" holes through the sides and bottom of the can every 4 to 6". Also cut an access hole at the top of the can for the drain tile. Set the can in the hole and insert the free end of the tile. Backfill dirt over the tile and trench and plant grass or cover with sod.