WINDOWS & DOORS
WINDOWS: INSTALLING: EGRESS
If your home has an unfinished or partially finished basement, it’s an enticing and sensible place to expand your practical living space. Another bedroom or two, a game room, or maybe a spacious home office are all possibilities. However, unless your basement has a walk-out doorway, you’ll need to add an egress window to make your new living space meet most building codes. That’s because the International Residential Code (IRC) requires two forms of escape for every living space—an exit door and a window large enough for you to climb out of or for an emergency responder to enter.
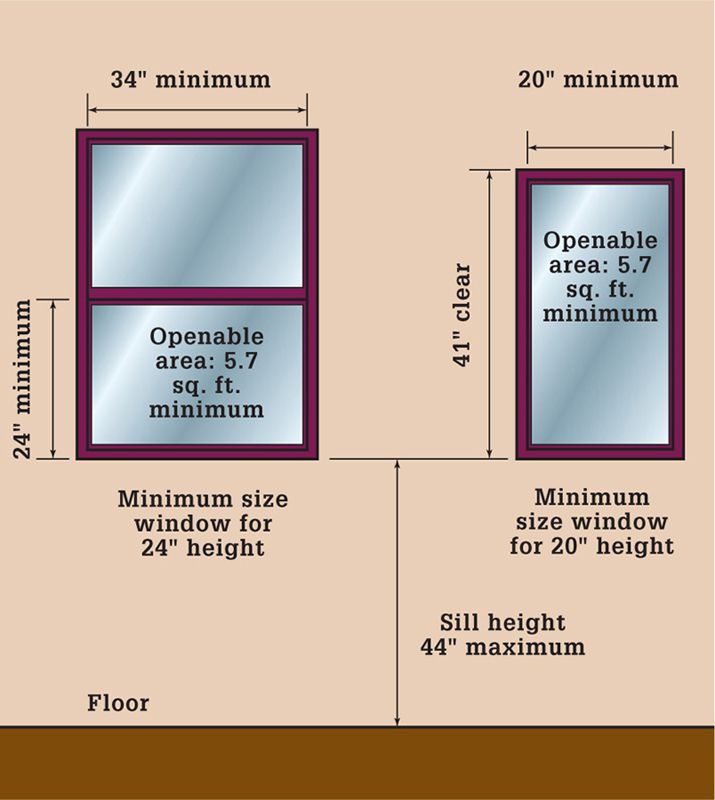
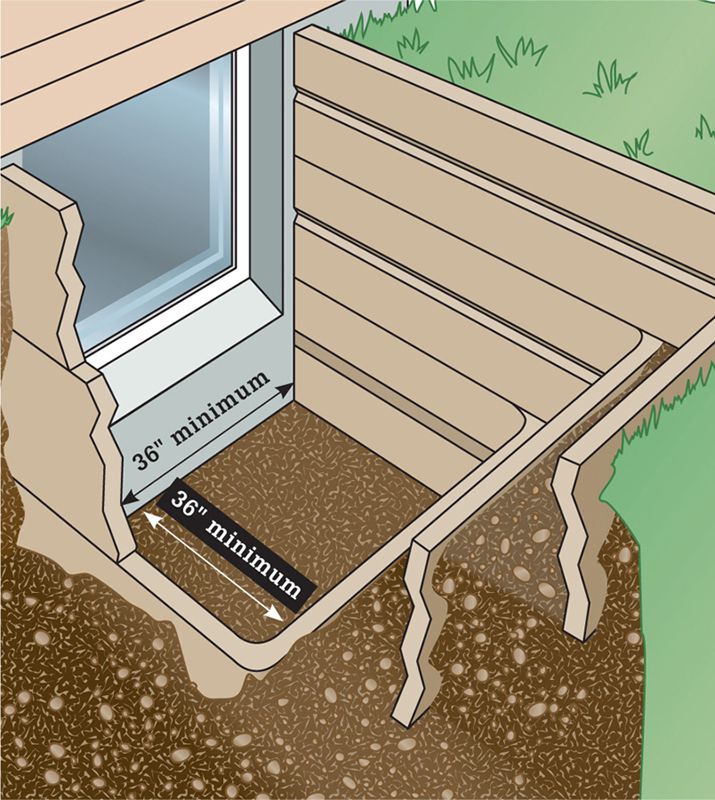
Code mandates that a below-ground egress window will have a minimum opening area of at least 5.7 square feet. There are stipulations about how this open area can be proportioned: The window must be at least 20 inches wide and 24 inches high when open. Additionally, the installed window’s sill height must be within 44 inches of the basement floor to permit easy escape. Typical basement windows do not meet these requirements. A large egress window requires an oversized window well. The well must be at least 36 inches wide and project 36 inches or more from the foundation. If the window well is deeper than 44 inches, it must have a fixed ladder for escape.
What does this all mean for the ambitious do-it-yourselfer? The good news is that if you’ve got the nerve to cut an oversized opening in your home’s foundation, and you don’t mind spending some quality time with a shovel, installing a basement egress window is a manageable project. Here’s a case where careful planning, a building permit, and some help can save you considerable money over hiring a contractor to do the work. To see a complete step-by-step egress window and well installation, see pages 562 to 566. Contact your local building department to learn more about specific egress requirements that apply to your area.
In order to satisfy building codes for egress, a basement window must have a minimum opening of 5.7 sq. ft. through one sash, with at least 20" of clear width and 24" of clear height. Casement, double-hung, and sliding window styles can be used, as long as their dimensions for width and height meet these minimum requirements.
Egress window wells must be at least 36" wide and project 36" from the foundation. Those deeper than 44" must have a means of escape, such as a tiered design that forms steps or an attached ladder. Drainage at the bottom of the well should extend down to the foundation footing drain, with pea gravel used as the drainage material.
 HOW TO INSTALL AN EGRESS WINDOW & WINDOW WELL
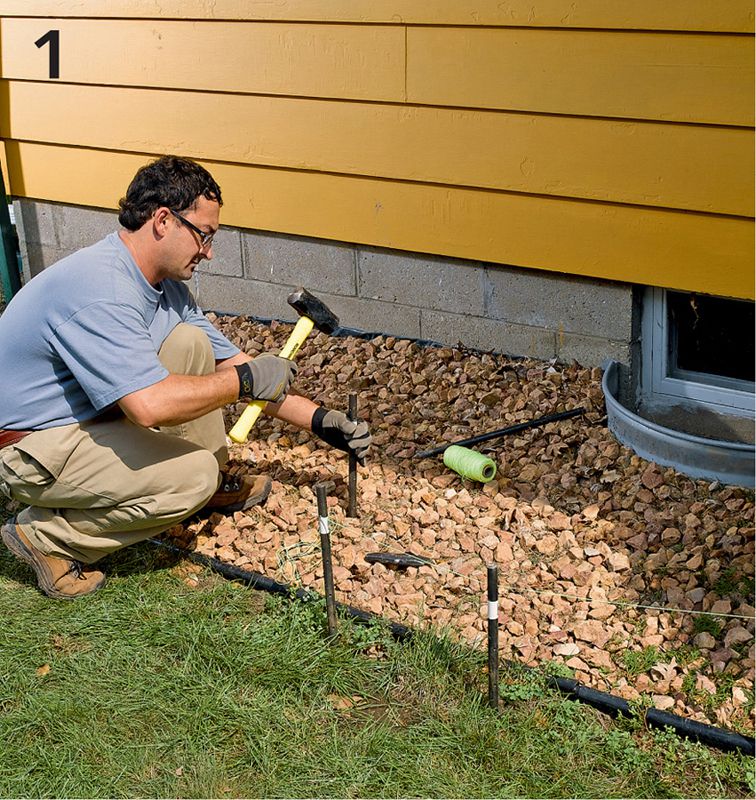
Lay out the border of the window well area with stakes and string. Plan the length and width of the excavation to be several feet larger than the window well’s overall size to provide extra room for installation and adjustment.
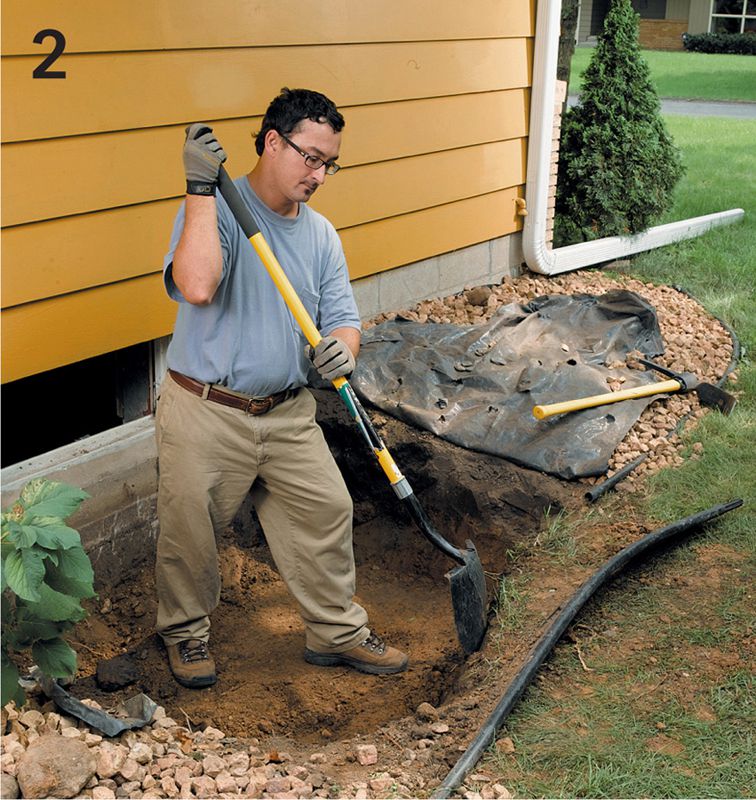
Excavate the well to a depth 6 to 12" deeper than the well’s overall height to allow room for drainage gravel. Make sure to have your local public utilities company inspect the well excavation area and okay it for digging before you start.
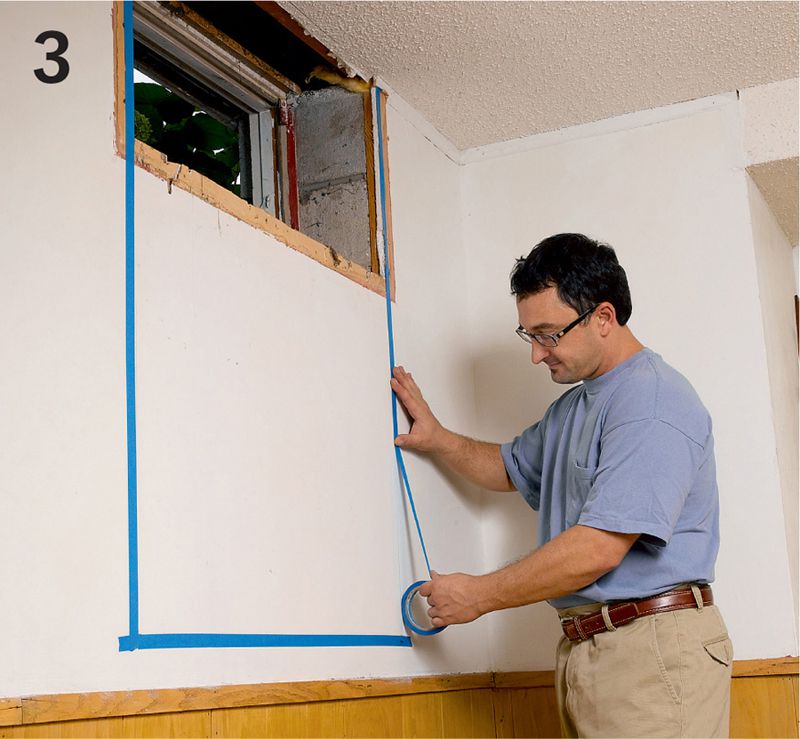
Measure and mark the foundation wall with brightly colored masking tape to establish the overall size of the window’s rough opening (here, we’re replacing an existing window). Be sure to take into account the window’s rough opening dimensions, the thickness of the rough framing (usually 2x stock), and the width of the structural header you may need to build. Remember also that sill height must be within 44" of the floor. Remove existing wall coverings inside the layout area.
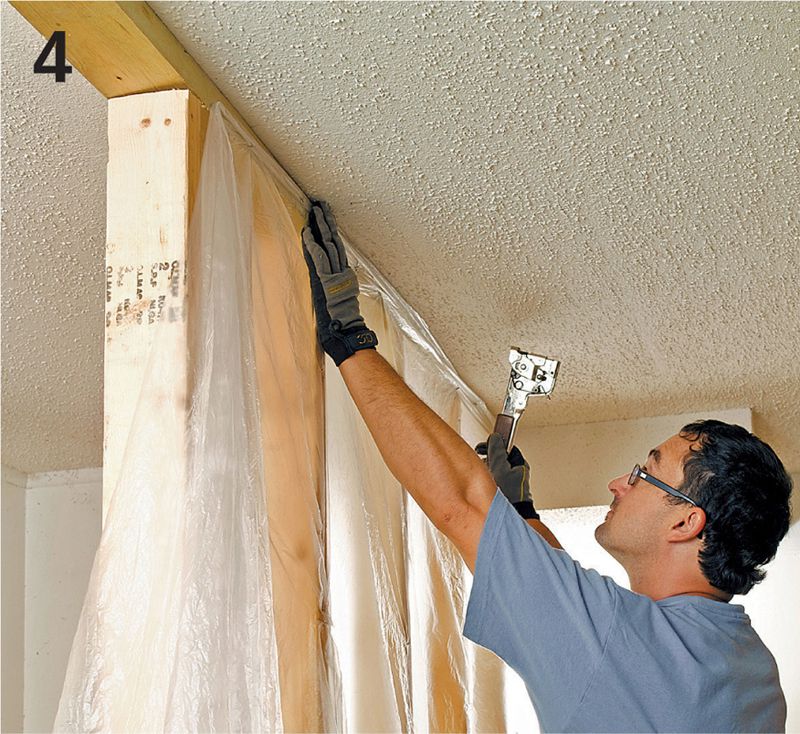
If the floor joists run perpendicular to your project wall, build a temporary support wall parallel to the foundation wall and 6 to 8 ft. from it. Staple sheet plastic to the wall and floor joists to form a work tent that will help control concrete dust.
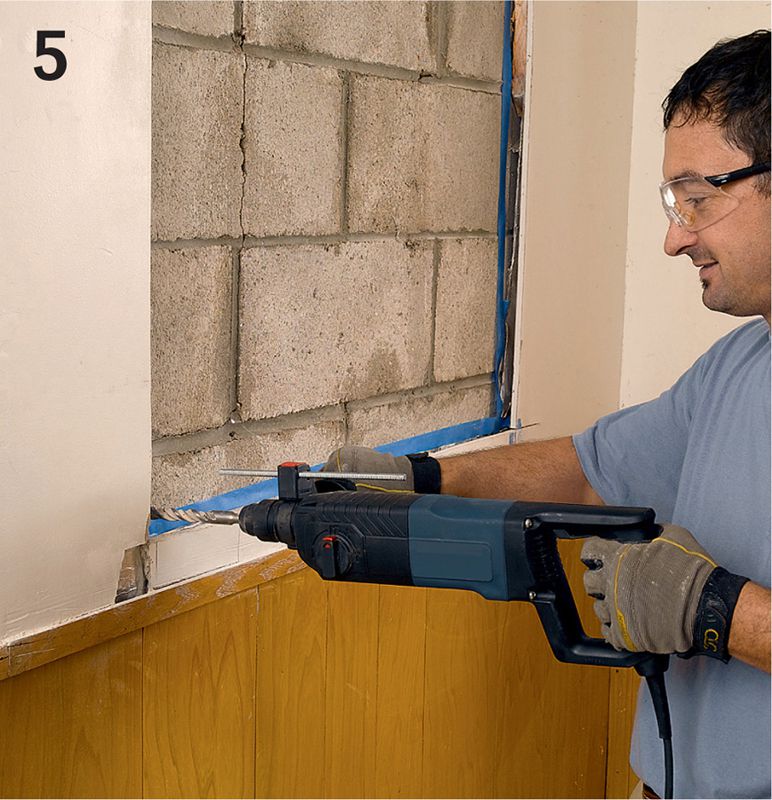
Drill reference holes at each bottom corner with a hammer drill and long masonry bit. These holes will provide reference points for cutting from both sides, ensuring clean breaks.
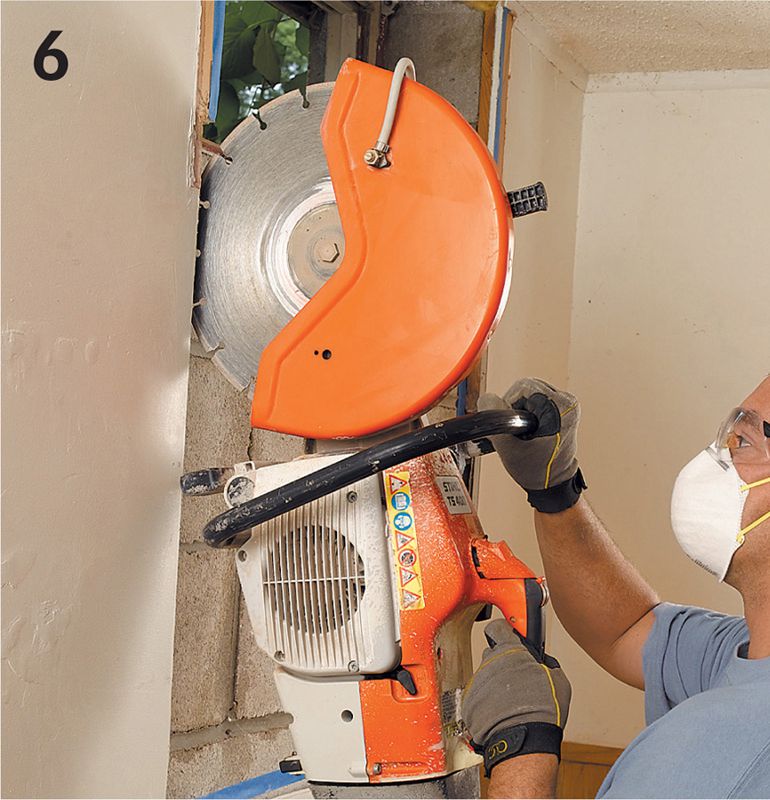
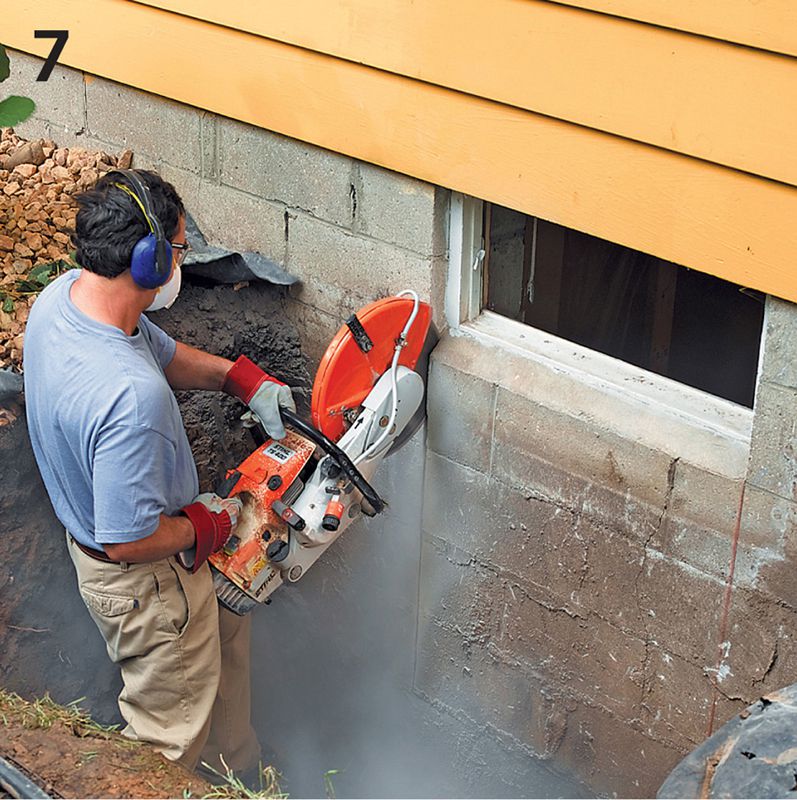
Equip a masonry cutting saw (or large angle grinder) with a diamond blade and set it for a 1/2" cut to score the blocks first. Then reset the saw to full depth and make the final bottom and side cuts through the blocks. Wear a tight-fitting particle mask, ear and eye protection, and gloves for all of this cutting work; the saw will generate a tremendous amount of thick dust. Feed the saw slowly and steadily. Stop and rest periodically so the dust can settle.
On the outside foundation wall, score the cuts, then make full-depth cuts.
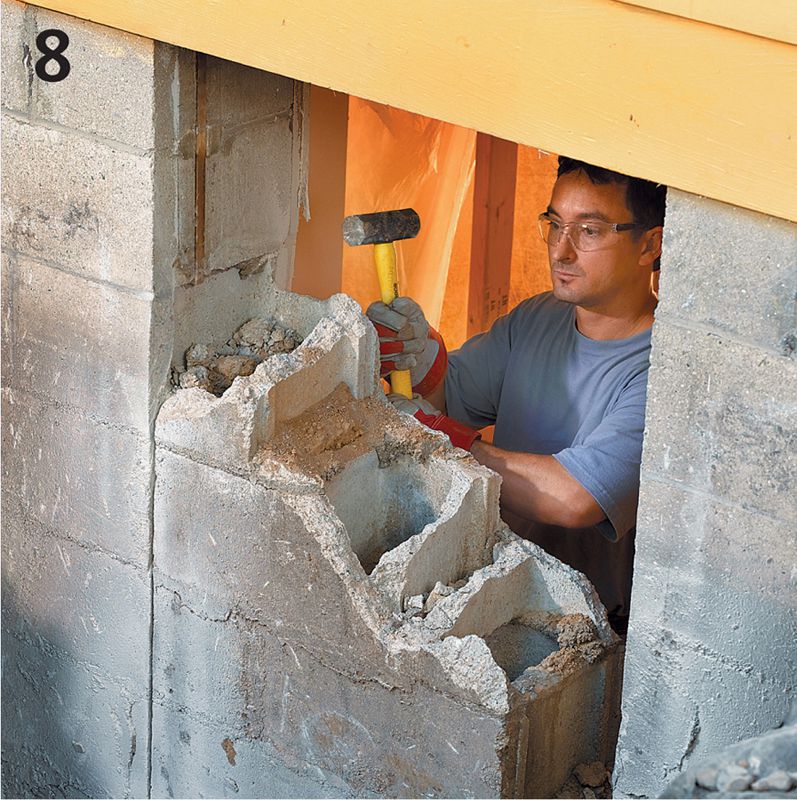
Strike the blocks with a hand maul to break or loosen the block sections. When all the blocks are removed, carefully chip away remaining debris with a cold chisel to create flat surfaces.
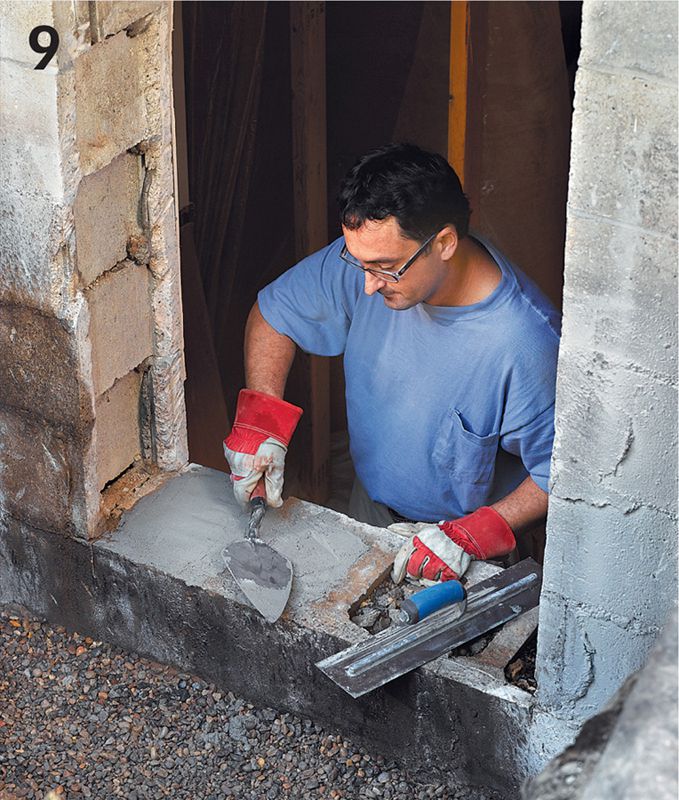
Fill the hollow voids in concrete block walls, with broken pieces of block, then level and smooth the voids by trowelling on a fresh layer of quick-curing concrete. Flatten the surfaces, and allow the concrete to dry overnight.
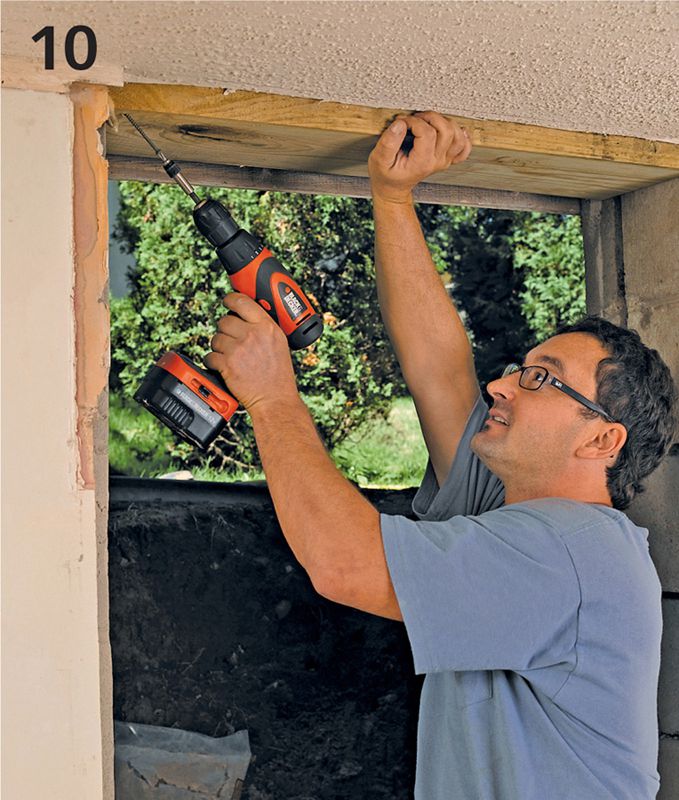
If your project requires a new header above the new window, build it from pieces of 2× lumber sandwiching 1/2" plywood and fastened together with construction adhesive and 10d nails. Slip it into place and tack it temporarily to the mudsill with 31/2" deck screws driven toenail style.
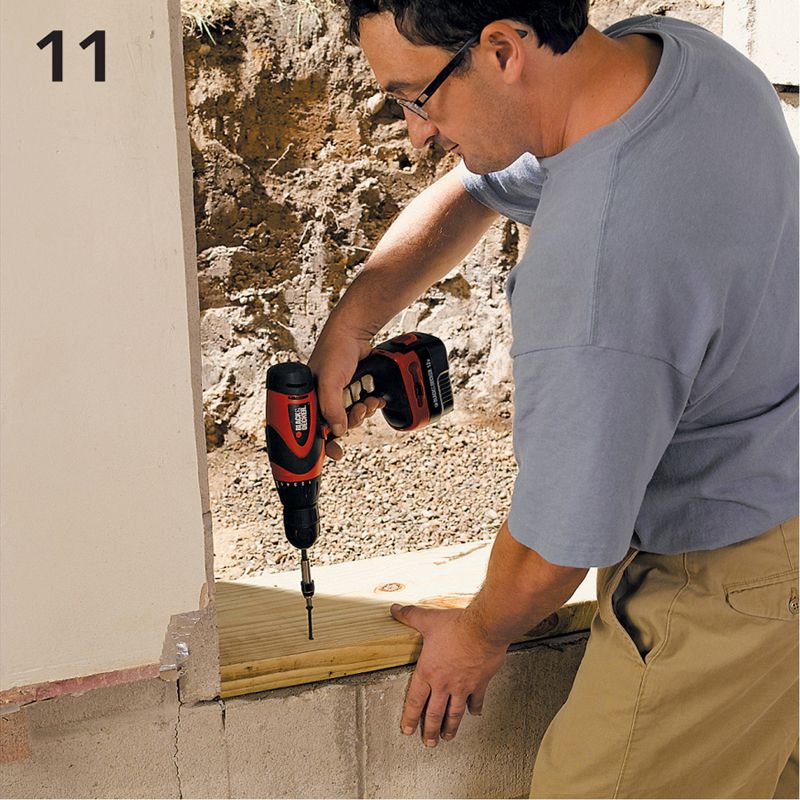
Cut the sill plate for the window’s rough frame from 2× treated lumber that’s the same width as the thickness of the foundation wall. Fasten the sill to the foundation with 3/16 × 31/4" countersunk masonry screws. Drill pilot holes for the screws first with a hammer drill.
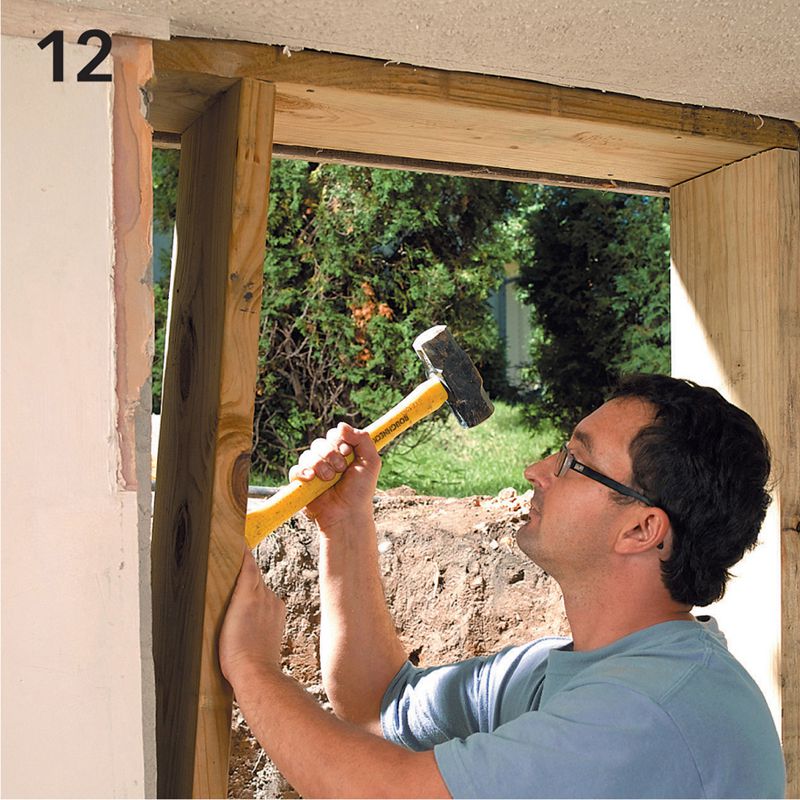
Cut two pieces of treated lumber just slightly longer than the opening so they’ll fit tightly between the new header and sill. Tap them into place with a maul. Adjust them for plumb and fasten them to the foundation with countersunk masonry screws or powder-actuated fasteners.
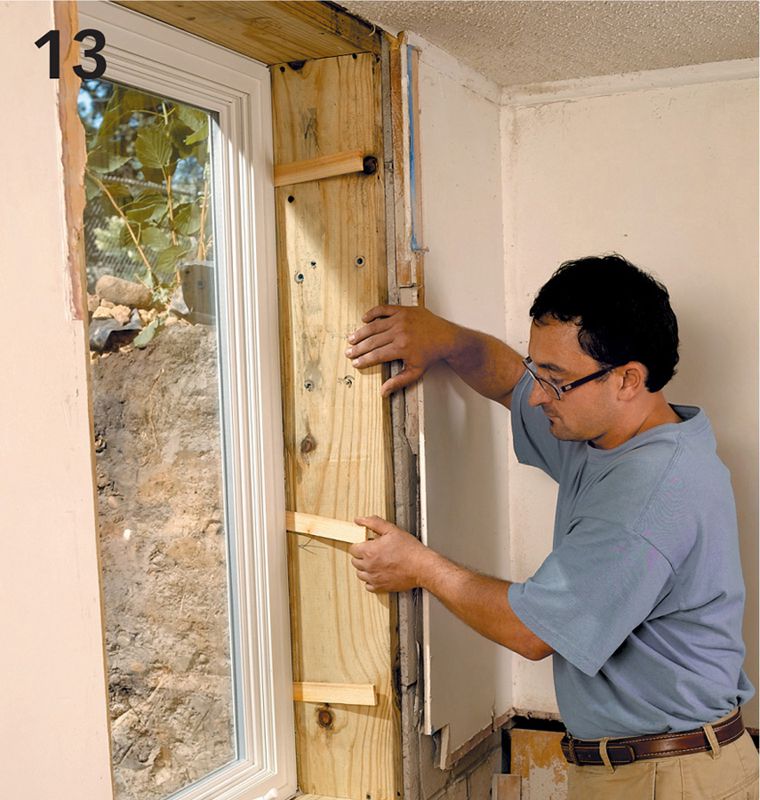
Apply a thick bead of silicone caulk around the outside edges of the rough frame and set the window in its opening, seating the nailing flanges into the caulk. Shim the window so the frame is level and plumb. Test the action of the window to make sure the shims aren’t bowing the frame.
Attach the window’s nailing flanges to the rough frame with screws or nails, as specified by the manufacturer. Check the window action periodically as you fasten it to ensure that it still operates smoothly.
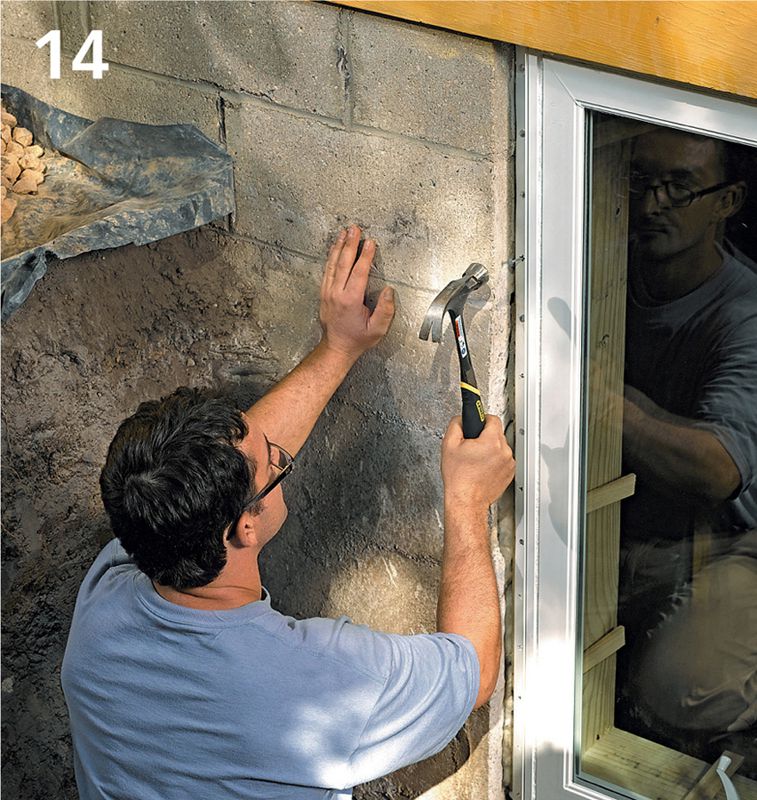
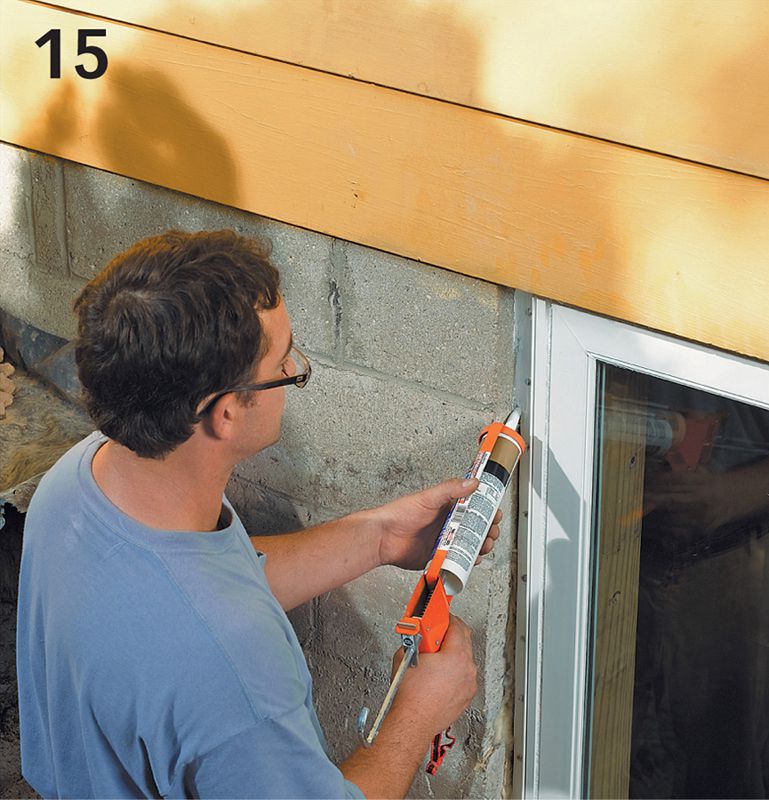
Seal gaps between the rough frame and the foundation with a bead of exterior silicone or polyurethane caulk. If the gaps are wider than 1/4", insert a piece of backer rod first, then cover it with caulk. On the interior, fill gaps around the window shims with strips of foam backer rod, fiberglass insulation, or a bead of minimally expanding spray foam. Do not distort the window frame.
Fill the well excavation with 6 to 12" of pea gravel. This will serve as the window’s drain system. Follow the egress well kit instructions to determine the exact depth required; you may need to add more gravel so the top of the well will be above the new window. Note: We added a drain down to the foundation’s perimeter tile for improved drainage as well.
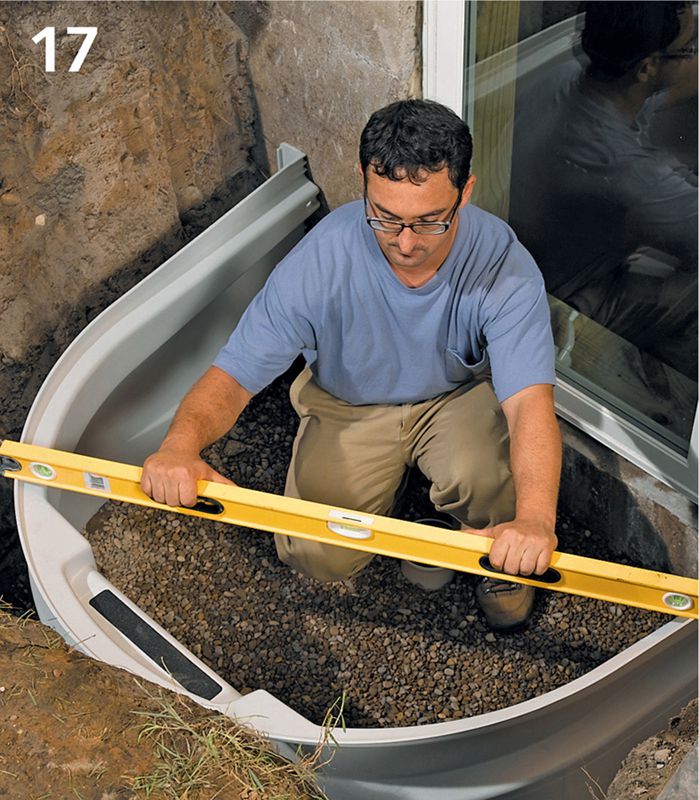
Set the bottom section of the well into the hole, and position it evenly from left to right relative to the window. Adjust the gravel surface to level the well section carefully.
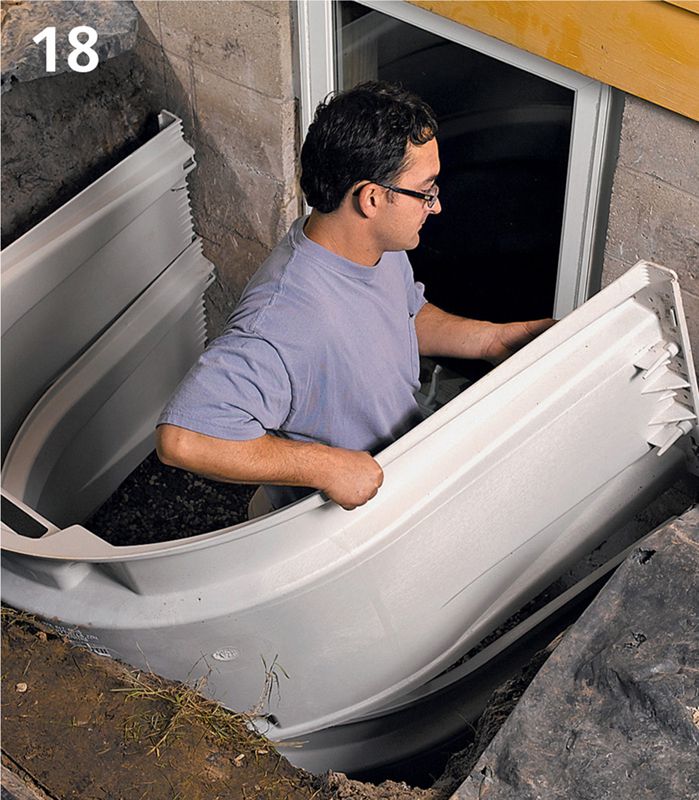
Stack the second well section on top of the first, and connect the two with the appropriate fasteners.
Fasten the window well sections to the foundation wall with concrete sleeve anchors driven into prebored pilot holes. You could also use masonry nails driven with a powder-actuated tool.
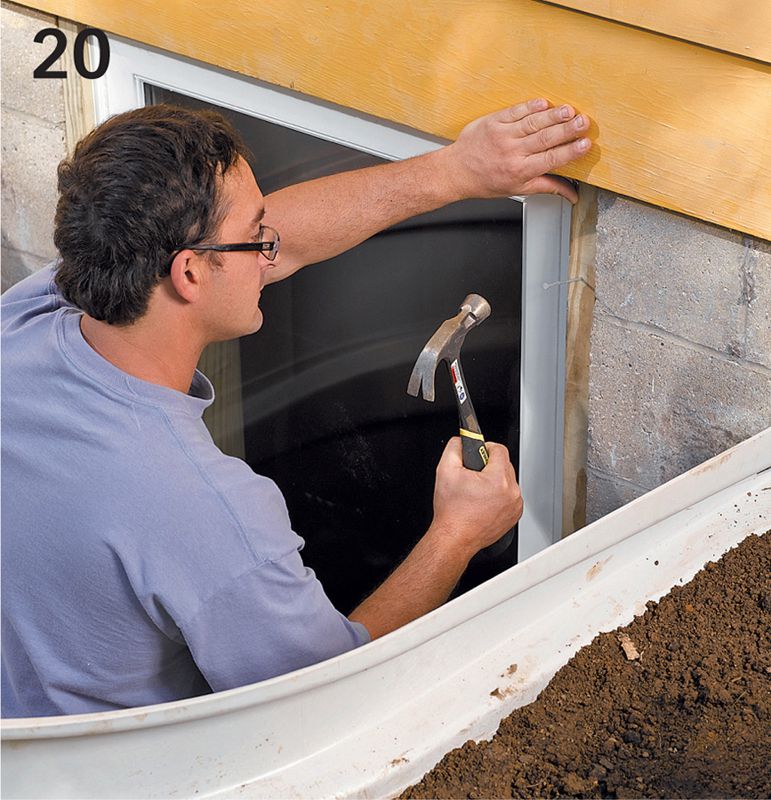
When all the well sections are assembled and secured, nail pieces of trim around the window frame to hide the nailing flange. Complete the well installation by using excavated dirt to backfill around the outside of the well. Pack the soil with a tamper, creating a slope for good drainage. If you are installing a window well cover, set it in place and fasten it according to the manufacturer’s instructions. The cover must be removable.
