CABINETS & COUNTERTOPS
MEDICINE CABINETS
Common bathroom cabinets include vanities, medicine cabinets, linen cabinets, and “tank topper” cabinets that mount over the toilet area. See pages 253 to 259 for more information on cabinets.
When installing cabinets in a damp location, like a bathroom, choose the best cabinets you can afford. Look for quality indicators, like doweled construction, hardwood doors and drawers, and high-gloss, moisture-resistant finishes. Avoid cabinets with sides or doors that are painted on one side and finished with laminate or veneer on the other because these cabinets are more likely to warp.
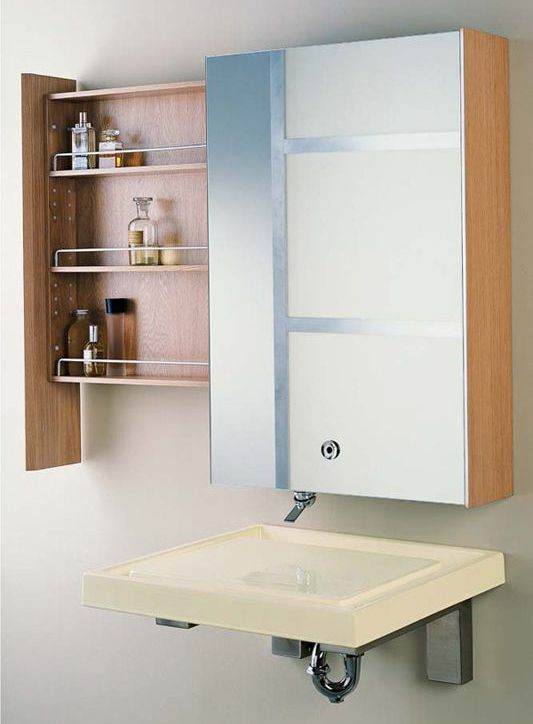
A medicine cabinet is wall-mounted or recessed above a lavatory sink. They are better suited for storing toiletries than medicine.
 HOW TO INSTALL A SURFACE-MOUNTED MEDICINE CABINET
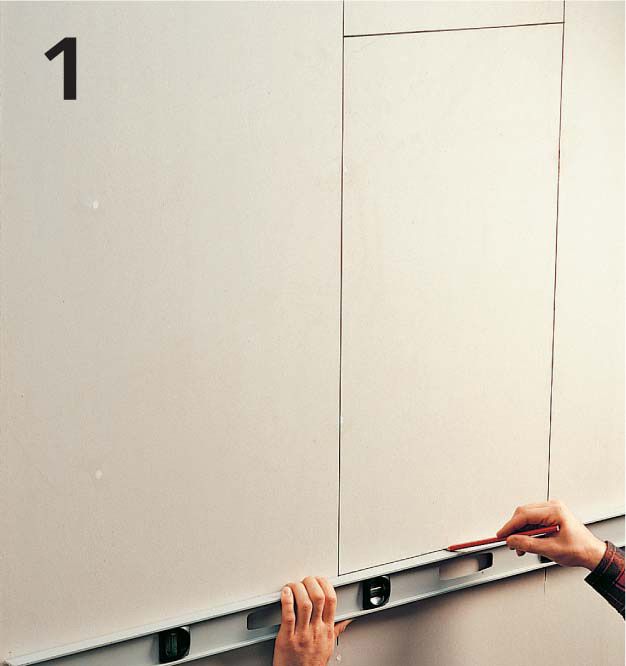
Locate the wall studs and mark them clearly on the wall surface. Draw a level line at the desired top height of the cabinet body, then measure and mark a second line to indicate the bottom of the cabinet.
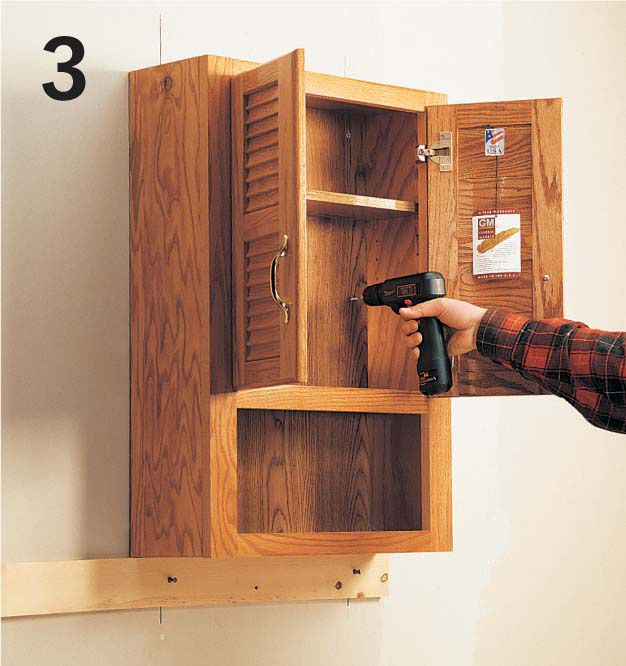
Attach a temporary ledger board (usually 1 × 4) just below the lower level line using duplex nails. Rest the base of the cabinet on the ledger and hold it in place or brace it with 2 × 4s.
Attach the cabinet to the wall at the stud locations by drilling pilot holes and driving wood screws. Remove the ledger when finished, and patch the nail holes with drywall compound.
 HOW TO INSTALL A RECESSED MEDICINE CABINET
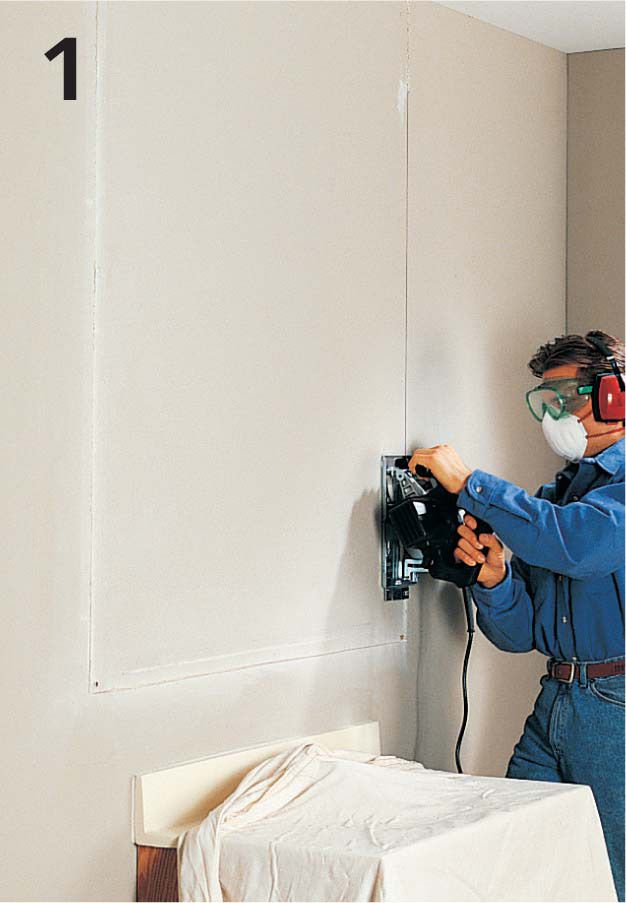
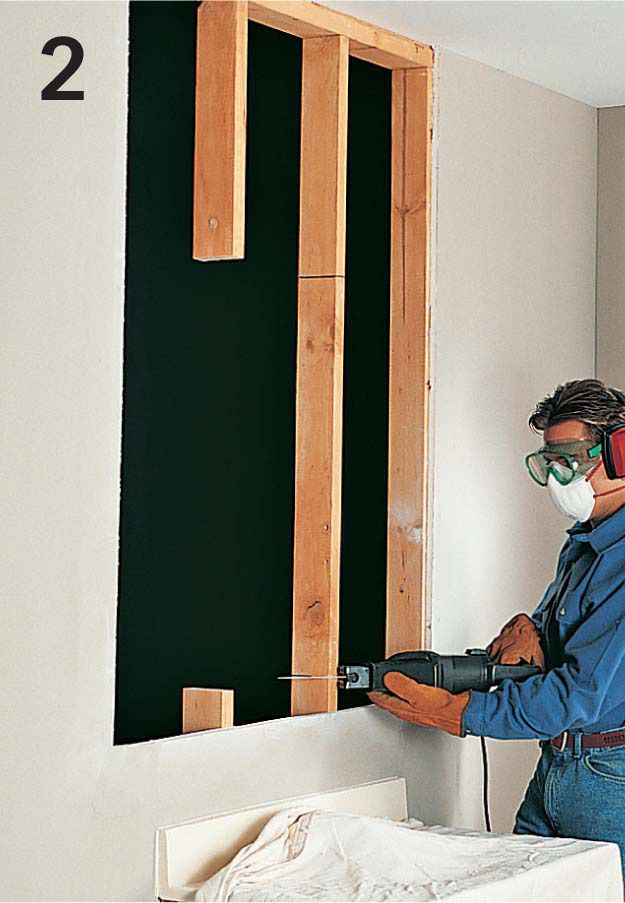
Locate the first stud beyond either side of the planned cabinet location, then remove the wall surface between the studs. (Removing the wall surface all the way to the ceiling simplifies patch work.) Cut along the center of the studs, using a circular saw with the blade depth set to the thickness of the wall surface.
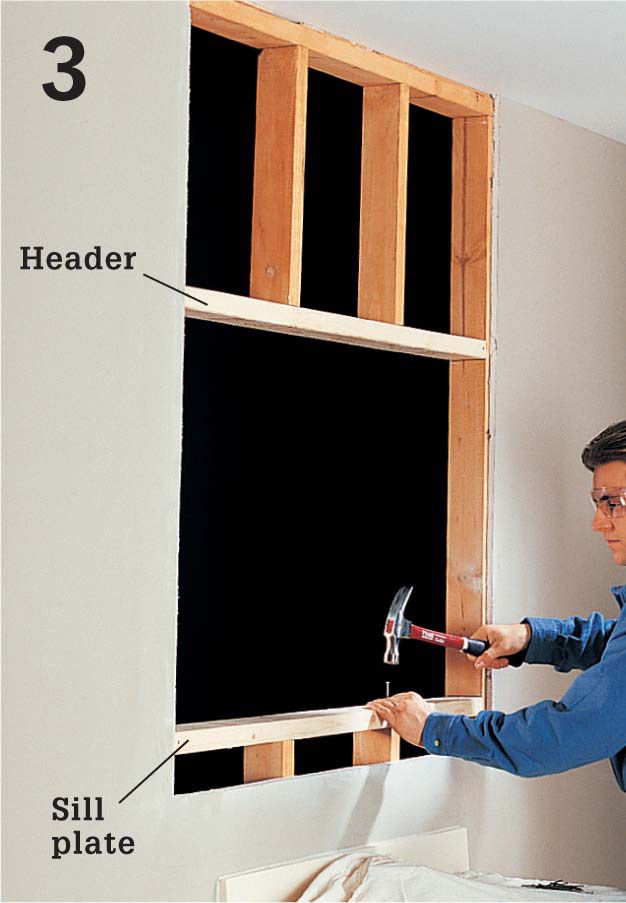
Mark a rough opening 1/2" taller than the cabinet frame onto the exposed wall studs. Add 1 1/2" for each header and sill plate, then cut out the studs in the rough opening area.
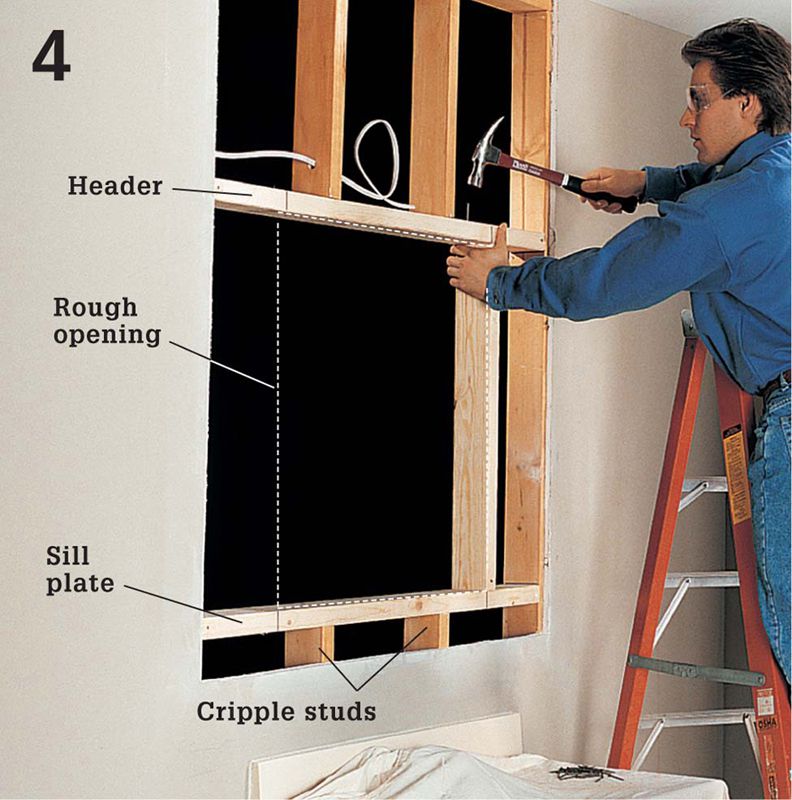
Frame out the top and bottom of the rough opening by installing a header and a sill plate between the cut wall studs. Make sure the header and sill plate are level, then nail them in place with 10d common nails.
Mark the rough opening width on the header and sill plates, centering the opening over the sink. Cut and nail jack studs between the header and the sill plate, just outside the rough opening marks. Install any wiring for new light fixtures and receptacles, then patch the wall where necessary.
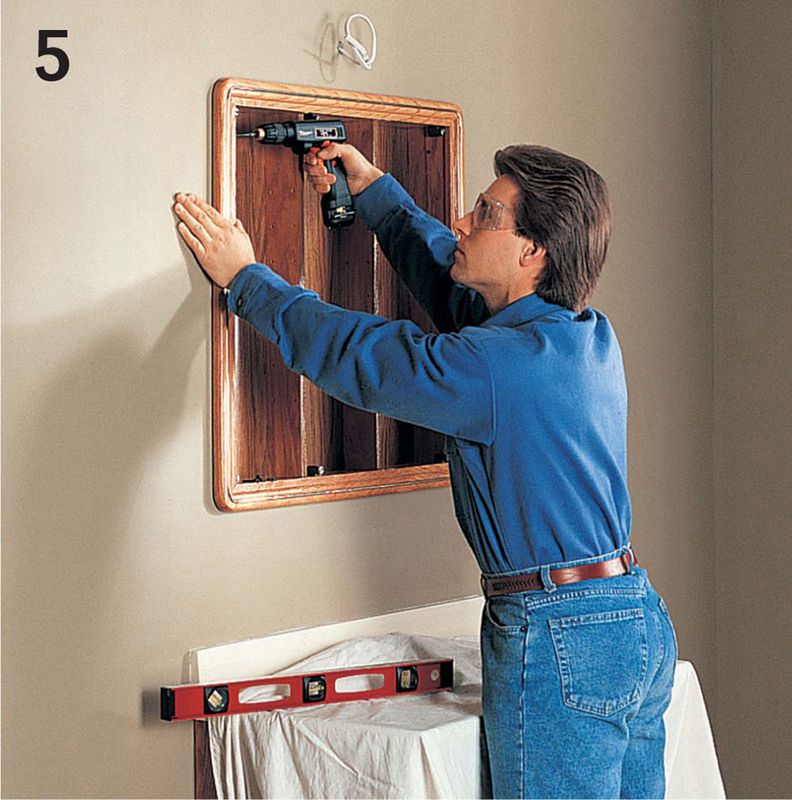
Position the cabinet in the opening. Check it for level with a carpenter’s level, then attach the cabinet by drilling pilot holes and driving wood screws through the top and bottom of the cabinet sides and into the wall studs, header, and sill plate. Attach the doors, shelves, and hardware.

