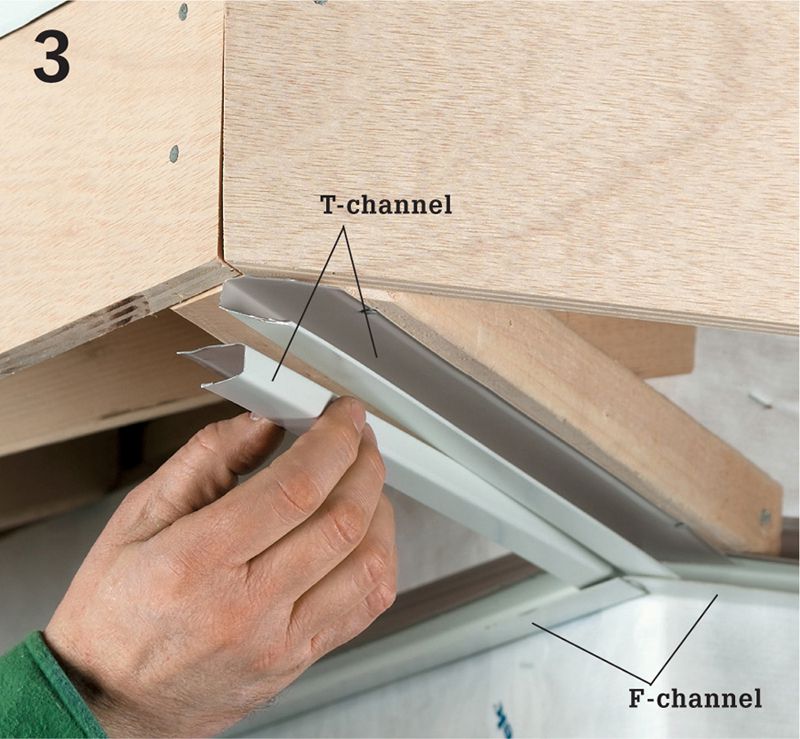
Remove trim, soffits, and fascia along the eaves using a flat pry bar. If the eaves contain debris, such as bird nests or rotted wood, clean them out.
Check the rafters and rafter lookouts for decay or damage. Repair or replace them as needed.

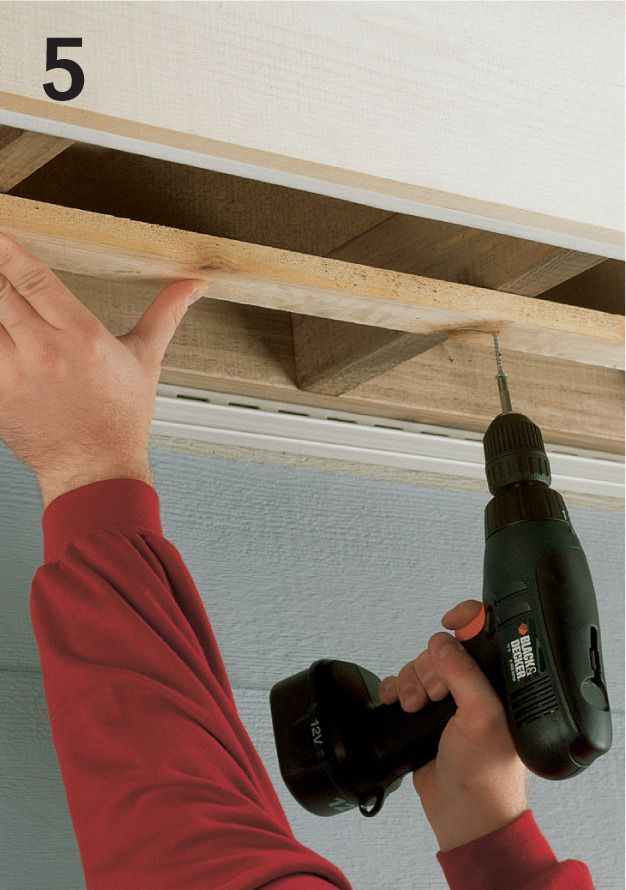
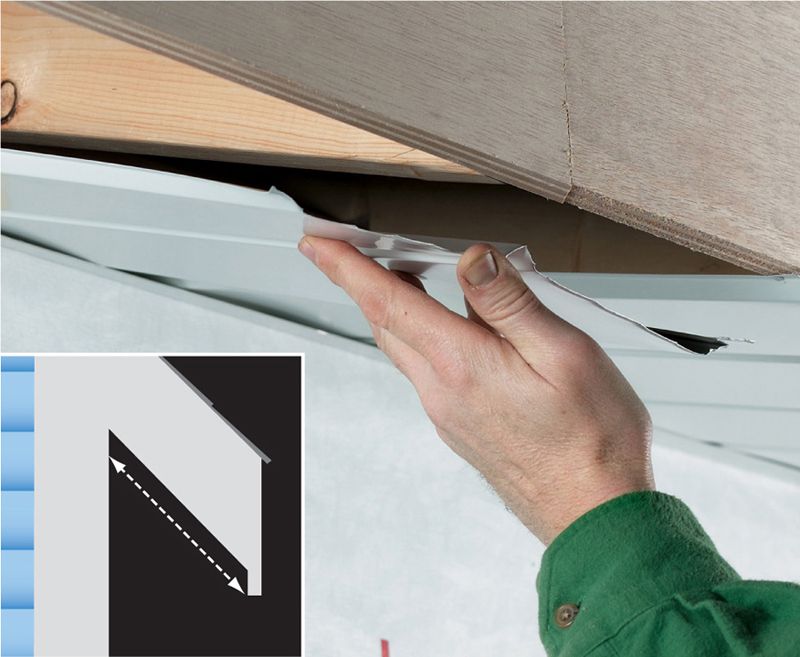
Install new 1 × 8 or 2 × 8 subfascia over the rafters and rafter lookouts using 16d nails. Butt subfascia boards together at rafter or rafter lookout locations. Install drip edge at the top of the subfascia. Leave a 1/16" gap between the drip edge and the subfascia for the fascia to fit.
Install F-channels for the soffit panels along the bottom inside edge of the subfascia and along the outside wall of the house directly below the rafter lookouts. If more than one piece of channel is needed, butt pieces together.
If the soffit panels will span more than 16", or if your house is subjected to high winds, add nailing strips to provide additional support.
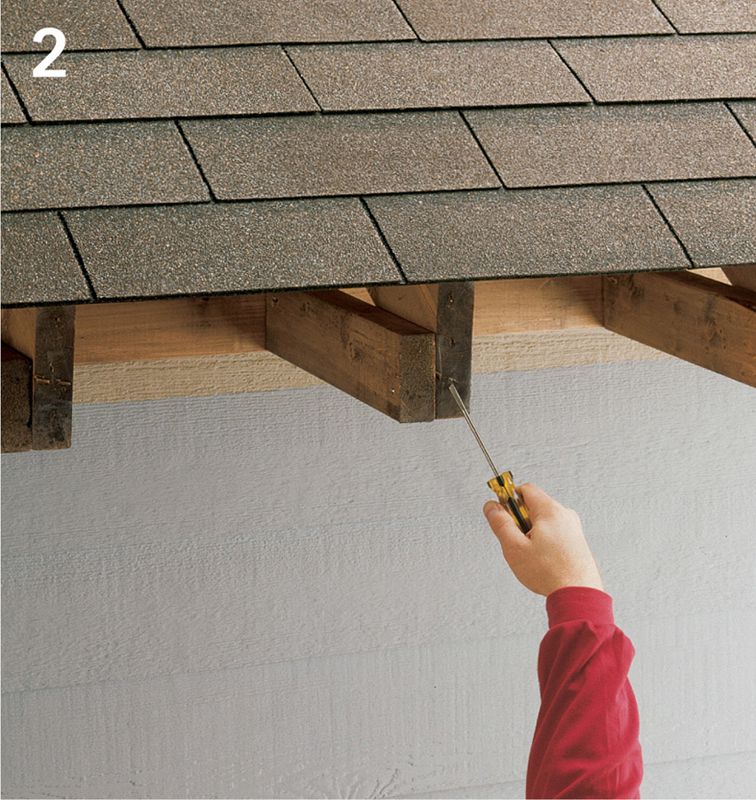
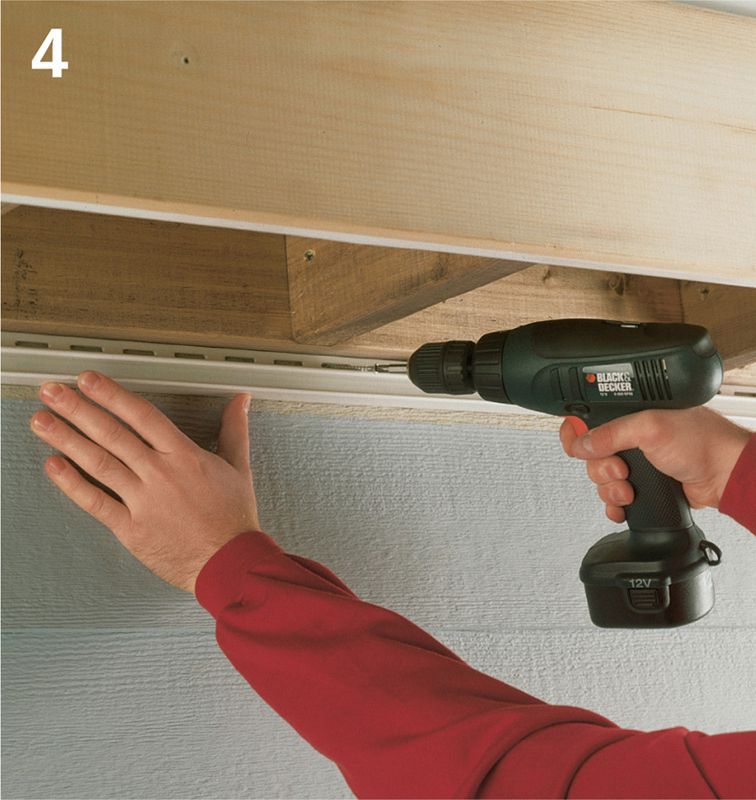
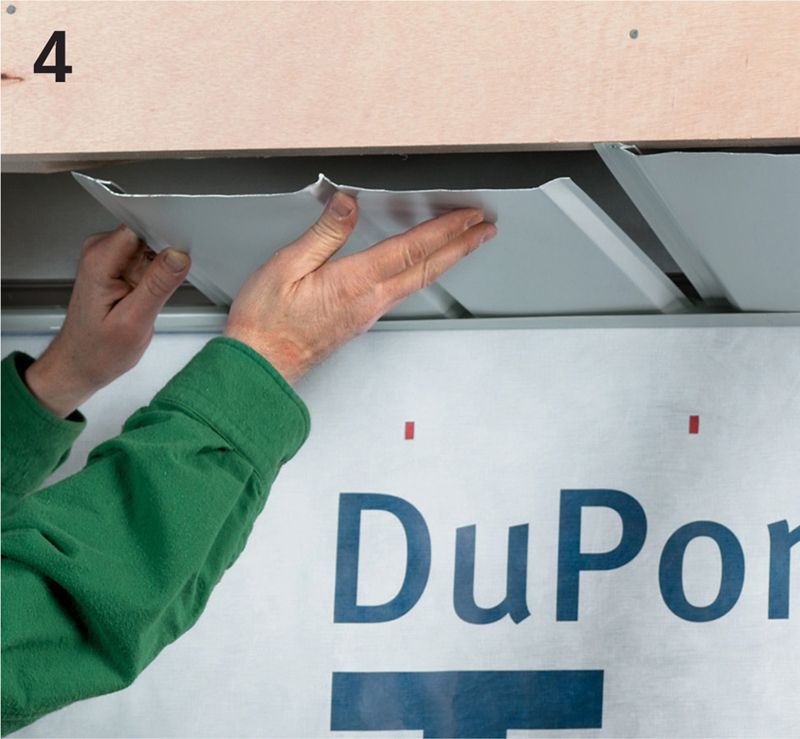
Measure the distance between the mounting channels, subtract 1/8", and cut soffits to size. Slide the soffit panels in place, fitting the ends inside the mounting channels. Nail the panels to the nailing strips, if you’ve installed them.
Install soffit panels in the remaining spaces, cutting them to fit as needed. When finished, install the fascia (pages 147 to 148).
 HOW TO INSTALL ALUMINUM SOFFITS (WITHOUT RAFTER LOOKOUTS)
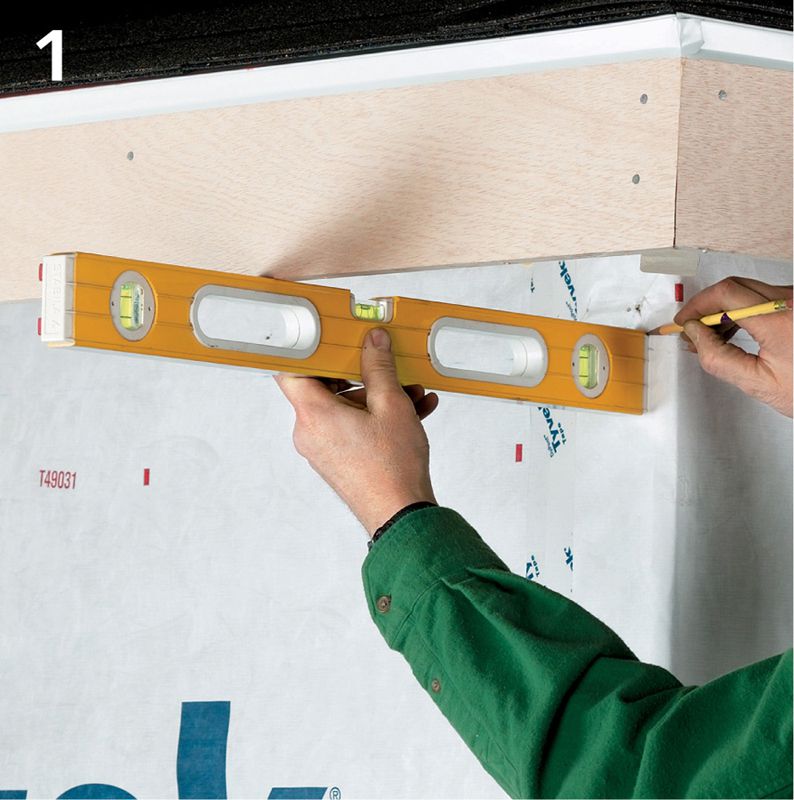
Remove the old soffits and fascia. Place a level at the bottom of the subfascia board level across to the house, and make a mark. Measure down from the mark a distance equal to the thickness of the soffits (usually about 1/4"). Do this on each end of the wall. Snap a chalk line between the lower marks.

Start the F-channel at a corner and align the bottom edge with the chalk line. Nail the channel to the wall at stud locations using 8d box nails. If more than one F-channel is needed, butt the pieces together.
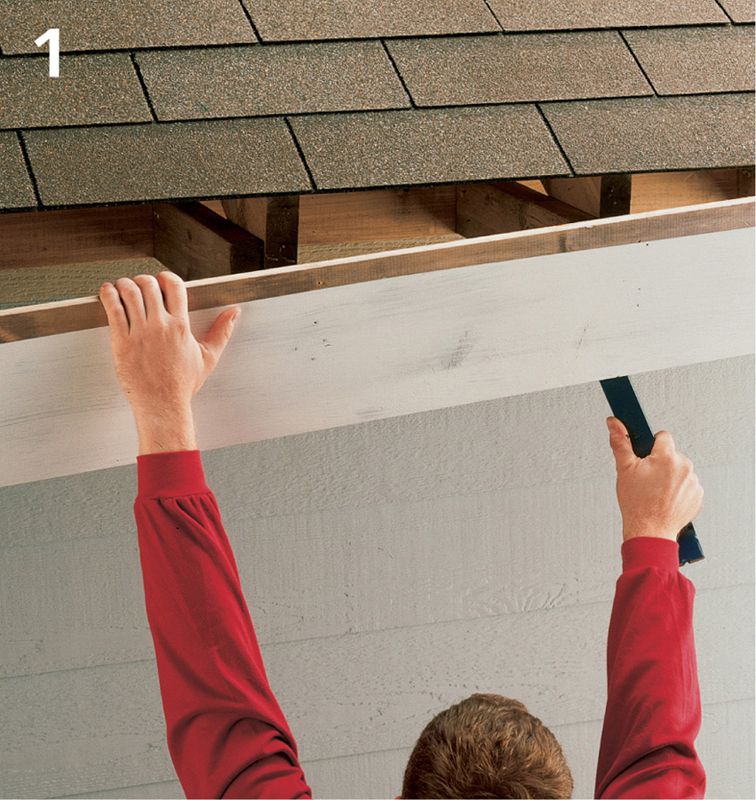
At corners, cut a 2 × 4 to fit between the house and the inside corner of the subfascia to provide support for the T-channel. Notch the 2 × 4 as needed, then nail in place so when the T-channel is installed, it will be aligned with the F-channel. Cut the T-channel to fit. Place it against the 2 × 4, setting the back edge inside the F-channel, and nail in place.
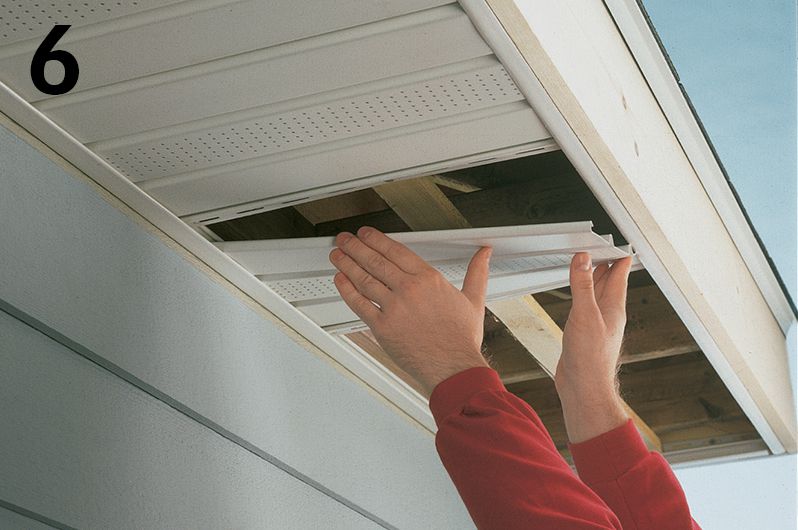
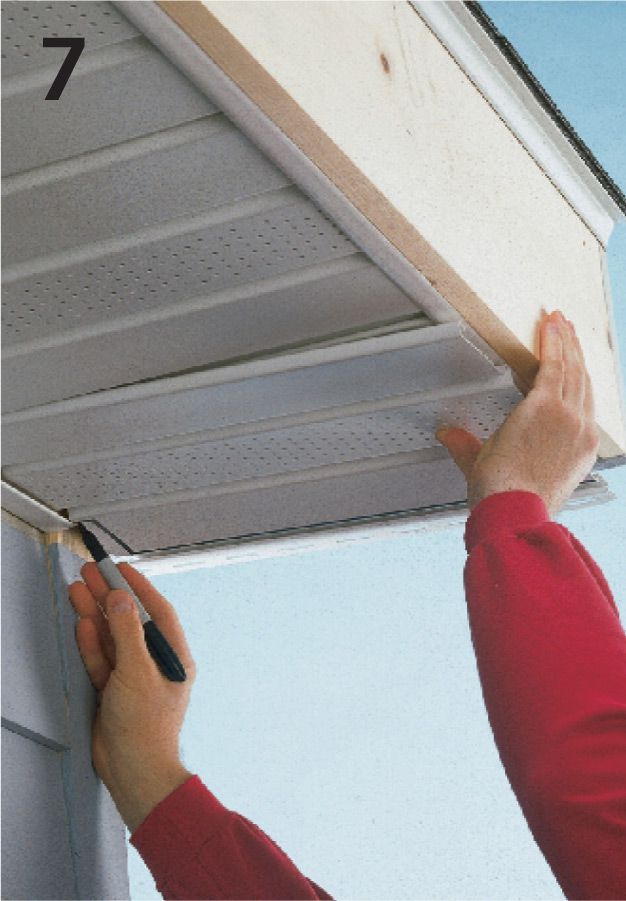
Measure between the F-channel and the outside edge of the subfascia. Subtract 1/4" and cut the soffits to size. For corners, miter the panels to fit the T-channel. Install the first panel inside the channel. Make sure the panel is square to the subfascia using a framing square. Nail the panel to the subfascia at the V-grooves. Slide the next panel against the first, locking them together. Nail the panel in place. Install remaining panels the same way.
VARIATIONS FOR INSTALLING ALUMINUM SOFFITS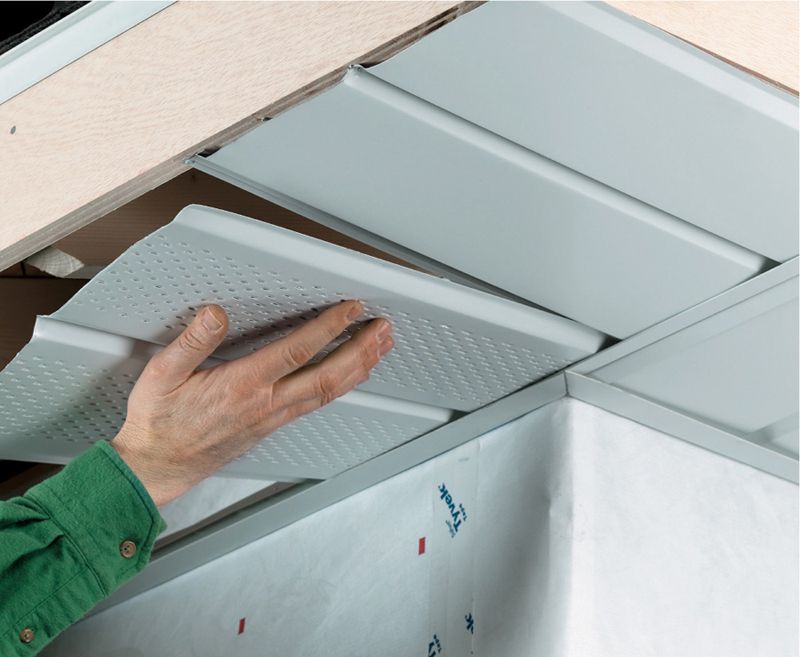
Straight corners are made by installing the T-channel parallel with one of the F-channels. Align the outside edge of the T-channel with the outside edge of the installed F-channel. Keep the T-channel back 1/4" from the outside of the subfascia, and nail it in place. Install the soffits in the channels.
Inclined overhangs allow soffits to run the same angle as the rafters. At the end of the rafter overhangs, measure from the bottom of the rafter to the bottom of the subfascia. Add the thickness of the soffits, then measure down from the rafters along the wall and make a mark at this distance. Do this on each end of the wall. Snap a chalk line between the marks. Align the bottom of the F-channel with the chalk line, nail the channel to the wall, then install the soffits.