Tools & Materials 
Hammer
Utility knife
Drill
Deck screws
Scraps of wood
2× lumber
Pencil
Painter’s tape
Miter saw
Tablesaw
Coping saw
Finish nails
Spackling compound or wood putty
Sandpaper
Paint or wood finish
Caulk
Nailer
Eye protection
Simply put, crown molding is angled trim that bridges the joint between the ceiling and the wall. In order to cover this joint effectively, crown moldings are “sprung.” This means that the top and bottom edges of the molding have been beveled, so when the molding is tilted away from the wall at an angle, the tops and bottoms are flush on the wall and ceiling surfaces. Some crown moldings have a 45° angle at both the top and the bottom edges; another common style (“38° crown”) has a 38° angle on one edge and a 52° angle on the other edge.
Installing crown molding can be a challenging and sometimes confusing process. Joints may be difficult for you to visualize before cutting, and wall and ceiling irregularities can be hard to overcome. If you have not worked on crown molding joints before, it is recommended that your first attempt be made with paint-grade materials. Stain-grade crown is commonly made of solid hardwood stock, which makes for expensive cutting errors and difficulty concealing irregularities in joints.
Inside corner joints of crown molding should be cope-cut, not mitered, except in the case of very intricate profile crown that is virtually impossible to cope (and must therefore be mitered). While mitering inside corners may appear to save time and produce adequate results, after a few changing seasons the joints will open up and be even more difficult to conceal.
Installing crown molding in a brand-new, perfectly square room is one thing, but what happens when the walls and ceilings don’t meet at perfect right angles? In most houses that have been around for more than a couple of seasons, walls have bulges caused by warped studs or improper stud placement that’s causing the drywall to push out into the room. Ceilings have issues caused by warped joists or drywall that has loosened or pulled away from the ceiling joists. Corners may be best finished with extra-thick layers of joint compound that has been applied a bit heavily, causing an outside corner piece to sit further away from the corner bead. These are just a few of the issues that can work against you and cause even an experienced carpenter to become frustrated.
Tools & Materials
Hammer
Utility knife
Drill
Deck screws
Scraps of wood
2× lumber
Pencil
Painter’s tape
Miter saw
Tablesaw
Coping saw
Finish nails
Spackling compound or wood putty
Sandpaper
Paint or wood finish
Caulk
Nailer
Eye protection
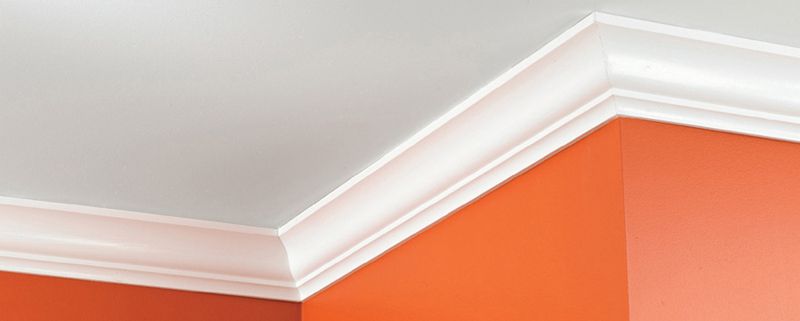
Basic crown molding softens the transitions between walls and ceilings. If it is made from quality hardwood, crown molding can be quite beautiful when installed and finished with a clear top coat. But historically, it is most often painted—either the same color as the ceiling (your eye tends to see it as a ceiling molding, not a wall molding) or with highly elaborate painted and carved details.
Make and use a gauge block to ensure that crown molding is installed uniformly. A gauge block is used to show where the bottom edge of the crown will sit on the wall. This is especially important for laying out inside and outside corners. To make a gauge block, place the profile of crown upside down against the fence of your saw. The top edge of the crown should lay flat against the base. The fence represents the wall and the base represents the ceiling. The crown will be situated in the same position as it would sit on the wall. Run a pencil line across the bottom edge of the crown. Tape can be placed against the fence to help see the pencil marks. Measure from the base to this line and subtract 1/16". Cut a block to this measurement and label it to match the profile of crown that you’re installing.

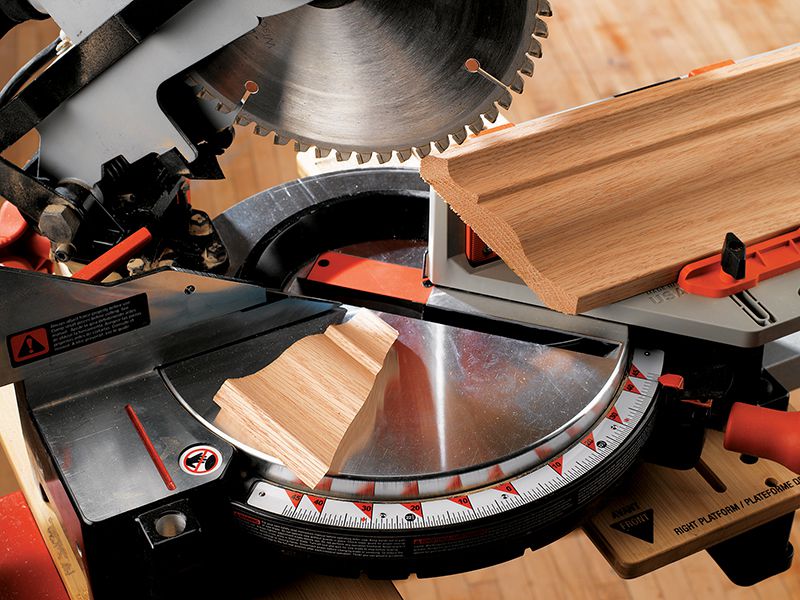
Cutting compound miters is tricky. Throughout this book, crown molding is shown being mitered with the workpiece held against a fence or fence extension. This hand-held approach is quick and effective, but takes some getting used to. A practically foolproof option is to use an adjustable jig, such as the compound miter jig shown here.
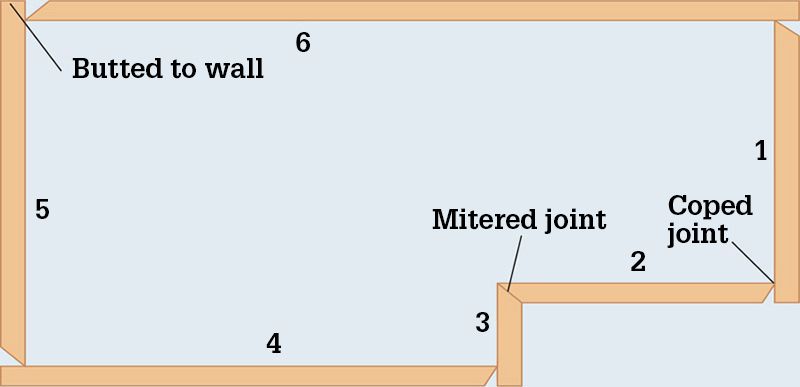
Plan the order of the installation to minimize the number of difficult joints on each piece and use the longest pieces for the most visible sections of wall. Notice that the left end of first piece is cope-cut rather than butted into the wall. Cope-cutting the first end eliminates the need to cope-cut both ends of the final piece and places the cuts in the same direction. This simplifies your installation, making the method to cut each piece similar.
 HOW TO USE BACKERS TO INSTALL CROWN MOLDING
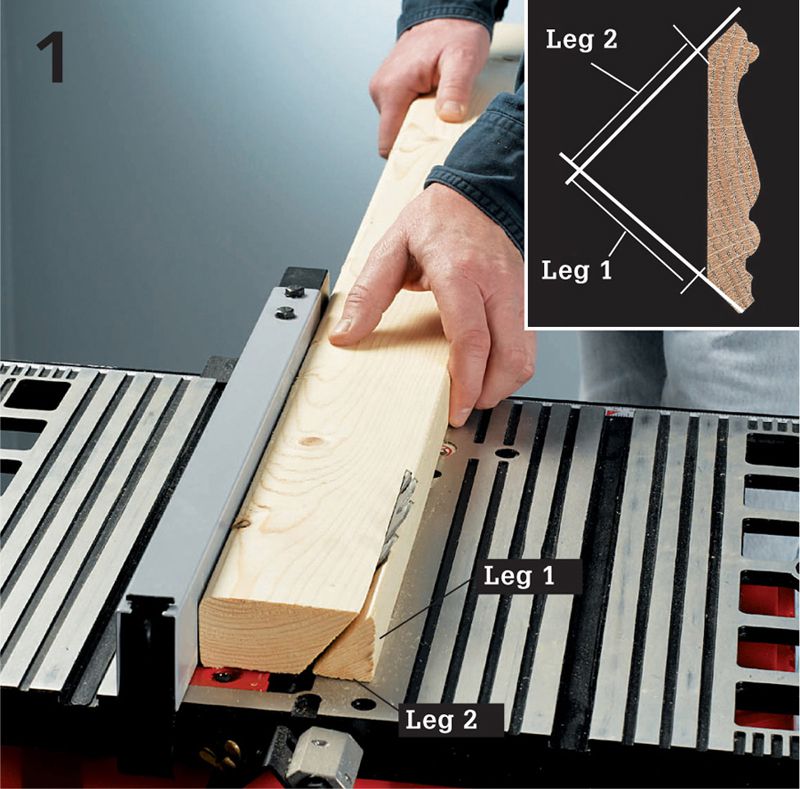
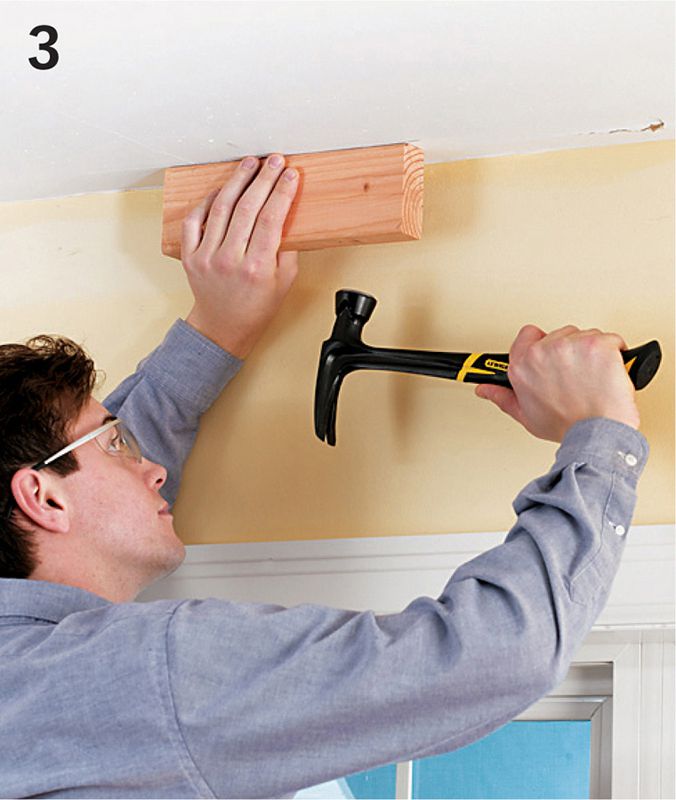
Installing crown molding is greatly simplified if you first attach triangular backers in the crotch area between the walls and ceilings. You can run the backers continuously along all walls or you can space them at regular intervals for use as nailers. To measure the required length for the triangle legs, set a piece of the crown molding in the sprung position in a square in an orientation like the inset photo above. Rip triangular backer strips from 2× stock on your tablesaw, with the blade set at 45°.
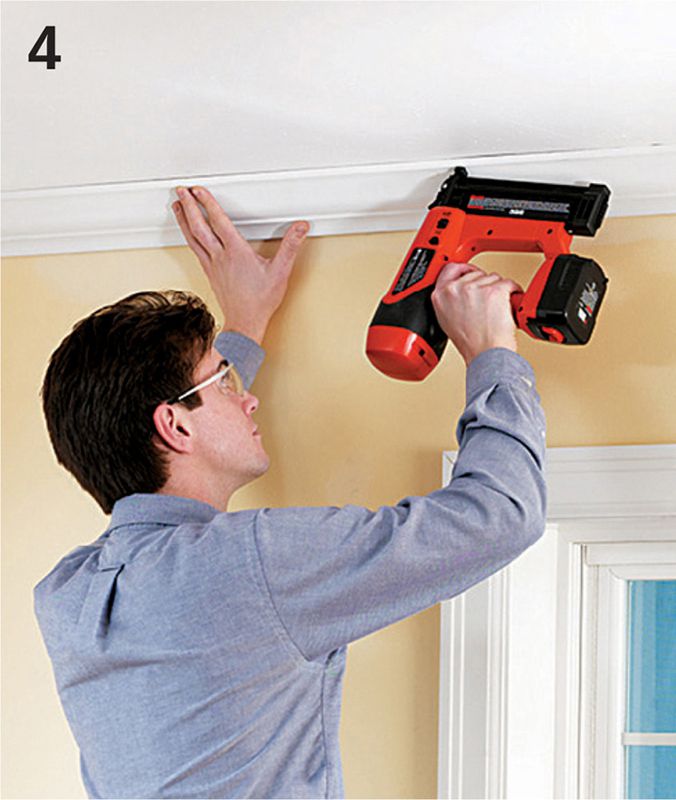
Locate the wall studs with a stud finder and mark the locations on the wall with blue painter’s tape. Secure the backer block to the wall by driving 2 1/2" or 3" deck screws at an angle through the block and into the top plate of the wall. Now, your crown molding can be attached to the backers wherever you’d like to nail it. Install crown according to the following instructions.
HOW TO INSTALL BASIC CROWN MOLDING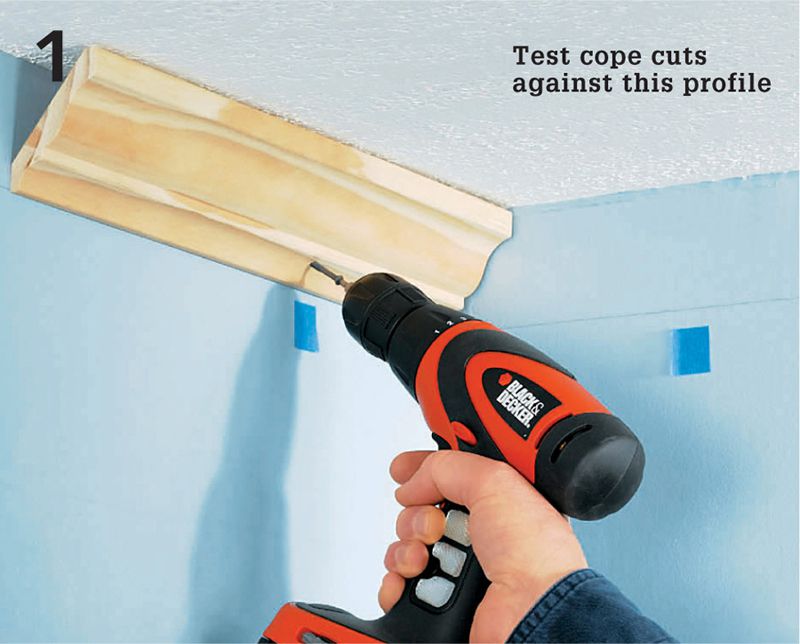
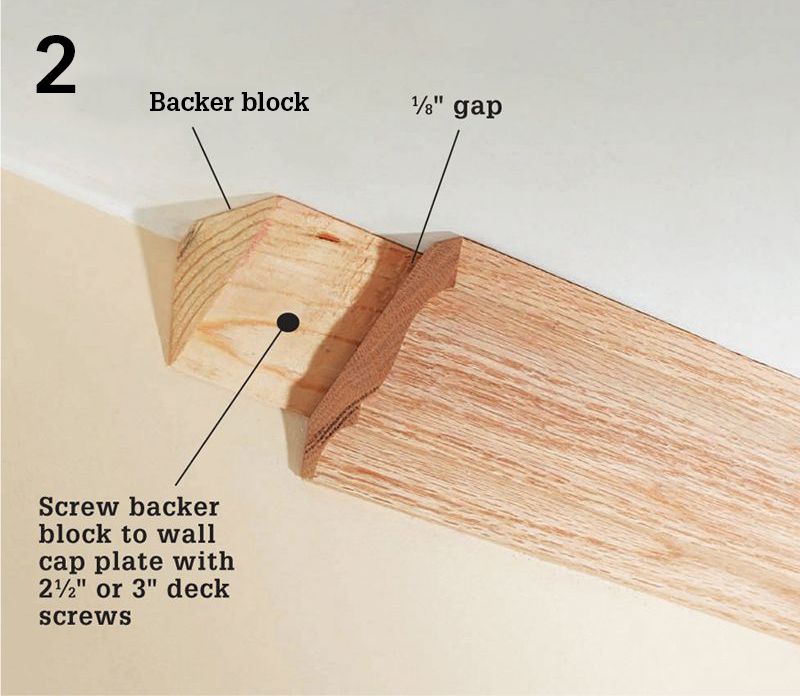
Cut a piece of crown molding about 1-ft. long with square ends. Temporarily install the piece in the corner of the last installation wall with two screws driven into the blocking. This piece serves as a template for the first cope cut on the first piece of molding.

Place the first piece of molding upside down and sprung against the fence of the miter saw. Mark a reference line on the fence for placement of future moldings, and cut the first coped end with an inside miter cut to reveal the profile of the piece.
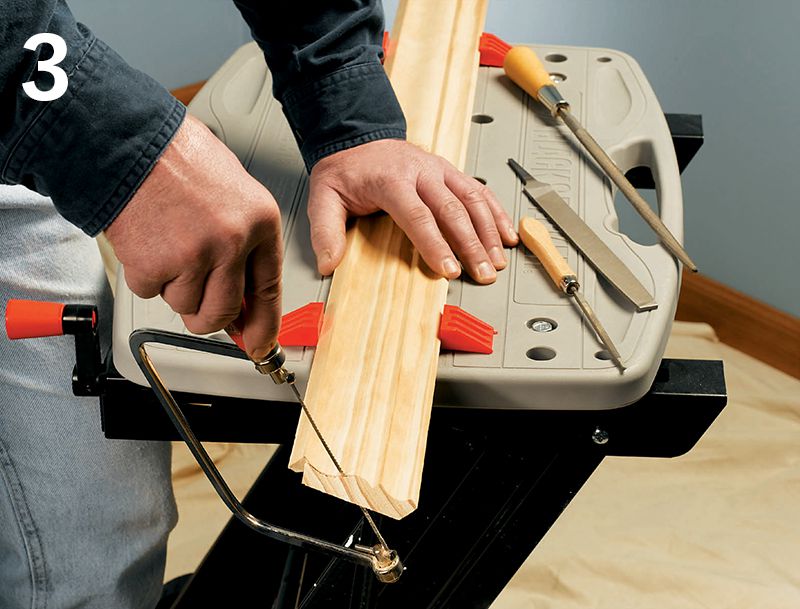
Cope-cut the end of the first piece with a coping saw. Carefully cut along the profile, angling the saw as you cut to back-bevel the cope. Test-fit the coped cut against the temporary scrap from step 1. Fine-tune the cut with files and fine-grit sandpaper.
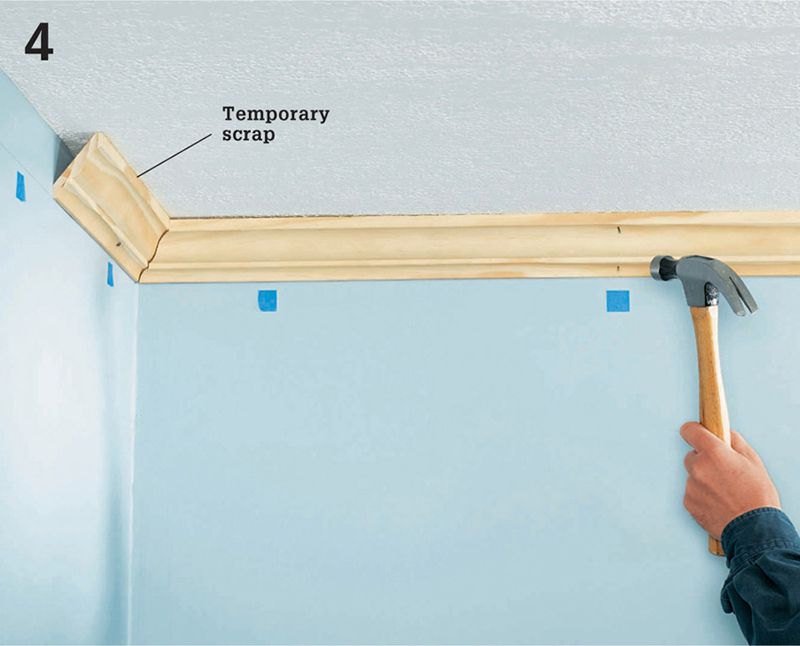
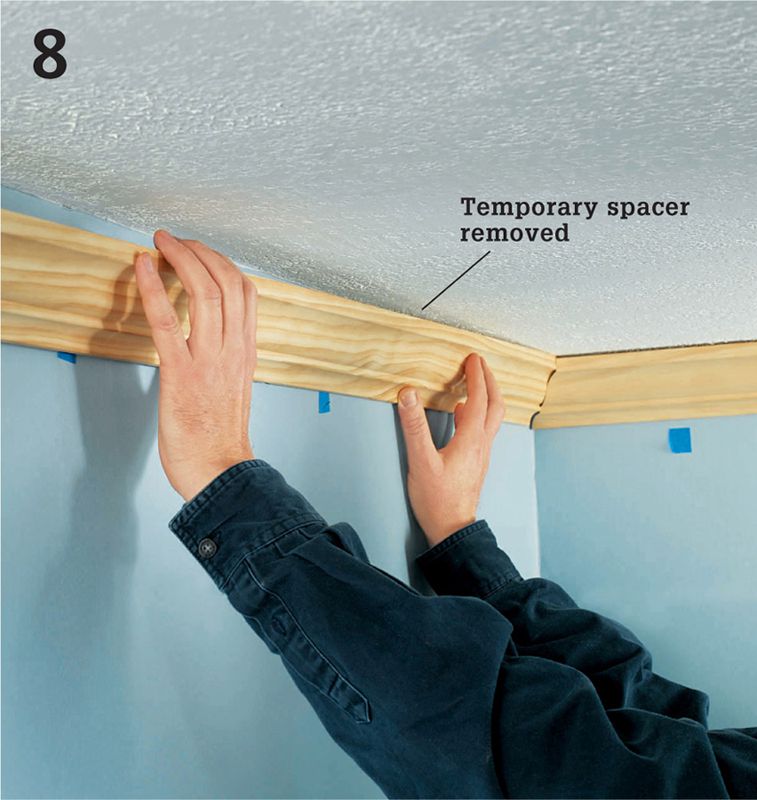
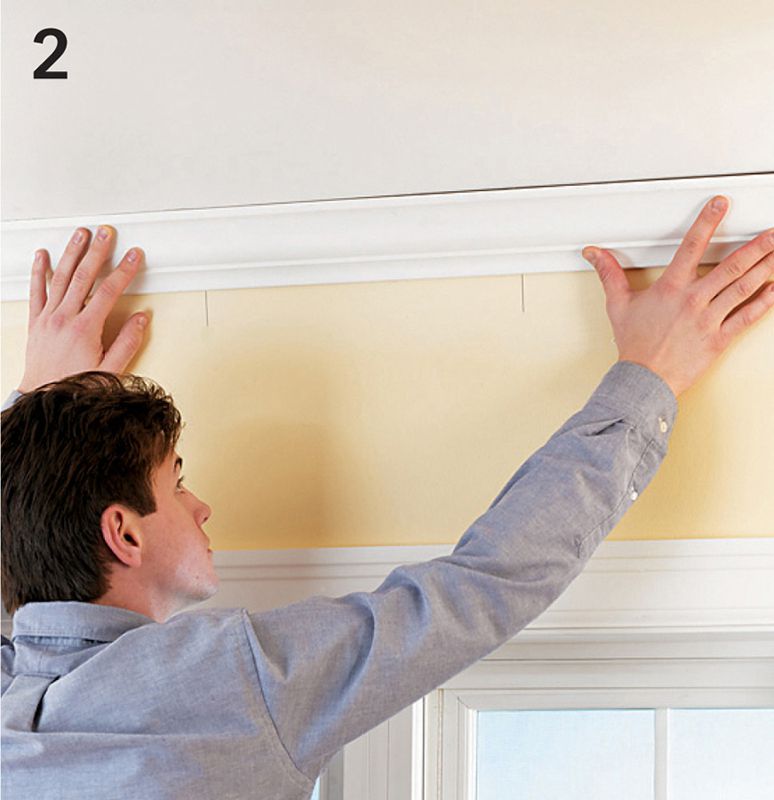
Measure, cut to length, and install the first piece of crown molding, leaving the end near the temporary scrap loose for final fitting of the last piece. Nail the molding at the top and bottom of each stud location.
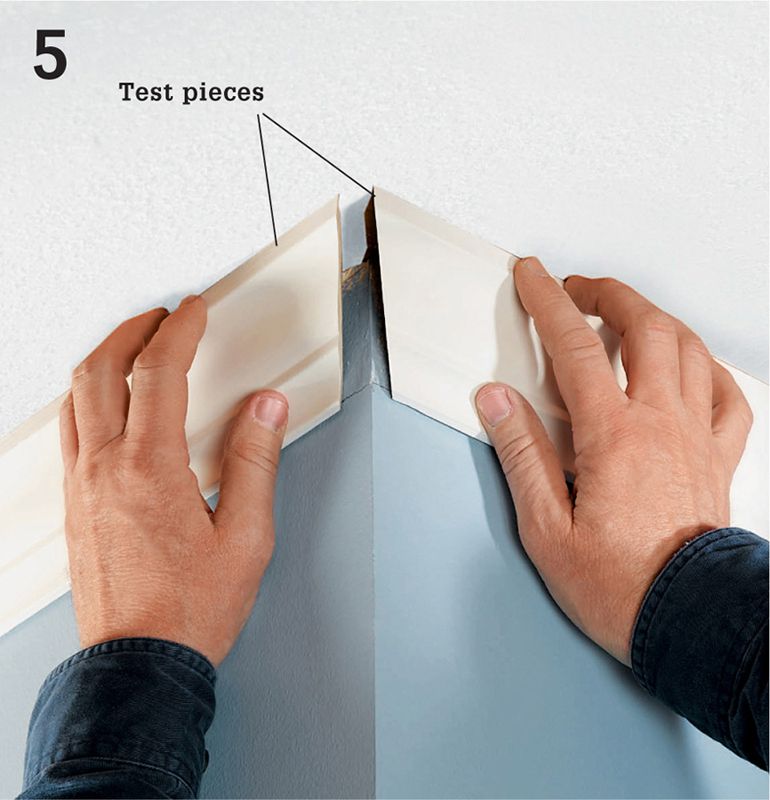
Cut two test pieces to check the fit of outside corners. Start with each molding cut at 45°, adjusting the angles larger or smaller until the joints are tight. Make sure the test moldings are properly aligned and are flush with the ceiling and walls. Make a note of your saw settings once the joint fits tightly.
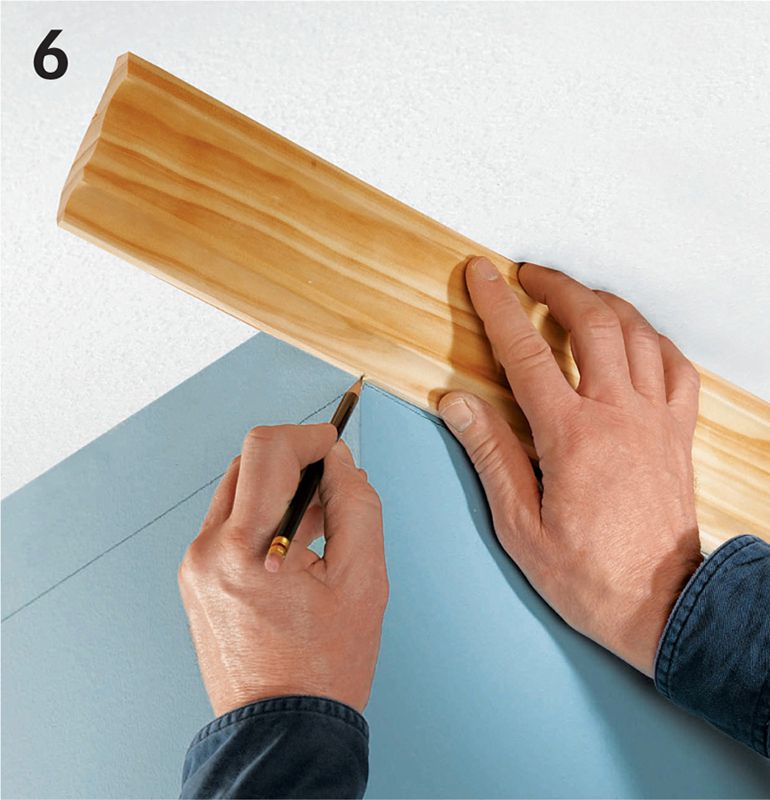
Position the actual stock so a cut end is flush against the wall at one end and, at the other end, mark the outside corner on the back edge of the molding. Miter-cut the piece at the mark, according to the angles you noted on the test pieces.
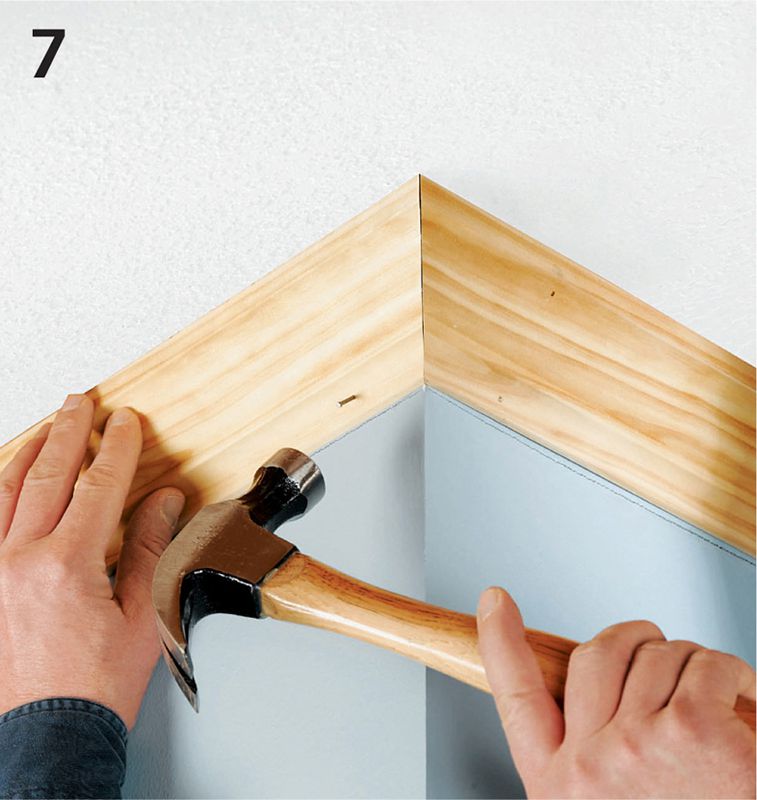
Measure and cut the third piece with an outside corner miter to match the angle of your test pieces. Cut the other end squarely, butting it into the corner. Install the piece with nails driven at stud locations. Install the subsequent pieces of crown molding, coping the front end and butting the other as you work around the room.
To fit the final piece, cope the end and cut it to length. Remove the temporary scrap piece from step 3, and slide the last molding into position. Nail the last piece at the stud locations when the joints fit well, and finish nailing the first piece.
Fill all nail holes (use spackling compound if painting; wait until the finish is applied and fill with tinted putty for clear finishes). Use a putty knife to force spackling compound or tinted wood putty into loose joints and caulk gaps 1/8" or smaller between the molding and the wall or ceiling with flexible, paintable, latex caulk.
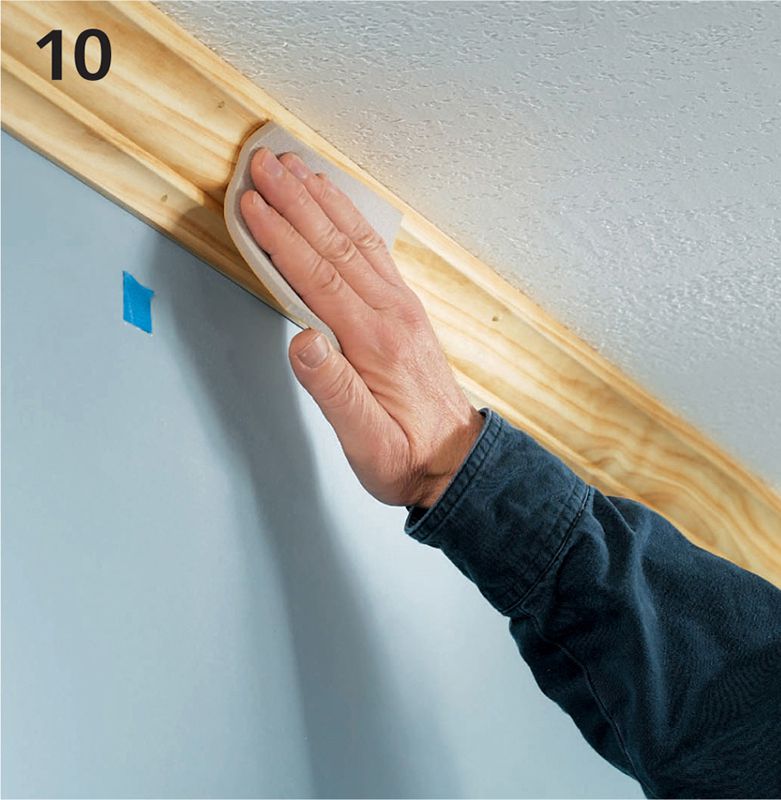
Lightly sand the filled nail holes and joint gaps with fine sandpaper. Sand the nail hole flush with the surface of the moldings and apply a final coat of paint to the entire project.
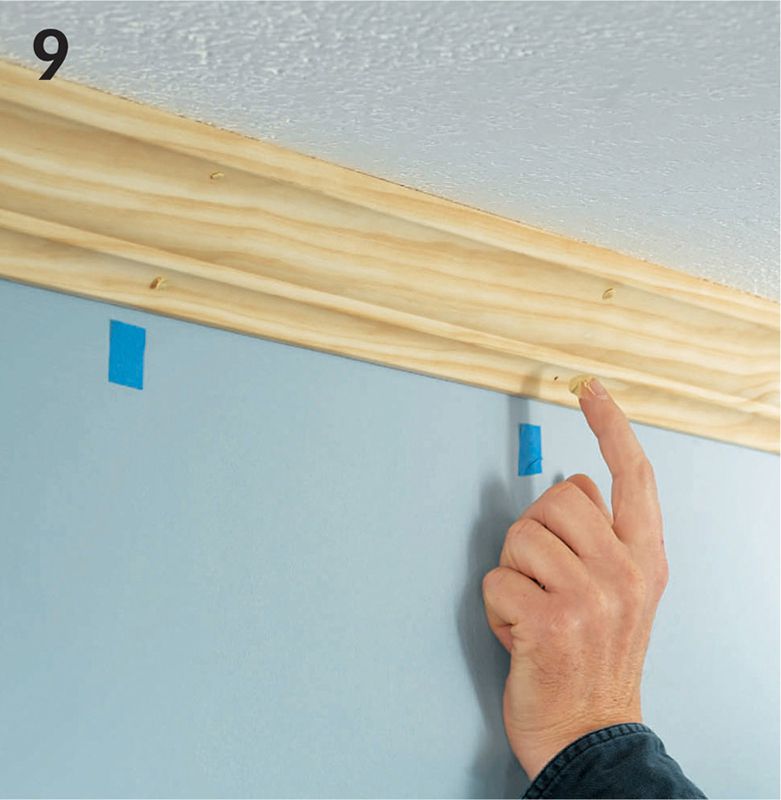
HOW TO INSTALL CROWN AT A SAGGING CEILING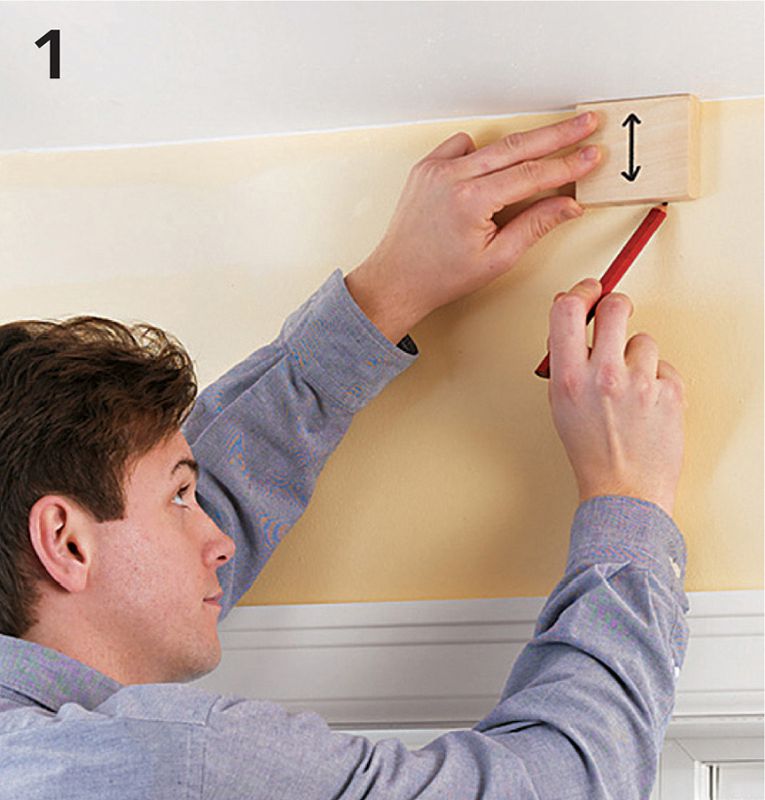
Make light pencil marks on the wall to show where the bottom of the crown will sit. TIP: Make and use a gauge block for this (see page 515). This is especially important on outside corners.
Score the drywall slightly in the sagging portion of the ceiling. Set the crown along the lines made by the gauge block and the top of the point where the drywall is scored. Mark the edges of the sagging area in a visible spot on the walls.
Use a small wood block to drive the sagging drywall up where it meets the wall. Don’t get too aggressive here.
Install the crown so the bottom edge is flush with the gauge line. The molding will conceal the damage to the drywall.
