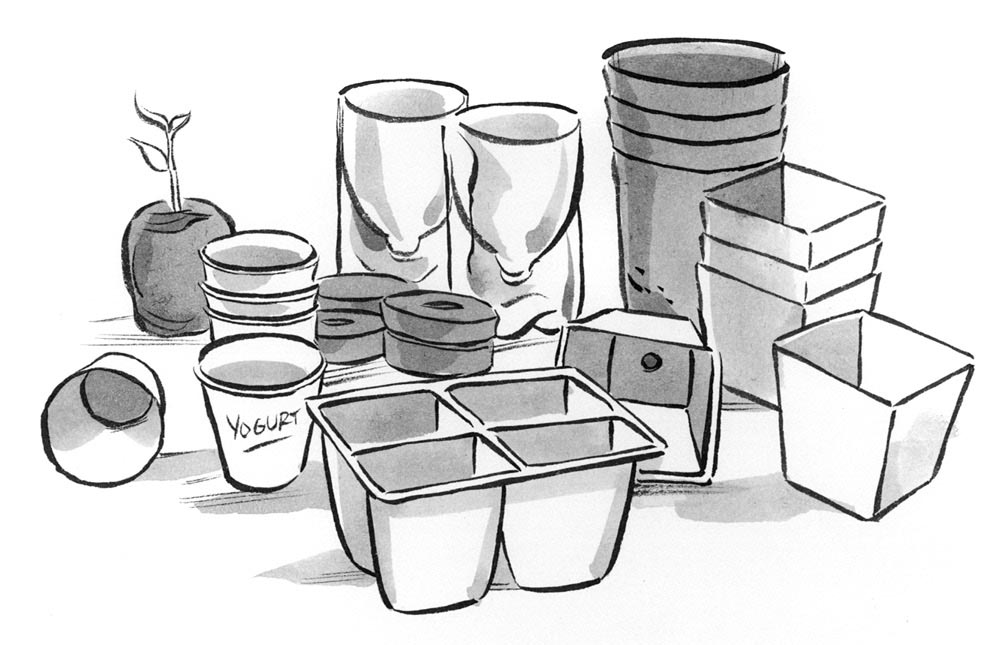
Homes for seeds. Many different containers work for germinating seeds, but sticking to one or two types makes seedling care easier, since they will need watering on similar schedules.
All the tools and supplies listed on the pages that follow are available from your garden center or through mail-order suppliers. Try out different containers, seed-starting mixes, and germination systems until you determine what works best for you. Even advanced gardeners continue to experiment, so plan on testing a few new options every year.
For most new gardeners, it comes as a surprise that seeds don’t need rich soil to germinate. In fact, the best seed-starting medium doesn’t contain fertilizer or compost at all. Feeding starts only after seedlings are up and growing. The light, firm-but-airy texture of a good seed-starting medium, plus the fact that it is sterile, helps reduce problems with seeds rotting and seedling diseases like damping-off. It also helps maintain the correct balance of moisture and air in the soil so seeds can germinate.
The easiest option is to buy premixed seed-starting medium. Or use the recipes on page 39 to mix your own from supplies purchased at your local garden center. Avoid adding ordinary garden soil to potting mixes used to germinate seeds or grow seedlings, because it contains fungi and other organisms that can cause rot and other diseases.
Seeds will happily germinate in a wide variety of containers, provided they are filled with good-quality seed-starting medium and have holes in the bottom for water to drain away. Here are some of your options:
Purchased pots and packs. While you’ll probably end up needing several sizes for seedlings as they grow, 3½-inch pots are a useful, standard size. Square pots are more space-efficient than round ones. Cell packs, with either 1½- or 2-inch cells, are also useful for smaller annuals.
Recycled pots and packs. Every gardener has a supply of pots from previous seasons. (If you’re a new gardener, ask gardening friends if they have pots to spare.) Wash pots before reusing them. Ideally you should sterilize them by dipping in a 10 percent bleach solution (1 part bleach added to 9 parts water). Air-dry before refilling.

Homes for seeds. Many different containers work for germinating seeds, but sticking to one or two types makes seedling care easier, since they will need watering on similar schedules.
To mix the recipes below, use a large bucket or tub. (A tarp may help contain the mess!) If you intend to transplant seedlings from small flats or pots into larger ones before planting in the garden, use the Germinating Mix recipe, or start with purchased seed-starting mix. When sowing seeds in pots that will hold plants until they are transplanted to the garden, use regular commercial potting soil or the Potting Mix for Seedlings recipe below, because they contain nutrients seedlings need to grow.
All the ingredients listed below can be purchased from a local garden center or via the Internet. Note: Coir fiber is made from coconut husk fibers. It’s a substitute for peat, which is a mined product.
Germinating Mix
Potting Mix for Seedlings
Alternate Potting Mix for Seedlings
Plantable containers. Pots that can go right into the ground are perfect for fussy seedlings, though some gardeners like to use plantable pots for all transplants, not just the fussy ones. The best-known plantable pots are made of peat and wood fiber, but now ones made from composted cow manure as well as coir (coconut fiber) are also available. Once these pots are moist, plant roots can grow right through the sides and into the soil. As the containers are biodegradable, seedlings can be set in the ground, pot and all.
Plantable pellets. These consist of small buttons of compressed seed-starting medium, roughly ⅜ inch tall and 1¾ inches wide. They offer another easy option for growing seedlings that can be planted in the garden, pot and all. Traditionally they were made of peat, but pellets made of composted cow manure are also available. Soak them in water to expand the pellet, then sow a seed in the top.
Found containers. Any container that can hold seed-starting medium and is the right size can be used to start seeds. Yogurt cups and paper coffee cups are popular choices. Just poke drainage holes in the bottom of each container before filling and sowing.
You’ll also want flats or trays in which to place pots or six-packs. If you’ll be germinating your seeds in a place that can get wet, flats with slits in the bottom to allow for drainage are best. Otherwise, look for shallow trays that hold water and won’t drip.
These simple systems make it easy to keep soil perfectly moist, not too damp and not too dry. If you didn’t have luck with previous attempts at starting seeds because seeds dried out or drowned, investing in one of these systems can guarantee success and increase your confidence. If you’re headed off on vacation, these systems will keep your seedlings watered while you’re away. Make sure you purchase one that can be reused just by refilling the seed tray with new mix.

Easy automatic watering. Most seed companies offer seed-starting systems where honeycomb-style seed containers sit on top of a water reservoir. An absorbent sheet or blanket wicks water from the reservoir to the soil mix, keeping seedlings perfectly watered as long as the reservoir remains filled.
Transplanting seedlings to the garden disturbs roots, and some plants cope with this better than others. Parsley and many vegetables such as melons, carrots, and cucumbers are often sown directly in the garden because they don’t transplant well. Annuals such as California poppies (Eschscholzia californica), nasturtiums (Tropaeolum majus), larkspur (Consolida ajacis), and wishbone flowers (Torenia fournieri) have similar problems. Fortunately, planning ahead helps. Use these tips to get fussy seedlings off to a good start:
It’s a good idea to sow all your seeds in the same size container, or maybe stick to only two different sizes. That way, all your seedlings will need watering on the same basic schedule.
Using strips of newspaper, homemade plantable pots are inexpensive and easy to make. You can buy one of the wooden forms for making them (from mail-order garden supply companies), or use a can or other container as a form to make larger pots. Here’s how to make them:
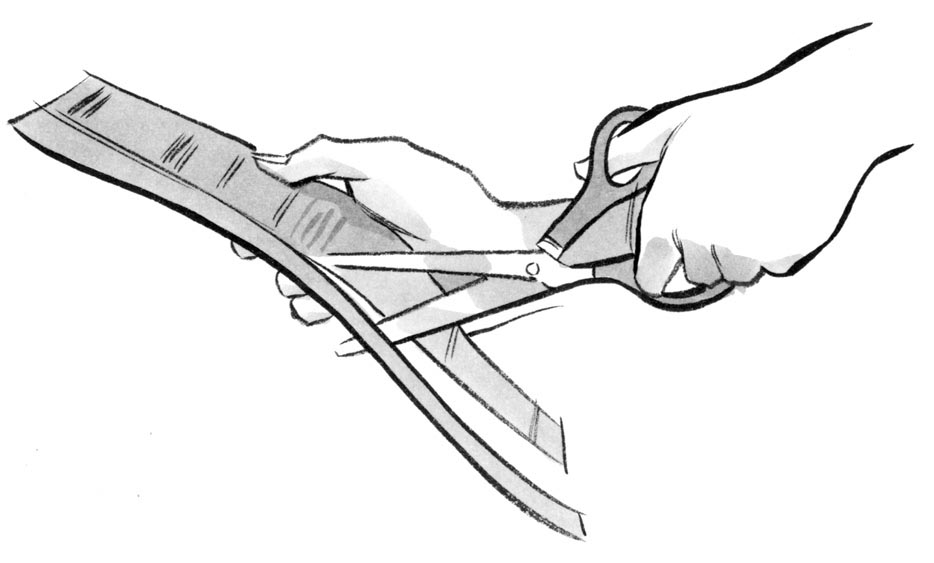
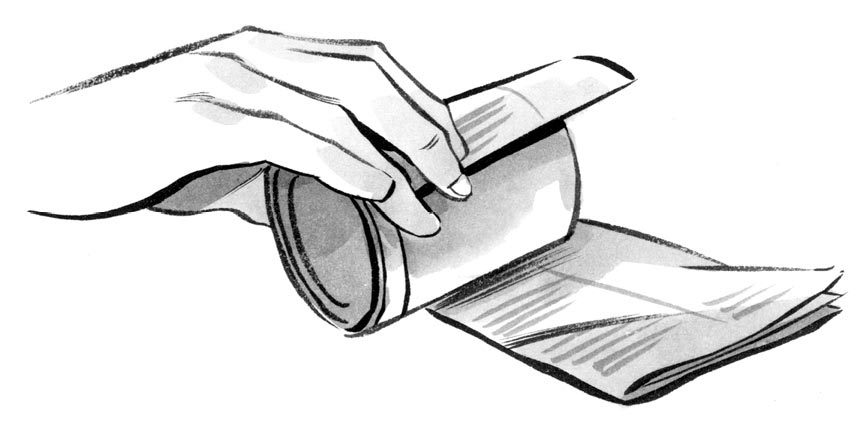
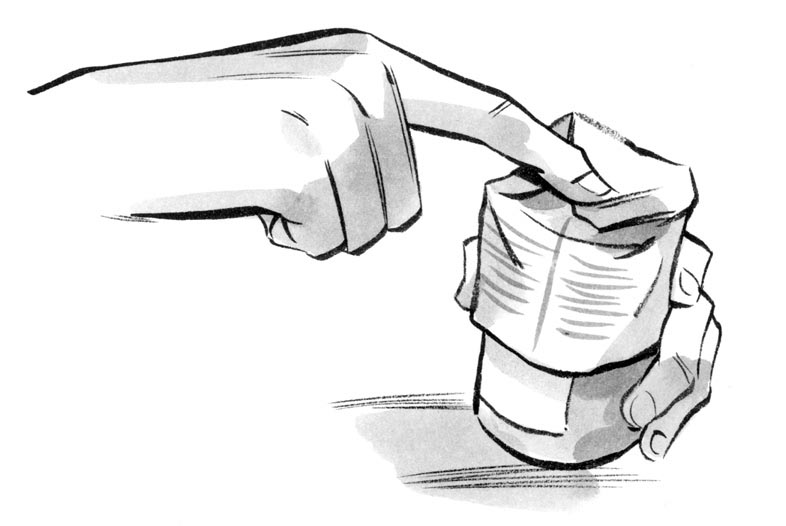

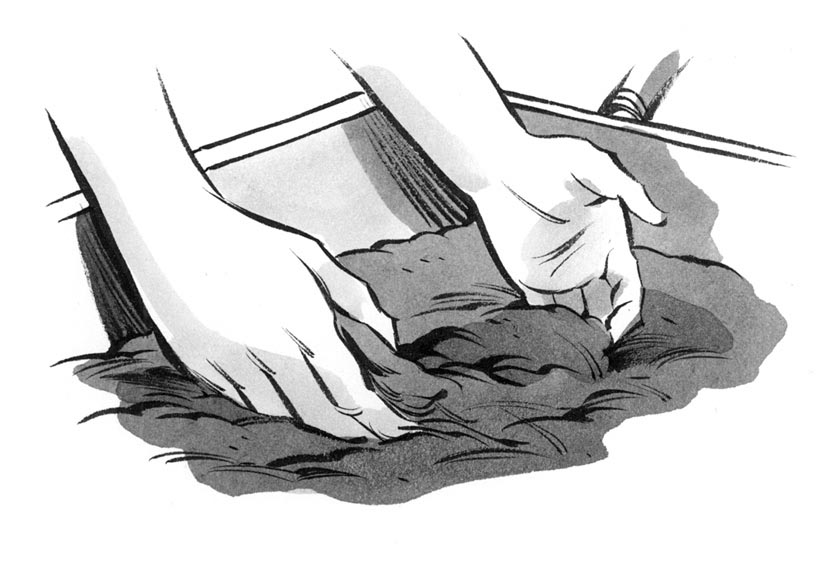
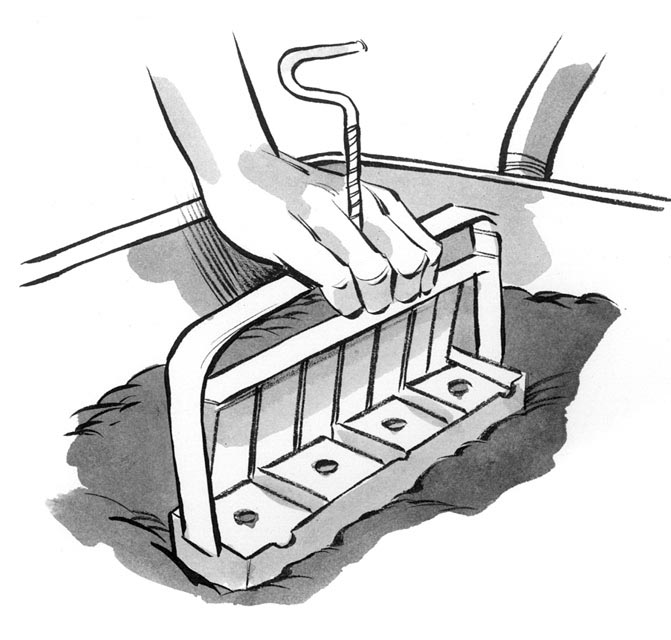
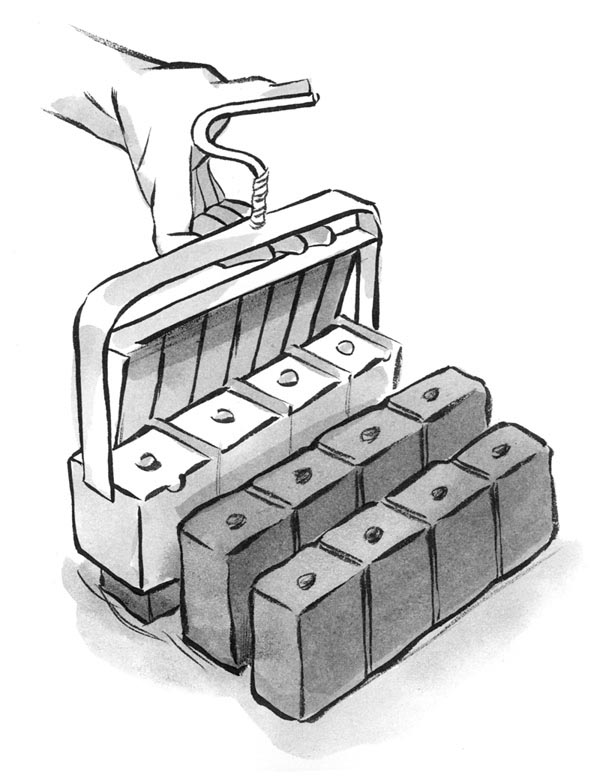
These “pots” consist of soil alone. Transplants don’t have to push their roots through the sides of a plantable pot and so establish quickly and easily. While you do have to make an initial investment in a block-maker, once you have one, soil blocks are less expensive than plantable pellets, plus you don’t have to bother with pots or flimsy market packs.
To make them, you’ll need a special soil block maker. A 2-inch blocker is a good size to start out. You also need special soil mix; use the recipe below, or buy premade mix. Don’t use ordinary potting soil, since the resulting blocks will not hold together well.
Practice a few times, and don’t be afraid to toss the first few test blocks back into the bin. There is a knack to making blocks, but learning how is well worth the trouble. Finished blocks should be firm and will hold together on their own.
It’s certainly possible to germinate seeds successfully with limited equipment, but some of the following items are worthwhile additions to any indoor seed-starting operation.
Heat mat. Seed for most vegetables and annual flowers germinates best when temperatures are between 68° and 86°F. Soil temperatures are key here, as seedlings are generally sturdier if air temperatures remain slightly lower. A heat mat keeps soil 10° to 20°F above the surrounding air. It’s the easiest way to keep soil warm, which speeds germination and encourages rapid root growth and sturdy plants. (A heat mat is also a must-have for rooting cuttings!) Because pots sit directly on the mat, there is no heat loss. Most are made of heavy-gauge polyvinyl; rubber heat mats are also available but are more expensive. They are designed to withstand damp conditions and spilled water. (Pots should still be set in flats on the heat mat to minimize spills when you’re watering). The mats are available in various sizes, which accommodate one, two, or four standard-size flats.
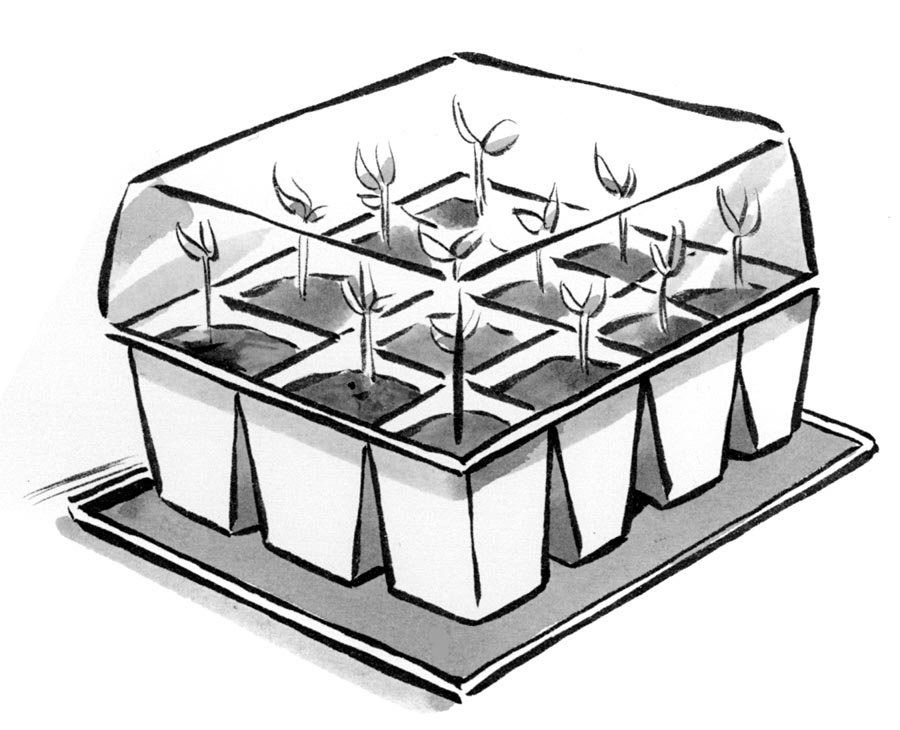
Toasty roots. An energy-efficient heat mat warms the soil slightly, which speeds germination and root growth.
Humidity covers. Seed companies sell a variety of clear plastic domes to go over seed flats and provide beneficial humidity for seedlings. It’s easy and inexpensive to make a simple humidity tent out of plastic dry-cleaner bags and wire coat hangers.
Seed sowers or handlers. Spreading seeds out thinly can be tricky, especially when they are small. A variety of simple tools make it easy to sow seeds thinly, two or three to a pot. A hand-held seed sower is inexpensive and makes handling seeds a cinch. Place seeds in the round portion, replace the clear plastic cap, and adjust the cap so the proper size hole lines up with the spout. Then tap seeds in place.

Sowing one by one. Spreading seeds out one at a time can be a tedious process. A simple seed handler is an easy solution that makes sowing all sizes of seed a simple matter.
Lights. Even if you have plenty of bright, sunny windowsills, consider supplemental lighting; it makes growing healthy seedlings much easier. Even with sunny windowsills, the early spring light is too weak to grow sturdy seedlings. One ordinary fluorescent shop light provides sufficient illumination for two standard flats. See Let There Be Lights below for more information.
Good light is essential for raising robust, stocky, vigorous seedlings, so it pays to do a bit of planning to make sure you can provide adequate light. Inadequate light results in tall, spindly seedlings. While newly sown flats don’t need light, once seedlings appear, they need fairly intense light in order to thrive. Use the following guidelines to provide your seedlings with what they need.
Evaluate your windowsills. Bright, east- or west-facing windowsills may provide sufficient light to grow compact, vigorous seedlings. Depending on what region of the country you live in, south-facing windows may be too sunny and hot, which means seedlings will need watering more often and are prone to scorching. If windowsills are too narrow, install shelf brackets and boards, bookcases, or other furniture under them. Protect furniture with plastic to prevent moisture damage. Even with bright windows, days are short in wintertime, so seedlings will likely need supplemental light for best growth.
More is generally better. Seedlings started indoors need about 16 hours of light per day; 14 hours is acceptable for good growth. (This is a major reason that supplemental lighting is so beneficial to seedlings.) If plants are growing in a cool location, seedlings can manage with 12 hours per day. Plants grow best with no more than 18 hours of light per day.
Use artificial lights. Fluorescent lights are ideal for raising good seedlings. While special plant grow lights are available, they are expensive. Seedlings raised under ordinary fluorescent lights are just about as healthy and stocky as those grown under fancy bulbs. (Use new bulbs, not old ones, since they provide significantly more light.) The secret to growing really sturdy seedlings is to mount the lights using chains and S-hooks. That way, it’s easy to adjust the distance between the growing seedlings and the lights. Keep the topmost leaves of the seedlings 3 inches below the lights for the first few weeks. After that, adjust the lights so they are 4 to 6 inches above the topmost leaves of the plants.

Bright is best. For the sturdiest seedlings, adjust lights to keep them close to the topmost leaves of the plants.
If you have lots of pots and loads of space, this may not be a question you’ll have to ponder, but most gardeners have to cope with the quandary of too many seeds and not enough space. Use these tips to help you make the best use of your space.
Sow densely. For space-efficient germination, sow many seeds per pot or tray (try to space them out over the entire surface). Then transplant seedlings to individual containers when they have at least two sets of true leaves. This is a good way to make the most of limited space on heat mats and under humidity covers. Once seedlings germinate, it is essential to thin them and then transplant to individual pots, to give them room to grow. Otherwise, the overcrowded seedlings compete with one another, get lanky, and become more prone to disease. See Thinning Seedlings (page 65) and Potting On (page 70) for more on these techniques.
Sow singly. Some gardeners hate fussing with tiny seedlings. If your goal is to avoid the need to transplant until seeds are moved to the garden, sow 3 or 4 seeds per pot. Remove all but the strongest 1 or 2 seedlings when they have about two sets of true leaves.

Seeds per pot. To avoid transplanting, sow 3 or 4 seeds per pot, then thin to one seedling. Or sow densely and move seedlings on when they are still small.