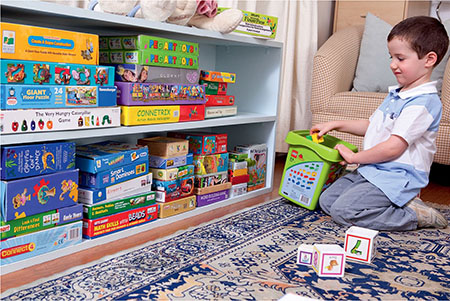
Children love a good story and bedtime is a wonderful opportunity for families to gather around a favourite classic so that Mum and Dad can bring the characters to life once more. Juliet never tires of Little Red Riding Hood or Hansel and Gretel and usually picks these from her bookcase when it’s story time. Any child who loves reading will want a special place to keep different sized books and this bookcase offers a stylish but practical solution that looks great anywhere. The playroom also needed extra storage space so we made two more bookcases of the same design, except lower and wider and featuring two internal shelves of the same height. This alternative design is useful because of the extra width, so that games, toys and puzzles can easily be stacked on top of each other.
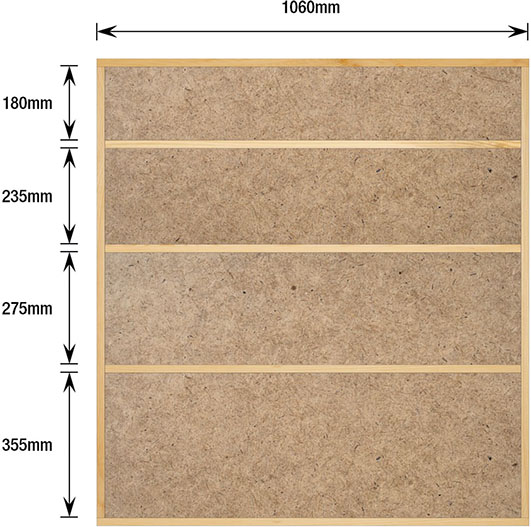
The large bookcase was painted white to match other furniture in our house and finished off with a routered edge around the front and sides of the top surface to add a stylish feature. All joints are simple butt joints fastened with right-angle brackets, which are positioned on the underside for aesthetic purposes. To determine the shelf heights I used different sized books, with the largest ones on the lowest shelf and progressively smaller sizes higher up. Of the two bookcases made with the wider design, one was varnished and the other was painted blue, but no edging was done on either. Should you wish to alter the design, additional vertical supports at the midpoint would be required for shelf lengths greater than 1,5m. This chapter explains the construction steps of the small bookcase; however, the principles apply equally to both or any other variation of the design. If you want a different size and configuration of shelves, then just the dimensions and shelf heights would vary according to your needs.
Family fun factor

The large bookcase design is suitable for children’s bedrooms and can take books of different heights.

The small bookcase fits well under windows, as seen in the Wendy house (see page 140).
WHAT I WOULD DO DIFFERENTLY NEXT TIME
The design of the outer frames of both bookcases is such that the top and bottom horizontal pieces run over the width of the sides. The inner shelves are thus shorter than the top and bottom by twice the width of the wood, as per the illustrations. For the large bookcase it would be easier to have all the horizontal pieces cut to the same size and simply butt joint both side pieces onto all of them in the same way. As the bookcases will be painted, the nature of the joints between the horizontal shelves and side supports will not be visible, and because the design uses right-angle brackets, this construction will be sufficiently strong. Most of the steps for the large bookcase would thus be done in such a way that it can be constructed lying on its side, which is much easier than building it up from the base.
LARGE BOOKCASE
| PART | QUANTITY | THICKNESS | WIDTH | LENGTH | |
| A | Top and bottom | 2 | 20mm | 300mm | 1060mm |
| B | Backing (Masonite) | 1 | 6mm | 1060mm | 1145mm |
| C | Inside shelves | 3 | 20mm | 300mm | 1020mm |
| D | Sides | 2 | 20mm | 300mm | 1145mm |
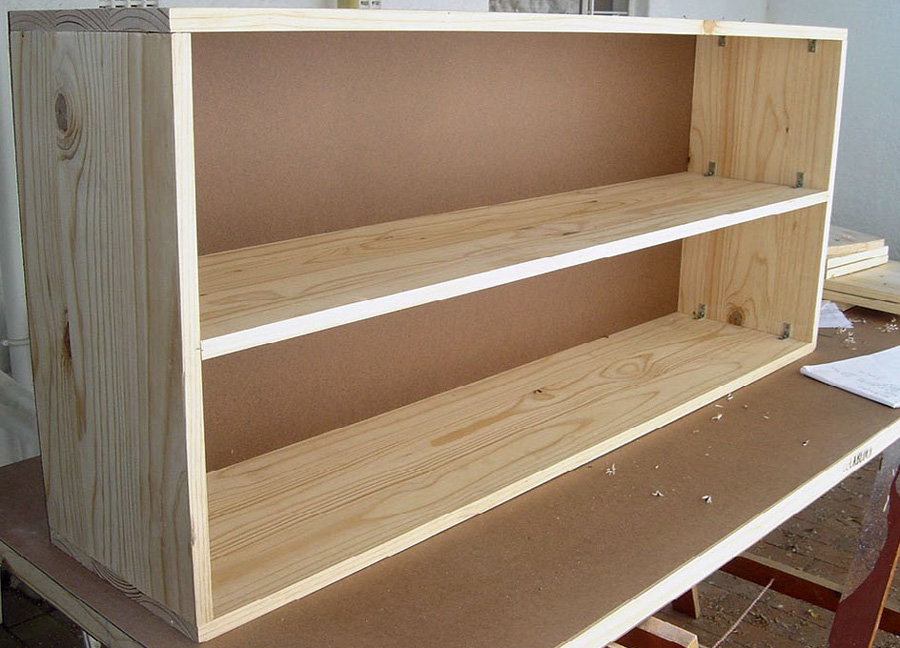
SMALL BOOKCASE
| PART | QUANTITY | THICKNESS | WIDTH | LENGTH | |
| A | Top and bottom | 2 | 20mm | 300mm | 1400mm |
| B | Backing (Masonite) | 1 | 6mm | 1400mm | 600mm |
| C | Inside shelf | 1 | 20mm | 300mm | 1360mm |
| D | Sides | 2 | 20mm | 300mm | 600mm |
Project information
| Overall dimensions | 1060mm wide x 300mm deep x 1145mm high (large) 1400mm wide x 300mm deep x 600mm high (small) |
| Number of parts | 8 (large) and 6 (small) |
| Special equipment | Router |
| Techniques | Decorative edging (see page 19) |
| Difficulty | Medium |
| Duration | 2 hours each |
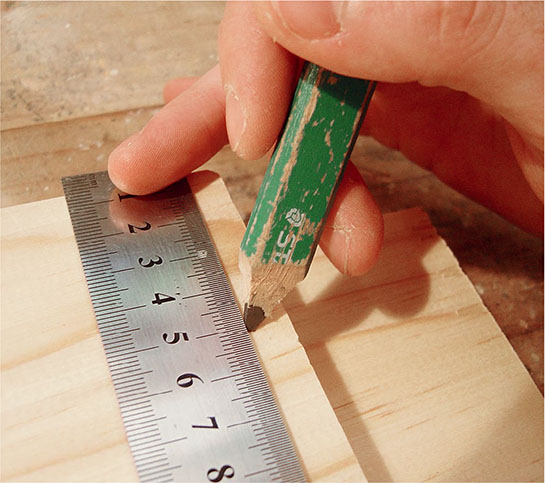
1 Use a steel ruler and carpenter’s pencil to measure and mark 50mm from the long edge of all the shelves. This will indicate the position of the right-angle brackets, which is easier to mark before assembling the bookcase.
2 Mount the bottom shelf (A) on the work surface using two quick grip clamps, as shown in the photograph.
TIP: Select which side is the front of the bookcase now so that you can rotate the rest of the shelves to ensure there are no knots on the front edges, which will most likely chip out and require filling.

INSTALL THE SIDES
3 Use a right-angle clamp to position and hold one of the sides (D) in place at one end of the bottom shelf (A). Use a rubber mallet to ensure that all adjoining surfaces of the two pieces of wood are aligned, as this will reduce the amount of sanding and smoothing required later on.

4 Add the other side (D) of the bookcase in the same way, using a right-angle clamp on both sides of the corner, as shown in the photograph. These clamps will preserve the right angles when fastening.

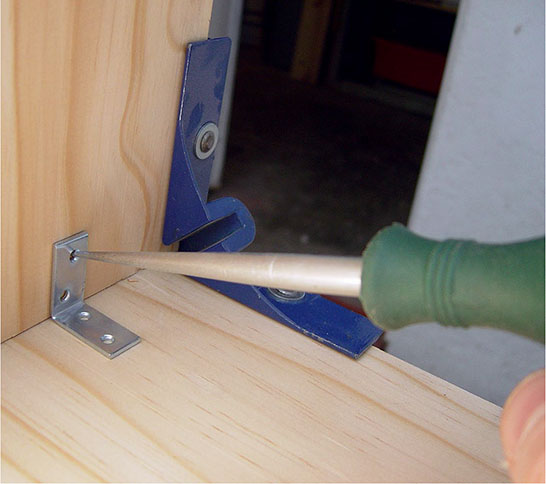
5 Place a right-angle bracket on the 50mm marking created in step 1. Use an awl to make surface holes in the wood which correspond to the positions of the screw holes in the right-angle bracket.
TIP: You can use a carpenter’s pencil to mark the positions of the screws, but a surface hole helps position the tip of the drill bit quicker and more accurately, as required in the next step.
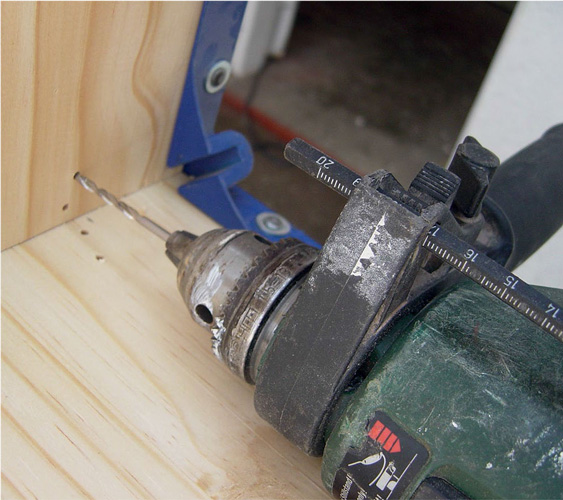
6 Use a power drill to make pilot holes so the wood does not split when the screws are tightened. Select a thin drill bit and be careful not to drill too deep as it is easy to push too hard and create a hole on the other side, which will then need to be filled with wood filler.
7 Use a screwdriver to fasten each right-angle bracket with four small wood screws, as shown in the photograph. The joints are likely to become misaligned during this step unless the right-angle clamps remain tightly in place.

8 Check for right angles with a try square and make any adjustments to ensure an accurate assembly. Minor gaps can be filled with wood filler just before finishing the project. If you want to varnish the bookcase, too much wood filler in the joints will look unsightly.

INSTALL THE TOP SHELF
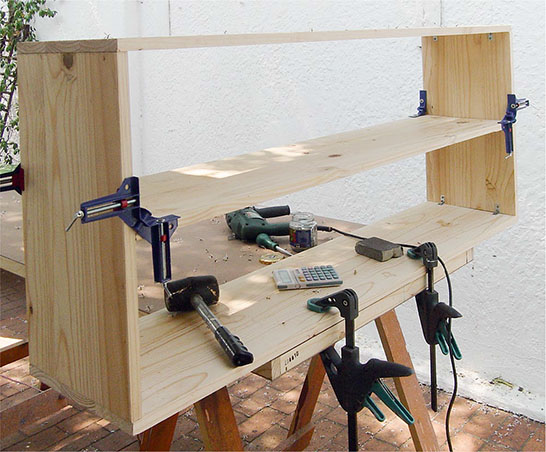
9Add the top shelf (A) and clamp in place with extra long quick grip clamps (or sash clamps), then fasten the top corner joints with wood screws and right-angle brackets as before. Keep the right-angle clamps in place on the bottom corners to preserve the right angles on the top corners.
10 Measure the position of the inside shelf (C) according to the design and mount in the same way as the top and bottom shelves (A) with right-angle clamps. Fasten the joints on both sides with right-angle brackets as before, but make sure they are mounted on the underside of the shelves so they are not visible.
MOUNT THE BACKING
11 Lay the shelf face down on your work surface and position the pre-cut backing (B), ensuring that its outer edges are within those of the bookcase – make adjustments if needed. Use a steel ruler and carpenter’s pencil to mark the position of the inside shelf (C) on the backing (B) and use a claw hammer to fasten it down with large head nails in the four corners, along the back of the inside shelf and along the top and bottom shelves (A) and sides (D).

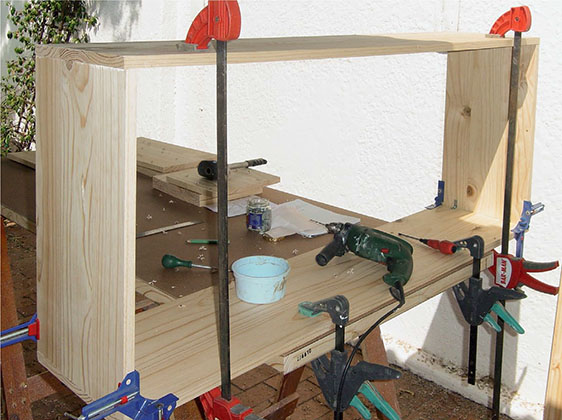
12Turn the bookcase over and clamp onto two trestles, as shown in the photograph. Use a belt sander to smooth all surfaces and corners, then fill any gaps with wood filler and sand down again with a random orbital sander to prepare for finishing.

13 The completed assembly is shown in the photograph – it is upside down to show the right-angle brackets for the inside shelf. Note again that there should be no knots (or as few as possible) along the front edges of the bookcase as these will chip and require additional filling work.