a drag of the brush…a scrape of paint…a dip of the pen nib into ink…a scribble… a zig-zag…a swirl of the pen…a smiley face with a crayon…all of these are the beginnings of unique marks. It’s that simple….
A doodle can be a mark, a scribble or a drawing created aimlessly and freely, without care. It’s not that doodles don’t have meaning—because a lot of times they do!—but for the most part, they are unplanned, spontaneous marks that are often drawn subconsciously. In this chapter, we will focus on making unique marks through doodling.
Unique marks are born whenever you put a pen to a piece of paper, but they are not limited to handwriting or drawing. A mark becomes unique based on the tools you use to make it, the inspiration behind it and the surface it is made on. When doodling, I use traditional mark-making tools like paint pens, correction fluid pens, dimensional paint and permanent markers, as well as nontraditional tools like bamboo skewers, old hotel room keys, craft sticks and sponges. Each tool produces a distinctive result.
My doodling process is random and scattered. I’ll work on multiple pages a day, adding a small bit to each page. I might scribble on a page with colored pencils, stamp paint on another page, and then go to a different page and doodle with black pens or write with a dip pen and sumi ink. I add elements of collage and draw a lot of faces, including my signature “girlie glam” doodles (see page 92) and my more stylized “fashionista” faces (see page 100).
There are so many ways to create unique marks that are inspired by everyday items and things we see in our travels and in daily life. Discover new and alternative ways to use tools and mediums and make your mark!
My love affair with colored pencils started in my high school art class. I remember creating a large drawing of a model from a fashion magazine using only colored pencils. I loved the way I could blend them to create customized colors. I incorporate colored pencils in many of my doodles, paintings and art journal pages. They can be used over most painted or porous backgrounds, including fabric. Colored pencils give me more control over a detailed drawing than a brush does. Blending them gives an airy quality to the piece.
The beauty of the colored pencil is in its ability to create blended colors and create vibrant marks over paint. It’s a great medium for adding bright color to doodles. My personal technique is to use a very “hard hand,” applying a lot of pressure as I color. I like the waxy finish that results when the pencils are blended with more pressure. Use this exercise to practice layering and blending color.
1" (2.5CM) FLAT PAINTBRUSH
BLACK .035 PEN (COPIC MULTILINER)
COLORED PENCILS (PRISMACOLOR)
FLUID ACRYLIC PAINT (MATISSE DERIVAN)
INDIA INK (SPEEDBALL)
PLASTIC SOUFFLÉ CUP
SIZE 1 LINER PAINTBRUSH
SURFACE TENSION BREAKER WATERCOLOR AND AIRBRUSH MEDIUM (MATISSE DERIVAN)
140 LB. (300GSM) MIXED-MEDIA PAPER (STRATHMORE)
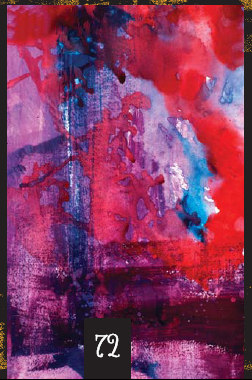
![]() Paint a piece of mixed-media paper with fluid acrylic paints. To create a wash of color, dip your brush into water and mix it with paint. Drizzle surface tension breaker medium over the surface and move the paper around in different directions, letting the medium flow over the page. Add another color for contrast.
Paint a piece of mixed-media paper with fluid acrylic paints. To create a wash of color, dip your brush into water and mix it with paint. Drizzle surface tension breaker medium over the surface and move the paper around in different directions, letting the medium flow over the page. Add another color for contrast.
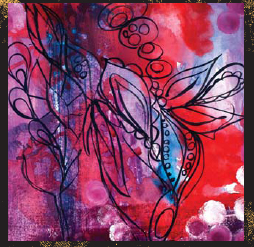
![]() Paint a flower or abstract design using a size 1 liner paintbrush dipped into India Ink.
Paint a flower or abstract design using a size 1 liner paintbrush dipped into India Ink.
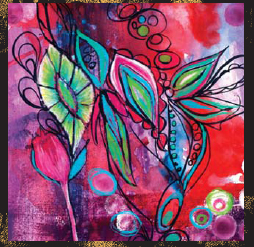
![]() Begin to fill in the painted design with colored pencils. Choose five to seven colors for a piece of artwork and use those throughout the painting to create a balanced composition. Experiment blending with three analogous colors, like lime green, turquoise and yellow. Start with one color, then add the next over the edge of the last until the drawing is filled in. Work in different areas of the piece, in no specific order.
Begin to fill in the painted design with colored pencils. Choose five to seven colors for a piece of artwork and use those throughout the painting to create a balanced composition. Experiment blending with three analogous colors, like lime green, turquoise and yellow. Start with one color, then add the next over the edge of the last until the drawing is filled in. Work in different areas of the piece, in no specific order.
![]() Use a white colored pencil to blend the colors together and create tints of colors. Color lightly over the first layer of colored pencil marks.
Use a white colored pencil to blend the colors together and create tints of colors. Color lightly over the first layer of colored pencil marks.
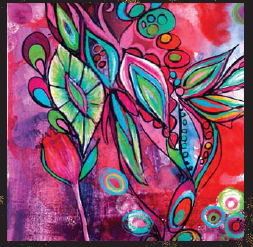
![]() Use a black .035 pen and clean up the edges of the design. This adds a nice sharpness to the finished piece.
Use a black .035 pen and clean up the edges of the design. This adds a nice sharpness to the finished piece.
The pipette is a great drawing tool. It creates beautiful lines and drips of paint depending on how it is used. There is a slight learning curve when working with the tool. You will need to lightly squeeze the ink out by pressing the top while dragging it across the page to create a design. Here are two different ways to incorporate pipettes into your doodling.
One of my favorite recurring themes within the pages of my journals and in my inspiration photos is flowers. I love painting, stamping and creating abstract floral shapes. This exercise focuses on beginning with a pipette doodle.
COLLAGE PAUGE
COLORED PENCILS (PRISMACOLOR)
FOAM BRUSH
PLASTIC PIPETTE
WATERCOLORS (SAKURA KOI)
WATERPROOF INDIA INK (SPEEDBALL) OR SUMI INK
![]() Prepare the pipette with waterproof India or sumi ink. Squeeze lightly as you draw a flower shape.
Prepare the pipette with waterproof India or sumi ink. Squeeze lightly as you draw a flower shape.
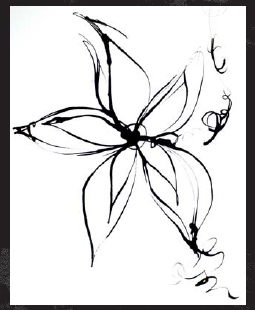
Keep the tip of the pipette on the surface as you draw to control the weight of the drawn line.
![]() Make sure the ink is completely dry before you paint over it or it will smear. Paint the inside of the flower with watercolors or an acrylic wash.
Make sure the ink is completely dry before you paint over it or it will smear. Paint the inside of the flower with watercolors or an acrylic wash.
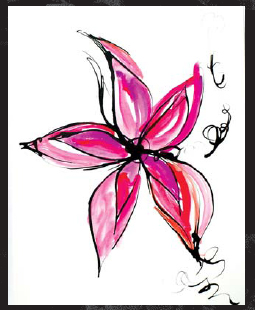
![]() Continue to add color and doodles around the flower and accent inside the flower with colored pencils.
Continue to add color and doodles around the flower and accent inside the flower with colored pencils.

 IDEAS:
 Experiment by collaging black-and-white photocopies over the pipette doodle and painting acrylic washes over the collage, letting the text show through.
 Try doodling on different surfaces, especially painted backgrounds—they make great jumpstarts.
![]() Cut out leaf and petal shapes from hand-painted construction paper, and collage them over the top of the doodled flower. Adhere the cut pieces with Collage Pauge or your favorite gel medium. Be sure to apply a layer of medium under and over the collage pieces. Smooth the pieces out with your finger to prevent air bubbles.
Cut out leaf and petal shapes from hand-painted construction paper, and collage them over the top of the doodled flower. Adhere the cut pieces with Collage Pauge or your favorite gel medium. Be sure to apply a layer of medium under and over the collage pieces. Smooth the pieces out with your finger to prevent air bubbles.

Work fast as you write so the ink doesn’t create a large puddle on the piece.
![]() Outline the collage pieces with waterproof India ink applied with a pipette.
Outline the collage pieces with waterproof India ink applied with a pipette.

Finding the doodle in a painted background takes a little creative visualization. Turn your paper in various directions and look at the shapes. What do you see? Begin to call out those shapes by making marks with a pipette and ink.
1" (2.5CM) FOAM BRUSH
BLEEDING TISSUE PAPER
“CLEANUP” PAPER
COLLAGE PAUGE
GESSO
OIL PASTELS (SAKURA SPECIALIST)
PAINTBRUSH
PLASTIC PIPETTE
SUMI INK
WATER BRUSH
WATERCOLOR PENCILS (DERWENT INKTENSE)
![]() Collage pieces of bleeding tissue paper into flower shapes over a piece of “cleanup” paper with Collage Pauge.
Collage pieces of bleeding tissue paper into flower shapes over a piece of “cleanup” paper with Collage Pauge.
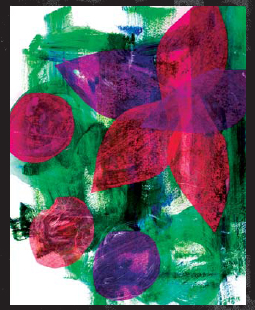
![]() Fill a plastic pipette with sumi ink. Drizzle ink onto the page, tracing the flower shape. Squeeze the pipette gently to slowly release the ink. To prevent large puddles of ink from forming, touch the tip of the pipette to the page and move across it slowly.
Fill a plastic pipette with sumi ink. Drizzle ink onto the page, tracing the flower shape. Squeeze the pipette gently to slowly release the ink. To prevent large puddles of ink from forming, touch the tip of the pipette to the page and move across it slowly.
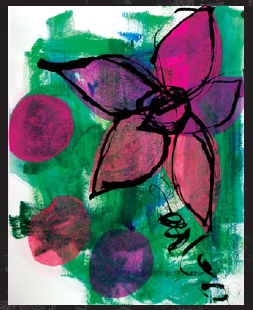
![]() Make marks with oil pastels, coloring the background and inside the flower.
Make marks with oil pastels, coloring the background and inside the flower.

![]() Scribble on the piece with watercolor pencils and spread the colors with a water brush. While the sumi ink is wet, use a brush to draw more doodles.
Scribble on the piece with watercolor pencils and spread the colors with a water brush. While the sumi ink is wet, use a brush to draw more doodles.
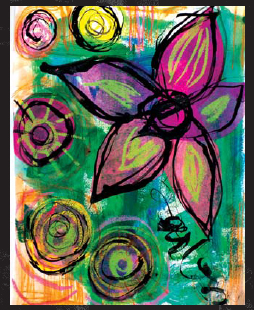
![]() With a foam brush, paint gesso over the wet surface to accent the doodles. The gesso will tint when it is painted over colored tissue paper.
With a foam brush, paint gesso over the wet surface to accent the doodles. The gesso will tint when it is painted over colored tissue paper.
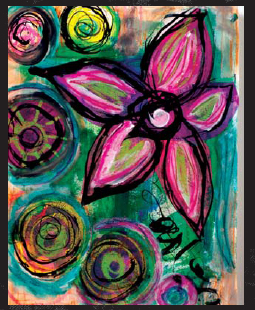
![]() Blend wet gesso with watercolor pencils, using a paintbrush to add tints of color to the page.
Blend wet gesso with watercolor pencils, using a paintbrush to add tints of color to the page.

Collage Pauge is not only an adhesive; it is also a painting medium. It can be mixed with paint for a glossy shine or used as a clear resist. I like to doodle lines and draw with Collage Pauge in a fine-tip applicator bottle.
Make unique marks by drawing with Collage Pauge. Dried adhesive will act as a resist when you paint over it. Write words, doodle and draw, let it dry, then paint a wash to reveal the marks.
140 LB. (300GSM) VISUAL JOURNAL WATERCOLOR PAPER (STRATHMORE)
COLLAGE PAUGE GLOSS
FABRIC CROCHET DOILY
FINE-TIP APPLICATOR SQUEEZE BOTTLE
SHIMMERING MIST SPRAYS (LUMINARTE RADIANT RAIN)
WATER BRUSH
![]() Transfer Collage Pauge Gloss into a fine-tip applicator squeeze bottle. Write words and phrases, scribble designs and make marks by writing with the applicator bottle on the surface of the paper. Let it dry. Spray through a fabric crochet doily with a couple colors of shimmering mist sprays. Let them dry.
Transfer Collage Pauge Gloss into a fine-tip applicator squeeze bottle. Write words and phrases, scribble designs and make marks by writing with the applicator bottle on the surface of the paper. Let it dry. Spray through a fabric crochet doily with a couple colors of shimmering mist sprays. Let them dry.

![]() Paint a wash of color by spraying two shimmering mist sprays onto a palette, then painting them onto the page. The Collage Pauge will act as a resist, and the paint sprays will slightly dye the Collage Pauge to cause a “ghosting” effect. The ghosting effect allows you to see the writing when you tilt the page in different directions.
Paint a wash of color by spraying two shimmering mist sprays onto a palette, then painting them onto the page. The Collage Pauge will act as a resist, and the paint sprays will slightly dye the Collage Pauge to cause a “ghosting” effect. The ghosting effect allows you to see the writing when you tilt the page in different directions.

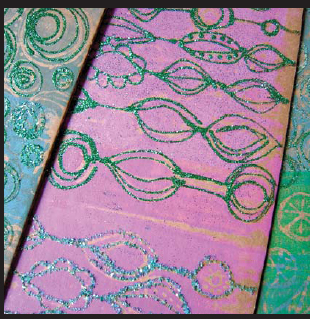
Add a little bling to your painted creations! Another great technique for Collage Pauge is to create clear dimensional lines and marks over painted designs. Play with doodling over your painted creations and adhere various glitters, mica powders or foils that will add texture to your art.
A VARIETY OF ULTRA-FINE GLITTERS AND VINTAGE GERMAN GLASS GLITTERS
CARDBOARD OR ANY PAPER OR FABRIC SURFACE
COLLAGE PAUGE
DOODLE PRINTING PLATE (SEE PAGE 9)
FINE-TIP APPLICATOR SQUEEZE BOTTLE
Try this technique on fabric or wood.
![]() Place Collage Pauge into a bottle with a fine applicator tip.
Place Collage Pauge into a bottle with a fine applicator tip.

![]() Use a doodle printing plate (see page 9) to apply a design to a piece of corrugated cardboard. Trace over the doodle design with Collage Pauge.
Use a doodle printing plate (see page 9) to apply a design to a piece of corrugated cardboard. Trace over the doodle design with Collage Pauge.
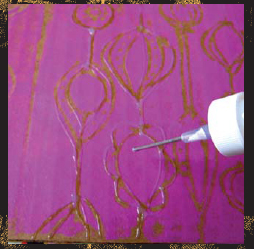
![]() Sprinkle glitter over the piece.
Sprinkle glitter over the piece.
scrawl (skrôl) v. scrawled, scrawl·ing, scrawls to write hastily or illegibly.
Creating stylistic scrawls is something that I have practiced since I was young. The combination of my mark-making tools and my personal graffiti creates my own unique brand of stylized writing. I use all kinds of tools to write with: pens, permanent markers, crayons, colored pencils, highlighters, Chinese paintbrushes, glitter paint or acrylic paint in a fine-tip applicator, glue pens and bleach pens. I also use found tools like eyedroppers filled with India ink, cut-up craft sticks, chopsticks and feathers—anything I can dip into ink or make marks with.
As I write, I rotate my painting or art journal in different directions, spilling my thoughts, feelings and ideas onto the page. I write in a circular direction or in a heart shape. I draw lines and then write in between them, overlapping my words to disguise my thoughts. Sometimes the words are illegible. Sometimes they are simple and plain. My journal tells a visual story with lines, scrawls and scribbles. Journaling is all about expressing yourself through images and words and writing whatever comes to mind.
Stylistic scrawls will look different for everyone. Start doodling words and phrases in your journal or on paper, napkins or fabric—anything you can write on. As you work, ask yourself, “What if I tried this?” and “I wonder if this would work?” Try adding swirls or flourishes to the ends of your letters. Make an outline of a letter and fill it in with more doodles. Write words, letters or phrases that are layered on top of each other to create interesting effects. Play a word-association game and write words as you think of them. If you get stuck, find a font that you like and try to copy the strokes. What are your favorite tools, mediums and pens? How can you combine them to make a stylistic mark unique to you? Practice developing your style by experimenting with different lettering styles using your favorite mark-making tools.
Don’t be afraid! You can’t make a mistake, because you are developing your own style. Just relax, have fun and play!
Create brush washes on a piece of paper or muslin (or both!). Dip your brush in ink or watered-down acrylic paint and paint strokes across your surface. Let the wash dry. Use a felt pen to accent the paint wash.
These stylistic scrawls were made on a manila folder. Scrape paint or stamp patterns in the background of the folder, then layer stylistic scrawls with pens and markers. Add flower doodles. Collage colored photocopy paper circles onto the piece, then add more doodles.

GO TO WWW.CREATEMIXEDMEDIA.COM/DOODLES-SCRIBBLES TO WATCH A TECHNIQUE VIDEO ON STENCILING, STYLISTIC SCRAWLS AND DIMENSIONAL GRAFFITI SCRIBBLES.
In some of my artwork, I experiment with lettering styles inspired by urban graffiti walls. I make these graffiti scrawls my own by adding doodles to the letters, layering scribbled graffiti or writing with glitter dimensional paint. The movement of my marks, the overlapping of the words and the repetitive style of the letterforms define these graffiti-inspired stylistic scrawls as mine.
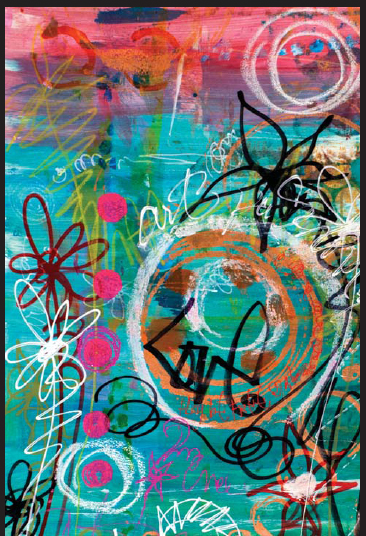
I love puffy paint! Using it in my art is a throwback to my days as a cheerleader and sorority member when I used it to design one-of-a-kind t-shirts. Now, I use it to doodle on top of painted fabrics and to embellish my collage paintings and journal pages.
Use dimensional paint to doodle over stencil prints (see page 54), highlighting different shapes. Write words with the paint. Draw quickly when applying dimensional paint so it doesn’t form large beads on the surface.
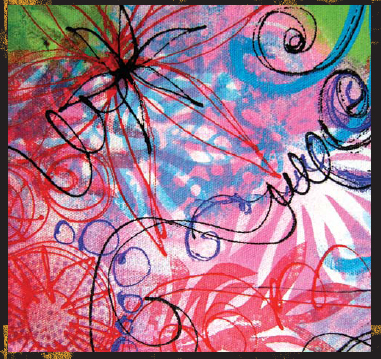
This technique is inspired by the colorful abstractions of urban graffiti walls layered with vibrant colors, peeling textures and words, and can be translated to create interesting backgrounds for collage or paintings. Create your own graffiti-style mixed-media layered backgrounds over cleanup paper, painted fabric or collage. This exercise is a great way to overcome the blank page. Write your thoughts, scribble words and make marks.
 IDEAS:
 Use a magazine, newspaper or book as inspiration.
 Graffiti wall: Place a large piece of paper on the wall and add marks to it daily. Cut the large paper smaller to use for journal pages.
 Alternate the size, color and type of letter.
 Experiment with different mark-making tools to create interesting lines.
 Create graffiti canvases by using fabric as the base.
 Spray through letter stencils, then add your own lettering.
Place a large piece of brown craft paper, white butcher paper or a manila folder over your work surface to catch all your excess paint and marks while you are creating. Write over a cleanup background paper with various markers and a white correction fluid pen.
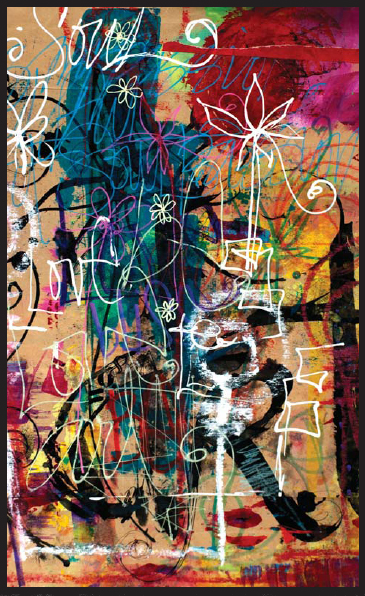
Apply a couple of different colors of acrylic paint to paper. Make random marks with colored pencils. Use a metallic gel pen that matches your background colors to write a hidden message.
Add washes of paint and clean your stamps and stencils onto the fabric. Let it dry. Draw designs with a black chisel-tip permanent marker. Fill in the doodles with various colors of oil pastels, markers and gel pens. Add some phrases and words with fine-nib markers. Turn the fabric in another direction and continue to write. For fine black lines, a Pilot Tough Wash pen or black permanent marker works well.

A great exercise to get your writing going is to write randomly on a large piece of paper or canvas. Stain the background with a few different colors of paint. Let it dry. Then write whatever comes to mind with a permanent pen. Alternate pens and nib sizes to create letters in varied weights. Use a black pen for more contrast. Try using gel pens over the paint, too. For a watercolor look, write with felt pens.
Many of my paintings are visual stories with minimal words, but there are also times when I want to spill my thoughts and express my feelings on the page. These words and letters are layered over each other—sometimes legibly and other times not—but the lines tell a visual story with their movement and color. I use various pens and markers to write about my day, thoughts and aspirations, or how I feel at any given moment. I alternate my writing by working in different directions on the page and using different markers to sometimes disguise my words. Experiment with layering different Copic markers and pens to form your own visual poetry.
 Outline black lines and shapes with metallic pens.
 Use red marker over yellow paint for contrast.
 Add dark lines with a black chisel-tip permanent marker.
 Write a few words about your day.
 Add circles with a white correction fluid pen.
 Outline circles with glitter pens.
A graffiti masterboard is a painting you can use as a “master” to photocopy, scan and print. Photocopy it in color and use the pieces for handmade cards, scrapbook pages or ATCs. Masterboards can be theme-based using different colors, letters, words or phrases.
Paint a piece of heavy cardstock or 140 lb. (300gsm) watercolor paper. Print patterns with handmade stamps by applying paint to the stamp with a foam brush and pressing the stamp on the surface. Stain the page with watered-down acrylic wash. Let it dry. Then write over the top with various markers. For this masterboard I used permanent markers, a white correction fluid pen and Sakura Glaze and Soufflé gel pens. This example can be used for birthday, autumn and thank you cards.

 IDEA: Create a themed “holiday nouveau” masterboard, painting the background fuchsia, lime and purple. Then write phrases like happy holidays, joy, merry and love and stamp or stencil tree, ornament and wreath shapes. Create one master and photocopy it multiple times. Cut out pieces of the photocopies and stitch them onto holiday cards or make mini journals. Print the design on inkjet fabric sheets or iron-on transfer sheets and make an art-quilt stocking.
Writing lists and scribbling quotes are fabulous ways to write continuously. Play with different tools as you write to build up layers of color. I use this technique to make creative layers of text that, in the end, look like abstract lines.
1" (2.5CM) FOAM BRUSH
BLACK, BLUE AND GREEN PERMANENT MARKERS (SAKURA PIGMA SENSEI)
BLUE INK (LIQUITEX)
DIMENSIONAL FABRIC PAINT (TULIP SLICK)
GREEN AND WHITE ACRYLIC PAINT
HIGHLIGHTER
MARKERS WITH BRUSH AND CHISEL TIPS (COPIC)
METALLIC MARKER (SAKURA PERMAPAQUE)
PAINTASTIC BRUSH PEN AND MAGIC WAND (ELMER’S)
POSTER MARKERS
RED WIDE MARKER (COPIC)
WHITE CORRECTION FLUID PEN
![]() Paint a background with green and white acrylic paint. Dip the brush corners into two different colors and mix the paint on the paper as you brush it onto the surface. Place a little bit of blue ink on a brush and brush it into the wet paint. This will darken areas on the background. Let the paint dry.
Paint a background with green and white acrylic paint. Dip the brush corners into two different colors and mix the paint on the paper as you brush it onto the surface. Place a little bit of blue ink on a brush and brush it into the wet paint. This will darken areas on the background. Let the paint dry.
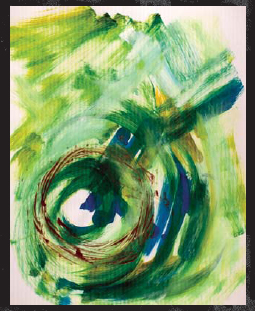
![]() Write words and phrases using two different colors of markers with brush and chisel tips.
Write words and phrases using two different colors of markers with brush and chisel tips.

![]() Continue writing around the circular painted design with a metallic marker.
Continue writing around the circular painted design with a metallic marker.
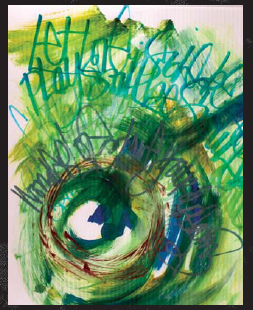
![]() Add contrast color with a poster marker and blue and green permanent markers. Scribble more words with a Paintastic Brush Pen and Magic Wand to create variegated colored letters. Write with a highlighter to create transparent letters. The highlighter will blend with the color it is written over.
Add contrast color with a poster marker and blue and green permanent markers. Scribble more words with a Paintastic Brush Pen and Magic Wand to create variegated colored letters. Write with a highlighter to create transparent letters. The highlighter will blend with the color it is written over.
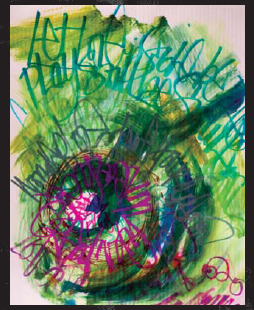
![]() Brighten up the page by writing with a red wide marker and a white correction fluid pen over the previous layers. Add contrast with words scribbled in black permanent marker.
Brighten up the page by writing with a red wide marker and a white correction fluid pen over the previous layers. Add contrast with words scribbled in black permanent marker.

![]() Add a layer of textured letters by writing with dimensional fabric paint.
Add a layer of textured letters by writing with dimensional fabric paint.

Experiment with creative lettering on fabric. Grab a piece of muslin and a few markers and make marks and scribbles by writing in layers, switching colors as you work. Paint the fabric with foam or fabric brushes. Create a watercolor effect by loading a little water and paint on the brush.
Doodle and write with your sewing machine! Freemotion lettering is a great way to embellish your art. After a little practice, you can create a unique personal lettering style with stitches. You need a sewing machine where you can drop or lower the feed dogs. Once you set up your machine and change your sewing foot to a darning or freemotion foot, you are ready to go.
Set up your sewing machine for freemotion stitching. Refer to your manufacturer’s sewing machine manual to find out how to do this. Pull the fabric through the machine using the same motion you’d use if you were writing the letters over the top of the fabric.

 Make sure your paint and glue is completely dry before you attempt to sew. Practice sewing doodles and letters on scrap fabric.
 Stitch along the lines and doodles of your background.
 Choose thread colors that contrast with the painted background, so they will pop off the surface and not blend with the background. For example, if you have a turquoise background, choose a bright, fire-engine red thread.
 Experiment with different types of thread. I prefer two different colors and types of thread: rayon for the top thread and cotton for the bobbin. I use rayon for the top because it creates a bright and shiny finish.
 Alter the speed of your machine to a comfortable pace so you can sew legible letters.
 When starting out, keep the machine speed slow to get comfortable with moving the fabric.
 If you use a lot of glitter in your artwork and stitch over the pieces, be sure to give your machine a good cleaning afterward to remove all the dust and particles.
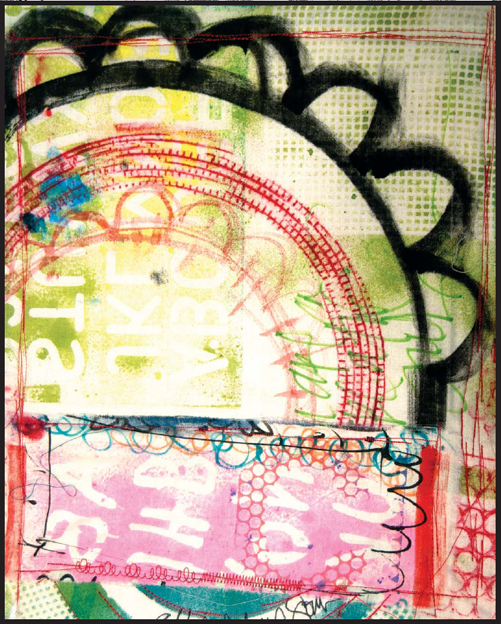
Create a patchwork art quilt collage background by freestyle stitching pieces of hand-painted fabrics together. To create a quilt, pin together the top painted fabric to a piece of bamboo batting and a backing fabric and stitch. Note that these fabrics were printed with letter stencils and needlepoint canvas. See the Stencils technique on page 54.
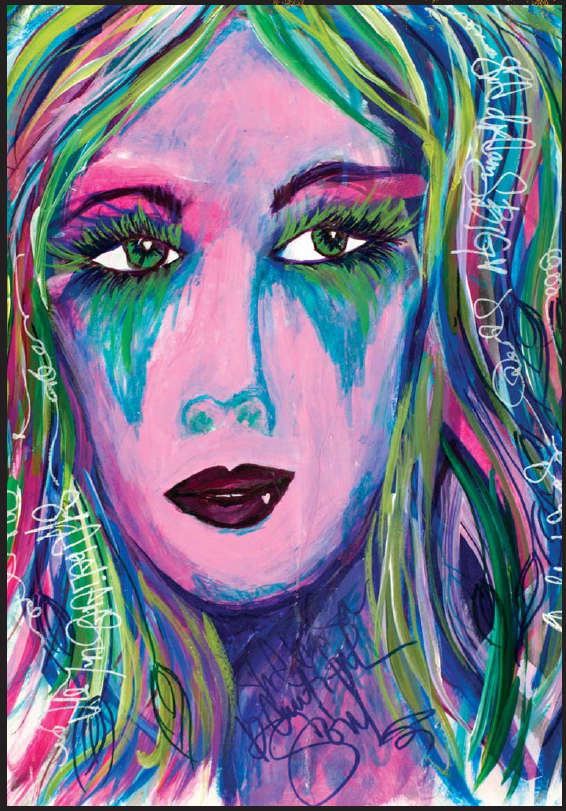
Throughout the years, I have developed my signature style of drawing faces, which I call “girlie glam” faces. These unique drawings are created with a mix of pens, paint markers, ink, acrylic paints and colored pencils. Some start with a doodle on a plain piece of paper or fabric. Others are painted over a collage base or fabric.
My “fashionista” faces are inspired by fashion photography. I scour through magazines to find inspiration from photos of models’ faces and poses to incorporate into my designs. I use the photos as guides for face shapes and shading.
Draw an outline of a face on a brown paper bag. Fill in the face with two colors of paint. Let it dry. Draw more details over the painted face and add lines for hair with a black fine-tip oil-based paint marker. Brush on contrasting colors of paint. Accent the drawing with colored pencils.

Create a patchwork collage on illustration board. Paint a shape for the face with a mix of white and green acrylic paint over the collage background. Let it dry. Draw a quick outline of a face with a black fine-tip oil-based paint marker. Fill in the design with contrasting paint colors. Add more detail with a black pen. Draw over the painted design with various colored oil-based paint pens. Highlight shapes in the background with colored pencils.
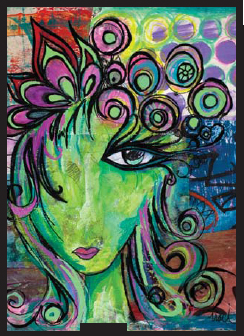
Create a wash by dipping a paintbrush into water, then into Golden fluid acrylic paint. Brush wash onto hot-press watercolor paper. Wash another color onto the surface. Brush paint onto a craft foam stamp and press it onto the paper to create a pattern. Let it dry. Draw a face over the painted background with a 0.35 black permanent pen. Thicken areas of the outline with a broader black permanent pen. Fill in the outline by mixing various colored pencils on the surface. Color with a heavy hand to yield more opaque coverage.
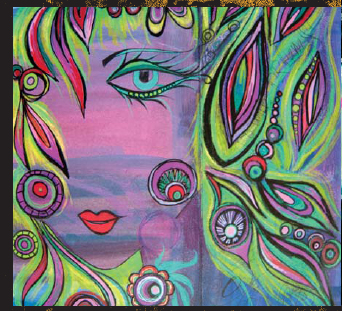
This face was painted on a fingerpainted background. Black and colored Sharpie oil-based paint pens were used to draw the girlie glam face. I then added accents with Prismacolor colored pencils and a correction fluid pen.
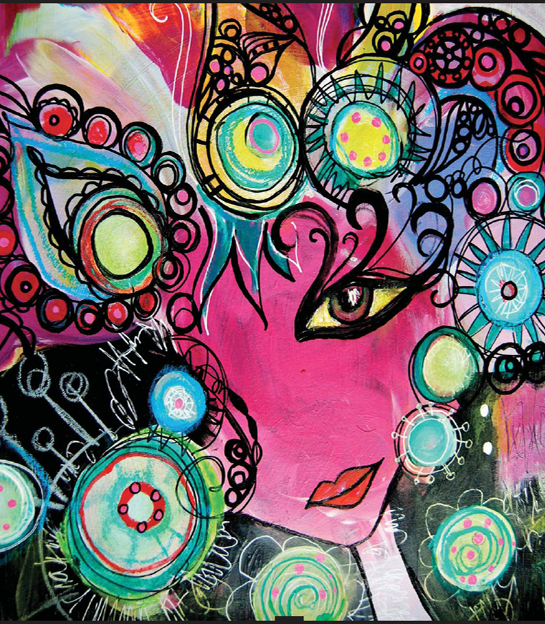
I find myself constantly doodling faces. Usually, my signature girlie glam girl has one eye and wildly drawn hair or a headdress. I can sit and draw different variations for hours. I don’t have a plan; I let the pen move around the page, embellishing the hair and eyes, making marks and outlining previous marks.
In order to discover your own style of character or face, you must practice. Use the girlie glam doodles below as inspiration to jumpstart your drawings. Study the lines and shapes. Begin by drawing the eye and mouth. Next, draw a chin and neck. Then, add lines and abstract shapes for hair. Thicken the lines with color for more detail. Remember to add your own style!

 IDEA: Create a journal or sketchbook dedicated to drawing faces. Draw one face a day.
GO TO WWW.CREATEMIXEDMEDIA.COM/DOODLES-FACES TO DOWNLOAD FULL-SIZE FACES TO PRACTICE WITH. TRACE, DOODLE, EMBELLISH AND USE THESE DOWNLOADS AS A GUIDE FOR YOUR OWN GIRLIE GLAM FACES.
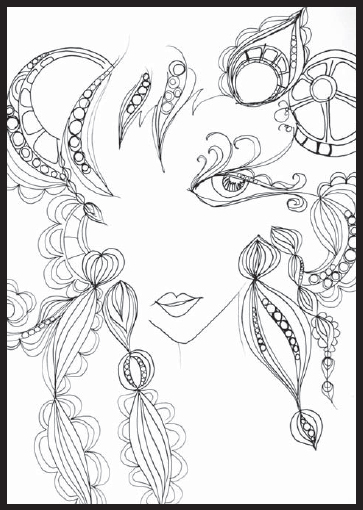
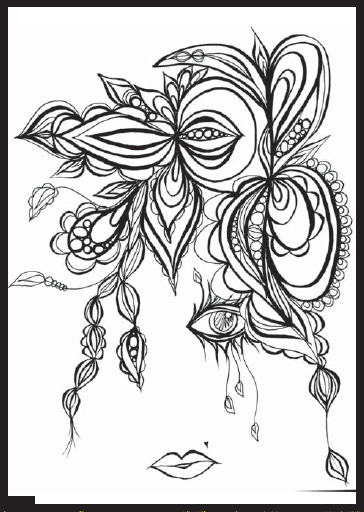
What images do you continue to draw over and over in your artwork? What style of art do you make? What types of lines do you draw? Is there a pen or a brush that you like to use? If you continuously make unique marks as you paint and draw, over time you will create your own signature style.
Practice … practice … practice creating your signature style faces, drawing the images many times. As you become familiar with the lines, drawing the faces will become second nature. Experiment with your favorite tools and add your personal touch with doodles and color.
My method of drawing stylized faces is similar to that of most of my paintings. I start with a simple drawing of a face on a surface. They are drawn on paper, fabric and handmade canvases. Some of the faces drawn on fabric are stitched into journal covers or tote bags, or become the main panel for an art quilt wall hanging. Below are a few examples of faces I have drawn on nontraditional surfaces.
Draw a girlie glam face on a piece of drill cloth with a permanent fabric pen. Write words and doodle flowers in her hair. Stitch the drawing onto various fabrics to create an art quilt.

Use the fabric from a pair of worn-out jeans as a background for a drawing. Stitch the fabric onto a heavyweight shipping envelope to make a sturdier cover. Draw a face with a black permanent marker.

The tools you use to draw your faces will yield different results. One of my favorite tools is a fine-tip round brush dipped in sumi or India ink. Draw the face as you would with a pen, but use a brush instead. It takes practice, but you can master it!
This girlie glam brush doodle was painted on a piece of painted drill cloth. The background is one of my graffiti canvases covered with layers of fabric paint sprayed through stencils and designs printed with transparency monoprints. It is then layered with scrapes of paint. I used sumi ink to doodle over the top of the dried paint.

I used a photo from a fashion magazine to inspire this face painting. I quickly sketched out a face using ink and a brush.
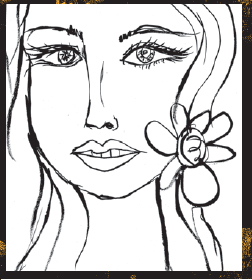
This face was painted with a size 1 round brush using India ink on vellum bristol. The vellum bristol paper is a smooth surface and holds the ink well.
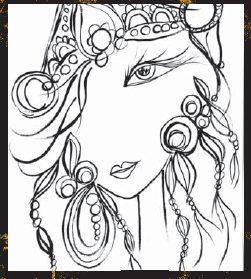
Create a girlie glam painting on fabric! One of my favorite surfaces to draw on is unbleached muslin. I use the muslin right off the bolt. Play with layers of paint and build up the color with markers and soft pastels.
BLACK PERMANENT PEN (PILOT TOUGH WASH)
BRUSH-TIP FABRIC MARKERS (TULIP)
COLORED PENCILS (PRISMACOLOR)
FABRIC PAINT IN TWO DIFFERENT COLORS (TULIP SOFT)
METALLIC GEL PENS (SAKURA)
OIL PASTELS (SENNELIER)
PAINTBRUSH
PENS (COPIC)
PERMANENT MARKERS
SOFT PASTELS (PANPASTEL)
SPONGE APPLICATOR
UNBLEACHED MUSLIN
WATERCOLOR PENCILS (DERWENT INKTENSE)
If you are creating art on a piece that will be worn, make sure to use fabric paints and markers.
![]() Iron the wrinkles out of a piece of muslin fabric. Draw a face with a Tough Wash pen. Note some of the features of the face: the hair with braids and flowers above her forehead.
Iron the wrinkles out of a piece of muslin fabric. Draw a face with a Tough Wash pen. Note some of the features of the face: the hair with braids and flowers above her forehead.
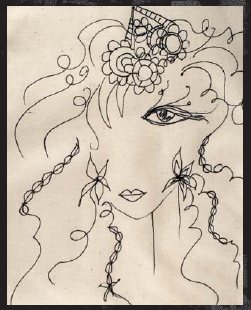
![]() Pour two different colors of fabric paint onto a palette. Dip a paintbrush into both paints. Apply the paint to the fabric in fast, wavy and circular strokes. Continue to add both colors of paint to the fabric until the hair is filled with color. Let the paint dry.
Pour two different colors of fabric paint onto a palette. Dip a paintbrush into both paints. Apply the paint to the fabric in fast, wavy and circular strokes. Continue to add both colors of paint to the fabric until the hair is filled with color. Let the paint dry.

![]() Dip a watercolor pencil into water and apply it over the paint to accentuate the lines in the hair. Scribble lines with colored pencils and color the braids with metallic gel pens. Doodle thicker lines in the hair using a brush-tip fabric marker.
Dip a watercolor pencil into water and apply it over the paint to accentuate the lines in the hair. Scribble lines with colored pencils and color the braids with metallic gel pens. Doodle thicker lines in the hair using a brush-tip fabric marker.
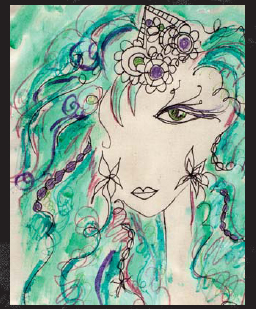
![]() Add hints of the colors throughout the hair with colored pens.
Add hints of the colors throughout the hair with colored pens.

![]() Add another color to the hair with a pen. Write words and phrases in the hair.
Add another color to the hair with a pen. Write words and phrases in the hair.
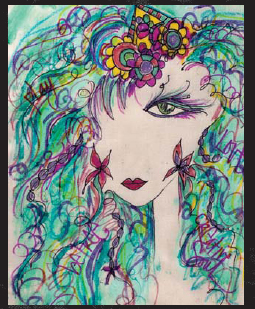
![]() Color the face with soft pastels using a sponge applicator to evenly apply the color. Highlight shadows at the edges of the face using a darker oil pastel.
Color the face with soft pastels using a sponge applicator to evenly apply the color. Highlight shadows at the edges of the face using a darker oil pastel.
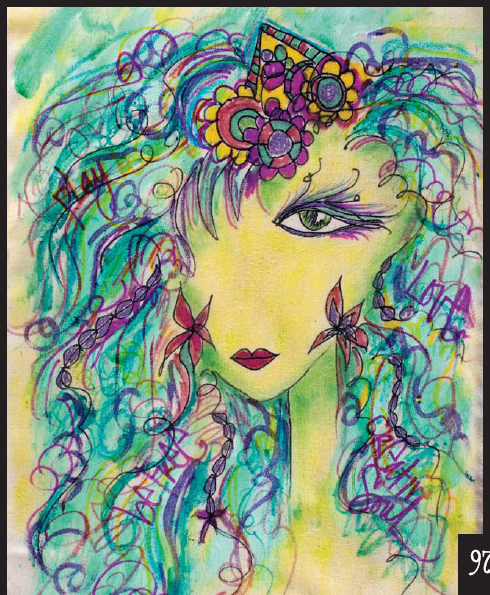
VISIT WWW.CREATEMIXEDMEDIA.COM/DOODLES-GIRLIE-GLAM TO WATCH A STEP-BY-STEP VIDEO OF THIS EXERCISE.
Patchwork collage is simple to create and makes a great background for doodling. I cut pieces of a variety of my hand-painted papers, graffiti tissue papers and photocopies and collage them onto a surface. Then I paint my doodles over the top. This is a great project to use all the remnant paper pieces in your stash!
ACRYLIC PAINT
BLACK-AND-WHITE PHOTOCOPIES
BLACK FINE-TIP OIL-BASED PAINT MARKER (SHARPIE)
BLACK PERMANENT MARKER
BROWN PAPER BAG
COLLAGE PAUGE
DYED PAPER TOWELS
GRAFFITI TISSUE PAPER (SEE PAGE 48)
MARKERS (COPIC)
PAINTBRUSH
PENS (COPIC MULTILINER)
SCISSORS
WHITE CORRECTION FLUID PEN
WHITE GESSO OR ACRYLIC PAINT
When creating patchwork collage, cut pieces and work in small sections. Brush Collage Pauge onto the surface. place the paper, brush another layer of Collage Pauge on top and smooth it out with your fingers. Apply another layer of Collage Pauge and place another paper overlapped onto the previous one. repeat these steps. Apply a final layer of Collage Pauge over the entire piece and let it dry before you draw or stitch over the top.
![]() Layer photocopies, dyed paper towels and pieces of graffiti tissue paper using Collage Pauge to create a patchwork collage.
Layer photocopies, dyed paper towels and pieces of graffiti tissue paper using Collage Pauge to create a patchwork collage.
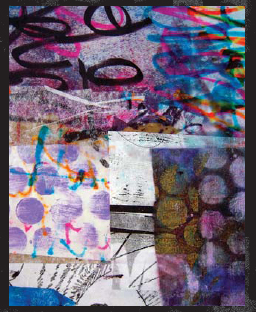
![]() Mix white gesso or white acrylic paint with another color. Paint a face shape onto the collage. Paint a darker color to add shadows to the face. Add a third color to the hair. Let it dry.
Mix white gesso or white acrylic paint with another color. Paint a face shape onto the collage. Paint a darker color to add shadows to the face. Add a third color to the hair. Let it dry.

![]() Outline the eye, the face and the hair with a black permanent marker.
Outline the eye, the face and the hair with a black permanent marker.

![]() Add color to the hair with paint pens, colored pencils and gel pens.
Add color to the hair with paint pens, colored pencils and gel pens.
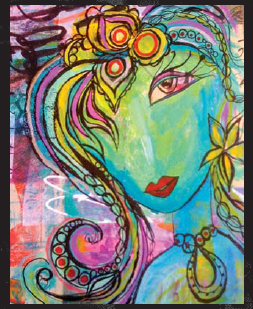
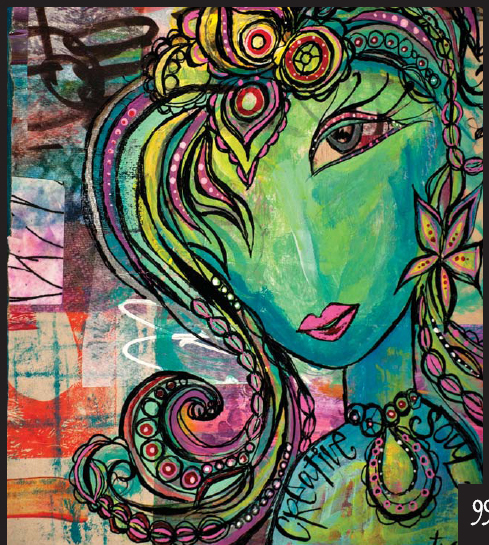
![]() Darken the outlines with a black oil-based paint marker. Add dots and circles with a white correction fluid pen.
Darken the outlines with a black oil-based paint marker. Add dots and circles with a white correction fluid pen.

![]() Write “creative soul” around the neckline with a black oil-based paint marker.
Write “creative soul” around the neckline with a black oil-based paint marker.
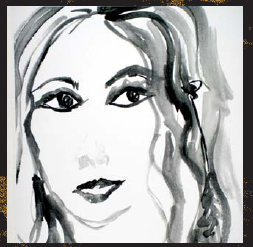
Recycle, reuse, photocopy! One way to leverage your work is to paint over photocopies. The original painting below was a watercolor face sketch. This exercise guides you through using a photocopy of one of your painted face outlines as a base for a brand new piece.
ACRYLIC PAINT
BLEEDING TISSUE PAPER
COLLAGE PAUGE
COLORED PENCILS (PRISMACOLOR)
PAINTBRUSHES
BRUSH MARKERS (COPIC)
PHOTOCOPY OR DIGITAL DOWNLOAD OF FACE
TISSUE PAPER
WHITE GEL PEN (SAKURA)
![]() Make a black-and-white photocopy of one of your original face paintings to use as a base for the new painting.
Make a black-and-white photocopy of one of your original face paintings to use as a base for the new painting.
![]() Collage bleeding tissue paper onto the photocopy with Collage Pauge. This type of tissue paper will stain paper when it gets wet.
Collage bleeding tissue paper onto the photocopy with Collage Pauge. This type of tissue paper will stain paper when it gets wet.
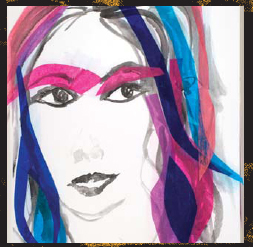
![]() Use acrylic paints to paint the hair, blending the colors with white paint.
Use acrylic paints to paint the hair, blending the colors with white paint.
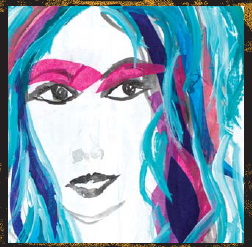
![]() Paint the face with one color, and then add a slightly darker shade to highlight certain areas.
Paint the face with one color, and then add a slightly darker shade to highlight certain areas.

![]() Add depth and contrast onto the face and eyes with a third color.
Add depth and contrast onto the face and eyes with a third color.
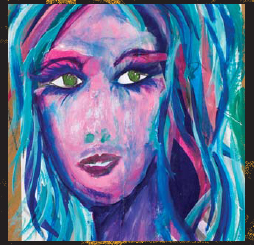
![]() Using brush markers, add darker lines for the hair, eyebrows and eyelashes.
Using brush markers, add darker lines for the hair, eyebrows and eyelashes.
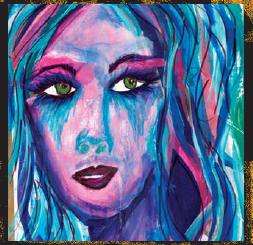
![]() Lighten up the painting by adding a brighter color to the hair, blending it with white paint. Smooth out the color of the face and add detail to the nose and skin tone.
Lighten up the painting by adding a brighter color to the hair, blending it with white paint. Smooth out the color of the face and add detail to the nose and skin tone.
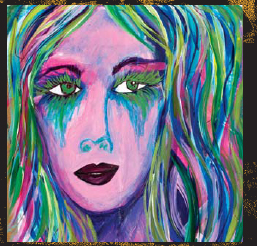
![]() Write a few phrases, scribbling and doodling with a white gel pen. Doodle hair embellishments with brush markers.
Write a few phrases, scribbling and doodling with a white gel pen. Doodle hair embellishments with brush markers.
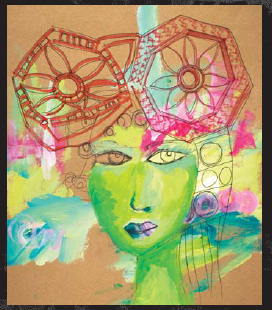
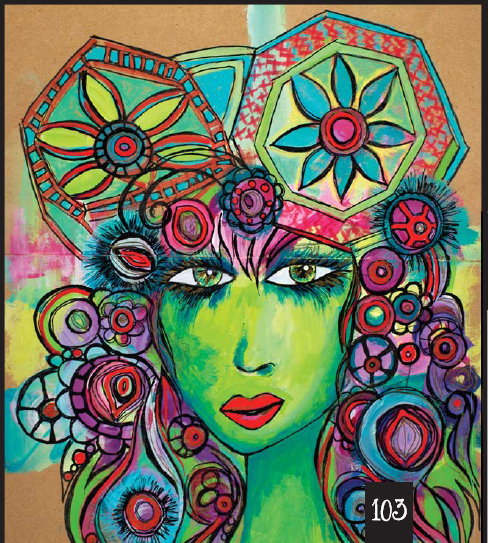
My fashionista faces are inspired by fashion photography and my own imagination. They are stylized illustrations that combine drawing, sketching and patterns with vibrant colors and inspirations from my travels. This face was inspired by my trip to Bali and the beautiful crowned dancers I saw there.
ACRYLIC FLUID PAINT (GOLDEN)
BLACK OIL-BASED PAINT MARKER (SHARPIE)
BROWN PAPER GROCERY BAG
COLORED PENCILS (PRISMACOLOR)
MARKERS (COPIC)
METALLIC GOLD PAINT PEN (SAKURA)
PAINTBRUSH
PENCIL
PICTURE FROM MAGAZINE
![]() Create a background by fingerpainting with acrylic paints on a brown paper grocery bag. Let it dry. Using a picture from a magazine as inspiration, quickly sketch a face about a third of the way down the page. This will leave room for you to create elaborate hair and a headdress later. The sketch doesn’t need to be detailed, as you will be painting over it.
Create a background by fingerpainting with acrylic paints on a brown paper grocery bag. Let it dry. Using a picture from a magazine as inspiration, quickly sketch a face about a third of the way down the page. This will leave room for you to create elaborate hair and a headdress later. The sketch doesn’t need to be detailed, as you will be painting over it.

![]() Mix paint colors and paint the face. I prefer to paint with primary colors and mix my own paints as I work. The base layer is a mixture of Hansa Yellow Medium with a dab of Phthalo Blue and a dab Titanium White.
Mix paint colors and paint the face. I prefer to paint with primary colors and mix my own paints as I work. The base layer is a mixture of Hansa Yellow Medium with a dab of Phthalo Blue and a dab Titanium White.
If you need help drawing, use tissue paper or transparencies to trace an image. Keep in mind, though, that the goal is to draw freehand. The more you practice this skill, the better you will be at drawing faces.
![]() Paint the face and doodles and highlight the photocopies with flow acrylic paints. Add soft pastels to even out the face color.
Paint the face and doodles and highlight the photocopies with flow acrylic paints. Add soft pastels to even out the face color.

![]() Add detail to the eyes by blending colored pencils over dried paint.
Add detail to the eyes by blending colored pencils over dried paint.

![]() Outline paint marks with a black oil-based paint marker. Color in the eyes and eyelashes, hair and headdress with colored pencils.
Outline paint marks with a black oil-based paint marker. Color in the eyes and eyelashes, hair and headdress with colored pencils.
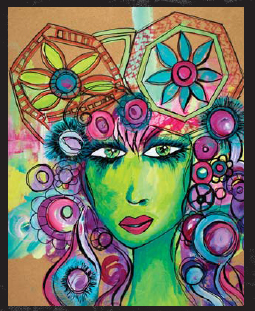
![]() Add thicker black lines and details with a black oil-based paint marker. Outline the facial features and add bits of gold throughout the design with a metallic gold paint pen.
Add thicker black lines and details with a black oil-based paint marker. Outline the facial features and add bits of gold throughout the design with a metallic gold paint pen.
Many of the surfaces I use for my paintings are recycled and reclaimed. I often paint on cardboard; an example of this is my graffiti panels (see page 62). I like to recycle USPS (United States Post Service) Priority mailing boxes. Paint the background, collage, doodle and color. Explore painting on this great nontraditional surface.
BLACK-AND-WHITE PHOTOCOPIES OF YOUR ORIGINAL ARTWORK
BLACK CHISEL-TIP PERMANENT MARKER
FLOW ACRYLIC PAINT (MATISSE DERIVAN)
GESSO
MAILING BOX OR CARDBOARD
SCISSORS OR AWL
SIZE 1 OR 2 ROUND PAINTBRUSH
SOFT PASTELS (PANPASTEL)
WATERPROOF INDIA INK (SPEEDBALL)
![]() Tear, score and add tape to a cardboard surface. Scribble with a black chisel-tip permanent marker. Combine acrylic paint and gesso. Paint the surface of the board.
Tear, score and add tape to a cardboard surface. Scribble with a black chisel-tip permanent marker. Combine acrylic paint and gesso. Paint the surface of the board.
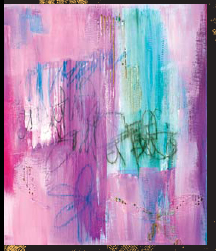
![]() Cut out shapes from photocopies and collage them to the board.
Cut out shapes from photocopies and collage them to the board.
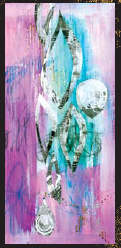
![]() Doodle a face and shapes with a round paintbrush and waterproof India ink.
Doodle a face and shapes with a round paintbrush and waterproof India ink.
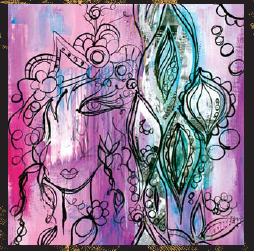
![]() Paint the hair and headdress with various contrast colors.
Paint the hair and headdress with various contrast colors.

These panels make great art journal covers. Create two panels of similar size and stitch them together to create a cover and add pages to finish the journal.
![]() Add final touches of paint and doodles to the hair and crown.
Add final touches of paint and doodles to the hair and crown.