PAINTING PINE
The pine tree is a symbol of longevity – it is often depicted with cranes, which are particularly long-lived birds. Pine also stands for the constancy of friendship in adversity. It is thought of as the king of trees and this is presumably why, unlike other tree species, it has come to be studied on its own in painting courses and manuals.
There is no real methodological difference between freestyle and outline pine, except that for freestyle pine you should use a larger brush and make fewer strokes.
Trunk, branches and roots
Begin by practising the bark as shown in figure 37. If a branch or tree trunk has a knot in it you should do this first, as you did when doing plum. Then, using a large dry brush and grey ink, do the shading by making rough circular shapes with the side of your brush. Do not make the circles too uniform and only paint enough to cover about half of the width of your branch or tree trunk. Use some semi-circles towards the centre of the trunk. Still with grey ink, draw in the side of the branch or trunk that you have not shaded, using strokes similar to those for outlining the plum branch in figure 8. Lastly, apply the black strokes, using the tip of your brush and varied pressure.
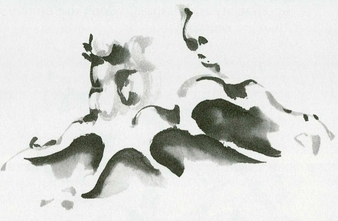
Figure 39 Pine tree roots
The side branches in figure 38 are done like the freestyle plum branches in figure 5 but with even more panache so that they give the impression of being flung onto the paper. Give them an upward sweep.
For the tree roots in figure 39, fill your brush with grey ink and then dip it in black to about half-way up the bristles. Paint the hollows of the roots with a twisting motion similar to that used for a large knot hole. Put in the root outlines with grey and black.
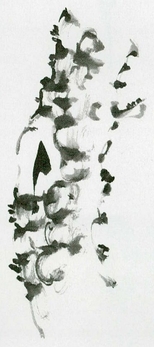
Figure 37 Pine bark
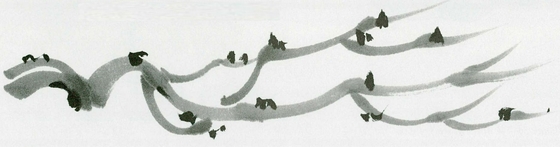
Figure 38 Pine side branches
Needles and cones
There are many species of pine tree and each has its own configuration of needles, but figure 40a shows the form of pine needles most usually depicted in Chinese brush painting. Once you have mastered their execution you can adapt the shape to suit your own needs. You may find it helpful at first to put in an inverted T shape and fill in the needles around it. Figure 40a has tapered needles. Figure 40b has blunt ones and fewer of them, which creates a more freestyle effect. Pine needles tend to grow upwards from a branch, but try to vary the angle slightly and overlap your groups of needles.
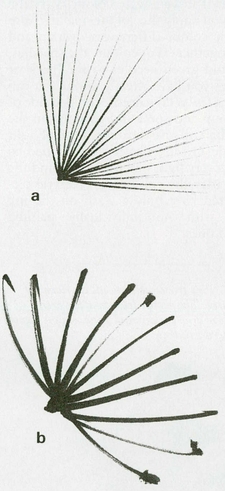
Figure 40 Pine needles
The pine cones in figure 41 are done in black with a flicking movement of the brush tip. Begin at the top of the cone and work back towards the base. The closer together you put the strokes the more closed the cone will look. In a painting when a pine tree forms part of a landscape and is intended to be seen from a distance the cones are often shown by means of black spots.
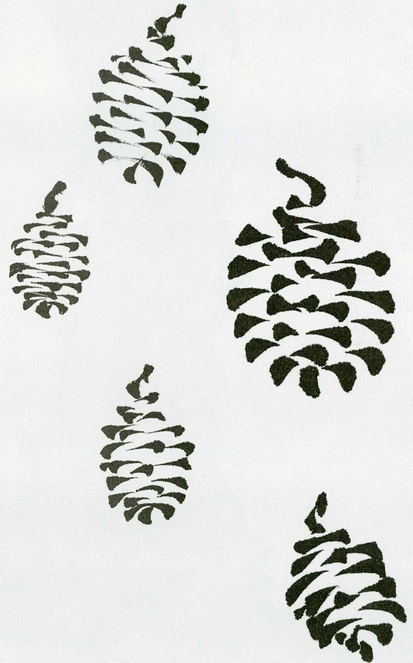
Figure 41 Pine cones
Using colour
Figure 42 combines the various elements discussed so far into a single pine tree and introduces colour.
The trunk and branches are coloured with a light wash. Use the whole of your brush and move it gradually over the area you want coloured, pushing down the heel as you go. Do not stroke the colour on with the tip as if it were watercolour. Vary the tone as you apply the colour, making sure that your colour differences overlap and blend together. To colour the needles, simply add green needles to the black or grey ones you have already done. You can also add a few yellow needles on one side of each group and some indigo ones on the other. This will give the impression of light and shade. Greater depth can be added by putting a very light green wash behind the needles after the colouring. Freestyle pictures often have only a wash on the ink needles with no individually painted coloured ones.
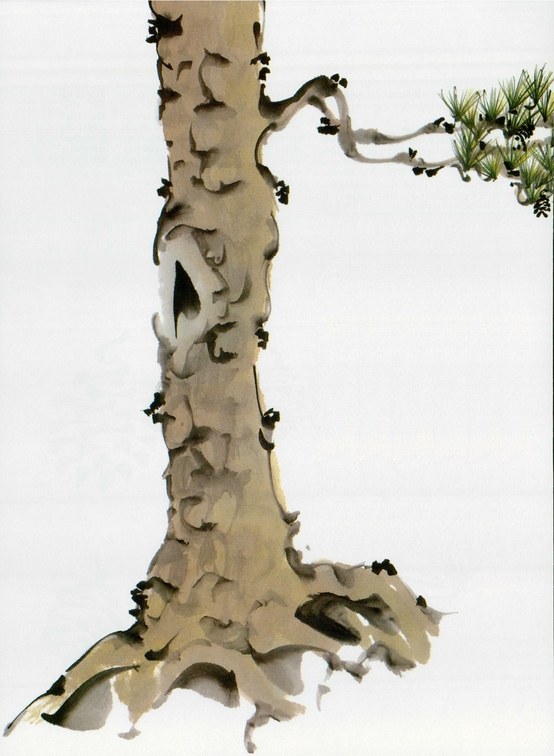
Figure 42 Pine tree combining all the elements and coloured. The picture looks complete even though there is no background as one might expect in a Western painting
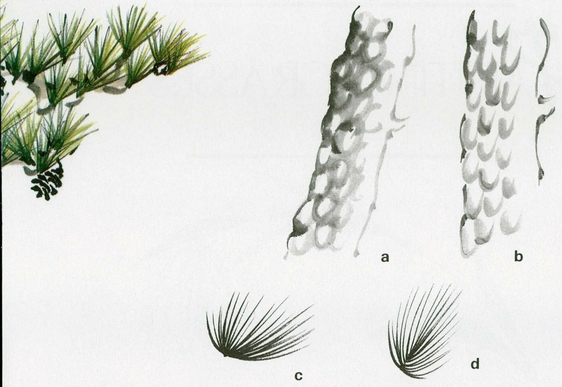
Figure 43 Some common mistakes when painting pine
Common mistakes
Figure 43 shows the most common mistakes beginners make with pine. In a the brush was not dry enough for the shading and the circles are too neat – the brush tip was used instead of the side; in b there are too many semi-circles and insufficient completed ones – avoid the temptation to do little scooping strokes; in c the needle group is unbalanced and the individual needles are too curved; and in d the centre point of the needle group has drifted. Other faults which can mar a painting of a pine tree are to do with the colouring. Often the trunk looks blotchy because too little care was taken to blend the wash, and students occasionally get carried away and make the needles rather garish by adding too much yellow and indigo. I have had a few pupils who have forgotten to put the green needles in at all.