
HOW TO…
• Read e-books and PDF files using the eBook app
• Create e-books and PDF files from your own documents
• Read newspaper and magazine articles with the Pulse newsreader
In this chapter, we’ll look at how to enjoy e-books, newspapers, and magazines on your Galaxy Tab.
Most Galaxy Tab models include the eBook app for reading e-books and PDF files and the Pulse newsreader for keeping up with news. If your Galaxy Tab doesn’t have these apps, you can download either these apps or similar apps from Android Market.

Your Galaxy Tab may also include the Amazon Kindle app, which you can use to get books from Amazon’s online store. Amazon has a huge selection of free books as well as books you must pay for, so you may want to install the Kindle app if your Galaxy Tab doesn’t already have it. Some Galaxy Tab models also come with an app called Readers Hub, which gives you access to a selection of newspapers, magazines, and books.
The best place to get started with reading e-books on your Galaxy Tab is to use the eBook app that comes with it. With this app, you can buy e-books online, find free books online, or load e-books you acquire from other sources. You can also read PDF files, which is a great way of catching up on white papers and similar reading.
To launch the eBook app, tap and hold the Recent Applications button until the Apps screen appears, and then tap the eBook icon. The eBook app launches and displays your bookshelf with an icon for each book it contains. Figure 11-1 shows the bookshelf with a modest population of books and PDF files. This view is called Icon view.
FIGURE 11-1 The eBook app displays your books and PDF files on a virtual bookshelf.
When you first launch the eBook app, your bookshelf may contain only sample books, or it may be completely bare. If you need to add books or PDF files immediately, see the section “Import Books and PDF Files into the eBook App,” later in this chapter, for instructions.
If your bookshelf contains only a few books or PDF files, as in Figure 11-1, you can see all of them at once, and you’ll have no difficulty finding the book or PDF file you want to read.
If your bookshelf is full of books and PDF files, use these moves to find the one you want:
• Scroll If your bookshelf is too long to fit on the screen all at once, scroll down to see the rest of it.
• Switch to List view To navigate a long list of books or PDF files more easily, tap the List view button, the third button from the right on the toolbar. The eBook app displays your books and PDF files in List view, as shown in Figure 11-2. You can filter the books and PDF files by tapping the Recent button, the Title button, the Authors button, or the Categories button in the left pane.
FIGURE 11-2 Switch your bookshelf to List view when you need to navigate quickly through your books and PDF files.
• Display only books or only PDF files Tap the drop-down menu in the upper-left corner of the eBook app’s screen, and then tap the Book item or the PDF item, as needed. To switch back to displaying all items, tap the drop-down menu again, and then tap the All item.
When you find the book or PDF file you want to read, tap it to open it.
After you tap a book or PDF file on your bookshelf, the eBook app opens it at the beginning (if you haven’t opened it before) or at the place you last stopped reading. You can then start reading—you don’t need me to tell you how to do that—and turn the page by dragging your finger from the right side of the screen to the left (see Figure 11-3).
FIGURE 11-3 Drag your finger from the right side of the screen to the left to turn the page forward. Drag the other way to turn the page back.

When you’re reading an e-book, the eBook app animates the page turn, as shown in Figure 11-3. When you’re reading a PDF file, there’s no animation.
When you need to annotate the page, change how it appears, or take other actions, tap the page to bring up the reading controls shown in Figure 11-4. You can then take the following actions:
FIGURE 11-4 Tap the screen to display the controls at the top and the bottom.
• Highlighter Tap this button to turn on the Highlighter, and then tap and drag to highlight text. Tap the button again when you’re ready to turn off the Highlighter.
• Pen Tap this button to turn on the Pen, with which you can draw on the page. Tap this button again to turn the Pen off.
• Eraser Tap this button to turn on the Eraser. With the Eraser on, tap the highlighting or pen annotation you want to remove. Tap the Eraser button again when you want to turn the Eraser off.
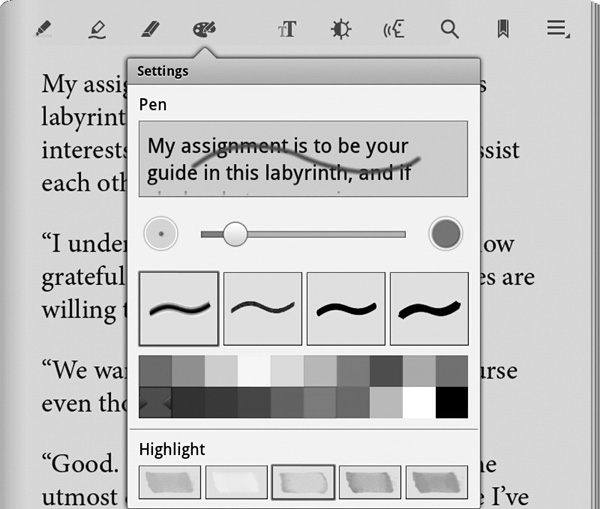
• Settings Tap this button to display the Settings dialog box (shown here), in which you can choose the pen thickness, style, and color, and the highlight color. Tap the Settings button again when you’re ready to close the Settings dialog box.
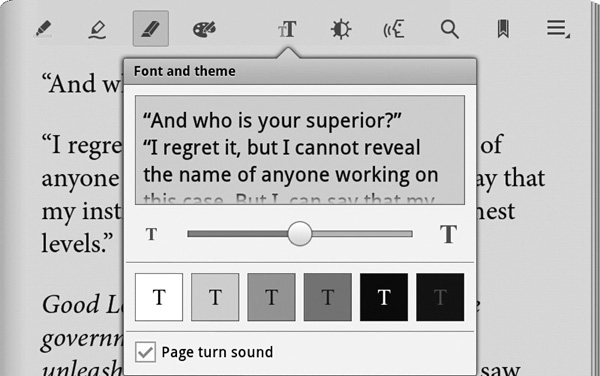
• Font And Theme Tap this button to display the Font And Theme dialog box (shown here), and then choose the font size and the theme you want. Select the Page Turn Sound check box if you want the eBook app to play a sound when you turn a page. Tap the Font And Theme button again to close the Font And Theme dialog box.
• Brightness Tap this button to display the Brightness dialog box (shown here), and then drag the slider until the brightness is the way you like it. Select the Automatic Brightness check box if you want the eBook app to adjust the brightness automatically to suit the light conditions. Tap the Brightness button again to close the Brightness dialog box.

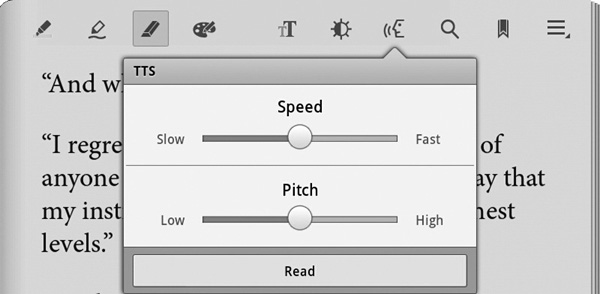
• TTS Tap this button to display the TTS dialog box (shown here; TTS stands for Text To Speech). Tap and drag the Speed slider and the Pitch slider to your desired levels, and then tap the Read button to start the text-to-speech reading. Getting the speed and the pitch right can be awkward, because you must stop playback (tap the Stop button that replaces the Read button) to change them. Tap the TTS button when you’re ready to close the TTS dialog box.
• Search Tap this button to display the Search dialog box (shown here), type your search term, and then tap Enter. The Search dialog displays matching results. Tap the result you want to see.
• Bookmark Tap this button to place a bookmark at the current page. The bookmark indicator appears in the upper-right corner of the page. Tap the button again to remove an existing bookmark from this page.
• Menu Tap this button to display the menu, shown in Figure 11-4, which provides commands for displaying the table of contents, your bookmarks, your highlights, your memos, your pen drawings, or the book’s information (author, file format, size, and download date).
• Progress bar Tap and drag the slider to change your place in the book swiftly.
To stop reading the book or PDF file, tap the Back button. The eBook app displays your bookshelf again, and you can tap another book or PDF file to open it.
If you already have e-books or PDF files, you can quickly import them into the eBook app. Follow these steps:
1. In the eBook app, display the home screen.
2. Choose Menu | Import to display the My Files app.
3. Navigate to the folder that contains the file or files you want to add.
4. Select the check box for each file.
5. Tap the Done button. You’ll see the e-books or PDF files appear on your bookshelf.
If you receive e-book files or PDF files attached to e-mail messages, tap the Save button to save them to your Download folder. You can then import the files into the eBook app from there.
To browse and buy e-books with the eBook app, tap the Shop button (the button with the shopping-cart icon) in the upper-right corner of the home screen. In the Stores dialog box (shown here), tap the store you want to visit.
The Galaxy Tab then displays the store in a browser window. You can navigate the store, browse the books it offers, and buy any you choose to.
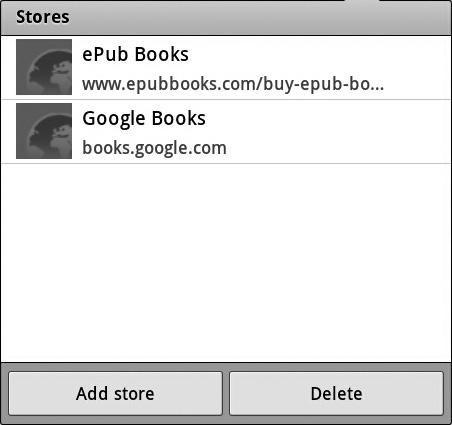

The selection of stores in the Stores dialog box depends on which country or region you’re in. You can add a store by tapping the Add Store button, typing the name and URL in the New Store dialog box that opens, and then clicking the OK button. Conversely, you can remove a store from the Stores dialog box by tapping the Delete button, selecting the check box to the right of the store’s name, and then tapping the Delete button.
To remove a book or PDF file from the eBook app, follow these steps:
1. Tap the Menu button to display the menu.
2. Tap the Edit item. The eBook app displays a – button at the upper-right corner of each book or PDF file, as shown here.

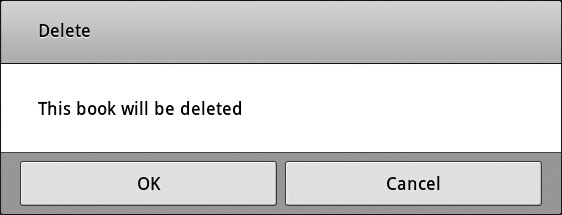
3. Tap the – button for the book or PDF file you want to delete. The eBook app displays the Delete dialog box shown here.
4. Tap the OK button.
5. When you finish deleting books or PDF files, tap the Done button on the toolbar.
Pulse is a newsreader app that gives you quick access to a wide range of news sources. You can choose which news sources to view and you can arrange them on the Pulse home page and on other pages you create. When viewing a news source, you can open an article for reading.

Some of the news sources featured in Pulse provide full articles that you can read freely. Others provide only a taster of the article, together with a link that you can tap to visit the news source’s web site to read the rest of the article. Some of these web sites require you to subscribe to read the full articles.
At this writing, the news sources to which Pulse gives you access are free. If you want to save stories to read later, send stories to bookmarking services, or sync your news so that you can view it on different devices, you need to sign up for a Pulse account—but this account too is free.
To get started with Pulse, launch it by following these steps:
1. Tap and hold the Recent Applications button to display the Apps screen.
2. Tap the Pulse button.

If Pulse displays an introductory screen with a message such as “Your sources everywhere!”, tap anywhere on the screen to dismiss the message and to get started with Pulse.
You then see the Pulse screen with its default selection of news. Figure 11-5 shows an example of this screen.
FIGURE 11-5 At first, the Pulse screen presents a default selection of news.
You can scroll sideways to view more articles in a news source; scroll down to display more newspapers, magazines, and headlines; and open an article by tapping it. But what you’ll probably want to do first is customize the selection of news, so let’s look first at how to do that.
To customize the selection of news, tap the cog icon in the upper-left corner of the Pulse screen to display the Customize screen (see Figure 11-6).
FIGURE 11-6 On the Customize screen, you can remove existing news sources, add other news sources, or add further pages to organize your reading material.
From here, you can take the following actions:
• Remove an existing source Tap the × button at the right end of the item’s bar to remove it from the list.
• Add a new source Tap the blue + button at the bottom of the Home page to display the Sources screen (see Figure 11-7). At the top, tap the category you want—Social, Featured, Art & Design, Business, Entertainment, Food, and so on—to display the list of related sources in the lower part of the screen. Scroll left or right if necessary to see other categories. Scroll down the list to find a source you want to add, and then tap the + button to add it. A check mark indicates that you’re already using the source.
FIGURE 11-7 At the top of the Sources screen, tap the category of reading material you want. In the list of sources that appears, tap the + button for any source you want to add to your page.

You can also tap the Search button (the magnifying glass icon) at the top of the Sources screen and then type a search term to find matching results. Again, tap the + button to add a source to your list.
• Rearrange your existing sources Tap the button for a source, and then drag it up or down the list to where you want it. You can also drag the source to another page after you create one (as discussed later in this list).
• Add a new page Pulse gives you a Home page to start with, but if you have many news sources or want to organize your sources into different categories, you can add other pages. To add a page, tap the Add Page button on the right of the Customize screen. Pulse adds a new page to the right of the existing page and gives it a default name, such as PAGE2 (see Figure 11-8); you can rename it as discussed in the “Rename a page” bullet below.
FIGURE 11-8 Pulse gives each new page a default name. You can populate the page either with an existing pack of sources, such as Science or Food, or tap the Browse Our Catalog button to add sources one at a time.
• Add content to a new page The quick way to add content to a page is by tapping the button to add a pack of sources. For example, tap the Science button in the Choose A Pack area to add the Science pack. Tap the > button to display more packs you can add. If you prefer to add sources one by one, tap the + button under the Browse Our Catalog heading, and then add sources using the Sources screen, as described earlier in this section.
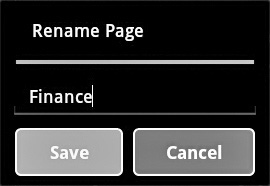
• Rename a page To rename a page, tap and hold its name until Pulse displays the Rename Page dialog box (shown here). Type the new name for the page, and then tap the Save button.
• Delete a page To delete a page you’ve added, delete all of its sources by tapping each × button in turn. When you delete the last source, Pulse removes the page.
When you finish setting up your sources, tap the Back button in the upper-left corner of the Customize screen to return to the Pulse home screen. Any new pages you added appear as tabs in the upper-right corner of the screen, as shown here. Tap a tab to display its page so that you can access the articles on it.
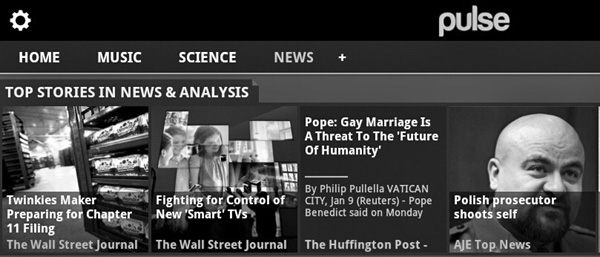
You can quickly add another page by tapping the + button at the right end of the bar containing the page tabs.
When you’ve chosen your sources, you’re ready to start reading articles in them.
Here’s how to navigate quickly and easily among your sources in Pulse:
• Switch from page to page Tap the tab for the page you want to view.
• View sources that are further down the page Tap and scroll up to view the lower parts of the page.
• Scroll through the articles in a source Scroll the articles left or right.
When you find an article you want to read, tap it to open it.
If you are holding the Galaxy Tab in landscape orientation when you open an article, Pulse displays the article only on the right side of the screen, as shown in Figure 11-9. This lets you quickly navigate to other articles by tapping their buttons on the left side of the screen (scroll as needed to see other buttons).
FIGURE 11-9 In landscape orientation, Pulse splits the screen between the sources (left) and the article you’ve opened (right).
When you find an article you want to read in full, you’ll normally do best to turn the Galaxy Tab to portrait orientation to view the article full screen (see Figure 11-10). Scroll left to display the next article, or scroll right to display the previous article.
FIGURE 11-10 Turn the Galaxy Tab to portrait orientation when you want to concentrate on an article.
In either landscape orientation or portrait orientation, Pulse at first displays the article in Text view, which presents the text formatted for easy reading onscreen. You can tap the Web button in the upper-right corner of the screen to switch to Web view, which displays the article as a web page. Figure 11-11 shows part of a page in Text view on the right side of the Galaxy Tab screen; Figure 11-12 shows the same page in Web view.
FIGURE 11-11 Text view shows the article formatted for easy reading onscreen.
FIGURE 11-12 Web view displays the article formatted as a web page.
To return to the Pulse home screen, tap the Back button in the upper-left corner of the screen.
If you like Pulse and want to take your usage of it to the next level, you can sign up for a Pulse account. This is free but requires you to provide your e-mail address.
To set up a Pulse account, tap the. Me button in the upper-right corner of the Pulse window, and then follow through the signup process.