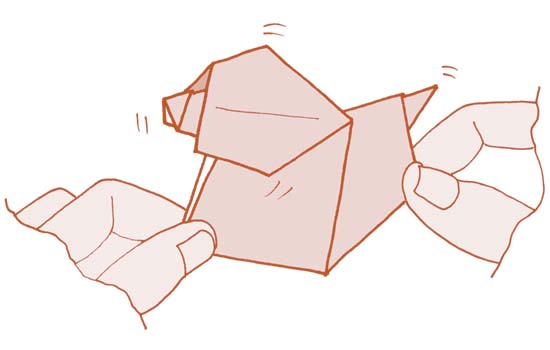
I’ve lost count of how many times this model has been published in origami magazines and books around the world...but usually incorrectly. The head shape is very specific but has often been mangled into something I consider unsatisfactory. Here, then, is my preferred version.
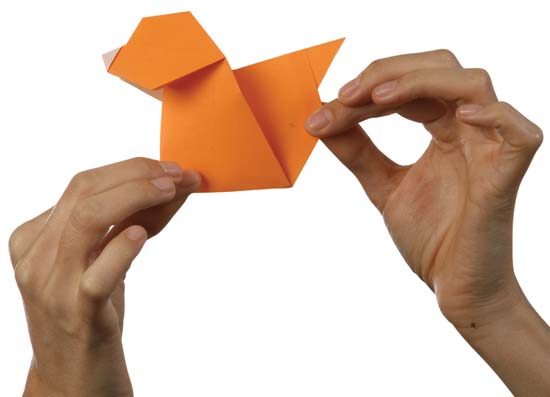
Begin with a square of origami paper, colored side up.
1. Fold corner to corner and unfold. Turn over.
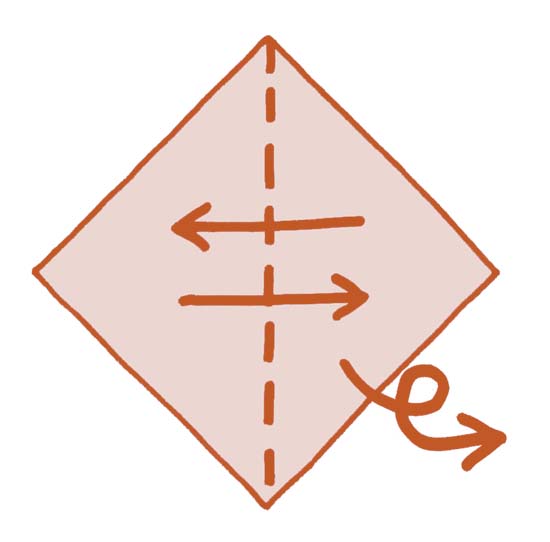
2. Fold the top edges of the paper square to the center line.
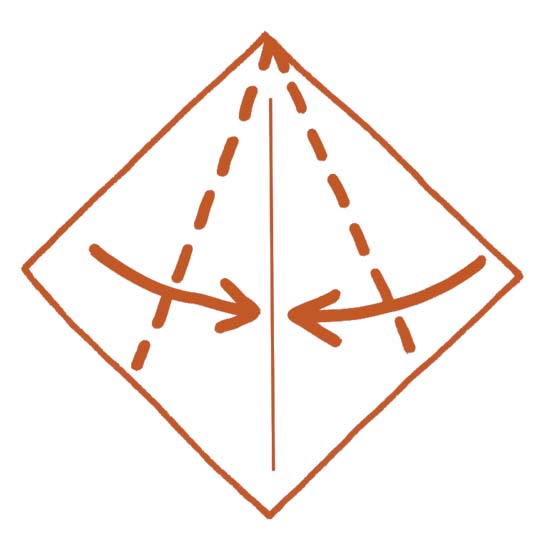
3. Fold the paper in half, along the Step 1 crease.
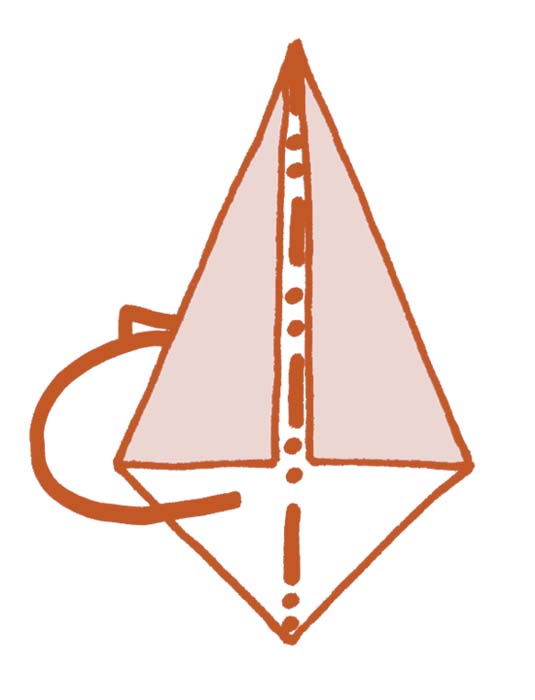
4. Fold dot to dot.
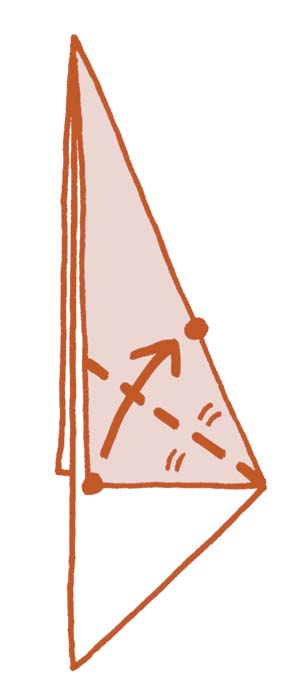
5. Make an Inside Reverse Fold, using the Step 4 fold as a guide...
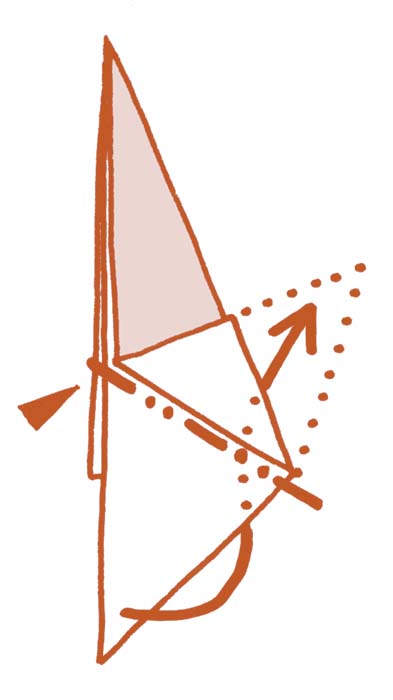
6....like this. Unfold the Step 4 fold.
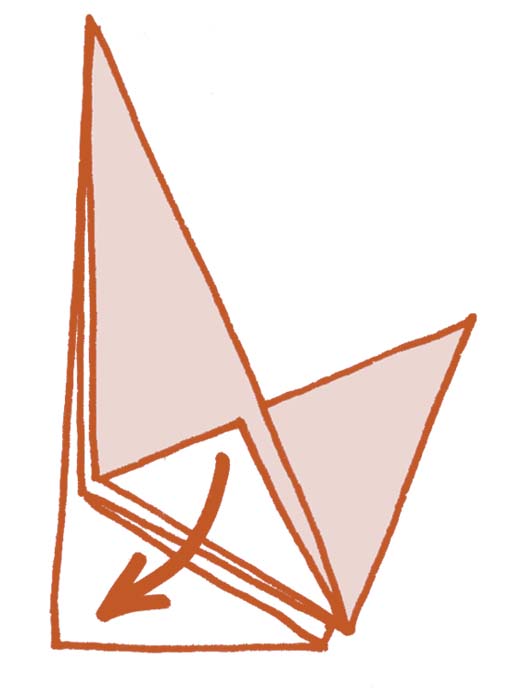
7. Make an Outside Reverse Fold. Note that the right-hand end of the fold is a little above the corner where the back of the head meets the spine.
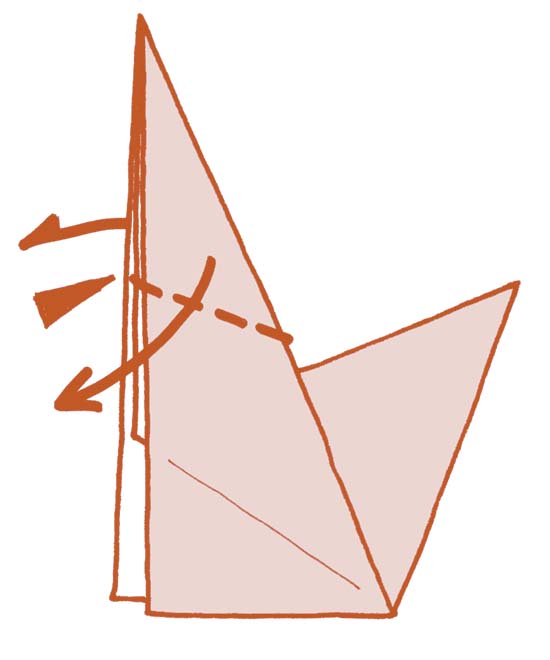
8. Up inside the head is a loose edge of paper. Open up the head a little to look inside and pull it all out. Press the paper flat to look like Step 9. This “growing” of the head is quite a surprising maneuver, so look carefully at Step 9 to see what you need to achieve.
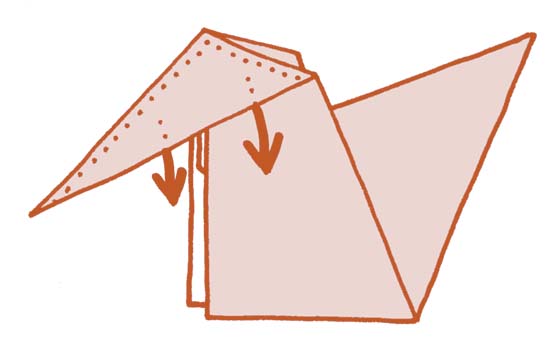
9. Make a narrow pleat to create the tail.
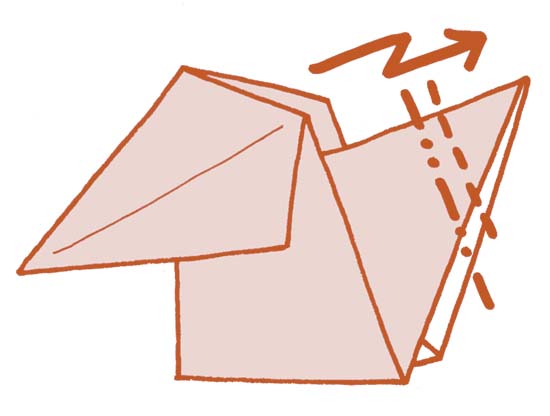
10. This is how the dog looks now. The remainder of the folding creates the shape of the head.
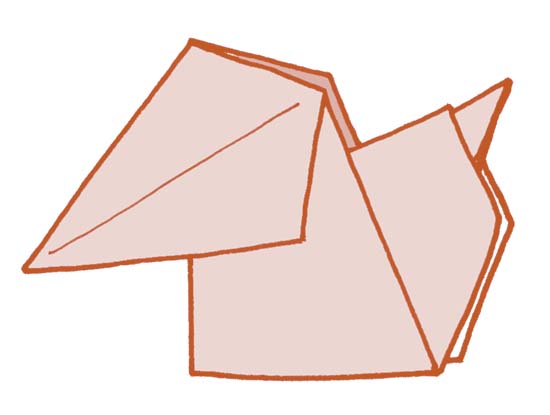
11. Fold dot to dot, exactly as shown.
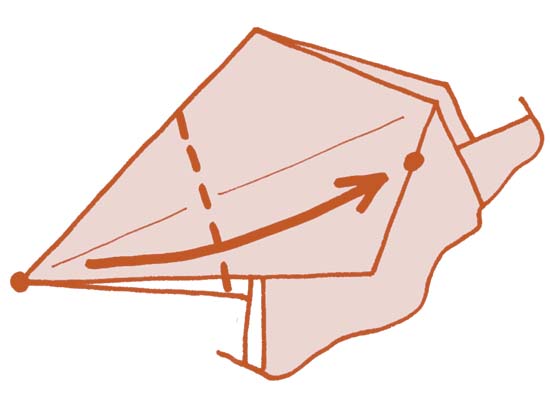
12. Again, fold dot to dot.

13. Finally, fold up the muzzle.
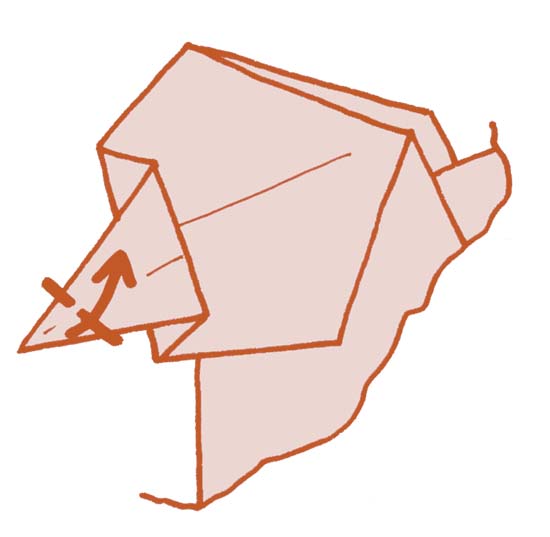
14. Unfold the previous three creases.
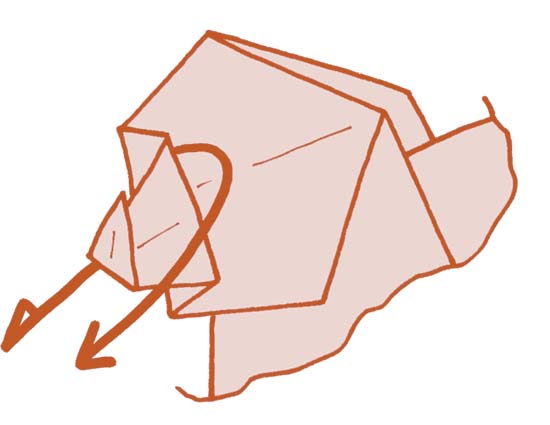
15. Make three Inside Reverse Folds. Begin by making the largest, then the middle one, and then finally the smallest . . .
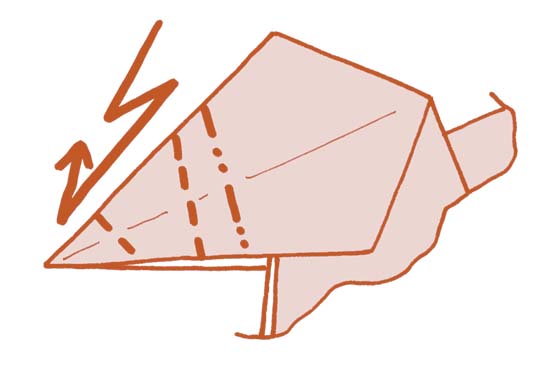
16....like this.
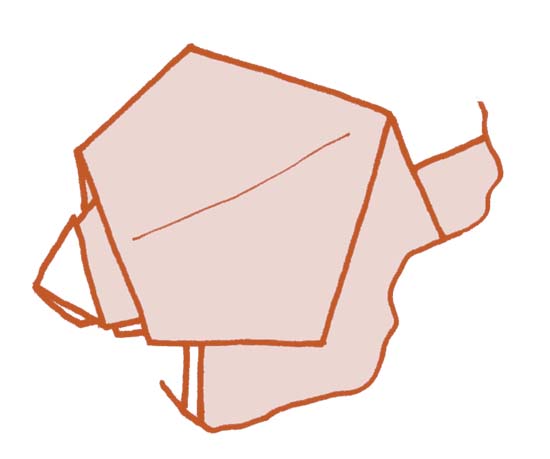
17. The dog is complete.
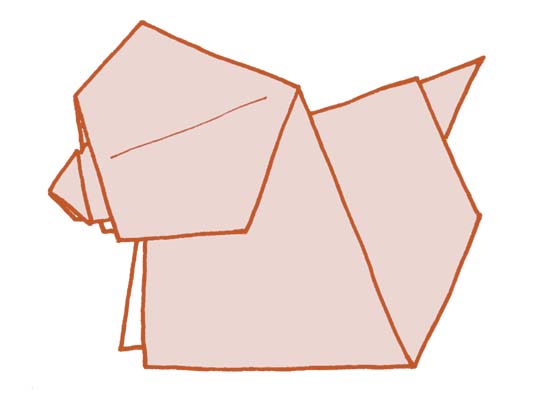
18. To make the dog bark, hold the front legs and pull the hind legs. The head will bob up and down quite realistically. Sound effects are obligatory!
