As long as you're connected to the Internet with a Windows or Mac computer, it's easy to get a copy of SketchUp and to install it. This appendix explains how. It also shows you how to find help in SketchUp and from some outside sources.
SketchUp is available in two versions: SketchUp (free) and SketchUp Pro ($495). For the differences between the two versions, see SketchUp vs. SketchUp Pro. You can install either version of SketchUp on Windows or on Mac OS X. Installing SketchUp is a two-step process: First, download the program from Google's website. Then run the installation program on your system. Once it's installed, you start SketchUp like any program—from an icon on your desktop, from Windows' Start menu or Quick Launch toolbar, or from the Mac's Dock.
In your web browser, go to http://sketchup.google.com/. On the right side of the page, you see a big blue button that says "Download Google SketchUp". Click that to go to the downloads page. On the right side of the downloads page, you see another big blue button that reads "Download Google SketchUp Pro" (Figure A-1). Below it you see a much less conspicuous link, "Download Google SketchUp 7".
When you download the free version of SketchUp, a web page asks you to provide an email address if you want to receive the Google SketchUp newsletter. When you download the Pro version, SketchUp asks you to provide a mailing address and other details. In either case you have to agree to Google's terms before you download and use the software. But before you read all those pages of legalese, rest assured that nothing unusual was in the terms at the time of this writing. Basically, you agree not to modify or reverse engineer the program, and not to sue Google or anyone else involved ("You agree to hold harmless and indemnify Google and its subsidiaries…") over anything to do with the program. Still, if you're concerned about protecting yourself, go ahead and read through the terms. (The terms for the Pro version include limits on installing the software on multiple computers or a network, and so on.)
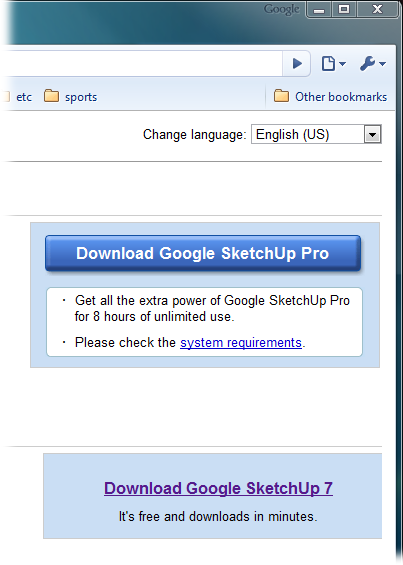
Figure A-1. You'll find two links on the SketchUp download page. Clicking the big, fancy button downloads SketchUp Pro. Clicking the less conspicuous link downloads the free version of SketchUp.
Before you download, you choose between operating systems: Windows XP/Vista and Mac OS X (10.4 or later). The download goes fairly quickly. The name of the installation file stored on your computer varies depending on the operating system and the version that was downloaded.
After you download SketchUp for Windows, you've got the SketchUp installer program on your computer. You may see links to the program on your computer desktop, but the program itself is probably stored in your Downloads folder. Your browser may prompt you to open or run the program. These options vary depending on your version of Windows, your settings, and the web browser you use.
Here are the steps for installing SketchUp on a PC:
Run the SketchUp installer program: GoogleSketchUpWEN.exe (or Google-SketchUpProWEN.exe for SketchUp Pro).
You may be prompted to open or run the installer from your web browser, or you may see links on your desktop. As a last resort, you can go to Start → Run (in Windows XP) or press the Windows key in Vista, and then begin to type the installer file name. A list appears in the Start window, where you can double-click the file name to run the installer.
Windows displays a warning to make sure you want to run a program that was downloaded from the Internet. On Windows XP, you see a message box. On Vista, you see the User Account Control box, unless, like a lot of folks, you've turned UAC off.
In the security warning window, click Run (Allow in Vista).
A progress bar appears as Windows decompresses the downloaded files. Then the Google SketchUp 7 Setup window appears. At the bottom of the window you see Back, Next, and Cancel buttons that you can use throughout the installation.
Click Next.
The End-User License Agreement appears.
Read the terms of the Agreement, turn on the "I accept the terms in the License Agreement" box, and then click Next.
The Destination Folder panel appears with a text box displaying the suggested location to store the SketchUp application. Usually this path is C:\Program Files\Google\Google SketchUp 7.
Click Next to accept the path.
After you click Next, the "Ready to install Google SketchUp 7" panel appears.
If you want to store the application in a different folder, click the Change button and browse to a new location. Then click OK.
Click Install.
A progress bar appears as the program is installed. When the process is complete, you see a message: "Completed the Google SketchUp Setup Wizard".
Click Finish.
The installer closes and SketchUp is ready to run. On your desktop, you'll find a shortcut to run the program. You can drag the shortcut to Windows' Quick Launch toolbar, making it easy to start the application in the future.
Tip
If you purchase SketchUp Pro, there's an extra step. After completing the online purchase, you get an email with an authorization code and serial number. You can authorize your copy of SketchUp the first time you use it, or later you can go to Help → License → Authorize. If you don't authorize your copy, the Pro features stop working after the 8-hour trial period.
Most of the time, the Google SketchUp Installer runs automatically after it's downloaded (Installing SketchUp). The Install Google SketchUp Pro 7 window opens. Items displayed on the left side of the window list the steps to install the program, like Introduction, License, and Destination Select. In the lower-right corner are Continue and Go Back buttons that you can use throughout the installation process (Figure A-2).
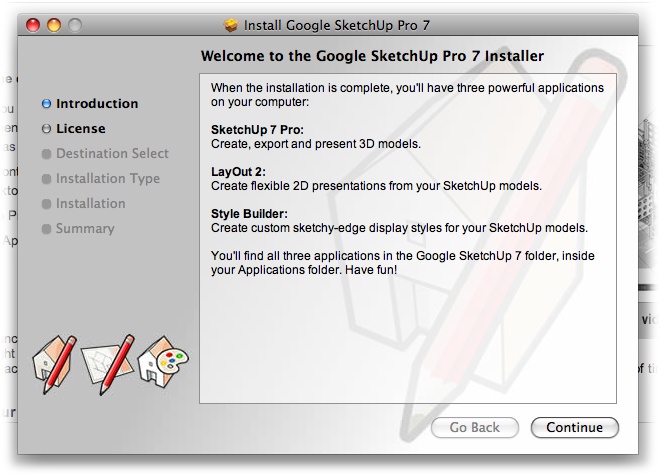
Figure A-2. The installers for Google SketchUp 7 and Google SketchUp Pro walk you through the installation. You fill in a few blanks, answer some basic questions, and click Continue.
Read the "Welcome to Google SketchUp" details and click Continue.
The window changes to show the Software License Agreement.
Read the license and if you agree, click Continue.
A banner appears with Disagree and Agree buttons.
If you want to continue to install the software, you must click Agree.
When you click Agree, the window displays the next window—"Select a Destination". If you click Disagree, the installation program stops.
Choose your hard drive as the destination, and then click Continue.
The "Select a Destination" window shows places where you can install the program. The usual place to install SketchUp is your hard drive, which is usually called Macintosh HD. If you've renamed your hard drive, it will have the name you specified.
When you click Continue, the Installation Type details are displayed. These details list how much space SketchUp needs.
Click the Install button.
On most systems, you see a message that says "Installer requires that you type your password." A box shows your account name, and another empty box is labeled "password". Mac OS X is telling you that it needs permission to install a program. If you're in charge of the computer, type in your password. If someone else manages the computer, you probably need their help to install the program.
Type your password and click OK.
A progress bar appears as the program is installed. When the process is complete, you see a Summary message that says "Install Succeeded".
Click Close.
The SketchUp application is ready to run. You can find the application in the Applications → Google SketchUp 7 folder. Drag the SketchUp icon to your Dock, and you can start SketchUp anytime with a single click.
If you installed SketchUp Pro, you can use the program for 8 days to see if it meets your needs. After that, you need to license (that is, pay for) the program to keep using it. To license the program, choose SketchUp → License → Purchase. You land at the Google website, where you can make an online purchase. After you pay, Google gives you a license number to enter in the SketchUp → Licenses window.