You may have noticed from the photo that a lot is going on up on the roof at Villa Savoye, which has some interesting curved walls and openings. The Front and Back view don't give you the whole picture, but Google Earth satellites do. In this next section, you apply a photo of the roof to the top of your model. Then you use the image to help you recreate that detail on the top of the villa. Instead of importing this image as a matched photo, you import it as a texture:
Click the "villa_savoye_front (2D) tab".
When you change your view in the next step, the photo disappears, but remember which side of the building is the front with the curved walls.
Use the Orbit (Q) tool to view the roof of the building.
Rotate the view so that the front of the building is pointed toward the bottom of your computer screen.
Choose File → Import.
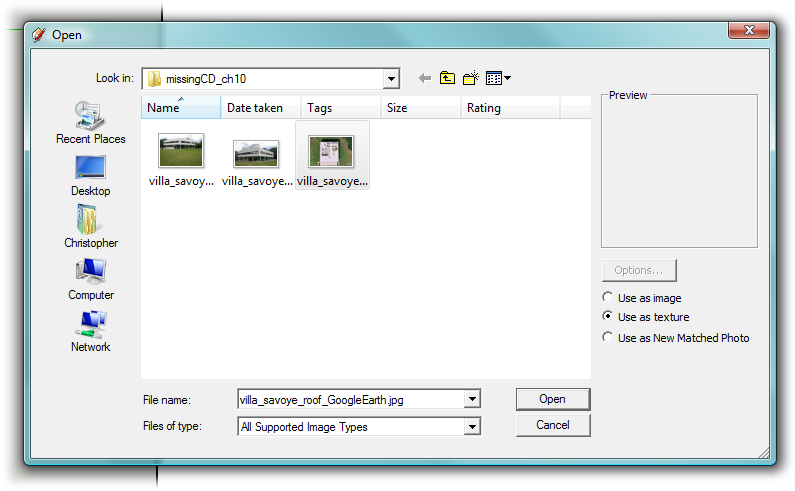
A file browser window opens. In Windows it looks like Figure 10-17.
Find and select the file named villa_savoye_roof_GoogleEarth.jpg. Click the "Use as texture" radio button and then click Open.
The image you're importing is attached to the cursor.
If you don't see the file where you saved it, make sure the "Files of type" menu (Format on a Mac) is set to either JPEG or All Supported Image Types.
Click the roof's upper-left corner and then click its right edge.
The first click anchors one corner of the image. The second click applies the texture to the face of the roof. The photo isn't oriented or sized properly.
With the Select tool, right-click the photo and choose Texture → Position.
The imported photo is tiled on the screen. You see pushpin markers at the corners of the image (Figure 10-18). Each of the pins is a different color and has an icon next to it. One icon, a cross with four arrows, looks like the Move tool. Drag that icon to move the image on the screen. Another icon is a circle. Click that icon to rotate the image. The last two icons show skewed rectangles. You can use these controls to change the photo's orientation to the face of the roof.
Click the circle icon and spin the image so that the curved walls face the bottom of the computer screen.
When you click the Rotate icon, a protractor style tool appears, making it easy to tell when you've rotated the image 90 degrees.
With the Select tool, right-click the image and choose Texture → Position.
The tiled image appears again. Pushpins mark the corners of one of the images.
Right-click once more and then click Fixed Pin.
The fixed pin mode is deselected, and the checkmark next to Fixed Pin disappears. This means you're in free-pin mode and can reposition the pushpins.
Tip
In free-pin mode, you can move the pins to different positions in the photo by using the click-move-click method. To position a pinned point of the image on a particular point of your model, drag the pin. First you click-move-click to mark positions in the photo. Then you drag to stretch the image into position over your model.
Click one of the pushpins, and then click again at the corner of the roof in the image. Place each of the pins on a different corner of the roof.
You move the pins using the click-move-click method. When you're finished, the four pins mark the corners of the roof in the image.
Drag the pin next to the Move icon to the nearest corner of the model. Drag each of the pins to the corner of the model.
As you drag the pins, the image twists and distorts, but when you're finished, the photo of the roof is positioned on top of the model, as shown in Figure 10-19.
Right-click and then choose Done from the shortcut menu.
When you click Done, you return to SketchUp's standard model editing mode. The Villa Savoye has images applied to all four sides and the roof, as shown in Figure 10-20.