Chapter 3. Equipping a Home Chemistry Laboratory
General Purpose Glassware and Plasticware
Any chemistry lab requires a good assortment of glassware to mix, store, measure, and dispense solutions. All of it needn’t be actual labware. To some extent, you can substitute ordinary household items such as drinking glasses, measuring cups, empty soft drink bottles, and so on. But you’ll also need at least some formal labware for tasks that require it.
When Robert built his first home chemistry lab in the early 1960s, some laboratory glassware was still made from ordinary flint glass. Nowadays, with the exception of glass tubing, some volumetric (measuring) glassware, and similar items, nearly all laboratory glassware is made from Pyrex or other heat-resistant borosilicate glasses like Kimax, Endural, or Bomex. Still, it’s worth checking. Flint-glass labware is ill-suited for any task that involves heat, whether that heat is applied externally or produced by a reaction.
Nowadays, a lot of “glassware” is actually made of plastic. Plastic has some advantages over glass; notably, that it usually doesn’t break if you drop it. Plastic labware is often (but not always) less expensive than glass equivalents. Because plasticware is produced by injection molding, it’s easy and inexpensive to produce complex shapes that are expensive to produce in glass.
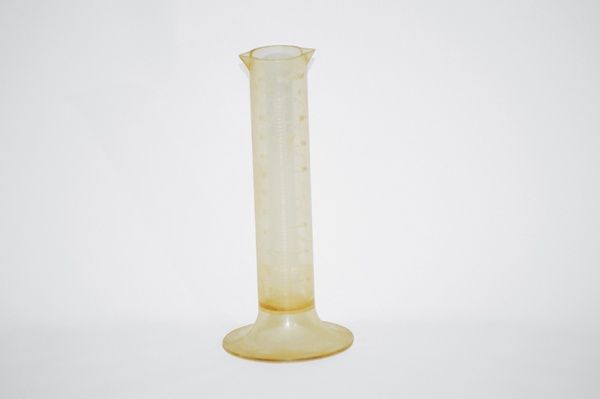
Against these advantages, plasticware has several disadvantages. Obviously, plasticware is less heat-resistant than glassware. Although good plasticware stands up to autoclaving, it cannot be heated over a flame or used for reactions that produce high temperatures. Plasticware may be damaged by organic solvents, oxidants, and some other chemicals. Because plasticware does not possess the vitreous surface of glassware, it is more difficult to clean thoroughly and may be permanently stained or otherwise contaminated by some chemicals, as Figure 3-1 shows.
On balance, we prefer to use glassware for most purposes. We suggest that you devote most of your glassware budget to actual glassware, and buy plasticware only for tasks where its advantages outweigh its disadvantages.
Labware, whether glass or plastic, is commonly available in at least two quality grades. Laboratory-grade glassware—also called professional-grade—is more expensive, better finished, often more precisely graduated, of heavier construction, better annealed, and is usually made in the United States, Europe, or Japan from Pyrex or other name-brand borosilicate glass. Student-grade glassware—also called economy-grade or educational-grade—is less expensive (sometimes much less), cruder in appearance, often less precisely graduated, may use thinner glass, often has annealing of questionable quality, and is usually made in China from Bomex or other inexpensive borosilicate glass. There are similar differences in grades of plasticware.
Drop the Flask and Turn Around Slowly
Before you order any laboratory glassware, make sure that it’s legal for you to possess it. We know that sounds strange, but legislators in some jurisdictions—in an attempt to eliminate underground meth labs—have passed laws that make it illegal to possess some pretty innocuous items. For example, in Texas it’s illegal to possess an Erlenmeyer flask, unless you have a permit for it. We are not making this up.
Be Careful With All Glassware
Even the best glassware can shatter unexpectedly, particularly if it is heated very strongly or if when hot it contacts a cold liquid. Inexpensive, student-grade glassware is more likely to shatter, because it may use thinner glass and may not be annealed as well as more costly name-brand glassware. Such accidents are very unlikely, even with inexpensive glassware, but you should always keep the possibility in mind. When you work with glassware, and particularly if you heat it, always wear splash goggles and protective clothing.
We use student-grade glassware in this book, solely for cost reasons. For example, we paid $1.80 for one Chinese Bomex student-grade flask. Similar name-brand laboratory grade flasks made of Pyrex or Kimax cost two or three times as much. If budget is not an issue, buy laboratory-grade glassware. But if the budget is tight, don’t hesitate to buy student-grade labware.
Test Tubes
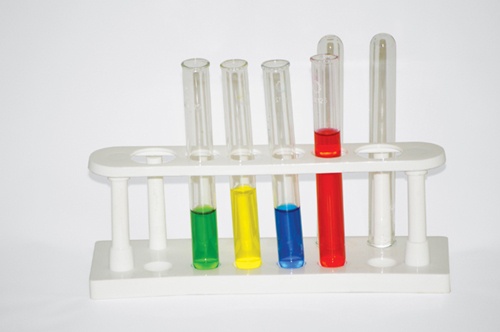
For most people, the test tube (shown in Figure 3-2) is the one piece of equipment that defines a chemistry lab, and rightly so. Test tubes are used so often and for so many purposes that it’s hard to imagine a chem lab without them. Most of the time, you’ll use test tubes to mix solutions, heat samples, observe reactions, and perform other similar tasks. But test tubes have many other uses. With a one- or two-hole rubber stopper, a glass tube or two, and some rubber or plastic tubing, you can convert a test tube into a miniature gas-generating apparatus or distilling setup or reaction vessel. Inverted in a pan of water, a test tube can be used to capture gases. With a solid cork or rubber stopper, a test tube serves to store samples. You can probably imagine many other uses without much effort.
Test tubes are readily available in sizes from 10×75 mm to 25×200 mm. For general use, the best sizes are 15×125 mm, which holds 14 mL, 16×150 mm (20 mL), or 18×150 mm (27 mL). One nice thing about test tubes is that they’re cheap. High-quality test tubes in standard sizes sell for $4 to $6 a dozen, and there are often significant discounts for buying larger quantities. That means that you needn’t worry about damaging test tubes, as you might with more expensive glassware. You can abuse your test tubes when necessary, and treat badly soiled test tubes as disposable. A dozen test tubes is a good starting point for a home lab.
Beakers
Beakers are among the most commonly used items of laboratory glassware; they’re used when test tubes aren’t large enough. Beakers are flat-bottomed, cylindrical containers, usually equipped with a pouring spout, and are used for routine mixing, measuring, heating, and boiling of liquids. Beakers are available in glass (usually Pyrex or a similar borosilicate glass), polypropylene, and other materials, and are available in capacities from 10 mL to 5,000 mL (5 L) or more.
Polypropylene beakers are popular because they are unbreakable, but they cannot be used for heating or boiling liquids and they may discolor or become cloudy when used with some organic solvents or strongly colored compounds. Polypropylene beakers are also more difficult to clean thoroughly and may have to be discarded in situations where a glass beaker could simply be washed.
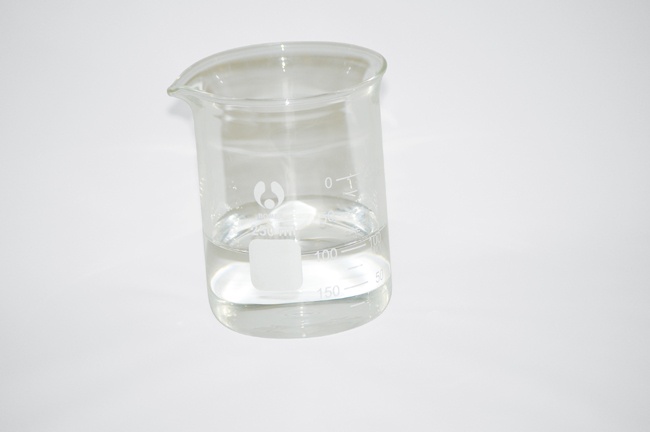
Most beakers are graduated with painted, etched, or raised lines to indicate the approximate volume the beaker contains at various fill levels. For example, the 250 mL beaker shown in Figure 3-3 has markings every 25 mL. Graduated beakers are typically accurate to within ±5%, and can be used to measure and dispense liquids when high accuracy is not required.
Laboratory beakers are available in two styles. Berzelius beakers, also called high-form beakers are tall and slender. Griffin beakers, also called low-form beakers, are shorter and squatter. For a home laboratory, either style is fine.
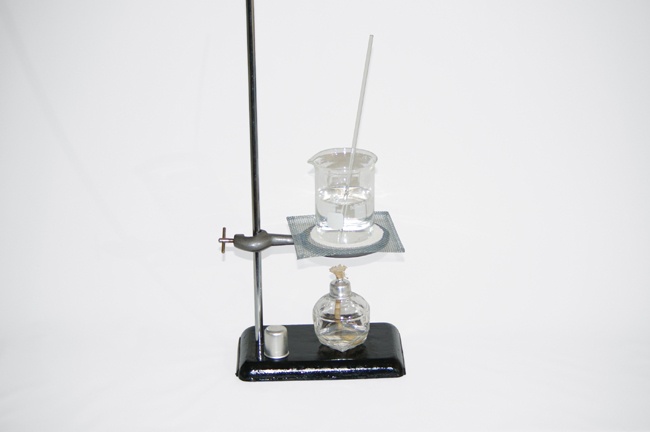
If you use a beaker for short-term storage of a solution, cover it to prevent evaporation or contamination. Use a watch glass, an ordinary piece of glass, or plastic film wrap. If you use a beaker to boil a solution, always add a boiling chip or leave a stirring rod in the beaker to prevent the solution from boiling over, as shown in Figure 3-4.
A well-equipped home chemistry lab should have a good selection of beakers, most mid-sized, but with a few larger and smaller ones for special purposes. The 150 mL or 250 mL size is the most useful for most home labs. Many laboratory equipment suppliers sell assortments of various-size beakers at a discounted price. Many also sell boxes of six to twelve beakers of the same size at a significant discount relative to the single-unit price.
FlaskS
Like beakers, flasks are used routinely for storing, mixing, measuring, heating, and boiling liquids. The primary difference is that beakers have wide mouths and flasks have narrow mouths, which means it’s easy to seal a flask using a rubber or cork stopper. Because they are easily sealed, flasks are commonly used as reaction vessels and for constructing various apparatuses such as gas-washing bottles, gas generators, receivers for a distillation apparatus, and so on. In addition to the volumetric flasks detailed later in this chapter, there are three main types of general-purpose laboratory flasks.
Erlenmeyer Flasks
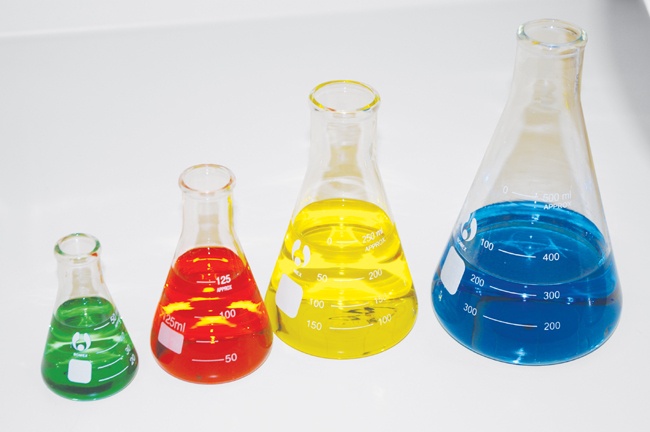
An Erlenmeyer flask, shown in Figure 3-5, has a wide, flat base and a conical cross section, which allows it to sit on the lab bench without risk of tipping. We frequently use an Erlenmeyer flask, also called a conical flask, for a task that requires a vessel larger than a test tube.
A well-equipped home chemistry lab should have Erlenmeyer flasks in various sizes. You’ll need at least one 500 mL and two 250 mL Erlenmeyer flasks, but it’s useful to have several 125 mL or 250 mL flasks. Like beakers, Erlenmeyer flasks can often be purchased in boxes of six or twelve at a significant discount, and are available in assortments of various sizes at a discount.
Florence (Boiling) Flasks
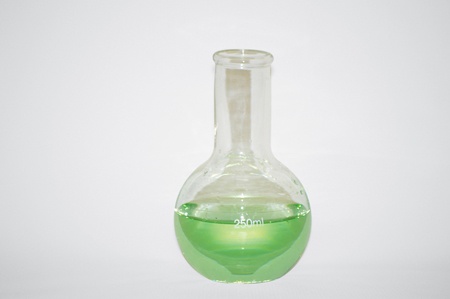
A Florence flask, also called a boiling flask, is specifically designed for vigorous boiling. Florence flasks are more robust than Erlenmeyer flasks, and are less likely to break from physical or thermal shock. A Florence flask is a good reaction vessel for distillations, refluxing, and similar operations. There are two varieties of Florence flask. A flat-bottom Florence flask, shown in Figure 3-6, has a small flat area on the bottom of the flask, which means that it can sit stable on a flat surface and can be heated on a wire mesh. A round-bottom Florence flask must be supported by a clamp at all times. In most home chem labs, an Erlenmeyer flask can be used instead of a Florence flask for occasional distillations and similar operations. If you plan to do frequent distillations, particularly on a larger scale or with high-boiling liquids, have at least one Florence flask on hand. The 250 mL and 500 mL sizes are the most useful.
Dangerous Assumptions
In order to make Figure 3-5 more visually appealing, we filled the flasks with attractively colored solutions. The 50 mL flask contains tap water with a few drops of green food coloring. The 125 mL flask contains tap water with a few drops of red food coloring. The 250 mL flask contains tap water with a few drops of yellow food coloring. The 500 mL flask contains tap water with . . . several grams of a toxic copper compound.
Or does it? We may have used blue food coloring in the 500 mL flask and a toxic chromium compound in the 50 mL flask. The point is that we can’t tell just by looking, and neither can you.
Never judge the contents of a flask or other container by visual appearance alone.
Filtering Flasks
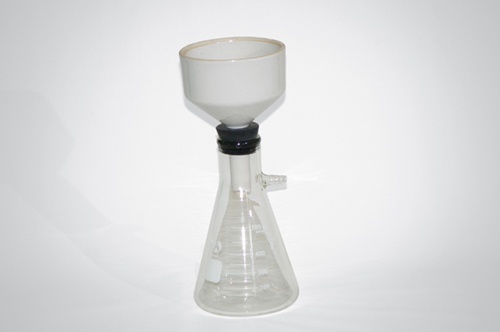
A filtering flask, shown in Figure 3-7, looks like an Erlenmeyer flask with a side arm. In use, tubing connects a vacuum source to the side arm, establishing a vacuum in the flask. A formal laboratory provides connections to a central vacuum pump. In a home laboratory, the vacuum source is usually a hand vacuum pump or an aspirator connected to a water faucet. The suction draws liquid through a Büchner funnel atop the flask, greatly increasing the speed of filtering. If you have an aspirator or other source of constant suction, you can also use the filtering flask to dry the material trapped by the filter paper by continuing to draw air through the Büchner funnel after all of the liquid has been filtered off.
Filtering flasks are readily available in sizes from 125 mL to 1,000 mL or more. A 250 mL or 500 mL filtering flask is generally the most useful size for a home chem lab. For most filtering operations you can get by without a filtering flask, using gravity filtration with a standard funnel and filter paper, as long as you’re willing to wait as long as it takes for gravity to do its work. Of course, depending on what you’re filtering, gravity filtration may take several minutes or even several hours. In some cases, a very finely divided precipitate may clog the filter paper, bringing gravity filtration to a dead stop. If that happens, suction is the only cure.
Funnels
Standard funnels are used to transfer liquids into narrow-mouth containers. A powder funnel resembles a standard funnel, but has a shorter, wider stem to allow solid chemicals to flow freely through the funnel.
Filtering funnels are available in two common varieties. One resembles a standard funnel, but has vertical ridges or channels inside the body of the funnel that are designed to keep the filter paper from adhering to the funnel. A Büchner funnel, shown in Figure 3-7 atop a filtering flask, is a special type of filtering funnel, designed to be used with suction to speed up filtration.
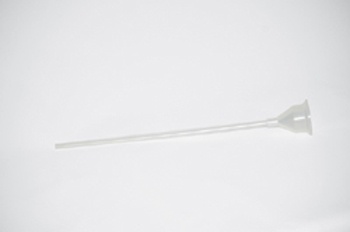
A safety funnel, also called a thistle tube, is shown in Figure 3-8. A safety funnel comprises a long tube with an open bulb on the top end, which may or may not be stoppered. A safety funnel is usually inserted in a rubber stopper and used to introduce additional reagents to a reaction vessel during the reaction.
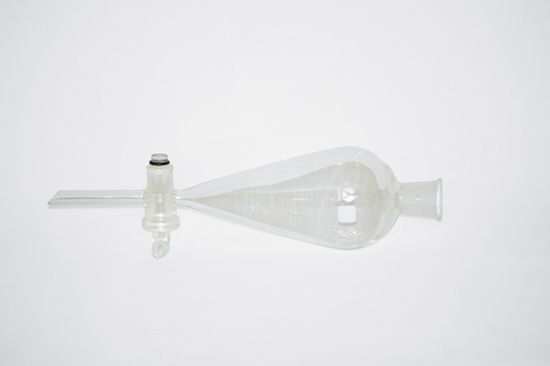
A separatory funnel (or sep funnel), shown in Figure 3-9, is used to separate multiple layers of immiscible liquids by draining off the lower layer or layers through a stopcock. Sep funnels are commonly used, particularly in organic chemistry experiments, for extraction and washing.
Bottles and Vials
Any chemistry lab needs a variety of bottles and vials to store and dispense chemicals. Although bottles seem mundane, some home chemists become fascinated with the great variety available. More than one home chemist has developed a serious secondary hobby of collecting bottles, some obsessively. I haven’t been bitten that badly, but will confess that I do have a collection of old bottles in various fascinating shapes and unusual colors. But even if your interest in bottles is merely utilitarian, you’ll probably want to acquire a lot of them in many different sizes and types.
Storage Bottles
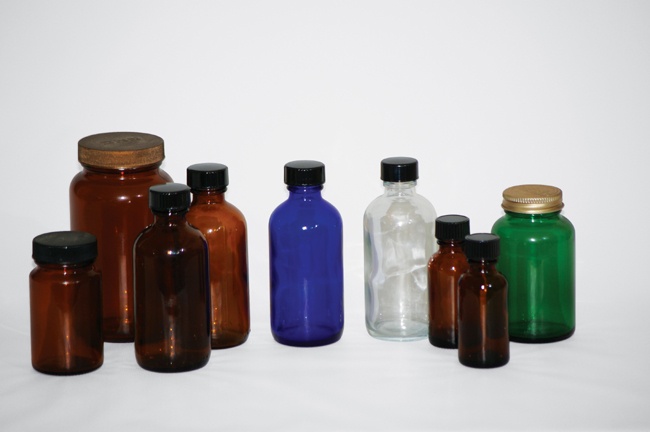
Storage bottles, shown in Figure 3-10, are used for stock solutions and other general storage. If you work mostly with chemicals from their original containers, you’ll need fewer storage bottles; if you make up stock solutions of commonly used chemicals, you’ll need more. I prefer the latter method, because it’s faster, more convenient, and more precise to measure small quantities of stock solutions rather than weighing out individual chemicals each time they’re needed.
You don’t have to buy storage bottles, of course. You can recycle empty household containers. For larger bottles, one good source is empty 500 mL soda bottles, which are made of resistant polyethylene terephthalate plastic and have tight-fitting caps. (Don’t use them to store organic solvents, concentrated acids or bases, or other chemicals that might react with the plastic, but dilute stock solutions of most inorganic chemicals are fine.) Before you reuse them, wash recycled bottles thoroughly with soapy water, soak them in a bleach solution (one part chlorine bleach to five parts water), and then rinse them thoroughly and allow them to dry until no odor of bleach (or anything else) remains.
If you decide to buy storage bottles, you’ll find them readily available in glass and various plastics in sizes ranging from 15 mL (0.5 ounce) or smaller to 1 quart/liter and larger. For general use, I prefer standard flint-glass narrow-mouth bottles in the styles called French Square and Boston Round, with plastic caps. Such bottles are commonly available in colorless or brown (amber) glass, and, less commonly, in blue glass. (Blue glass bottles were historically used to store poisons.) Brown glass bottles are usually less expensive than similar bottles in colorless glass, presumably because making colorless glass requires using purer and more expensive materials. That’s just as well, because some stock solutions are light sensitive, and should be stored in brown or amber glass. It doesn’t hurt to store any solution in a brown glass bottle, so that’s what I generally use.
Before you buy storage bottles, think about the quantities of stock solutions you’re likely to make up for your lab. For my lab, I decided to make up 100 mL of most stock solutions, so I ordered most of my bottles with that in mind. As it turned out, 4-ounce (118 mL) bottles were considerably less expensive than 100 mL bottles, so I ordered 100 4-ounce bottles. I also wanted to make up 500 mL of commonly used stock solutions such as dilute acids and bases, so I decided to order two dozen 500 mL bottles as well. Once again, pint (473 mL) bottles turned out to cost less than the 500 mL metric equivalent, so I ordered pint bottles instead of the 500 mL ones. Pint bottles are too small for 500 mL of solution, but that’s no problem. For example, if I make up 500 mL of 1 M hydrochloric acid, I simply store part of it in a 4-ounce bottle and the remainder in a pint bottle, from which I refill the smaller bottle as needed.
Implosion Danger
Filtering flasks are considerably more expensive than standard Erlenmeyer flasks. Don’t attempt to save money by building your own filtering flask with a standard Erlenmeyer flask and a two-hole rubber stopper. Filtering flasks are built of thick glass to resist air pressure when they’re evacuated. A standard Erlenmeyer flask is much more fragile, and may implode when evacuated, scattering broken glass and chemicals all over the lab (and you).
Some experimenters construct filtering flasks with standard Florence flasks, which are more strongly built than Erlenmeyer flasks and less likely to implode, but we strongly recommend against this practice. If you need a filtering flask, buy a filtering flask. Don’t attempt to make do.
Always clamp a filtering flask securely while it’s in use. Otherwise, it may tip over and shatter, scattering glass and chemicals.
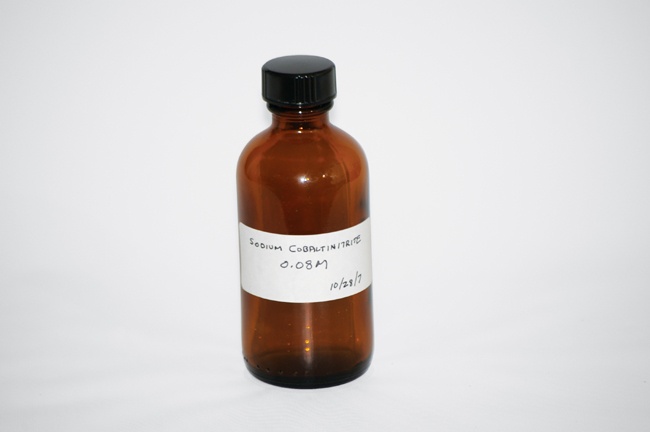
Every bottle should be labeled indelibly with its contents. If you’re patient and want to do things the traditional way, you can use an oilstone or whetstone to frost an area on a glass bottle that can then be labeled with a marking pen or wax pencil. I prefer to use my laser printer to print sheets of sticky labels, which adhere quite well to glass and plastic bottles. After applying the label, I cover it with clear tape to protect it. It’s also fine to hand-label bottles, as shown in Figure 3-11, as long as you print neatly and use an indelible marking pen. Include at least the name of the chemical and, if it’s a solution, its concentration. Many reagents have limited shelf lives, so date the bottle when you make up the contents.
Barnes Bottles
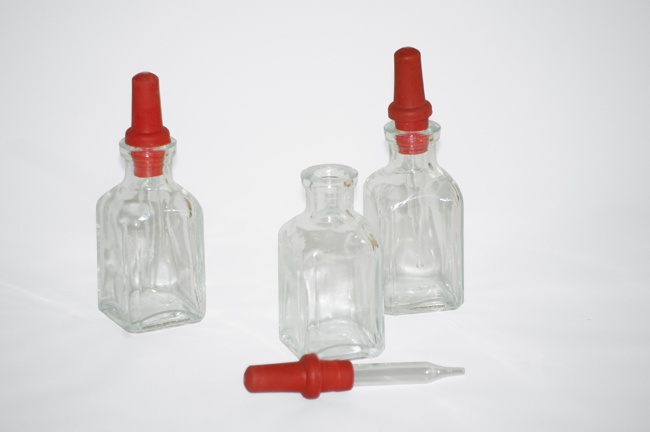
A Barnes bottle is a dropping bottle that is used to store an indicator or another solution that is typically used drop-wise in small quantities. The rubber bulb of the dropper in a Barnes bottle is large enough to plug the mouth of the bottle. When you need a few drops of the solution contained in the Barnes bottle, you remove the dropper, dispense the solution, and then reinsert the dropper in the bottle, which seals it. It’s handy to have half a dozen or so Barnes bottles on hand, filled with phenolphthalein and other indicators, dilute acids and bases, and so on. You can, of course, substitute any dropping bottle that you recycle from the bathroom or kitchen.
Wash Bottles
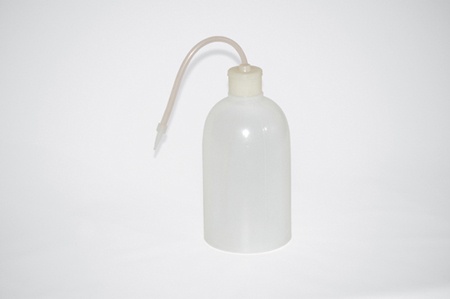
A wash bottle is a soft plastic bottle that allows you to dispense a liquid through a tube in a fine stream by squeezing the bottle. Washing bottles are used for rinsing glassware, adding small amounts of liquid to a reaction vessel in a controlled manner, and so on. You’ll want at least one washing bottle, filled with distilled or deionized water for general use around the lab. You may want additional washing bottles to contain alcohols and other commonly used liquids. Note that washing bottles are designed to dispense liquids, but are not intended to be used for long-term storage. An empty, thoroughly washed shampoo bottle with a squeeze top is an adequate substitute, as is a boutique spring water bottle with a squeeze top.
Miscellaneous General Glassware
In addition to the test tubes, beakers, flasks, bottles, and other general glassware, a well-equipped lab requires an assortment of miscellaneous glassware.
An assortment of glass tubing is useful for constructing various apparatuses, including gas-generating bottles, distillation setups, and so on. Look for tubing with an outside diameter of 5 mm, which is the size accepted by all but the smallest-holed rubber stoppers. Glass tubing is available in borosilicate (Pyrex) and standard flint glass. The former is useful for its resistance to heat, but the latter is more generally useful, because it can be bent, stretched, and otherwise manipulated after being heated in a standard alcohol lamp flame.
Stirring rods
Stirring rods are solid glass rods that are available in various lengths and diameters. In addition to their nominal purpose, stirring rods can be used to decant liquids from one container to another without spillage, and to prevent boiling liquids from “bumping.” Have several stirring rods available, and consider buying rods that include a “rubber policeman” on one end. (A rubber policeman is a rubber scraper that fits snugly on the end of the stirring rod.) These are useful for scraping crystals from the sides of flasks and beakers and for other similar tasks. Choose the length and diameter of your stirring rods according to the sizes of glassware you use. Rods much smaller than 5 mm are relatively fragile, particularly longer ones. I generally use stirring rods that are 5 mm in diameter and 8″ (200 mm) long.
Evaporating dishes
An evaporating dish is a shallow bowl, usually made of porcelain or borosilicate glass. They are used for evaporating the solvent from a sample, either in the open air at room temperature or in a desiccator or an oven. The 75 mm porcelain models are a good size for a home chem lab. You can substitute a Pyrex saucer or similar heat-resistant container.
Watch glasses
Watch glasses are round convex/concave glass plates that are used as beaker covers and for evaporating solvent from small samples. I keep on hand a couple of watch glasses in sizes that fit my beakers. For covering a beaker, plastic film wrap works just as well.
Crucibles
Crucibles are small ceramic or metal pots with lids, used when you need to heat a sample to a very high temperature. Although it’s often possible to reuse crucibles, you should discard it if the reaction causes any staining or other noticeable change. Fortunately, crucibles are cheap—at least the Chinese-made ones are. I confess that I prefer those, because if I’m going to ruin a crucible, I’d sooner ruin a $0.75 Chinese one than a $5.00 U.S.-made Coors crucible.
Avoid Toxic Dust
Always wear splash goggles, gloves, and a respirator when you use a mortar and pestle to grind chemicals. To minimize the amount of dust that escapes into the air, make a temporary cover with a sheet of thin cardboard or heavy paper large enough to cover the mortar. Punch a hole in the cardboard large enough to fit the pestle, and keep the mortar covered as you grind the chemical. Wear a respirator mask any time you grind a chemical.
Mortar and pestle
A mortar and pestle is used to grind dry chemicals to a fine powder. A laboratory mortar and pestle may be made of ceramic or glass or such metals as stainless steel or nickel. Many kitchen supply stores carry mortars and pestles intended for kitchen use that are also fine for laboratory use (but use them in one place or the other, NOT both). As a teenager, my mortar and pestle looked very much like a 4″ steel pipe cap and a large steel bolt.
Volumetric Glassware
Volumetric glassware is used to measure liquids with accuracy ranging from moderate to very high. Many standard beakers and flasks have graduations accurate to ±5%. Although this level of accuracy is sufficient for many routine tasks, you’ll often need to measure liquids more precisely. Volumetric glassware allows you to measure liquids with accuracy ranging from ±1% to ±0.1% or less, depending on its type, design, and quality.
Class A volumetric glassware provides the highest accuracy, but is expensive and is used primarily in professional laboratories. Class A volumetric glassware complies with the Class A tolerances defined in ASTM E694, must be permanently labeled as Class A, and is supplied with a serialized certificate of precision. (Some manufacturers have begun supplying “generic” Class A vessels, which meet Class A tolerances, but are not technically Class A because they are not serialized or certified.) All Class A volumetric glassware is actually glass; volumetric plasticware is not eligible for Class A status.
Class B volumetric glassware has tolerances twice those of Class A (except graduated cylinders, which have rules of their own), but is considerably less expensive and is adequate for most home laboratories. Class B volumetric glassware must comply with the Class B tolerances defined in ASTM E694 and must be permanently labeled as Class B. Many inexpensive volumetric glassware items, particularly those made in China, are unlabeled and so cannot be guaranteed to meet Class B standards. In practice, most of them seem to meet Class B standards, or at least come close.
Table 3-1 lists the Class A and Class B tolerances for the four common types of volumetric glassware used in home chem labs.
Depending on its type and design, volumetric glassware may be rated To Contain (TC) or To Deliver (TD). A vessel marked TC contains the amount specified when it is filled to the graduation line. A vessel marked TD delivers the amount specified when it is filled to the graduation line and then emptied using the proper procedure. The difference arises because of drainage holdback error. For example, volumetric flasks are rated TC. If you fill a 500 mL volumetric flask to the graduation line, it contains exactly 500 mL of solution (within its tolerance, and assuming that the ambient temperature corresponds to that at which the flask was rated, usually 20°C). If you empty that flask into another container, a bit less than 500 mL will transfer. That’s because some of the solution remains in the flask, wetting its inner surface.
Graduated Cylinders
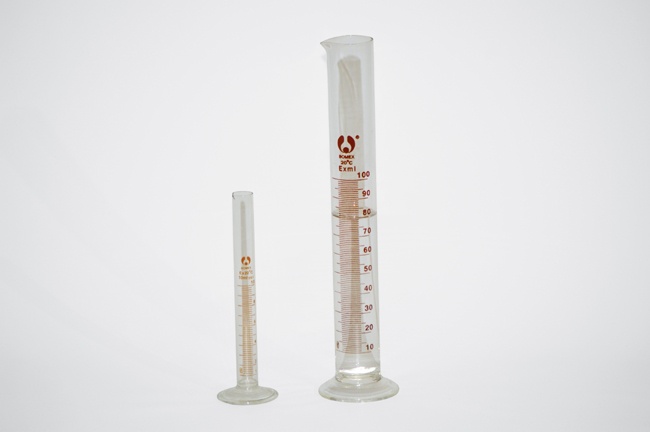
A graduated cylinder is a tall, slender cylinder with numerous graduation lines from near the bottom to near the top. You use a graduated cylinder to measure liquids with moderate to moderately high accuracy—from ±1% to ±0.2% of full capacity, depending on the capacity and quality of the cylinder. Graduated cylinders are made in glass and various plastics. Although they are breakable and usually more expensive than similar plastic models, I prefer glass cylinders because they are much more resistant to organic solvents, oxidizers, and other chemicals, and because they are much easier to keep clean. Figure 3-14 shows typical 10 mL and 100 mL glass graduated cylinders.
Graduated cylinder | Pipette | |||
Nominal Volume | Class A | Class B | Class A | Class B |
1 mL | n/a | n/a | ±0.006 mL | ±0.012 mL |
5 mL | n/a | n/a | ±0.01 mL | ±0.02 mL |
10 mL | ±0.08 mL | ±0.1 mL | ±0.02 mL | ±0.04 mL |
25 mL | ±0.14 mL | ±0.3 mL | ±0.03 mL | ±0.06 mL |
50 mL | ±0.20 mL | ±0.4 mL | ±0.05 mL | ±0.10 mL |
100 mL | ±0.35 mL | ±0.6 mL | ±0.08 mL | ±0.16 mL |
250 mL | ±0.65 mL | ±1.4 mL | n/a | n/a |
500 mL | ±1.10 mL | ±2.6 mL | n/a | n/a |
1000 mL | ±2.00 mL | ±5.0 mL | n/a | n/a |
2000 mL | n/a | ±10.0 mL | n/a | n/a |
1 mL | n/a | n/a | n/a | n/a |
5 mL | n/a | n/a | n/a | n/a |
10 mL | ±0.02 mL | ±0.04 mL | ±0.02 mL | ±0.04 mL |
25 mL | ±0.03 mL | ±0.06 mL | ±0.03 mL | ±0.06 mL |
50 mL | ±0.05 mL | ±0.10 mL | ±0.05 mL | ±0.10 mL |
100 mL | ±0.10 mL | ±0.20 mL | ±0.08 mL | ±0.16 mL |
250 mL | n/a | n/a | ±0.12 mL | ±0.24 mL |
500 mL | n/a | n/a | ±0.20 mL | ±0.40 mL |
1000 mL | n/a | n/a | ±0.30 mL | ±0.60 mL |
2000 mL | n/a | n/a | ±0.50 mL | ±1.00 mL |
Single-scale graduated cylinders are graduated from zero at the bottom of the cylinder to the nominal capacity near the top. Double-scale graduated cylinders have a second set of graduations, with zero at the top, which makes it easier to calculate the amount dispensed from the cylinder. Graduated cylinders are available in capacities from 10 mL to 2000 mL. The most useful sizes in a home chem lab are the 10 mL and 100 mL versions.
Pipettes
A graduated pipette (also spelled pipet) is a slender glass tube that is used to measure and dispense liquids with a very high degree of accuracy and precision. Three types of graduated pipettes are commonly used in chemistry labs.
Volumetric pipette
A volumetric pipette, also called a transfer pipette, is easily recognized by the bulge in its middle. Standard volumetric pipettes have only one graduation line that corresponds to the nominal capacity of the instrument, and so can be used only to measure that specific quantity. For example, a 50 mL volumetric pipette can measure exactly 50 mL (within its tolerance), but cannot measure smaller quantities because it has no graduation lines for them. Volumetric pipettes are available in Class A and Class B, and may be calibrated To Contain or To Deliver. A few volumetric pipettes are dual-calibrated TC and TD, with two corresponding graduation lines. Volumetric pipettes are specialized instruments that aren’t needed in most home chem labs. Instead, use a Mohr or serological pipette to measure and transfer small quantities of liquids, and a volumetric flask for larger quantities.
Mohr pipette
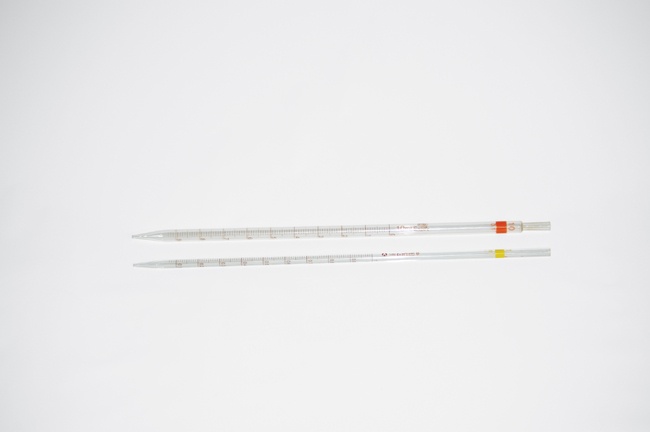
A Mohr pipette, also called a measuring pipette, is graduated from a zero line near the top of the pipette to a baseline near the bottom. Those graduations allow a Mohr pipette to be used to measure any amount of liquid from its smallest increment up to its maximum capacity. The fineness of the graduations depends on the capacity of the pipette. For example, a 10.0 mL Mohr pipette is typically graduated by 0.1 mL markings, while a similar 1.0 mL model is graduated by 0.01 mL markings. You can interpolate between markings. For example, if the fluid level in a 10.0 mL Mohr pipette is about halfway between the 5.1 mL and 5.2 mL marks, you can record that as 5.15 mL, give or take. A Mohr pipette is a TD device, in the sense that when a Mohr pipette has delivered its maximum calibrated volume, some liquid remains in the tip. Do not blow out this remaining liquid, which is accounted for in the calibration.
Never Pipette by Mouth
In the Bad Olde Days, many chemists used their mouths to suck liquids into pipettes and to blow out the last droplet. Many of them dropped dead, too. Never put your mouth in contact with a pipette. Not even if you’re pipetting pure water. If you get into the habit of filling pipettes by mouth, the day will inevitably arrive when you suck something nasty into your mouth. Just don’t do it. Use a pipette bulb or pipette pump instead.
Serological pipette
A serological pipette, also called a blow-out pipette, can be thought of as a TC version of a Mohr pipette. The only real difference is that the serological pipette is calibrated TC rather than TD, which means you have to blow out the liquid that remains in the tip after the serological pipette drains. Serological pipettes are made in glass and plastic versions, and have at best Class B accuracy. They are also inexpensive and sufficiently accurate for nearly any task in a home chem lab. Serological pipettes are readily available in capacities of 0.2 mL, 0.5 mL, 1.0 mL, 2.0 mL, 5.0 mL, and 10.0 mL. Most serological pipettes are color-coded for easy identification. Glass models sell for $0.50 to $3.00 each, depending on capacity and quantity, and disposable plastic models for less. Keep at least one 1.0 mL and one 10.0 mL glass serological pipettes on hand.
Various types of ungraduated or roughly graduated pipettes are also useful in a chemistry lab, including medicine droppers, the Pasteur pipette (essentially a large medicine dropper with a long, fine tip), and the Beral pipette, which is described later in this chapter.
Burettes
A burette (also spelled buret) is used to dispense controlled small amounts of a liquid with great precision. Burettes are used to perform titrations for quantitative analyses, determining accurate concentrations of stock solutions, and so on.
Burettes are available in glass and plastic models. Although glass burettes are breakable, we prefer them, because they are easier to clean and are unaffected by organic solvents. The least expensive burettes use a rubber tube and pinchcock to control the flow of the reagent. More expensive models use a ground glass stopcock, which must be kept scrupulously clean and stored disassembled to prevent the ground glass joint from binding. The most expensive models use a Teflon stopcock to control the flow, and are much easier to clean and maintain. You’ll want a burette if you plan to do quantitative analyses. A 50 mL model is the best compromise of capacity, flexibility, accuracy, and general usefulness.
Volumetric Flasks
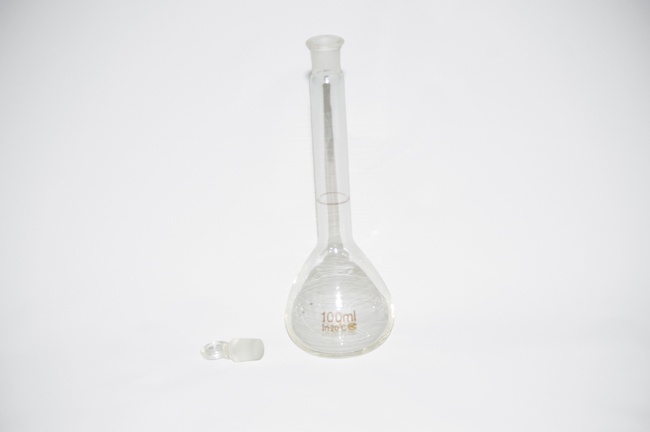
A volumetric flask, shown in Figure 3-16, is used to make up a precise volume of solution. It has one graduation line that indicates the nominal volume. To use a volumetric flask to make up a solution, you fill it partially with distilled water, add the chemical or chemicals to be dissolved or diluted, swirl the flask until the solute is dissolved, and then fill the flask to the graduation line.
Unless a volumetric flask is otherwise labeled, it is designed to be accurate at 20°C. Small variations in room temperature are no cause for concern, but dissolving or diluting some chemicals, such as strong mineral acids, is highly exothermic, and raises the temperature of the solution enough to affect accuracy. (Although it is less common, dissolving or diluting some other chemicals can be endothermic, and can lower the temperature of the solution enough to affect accuracy.) If you use a volumetric flask to make up solutions of these exothermic or endothermic solutes, allow the solution to come to room temperature before you top up the flask to the graduation line.
Although some glass volumetric flasks are made of Pyrex or similar borosilicate glass, many are of flint glass. For those flasks in particular (and even for Pyrex flasks), we prefer to do the initial dissolving of exothermic solutes in a beaker or Erlenmeyer flask. For example, if we’re making up 500 mL of a stock solution of sodium hydroxide, which releases a great deal of heat as it dissolves, we start with about 400 mL of distilled water in a 600 mL beaker, add the sodium hydroxide gradually, and stir until it dissolves. Only after that solution has cooled to room temperature do we transfer it to the volumetric flask (rinsing the beaker several times with distilled water to make sure we’ve done a quantitative transfer) and then top off the volumetric flask.
Exothermic Dangers
When you make up a solution using a concentrated or solid strong acid or base, always gradually add the acid or base to the water, not vice versa. If you add water to the strong acid or base, the solution may boil almost instantly, ejecting the chemical forcefully from the container.
Volumetric flasks are available in glass (Class A or Class B) and plastic (Class B only), in sizes from 10 mL to 2000 mL or larger. A home lab should ideally have a set that includes 25 mL, 50 mL, 100 mL, 250 mL, 500 mL, and 1000 mL flasks. But volumetric flasks, particularly good ones, aren’t cheap. If you can afford only one volumetric flask, choose a 100 mL flask. If you can afford two volumetric flasks, add a 500 mL flask for making up stock solutions that you use in larger amounts, such as dilute acids and bases. If you can afford three, add a 25 mL flask for mixing up small quantities of stock solutions of expensive chemicals, such as silver nitrate, expensive indicators with short shelf lives that you buy by the gram, and so on. If you’re on a very tight budget, you can do without a volumetric flask and use a graduated cylinder instead. You’ll give up some accuracy, but your results will be accurate enough for all of the labs in this book.
Microscale Equipment
The recent trend in chemistry labs, particularly school and university labs, is to substitute microscale chemistry equipment and procedures for traditional semi-micro or macroscale equivalents. Microscale chemistry, often called microchemistry, is just what it sounds like. Instead of using standard test tubes, beakers, and flasks to work with a few mL to a few hundred mL of solutions, you use miniaturized equipment to work with solution quantities ranging from 20 µL (microliters, where one µL equals 0.001 mL) to a couple mL.
Using microscale equipment and procedures has many advantages. Microscale equipment and procedures are less expensive than standard equipment and procedures, which is a major reason for the popularity of microscale chemistry. Using microscale equipment and procedures means that chemicals are needed in very small quantities, which are safer to work with and easier to dispose of properly. Microscale also makes it economically feasible to do experiments with very expensive chemicals, such as gold, platinum, and palladium salts. Setup and teardown is faster, allowing more time for actual experiments, and cleanup usually requires only rinsing the equipment and setting it aside to dry.
Against these advantages, there are several disadvantages to microscale chemistry. First and foremost, everything is on such a small scale that it can be difficult to see what’s going on. For example, you may need a magnifier to examine a precipitate (or even to determine whether there is a precipitate). Because of the small scale, measuring or procedural errors so small that they would have no effect on a traditional scale experiment can greatly affect the outcome of a microscale experiment. With traditional equipment and procedures, a milligram balance (or even a centigram model) is sufficiently accurate to do reasonably precise quantitative work, but equivalent precision in microscale requires a very expensive tenth-milligram (0.0001 g) or hundredth-milligram (0.00001 g) analytical balance. Finally, although it sounds odd, like most people we find microscale experiments less satisfying emotionally than larger-scale experiments. Watching two drops of reagent combine in a reaction plate to yield a precipitate smaller than a grain of sand just isn’t as thrilling as combining 10 mL of each reagent in a test tube and watching the precipitate settle to the bottom of the tube, where it can be isolated, purified, and used for subsequent experiments and tests.
Still, the ubiquity of microscale chemistry means that it’s important for you to become familiar with basic microscale equipment and procedures. Most of the experiments in this book use semi-microscale, such as test tubes and small beakers and flasks. If you want to gain experience with microscale procedures, you can substitute microscale equipment and techniques. The only microscale equipment you need to do the experiments in this book is described in the following sections.
Reaction Plates
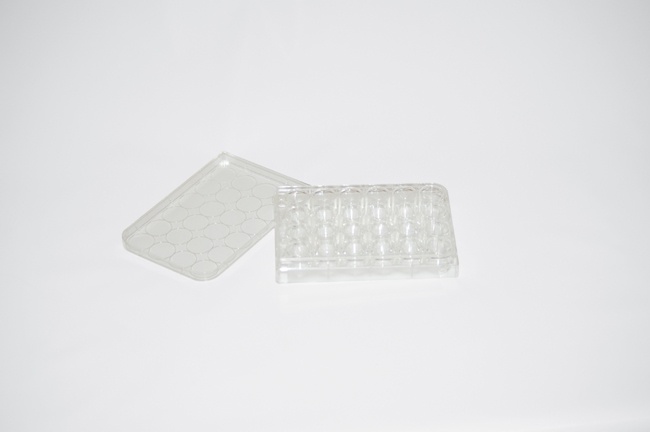
A reaction plate, shown in Figure 3-17, is a flat sheet of glass, plastic, or porcelain with an array of small wells that typically contain 0.25 mL to 4 mL each. Reaction plates are available in many sizes with from half a dozen to 96 or more wells. Reaction plates are widely used in microchemistry to substitute for test tubes and other containers, but they are equally useful in a general chem lab when you need to test one reagent against many unknowns or many reagents against one unknown. For example, in one of the experiments in the Forensic Chemistry chapter, we use Marquis reagent (a presumptive test used by drug enforcement agents) to test many substances found around the home. If we performed these tests in standard test tubes, we’d need a fairly large amount of Marquis reagent (and a lot of test tubes, all of which we’d have to wash after we completed the tests). Using a reaction plate instead means that we need only a few drops of Marquis reagent for each test, and we have only one item to wash when we complete the tests.
It’s useful to have both white and black reaction plates. White plates make it easier to see color changes. Black plates make it easier to see precipitates. Alternatively, a clear plastic or glass reaction plate serves both purposes, according to the color of the surface that you rest it on.
Reaction plates are available in deep-well models that have cylindrical, flat-bottom wells and shallow-well models with wells with rounded bottoms. Models with a large number of wells generally have wells of lower capacity, and vice versa. One of the most useful and common sizes is a 24-well deep-well model that holds 3 mL per well. At a buck or two each, these are cheap enough that every home chem lab should have at least a couple on hand. (Having at least two available makes it easier to do comparative procedures such as colorimetric comparisons.)
Droppers and Disposable Pipettes
Droppers and disposable pipettes (also called Beral pipettes) are used to transfer or dispense small amounts of liquids in a controlled fashion. The traditional eyedropper, with its glass tube and rubber bulb, remains useful for these purposes, particularly when the liquid in question is an organic solvent or other liquid that would damage or react with a plastic pipette. (Of course, that same solvent may damage a plastic reaction plate, which is an argument for having at least one glass or porcelain reaction plate available.)
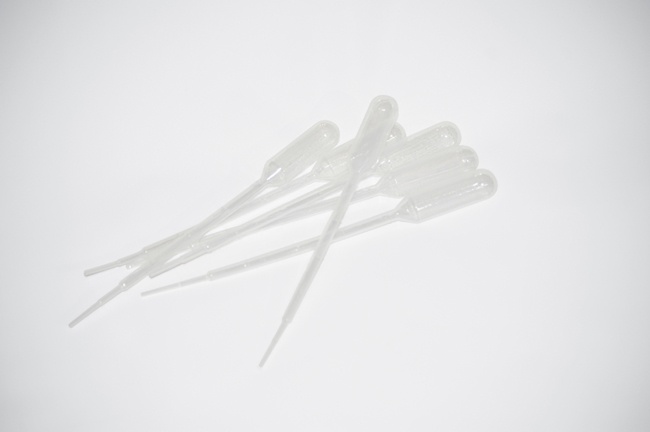
Beral pipettes, shown in Figure 3-18, are single-piece injection-molded plastic dropper pipettes. Beral pipettes are cheap, disposable, and have many different uses around the lab. In addition to their intended use, I have used Beral pipettes as miniature reaction vessels, miniature filtering funnels, thistle tubes, and, by cutting their bulb ends at a diagonal, as disposable miniature chemical scoops to avoid contaminating our stocks of reagent-grade dry chemicals.
In bags of 100, Beral pipettes sell for five or six cents each, versus two or three times that much if you buy in small quantities. Beral pipettes come in various sizes, and are rated by the amount they contain and the number of drops they dispense per mL. I prefer the standard 150 mm by 5 mm models, which contain about 3 mL, dispense 25 drops per mL, and are graduated in mL.
Recommended Laboratory Glassware
Table 3-2 lists my recommendations for a basic set of laboratory glassware. With only these items, you can complete all of the laboratories in this book.
If you’re on a tight budget, you can get along with less than the recommended basic glassware by washing and reusing glassware during a lab or by modifying the quantities we used or the equipment setups I describe. For example, in one lab you will distill 100 mL of ethanol from one flask to another. By reducing the quantity of ethanol to 10 mL, you can substitute a setup using test tubes rather than flasks. Similarly, many of the labs can be done microscale using reaction plates and Beral pipettes rather than the test tubes or beakers that I used. Even if you can’t afford to buy all the basic glassware I recommend, don’t let that stop you. You can manage, one way or another, by substituting and making do.
I maintain a current list of vendors of laboratory glassware, equipment, and chemicals at http://www.homechemlab.com/sources.html. Check that page before you order any glassware, equipment, or chemicals.
At the expense of some inconvenience and accuracy, you can economize on glassware by using nonstandard procedures. For example, rather than buying a volumetric flask or flasks, you can use your 10 mL and 100 mL graduated cylinders as ad hoc volumetric flasks. Your results won’t be quite as accurate, but they won’t be terribly far off, either. Similarly, if there’s no room in the budget for a burette to do titrations, you can substitute a $1 Mohr or serological pipette. The pipette is less convenient to use for a titration than the burette, but if you work carefully, your results can be as accurate with the pipette as they would have been with the burette. You can even substitute a calibrated Beral pipette, and do your titration by counting drops.
The items listed in Table 3-3 are useful additions to the basic glassware kit. None of them are absolutely necessary, but all of them make things easier, both for the laboratory sessions in this book and for other experiments you may do on your own. You will also find it helpful to increase the numbers of the frequently used items in Table 3-2, especially beakers, Erlenmeyer flasks, test tubes, pipettes, and graduated cylinders. For example, my home lab has at least half a dozen beakers and Erlenmeyer flasks in each of the sizes I use most often, a dozen serological pipettes, several dozen test tubes, and half a dozen graduated cylinders.
Having more than the required minimum on hand allows for some breakage, and also speeds up lab work. For example, if you have only one 10 mL graduated cylinder, you might have to wash and dry it in the midst of a lab session. If you have extras, you can simply rinse and set them aside as you use them and wash all of them thoroughly at the end of the session.
Description | Qty | Notes |
Beaker, 50 mL | 1 | Useful as a weighing boat, for making up small amounts of solutions, and so on. |
Beaker, 150 mL | 6 | Most generally useful size for typical home lab work; can substitute 250 mL. |
Beaker, 250 mL | 2 | Use when a 150 mL beaker isn’t quite large enough. |
Beaker, 600 mL | 1 | Useful for making up stock solutions, for general mixing, as an ice bath, and so on. |
Bottle, storage, amber glass | * | As required; use to store stock solutions; choose appropriate sizes from 25 mL to 500 mL. |
Bottle, wash, 500 mL | 1 | Use to store and dispense distilled water for making up solutions, rinsing glassware, and so on. |
Burette, 50 mL | 1 | Use for titrations, standardizing solutions, and so on. |
Crucible with cover | 1+ | To fit clay triangle described in equipment section. |
Cylinder, graduated, 10 mL | 1 | Use for fast, moderately accurate measurement of liquids. |
Cylinder, graduated, 100 mL | 1 | Use for fast, moderately accurate measurement of liquids and as a substitute volumetric flask. |
Dish, evaporating | 1 | Porcelain or Pyrex glass. |
Flask, Erlenmeyer, 250 mL | 2 | Most generally useful size for typical home lab work. |
Flask, Erlenmeyer, 500 mL | 1 | Use as reaction vessel for larger-scale experiments, as a distillation vessel, gas-washing bottle, and so on. |
Flask, volumetric, 100 mL | 1 | Use for making up solutions accurately. |
Funnel, general-purpose | 1+ | Assorted sizes useful; may be glass or plastic (resistant to boiling temperatures). |
Pipette, eyedropper, glass | 3+ | Use with solvents that would damage polyethylene Beral pipettes. |
Pipette, Beral, disposable | 10+ | Use for microscale procedures, as a substitute burette, and so on. |
Pipette, Mohr or serological, 1.0 mL | 1+ | Use for microscale titrations and for exact measurement of small quantities of liquids. |
Pipette, Mohr or serological, 10.0 mL | 1+ | Use for microscale titrations and for exact measurement of small quantities of liquids. |
Plate, reaction | 1+ | Use for microscale procedures; choose 24-well transparent plastic or ceramic model. |
Rod, stirring, glass | 3+ | Use for stirring and to prevent bumping when boiling solutions. |
Tubes, capillary | 12+ | Use for chromatography spotting. |
Tube, test | 12+ | 16 x 150 mm or 18 x 150 mm. |
Tubing, flint glass, 5 mm | 1 | 12″ or 300 mm; use for building apparatuses. |
Watchglass | 1+ | Large enough to cover 250 mL and 600 mL beakers. |
Qty | Notes | |
Bottle, Barnes dropping, 25 mL | 12+ | Use to store indicator solutions and other solutions that are often used dropwise. |
Bottle, gas-generating | 1 | Buy or make your own with an Erlenmeyer flask, 1- or 2-hole stopper, and tubing. |
Bottle, gas-washing | 1 | Buy or make your own with an Erlenmeyer flask, 2-hole stopper, and tubing. |
Flask, filtering, 250 mL or 500 mL | 1 | Use for faster filtration; requires hand vacuum pump or other vacuum source. |
Flask, Florence (flat-bottom), 250 mL | 1 | Better than Erlenmeyer flask for high-temperature distillations and similar procedures. |
Flask, volumetric, 500 mL | 1 | Use for making up larger quantities of bench and stock solutions accurately. |
Flask, volumetric, 25 mL | 1 | Use for making up small quantities of indicators and solutions of expensive chemicals accurately. |
Funnel, Büchner, with stopper | 1 | Use with filtering flask. |
Funnel, separatory, 100 mL to 250 mL | 1 | Use for separating aqueous and organic phases in extractions or washings. |
Funnel, thistle tube | 1 | Useful for adding reactants to a stoppered flask. |
Laboratory Equipment and Supplies
In addition to glassware, a home chem lab requires a variety of laboratory equipment and supplies. Some of it you can make yourself, but much of it must be purchased.
Balance
A good balance is an essential tool for any chemistry lab. When I built my first home chem lab in the mid-1960s, the only options were mechanical balances, which were relatively inaccurate and very expensive. (I ended up building a knife-edge balance that was usable but never entirely satisfactory.) Fortunately, there are many accurate, inexpensive electronic balances available nowadays.
When you choose a balance for your home chemistry lab, pay close attention to the following important characteristics:
Resolution/Readability
Resolution or readability is the minimum increment of weight that can be determined by the balance. For example, a balance may be able to weigh samples to within 0.1 g, 0.01 g (one centigram or cg), 0.001 g (one milligram or mg), or 0.0001 g (100 microgram or µg). All other things being equal, a balance with higher resolution costs more than one with lower resolution. The least expensive balances suitable for use in a home lab cost $60 or so and can weigh samples to within 0.01 g. Balances with resolution of 0.001 g start at about $175, and those with 0.0001 g resolution cost $750 and up.
Reasonably high resolution is important, because it allows you to work to a particular level of accuracy while using smaller amounts of materials. For example, if 0.01 g resolution is sufficient to allow you to make up 100 mL of a stock solution to the desired degree of accuracy, if you instead used a 0.1 g balance, you would have to make up 1,000 mL of that stock solution to achieve the same degree of accuracy. Similarly, if you used a 0.001 g balance, you could make up only 10 mL of that stock solution to the same degree of accuracy.
Capacity
Capacity specifies the maximum weight that a balance can handle, and is related to the resolution and price of the balance. For example, a $25 centigram balance may have a maximum capacity of 25 g, and a $100 centigram model may have a maximum capacity of 200 g. Note that some balances also have a minimum capacity, below which their readings may be inaccurate.
Reasonably high capacity is important, because you will often tare and weigh by difference. For example, before you begin a procedure, you may weigh the beaker in which the reaction will take place. Rather than weighing reagents directly, you place the beaker on the balance and use the tare function to “zero out” the balance, so that the balance shows a weight of zero with the beaker on it. You then add the reagents to the beaker. You can read the weight of the first reagent you add directly on the display. You can determine the weight of the second reagent you add by subtracting the original weight from the new weight, and so on. When the reaction is complete, you can filter the precipitate and determine the weight of the product.
Accuracy and Precision
Accuracy and precision (also called repeatability) are separate but related characteristics. Accuracy specifies how closely a balance indicates the true weight of a sample. For example, if you weigh a calibration weight with a known weight of 100.0000 g, an accurate balance indicates that weight to within its resolution (e.g., an accurate centigram balance reads 100.00 g, and an accurate milligram balance reads 100.000 g).
Precision or repeatability specifies how closely repeated weighings of the same sample agree. For example, if you weigh the calibration weight nine times, a precise but inaccurate balance may report weights of 100.83 g seven times, 100.82 g once, and 100.84 g once. Although the indicated weights are far from the true weight, which means the balance is inaccurate, the separate weighings agree closely, which means the balance is precise. Conversely, an accurate but imprecise balance may report weights of 99.96 g, 99.97 g, 99.98 g, 99.99 g, 100.00 g, 100.01 g, 100.02 g, 100.03 g, and 100.04 g. No two weighings gave the same result, which means the balance is imprecise, but none of the results differed much from the actual weight, which means the balance is accurate.
Repeatability is more important than accuracy. An inaccurate balance can be calibrated by using a known weight and adjusting the display accordingly. An imprecise balance cannot be adjusted to be more precise.
Linearity
Linearity specifies the accuracy and precision of a balance across its range of capacities from minimum to maximum. For example, a centigram balance with a 200 g capacity should have similar accuracy and precision whether you are weighing a 1 g sample or a 195 g sample. The best way to test the linearity of a balance is to weigh multiple items individually and then together. For example, you might weigh three labeled bolts and get results of 34.18 g for bolt A, 44.77 g for bolt B, and 61.29 g for bolt C. When you weigh bolts A and B together, a balance with good linearity will read 78.95 g (34.18 g + 44.77 g = 78.95 g). When you weigh bolts A, B, and C together, a balance with good linearity will read 140.24 g. Other than the least-expensive models, most decent electronic balances have good linearity through most of their range of capacities.
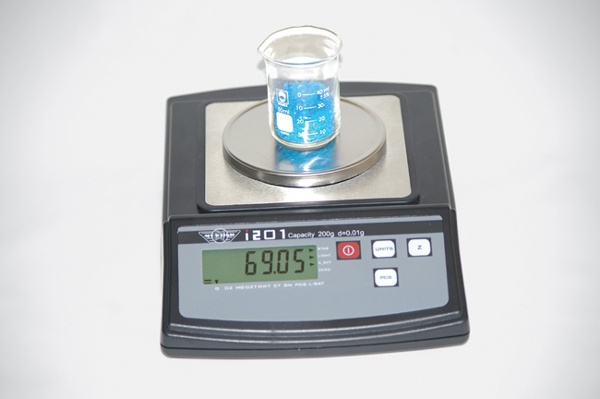
Of course, price is often a major consideration for a home lab, but I suggest you don’t skimp too much. If you’re on a tight budget, choose a $60 model like the My-Weigh Dura 50 Digital Scale (0.01 g/50 g). If you can afford more, choose the $100 My-Weigh iBalance 201 (0.01 g/200 g) shown in Figure 3-19, which is what I used for the lab sessions in this book. If you need a milligram scale, the least expensive model I can recommend is the $170 My-Weigh GemPro 250 (0.001 g/50 g), although I think the $220 Acculab VIC-123 Milligram Scale (0.001 g/120 g) or the $270 Acculab VIC-303 (0.001 g/300 g) is a much better choice.
Most laboratory supply places carry balances suitable for home labs. The best source we know of in terms of selection and price is Precision Weighing Balances (www.balances.com).
Heat Sources
Although modern chemistry sets make a point of using “no flame,” it’s impossible to imagine a real wet-chemistry laboratory without heat sources. Heat sources are essential for warming and boiling solutions, bending and drawing glass tubing, drying samples, and so on. A well-equipped lab should have several heat sources, including the following:
Alcohol lamp
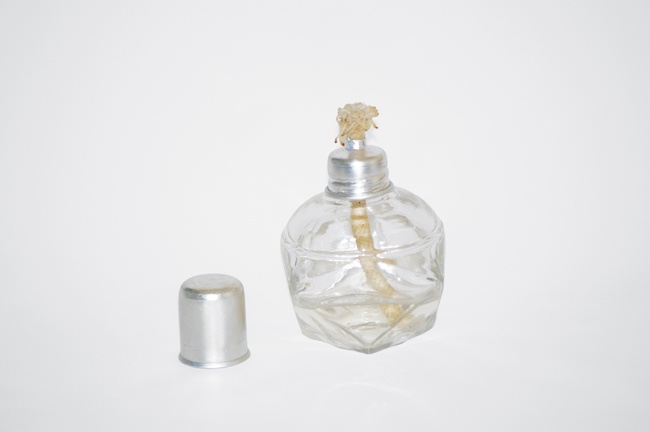
An alcohol lamp, shown in Figure 3-20, has been a staple of home laboratories since there have been home laboratories. Alcohol lamps are inexpensive, widely available, reliable, relatively safe to use, and provide a gentle heat that is useful in a wide variety of laboratory procedures. Even if you have other heat sources, you’ll want an alcohol lamp for general heating tasks. I got my alcohol lamp as a part of a glassware assortment offered by United Nuclear, but you can buy one from any laboratory supply house.
Gas burner
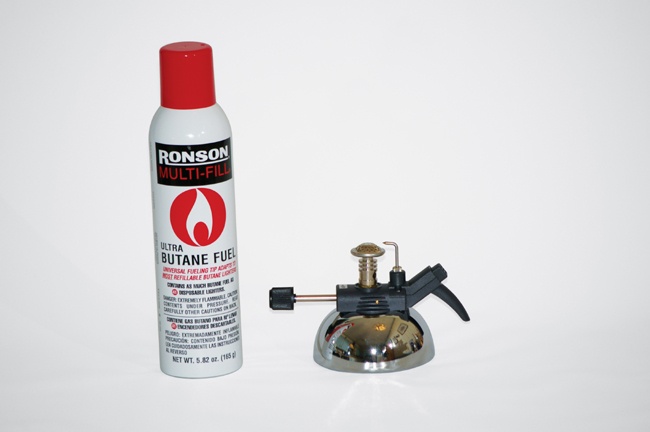
Formal laboratories invariably have burners fueled by natural gas, which is impractical for most home chem labs. Fortunately, there are some good, inexpensive alternatives. Most laboratory supply houses sell gas microburners (Figure 3-21) that do not require a connection to a natural gas supply. Instead, they have a self-contained fuel tank that can be refilled from standard butane cylinders sold by drugstores and tobacconists.
One advantage of a gas burner is that it provides a much hotter, more focused flame than an alcohol lamp. Sometimes, such as when you are heating a solution in a test tube, this hotter flame is actually undesirable. Other times, for example when you are trying to reduce a metal ore with carbon, the higher temperature of the gas flame may be necessary to initiate and sustain the reaction. (If you have no gas burner, you can increase the temperature of an alcohol lamp flame significantly by using a blowpipe or a piece of glass tubing to blow air into the flame.)
Another advantage of a gas burner is that most models produce much more heat than an alcohol lamp. For example, an alcohol lamp takes a long time to bring 250 mL of a solution to a boil. A gas burner accomplishes the task much faster.
You may already have a suitable gas burner in your garage or workshop. Bernz-o-Matic and other companies produce inexpensive burners that use disposable propane cylinders. Various accessories are available, including stands and heat spreaders, that make these burners very useful in a home lab.
Hotplate
As useful as alcohol lamps and gas burners are, there are times when you need a heat source that doesn’t use flame. An open flame can be very dangerous, particularly if you are working with a flammable liquid or gas. For those situations, the best solution is an electric hotplate. The best models have electronic controls and are specifically designed for laboratory use. Many laboratory hotplates also include a built-in magnetic stirrer, which can be very useful. Unfortunately, laboratory hotplate/stirrers aren’t cheap. Fortunately, an ordinary kitchen hotplate is inexpensive and serves the purpose nearly as well.
Support Stands, Rings, and Clamps
A ring stand, also called a support stand, is a heavy metal base, usually of cast iron, that supports a vertical rod to which various rings and clamps can be attached. Ring stands vary in price, construction quality, base size, rod diameter and length, and other factors, but essentially any ring stand is suitable for use in a home chem lab.
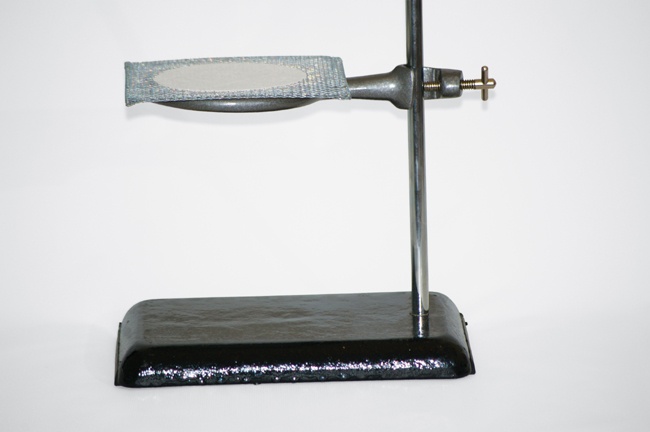
Support rings are generally made from cast iron or steel, and are available in various diameters. Some require a separate clamp to attach them to the stand, but most include a built-in clamp. A ring is not normally used alone when heating a container. For heating flasks and beakers, a wire gauze with a ceramic center is used between the ring and the base of the container to spread the heat evenly. Figure 3-22 shows a ring stand with ring and wire gauze.
Avoid Open Flames
If you are working with any flammable liquid or gas, never use an alcohol lamp, gas burner, or any other heat source that produces a flame. No matter how careful you are, a catastrophic fire or explosion could occur without warning.
A ring stand and ring are also useful to support a filter funnel or sep funnel.
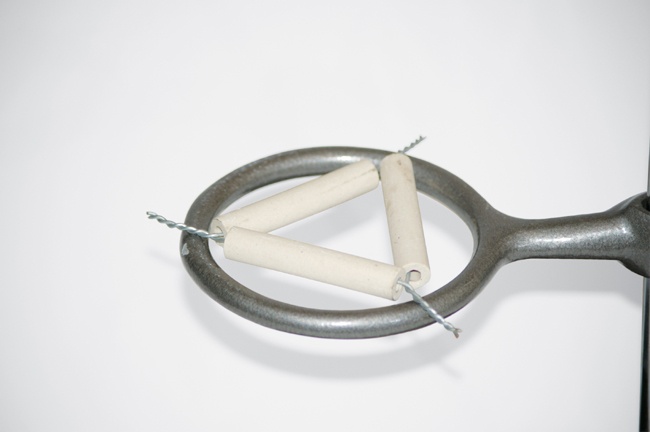
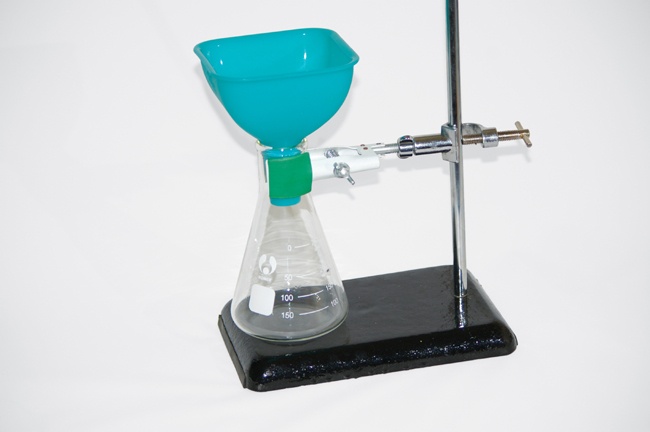
Crucibles are designed to be used at very high temperatures, and are normally heated by a gas flame directly on them. Despite their temperature resistance, crucibles are relatively fragile physically, and might fracture if supported directly by a metal ring. Instead, as shown in Figure 3-23, a ring is used to support a clay triangle, which in turn supports the crucible. The crucible contacts only the clay pipes, which insulate it from rapid temperature changes that could cause it to crack. In addition to rings, various types of clamps can be connected to the support rod. These clamps are used to secure glassware and any other apparatus to prevent them from tipping over or coming apart during a procedure. Among the most useful of these is the general-purpose utility clamp, shown in Figure 3-24, which is used to secure flasks, test tubes, and other glassware. Other general-purpose clamps include right-angle clamps and adjustable-length clamps. A thermometer clamp can be used for its nominal purpose, but is also useful for securing glass tubing. A three-finger clamp is usually used to support a separatory funnel, but is also useful for other purposes. A burette clamp is most often used to support a burette, but is also useful for holding any slender glassware.
A tripod stand provides a stable elevated surface upon which to heat flasks and beakers, typically over an alcohol lamp. A tripod stand is more accident-prone than a ring stand because the vessel isn’t clamped, but tripod stands are inexpensive and suitable for heating small containers if you’re careful not to knock them over.
Pipetters
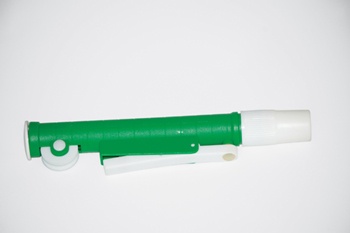
A pipetter is a device used to fill pipettes and then deliver the liquid in a controlled fashion. A bulb pipetter is the simplest and cheapest type. It’s a plain rubber bulb, similar to the ones used on eyedroppers, but sized to the capacity of the pipette. Ordinarily, you use the suction of the bulb to fill the pipette above the zero mark, and then quickly remove the bulb and use your finger to control the flow. Better bulb pipetters have multiple valves. You squeeze one place on the bulb to fill the pipette, another place to deliver the solution in a controlled fashion, and still a third place to dump the contents quickly. A pipette pump, shown in Figure 3-25, is a plastic device that friction-fits the top of the pipette. A thumb wheel allows you to draw in liquid, which can then be released in controlled fashion. You’ll want at least one pipetter that’s appropriate in size for each size of pipette you have. Some pipetters can be used with more than one size of pipette.
pH Measuring Tools
An aqueous solution can range from pH 0 (strongly acid) through pH 7 (neutral) to pH 14 (strongly basic). It’s often important to have some idea of the pH of a solution. Sometimes, all you need to know is whether the solution is acidic or basic. Other times, you need to know the pH with some precision.
For a quick and dirty determination of pH, indicator papers are the traditional choice. Litmus paper is so familiar even to nonchemists that the phrase “litmus test” has become part of the vernacular. Litmus paper turns red at pH 4.5 and below, and blue at pH 8.3 and above. When wet with a solution that has a pH between 4.5 and 8.3, litmus paper turns an intermediate purplish color. Even in laboratories that have expensive, precise electronic pH meters available, litmus paper is still used when all that’s needed is a quick test for acidity or alkalinity. Every lab needs at least two vials of litmus paper, one red and one blue.
When you need a more precise indication of pH, you can use pHydrion paper or universal indicator paper, which use a combination of indicator dyes to provide a wide range of color changes at different pH levels. Such papers are available in broad- and narrow-range forms. Broad-range papers test all or most of the range of pH values from 0 to 14, but with accuracy limited to ±0.5 pH. Narrow-range papers are available in various ranges (e.g., pH 7.0 to pH 10.0), with typical accuracy of ±0.2 to ±0.3 pH.
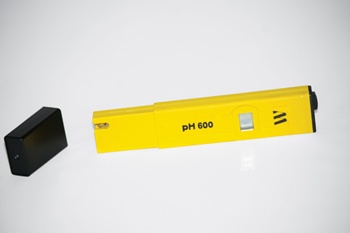
An electronic pH meter can determine pH very accurately. Expensive laboratory-grade pH meters are incredibly accurate, but are overkill for a home lab. The Milwaukee Instruments pH600 meter shown in Figure 3-26 sells for $30, fits in your pocket, runs for 700 hours on one battery, and covers the entire pH 0 to pH 14 range with resolution of 0.1 pH and accuracy of 0.2 pH. Unless you’re on a very tight budget, we strongly recommend that you acquire an inexpensive pH meter.
Thermometers
It’s often important to know the temperature of a solution, so any chem lab needs at least one thermometer. A traditional tube thermometer is a glass tube with a narrow bore and a bulb on one end, filled with a fluid that expands and contracts with changes in the temperature. In the past, most tube thermometers used mercury as the indicating fluid, but environmental concerns have caused a wholesale shift away from mercury to dyed alcohol or similar fluids.
Alcohol-filled thermometers, also called spirit thermometers, are as accurate as mercury thermometers, but are limited to measuring a smaller range of temperatures. A typical wide-range spirit thermometer measures temperatures from –20°C to +150°C, whereas a wide-range mercury thermometer might have an upper limit of +250°C. (Spirit thermometers with a wider range are available, but are longer, typically 400 mm or more rather than the standard 300 mm.)
Standard-length thermometers with very wide ranges have lower resolution. For example, a thermometer with a very wide range might have 2°C gradations, while a similar thermometer with a narrower range might have 1°C gradations. For general lab work, a thermometer with a range of about –20°C to +150°C and 1°C resolution is suitable. For several of the experiments in this book, a second thermometer with a narrower range (say, –20°C to +50°C) allows more accurate measurements.
There are two general classes of tube thermometers, called partial-immersion thermometers and full-immersion thermometers. A partial-immersion thermometer, which is the more common type, is designed to measure temperatures accurately when a specific length of the tube (usually 3″ or 75 mm) is submerged in the liquid being measured. “Full-immersion” is a misnomer, because it doesn’t mean that you literally submerge the entire thermometer. A full-immersion thermometer reads accurately when the tube is submerged in the liquid to the level of the indicator fluid. (For example, if the full-immersion thermometer reads 50°C, the thermometer should be submerged until the level of the liquid being tested is at the 50°C mark on the thermometer.)
A digital thermometer is also an excellent choice. A wide variety of models is available, starting at around $10. The least expensive models are direct substitutes for glass thermometers. They have about the same range and accuracy as glass thermometers, but are less fragile. Somewhat more expensive models boast wider ranges and better accuracy, often to within 0.1°C. The accuracy of digital thermometers often varies according to the temperature being measured. For example, one $50 model we looked at had a range of –50°C to 280°C. The accuracy of that thermometer was 0.1°C in the range –10°C to 150°C and 1°C outside that range.
Scoops, Spatulas, and Spoons
Scoops, spatulas, and spoons are used to transfer dry chemicals, typically from a reagent bottle to a weighing boat or weighing paper. Good laboratory practice requires that to prevent contamination, you never return unused chemicals to the original bottle. In theory, that’s correct, but chemicals are expensive and the economic realities of a home chem lab are such that I routinely violate this rule in my own lab.
Don’t Dip
Beginners often dip the indicator paper into the solution to be tested, which may contaminate the solution. The proper method is to dip a clean stirring rod into the solution and then use it to transfer one drop of the solution to the indicator paper.
The risk of that practice is nil, because I always use a new scoop (or at least one that has been thoroughly washed) each time I transfer chemicals from the original bottle. For transferring small quantities of chemicals, use a modified Beral pipette. Trim the bulb end diagonally to make a disposable scoop. For transferring larger amounts of chemicals, use a disposable plastic spoon, which you can find in the picnic supplies section of the grocery store. (Or, if you’re cheap like I am, save the ones you get at fast-food restaurants.)
Some chemicals tend to form solid masses in the bottle, making it difficult or impossible to scoop them out with one of these field-expedient plastic scoops. In that situation, use a standard stainless-steel spatula or an ordinary stainless-steel teaspoon or soup spoon. Wash the spatula or spoon afterward, rinse it in distilled water, and put it aside to dry thoroughly before you reuse it.
Filter Paper
Filter paper is used with a standard or Büchner funnel to separate solids (the filtrand) from the filtrate (the liquid you’re filtering, also called the supernatant liquid). Filter paper is sold in precut circles of various sizes to fit different size funnels. The 9 cm or 11 cm size is most useful in home labs.
There are many varieties of filter paper with different characteristics. Quantitative filter paper is pure cellulose with almost no mineral content. It is used in quantitative tasks because when it is heated to combustion, it leaves almost zero ash to contaminate (and add weight to) the filtrand. Qualitative filter paper has a higher mineral content, but is less expensive and suitable for most uses.
Filter paper also differs in the tightness of its fibers, which determine both its flow rate (filtering speed) and its particle retention size. Coarse filter paper offers a very fast flow rate, typically captures particles 20 µm (micrometers, 0.001 mm) or larger, and is suitable for filtering coarse or gelatinous precipitates. Medium filter paper has a moderate flow rate, typically captures particles larger than 5 µm to 10 µm, and is suitable for general lab use. Fine filter paper has a low flow rate, typically captures particles larger than 1 µm to 3 µm, and is suitable for capturing the finest precipitates.
Ordinary unbleached coffee filters substitute adequately for formal filter paper for most home labs. Coffee filters have a high flow rate and correspond roughly to coarse laboratory filter paper.
Chromatography Paper
Chromatography paper has special characteristics that optimize it for chromatography. The type of fibers used and their length are carefully controlled, and the production process is designed to orient the fibers parallel to minimize spreading of the sample as the solvent carries it along the paper. Chromatography paper is sold in rolls, large sheets, and small strips, of which only the last is reasonably priced for home lab use.
If you don’t have chromatography paper, you can substitute sheets or strips of ordinary 100% cotton bond writing paper, making sure to orient the grain of the paper parallel to the direction of the solvent flow. The results aren’t quite as good as they would be if you used actual chromatography paper, but they’re usable for most purposes in a home lab.
Battery and Electrodes
To complete the electrochemistry labs in this book, you’ll need a power supply, a selection of electrodes, and a set of leads with alligator clips. An ordinary 9V battery works fine for the power source. You can buy the electrodes or make your own, as follows:
Carbon
Use a bundle of several mechanical pencil “leads,” which are actually graphite.
Aluminum
Cut strips from an aluminum beverage can. Use sandpaper or a similar abrasive to polish the surfaces to remove paint, oxidation, and plastic coatings.
Copper
Heavy-gauge copper wire salvaged from a scrap piece of Romex works well, as does a flattened section of copper tubing.
Iron
A large iron or steel nail or bolt works well. Polish the surface with sandpaper before you use it. Make sure that whatever you use is not galvanized, or you’ll actually be using a zinc electrode instead of an iron or steel one.
You’ll also need electrodes of lead, magnesium, nickel, tin, and zinc, which are best purchased from a laboratory supply vendor.
Rubber Stoppers and Corks
An assortment of rubber stoppers and corks is useful for sealing test tubes and flasks, constructing apparatuses, and so on. Rubber stoppers are popular because they are durable, reusable, provide a good seal, and are available in solid, 1-hole, and 2-hole versions.
Unfortunately, there is little standardization in the sizes of rubber stoppers or the stopper size required to fit vessels of particular sizes. One vendor’s #2 stopper may be the same size as another vendor’s #3 stopper, for example, and two 250 mL Erlenmeyer flasks from different vendors may require different stopper sizes.
Table 3-4 lists standard rubber stopper sizes used by most (but not all) U.S. vendors, the hole sizes for predrilled stoppers, the sizes of openings those stoppers fit, and the types of vessels they are typically used with. Some stoppers use different dimensions for the same stopper numbers, so it’s important to verify the actual size of the stoppers before you order them. Either that, or order a large assortment that includes solid, 1-hole, and 2-hole stoppers in each size to make sure you always have a stopper that fits whatever vessel you need to use it with. Verify that the hole sizes of the stoppers you buy matches the outside diameter of your supply of glass tubing.
The one- and two-hole versions of #1 rubber stoppers usually have 4 mm holes, although we have seen two-hole #1 stoppers with 3 mm holes. The one- and two-hole versions of #2 and larger rubber stoppers all use the standard 5 mm hole size, except some #6.5 stoppers that use the 4 mm size. The oddball #6.5 size can be difficult to find, but is the best fit for a 3-liter soda bottle.
Corks are less durable and less convenient to use than rubber stoppers, but are also less expensive and more resistant to high temperatures. For historical reasons, corks use an entirely different numbering system from stoppers. In fact, cork measurements were originally specified in fractions of an inch rather than SI (metric), and only later were those inch denominations converted to SI.
Table 3-5 lists standard cork sizes used by most U.S. vendors. The actual size of a cork may vary slightly, depending on whether it is specified in U.S. customary units or SI. Corks are much more compressible than are rubber stoppers. Proper use of corks requires using a cork roller, which compresses the cork before it’s inserted into the vessel. As the cork relaxes, it expands to seal the vessel. This results in a much better seal than is possible simply by pressing a cork into the opening using finger pressure.
Corks are usually sold without holes. If you want a 1-hole or 2-hole cork, use a cork borer to make it yourself. If you buy the cheapest corks, you’ll probably discover why they were so cheap the first time you try to bore a hole in one. Cheap corks often have internal cavities and cracks, and are prone to crumble when you attempt to bore them. Better corks, usually sold as laboratory-grade, are solid throughout and less prone to crumbling.
Stopper # | Hole size | Fits opening | Typically fits |
00 | 3 mm | 10 mm to 13 mm | Very small test tubes. |
0 | 3 mm | 13 mm to 15 mm | Small test tubes; many 25 mL flasks. |
1 | 3 mm or 4 mm | 15 mm to 17 mm | Some medium test tubes; many 50 mL flasks. |
2 | 5 mm | 16 mm to 18.5 mm | Some medium test tubes. |
3 | 5 mm | 18 mm to 21 mm | 2-liter soda bottles; some large test tubes. |
4 | 5 mm | 20 mm to 23 mm | Some large test tubes. |
5 | 5 mm | 23 mm to 25 mm | Most 125 mL flasks; some very large test tubes. |
6 | 5 mm | 26 mm to 27 mm | Many 250 mL flasks; some 500 mL flasks. |
6.5 | 4 mm or 5 mm | 27 mm to 31.5 mm | 3-liter soda bottles; some 500 mL flasks. |
7 | 5 mm | 30 mm to 34 mm | 3-liter soda bottles; most 500 mL flasks. |
8 | 5 mm | 33 mm to 37 mm | Some 500 mL flasks. |
Bottom diameter | Length | |||||
Cork # | inch | mm | inch | mm | inch | mm |
000 | 1/4 | 6 | 5/32 | 4 | 1/2 | 13 |
00 | 5/16 | 8 | 7/32 | 5 | 1/2 | 13 |
0 | 3/8 | 10 | 9/32 | 7 | 1/2 | 13 |
1 | 7/16 | 11 | 21/64 | 8 | 5/8 | 16 |
2 | 1/2 | 13 | 3/8 | 10 | 11/16 | 17 |
3 | 9/16 | 14 | 27/64 | 11 | 3/4 | 19 |
4 | 5/8 | 16 | 15/32 | 12 | 13/16 | 20 |
5 | 11/16 | 17 | 17/32 | 13 | 7/8 | 22 |
6 | 3/4 | 19 | 37/64 | 15 | 15/16 | 24 |
7 | 13/16 | 21 | 5/8 | 17 | 1 | 25 |
8 | 7/8 | 22 | 43/64 | 17 | 1-1/16 | 27 |
9 | 15/16 | 24 | 47/64 | 18 | 1-1/8 | 29 |
10 | 1 | 25 | 49/64 | 20 | 49/64 | 31 |
11 | 1-1/16 | 27 | 53/64 | 21 | 53/64 | 31 |
12 | 1-1/8 | 29 | 57/64 | 22 | 57/64 | 31 |
Recommended Laboratory Equipment and Supplies
Table 3-6 lists my recommendations for a basic set of laboratory equipment and supplies. With only these items (and perhaps a few things we’ve forgotten that you can scrounge around the house), you can complete all of the laboratories in this book. Most of these are described in the previous sections.
Description | Qty | Notes |
Aspirator, vacuum | 1 | Needed only if you use a filter flask and Büchner funnel; alternatively, use a manual vacuum pump. |
Balance, electronic, 0.01 g/150 g or better | 1 | Higher resolution and capacity is always better, if you can afford it. |
Barometer | 1 | Optional; you can use pressure readings from local TV or radio. |
Burner, alcohol | 1 | Not absolutely necessary; the gas burner and hotplate can substitute for this item. |
Burner, electric hotplate | 1 | For heating and distilling flammable liquids. |
Burner, gas | 1 | Purchase a butane microburner, or use a hardware store propane torch. |
Brush, burette | 1 | For cleaning burettes. |
Brush, test tube | 1+ | For cleaning test tubes. |
Brush, utility cleaning | 1+ | For cleaning beakers, flasks, and other glassware. |
Cables, patch with alligator clips, set of 2 | 3 | 50 cm length and 26-gauge or heavier wire are ideal. |
Caliper | 1 | Optional, but useful. |
Calorimeter | 1+ | Purchase, or build your own with nested foam cups. |
Chips, boiling | * | Small bottle; used to prevent boiling over when heating liquids. |
Chromatography jar and cover | 3+ | Large pickle jars or similar wide-mouthed containers are fine. |
Clamp, burette | 1 | For supporting a burette on a ring stand. |
Clamp, utility | 1 | For supporting funnels or flasks on a ring stand. |
Cup, plastic, rigid | 1 | Should fit support ring loosely. |
Digital multimeter (DMM) | 1 | Even a $10 or $15 model suffices. |
Distillation apparatus | 1 | Purchase, or make with an Erlenmeyer flask, holed stopper, glass tubing, and rubber tubing. |
Electrode set | 1 | Three each Cu and Mg electrodes; one each Al, C, Fe, Pb, Ni, Sn, Zn. |
Gauze, wire with ceramic center | 1 | For protecting beakers and flasks from direct flame of gas burner. |
Knife, utility | 1 | For general use around the lab. |
Laser pointer, red | 1 | Use for Tyndall Effect tests of colloids and suspensions. |
LED, red | 1 | For electrochemistry experiments. |
Loop, inoculating | 1 | Platinum or Nichrome. |
Magnet | 1 | For general use around the lab. |
Magnifier or loupe | 1 | For general use around the lab. |
Mortar and pestle | 1 | For grinding solid chemicals; can substitute pipe cap and large bolt. |
Pad, protective | * | As needed to protect work surfaces; we use thick, nonslip pads sold in craft supply stores. |
Pail, water | 1 | Use for drenching overenthusiastic reactions. |
Paper, chromatography | * | Vial of 100 strips; several 15 cm sheets. |
Paper, filter, 100 sheets | 1 | Choose medium flow, qualitative in a size appropriate for your Büchner funnel and gravity funnel. |
Paper, litmus, red and blue, 100-strip vial | 1 | Use for quick determinations of acidity or alkalinity. |
Paper, pHydrion, 100-strip vial | 1 | Use for accurate determination of pH if you do not have a pH meter. |
pH meter | 1 | Range pH 0–14 with 0.1 or 0.2 resolution and accuracy. |
Pinchcock | 1 | Use with flexible tubing to control flow, to convert a pipette into a burette, and so on. |
Pipetter, pump or bulb | 1+ | In sizes appropriate for your pipettes. |
Reservoir, pneumatic trough | 1 | Use a plastic storage tub (Rubbermaid “S” 17-liter or similar). |
Ruler, mm scale, 15 cm or 30 cm | 1 | For general length measurements. |
Sand bed | 1 | Use when burning solids to contain heat and flame; large container with several kilograms of sand. |
Ring stand | 1+ | 5″ x 8″ (12.5 x 20 cm) or 6″ x 9″ (15 x 22.5 cm) with 20″ (50 cm) support rod. |
Ring, support, with clamp | 2 | 4″ (10 cm) and 5″ (12.7 cm) sizes are most useful; make sure your funnels fit the ring. |
Scoop, powder | 1 | Use for breaking up hardened masses of solid chemicals in bottles. |
Spatula | 1+ | Use for removing small amounts of chemicals from bottles; substitute Beral pipettes or plastic spoons. |
Stopper, rubber, assortment | * | As required, in solid, 1-, and 2-hole, to fit your test tubes and flasks. |
Syringe, plastic, 10 to 50 mL, graduated, with cap | 1 | Used in gas chemistry experiments. |
Test tube holder | 1 | Used to hold test tubes while heating. |
Test tube rack | 1+ | To fit your test tubes. |
Thermometer | 1+ | Digital thermometer preferred. |
Timer | 1 | With second hand, for timing reactions. |
Tongs, beaker | 1 | Use for handling hot beakers and other larger items. |
Tongs, crucible | 1 | Use for handling hot crucibles and other small items. |
Triangle, clay | 1 | To fit support rings, in size(s) appropriate for your crucibles. |
Tubing, rubber or plastic, assortment | * | In various lengths and with an inside diameter to fit glass tubing. |
You’ll also need an assortment of items commonly found around the house, including an abrasive (such as sandpaper, emery board, or steel wool), aluminum foil, a 9V transistor battery, cotton balls and swabs, foam cups, empty tin cans and lids, empty soft drink bottles and caps, a stick of incense, strike-anywhere matches, paper clips and rubber bands, paper towels, pencils and marking pens of various colors and types, thread or string, toothpicks or tongue depressors, some stiff wire (such as a coat hanger), and so on.
Check out the current list of vendors at http://www.homechemlab.com/sources.html before you order any glassware, equipment, or chemicals.
Miscellaneous Equipment (Junk Collecting)
Back in the mid-1960s, when I, a young teenager, was setting up my first home chemistry lab, my mother got used to things disappearing from her kitchen and laundry room. Now, 40 years later, my wife wonders about similar mysterious disappearances. There’s no doubt that building a home chem lab can cause a Bermuda Triangle effect elsewhere in the house.
As you set up your own lab (and forever after) keep an eye out for anything that might be useful in the lab. For example, my chromatography jars are actually durable plastic one-quart containers that originally contained wonton soup from take-out Chinese food orders. My water bath began life as a Crock-Pot slow cooker, and two of my white plastic reaction plates look suspiciously like discarded ice cube trays. My first calorimeter —since replaced with a store-bought model—consisted of two large nested Styrofoam cups with a tight-fitting lid on the inner one. (The straw hole in the lid works just as well for a thermometer.) And so on.
If you’re on a limited budget (or even if you’re not), collect anything that looks like it might be useful, now or in the future. Chances are, it will be. I have drawers full of such stuff, and frequently end up using one thing or another as a field-expedient substitute for something I’d otherwise have had to order and await its arrival.
Work Area
Give serious consideration to the best location for your home lab. Of course, you may have to choose between a poor location and having no lab at all. In that case, do the best you can with what you have to work with. Here are some things to think about when you choose a location for your home lab.
Counter space
Even microscale experiments require a surprisingly large amount of workspace. In addition to space for the experiment setup itself, you’ll need space for your balance, your lab notebook, temporary space for any chemicals that you are using, and so on. Consider 10 ft2 (1 meter2) of counter or table space as an absolute minimum—more is better. The ideal setup is arranged like a photographic darkroom or galley kitchen, with a wet side and a dry side. The wet side is used for doing the actual experiments, and the dry side for storing and weighing chemicals, recording observations in your lab notebook, and so on.
Storage
It’s important to have secure storage space for your equipment and chemicals—particularly those chemicals that are toxic, flammable, or otherwise hazardous—and that your lab storage space not be shared with general household items, particularly food and beverages. Make absolutely certain that children and pets cannot get to dangerous equipment and chemicals. If you have only part-time possession of your work area, store your equipment and chemicals out of reach in Rubbermaid tubs or similar containers.
Ventilation
Some experiments produce smoke, strong odors, or even toxic fumes. It’s important to have some means of ventilating the work area and exhausting these fumes to the outdoors. The ideal solution is a formal laboratory exhaust hood, but an open window with a portable exhaust fan can often serve the purpose. For experiments that produce a lot of smoke or fumes, work outdoors.
Lighting
It’s dangerous to do chemistry in a poorly lit environment. My first home chem lab was located in a dark corner of the basement, and I had more than one near-accident before I installed some fluorescent fixtures. Make sure your work area is well lit. If the overhead lighting is inadequate or nonexistent, use table lamps, clamp lamps, or other portable light sources.
Electric receptacles
You can get along without electricity other than for lighting, but it’s very convenient to have one or more electric receptacles within easy reach of your work surface. If those receptacles are not protected, install ground-fault circuit interrupters.
Water and sewer
Although it is not essential, it is extremely convenient for the home chem lab to have access to running water and a sewer connection. If that’s not possible, acquire a large bottle to use as a water supply. The 5-gallon plastic carboys used in water coolers are ideal. With a stopper, some tubing, and a pinch clamp, you can build a siphon to deliver water as needed. Use a large plastic bucket, tub, or similar container for waste liquids, and empty it after each lab session.
Flooring
Even if you are extremely careful, sooner or later you are bound to spill something. Murphy’s Law says that what you spill will be corrosive or strongly colored, and will fall exactly where you don’t want it to fall. If the floor is carpet or another vulnerable material, your spouse, parents, roommate, or significant other will not be amused. Sheet vinyl or linoleum is the best flooring material for a home chem lab, although vitreous tile and similar resilient materials are also good. If the floor is concrete, consider painting it with epoxy-based floor paint to prevent it from being stained or absorbing spilled chemicals.
I have a seldom-used second kitchen in our basement guest suite that is an ideal home chemistry laboratory (and also serves well as a photographic darkroom). Not everyone is lucky enough to have a room or even a corner that can be dedicated to a laboratory. Fortunately, there are many alternatives.
Kitchen
Let’s get this one out of the way first. The kitchen may seem to be an ideal location for a part-time chemistry laboratory. There’s usually plenty of counter space and storage, hot and cold running water, good lighting, plenty of electrical outlets, resilient flooring, and the exhaust fan over the stove can serve as a field-expedient fume hood. But in fact, unless you limit yourself to using only nonhazardous chemicals, the kitchen is about the worst possible choice for a part-time chemistry lab. Food and laboratory chemicals are a dangerous combination.
Still, thousands of home chem labs over the years have been set up in kitchens, and the kitchen may be your only option. If so, take extreme care to prevent any contamination from occurring. Protect the counter or table surface with a resilient mat, and clean up thoroughly after each lab session. Make sure that all of your equipment, and particularly your chemicals, are returned to their storage containers and that none are missing.
Laundry room
Many laundry rooms are ideal candidates for a part-time chem lab. Laundry rooms are usually well equipped with electric power, water, drain, lighting, and have adequate ventilation. There is often sufficient storage and if not, it’s usually easy to add more. There is probably a suitable work surface available, and if not it’s usually easy to add a fold-down or other temporary work surface. The floor of most laundry rooms is concrete or vinyl, which minimizes the danger of damaging it with spills. In most homes, the laundry room is the best choice for a part-time lab. Of course, you have to clean up carefully after each lab session to avoid the risk of staining or damaging clothes.
Spare bathroom
A spare bathroom is often an excellent location for a part-time chemistry laboratory. It provides running water and a drain, plenty of electric receptacles (with ground-fault circuit interrupters), good lighting, and good ventilation. Many spare bathrooms are a bit short on storage and counter space, but that’s often easy to remedy simply by constructing a collapsible framework that supports a plywood work surface over the tub. Particularly if you live in an apartment, a spare bathroom may be the best choice for a part-time chem lab.
Basement workshop
A basement workshop area is generally not an ideal location for a part-time chem lab, but may be the only option. On the plus side, storage and work surfaces are usually not a problem, the floor is often of concrete or another relatively impervious substance, and electric power is usually available. However, ventilation is often inadequate, and many basements have no water supply or drain.
Garage or garden/storage shed
For some people, the garage or garden/storage shed will be the location of last resort. There are some good points to using such a location as a part-time lab (or even a full-time one). Storage and work surfaces are usually plentiful or can easily be made so, ventilation is often adequate, there is probably electric power available, and spills that damage the floor or work surfaces are of less concern than they would be in a finished area of the house. Weighed against this, it may be a long trek to the nearest sink and drain (although you may be able to use the garden hose as a water supply). Perhaps the worst aspect of using such a location is the lack of climate control. You’ll swelter in the summer and freeze in the winter. Even if you can tolerate that, it’s not the best environment for storing your equipment and supplies or for doing controlled experiments.
