COCONUT ROASTED SPROUT POPS WITH GOMASHIO
CELERIAC AND BLUE CHEESE GRATIN
LUBEE BEANS (LEBANESE GREEN BEANS IN TOMATO SAUCE)
AYURVEDIC CARROT STIR-FRY/SALAD
CUCUMBER AND SMOKED SALMON CANAPÉS
SALTY CAJUN-ROASTED CAULIFLOWER
FOR MORE IDEAS FOR SIDES AND SNACKS TRY:
RAW BEETROOT CARPACCIO WITH GOAT’S CHEESE AND HERBS
NICKY’S CHOCOLATE CHIP COOKIES
So what is the ‘right’ snack, we hear you say. Well, to us it’s something that provides sustained nourishment and energy with no down side. Snack foods labelled ‘low fat’ or ‘diet’ have no place in a real-food diet – they tend to be full of preservatives, additives and highly processed ingredients, as well as artificial sweeteners in order to keep them ‘low cal’. By contrast, the ‘smart’ snacks in this chapter provide slow-burning fuel for your body while keeping the munchies at bay.
When eating real, well-balanced foods, those peaks and troughs that make you think that only another dose of sugar or caffeine can save the day will no longer be an issue. Eating a small serving of real food between meals, even if it’s leftovers, helps quash those crazy cravings that can cause you to make poor choices or overeat at your next meal. A quick-and-easy example is half or a whole ‘avo’ – fresh and filling – we’ve shown you our favourite ways (see here) to enjoy this nutritious bite. Getting into the habit of stocking up on delicious snacks for home and work helps, whether it’s making a batch of Apple and Bacon Muffins (see here) or Tahini Applejacks (see here) during your Sunday Cook-Off (see here), or enjoying our favourite quick fix: a mug of Bone Broth (see here).
Now you are prepared, it’s not just what you eat but how you eat it. Popping nuts and dried fruit all day at your desk, spooning out almond butter every time you get bored or absent-mindedly polishing off food while watching TV is not good, and it’s easy to overdo. Take a break from what you’re doing so that you can savour your snack properly. You don’t have to leave your desk if you’re busy (though stretching your legs and back regularly is always a good idea); just turn your attention to your snack, then get back to work. It makes all the difference to your digestion and energy levels and you’ll feel satisfied with less than you’d expect.
If you feel as though you are having a craving, try having a drink first. Wait 20 minutes and then see what has happened to the craving. Eating well-balanced meals for breakfast, lunch and dinner will also lessen the need to graze throughout the day. Usually something sour, bitter or zingy on your taste buds does the trick to blow away sweet or salty snack attacks.
We’ve also included an array of side dishes to complement the veg and meat mains, from our Creamy Carrot Bake (see here) to Celeriac and Blue Cheese Gratin (see here), and quick and colourful veg mashes (see here). Add them to packed lunches or team them with anything from the salad section (see here) to make a smorgasbord-style feast. Last but not least, if you’re looking for entertaining ideas, start a party off with our Sri Lankan Squash Croquettes (see here), Cucumber and Smoked Salmon Canapés (see here) and Broccomole (see here) with crudités.
KEEPING FOOD HOT OR COLD For a hot meal on the go, keep your lunch hot by packing it into a flask (you can get small ones too); a flask will keep a cold dish or smoothie cool too.
FOURSIES The mid-afternoon version of elevenses! (For splitting breakfast into two, see here). Why not split your dinner in the same way? Enjoy half as a 4pm snack before your evening workout and finish the rest straight after, so that you don’t end up eating a big meal too late in the evening.
POP VEGGIES Not usually found in a vending machine, vegetables might seem the most unlikely snack, but they are one of the best. Try our Coconut Roasted Sprout Pops with Gomashio (see here) or Spicy Coconut Kale Crisps (see here) – better than popcorn for a rumbling belly, we promise!
CRACKERS AND DIPS Our Multiseed Crackers (see here) make the perfect dunkable snack and will satisfy cravings for crunchy foods. Teaming a tasty dip such as hummus with crudités is also a great way of getting in lots of raw veggies even if you’re not usually a fan of them.
ON THE MOVE On short-haul flights, when it’s usually just a sandwich and bag of salted nuts on offer, we always take our own food. A boiled egg, fresh fruit, avocado and some biltong (beef jerky) are easily portable. Make sure to bring a few of your favourite sweets too – like Tahini Applejacks (see here) or Nicky’s Chocolate Chip Cookies (see here) – and always have a stash of non-perishables in your suitcase for emergencies and airport munchies (see here).
MAKE USE OF LEFTOVERS Leftovers make the best snacks, so we’ll often enjoy a bowl of our Moroccan Meditation Stew (see here) or one of our soups (see here), even on the move – just don’t forget your flask (see left).
SMOOTHIE TO GO A homemade green smoothie (see here) is the best way to concentrate your greens in an easy-to-consume and portable way, especially when you’re not sure when you’ll get your next plate of veg.
ENJOY BONE BROTH It’s the ultimate snack. Simply poured into a mug, this liquid gold (see here) makes a wonderful snack at any time of day. Whisk in an egg towards the end of heating for added fats and protein and to make it super creamy.
MAKE IN BULK Most of the snacks in this chapter can be made in large quantities and frozen. So make use of your freezer and save yourself time in the long run.
FOOD COMBINING For optimal digestion, remember our simple food-combining rules (see here) when choosing side dishes to accompany your main meal.
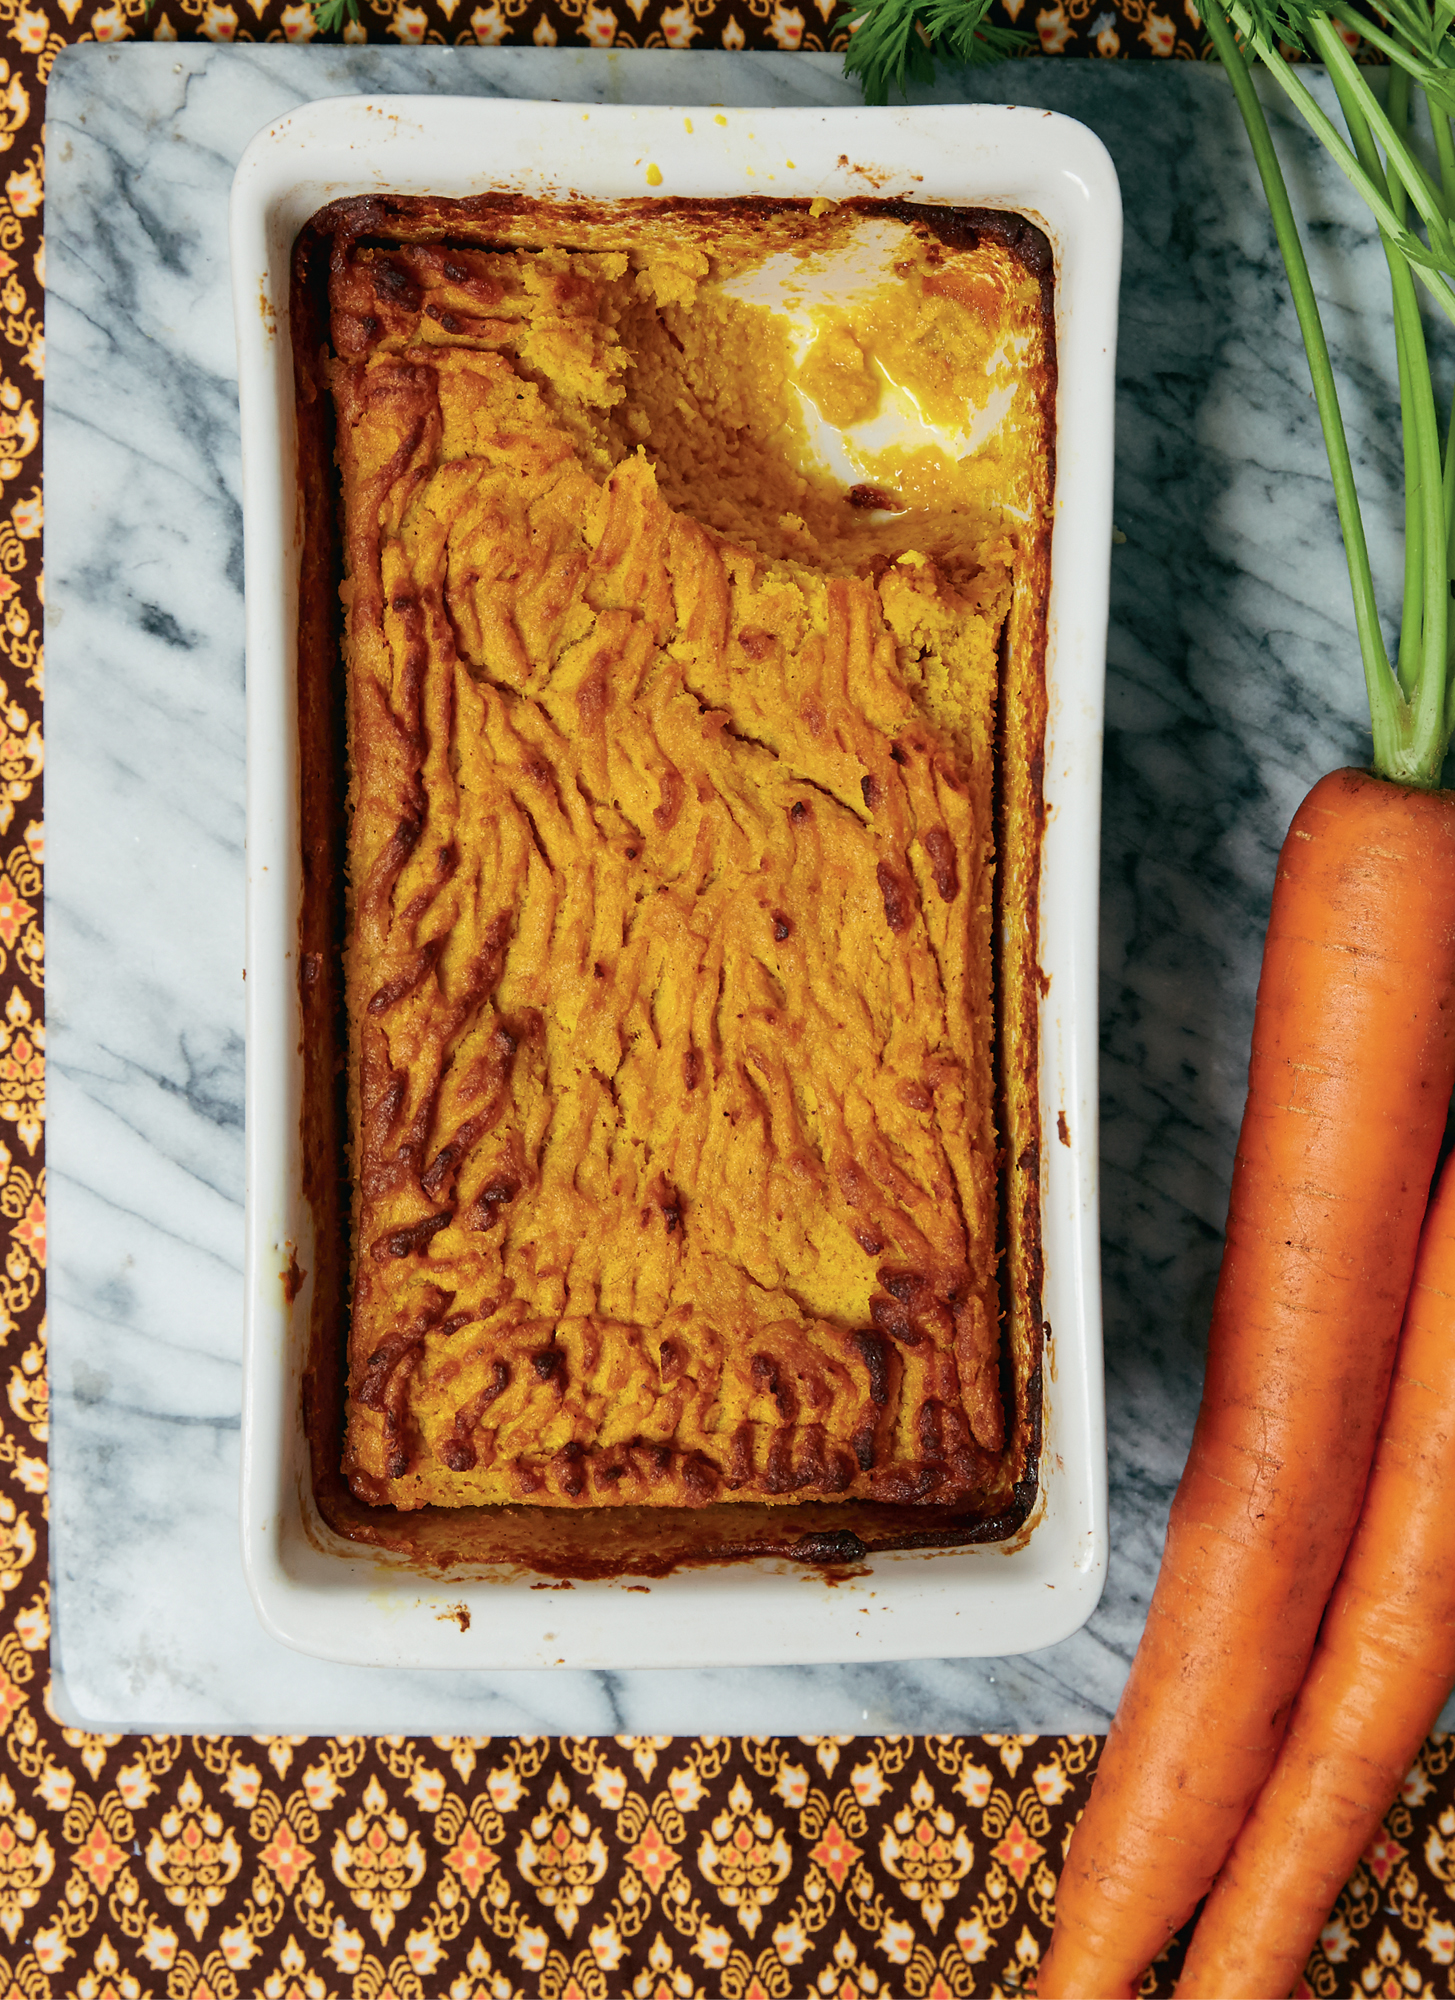
A light, fluffy carrot dish, this is perfect for serving with roast dinners as it soaks up gravy like standard mash but, being low in carbs, adheres to our food-combining rules, pairing with meat better than starchy potatoes. You can make this ahead and reheat it, and any leftovers can be turned into carrot croquettes (see here) in place of the squash. Treat this like any other mash and throw in other ingredients to jazz it up – grated cheese, caramelised onions and mustard or any leftover roasted veggies. You can also serve this freshly blended instead of baked and adjust the liquid to whatever suits you.
SERVES 4 AS A SIDE
500g carrots, roughly chopped
5 tablespoons Bone Broth (chicken or beef bones – here) or vegetable stock
½ medium onion, roughly chopped
25g butter, at room temperature
¼ teaspoon ground cinnamon
¼–½ teaspoon freshly grated nutmeg
½ tablespoon coconut flour
1 egg
Sea salt and black pepper
1 Preheat the oven to fan 180°C/Gas mark 6.
2 Simmer the carrots in the broth for about 15 minutes until very tender. Place in a food processor with the onion, butter, spices and coconut flour. Season with a pinch of salt and some pepper and pulse until smooth.
3 Allow to cool a little and then pulse in the egg until well combined.
4 Pour into an ovenproof dish and bake for 35 minutes until firm in the middle and browning on top. Serve immediately.
We’re pretty mad on sprouts! This underrated veg makes a star appearance at Christmas, often tarted up with cranberries, bacon and chestnuts, but they’re equally delicious throughout their cool weather season simply roasted in a little coconut oil. The natural sweetness of the coconut counterbalances any bitterness in the sprouts, while the roasting process sweetens it further with some light caramelisation. This recipe is our savoury (and healthy!) answer to ‘cake pops’ – bursting with nutrients and quicker and easier to do. Just pop each roasted sprout on a cocktail stick and dip into our homemade gomashio – a Japanese condiment made from ground sesame seeds and salt. Once made, store the gomashio in a glass jar in the fridge and use for sprinkling over all sorts of things – just remember not to salt them first!
SERVES 2–3 AS A SIDE OR SNACK
1 tablespoon coconut oil
500g Brussels sprouts
FOR THE GOMASHIO
100g white or black sesame seeds
1 tablespoon sea salt
1 Preheat the oven to fan 200°C/Gas mark 7, add the coconut oil to a large roasting tin and place in the oven to allow the oil to melt.
2 Slice off the ends of the sprouts and remove any brown or yellow leaves. Remove the roasting tin from the oven, add the sprouts and very carefully toss in the hot coconut oil.
3 Roast for 20 minutes, then remove any that are starting to caramelise. Stir the remainder and roast for a further 3–5 minutes until done.
4 Meanwhile, make the gomashio. Toast the sesame seeds in a dry pan on a medium-to-low heat for 2 minutes until popping and fragrant, taking care that they don’t burn or you’ll need to start over with a clean pan.
5 Grind the salt and sesame seeds together using a pestle and mortar or spice grinder or high-powered blender until roughly chopped or fairly fluffy.
6 Serve the roasted sprouts in a dish with a few cocktail sticks on the side and a small bowl of gomashio, or spear each sprout with a stick, dip in the gomashio and serve upside down in the hot roasting tin. They are also delicious cold.
TIPS
+ Take care when toasting black sesame seeds as it’s harder to see if they’re burning.
+ If using a high-powered blender, try not to overblend or you’ll end up with tahini! Pulse and stir regularly.
VARIATIONS
+ Try mixing desiccated coconut with the salt instead, but don’t put it through the grinder as it releases too many oils.
+ Dip into Parmesan or try with any of our dips and dressings (see here).

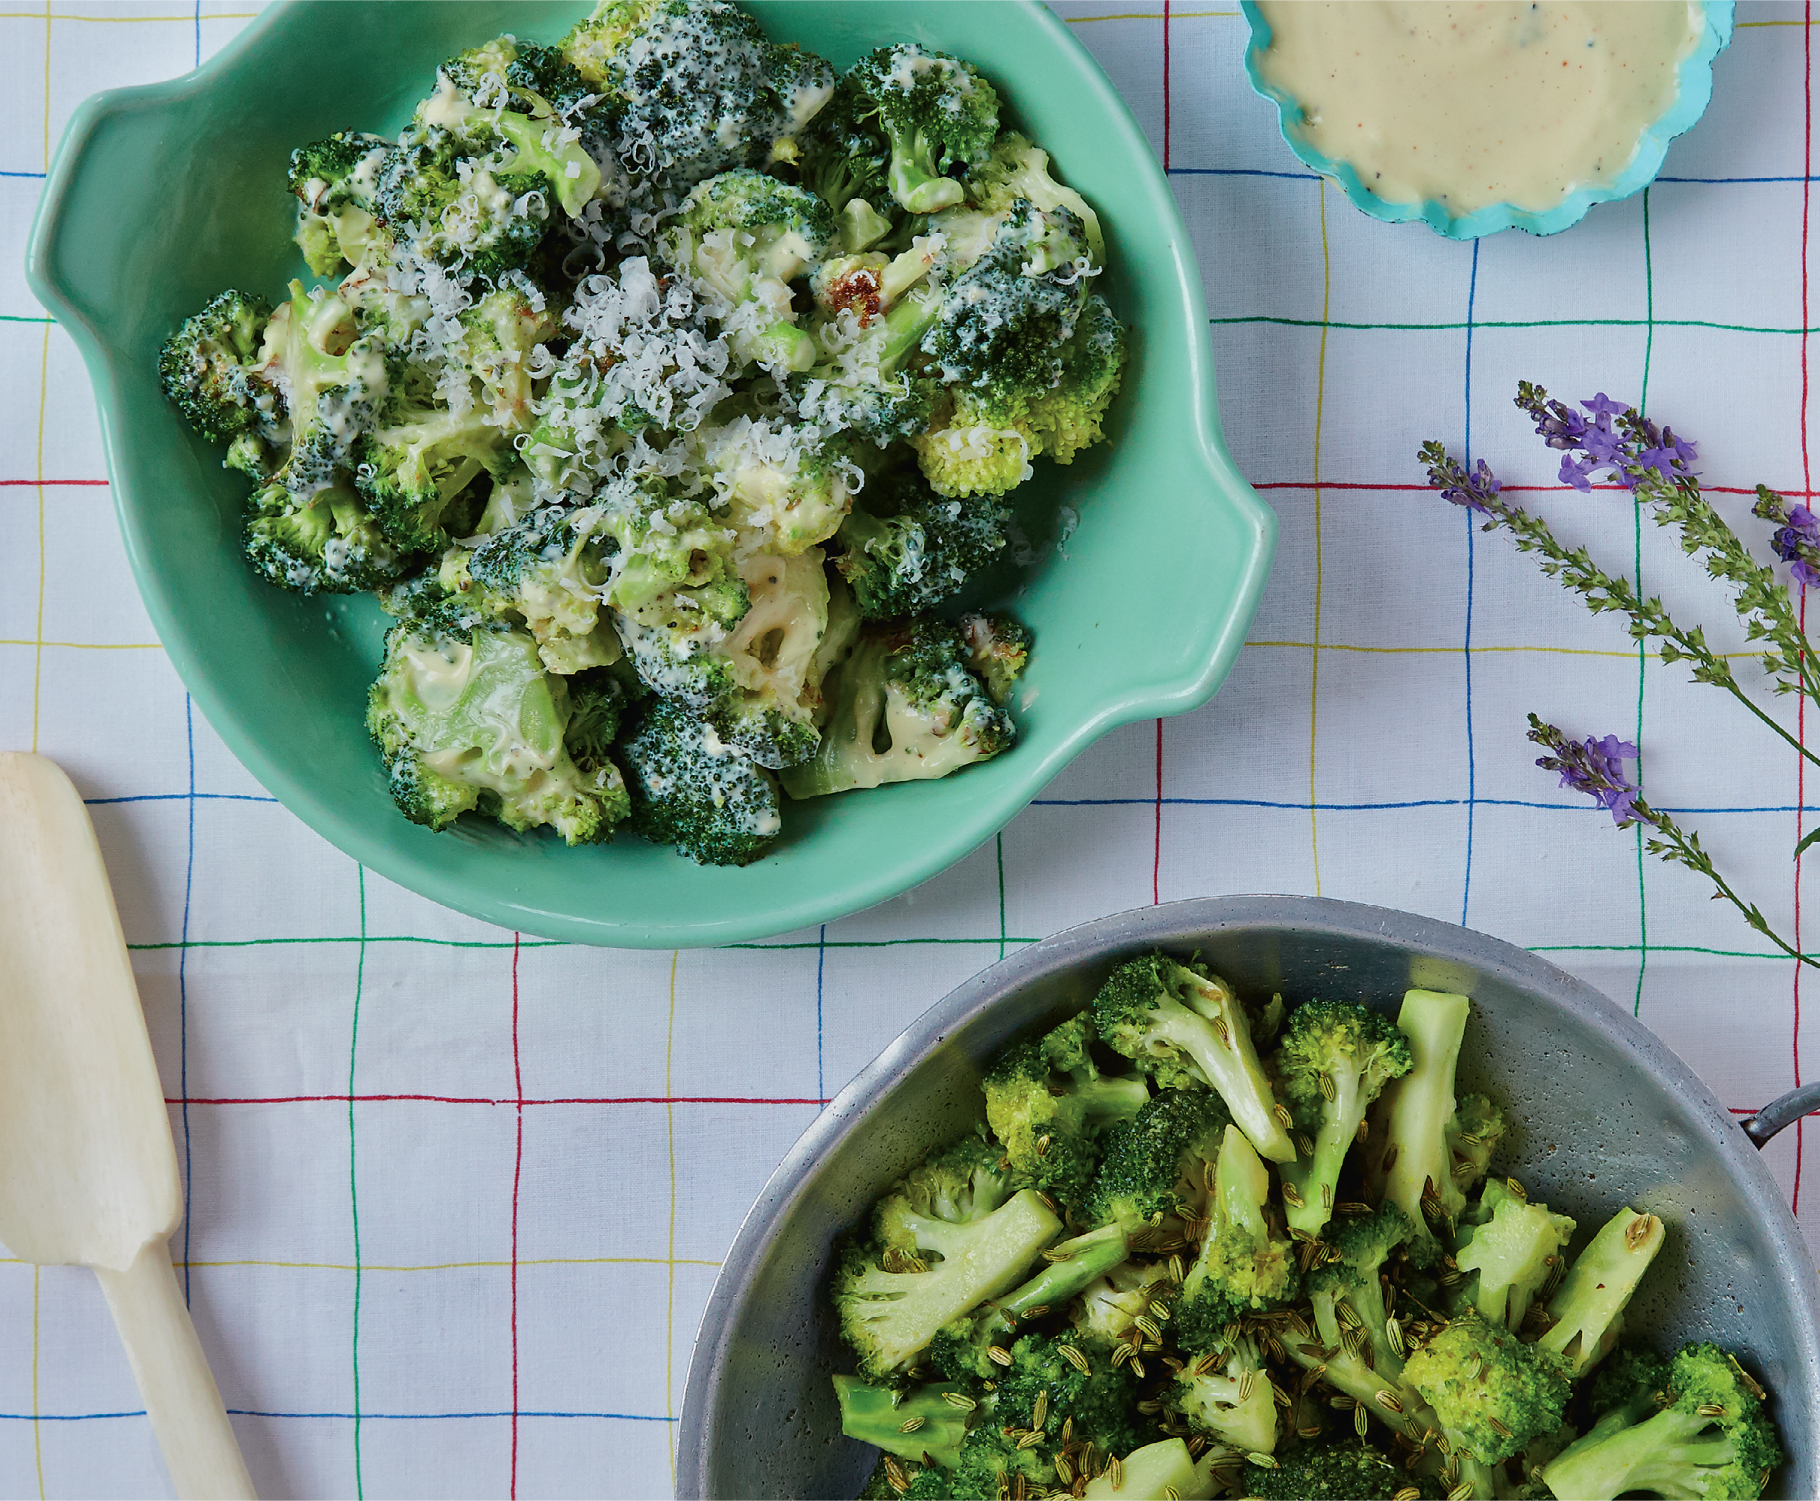
Our top five favourite greens have to be spinach, parsley, watercress, cabbage and, of course, broccoli – our kind of superfoods. Dubbed ‘gut brushes’ by one of our friends due to their shape and their benefit to one’s insides! As kids, we loved to prop broccoli ‘trees’ up in mash and have a gravy river running round them. Broccoli is standout with the right dressing – and here are two of our favourites. Remember that you can apply this cooking method and dressing to cauliflower florets too. The recipe below was inspired by a dish from the famous Café Habana in New York, and it’s always on the menu at home if we’ve made a batch of our Quick-cooked Mayo (see here).
SERVES 2 AS A SIDE
300g broccoli
1½ tablespoons coconut oil
½ quantity of Quick-cooked Mayo (see here)
¼ teaspoon cayenne pepper
Grated zest of ½ lime, juice of 1 lime
Sea salt and black pepper
1 tablespoon finely chopped fresh coriander, to serve
1 handful of finely grated Parmesan or other hard cheese (such as mature Cheddar), to serve
BROCCOLI WITH SPICY LIME MAYO
1 Prepare the broccoli by cutting into equal-sized florets and roughly chopping the stalks (after first slicing off the tough outer layer).
2 Melt the coconut oil in a large frying pan on a medium-high heat, add the broccoli and sauté for 4–5 minutes. Season with salt and pepper and set to one side in a serving bowl.
3 In a separate bowl, blend the mayonnaise with the cayenne pepper and lime zest and juice. Adjust the seasoning to your taste. Drizzle over the warm broccoli, or serve in a bowl alongside the broccoli as a dip. Sprinkle the coriander and cheese over the broccoli to serve.
TIP
+ The mayo can be substituted with full-fat probiotic yoghurt, or throw in some butter or coconut oil.
SERVES 2 AS A SIDE
1 teaspoon fennel seeds
300g broccoli
2 tablespoons butter
½–1 tablespoon mustard (to taste)
½–1 teaspoon maple syrup
Sea salt and black pepper
MUSTARD MAPLE BROCCOLI
1 On a medium-high heat, toast the fennel seeds in a large, dry frying pan for about a minute or so until fragrant.
2 Prepare the broccoli by cutting into equal-sized florets and roughly chopping the stalks (after first slicing off the tough outer layer).
3 Add the butter to the fennel seeds in the pan, along with the broccoli, mustard and maple syrup and sauté for 6 minutes or more – adding a dash of water, if needed, to prevent burning – until the broccoli is tender. Season with salt and pepper. Serve hot or cold.
Sri Lankan food offers a wide array of different flavours. Often more heavily spiced than Indian dishes, it is renowned for its fiery curries, sweet onion relishes and sour lime pickles, not to mention all that lovely coconut. Inspired to make croquettes using leftover roasted butternut squash, we thought the natural sweetness would be ideal to carry all that heat and spice. We use toasted chickpea flour to bind the mixture (toasting reduces the bitterness of the flour, while making it easier to digest) and then rolled the croquettes in desiccated coconut to coat before baking in the oven. Absolutely moreish: once you pop, you just can’t stop! Delicious with a yoghurt and lime dip or, as here, straight-up lime juice.
MAKES 10–12 CROQUETTES
1 medium butternut squash (about 1kg – to make 300g roasted flesh)
60g chickpea flour
1 tablespoon coconut oil, ghee or butter
½ teaspoon grated fresh root ginger (unpeeled if organic)
1 garlic clove, diced
1 teaspoon fennel seeds
A pinch of cayenne pepper or chilli powder
20g spring onions, sliced
2 teaspoons grated lime zest
10g fresh coriander (leaves and stalks) or mint leaves, finely chopped
80g desiccated coconut
½ teaspoon sea salt
¼ teaspoon white or black pepper
FOR THE DIP
Juice of 3 limes
A pinch of sea salt
1 Preheat the oven to fan 180°C/Gas mark 6. Line a baking tray with baking parchment.
2 Roast the butternut squash whole for 30–40 minutes until a knife slides in easily, then slice in half to cool so that much of the moisture evaporates. Alternatively, slice the squash in half lengthways and roast cut side up to allow the moisture to evaporate during cooking. When it’s cool enough to touch, discard the seeds and scoop the flesh out into a bowl to dry out further. Leave the oven on for the croquettes.
3 Meanwhile, place the chickpea flour in a dry pan and toast on a medium heat for 5 minutes until fragrant and golden brown, being careful not to let it burn, then add it to the bowl with the squash. Give the pan a quick wipe clean.
4 In the same pan, melt the coconut oil, ghee or butter and fry the ginger with the garlic, fennel seeds and cayenne pepper or chilli powder for 5 minutes, being careful not to let them burn, then add to the bowl. Mash everything together with a fork until well combined, then stir in the spring onions, lime zest and coriander or mint. Add 20g of the desiccated coconut and the salt and pepper.
5 Spread out the remaining desiccated coconut on a plate. Take roughly 2 tablespoons of the butternut mixture, shape into a croquette and roll in the desiccated coconut (use two metal spoons to help you do this) until completely covered, then place on the lined baking tray. If the mixture is quite moist, adding a bit more desiccated coconut and chilling in the fridge for 10 minutes will make it easier to roll.
6 Bake on the top shelf of the oven for about 20 minutes until golden brown all over. Mix the lime juice and salt for the dip in a bowl. Serve the croquettes warm with the dip.

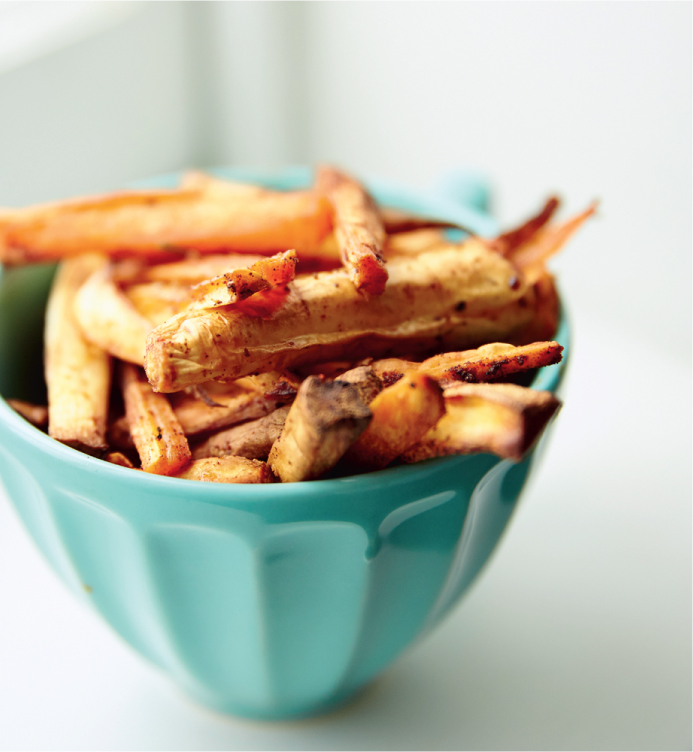
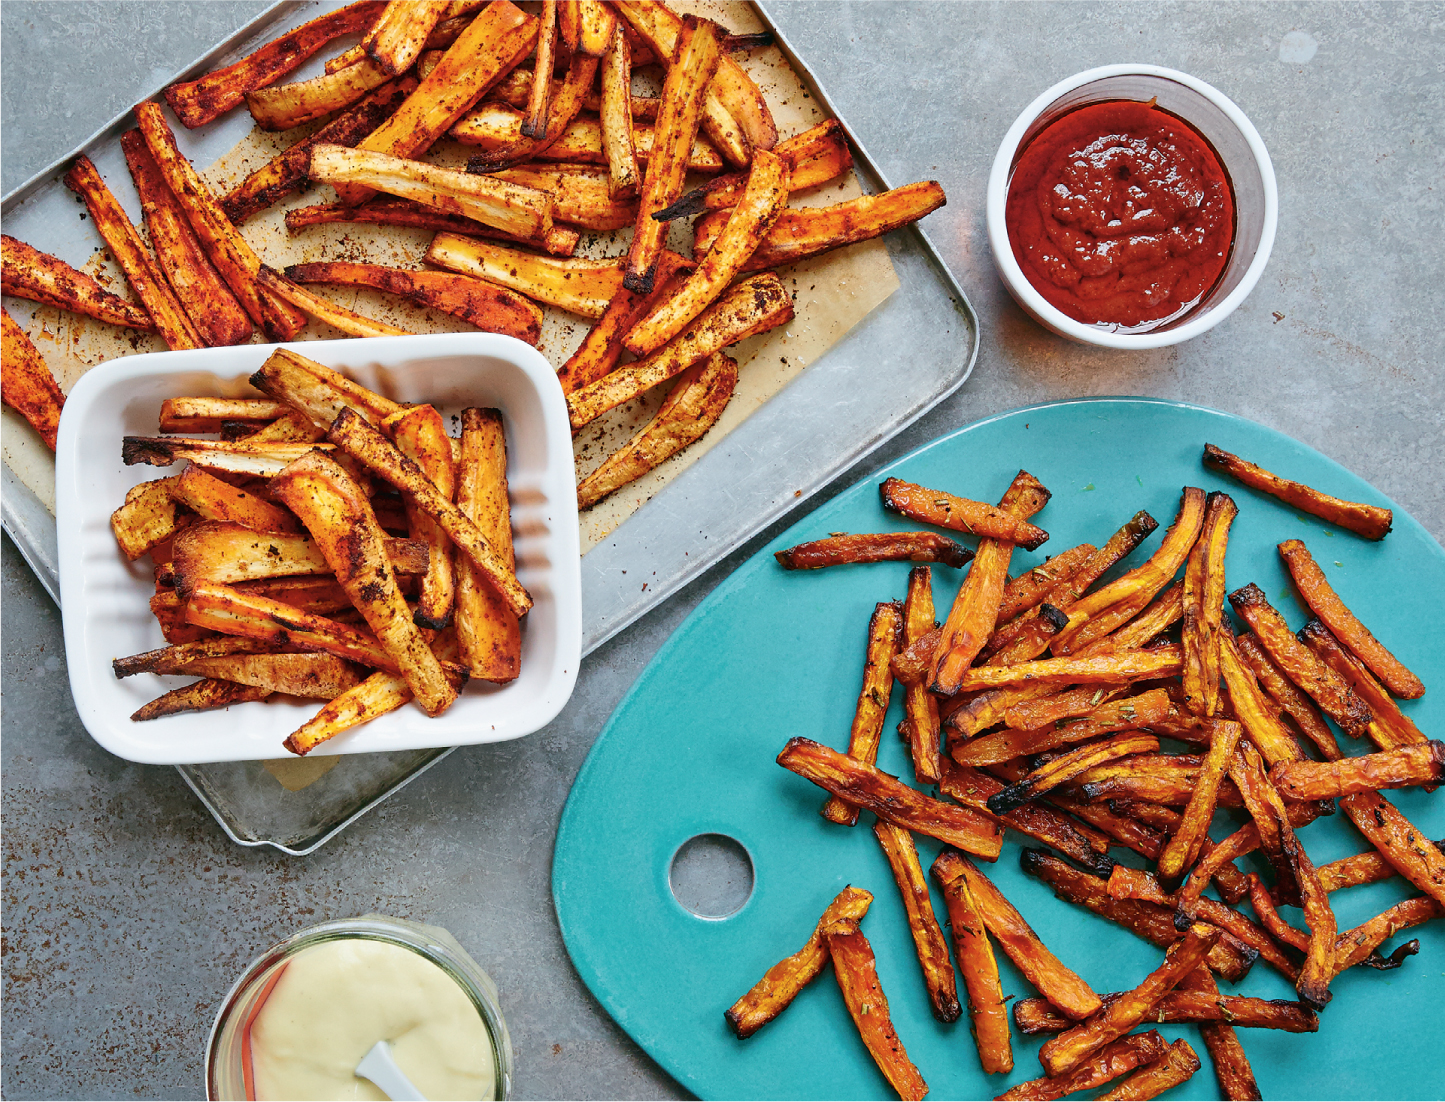
Even if you’re not that keen on parsnips, parsnip chips are guaranteed to win you over! Smoky and sweet from the paprika and coconut oil, they make an addictive accompaniment to any main dish, especially when served with one of our dips, such as Homemade Sriracha (see here) or BBQ Ketchup (see here), or something cool and creamy like Quick-cooked Mayo (see here) or Creamy Cashew Ranch Dressing (see here). They also pair wonderfully with Mushroom Lentil Burgers (see here). For those times when parsnips are harder to track down, and for a low-carb option that’s more easily digested with a protein-based main dish such as our onglet steak (see here), we’ve included our equally tasty Carrot and Rosemary Chips. Both are delicious cold the next day – a good one for the lunch box.
SERVES 4 AS A SIDE
1 tablespoon coconut oil
500g parsnips (about 4 large), topped and tailed
1 tablespoon hot smoked paprika (or to taste)
Sea salt and black pepper
SMOKY PARSNIP CHIPS
1 Preheat the oven to fan 200°C/Gas mark 7. Line a baking tray with baking parchment, add the coconut oil and leave it in the oven for a few minutes until the oil has melted.
2 Meanwhile, scrub the parsnips until clean and then lightly peel them. (No need to peel them if yours are organic.) Slice into thin chips.
3 Remove the hot tray from the oven, add the parsnips with the other ingredients and, using tongs, toss in the oil until the chips are evenly coated. Spread out evenly on the tray, then bake for 35 minutes until golden brown. Flip the chips halfway through baking so they crisp up evenly.
4 Remove from the oven and serve immediately with an extra sprinkling of sea salt.
1 tablespoon coconut oil
500g carrots (about 5 large), topped and tailed
2 teaspoons roughly chopped fresh rosemary leaves or 1 teaspoon dried
3 tablespoons finely grated Parmesan (optional)
Sea salt and black pepper
CARROT AND ROSEMARY CHIPS
1 Preheat the oven to fan 200°C/Gas mark 7. Line a baking tray with baking parchment, add the coconut oil and leave it in the oven for a few minutes until the oil has melted.
2 Meanwhile, scrub the carrots until clean and then lightly peel them. (No need to peel them if yours are organic.) Slice into thin chips about 1cm wide.
3 Remove the hot tray from the oven, add the carrots with the other ingredients (not too much salt if you’re including Parmesan) and, using tongs or two spoons, toss in the oil until the chips are evenly coated. Spread out evenly on the tray, then bake for 30–35 minutes until golden brown. Flip the chips halfway through baking so they crisp up evenly.
4 Remove from the oven and serve immediately.
TIP
+ Use two baking trays, if needed, to allow plenty of space between the chips so that they bake rather than steam.
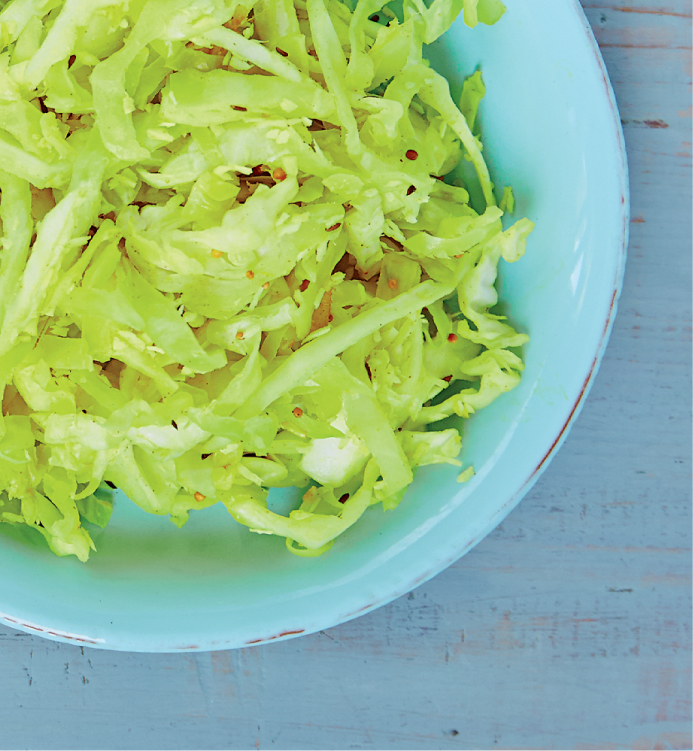
Quick and easy to prepare, this Indian-inspired dish can be on the table in fifteen minutes. It’s even better served cold the next day, so make ahead or save any leftovers for a packed lunch. The flavours here go especially well with the tomato-based Slow-Cooked ‘No Fry’ Chicken Curry (see here). Cook the cabbage according to your preference for crunch: for us this varies according to our mood, what we’re serving it with or whether we are short of time! To make it more of a meal, combine with buckwheat noodles or quinoa, or serve quick-cooked and crunchy with two fried eggs. The spice mix here would be delicious with green beans, broccoli or any other green vegetables.
SERVES 4 AS A SIDE
1 tablespoon coconut oil
1 garlic clove, diced
4cm piece of fresh root ginger (unpeeled if organic), finely diced
1 large green or white cabbage, shredded
2 tablespoons desiccated coconut
Grated zest and juice of ½ lemon or 1 lime
Sea salt and black pepper
FOR THE SPICES
1 teaspoon cumin seeds or ½ teaspoon ground cumin
½ teaspoon ground turmeric
1 teaspoon mustard seeds
1 Toast the spices in a deep, wide frying pan on a medium heat for 30 seconds. Add the coconut oil with the garlic and ginger and fry for 1 minute.
2 Tip in the cabbage and desiccated coconut and cook for 10 minutes, covered, until softened and fragrant (or cook for 3 minutes if you want it crunchy – with the lid off).
3 Season with salt and pepper to taste and stir through the lemon or lime zest and juice.
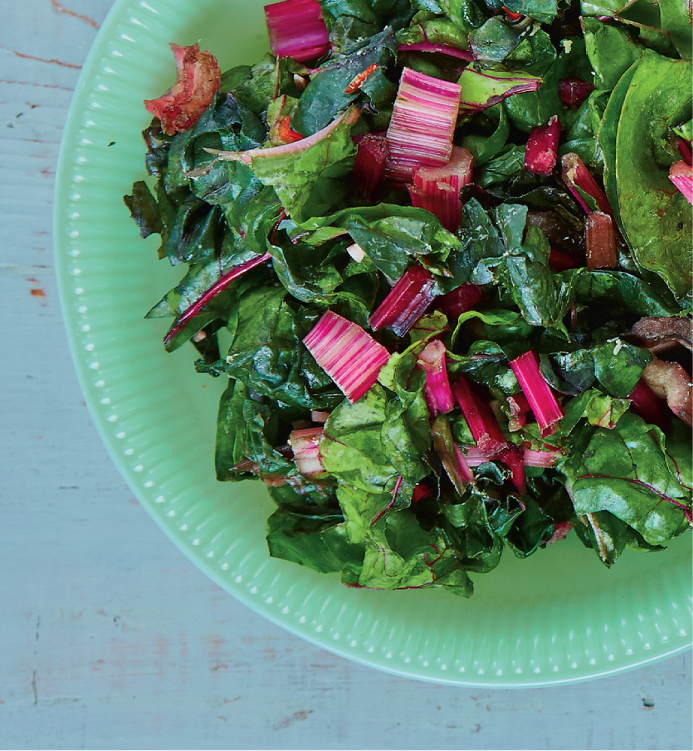
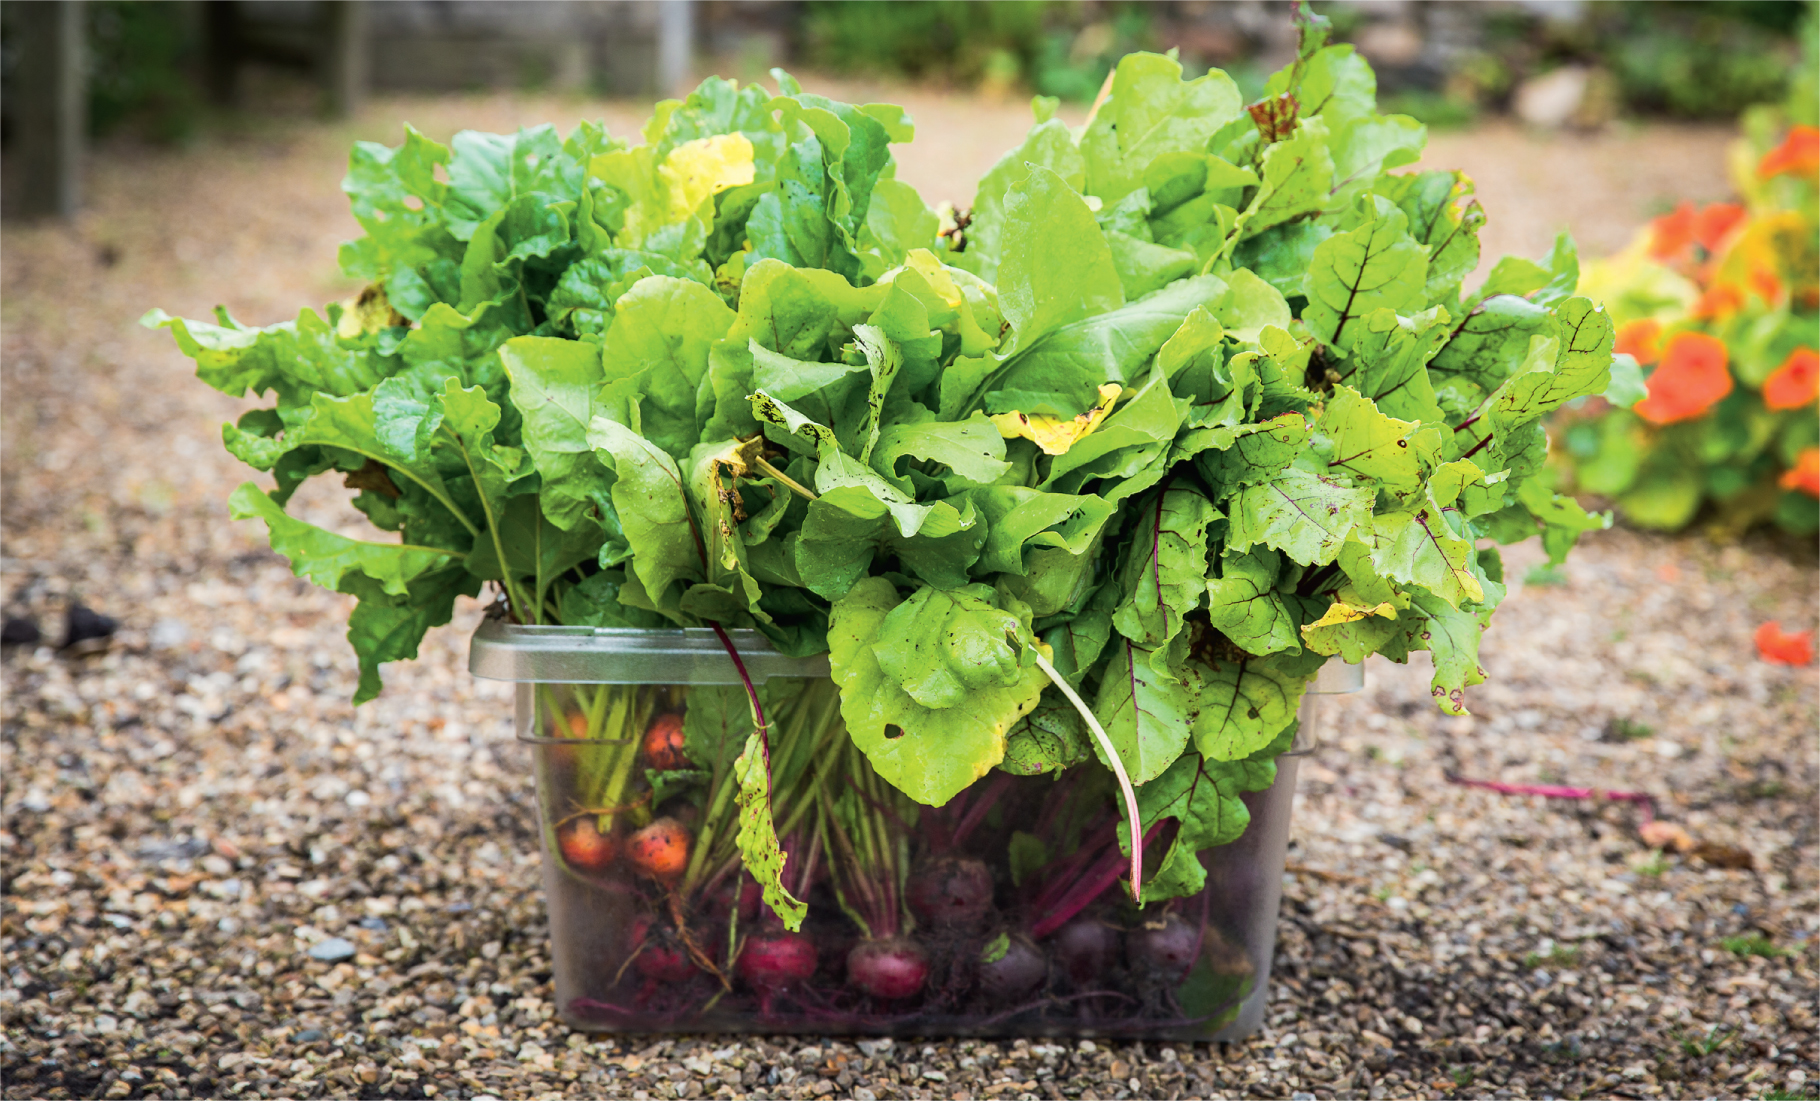
Hot or cold, this immune-boosting side dish of greens goes with absolutely everything. Top cold leftovers with freshly fried eggs or stir it into cooked quinoa for a speedy lunch on the go. You could even add a spoonful to a bowl of steaming hot soup. Use rainbow chard when in season to give dinner-party finesse to a knockout dish of vibrant colours. Try making it with cavolo nero, spinach or kale, too – we love all these iron-rich super-greens.
SERVES 4 AS A SIDE
400g chard (preferably rainbow), spinach, cavolo nero or kale
1 tablespoon ghee or coconut oil
2 garlic cloves, diced or crushed
½–1 fresh red chilli (to taste), diced
4 tablespoons water
Juice of ½ lemon (to taste)
2 tablespoons extra-virgin olive oil, for drizzling
Sea salt and black pepper
1 Discard any particularly tough ends of the chard or other choice of greens (and discard the kale stems, if using), then slice the stalks into 1cm-wide pieces before shredding or roughly chopping the leaves.
2 Add half the ghee or coconut oil to a large pan and fry the stalks with the garlic and chilli over a medium heat for a minute until the garlic is softened but not browned.
3 Add the leaves and the water, put a lid on the pan and steam for a further 2–3 minutes until the stalks are tender, the leaves just cooked and the water fully absorbed.
4 Season with lemon juice, salt and pepper to taste and drizzle with the EVOO.
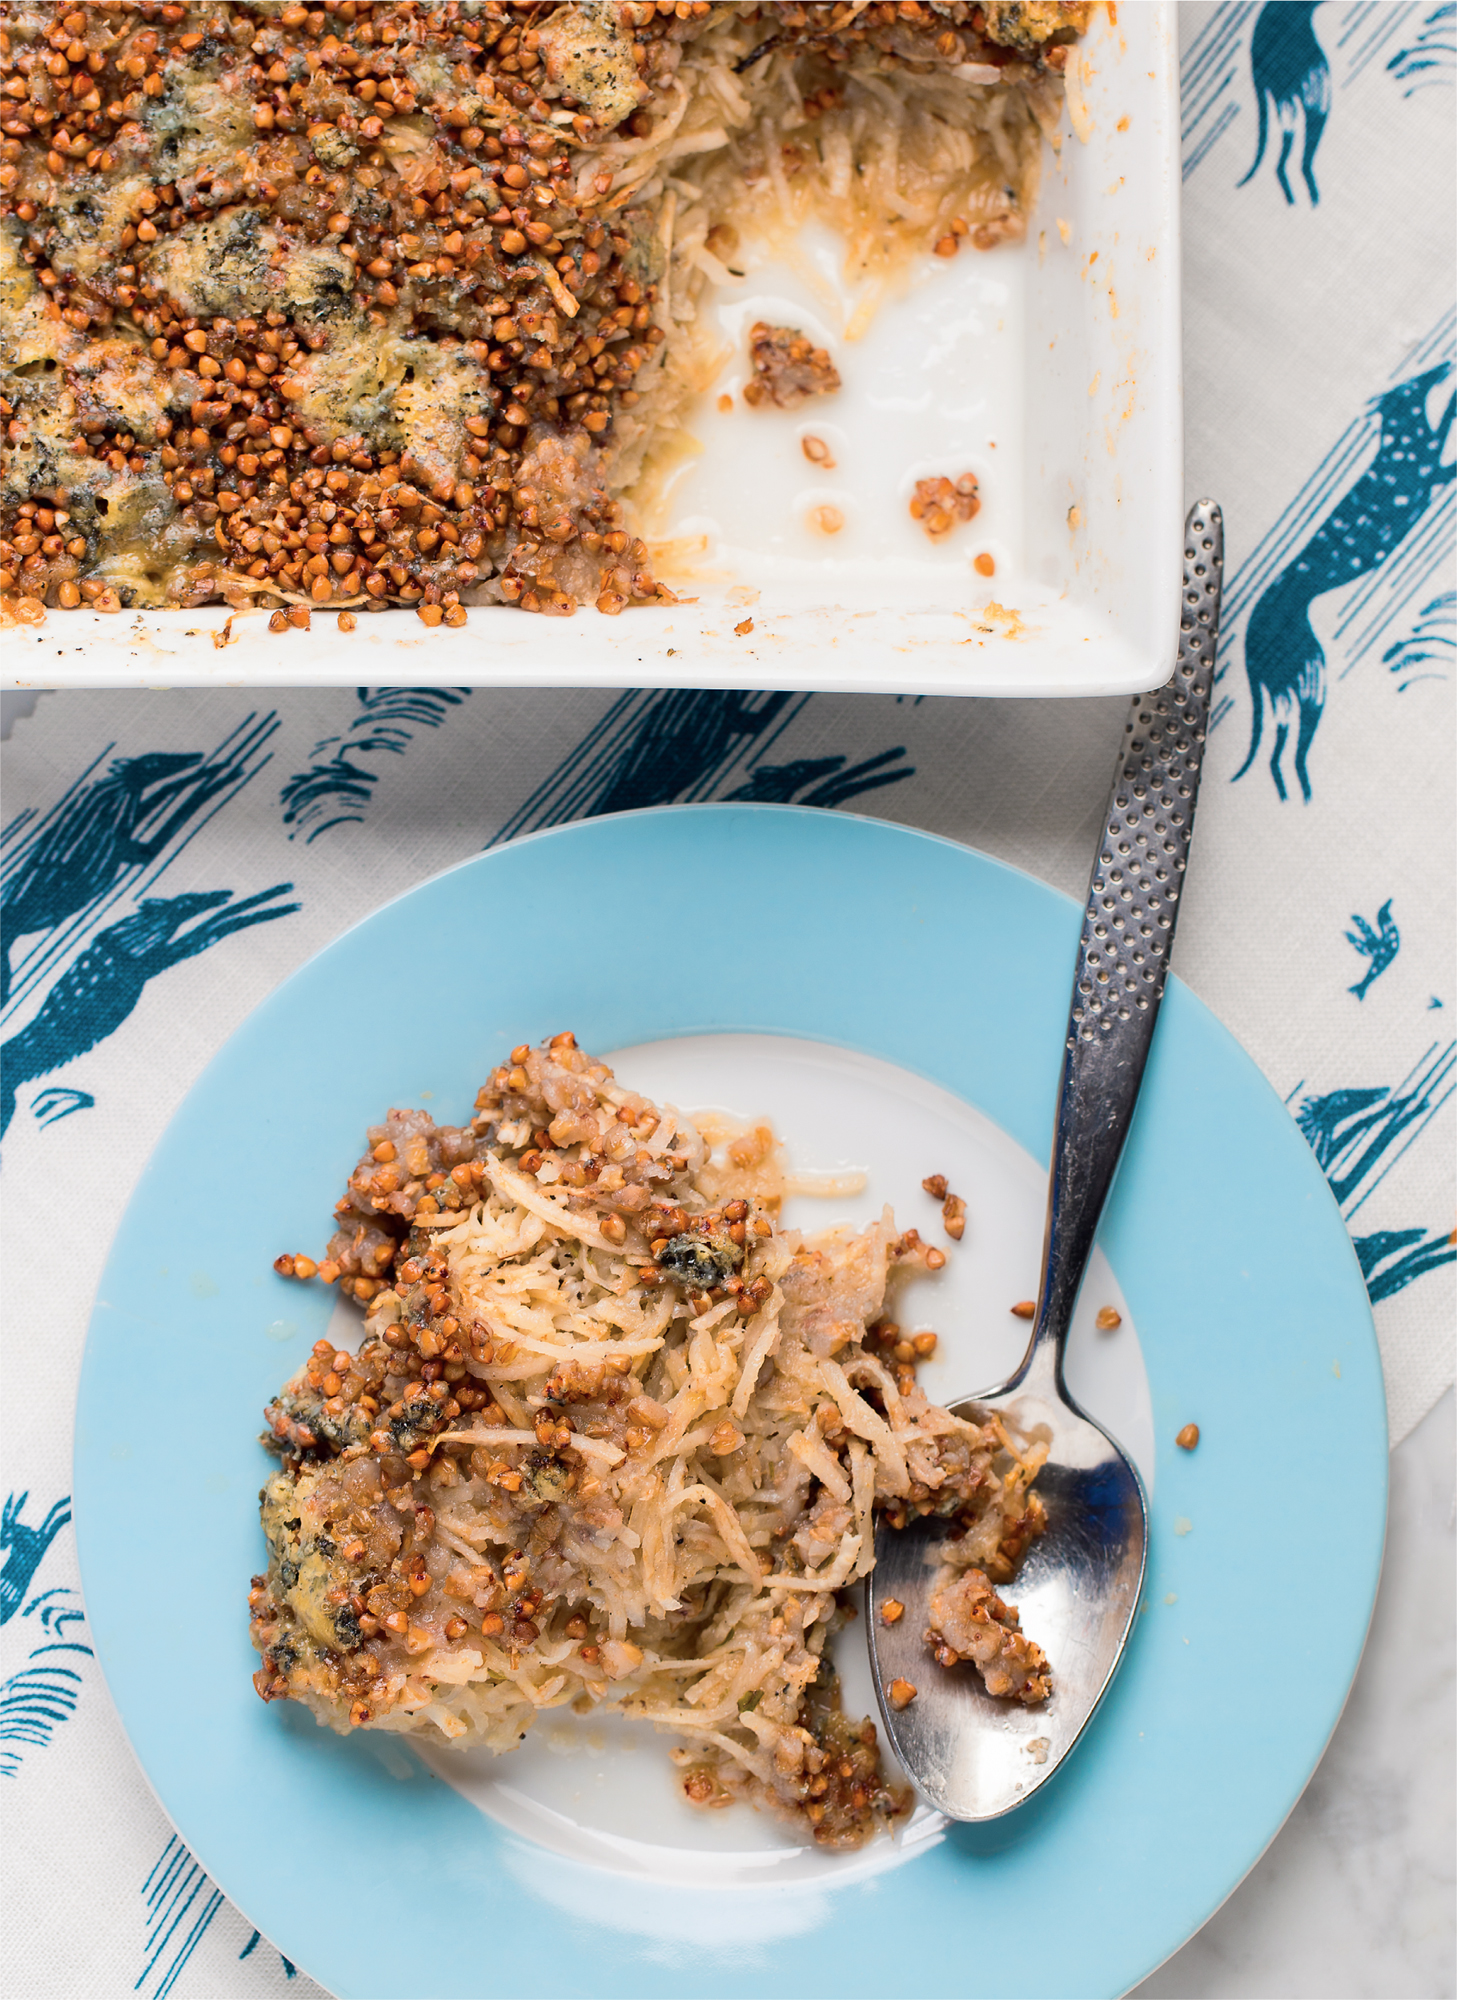
This simple one-pot dish always inspires much appreciation when it leaves the oven and lands in the centre of the table – earthy root vegetables baked in bone broth, topped with a crunchy layer of blue cheese and buckwheat groats. Our recipe is really versatile – swap grated turnip for the celeriac, top with roughly chopped hazelnuts or ground almonds, and substitute with any hard cheese, such as Cheddar. You can easily double the quantities, too. For a dairy-free dish, season the gratin with onion powder, herbs and extra sea salt, and dot with coconut oil, dripping or ghee (suitable for most people who are lactose intolerant).
SERVES 4
3 tablespoons butter, plus extra for greasing
1 large celeriac
A pinch of freshly grated nutmeg
½ teaspoon dried thyme
5 tablespoons Bone Broth (see here) or vegetable stock
100g buckwheat groats or ground almonds
200g blue cheese (such as Stilton), crumbled
Sea salt and black pepper
1 Preheat the oven to fan 180°C/Gas mark 6 and grease a 25cm × 18cm ovenproof dish with butter.
2 Peel and quarter the celeriac and grate by hand or in a food processor using the S-curved blade or grater attachment.
3 Toss in the prepared dish with the nutmeg, thyme, 2 big pinches of salt and some pepper, then pour over the broth or stock.
4 Sprinkle over the buckwheat groats or ground almonds, crumble over the blue cheese so that it’s evenly spread, and dot with the butter.
5 Bake for 30 minutes, then raise the oven temperature to fan 200°C/Gas mark 7 and bake for an extra 10–15 minutes until crispy and golden on top.
Everyone loves a tomato sauce with garlic and onions. Throw in some green beans and you have the most delicious dish to go with meat or fish, or to accompany quinoa or butternut squash. Made with sliced runner or green beans, this has roots in Greek and Middle Eastern cooking. Traditionally, olive oil is used to cook the beans before adding the tomatoes; here we save the goodness of extra-virgin olive oil to finish the dish and use ghee or dripping instead to cook the beans. We’ve based this recipe on the Lebanese version recommended by our friend Miss Bibi, who emailed us specially to say that it’s perfect for this book. It’s a favourite of ours, too – not only because it can all be chucked into a pot and left to simmer, but because it uses ingredients from the store cupboard. We call it ‘Lubee Beans’; the correct name is loubieh bi’ zayt.
SERVES 6 AS A SIDE
1 large onion, finely diced
1 tablespoon ghee or dripping
5 large garlic cloves, diced
1 × 400g tin of chopped tomatoes
1 tablespoon tomato purée
500g frozen green beans or trimmed fresh beans
¾ teaspoon sea salt
½ teaspoon black pepper
3 tablespoons extra-virgin olive oil, to serve
1 Sauté the onion in the ghee or dripping on a medium heat for 5 minutes until softened. Add the garlic and cook for an extra 3–4 minutes.
2 Add the rest of the ingredients except the EVOO and simmer, covered, on a low heat for 20 minutes. Remove the lid and continue to cook for a further 5–10 minutes, stirring frequently, until the sauce has thickened.
3 Allow to cool slightly and then stir in the EVOO to serve. Store any leftovers in the fridge and serve cold the next day.
VARIATIONS
+ You can use butter instead of the ghee or dripping, giving a creamier taste.
+ Replace the green beans with runner beans. Choose young ones so that you don’t have to de-string them, and slice on the diagonal. They will need cooking for slightly longer.
+ We also make this with okra (super-nutritious!) and even Savoy cabbage and peas. Very British!
+ Delicious served with Kasha Buckwheat Burgers/Balls and Quick-cooked Mayo (see here and here).

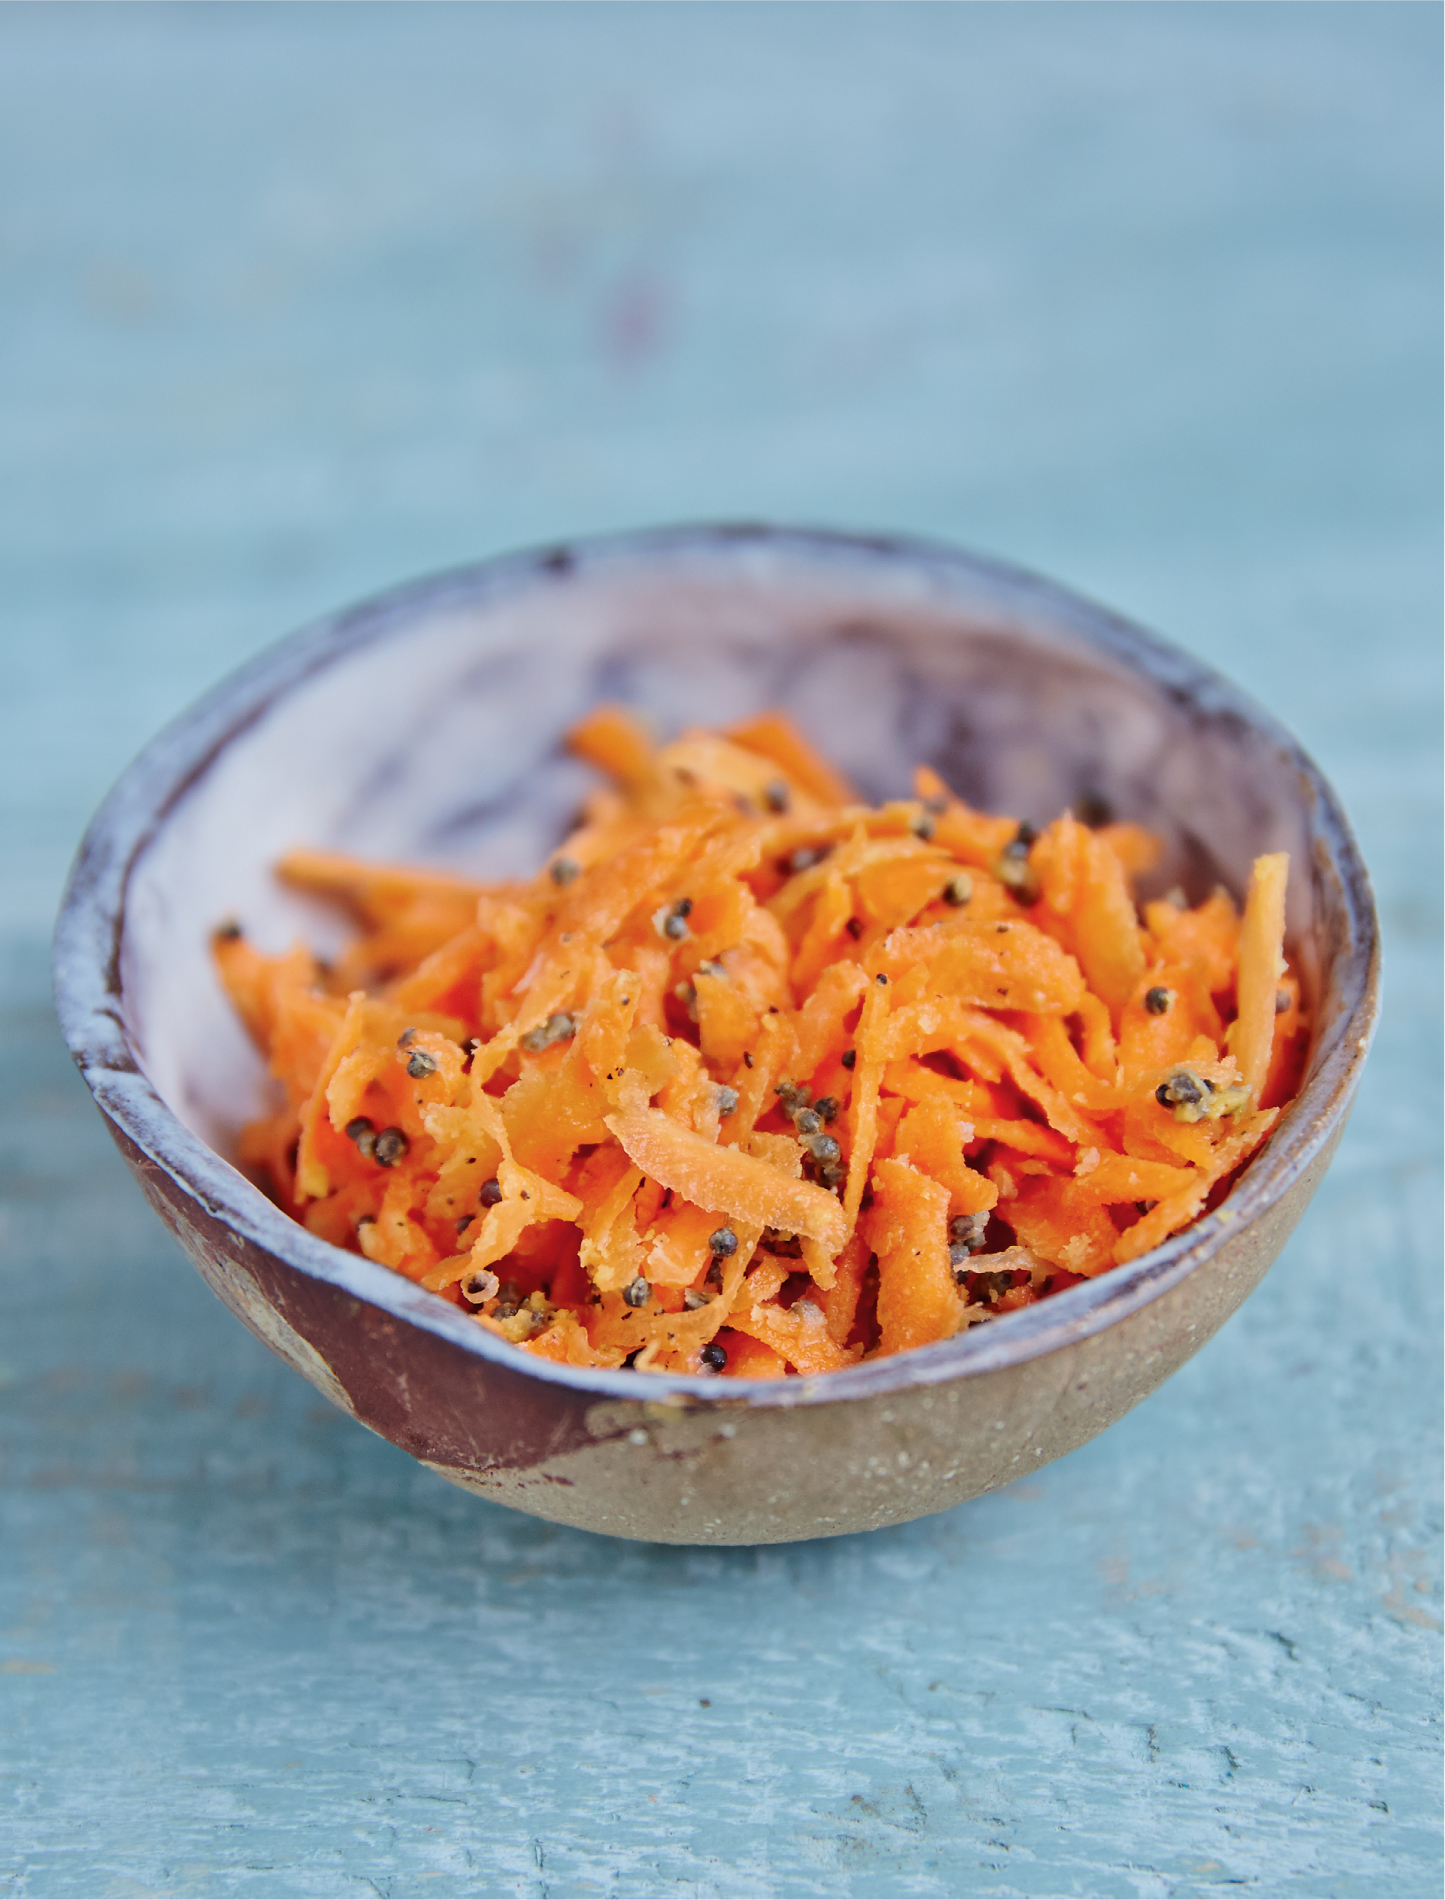
We all know that carrots are great for the eyes. But did you know they are also good for the skin and the brain, as well as helping to reduce inflammation? This two-way Ayurvedic recipe was taught to us by our meditation teacher, Gary Gorrow, over in Sydney, Australia. Just grate the carrots and lightly stir-fry with mustard seeds, or mix the raw carrots with the toasted seeds, then enjoy on its own or serve as a side dish. This dish ‘food combines’ with everything: try it with our Kasha Buckwheat Burgers/Balls (see here), Easy Cheesy Broccoli Risotto (see here) or Spicy Miso Salmon with Broccoli Rice (see here). Cooked carrots are sweet and nourishing, easy to digest yet contain plenty of fibre – perfect as part of your supper. Raw carrot, on the other hand, is said to be stimulating – excellent eaten earlier in the day or during hot weather.
SERVES 2 AS A SIDE
1 tablespoon ghee or coconut oil
1 tablespoon black mustard seeds
2 large carrots, grated
Juice of ½ lemon or ½ lime
Sea salt and black pepper
1 FOR THE STIR-FRY: Heat the ghee or coconut oil in a small pan over a medium heat. Add the mustard seeds and cook until they begin to pop out of the pan (taking care not to let them burn and become bitter). Add the grated carrots and stir-fry for 5 minutes until just tender, then season with salt and pepper and toss with the lemon juice.
2 FOR THE SALAD: Place the grated carrots in a bowl, toast the seeds in the ghee or coconut oil as in step 1 and pour over the carrots, stirring to mix. Season with salt and pepper and toss with the lemon juice.
Our mash recipes call for nutrient-rich, lower-starch vegetables in place of standard potatoes, to help you feel satisfied for longer! We love to experiment with different root vegetables depending on the season. Here, we use beetroot, carrot or cauliflower as the base and flavour each one differently so that you have mash for any occasion. You can steam or roast your vegetables before mashing. Try the cauli mash with bangers and onion gravy or topped with a fried egg, and serve the carrot and mustard mash with roasted chicken and our Sensational Sprout Salad (see here). For optimum food combining, serve beetroot mash with vegetable dishes, such as Kasha Buckwheat Burgers/Balls (see here) or Mushroom Lentil Burgers (see here). Any leftover mash can be reheated in a pan with a few tablespoons of bone broth or water, covered with a lid, until steaming hot.
SERVES 4 AS A SIDE
2 large cauliflowers, outer leaves removed
25g butter
4 tablespoons water
4 garlic cloves
Sea salt and black pepper
GARLICKY CAULIFLOWER MASH
1 Slice off the tough skin at the base of the stem, then roughly chop the cauliflower into 5cm chunks. Place the butter and water in a large pan and add the cauliflower and garlic.
2 Cover the pan with a lid and steam over a medium heat for around 8 minutes until the cauliflower is tender when tested with a knife. All the water should be absorbed, but add a splash more water during cooking if needed and allow any excess water to evaporate.
3 Add the cauliflower and garlic to a food processor – or leave in the pan and use a hand-held stick blender – and purée until smooth and creamy or roughly textured, as you wish. Season with salt and pepper to taste. Garnish with fresh herbs (such as chives) if you like.
VARIATIONS
+ CHEESY CAULIFLOWER MASH Make the cauliflower mash in the same way, adding 2 handfuls of grated cheese in step 3 above. Use any cheese you have to hand, but for a nostalgic mash we prefer good old Cheddar.
+ CAULIFLOWER MUSTARD MASH Make the cauliflower mash in the same way, adding 1 tablespoon of mustard to the pan in step 1 above.
TIP
+ If the cauliflower mash is too sloppy or wet, reheat in a pan, over a low heat, to allow some moisture to evaporate.
SERVES 4 AS A SIDE
2 tablespoons water
5 large carrots, roughly chopped
1 garlic clove (unpeeled)
1 tablespoon butter
2 teaspoons mustard (to taste)
Sea salt and black pepper
CARROT AND MUSTARD MASH
1 Put the water in a pan, along with a pinch of salt then add the carrots and garlic and steam over a medium heat, with the lid on, for 15 minutes until tender. Drain off any excess liquid, reserving some for thinning the mash if needed.
2 Slip the garlic from its skin using your thumb.
3 Add all the ingredients to a food processor and blend until smooth, seasoning with salt and pepper to taste.
VARIATION
+ We’ve also added leftover celeriac to this mash, and swede makes a good addition too.
SERVES 4 AS A SIDE
300ml water
4 large beetroots, scrubbed and quartered (roughly 500g)
2 tablespoons grated (peeled) fresh horseradish or creamed horseradish
1 tablespoon butter
Sea salt and black pepper
PINK BEETROOT MASH WITH HORSERADISH
1 Put the water in a pan, along with a pinch of salt then add the beetroot chunks. Cover and simmer for 30–40 minutes until tender.
2 Once cooked, drain the beetroots of any excess water, peel them and place in a food processor with the horseradish and butter. Blend until smooth and creamy, adding a little water if needed, and season with salt and pepper to taste.
TIP
+ Wasabi would make a quirky alternative to the horseradish.

The avocado boat marks a return of the delicious 1970s-style starter, which we like to eat as a snack. Rich in satiating fats, these make real hunger-busters, especially if filled with full-fat cottage cheese for added protein and topped with a little paprika. For something light and refreshing, a splash of olive oil and a dash of balsamic will do. This was the family favourite growing up. If your taste buds are calling for something sweet, then drizzle with raw honey and squeeze over some lemon juice. A touch of sea salt is a must to bring out the flavours, and some black pepper wouldn’t go amiss either – even on the sweet version.
SERVES 1–2 AS A SNACK
1 ripe avocado
Sea salt and black pepper
OLIVE OIL AND BALSAMIC VINEGAR
Fill with extra-virgin olive oil and a splash of balsamic vinegar.
LEMON AND HONEY DRIZZLE
Squeeze over some lemon juice and drizzle with raw honey. A tiny sprinkle of ground cinnamon is also a nice touch.
COTTAGE CHEESE AND PAPRIKA
Add a spoonful of full-fat cottage cheese, topped with a dusting of paprika. Chopped spring onions and a pinch of ground cumin are delicious too.
1 Cut into the avocado lengthways, producing two long avocado halves that are still connected in the middle by the stone. Take hold of both halves and twist them in opposite directions until they naturally separate. The stone will remain in one half: remove the stone if serving the whole avocado or store the unused half (with the stone still in it) in the fridge in an airtight container, to stop it going brown.
2 Fill the hole of each avocado half with one of the following combinations, season with salt and pepper and serve immediately.

SERVES 4 AS A CANAPÉ
We love these fun bites – using the best bits of a smoked salmon and cucumber sandwich! Dinner parties and gatherings are for enjoying, rather than spending too much time in the kitchen, so this is the perfect canapé for such occasions because it allows you to do just that. The cucumber and horseradish cream can be prepared in advance then assembled just before your guests arrive. These also make a delicious starter, as well as a quick and easy mid-afternoon snack and are great for picnics too: just put out the sliced cucumber, smoked salmon, horseradish, lemon halves for squeezing and cream cheese and let everyone help themselves. No more fiddly canapés!
150g full-fat cream cheese or soft goat’s cheese
1–2 teaspoons grated horseradish (peeled fresh root or a good-quality one from a jar), to taste
2 teaspoons chopped fresh dill, plus dill sprigs or chopped chives, to garnish
1 teaspoon lemon juice
1 large cucumber (the thinner the better for canapés)
100g smoked salmon
Sea salt and black pepper
1 Place the cream cheese or goat’s cheese in a bowl with the horseradish, dill, lemon juice and a pinch of salt and pepper. Mix together and chill in the fridge for up to 1 hour, if you have time, to allow the flavours to develop. You can always add more horseradish later, if needed.
2 Cut the cucumber into 1cm-thick slices and carefully scoop out some of the seeds, making sure not to go through to the bottom.
3 Arrange the cucumber slices on a platter and distribute the cream cheese mixture evenly between them, neatly filling the centres.
4 Cut the smoked salmon into strips. Roll up and place one on top of each piece of filled cucumber. Garnish with dill sprigs or chopped chives and a sprinkling of black pepper.
VARIATIONS
+ This recipe works with any smoked fish: switch it up and use mackerel, herring or trout, or top with cooked crab, small prawns or crayfish.
+ If you don’t have horseradish to hand, up the black pepper so that you still have a kick, or try wasabi to taste.
+ For a vegetarian version, simply swap the salmon with half a cherry tomato or a slice of radish.

Fantastic for breakfast too (especially breakfast on the move), these delicious savoury muffins contain all the favourites – bacon, apple, onion (and cheese if you like!). Whole strips of bacon line the muffin moulds, with no need to pre-cook the rashers. Coconut flour gives the muffins a crumb, the apple keeps them fresh and yoghurt makes them fluffy. We also sneak in a few greens to offset the salty bacon and cheese. Here we’ve used kale, but you could try spinach, rocket, spring greens or chard, or pack in some parsley. Experiment with flavours: try different spices (cumin and egg always go together) or swap the bacon and Cheddar for Stilton. You can leave out the yoghurt for a denser, more eggy muffin, and use a little ground cinnamon instead of Cheddar – a great match for the bacon and apple too.
MAKES 6 MUFFINS
Butter or coconut oil, for greasing (optional)
5 eggs
4 tablespoons coconut yoghurt or full-fat probiotic yoghurt
4 tablespoons coconut flour
2 apples, cored and finely diced
1 handful of kale, thick stems removed and leaves shredded (about 20g)
2 spring onions, finely sliced
40g mature Cheddar, grated, or ½ teaspoon ground cinnamon
¼ teaspoon bicarbonate of soda
¼ teaspoon sea salt
A big pinch of black pepper
1½ teaspoons apple cider vinegar or lemon juice
6 rashers of unsmoked bacon
1 Preheat the oven to fan 190°C/Gas mark 6½ and line a six-hole muffin tin with baking parchment cases. If you are using a stainless-steel tin, lightly grease with butter or coconut oil (no need to add paper cases).
2 Beat the eggs and the yoghurt together, then stir in the rest of the ingredients except the bacon.
3 Use a rasher of bacon to line each hole or paper case, so that the fat side comes above the edge of the hole/paper case. Divide the batter between the bacon-lined holes or paper cases.
4 Bake in the oven for about 25 minutes until the tops of the muffins are golden brown. Remove from the oven and allow to cool in the tin for a few minutes before serving, or transfer to a wire rack and leave to cool completely before storing in an airtight container in the fridge.

MAKES 1 BIG TRAY
It took us a little while to find the perfect way to cook kale crisps. The trick, in our opinion, is to let them bake nice and slowly, as well as making sure they are well spaced out on the baking sheet so they roast rather than steam. In our quest for the perfect kale crisp, we tried many flavour combinations and this chilli-paprika blend came out as our favourite. Try it yourself: it’s the perfect excuse to use up any spices gathering dust in your cupboard! Kale crisps make great nibbles if you’re having people round for drinks, especially if served alongside our Salty Cajun-roasted Cauliflower (see here).
2 teaspoons coconut oil
200g kale, thick stems removed
A small pinch of chilli powder or cayenne pepper
1 teaspoon sweet smoked paprika
½ teaspoon sea salt
1 Preheat the oven to fan 150°C/Gas mark 3½. Line a large baking tray with baking parchment, add the coconut oil and place in the oven to allow the oil to melt.
2 Wash the kale, then pat it dry with a clean tea towel (the drier the kale, the crispier the chips will be).
3 Tear the kale leaves into pieces that are just larger than bite-sized.
4 Remove the hot tray from the oven, add the kale with all the remaining ingredients and, using tongs or two forks, toss together until the kale is evenly coated.
5 Spread the kale evenly over the tray, leaving a little space between the leaves (it’s important you don’t overlap the kale pieces), and return to the oven to bake for 25 minutes.
6 Watch the kale carefully and remove it from the oven as soon as the edges start to brown. If you can resist them, leave for 3 minutes to crisp up even more before serving.

This is the easiest snack to serve to peckish guests. Do all the prep before they arrive – use a quality ready-made Cajun/Creole spice mix if you’re short of time – and then just chuck in the oven. They are always a crowd-pleaser and we love surprising people with yet another way to enjoy cauliflower. Serve with BBQ Ketchup (see here), a drizzle of Homemade Sriracha (see here), Creamy Cashew Ranch Dressing (see here) our Quick-cooked Mayo (see here) or any of our dips or dressings (see here) – they will all be delicious. Or just sprinkle over some chopped fresh herbs like chives. Pop any leftovers in a Power Salad in a Jar (see here) for a packed lunch, whizz into a quick soup with some Bone Broth (see here), or make into a frittata for your Sunday brunch.
MAKES 1 BIG TRAY TO SERVE 4
1 tablespoon coconut oil
1 large cauliflower (outer leaves and stalk removed), chopped into equal-sized florets
1 handful of fresh chives, snipped, to serve (optional)
FOR THE CAJUN SPICE MIX
1 teaspoon sweet smoked paprika
1 teaspoon dried oregano or thyme
⅛ teaspoon cayenne pepper or chilli powder
1 teaspoon garlic powder (optional)
½ teaspoon onion powder (optional)
Sea salt and black pepper
1 Preheat the oven to fan 215°C/Gas mark 8½. Put the coconut oil in a large baking tray and leave in the oven for a few minutes until the oil has melted.
2 Meanwhile, mix together all the ingredients for the spice mix, seasoning with salt and pepper.
3 Remove the hot tray from the oven, add the cauliflower with the spice mix and, using tongs or two spoons, toss together until the florets are evenly coated. Spread them out on the tray, then roast for 30–40 minutes, tossing in the tray at regular intervals, until golden brown but still with a bit of bite.
4 Serve with an extra sprinkling of sea salt and eat as they are or serve with the snipped chives sprinkled over, if you wish.

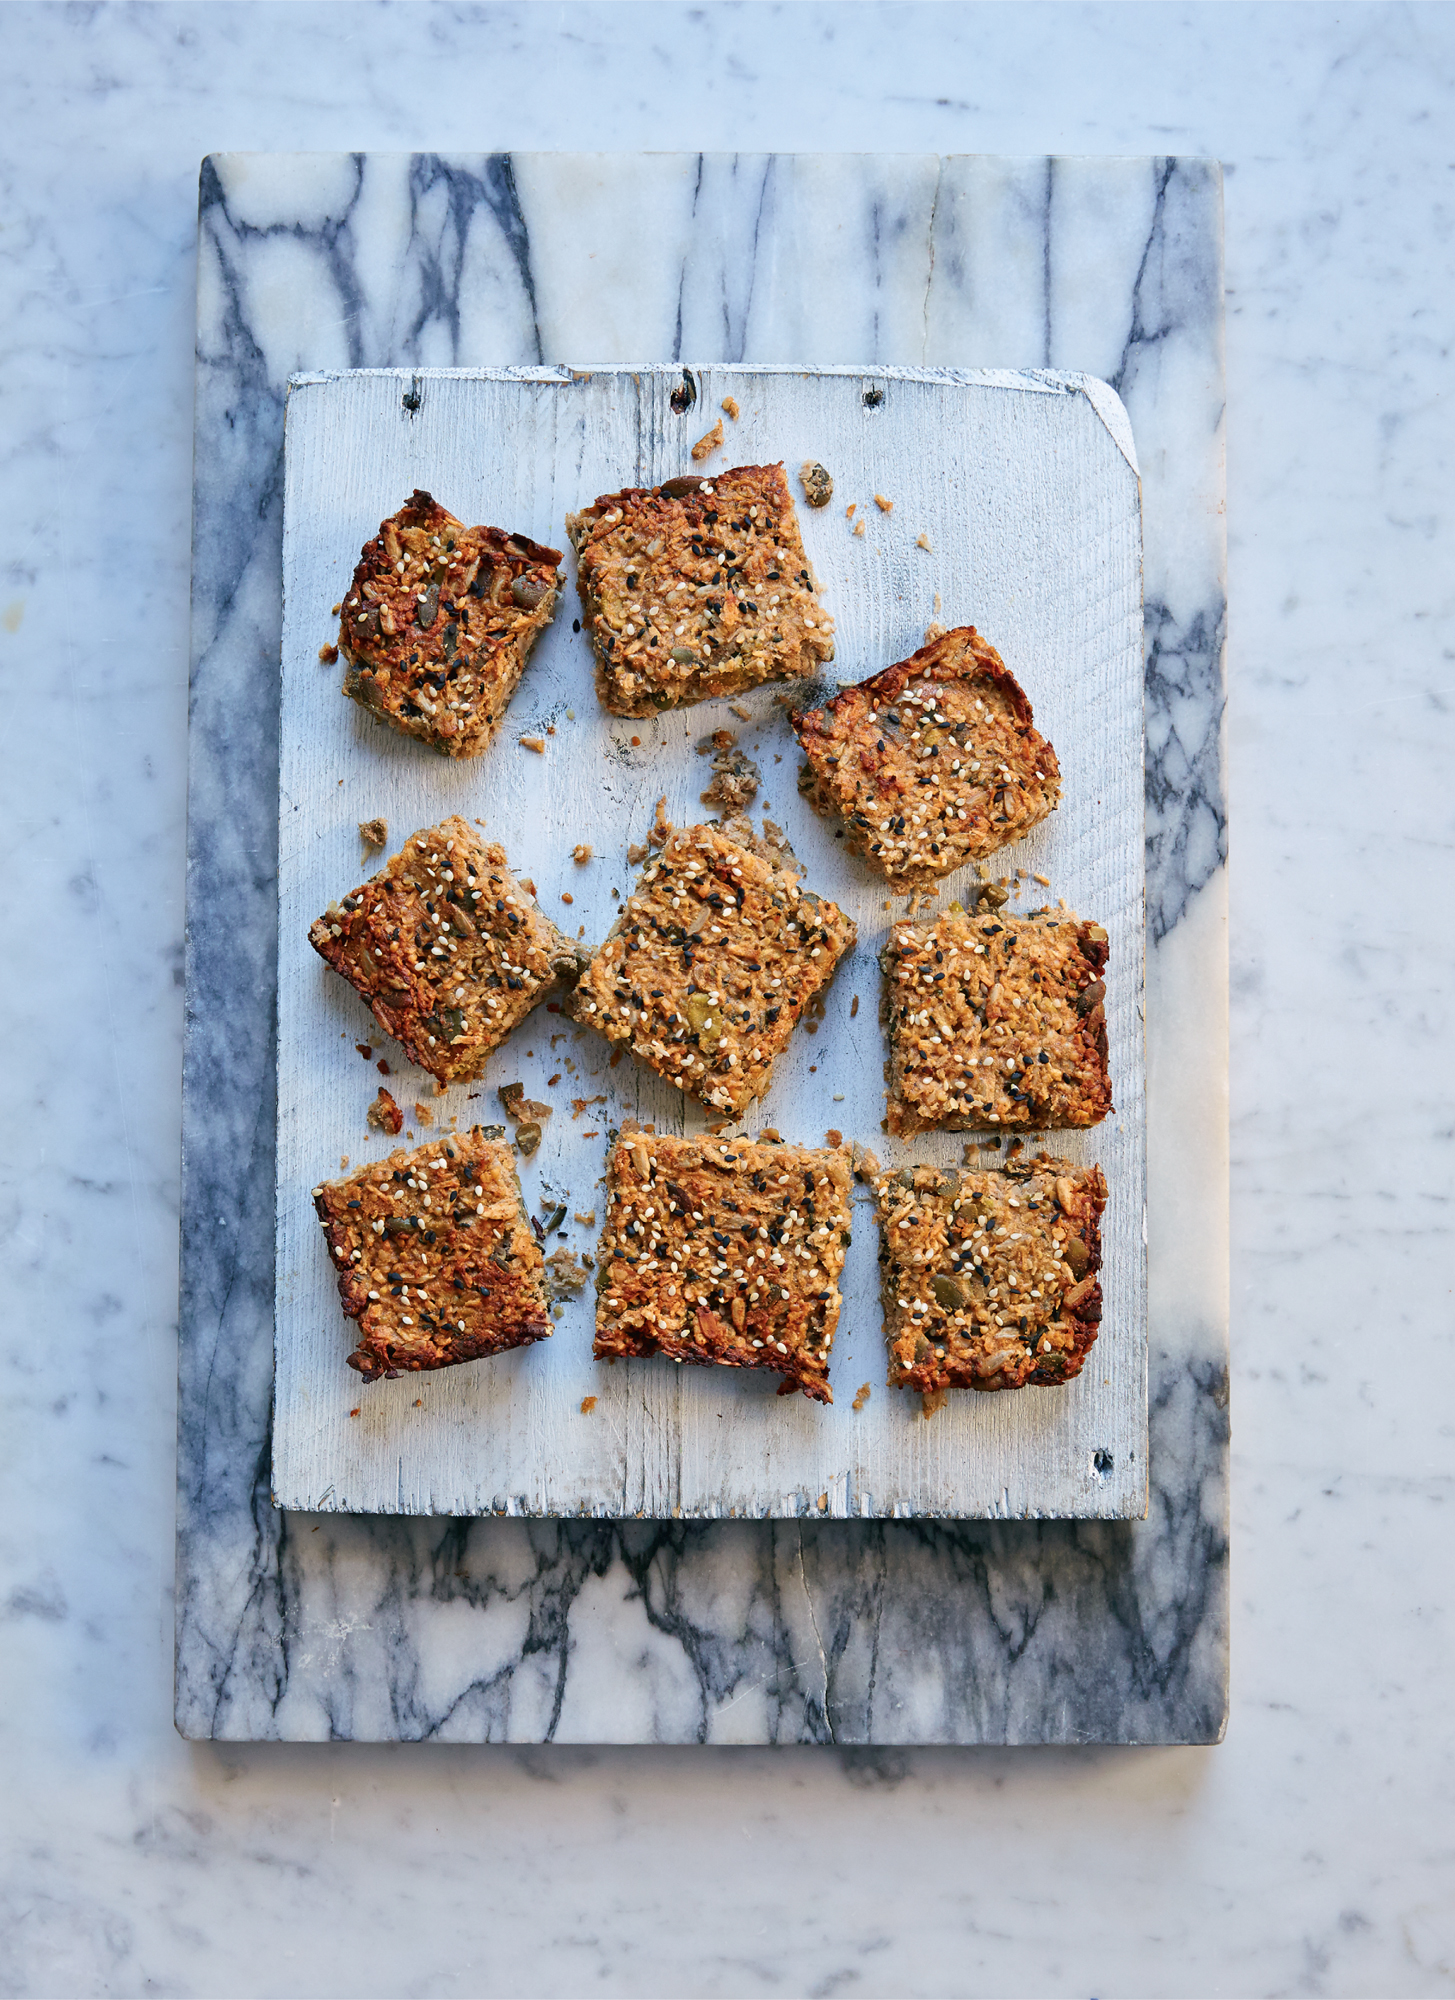
Shop-bought flapjacks, trail mixes and granola may have a healthy image, but they can be loaded with a variety of sugars, processed vegetable oils and other undesirables. Try making your own seed bars – not too sweet, not too savoury – using only wholesome ingredients. Just stir the ingredients together and bake. The egg white in this recipe adds protein and gives the mixture a crispier texture, though you could leave it out for a more crumbly bar.
MAKES 9 BARS
6 tablespoons light tahini
1 tablespoon coconut flour
1 tablespoon raw honey
A pinch of sea salt
1 teaspoon vanilla extract
2 teaspoons ground cinnamon
1 egg white
1 apple, cored and grated
5 tablespoons shelled hemp seeds
5 tablespoons pumpkin seeds
5 tablespoons sunflower seeds
5 tablespoons desiccated coconut
Sesame seeds in different colours (black, white), to decorate (optional)
1 Preheat the oven to fan 180°C/Gas mark 6 and line a 20cm-square cake tin or ovenproof dish with baking parchment.
2 Mix the first seven ingredients together in a mixing bowl and then fold in the rest of the ingredients except the sesame seeds.
3 Pour the mixture into the prepared tin or dish. Flatten down evenly with the back of a spoon and sprinkle with the sesame seeds if desired.
4 Bake in the oven for 30–35 minutes until lightly golden at the edges. Remove from the oven, allow to cool completely in the tin/dish and then slice into bars. Store in the fridge or freezer.
TIP
+ Save the unused egg yolk for making Quick-cooked Mayo (see here) or for adding to soups or Green Eggs 3 Ways (see here).
These easy sweet and savoury crackers are crispy and nutritious. We use a mix of chickpea flour and buckwheat flour to make the base. Each of these has a distinctive flavour but, in an equal blend, one offsets the other, allowing the cinnamon and maple syrup for the sweet crackers and the spices for the savoury version sing through. Ground flaxseed binds them for an egg- and nut- free cracker that’s also dairy-free if you use coconut oil instead of butter. These last well in the fridge and are also great for freezing, so make big batches of them for a regular supply. Dip them (try the Spicy Turmeric and Red Lentil Dip, here), smother in Broccomole (see here), top with cheese or just slather with butter or coconut oil – yum!
MAKES ABOUT 40 CRACKERS
6 tablespoons chickpea flour
6 tablespoons buckwheat flour
5 tablespoons ground flaxseed or 6 tablespoons (90g) whole flaxseeds
½ teaspoon sea salt
4 tablespoons water
2 tablespoons coconut oil or butter, melted
4 tablespoons sunflower seeds
4 tablespoons pumpkin seeds
FOR THE FLAVOURINGS
2 tablespoons ground cinnamon and 2–3 tablespoons maple syrup (for sweet crackers)
½ teaspoon ground cumin, 3 teaspoons garlic powder and a pinch more sea salt (for savoury crackers)
1 Preheat the oven to fan 150°C/Gas mark 3½. You’ll need a 27cm × 39cm baking tray.
2 Combine the chickpea and buckwheat flours, flaxseed and salt in a bowl. Stir in the water and use your hands to mix together. Add the coconut oil or butter, seeds and your choice of flavourings. For the savoury you might need another ½ tablespoon of water to make the dough come together.
3 Use your hands to bring everything together into a dough and place on a piece of baking parchment the size of the tray. Cover with a second piece of baking parchment and, using a rolling pin, roll the dough as thin as possible between the sheets to the thickness of the pumpkin seeds.
4 Use the back of a knife to mark the cracker shapes through the paper into about 40 squares and then carefully peel back the top sheet of baking parchment and discard.
5 Put the crackers with the baking parchment onto the baking tray and bake in the oven for 25 minutes until deep golden brown and crisp. Remove from the oven and cool completely before snapping into pieces. Store in an airtight container in the fridge or freezer.
TIP
+ These freeze really well, so take advantage of the oven being on and make more than one batch.
VARIATION
+ You can split the dough into two and make one half savoury and the other sweet, remembering to halve the quantities of the flavourings for each half-batch.

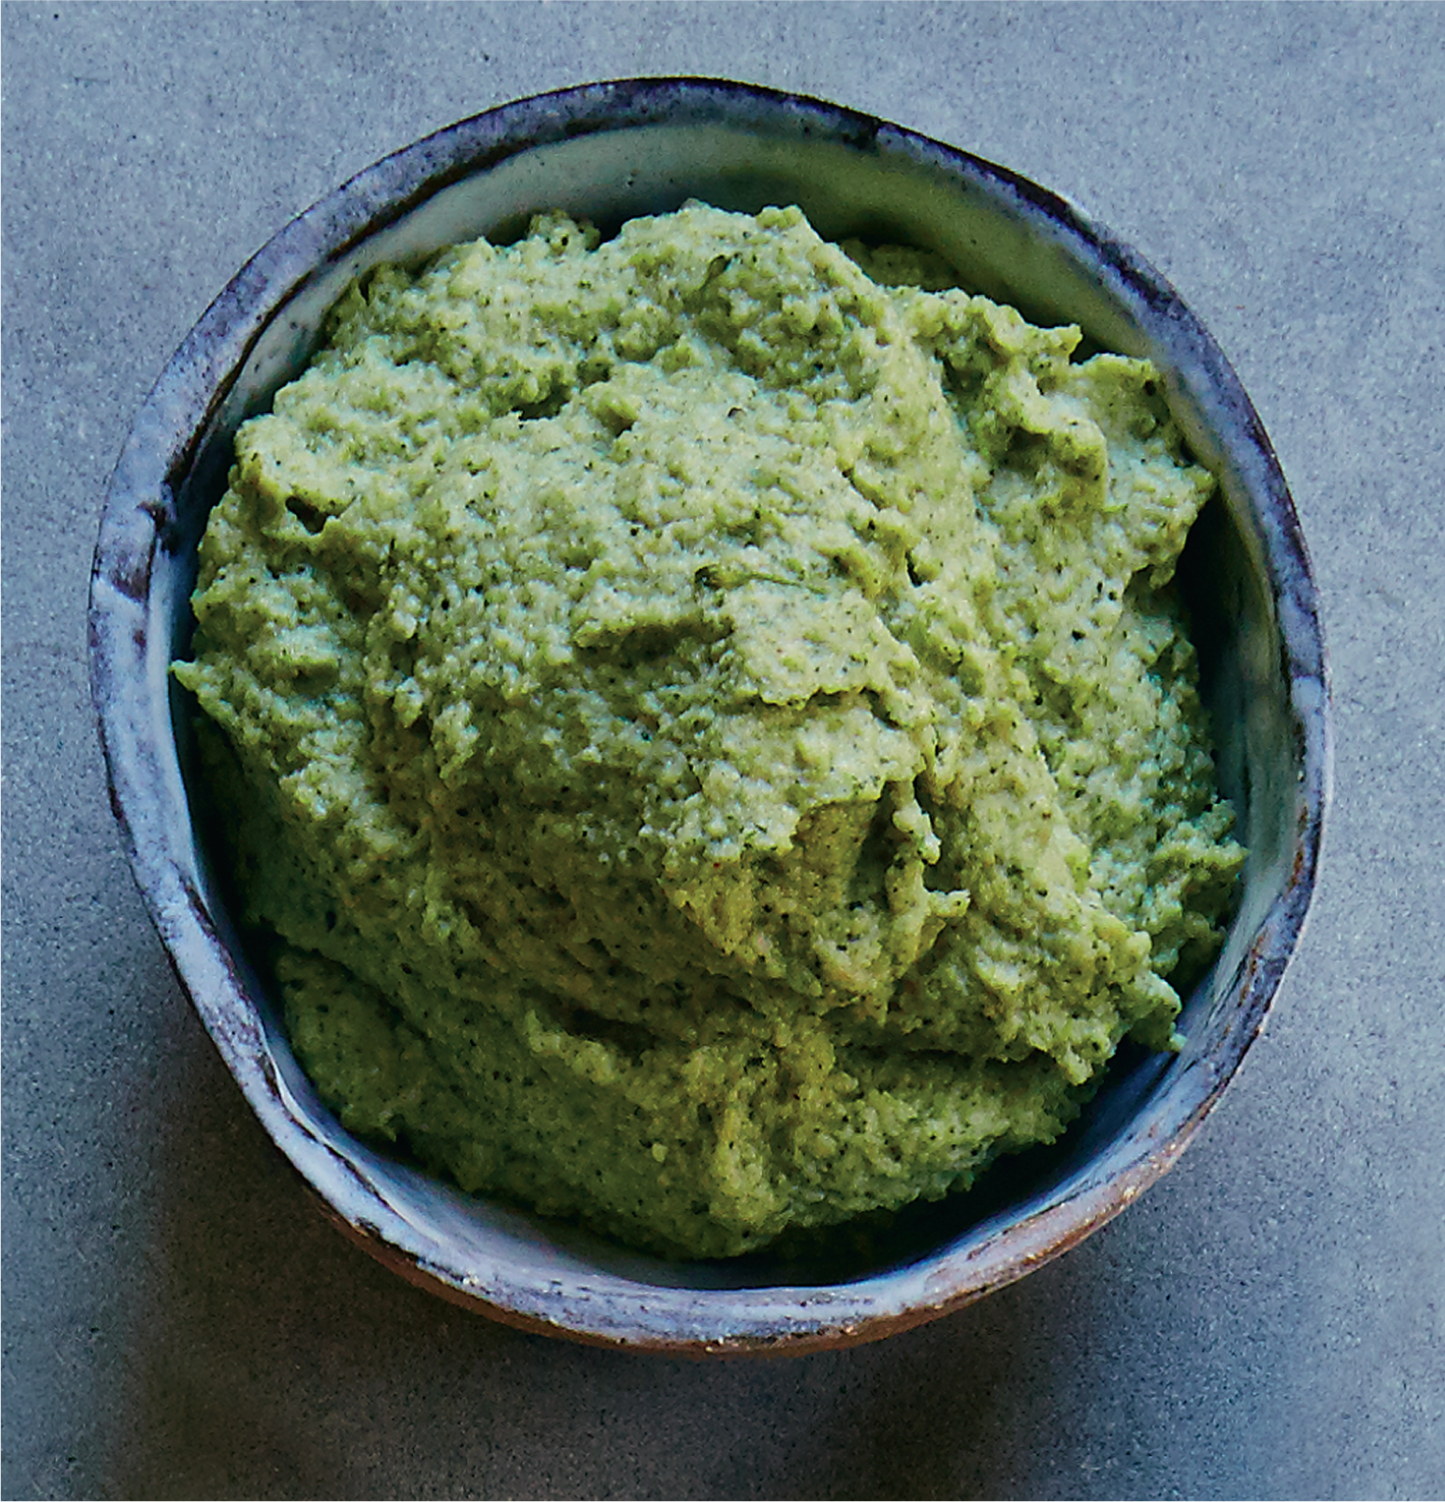
A broccoli version of guacamole, this is an easy dip that goes with just about everything. Try it with Punchy Piri-piri Chicken Wings (see here) or Mexican Beef and Carrot Burgers/Balls (see here), or dunk your Smoky Parsnip Chips (see here) or Multiseed Crackers (see here) into it. For a little more punch, add a clove of garlic – either raw or steamed – with the broccoli or roasted during your Sunday Cook-Off (see here). We’ve given the option of cashews or yoghurt to make it creamy, and even avocado for those who prefer it to be more like guacamole – so you can try a different version each time.
MAKES 660G
1 large head broccoli (about 300g)
1 garlic clove (optional)
4 tablespoons water
150g cashews (soaked in double the volume of water for 2–3 hours, then drained and rinsed), or 80g full-fat probiotic yoghurt, or 1 medium-sized ripe avocado
4 slices of pickled jalapeño (or to taste) or a pinch of cayenne pepper
2 spring onions or ¼ small onion
Juice of 1 lime
4 tablespoons extra-virgin olive oil, plus extra for drizzling
¼ teaspoon sea salt
¼ teaspoon black pepper
1 Prepare the broccoli by cutting into equal-sized florets and roughly chopping the stalks (after first slicing off the tough outer layer).
2 Place the broccoli (and the garlic clove if desired) and water in a saucepan and steam, covered with a lid, on a medium heat for 5 minutes until tender, then transfer to a food processor along with 1–2 tablespoons of the remaining cooking water.
3 Add the remaining ingredients and blend until smooth. Taste and adjust the seasoning if needed. Drizzle with EVOO and serve warm or cold.
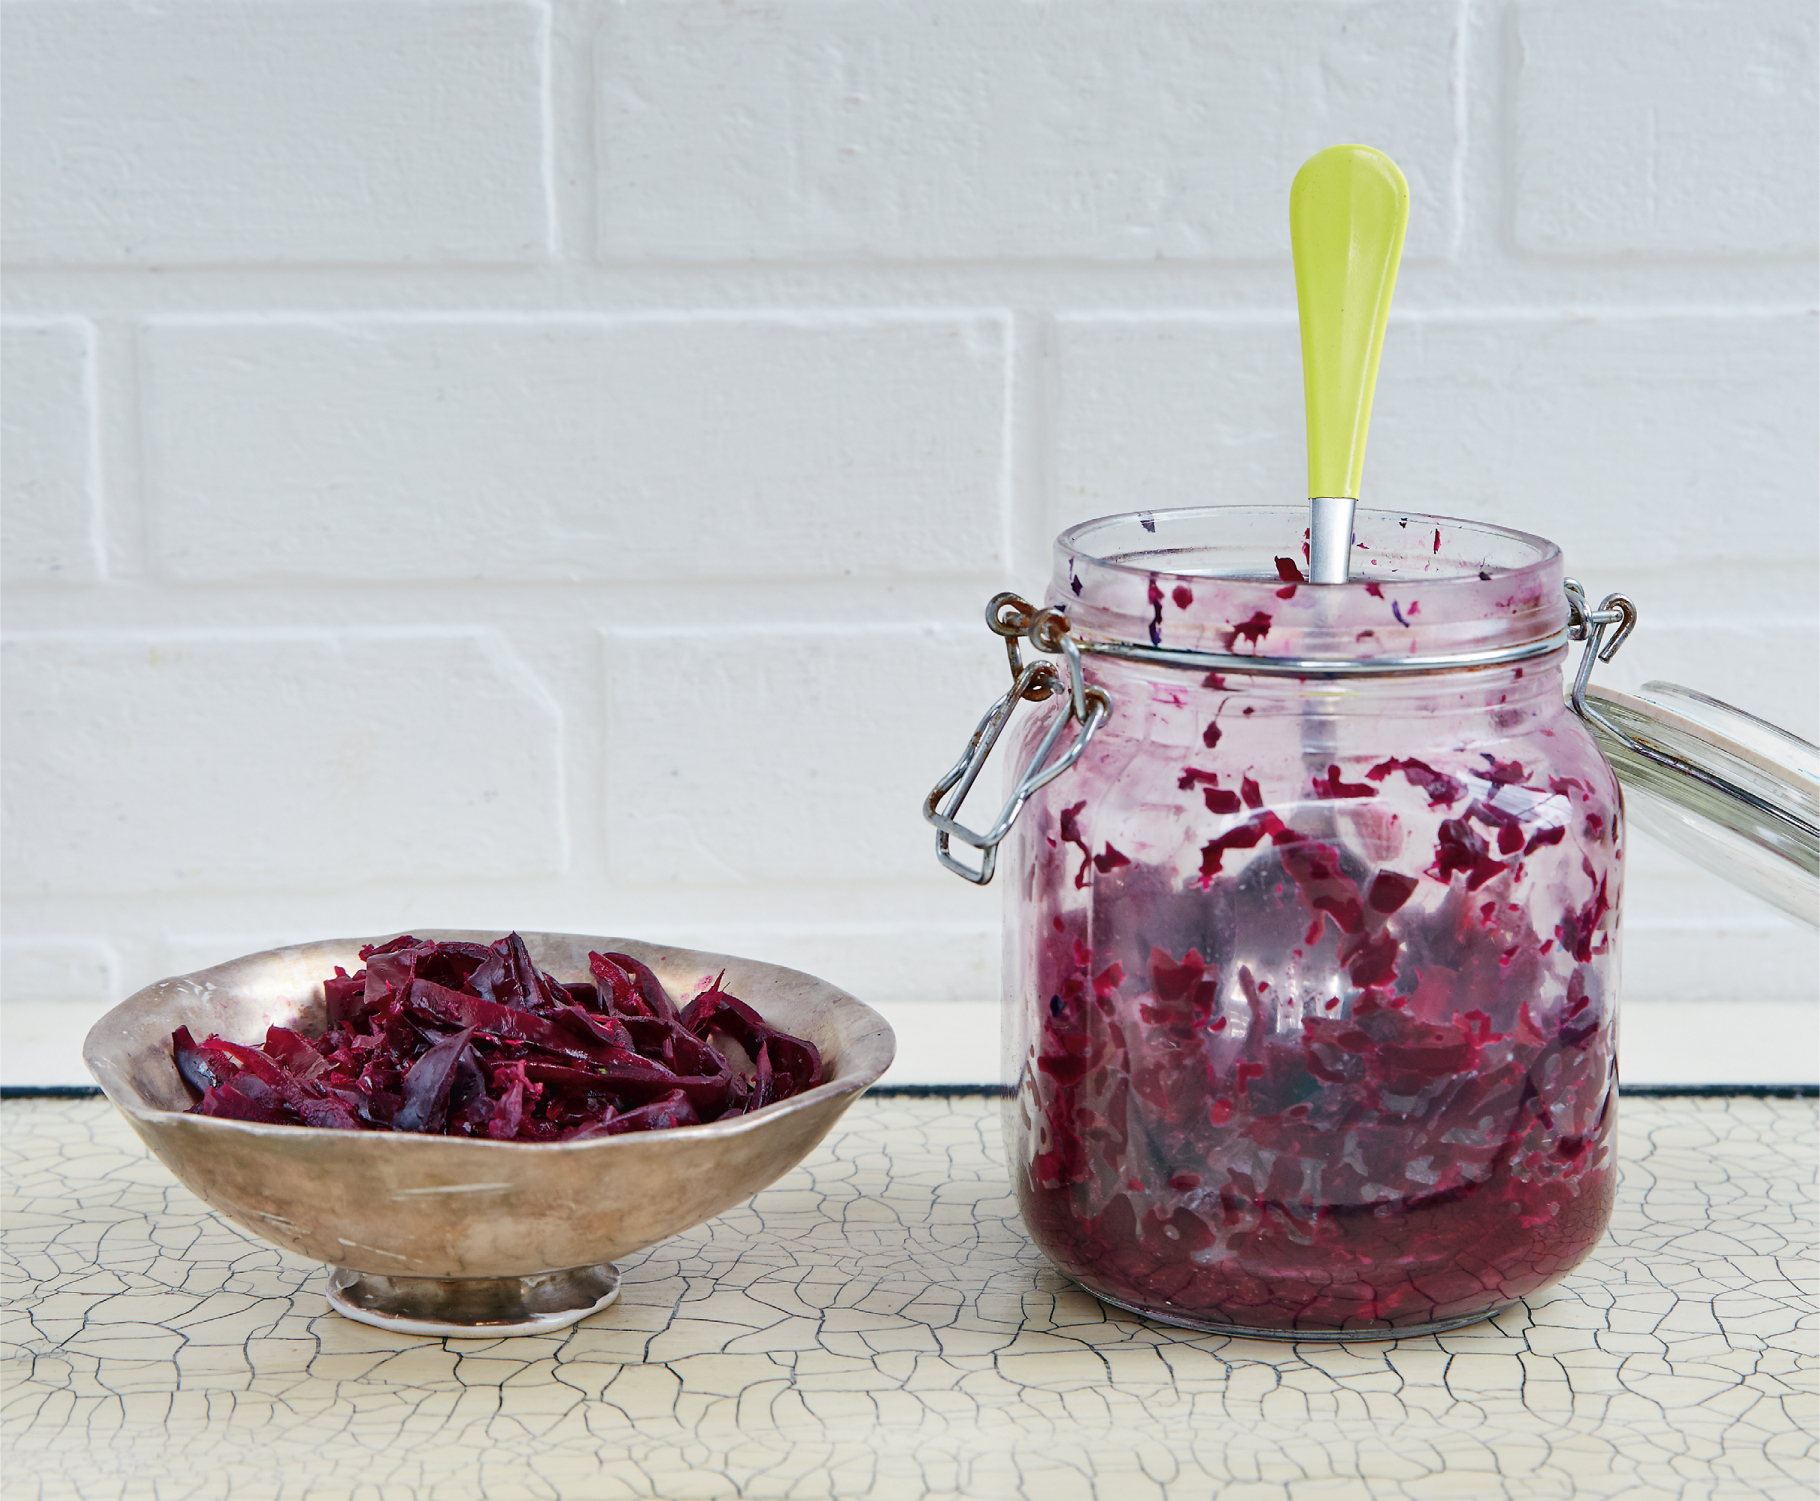
This delicious pink condiment not only adorns the plate with its rich colour and tantalises the taste buds with its garlicky, spicy-sour tang, but it’s also a tasty source of probiotics on the cheap. Cabbage leaves have their own bacterial cultures, so by creating the right conditions for them to ferment, we end up with an even more nutritious food that keeps in the fridge for months and months! We’ve gone for red cabbage for its glorious colour, ranging from a pale pink to a deep purple, and added our favourite combo of garlic, ginger and jalapeño so that it not only does us good, but tastes good too. Great served with sausages and cauli mash (see here) and other hearty flavours like steak and dahl (see here and here), it’s also good added to leftovers and drizzled with olive oil for a quick meal.
MAKES A 1-LITRE JAR
1.5kg red cabbage (about 2 medium)
3 garlic cloves, diced
30g grated fresh root ginger (unpeeled if organic)
4 slices of pickled jalapeño (or to taste)
1 tablespoon sea salt
1 Remove the outer leaves of each cabbage and set aside. Quarter each cabbage, remove the core and shred the leaves by hand or in a food processor using the grater attachment.
2 Add to a large mixing bowl with the rest of the ingredients, pop on some rubber gloves and knead everything together for several minutes. Let the mixture stand for a few more minutes and knead again. By now, the cabbage juices and salt should have created a nice brine.
3 Layer the cabbage mixture in a sterilised 1-litre jar (see here), packing down regularly with your fist or the end of a rolling pin so that the mixture is submerged in the brine.
4 Roll up the reserved outer cabbage leaves and use to wedge the mixture down so that it is completely submerged in the brine by at least 2cm. If there is not enough brine, add 1–2 tablespoons of water and give a little shake to mix.
5 Seal the jar with its sterilised clip-top lid, or tightly cover with a muslin cloth fastened with an elastic band.
6 Stand the jar on a plate and leave at room temperature for a few days to ferment. (This will vary depending on the time of year – in warmer weather, it will ferment more quickly.)
7 After a few days, taste to see if it has fermented to the desired degree of sourness. Transfer the jar to the fridge, where it will keep for months. Use a clean spoon every time you dip into the jar to serve from it, then reseal it.
TIPS
+ If you can’t find red cabbage, white cabbage will do just as well. But if you just have to have pink, then throw in some grated raw beetroot too!
+ Remember when introducing probiotics to your diet to build up slowly. Start with a teaspoon as a condiment and before you know it you’ll be enjoying this dish as a side!
+ To sterilise your glass jar and lid, add boiling water and leave for 10 minutes then drain, or put through a hot dishwasher cycle.
