HAND-STITCHING ESSENTIALS
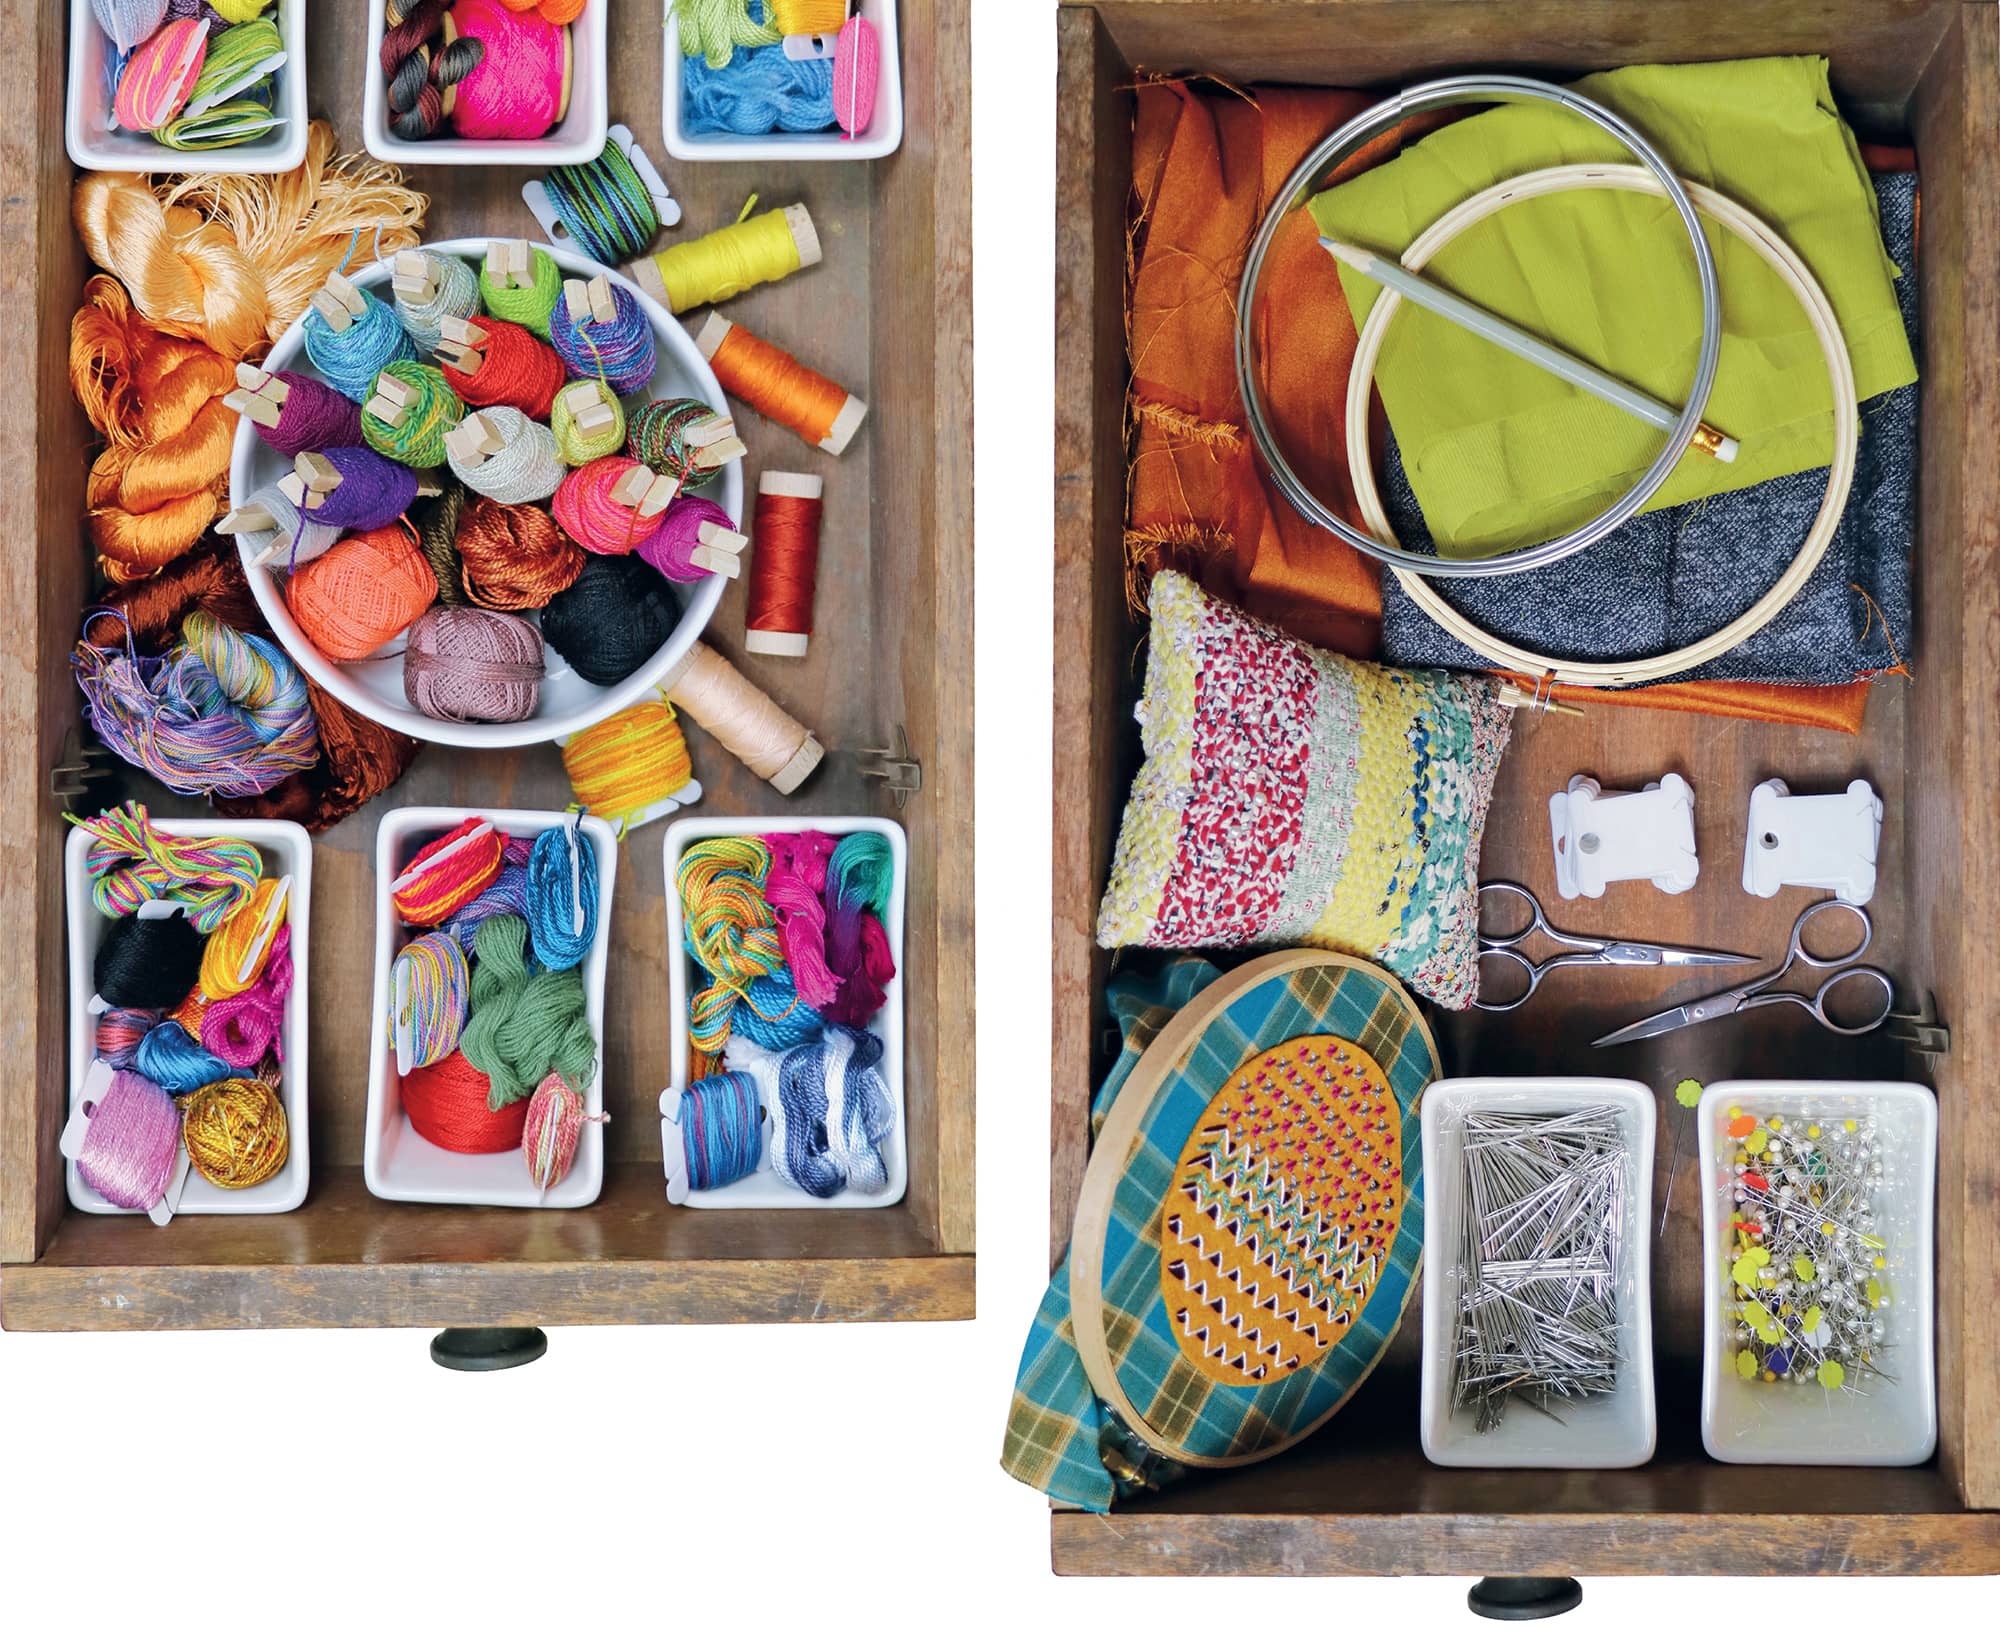
One of the nice things about hand stitching is that all of the materials and tools are portable. You can toss every single thing you need to hand stitch a project into a tote bag and you’re an instant mobile art studio. Your stitching essentials toolbox is, for the most part, fairly basic.
Basic Tool Kit
You’ll need thread, needles, and embroidery scissors for any stitching project, whether you’re working on fabric or paper. The most essential of these—thread and needles—are discussed on the following pages. The particular materials and tools you’ll need for stitching on fabric or on paper are described later in this chapter.
Your basic toolkit can include other items such as a thimble, needle threader, and sewing box. You’ll find that some hand stitchers use tools that you don’t particularly care for. (I have personally never been able to warm up to using a thimble.) So while it’s impossible to hand stitch without some items, others will depend solely on personal preference.
Thread
Thread is by far the most fun tool in your arsenal. Solid or variegated colors, cotton or silk or wool, floss or perle twist, thin or heavy—you will never be bored when choosing thread for your projects!
I have very few allegiances when it comes to thread. Basically, if I can thread it through a needle, I’ll stitch with it. The best recommendation I can give for thread is this—use the best quality you can afford and the kind you love. If you love working with it, it will show in your project.
A stitch made with cotton floss is affected by the number of strands used. From left to right: stitches made with a single strand to all six strands.
Floss
Floss consists of six individual strands of lightweight thread that can be separated. The beauty of this type of thread is that you can choose how heavy you want your stitch to appear by using more or fewer strands.
I recommend that you always separate the strands, no matter how many you’re using. Even if you plan to use all six strands at one time, pull them apart first and thread together as a group. Why bother doing this? Because separating the strands takes the twist out of them. You’ll get much fluffier stitches by doing this.
Here’s how you separate out a stand of floss.
1 Cut a length of thread no more than 18" (45.6 cm) long.
2 Loosely hold one end between your forefinger and thumb.
3 Grab the end of one strand and slowly begin pulling. The thread will begin to bunch, but keep pulling. The single strand will come free.
4 Straighten out the remaining strands and repeat for as many strands as you want to use.
Perle cotton
This is a two-ply thread that cannot be divided like cotton floss. It comes in various weights, with the smallest number equaling the heaviest thread.
Perle cotton in the most common sizes (from left to right): 5, 8, and 12.
Wool thread
This thread has a slight fuzz to it. You most often find it in thinner weights. Use more than one strand for a heavier stitch.
Sashiko thread
This is a twisted nondivisible cotton thread. It has a weight a little heavier than a perle size 5, but where it differs is that it has a matte finish, making it unique.
Linen thread
This thread is stiffer than the others we’ve discussed, and it creates a thinner line.
Silk thread
This kind of thread comes in stranded and perle forms. Its sheen is incredibly addictive, and it’s incredibly easy to stitch with.
A variety of threads (from left to right): wool, cotton sashiko, linen, and silk perle.
Needles
The needle you choose for your project is important—choose one too thin and you’ll stress the thread; choose one too large and the hole it makes will remain visible after the thread is pulled through.
Here are some of the most common ones. Note that, like thread, the lower the number designated on a needle size, the thicker it is.
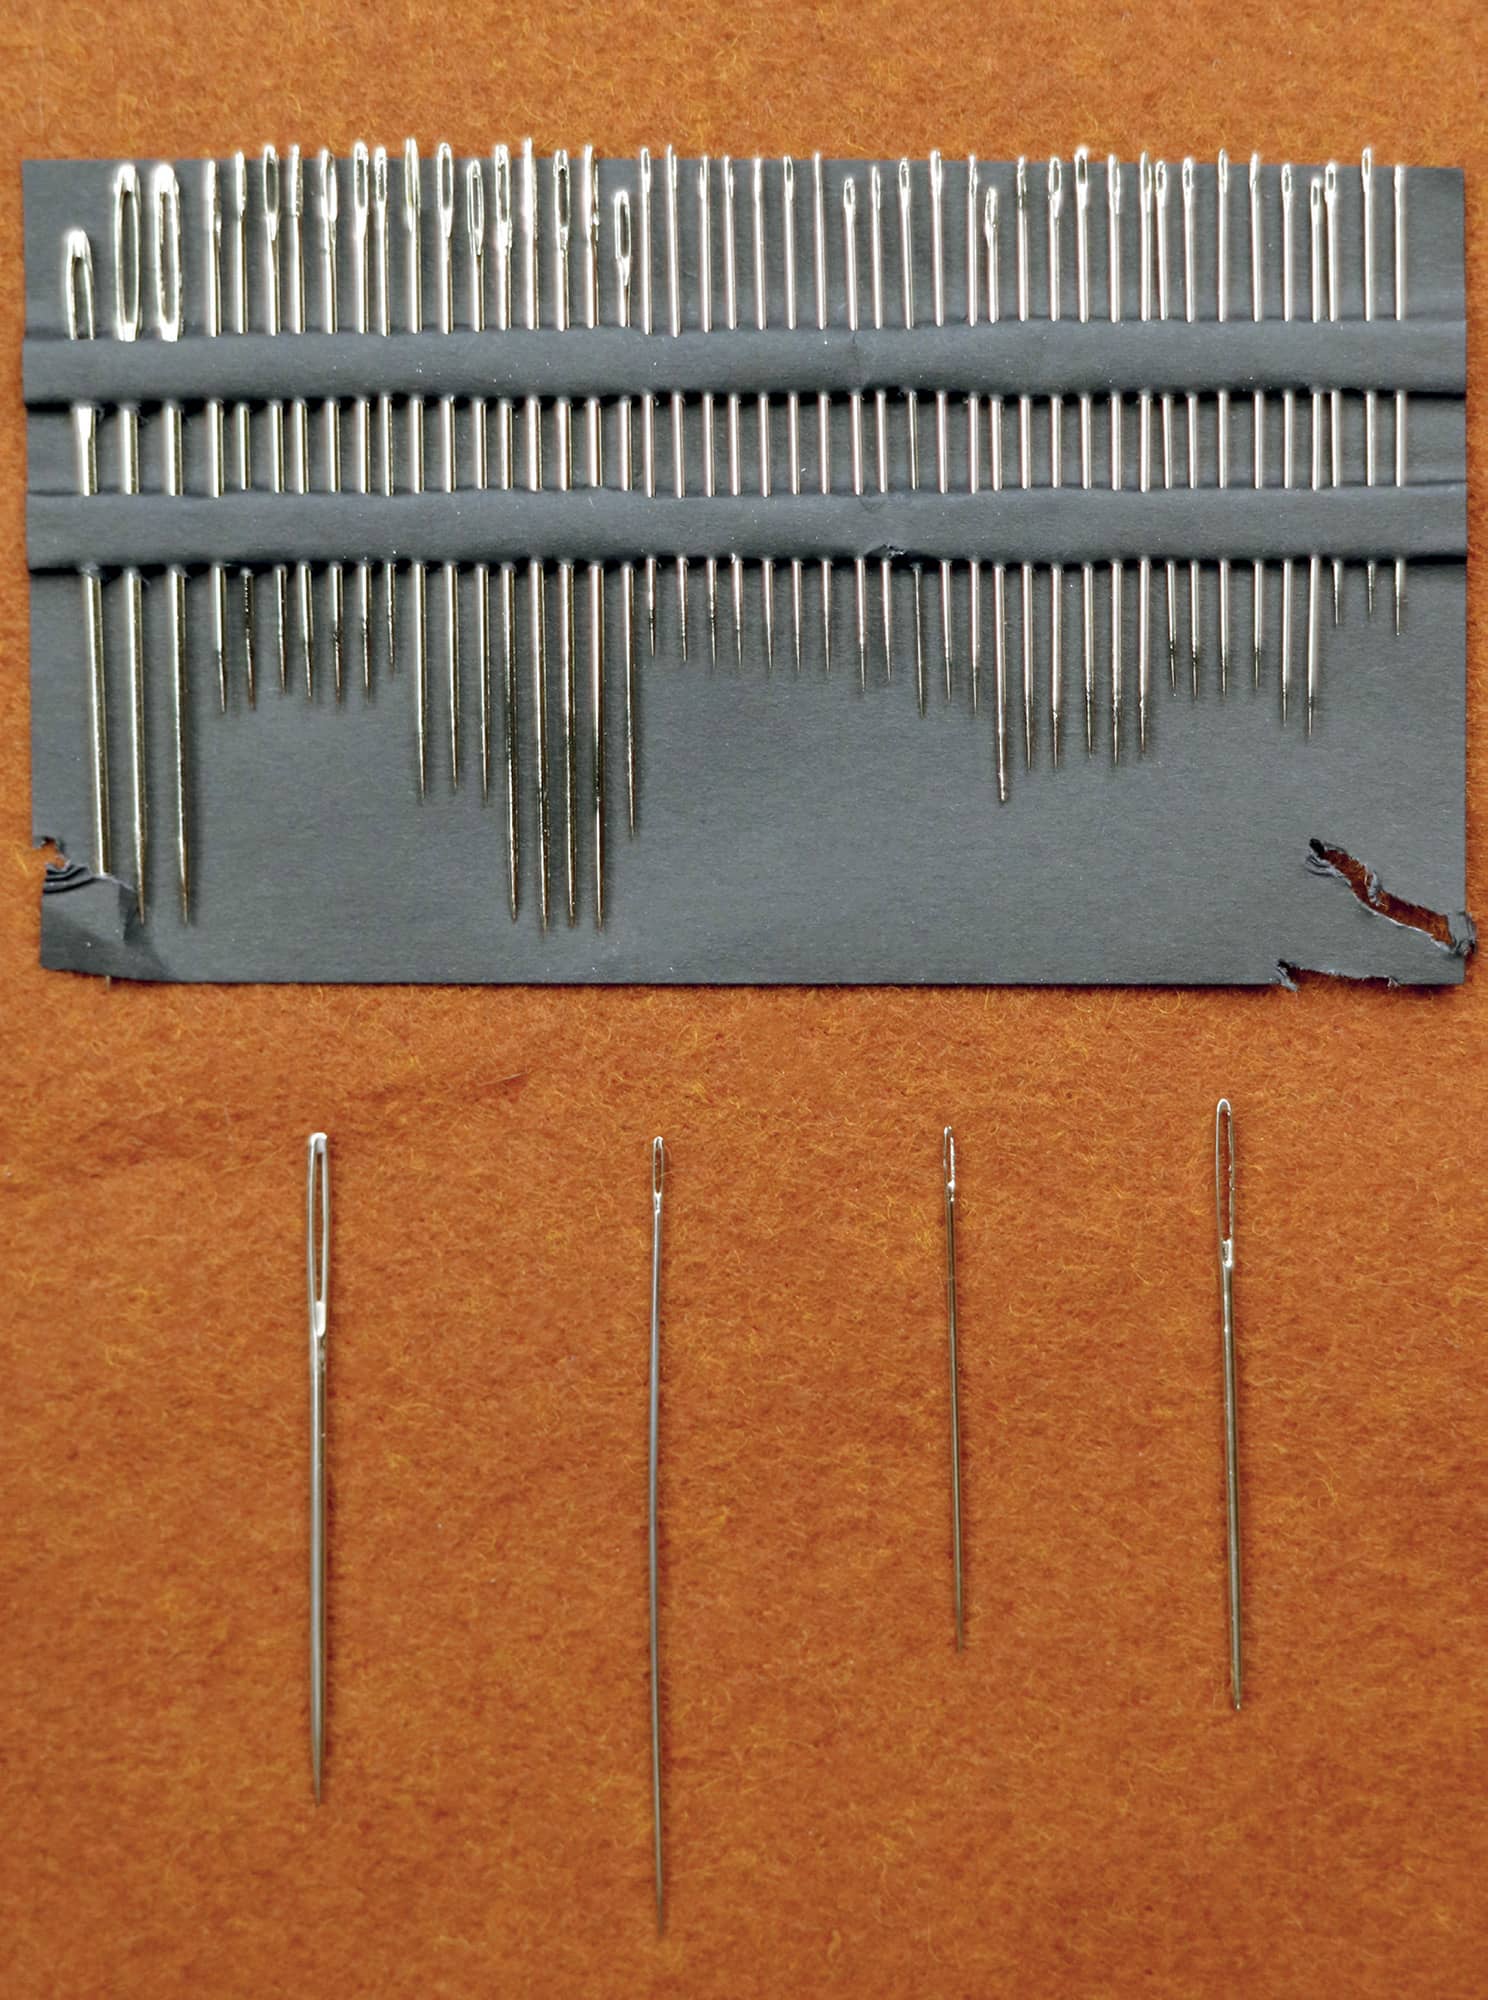
(Top) A variety pack of needles.
(Bottom, from left to right) Chenille needle, darning needle, embroidery needle, and tapestry needle.
Embroidery needles
These are just what they sound like—needles made for hand stitching. They work better for thinner weight threads. I use size 5—most often because it’s an in-between size. In a size 5, there’s very little flair between the eye of the needle and the shank, so it’s a master at not leaving evidence of a hole behind.
Chenille needles
These are for heavier threads, like perle weights. They work really well for thicker fabrics and projects with several layers.
Tapestry needles
These are similar to chenille needles except that their tip is blunt instead of sharp. These needles work well for weaving projects.
Tools and Tips for Stitching on Fabric
Here’s a rundown of what you’ll need—and need to know—when hand stitching on fabric.
Fabrics
I use many different types of fabric for the projects in this book. All have endeared themselves to me for one reason or another. Most of the time, I work with heavier to medium-weight fabric. Since I don’t like working with an embroidery hoop (see Tools, on the following spread), those weights add stability to my project.
Below is a brief description of each fabric and why I like it. This is by no means a comprehensive list of what kinds of fabric you can stitch on. If you have a fabric that you just adore that isn’t discussed here, then use it!
100 percent quilting-weight cotton
This is the most common cotton-weight fabric you’ll find in craft stores. It can range from a very dense weave to lightweight and thinner. I lean more toward solid-color fabric for my hand-stitched projects. I love that it puts the thread and stitches front and center.
Linen
This too is a versatile fabric, and it comes in many weaves and weights. The thing I love most about linen is that the weave is so obvious. Being able to see the weave adds to the beauty of the stitched fabric. Linen comes in many different blends and colors. I lean more toward natural and white colors, but it’s not impossible to find linen in vibrant colors.
Raw silk
I have a deep affection for raw silk. The texture of it makes me swoon. It’s a heavier weight than many of the silks that are used for scarves but still has a wonderful drape. I also love its natural color, a lovely cream color that has such warmth to it.
Osnaburg
This is a coarser cotton fabric that I’ve only ever encountered as a natural color. I like it because the weave has flecks in it, which lends interesting visual texture.
Felt
I love both the stability and the pliability of felt. On thicker felt, the stitches sink ever so slightly into it and feel more integrated. I love that! I use both acrylic felt and a wool felt blend. I find the wool felt blend easier to work with than 100 percent wool felt, which can be quite dense depending on how it’s made. Felt comes in a huge array of colors and is easy to find in both small sheets and yardage. Heathered felt has specks of gray or beige in it to create a more complex color. This can add some beautiful depth to a project. I also use felt to add more stability to a project. A layer of felt adds enough thickness so that the project has some structure and it’s easier to control the tension.
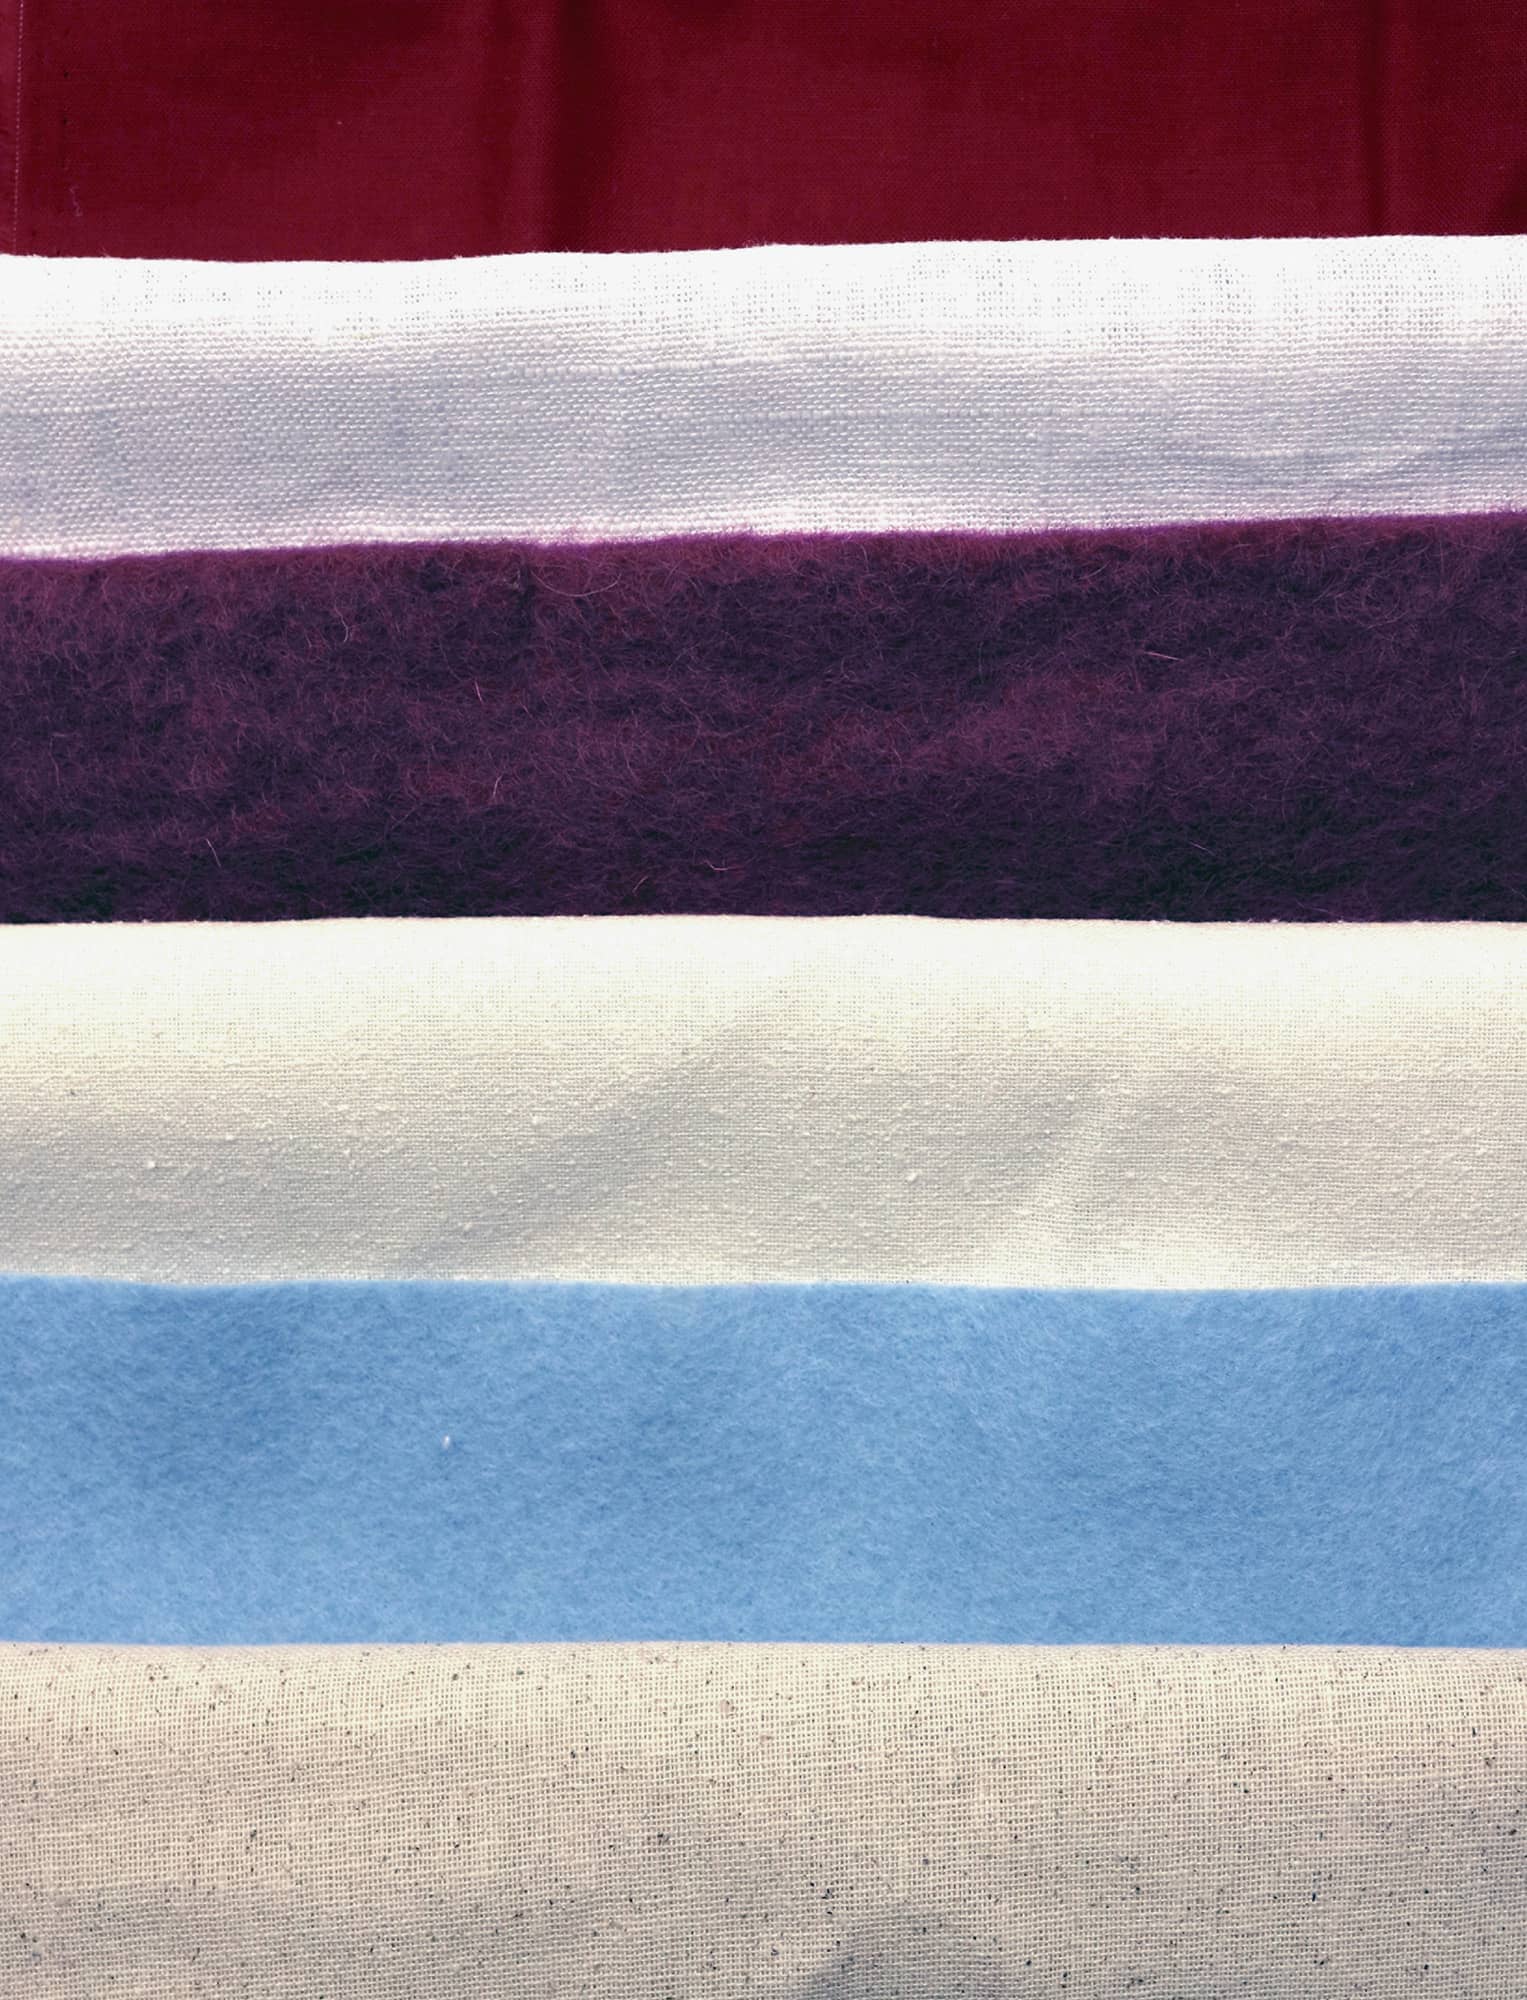
Some stitching fabric (from top to bottom): quilting cotton, linen, 100 percent wool felt, raw silk, felt wool/rayon blend, and osnaburg.
Tools
Supplement your basic tool kit with these essential fabric, stitching supplies.
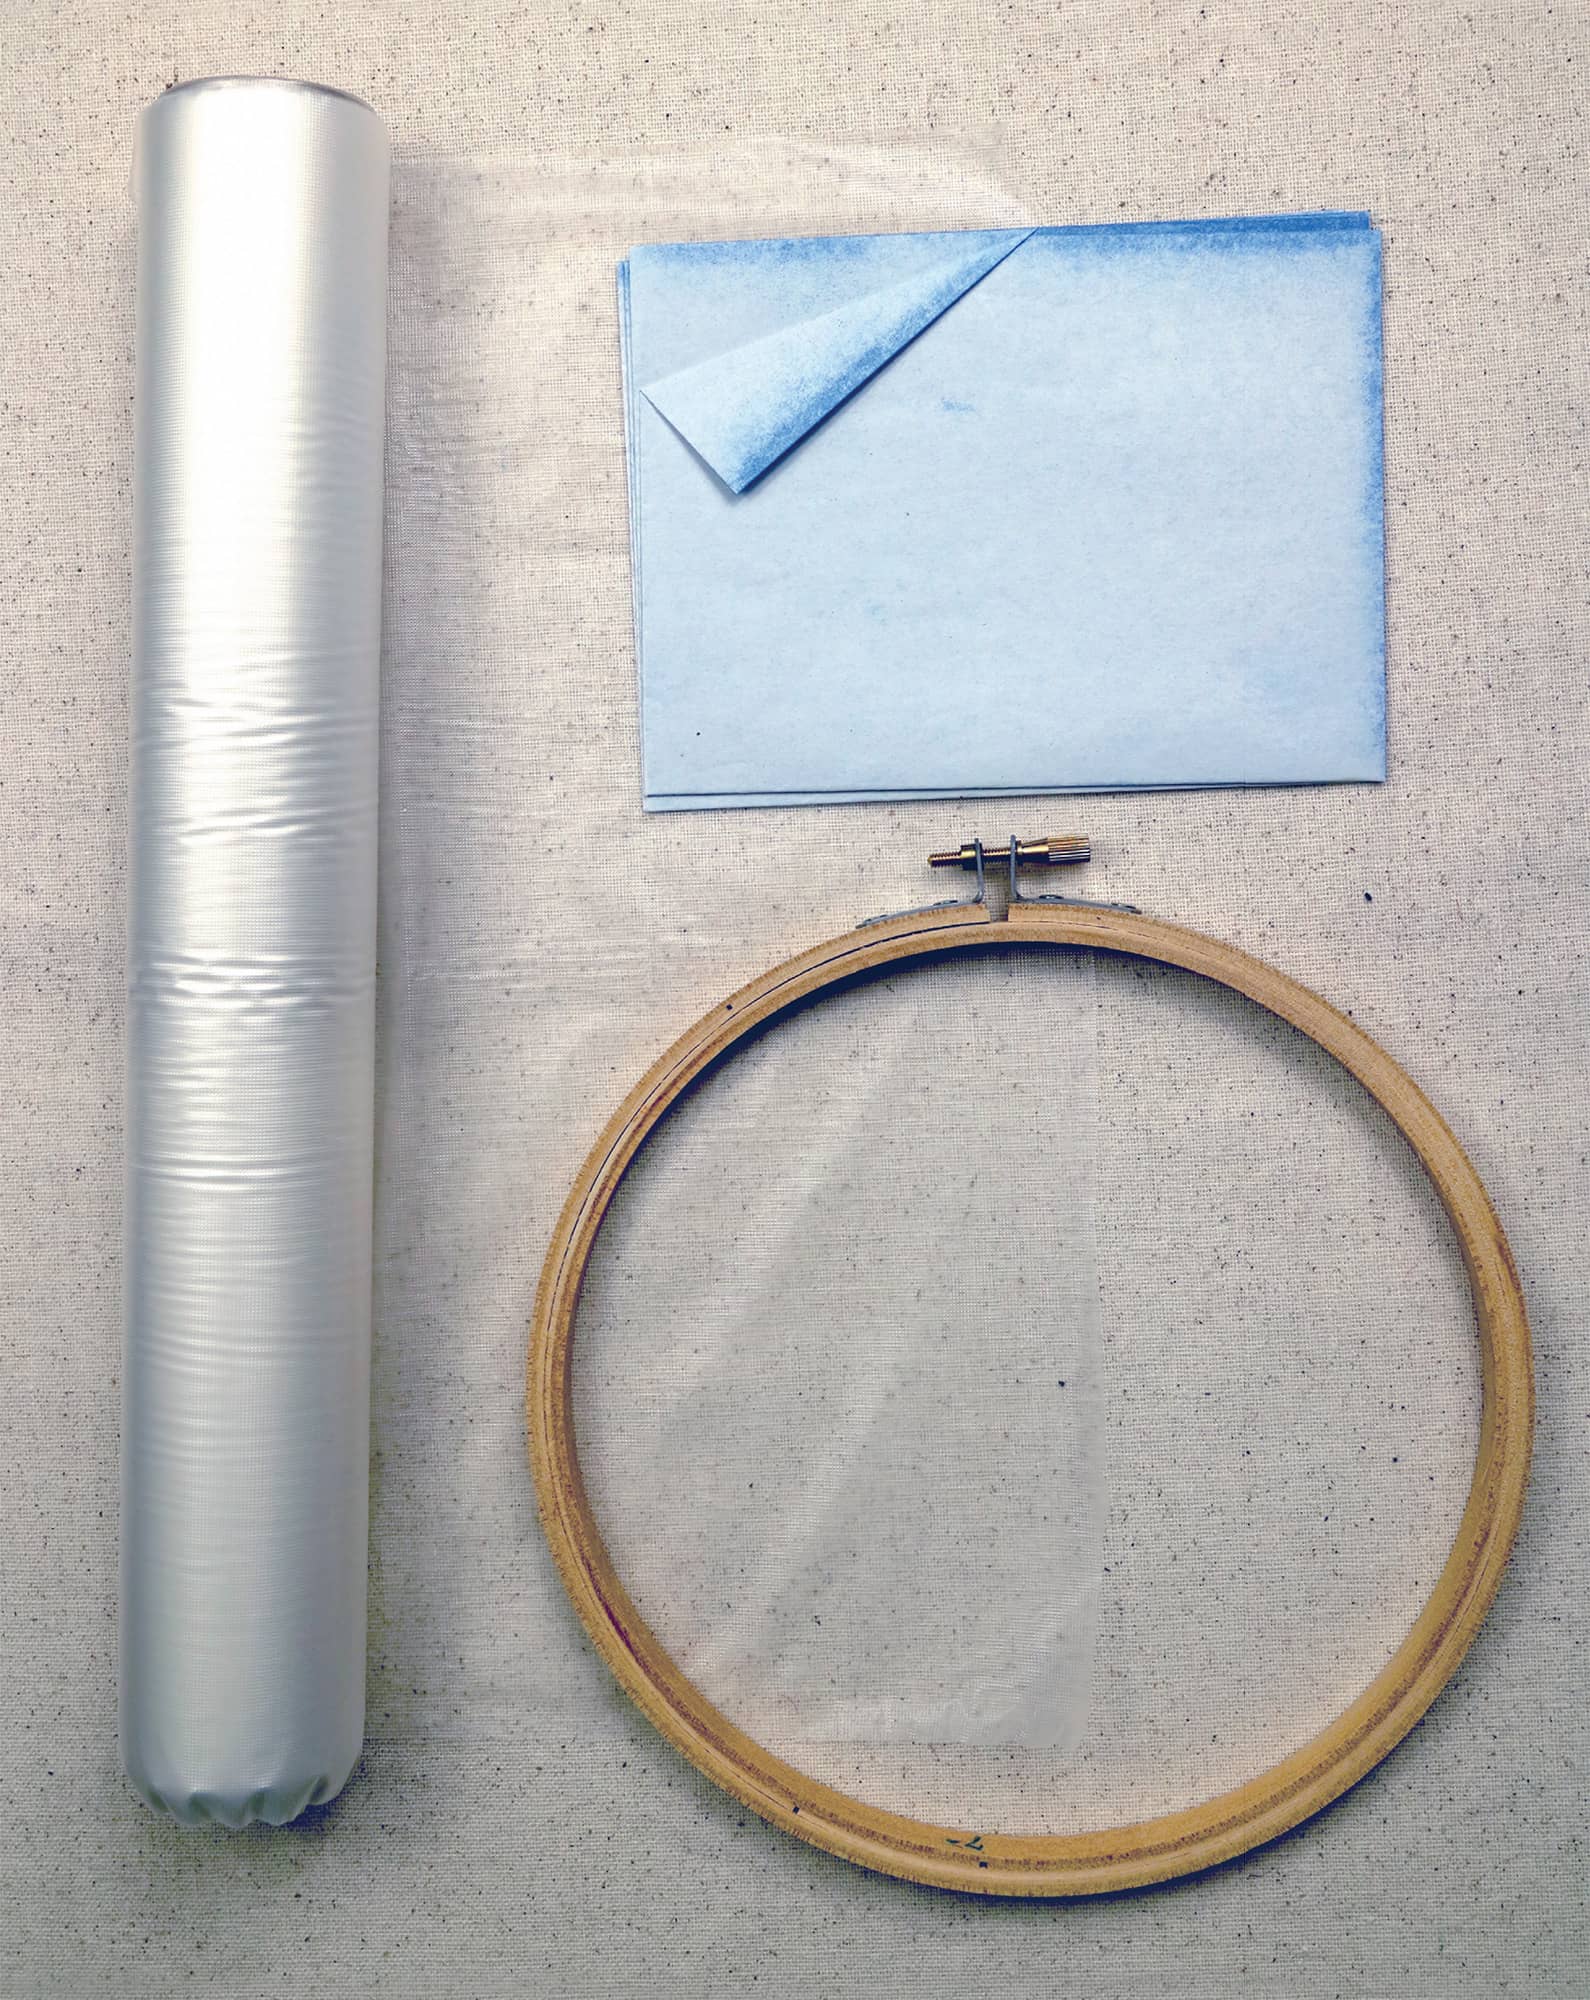
(Clockwise from left): A roll of water-soluble stabilizer, transfer paper, and an embroidery hoop.
Embroidery scissors
These are a must. These are small scissors that help you get into small places and snip specific threads. Standard-size scissors can be clunky and you run the risk of accidentally cutting a hole in the project (ask me how I know).
Embroidery hoops
Embroidery hoops are a wonderful support aid for hand stitching. They consist of two hoops. You place your project over the top of the inner hoop, place the outer hoop over that, and tighten the screw to create tension on the fabric. It’s important not to stretch the fabric too much or you can cause distortions or permanent stretching that can’t be removed. (Cotton, especially, is susceptible to this.) It’s also a good idea to remove your project from the hoop whenever you’re done with a work session. This will prevent the hoop from making permanent marks on the fabric. You can add a layer of defense against hoop marks by wrapping the inner hoop with a strip of fabric. This acts as a buffer between the hoop and your fabric.
I’ll be totally honest with you—I’m not a fan of embroidery hoops, and I rarely use them. Part of me believes that I learned good control over my tension by ignoring them. I practiced on single layers of fabric until I was able to do a running stitch without creating any puckers in the textile. This is not to say you shouldn’t use a hoop if you like it; rather, if you find them uncomfortable to work with, you can skip them and still achieve wonderful results.
Pins
The best advice I can give about pins is this—use ones that are appropriate to the weight of the fabric you’re working on and use ones with flat heads. Pins have different-size diameters, so if your fabric is delicate, you can leave holes in it if you use a pin that is too large. Quilting pins have flat heads, which keep them from distorting the fabric while they’re holding your project together.
Pincushion
Pincushions serve a very utilitarian purpose—they’re a place to park your needles and your pins so you don’t end up stepping on them. That doesn’t mean they can’t be fun! Whether you choose a quirky vintage cushion that’s seen the work of several stitchers or a brand-new one from the craft store, this item will see a lot of action during your work time.
Marking pens
Marking pens let you draw a pattern onto fabric for stitching. They come in two varieties—chalk and water-soluble marker. The chalk often gets rubbed off during stitching, or it can be removed using a damp cloth. Chalk works really well on darker fabric. Water-soluble markers produce a much more pronounced outline and won’t rub off from handling.
It can only be removed through washing or blotting with a wet towel. However, it’s extremely important to test both the fabric and the thread when using a water-soluble marker. Although dyers make every effort to ensure their colors won’t bleed, better safe than sorry. This applies to both chalk and marker marking.
Transfer paper
This paper accomplishes the same thing as using a chalk marker. The advantage is that you can trace over a design you’ve already created rather than drawing freehand onto the fabric. My preferred brand is Transdoodle from Mistyfuse, but there are other brands on the market that also work well.
Water-soluble stabilizer
This stuff is like magic. It’s a type of plastic that is extremely easy to stitch through. Simply draw the design you want to stitch onto the stabilizer, place over the fabric, and stitch away. A soak in warm water makes it disappear, and you’re left with just fabric and thread.
Fabric-Stitching Tips
I’d like to share this round-up of advice and guidance that’s based on the wisdom of my personal experience (both good and bad).
—
Test thread for colorfastness before you start stitching. Although thread companies make every effort to ensure their colors won’t bleed, it does happen. I lay a few short strands of thread across a white piece of fabric, wet it, then fold it over on itself and rub it together to see if any dye transfers. You’ll see fairly quickly whether the thread could cause any unwanted blotches on your project.
—
Work with strands of thread that are no longer than 18" (45.6 cm). I strongly, strongly, strongly (did I say strongly?) recommend this. Anything beyond this length is sure to lead to knots and frustration. Plus, using this length reduces the number of times the thread gets pulled through the project, so it won’t show any signs of stress or fraying.
—
When creating large stitches, you run the risk of them snagging because they’re looser. Add a small tack stitch somewhere in the stitch that can be hidden to give it the stability it needs.
—
When straight stitching around a curve, take smaller stitches. This helps maintain the curved appearance of the stitching patterns.
—
Add stitches with thinner thread in a contrasting color along finished stitch patterns to create a sense of depth and visual interest.
—
When you travel long distances between stitches, sometimes you end up with a longer thread on the back that could get snagged and wreck the stitches on the front by pulling them too tight. There are two ways you can secure long thread travelers:
1 If you’re stitching on a single layer of fabric or on paper, weave the thread under other stitches to keep it secure.
2 If you’re working on more than one layer of fabric, you can take a stitch or two through the back fabric to get to the new location where you will continue stitching.
—
I have two ways that I like to secure threads when I come to the end of stitching with them:
1 If you’re working on multiple layers of fabric, take a couple of small stitches through the back fabric and snip the thread.
2 If you’re working on a single layer of fabric, pass the thread underneath the previous stitch, pull the thread until it becomes a loop, and pass the needle through that. Repeat one more time to create a knot.
Creating a Mobile Stitch Studio

The beauty of hand stitching is that you can do it anywhere. This means that creating a mobile stitch studio is essential. You can easily carry it with you day to day without feeling like you’re dragging your entire studio around. Here are my best tips for creating a mobile stitch studio:
—
Use a lightweight bag. You don’t want to add extra weight to your daily purse or backpack—this is meant to help you through your day, not hinder it by making you feel like you’re lugging around a boulder.
—
Use a lightweight pincushion substitute, such as a scrap piece of felt.
—
Take along a plastic sandwich bag for trash bits. Remember—snips of random thread are not a fashion statement.
—
Keep your thread, fabric, and main project in separate plastic bags. It’s impressive how quickly everything can turn into a tangled mess when the elements of a project are allowed to mingle in one space, so it’s best to keep them seperated.
—
Take only what you need for the project you’re working on. I know this sounds obvious, but it’s so easy to just keep adding items you might think you need. You’ll overwhelm your project bag very quickly this way.
Tools and Tips for Stitching on Paper
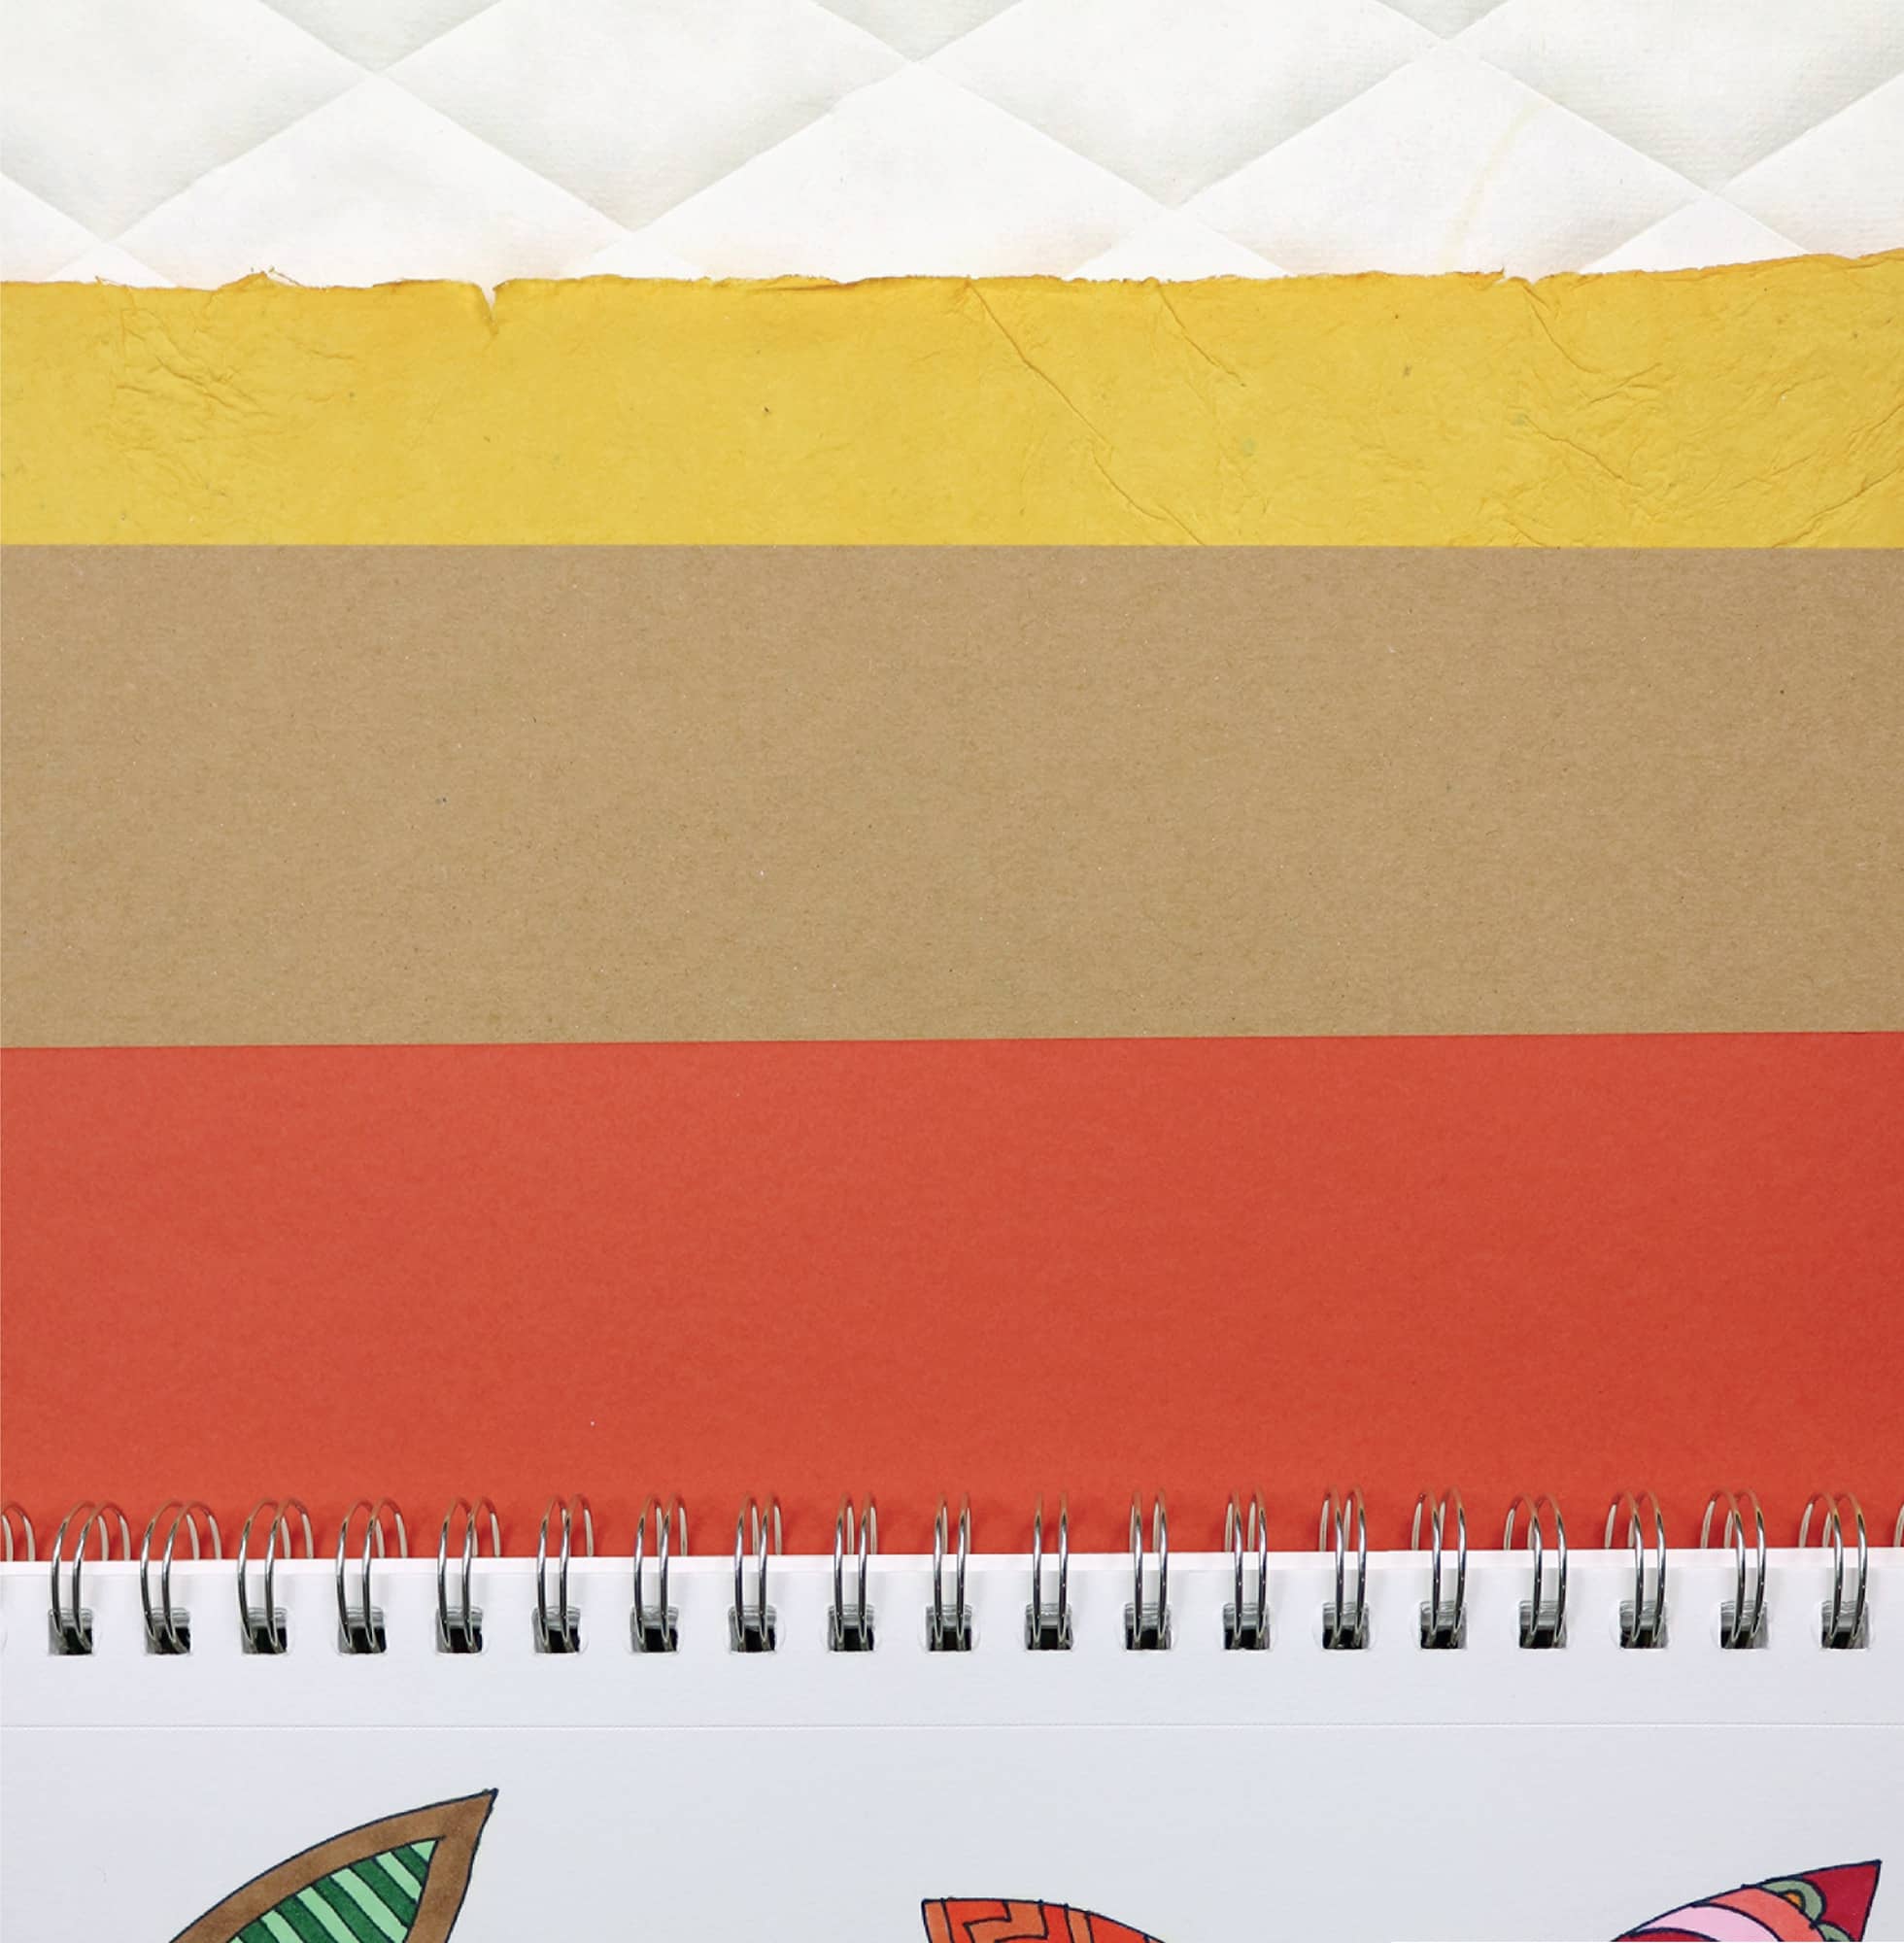
A variety of papers (from top to bottom): specialty paper that has been molded to have a diamond pattern, colored rag paper, chipboard, medium-weight card stock, and a pad of mixed-media paper.
Paper
Card stock
This is a medium- to heavy-weight paper that can be easily found in any craft store. Think scrapbooking paper—it has enough thickness to be stiff but not so much that you can’t get a needle through it. It comes in pretty much every color and can be smooth or have texture.
Specialty paper
If you’re fortunate enough to have a specialty paper store in your area, hide your credit card. It’s impossible not to take several sheets home. These papers are made from the unusual, like cork, bark, or leaves. They can also have patterns formed directly into them or include materials trapped between layers. They are wonderful additions to any project featuring paper.
Mixed-media paper
This refers to paper that can handle a wide range of media, such as markers, watercolors, and paints (and, of course, hand stitching!). I usually buy pads of this paper in the craft store. Hot press paper has a smooth surface and cold press paper has a surface with texture.
Chipboard
This is a thick paper often made from recycled paper. It’s most often used as the backing for items such as notepads. I love it for its plain appearance and strength.
Tools
Screw punch
This tool is commonly used by book makers. It punches uniform holes into paper and, unlike a traditional hole punch, its reach is not limited. You can punch holes from 1/25" to 1/6" (1 to 4 mm). You need to use a cutting mat beneath, as it’s a sharp tool and can damage surfaces.
Awl
An awl is like a giant needle attached to a handle. It’s used for punching holes and comes in a variety of sizes.
Hole punch
This tool is used to punch circles in paper. It comes in different diameters and typically can only punch one size per tool. It has a handle similar to a pair of scissors, which makes its reach limited.
Cutting mat
This is a hard-surfaced mat, often with a grid showing measurement marks, that protects work surfaces from sharp tools, such as craft knives and rotary cutters.
Double-sided tape
This clear tape is sticky on both sides.
Masking tape
This paper-type tape is easy to tear and has a low-tack adhesive, making it easy to reposition if needed.
Craft knife
A craft knife, such as X-Acto, lets you get into small spaces and curves easily and precisely.
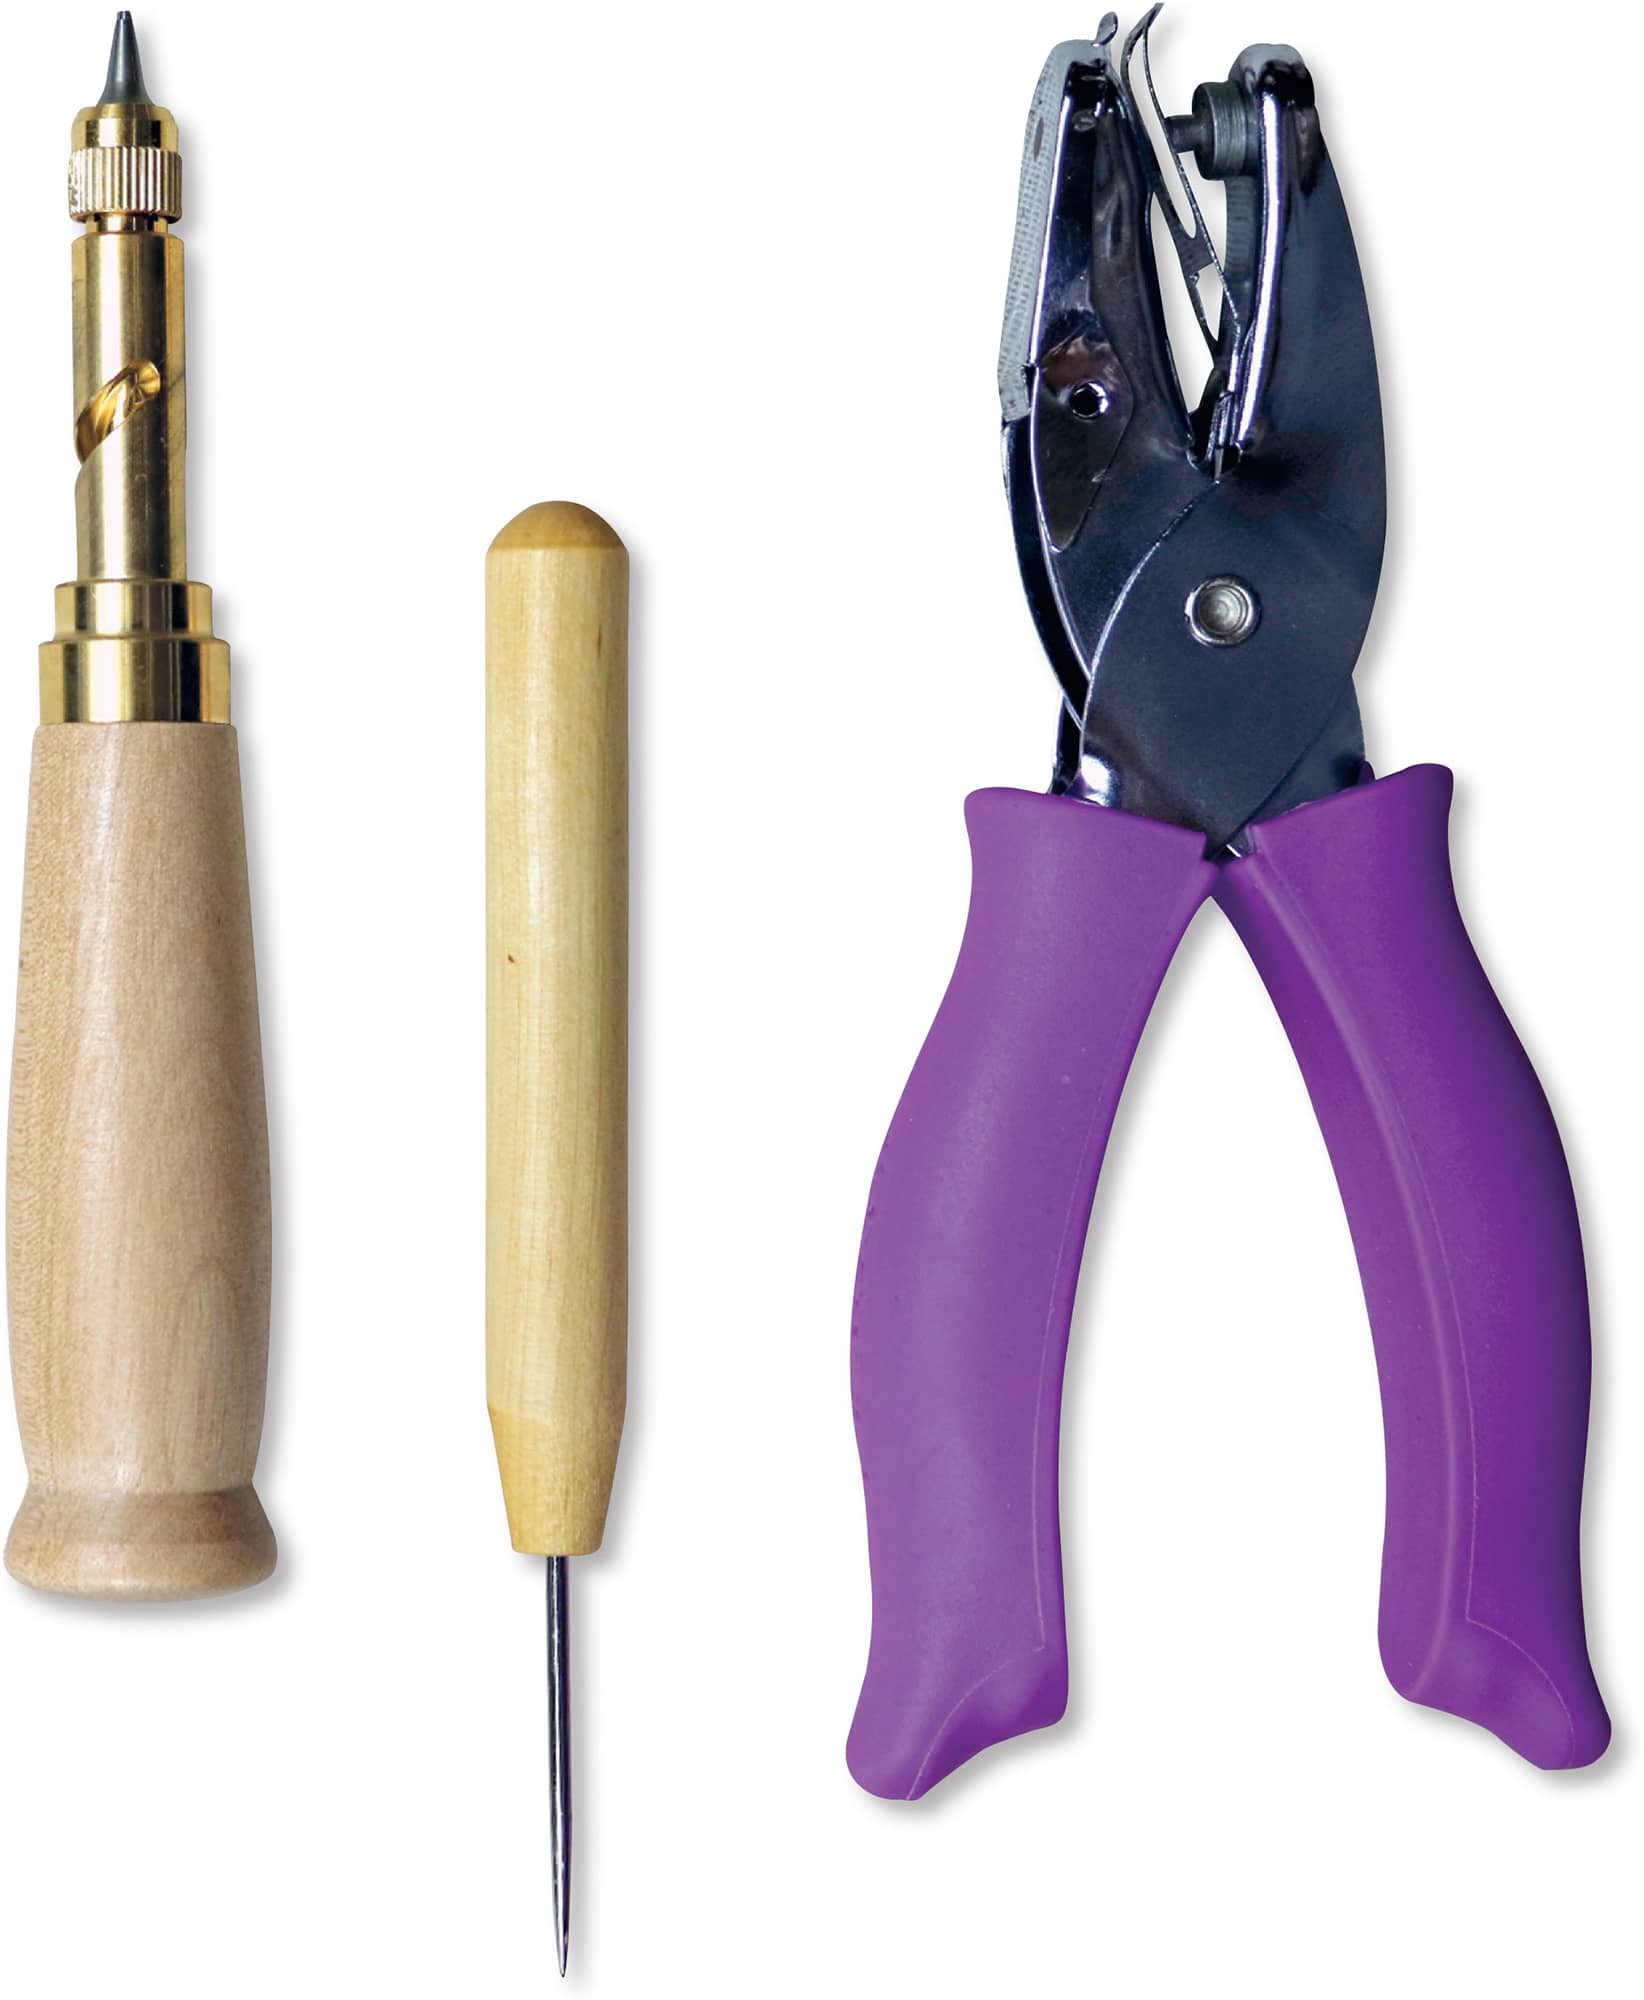
Selected tools for stitching on paper (from left to right): a screw punch, an awl, and a paper punch.
Paper Stitching Tips
—
Making a hole in paper is completely unforgiving. Once it’s there, there’s no going back. You can make holes with a screw punch, a hole punch, an awl, or an embroidery needle. If you’re using an awl or an embroidery needle, punch the holes from the front of the project to the back because this does not remove material like a hole punch; it displaces it.
—
Avoid punching holes too closely together. The stability of paper greatly decreases when the holes are too close to each other, and you run the risk of tearing a hole in your project.
—
When starting or ending thread, it’s easiest to secure these to the paper project using a piece of masking tape. This eliminates the bulk of knots and helps keep the project flat.
—
If you want to use layers of paper in a project, consider one of these two options to avoid making it too hard to stitch through:
1 Use thick paper on only one layer and very thin papers on the others.
2 If you want to use multiple layers of thicker paper, punch holes in each layer individually before combining for the project.