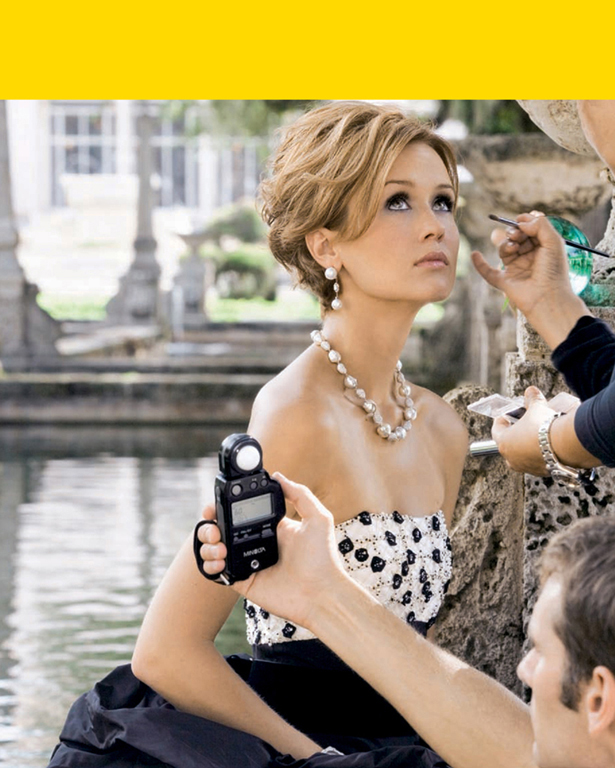
PHOTO: DAVID VANCE
WORST-CASE SCENARIO: YOU GET THE JOB BUT HAVE NO IDEA WHERE TO START. YOU ASK YOUR MOM TO CALL THE ART BUYER AND TELL HER YOU ARE SICK.
WORST-CASE SCENARIO: THE CLIENT WANTS RECEIPTS AND YOU DIDN’T SAVE ALL OF THEM.
WORST-CASE SCENARIO: THE CLIENT IS UNHAPPY WITH THE IMAGES YOU PRODUCED AND DOESN’T WANT TO PAY.
The answer to all of these: Be prepared for every situation. Photographers often do things at the last minute. You need to work against that tendency. The advice in this chapter—on how to handle business issues before the shoot, on the set, and after the shoot—will help you conduct a smooth, efficient shoot.
Ask the client at the start of the project what they need in order to reimburse you for expenses.
It is the client’s responsibility to have a representative (say, the art director or account executive) on the set. Make a Polaroid-like version of each shot (a quick digital print or an image posted in an online gallery for clients to view) and get that person to sign off on it. If the client doesn’t like the work but has not sent a representative, you are not obliged to fund a re-shoot. You can agree to re-shoot for no or half the fee, but all expenses must be covered.
What if you need only half of everything we suggest in this chapter? That is the best worst-case scenario of all.
In the days and weeks before the shoot, you will be getting people lined up, assembling the equipment you will need, and generally preparing for the shoot. During this time, foremost in your mind should be the production value you and the crew will strive to deliver—the unique feel or style that the client has hired you to create.
This book includes downloadable versions of a number of documents that will help you to organize and keep track of the many details that come with producing and successfully completing a shoot. See Appendix B for an image of each form and more about its importance and usefulness:
» Location File. Organizes your notes about the shooting location.
» Talent Casting Form. Records details about the individual models you have cast.
» Talent Booking Worksheet. Helps you keep track of the bookings you have made.
» Wardrobe Check-In Sheet. Helps you keep track of wardrobe items you’ve purchased.
» Wardrobe Disposal Sheet. A record of wardrobe items you’ve returned and kept.
» Prop Check-In Sheet. Helps you keep track of the props you’ve purchased.
» Prop Disposal Sheet. A record of the props you’ve returned and kept.

PHOTO: CHRISTOPHER ROBBINS/DIGITAL VISION/GETTY IMAGES
Strong set design, wardrobe, and prop styling support the overall production value of the shot and Christopher Robbins’s ability to tell a story.
It is very important to ask the buyer about the schedule for the shoot. The schedule should be based on the final deadline: the date for the completed images to be delivered to the client, whether a magazine, an ad agency, or a corporate client. If you shoot an image and have to deliver a retouched version, be sure you include that in your schedule.
Once the schedule is set, everyone involved in the shoot should have a copy. It puts everyone “on the same page” as they pace themselves and work toward a common goal.
If the client needs to approve locations, talent, and props, make sure you ask about and settle these issues up front and factor any complications into the schedule. To speed up the approval process, create a Web gallery, an online counterpart to a series of Polaroids that can be accessed online by the client; posting images to the Web gallery allows the clients to review an item and quickly approve it. The Web gallery can also contain and show copies of location files and casting sheets.
When producing a project, large or small, it is important to make sure all team members—from assistants and caterer to talent and stylists—have the contact information for everyone else. Even include the FedEx number to cover shipping costs. Click here for a PDF version of the Call Sheet.
No matter how small or large the project, it is important to make sure everyone has all contact information, including numbers for the client and the entire crew. If you are traveling to a location, include information on flights, hotels, rental cars, caterers, and RV drivers as well. We also highly recommend noting additional information like FedEx numbers, cab service companies, and anything and everything that might benefit you, your crew, and/or the client on the job.
Have releases signed before the shoot. You need this protection if things don’t go as planned. Without signed talent and property releases, if something goes wrong you cannot use the images. Some agencies have release forms they like to use. Be sure to ask.

Make sure you have a release signed before the shoot in case something goes wrong and the talent becomes uneasy or upset. Click here for PDF version of Talent Release.
A signed property release guarantees your right to use the location, even in the face of unexpected difficulties. Without the release, those difficulties could leave you without a location or without the right to use the image already captured. Click here for PDF version of Property Release.
When you receive the purchase order (PO) and read through the client’s terms and conditions, sign it immediately. Many companies will not use you if you do not agree to their terms and conditions, so you must understand what they are asking for up front.
Many agencies slip an exclusivity clause into their terms and conditions without paying for it up front. This means they own the rights to the image forever and you are unable to sell that image to others once the usage terms have expired.
If you do not want to sign certain clauses on a purchase order, cross them out, but ask the buyer to approve the changes you have made with a signature; otherwise they are not legally valid.
This is a tough part of the business, but you usually have to finance a large portion of any project. Then, once you’ve completed the project, you need to have all receipts ready to submit with your invoice, which will need to be approved by the client and then finally processed.
If you’re going to finance the project yourself, you should have a line of credit with your bank. If you have bad credit, you should not take on large projects that you cannot finance. Instead you should work to get your credit in line first.
If you’re unable to finance the project, ask the client for a cash advance. Some agencies will advance up to 100 percent of expenses and even part of your creative fee. You can ask for 50 percent, 75 percent, or even 100 percent of your total estimated expenses. When planning to ask for an advance, consider your best approach. Will you be able to get more by asking for 50 percent of the total job (creative fee and expenses) or, instead, 100 percent of the total estimated expenses?
Ask the agency about their policy on advances and try to negotiate if you need to, but make sure you are fair. You typically will need to send the agency a cash advance invoice in order to get a check. Also ask whether the agency needs to first get the money from the client before issuing you a check, as this may slow things down. You may want the agency or client to wire the money into your bank account.
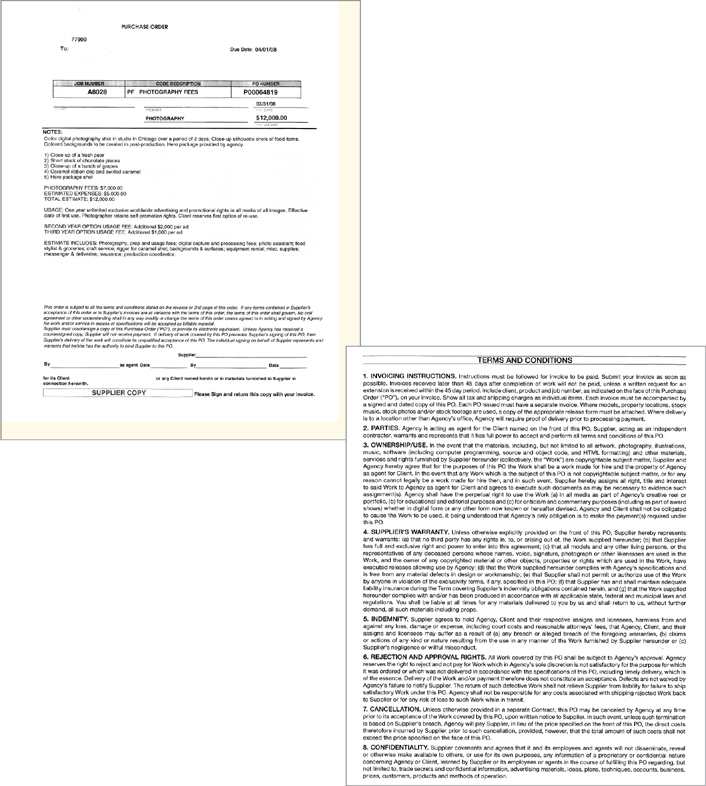
This is a typical client purchase order (PO) and statement of terms and conditions (T&C). Always ask for a PO before moving forward on a project. Read all agency POs very carefully. Some agencies use POs just for their photography assignments, while others use them for everything from copier paper to computers to your services. Click here for PDF version of Terms and Conditions.
Ask nicely for the advance. If you don’t get it, be very clear that you will need to be paid immediately following the shoot. Whatever you do, don’t threaten not to shoot because you have not received an advance—if you do, you will never work for that agency again and your reputation will be out the door. People do talk and word gets around.
If you are awarded 100 percent of the estimated expenses, remember that on your final invoice you must deduct that amount from the total amount due. If you asked for $50,000 up front but your expenses totaled $45,000 and your fees are $10,000, your final bill will be for $5,000—the remaining amount due.
Make sure you have proper insurance before stepping onto the set. While many agencies will provide insurance, this is still not the norm. We recommend having $1 million in coverage. You can research your best insurance options through an organization like Advertising Photographers of America (APA) or American Society of Media Photographers (ASMP).
Working on the set is your time to shine as an artist. How you handle yourself, speak to your crew, communicate to your client, capture the image—all will contribute to defining your moment of truth. Always strive to create and run a set that clients want to return to.
First, stay calm, and then contact the person who hired you—usually the person who issued the purchase order. Make them aware of what has happened, and don’t make it their fault or problem. Give them the scenario and how you think it should be resolved. Let them know of any additional cost. Have a change order or budget overage form with you on the set and have whoever is responsible for the cost change sign it. (See Appendix B for downloadable versions of these forms.)
It’s important to make all this happen without making too much of an issue in front of either the agency or the client. Doing all of this is usually the role of a producer. If there is no producer, it’s the role of the photographer.

This form must be on the set of every shoot you do. It is the only way to cover yourself if someone who has hired you asks about something that was billed but not estimated. There should be someone on the set who is sent as a representative of the client and is responsible for approving this additional cost. Click here for PDF version of Budget Overages.
Be prepared to have two hard drives on the set and to back up the entire day’s shoot on multiple hard drives. There is nothing worse than spending $20,000 to $100,000 of your client’s money and then losing the work. Do not let this happen to you.
You have completed the shoot, and now you have more work to do: gathering receipts from everyone involved on the job, post-production processing, delivering the final artwork, doing your final invoicing, and sending a thank-you note to the art director and/or art buyer on the job.
You want completing the final product and delivering it to be quick and smooth. Giving the client a superior final product—on time and within the budget—will “seal the deal” for you. Your client will walk away with a great overall experience and will be likely to call you again in the future.
Use an adding machine with a printable paper tape, or use the “show tape” option on your computer’s calculator and print out the calculations. Staple or tape receipts (originals or copies; be sure to ask what the agency or company requires), organized into categories, on sheets of paper.
In each category for which you have receipts (props, wardrobe, travel, etc.), add the machine tape totals for each page and put this figure in an Excel chart to add up for the total for that category.
Calculate the receipts per page with the adding machine tape or computer printout at the top, then create a cover sheet for each category that shows the dollar total of the tallied amounts from the sheets that follow.

PHOTO: COPY ART BY CHRIS CASLER
When sending in your invoice, make sure to show original receipts. Tape the receipts per category (food, props, wardrobe, etc.) and in chronological order. Show an adding machine tape of the receipts per page, and attach the tape to the top right-hand corner of each page. At the beginning of each category, provide either a cover sheet of the items that follow or an adding machine tape of just the totals for the pages.
Before the digital era, an entire project was subject to a sales tax when a tangible item passed from the photographer to the client, but in the digital world, the tax laws have changed.
If the client receives the files electronically, the project may not be taxed, but putting the images on an external drive or disk (which photographers do in order to be able to bill for “digital processing fees”) makes it a tangible item even though the images are digital. Check with your accountant.
Also check with your accountant about your income tax situation. For example, if you don’t live in California but do a majority of your work there, you may be required to pay California income tax.
Many agencies pay 45 days from the date of the invoice. So it’s best to date your invoice using the day of your shoot or one day after.
Your final invoice must look like the estimate and list line items in the same order. All expense receipts should be presented, by category, in the same order that the categories appear on the invoice and in the dated order that appears on the receipt, from the beginning to the end of a project.
If a receipt is not clear, add a handwritten note to provide an explanation. Invoices must balance out to the penny, or most accounting departments will send them back to be revised.
When the entire invoice and all receipts are in order and add up to the penny, send the invoice to the client. Keep one complete set of expense receipts for your records and send the original receipts in a binder or folder to the client, along with two copies of the final invoice (which you can stick in the back of the binder or folder).
See here and Appendix B for an Estimate/Invoice form. You can use this form to submit your estimate for a job (use the “Estimate” part of the heading), and then submit your final bill using the same form (this time use the “Invoice” part of the heading).
A wrap party usually means going out to a restaurant or bar and celebrating. It could cost anywhere from a hundred or two to a couple thousand dollars, depending on how many people are involved and what they drink and eat.
It used to be that the client always paid for the wrap party, and that is what we tend to assume, but there are sometimes situations where people are not sure. Many client representatives are very young and not familiar with who should pay.
If you invite a client to a wrap party, you should be prepared to pay. However, if they offer to pay, do not argue. Many photographers pay and bill the client afterward. This is your choice.
Amanda’s opinion is that it’s tacky to offer to pay and to then bill the client back without asking up front. However, she feels it’s also tacky for a client to assume a photographer has the money to pick up the tab. She recommends asking up front. Suzanne’s opinion is that the client pays, as it is part of craft services or per diem. Either way, do your best to handle this issue with grace.
If you need to call the agency in order to find out where your payment is, ask them to check if the accounts payable department has the invoice posted, which needs to happen before the invoice can be paid.
Once your invoice is posted, it will be scheduled to be paid on a certain date, and you can ask what that date is for your invoice. It’s reasonable to expect your invoice to be paid within 45 days of the invoice date.

