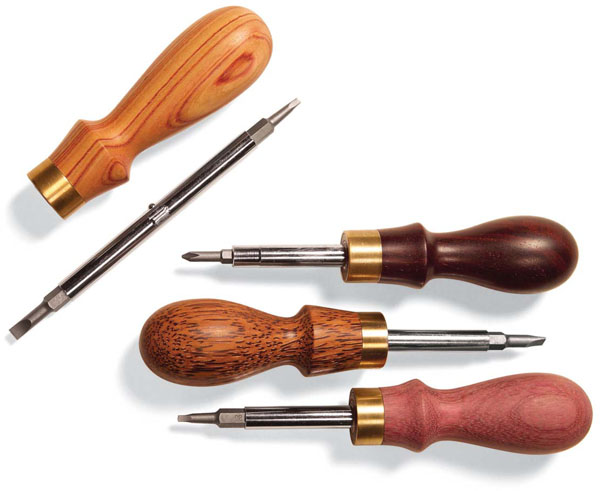
Buy the parts; turn the handle
You just can’t beat the look and feel of a beautifully turned handle. I love commercially made multiple-tip screwdrivers because they cut down on the clutter in my tool drawers. I don’t care for their plastic handles, though, so I make my own from wood. It’s easy to crank out these screwdrivers in any shape or size. They make great gifts. All you need is a chunk of your favorite wood, a drill chuck for your lathe’s headstock and a $5 to $7 hardware kit that contains two double-ended bits. This is a terrific project for a larger mini-lathe and takes less than an hour to complete.

Drill a 5⁄8"-dia. starter hole in a square blank. Make the hole 1 in. deep.
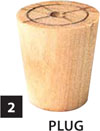
Turn a tapered plug to fit in the hole. Put the plug in the hole and mount the blank on your lathe. The plug’s center bears against the point of the live center in the tailstock. You may use a metal cone-type center as well.
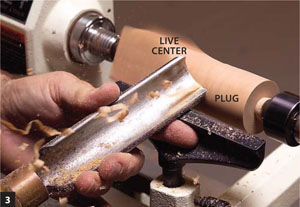
Turn the blank into a cylinder using a spindle-roughing gouge.
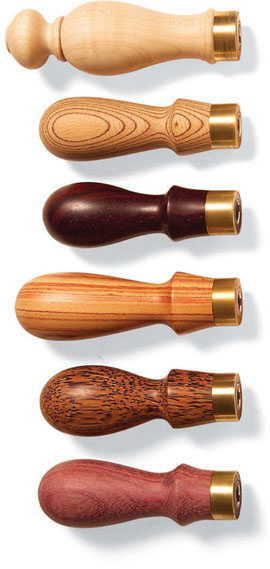
Pick a wood that’s beautiful and durable. Hard maple, white oak, hickory, cherry, apple or Osage-orange are good domestic options. Purpleheart, cocobolo, tulipwood, goncalo alves, ipe, olive, black palm and Brazilian cherry are imports I also like. Avoid softer woods, such as poplar, pine, cedar and basswood. They scratch easily and won’t stand up to the daily rigors of driving screws or any of those jobs you’re not supposed to do with screwdrivers.
The hardware kit contains a brass ferrule, a knurled insert, a hollow stem and two double-ended bits. Two different kits are available (see Sources). Rockler’s kit is used and shown here. Check instructions with other kits for specific dimensions.


Cut a tenon using a parting tool. Set calipers to the ferrule’s outside diameter. When the tenon matches this diameter, continue to remove small amounts of wood. Turn off the lathe and remove the handle often to check the ferrule’s fit. Smooth caliper edges before using.

Use a soft mallet to tap the ferrule onto the tenon. Insert the plug and mount the blank back on your lathe with the ferrule in place.

Shape the handle using a spindle or detail gouge. Sneak up to the ferrule using very light pressure. Avoid cutting it with the gouge. Turn off the lathe to test the handle’s fit in your hand. Remove the tool rest when you’re done.

Sand the handle and ferrule. Make a smooth transition between them. Start with #120-grit sandpaper; continue with #150-, #180- and #220-grit paper. When you’re done, remove the handle and insert a Jacobs chuck in your lathe’s headstock.
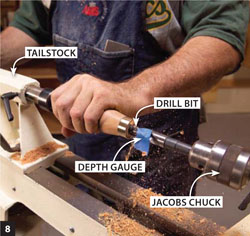
Deepen the handle’s hole. Put a 5⁄8" bit in the chuck and set the lathe at a slow to medium speed. Mount the handle with the bit inserted into the handle’s shallow hole. Simulaneously grip the handle and turn the hand wheel to make a 1-5⁄8"-deep, perfectly centered hole (Fig. A). Next, insert a 7⁄16" bit and drill a hole 3-3⁄4" deep. Turn off the lathe, remove the handle and use a small handsaw to remove the waste material from the handle’s end.
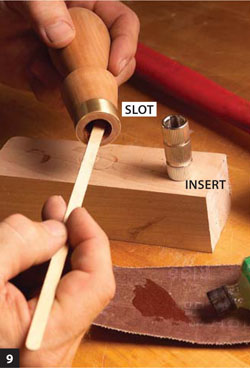
Glue the knurled metal insert into the handle using 30- to 60-minute slow-set epoxy. Spread epoxy inside the hole, but not on the insert. The insert has two slots on one end. Put the opposite end in the hole first.
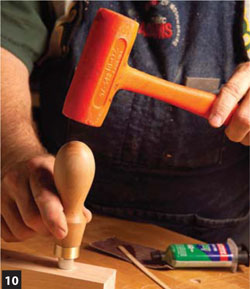
Tap the insert into the hole. To seat the insert, turn the handle over, set it on a wood block and strike the handle. Remove any glue drips from inside the handle. Sand the saw marks on the handle’s end.
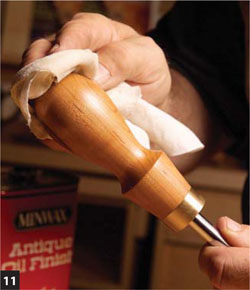
Apply two coats of finish. I like to use an oil or an oil and varnish mixture. Assemble the shaft and bits. Your screwdriver is ready to go to work!
SOURCES Rockler, (800) 279-4441, www.rockler.com 4-in-1 kit, including insert, ferrule, hollow stem, No. 2 Phillips, standard slot and two square drive bits, #37707, $7. Penn State Industries (800) 377-7297, www.pennstateind.com 4-in-1 screwdriver kit, including two reversible bits, brass ferrule and endcap, and a reversible steel bit holder, #PKSDK4, $6. Packard Woodworks, (800) 683-8876, www.packardwoodwork.com No. 1 and No. 2 Morse taper arbor key chucks, $37.