Get Ready!
An Overview of Tools and Materials
It is always good to gather all of the tools and materials you’ll need for a project before you start. This includes making sure you have more than enough yarn. (Nothing is worse than running out of yarn before you finish the project!)
As you make more and more knitting projects, you’ll discover what tools you really like and what works best with your individual knitting style, but here are a few basics you’ll need before you get started.
The first thing to think about when you are starting a knitting project is what kind of yarn you’re going to use. There are many choices available. All yarn is made up of some kind of fiber. If the fiber comes from a sheep, it is called wool. It can also come from a plant fiber, like cotton. Many people prefer the feel of natural fibers like wool and cotton, but fiber can also be man-made; two common types are acrylic and nylon. There are also lots of yarns that blend different fibers together. It is good to try to use all different yarns and fibers, to see what works best for you.
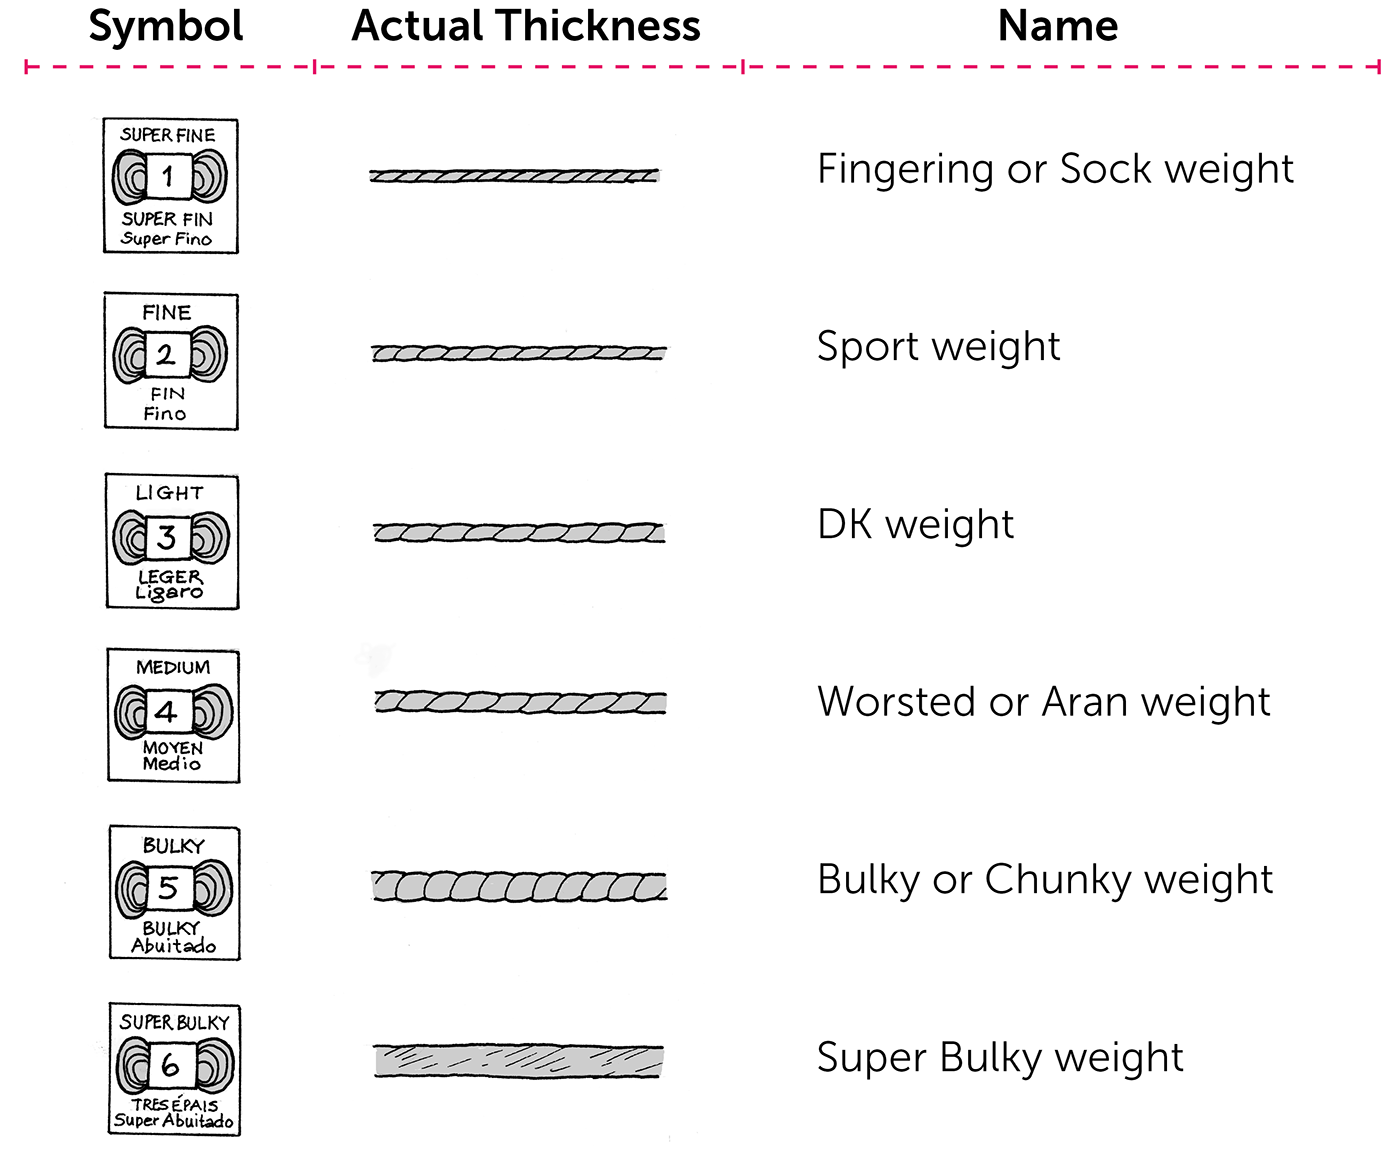
The beginning of every knitting pattern will list the amount of yarn you’ll need and the weight of the yarn. The “weight” of the yarn is how thick the strand is. Some yarn is a heavy weight, and some yarn is a medium or light weight. It is important to use a yarn that is the same weight as used in the pattern. In this book, we use a variety of weights of yarn—but nothing too skinny or lightweight, because that can be a little more difficult to work with, especially when you’re starting out.
Yarn can be labeled with a name like “sock yarn” or “worsted-weight yarn,” or sometimes it is given a number that represents the weight. The lower the number, the lighter the weight of the yarn (and the thinner the strands).

1. Your local yarn shop is the best place to start. In a local shop you will find knowledgeable staff who can help you select the correct materials for your projects. And if you buy the materials for a project from a local shop, the staff will be happy to help if you have any questions while you’re working through the pattern. Yarn can also be purchased online, in craft shops, and often in fabric stores.
2. Yarn doesn’t have to be expensive to be good. There are many inexpensive options for every type of yarn, including yarns that are made up of natural fibers.
3. Always ask for help if you are not sure what weight or type of yarn to use for a project you want to knit. You can ask a knitter in your family, a friend, or a local yarn shop staff member; there are also places online where you can get help with your knitting. Online yarn shops often have phone numbers to call if you need help selecting yarn and needles.
4. Pay attention to the label. When you select your yarn, make sure you note whether or not it needs to be wound before you can use it (see below to learn more). One ball of yarn is also called a skein. If you are buying more than one skein for a project, double-check that they are the same weight, color, and dye-lot number. The dye-lot number is important because different dye lots can vary greatly in color, and you want your yarn to match.
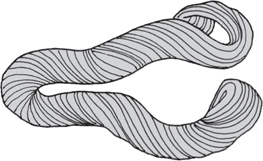
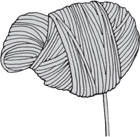
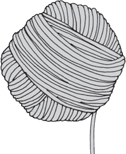
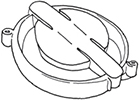
There are different names for the ways yarn is wound when you buy it in a store. It is important to know about the different types of skeins/balls of yarn, because if you start working from a skein that isn’t wound, you will end up with a mess of tangled yarn. Here are two examples of yarn balls that are ready to use when you buy them:
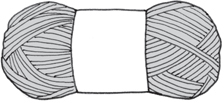
Oblong yarn ball
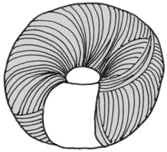
Doughnut yarn ball
TIP
Always save the labels from your yarn skeins. The label has important information that you may need later.
For yarn that is ready to use, you can just remove the label and then find an end to begin working with, either from the outside or the center of the ball. I like to pull the yarn from the center because then the ball doesn’t move around as much when you are knitting.
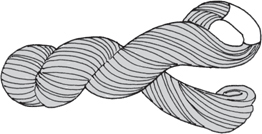
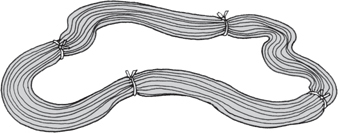
Here is an example of what an unwound skein looks like when you buy it:
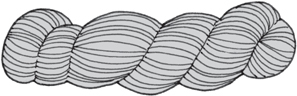
Twisted skein (or hank of yarn)
There are many ways to wind a skein of yarn. One way is with a swift and a ball winder. Most yarn shops have these tools handy and will even wind your yarn for you if you ask. Most new knitters don’t own a swift and a ball winder. Don’t worry! There are many other ways to wind a twisted skein.
One option is to find a friend and ask if you can use his arms to hold the loop of yarn while you wind. Once your winding partner is ready with the yarn on his arms, cut the ties holding the loop in place, find one end, and start winding your ball of yarn. You will get into a rhythm, and the yarn holder can move his arms to help you wind faster.
If you don’t have a willing friend nearby, you can also place the yarn loop around your knees or the arms of a chair. Or you can place two chairs back to back and spread the chairs apart until they hold the loop of yarn with some tension.
Pick one of these ways to hold the yarn loop and follow the instructions to start winding!
How to Open an Unwound Skein of Yarn
Step 1: When you purchase an unwound skein, you have to open it up. Begin by pulling the loops apart.
Step 2: Gently untwist the yarn, then take off the label.
Step 3: An opened skein of yarn looks like a big loop. Don’t cut the ties that are holding the loop together yet! You have to wind it into a ball before you can use it (How to Wind a Ball of Yarn will show you how).
Don’t try to use the yarn directly from the loop! You will end up with a mess of yarn that will take hours to untangle.
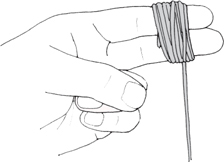
Step 1: Take the end of the yarn and wind it around two or three of your fingers about 20 times. Once you get a good bit of yarn wound around your fingers, slide the yarn off your fingers. Now you have a tiny loop of yarn.
Step 2: Turn the tiny loop on its side so the folded ends are on the sides. Wind the yarn around the middle of the loop.
Step 3: Turn the ball again and continue to wind the yarn around the loop, covering the ends of the tiny loop.
Step 4: Turn the ball again and continue to wind the yarn so the tiny loop is completely covered.
Now you have the inside of the yarn ball all set. Continue to wind the yarn, turning the ball in all different directions so you end up with a round shape, until all of the yarn is wound.
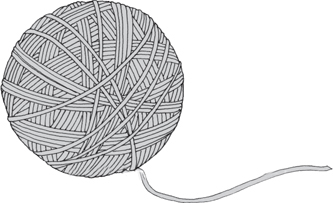
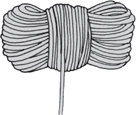
When you’re finished, your ball will look like this. Now you are ready to start knitting!
There are three different types of basic knitting needles: straight needles, circular needles, and double-pointed needles.
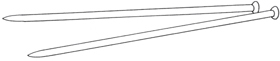
Straight needles
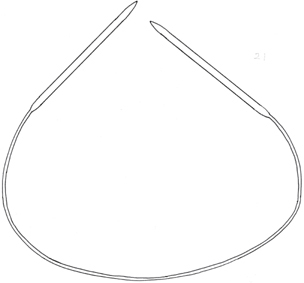
Circular needles

Double-pointed needles
TIP
Twelve-inch circular needles can be a little tricky to find, but they are always available online if not at your local yarn shop. I use Skacel Addi Turbo needles, but HiyaHiya and Chiaogoo also have 12-inch needles.
All of the knitting in this book uses circular needles, which are made of two small knitting needles connected by a cord. The cords come in different lengths, and when knitting in a circle, you’ll need different lengths to knit different projects (in this book, you’ll use 12-, 16-, and 24-inch needles). Circular needles can be used to knit back and forth, which makes a flat piece of material, and to knit in the round, which makes a tube of material.
TIP
Needles can be made out of different materials, like wood, metal, or plastic. Wooden needles tend to be less slippery, so they’re good for beginners.
The size of a needle (which tells you how thick it is) determines how big the stitches you are knitting will be. The most common US needle sizes are 0 to 15. Other countries use millimeters as sizes for needles.
The length, size, and type of needles you need will always be listed at the beginning of a pattern. This is important information because if you use an incorrect needle, the project may not turn out the way you want it to.
TIP
If you have needles that are unmarked and you aren’t sure what size they are, you can use a needle gauge to find out. Simply slide the needle into the holes. When the needle exactly fits a hole, you’ve found the size!

Needle gauge
In addition to the yarn and needle size you should use for a project, a pattern will also give you a gauge, which is the number of stitches you should get in 1 inch of your knitting when using the suggested yarn, stitch pattern, and needle size. Gauge is very important, since it helps you make sure your project turns out the right size. Lots of things can affect your gauge, including the type of yarn and needles and how tightly or loosely you personally knit—all knitters are different! If you find that you knit loosely, try smaller-size needles; if you knit tightly, try larger needles. Checking gauge is simpler than it seems, and it becomes second nature after a while.
After you learn the basic knit stitch, come back to this section to learn how to check for gauge when you start working on your projects.
If you can’t find the particular yarn used in a pattern, or you want to use a different yarn, you need to make sure the yarn you are substituting has the same gauge called for in the pattern. One easy way to tell if a different yarn might work is if the weight is the same (for example, one DK-weight yarn can be substituted for another DK-weight yarn)—but to be safe, check the gauge after completing a few inches of your project. Yarn labels also often give a recommended gauge for the yarn (for example, 5 to 6 stitches per inch), so you can compare that with the gauge listed in the pattern.
After completing a few inches of your project, measure the gauge as follows:
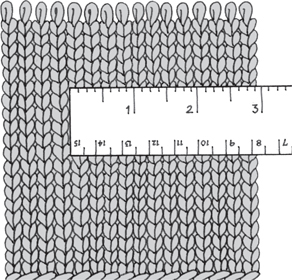
Step 1: Lay the project flat on a table with the right side facing you and let the yarn take its natural shape. Do not tug or stretch the fabric. Set your ruler or tape measure on top of the knitting.
Step 2: Choosing a section near the center of the project, count how many stitches there are in 1 inch. (A lot of patterns give gauge over 4 inches. If your project isn’t that wide, you can measure the stitches in 1 inch of fabric and multiply that by 4.)
If the number of stitches in 1 inch of your project matches the required number of stitches per inch in the pattern, then you are in good shape! If the gauge is off, pull out the project and start again with different-size needles. If there are too many stitches per inch, use one size larger needles. If there are too few stitches per inch, use one size smaller needles. Keep restarting the project until you get the correct gauge.
NOTE: If you’re knitting a large project, make a small swatch to check the gauge instead of starting with the project right away. Cast on 25 stitches with your selected yarn and needles, knit in the pattern stitch for 4 inches, then slip the fabric off the needles without binding off. Then check the gauge as you normally would.
Along with your yarn and needles, there are a few other tools you’ll need.
1 STITCH MARKERS
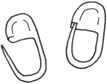
Stitch markers help you keep track of where you are in your knitting project. The best stitch markers for our purposes are the plastic ones that open up like a safety pin, often called detachable stitch markers. These can be attached right to the knitted fabric, or they can be slipped onto the knitting needle, and they can be taken off the knitting at any time.
2 STRAIGHT PINS

For a few projects in this book, you will need straight pins to hold things in place while you stitch them down. Pins with large heads are best, so they won’t slip through the knitted fabric.
3 YARN NEEDLE

You need a large needle that has an eye big enough to thread yarn through. A yarn needle has a duller point than a sewing needle, so it won’t split the yarn when pulled through the knitted fabric.
4 SCISSORS
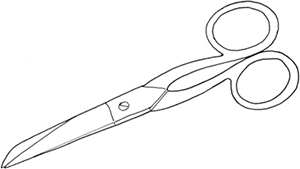
Good-quality, sharp scissors are an important tool for knitting.
5 POM-POM MAKERS
Pom-pom makers, small plastic devices that help you make pom-poms out of yarn, are a nice extra to have when knitting hats and other fun projects. You can also make your own out of a piece of cardboard if you don’t have these.
6 RULER OR TAPE MEASURE
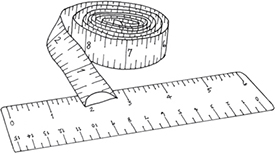
Having a ruler or tape measure is a necessity in knitting. You’ll need to measure your work often for most knitting projects.
7 PROJECT BAG
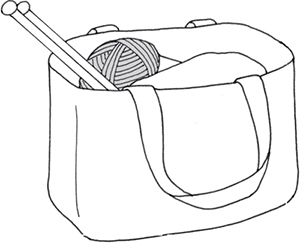
Knitting is a portable craft, and that means you can take it with you and work on your project just about anywhere. Keeping a designated knitting bag to hold your current project, its pattern or book, and the tools you’ll need means it will be ready to go when you are, and you’ll have all of the materials handy.
8 SEWING THREAD AND NEEDLE
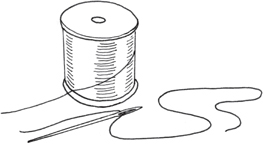
You only need these for projects that have a felt embellishment or buttons.
9 BUTTONS
Buttons are used for a few of the projects in this book. The pattern will always list the size and number of buttons you’ll need for the project. Button collections are fun, and you may even want to start collecting your own! This way you always have buttons handy when needed.