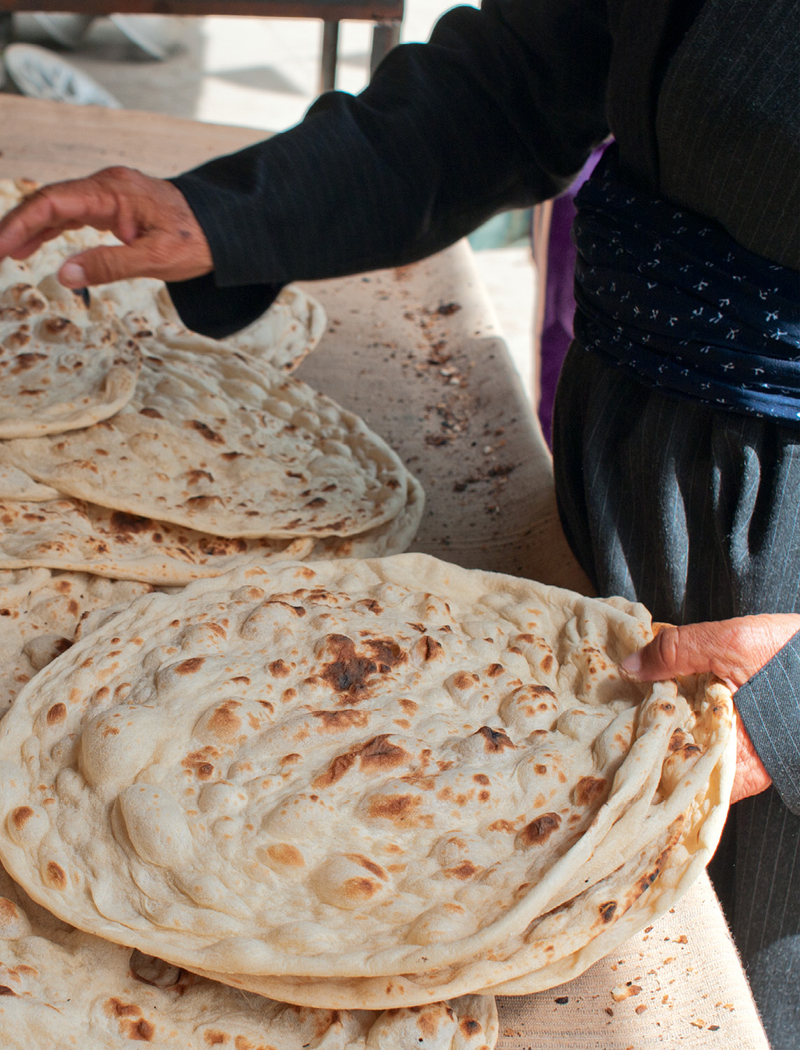

Sulaymaniyah, Kurdistan—An older Kurdish man selects flatbreads at a bakery in the bazaar. Families go through stacks of flatbread in a day.
Bread is life in Greater Persia: Flatbreads are eaten every day as the accompaniments to meals. For centuries, they were the most important source of sustenance for most people.
In Iraqi Kurdistan, home cooks make fine, thin unleavened breads called nane-tire (see recipe), baking them on the curve of a saj, a dome-shaped metal pan set over a fire. The breads are used to wrap foods or pick them up, as traditionally in Kurdistan people eat with their hands.
A yeasted version of the Kurdish saj breads, called lavash, is the bread of Armenia, and similar breads are made in bakeries in Kurdistan, Azerbaijan, and Iran (see photo).
In Azerbaijan, Armenia, and Kurdistan, fine unleavened flatbreads are folded over chopped greens or other fillings to make large half-moon-shaped hand pies that are like inviting baked sandwiches. See the recipe for Azeri kutab. Georgian cheese-filled breads, called khachapuri (see recipe), are rich and satisfying; both home cooks and bakeries make them. Bakeries in Georgia also make distinctive crusty, boomerang-shaped tandoor-baked breads with pointed ends (see recipe).
In Iran, two remarkable breads have pride of place: sangak and barbari (see Bread in Iran). Most bread is made in bakeries except in some rural areas, where women bake bread at home. Homemade versions of sangak and barbari are included here (see recipes here and here).
These days in the Persian culinary world, almost all bread is made with white or unbleached white flour. In earlier times, breads would have been made with less-refined flour, so you will find occasional suggestions in some of these recipes for including whole-grain flour.
I learned a lot about bulgur breads from several Kurdish women I met in the town of Sulaymaniyah in Kurdistan. This recipe includes an enticing spice blend. Bulgur breads are delicious on their own, chewy and flavorful, and they also pair well with soft fresh goat cheese and with strong cheeses such as aged cheddar.
Makes 8 flatbreads, about 8 inches in diameter
2 cups medium or fine bulgur
¼ teaspoon ground cumin
¼ teaspoon ground nigella
⅛ teaspoon ground fenugreek
½ cup minced onion
1 teaspoon sea salt
2 cups hot water
About 1 cup unbleached all-purpose flour, plus extra for surfaces
Combine the bulgur, spices, onion, and salt in a bowl. Pour over the hot water and stir to mix, then cover and set aside for 30 minutes.
Add ½ cup of the flour and start pressing and mixing the dough. As you press and work it, the bulgur, softened by the hot water, will start to get sticky and turn into a dough. If your bulgur is very fine, you may need only ½ cup flour, but with coarser bulgur, you will need to add a full cup of flour and knead it thoroughly and firmly so that it develops into a dough. Set the dough aside, covered with plastic wrap, to rest for at least 30 minutes or as long as 3 hours.
Thirty minutes before you want to bake, place a baking stone or unglazed quarry tiles on a rack in the upper third of the oven. Preheat your oven to 450°F.
Turn the dough out onto a lightly floured surface, pull it together into a block, and cut it into 8 equal pieces. Using floured palms, flatten each one into a disk. Use a rolling pin to roll out 2 or 3 disks (as many as will fit in your oven) into 8-inch rounds. Use a flour-dusted peel or the back of a baking sheet to transfer the breads to the hot stone or tiles. Bake for about 2 minutes on each side, until touched with color; use a long-handled spatula to turn them over. Remove them, once done, to a cotton cloth and wrap them in it so they will stay supple. Repeat with the remaining breads.
This is the bread that I watched Hoshida’s daughter Dila make one day in Halabja (see Kurdish Welcome). She made a huge quantity of large, fine, supple breads, enough to feed her household and her mother’s for about a week. This recipe makes breads that are smaller than Dila’s and thus more easily managed in a North American kitchen. Dila baked on a saj, a kind of domed griddle, like an upside-down wok, for which I substitute a cast-iron skillet.
Unleavened saj-baked breads like this are called nane-tire by the Kurds; the same name is also used by the Khamseh, a nomadic people in southern Iran—see Nomad Encounter. Lavash, a similar-looking bread, is usually leavened; see the variation. This recipe calls for a little fine bran, to mimic the higher-extraction flour that Dila used for her bread dough, but it’s optional. If you omit the bran, you’ll just need a little less water. (If your bran is rather coarse, put it in the food processor and grind it to a finer texture.)
The kneading technique is special: It calls for a stretching of the dough that’s rather like the pastry-making technique called fraisage (see photo). For rolling out the breads very thin, it’s best to use a tapered rolling pin.
Makes about 16 thin flatbreads, about 9 inches across
4 cups unbleached all-purpose flour
Scant ½ cup finely ground bran (optional; see headnote)
1½ teaspoons sea salt
About 1¾ cups lukewarm water
Place the flour, bran, if using, and salt in a large bowl or a large food processor. If working by hand, add about half the water and stir, then slowly add the rest and stir and fold to incorporate it. If using a processor, with the machine running, slowly pour the water through the feed tube. The dough should come together into a ball; continue processing for another 15 seconds.
Turn the dough out onto a lightly floured surface and knead it: Flatten it slightly, fold it in half, and give it a half turn before flattening it and folding it again. Repeat for a few minutes, until the dough is fairly smooth and not sticky.
Stretch the dough: Hold one end of the dough against the work surface with one hand and use the heel of your other hand to rub and push the rest of the dough away from you, stretching it until just before the point where it feels like it might tear (see photo). Fold the dough over itself and repeat. Continue this stretching-kneading until the dough feels extremely smooth and less tight than at the start, 8 to 10 minutes (yes, I know that’s a long time!). Set the dough aside to rest for an hour, or as long as 3 hours, in a large plastic bag.
Meanwhile, figure out your cooking arrangement: If you have a saj, use it. I use an 11- or 12-inch cast-iron skillet. You could also use a cast-iron griddle.
Turn the dough out onto a lightly floured work surface. Use a dough scraper or a large sharp knife to cut it in half, then cut each half into 8 equal pieces (by cutting the pieces in half and then in half again twice more). Roll each of them under your palm on the lightly floured surface to make a rough ball and flatten gently. Set them aside on your work surface, loosely covered.
Place your saj or pan over medium-low heat. While it heats, start rolling out your first bread. Flatten it with your palm, then with a rolling pin (see headnote). Working from the center outward and rotating the dough a quarter turn after each stroke, roll it out to a circle 9 to 10 inches in diameter. If the dough springs back, let it rest for a moment while you start rolling out a second bread. Then return to the first bread and roll it out a little more; or, if you prefer, pick it up between your palms and stretch it a little over the back of your hands. The dough should be very thin, almost translucent.
Place the stretched bread on the hot surface of the pan, and continue rolling out portions of dough, all the while keeping a close eye on the bread that is cooking. Cook it on one side only, lifting it to check for color on the underside; it should show small touches of pale brown in about a minute. If it colors more quickly than that, lower the heat slightly. Lift up the cooked bread, lay it on a cotton cloth, and cover with another cloth.
Continue rolling out and baking the remaining pieces of dough, stacking them on top of each other and covering them so that they stay soft and supple.
Serve warm or at room temperature. Once the breads are exposed to the air, they will dry out and crisp up. You can eat them like that or sprinkle on a little water to soften them.
Note: When the breads dry out, they become very brittle and break into large flakes. You can gather these up and use them to make the bread-cheese pie the Armenians call banrakhash (see recipe).
You can make a leavened version of this bread using the Home-Style Bread Dough (see recipe). The breads will be slightly thicker than the Kurdish flatbreads; in Iran, they are called lavash or taftoon, and in Armenia, they’re lavash. They’re traditionally baked in a tandoor oven, but a baking stone in a 450°F oven is a good substitute. Turn the risen dough out onto a lightly floured surface and divide it into 4 pieces, then cut each of those into 4 pieces. Shape into balls, flatten them with the palm of your hand, and set aside to rest, loosely covered, for 10 minutes. Stretch one piece between your hands, or use a rolling pin, as above, until it is a very thin round or oval about 9 inches across. Place it on a floured peel or the back of a baking sheet and transfer to the hot baking stone. The bread will bake in about 2 minutes. Remove and repeat with the remaining dough. Wrap the baked breads in a cotton cloth to keep them soft.
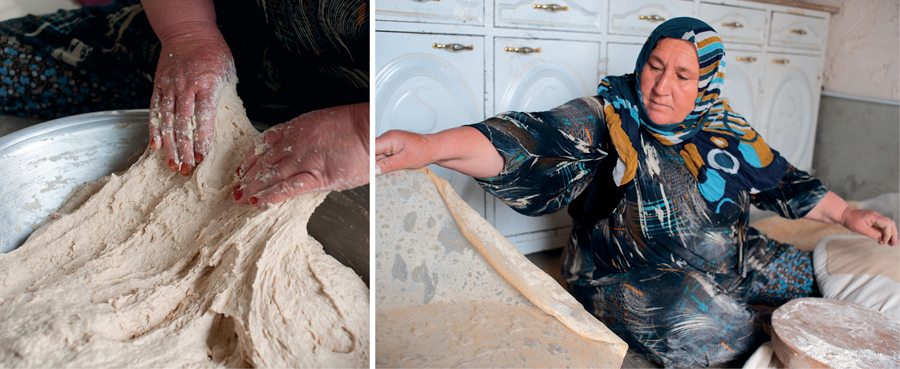
Halabja, Kurdistan—Pulling and stretching the dough to develop it for Kerchief Flatbreads (see recipe; left). Dila lifts a paper-thin bread off the saj after it cooks for about a minute (right). She makes over a hundred breads at a time, shaping and baking them one by one, on the roof of her house.
Massouleh, Iran—A tandoor baker flings a baked lavash onto his pile. He uses the oblong pillow to transfer stretched dough onto the oven walls.
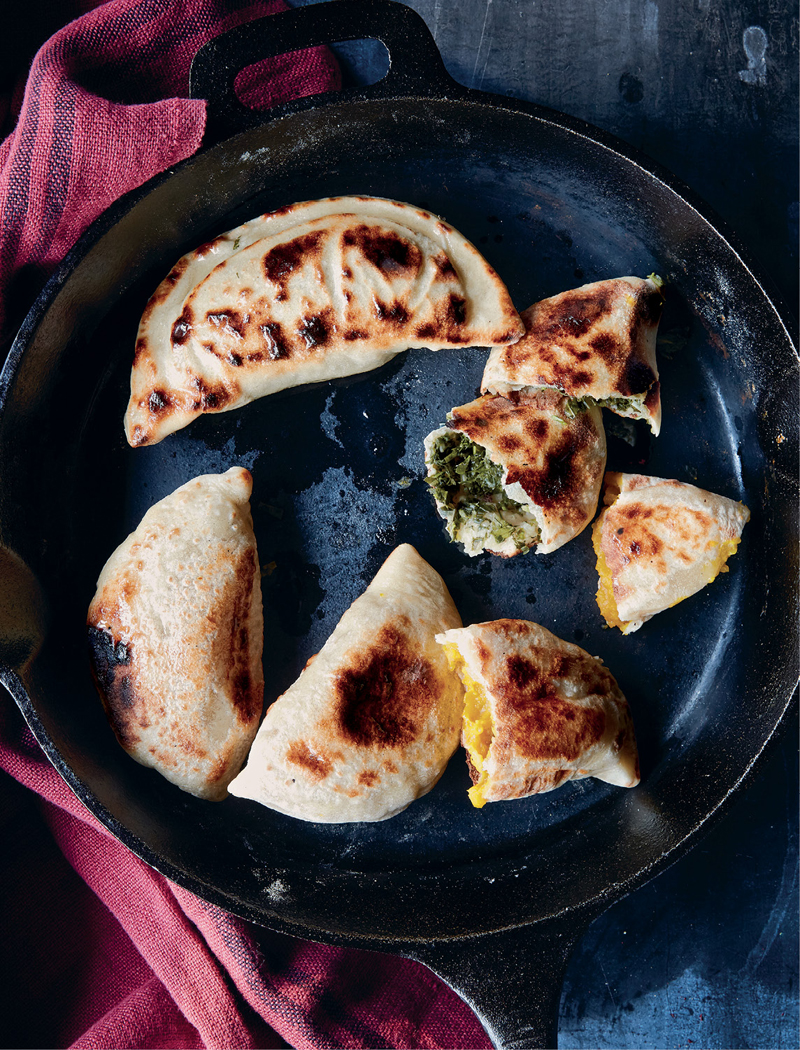
The unleavened dough of the Kurdish nane-tire is used to make supple filled breads called kalana in Kurdistan and kutab in Azerbaijan. The most common filling is chopped greens (scallions and fresh herbs), but in Azerbaijan I also encountered cheese-filled kutab, as well as breads stuffed with pumpkin. You can use one filling for all the breads or mix and match them; quantities of each filling below are for 16 breads.
Two filled breads with a bowl of soup make a satisfying meal.
Makes 16 half-moon-shaped filled flatbreads
Greens: 4 packed cups finely chopped greens, a mix of any or all of these: scallions, coriander, tarragon, dill, and other herbs, sprinkled with 1 teaspoon salt
Pumpkin or squash: About 3 cups mashed cooked pumpkin or squash, mixed with a tablespoon of sunflower or extra-virgin olive oil or melted butter and seasoned with salt and a little ground cumin
Cheese: 2 cups crumbled aged goat cheese or feta, mixed with ½ cup fresh chopped tarragon or a generous 2 tablespoons dried mint
Dough for Kerchief Flatbreads (see recipe), allowed to rest
About ¼ cup melted butter or butter-ghee for brushing
Mix together your filling ingredients of choice.
Turn the dough out onto a lightly floured surface and divide it into 16 equal pieces, cutting it first in half and then each half into 8 pieces. Roll out one piece to a round about 9 inches in diameter. Put it aside to rest while you roll out a second round, then return to the first one and roll it out a little more, to close to 10 inches across; you want it to be as thin as possible. Set aside for a moment.
Heat a large heavy griddle or skillet over medium heat for several minutes. Rub the skillet with a lightly oiled paper towel or cloth, then return to shaping the breads.
Place about ¼ cup packed chopped greens, a scant ¼ cup pumpkin or squash, or about 2 tablespoons cheese filling on one half of a dough circle, leaving a ½-inch margin at the edge. Fold the dough over to cover the filling, flatten lightly with the palm of your hand, working from the folded edge outward to press out any air, then press the edges together to seal well. Use a pizza cutter or a knife to trim the curve to a tidy edge; this also helps seal the edge. Transfer the bread to the hot skillet. Continue shaping the next bread as the first one cooks. The bread should get touched with pale brown on the bottom in about 1½ minutes; if it starts to get darker patches sooner than that, lower the heat slightly. Once it is light brown, turn it over and cook the second side until touched with color. Remove and brush with a little melted butter or ghee. If not serving the breads right away, wrap them in a cotton cloth to keep warm.
Continue shaping and baking the remaining breads. If you make them ahead and want to rewarm them, reheat in the skillet, or wrap in foil and place in a 300°F oven for 5 to 10 minutes. Brush the warmed breads with a little more melted butter or ghee if you wish.
Armenian versions of these half-moon pies, called zhingalov hats, are a specialty of the disputed Nagorno-Karabakh region. They’re made with a yeasted dough and filled with lightly cooked greens: finely chopped leeks and scallions with fresh herbs. Use well-risen Home-Style Bread Dough (see recipe) instead of the unleavened dough. Cut it into 16 pieces and follow the instructions above for shaping, rolling the dough out very thin. Bake as above, or on a baking sheet in a 400°F oven.
Halabja, Kurdistan—Dila sprinkles chopped scallions and herbs onto a stretched round of bread before folding it in half and cooking it on the saj, in the background.
These beautiful rich pastries are sold street-side and in markets in Georgia. Make them as appetizers, or pair them with a Persian ash (or other hearty soup) or a bean stew for a warming dinner.
If it’s winter and you don’t have access to fresh herbs, you can substitute about 1 tablespoon dried dill or dried mint, and you’ll want to add a generous amount of freshly ground pepper.
Makes 16 pastries, about 2½ inches square
1 packed cup crumbled or grated cheese: a mix of feta and mild cheddar
½ cup minced fresh tarragon, dill, mint, or scallion greens
1 teaspoon freshly ground black pepper (optional)
½ teaspoon cayenne (optional)
Georgian-Style Flaky Pastry (recipe follows)
Place a rack in the upper third of your oven and preheat the oven to 425°F. Lightly oil a baking sheet.
Put the cheese in a bowl, add the herbs and black pepper or cayenne, if using, and mix well. Set aside.
Cut the dough into 4 equal pieces. Set 3 aside, loosely covered with a cloth or plastic.
Lightly flour your work surface. Flatten the remaining piece of dough into a square (the dimensions don’t matter, because you’ll be rolling it out thinner later on). Cut in half lengthwise and then crosswise to yield 4 equal pieces. Set 3 pieces aside, loosely covered.
Use a rolling pin or your floured palm to flatten and stretch the remaining piece of dough into a square about 4 inches on a side. Scoop up 1 tablespoon of the filling and place it in the center of the square. Pick up one corner and fold it over to the center of the cheese, repeat with the opposite corner, and pinch them together. Do the same with the other 2 corners. Pinch the open slits lightly at the bottom (the corners of your pastry) to make sure the cheese won’t flow out of the corners, leaving the rest of the slit open. Set on the lightly oiled baking sheet. Repeat with the other 3 dough squares, then repeat with the remaining dough. Use a second baking sheet if necessary, or bake in batches.
Bake for 20 minutes, or until the pastries are lightly touched with gold and the bottoms are firm and almost crisp. Transfer to a rack or a plate and serve warm.
Puff pastry meets baklava in a yeasted dough that is a pleasure to work with. It makes a tender wrapping for cheese-filled pastries and other savory pastries, and for sweet pastries too. Make it at least 2 hours and up to 2 days ahead, then refrigerate it to chill and settle.
I start with cold butter and grate it on a box grater, but you can instead use very soft butter. The important thing is that you be able to spread the butter easily onto the dough. The butter between the layers of dough causes the pastry to puff as it bakes, and the result is very tender.
Makes about 1½ pounds
1 cup lukewarm water
1 teaspoon active dry yeast
1 teaspoon sugar
3 cups unbleached all-purpose flour, plus extra for surfaces
½ teaspoon sea salt
8 tablespoons (1 stick) unsalted butter, grated or very soft
Place the water in a medium bowl, add the yeast, sugar, and 1 cup of the flour, and stir well. Set aside for at least 20 minutes, and preferably several hours.
Add the remaining 2 cups flour to the mixture, stirring and turning to incorporate it. Sprinkle some flour on your work surface. Turn out the dough and knead briefly, until the dough is soft but no longer sticky, incorporating flour from the work surface as necessary.
Sprinkle a little more flour on your work surface and use your hands or a rolling pin to flatten the dough into a rectangle about 18 by 12 inches, with a long side toward you. Spread one-quarter of the butter over the center and right side of the dough, covering two-thirds of the surface, all the way to the edges, as you would for puff pastry. Fold the unbuttered third over to cover the center, and then fold again, as you would a letter, so you have three layers of dough separated by two layers of butter. Flatten the dough again with lightly floured hands and rotate it 90 degrees, so that again a long side is facing you. Repeat the buttering and folding, flattening, and rotating three more times, using one-quarter of the butter each time and reflouring your work surface and your hands as needed.
Fold the dough in half and flatten it a little. Fold it in half again in the other direction, and flatten it a little. Seal it in plastic wrap and refrigerate it for at least 2 hours, and for as long as 2 days.
Use the chilled dough to make the cheese-filled pastries, or fill it with the apricot-nut filling from the paghlava recipe or with a very thick fruit jam, such as Apricot Moraba (see recipe), using about 1 tablespoon filling per pastry.
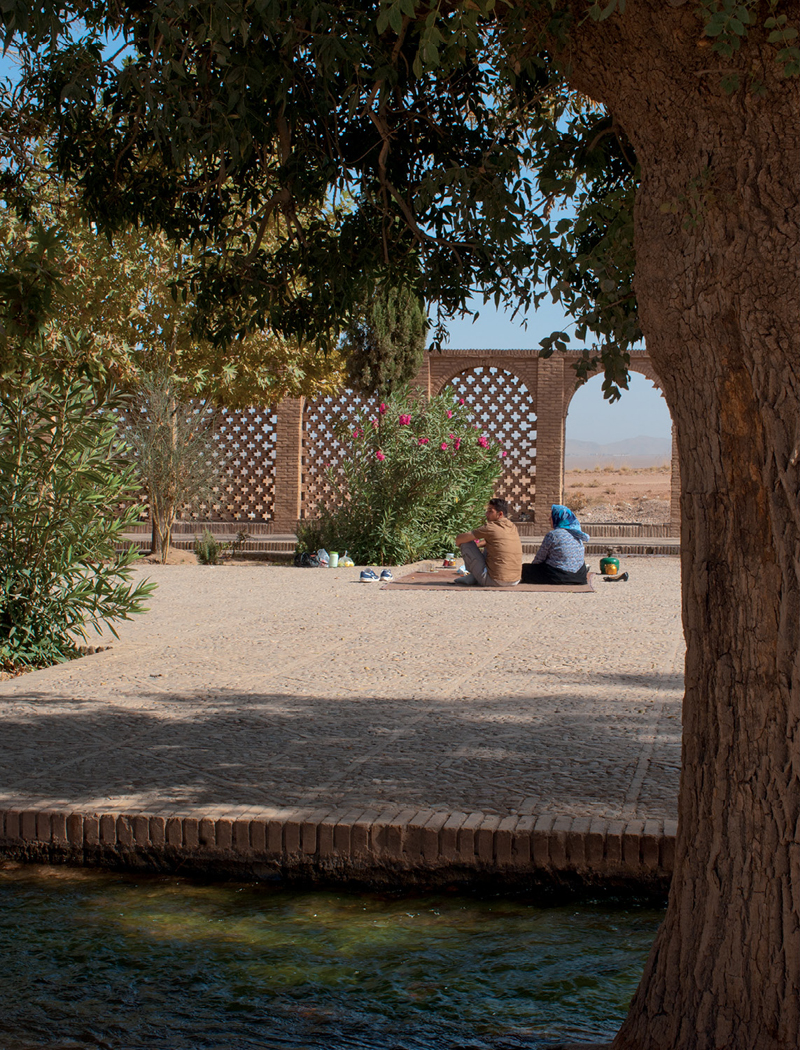
Near Kerman, Iran—A couple picnicking in Shazdeh Garden (meaning Prince’s Garden), near the village of Mahan. Cascading fountains flow through the garden, cooling the air.
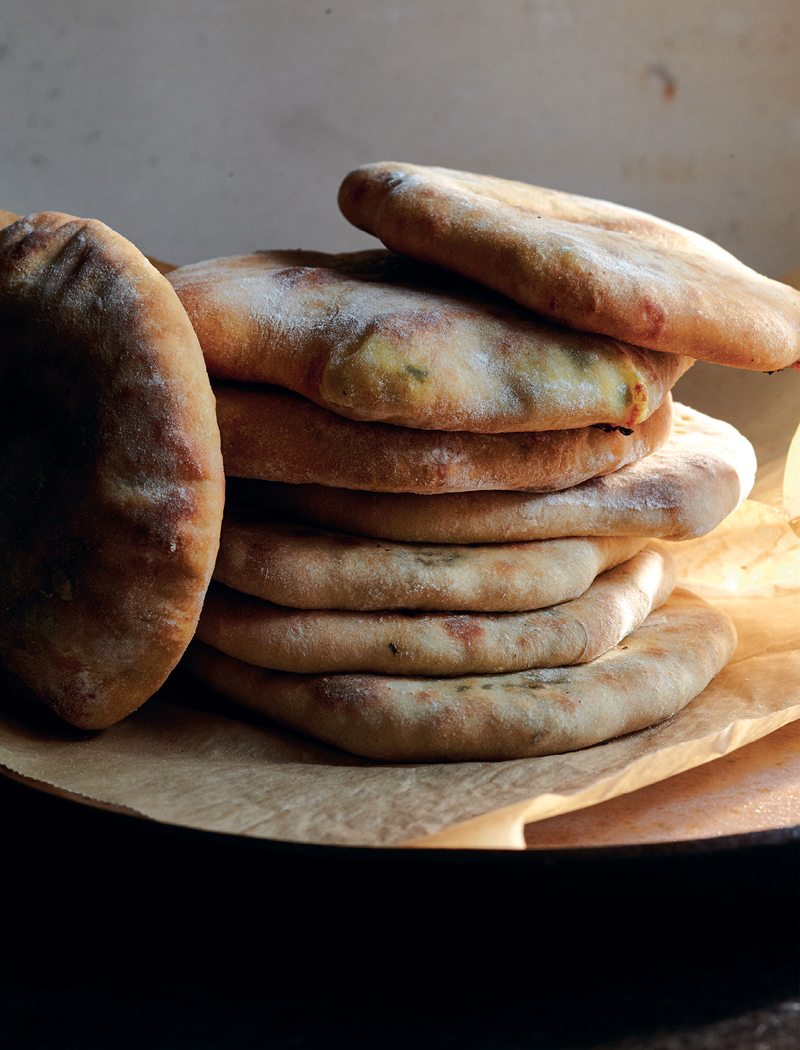
With a little practice, these quick-bread versions of Georgian khachapuri can be mixed, shaped, and baked in less than an hour. As with many quick breads, they are best eaten hot and fresh, for they toughen a little as they cool. These are made with a blend of all-purpose and pastry flour, to replicate the softer flour used in Georgia; use either white or whole wheat pastry flour.
Many people in Georgia don’t have ovens, so they cook their khachapuri in a skillet on the stovetop. See the Note for stovetop cooking instructions.
Makes 8 cheese-filled rounds, about 7 inches across
4 ounces mild or medium white cheddar, Monterey Jack cheese, or mozzarella, grated (about ¾ cup packed)
4 ounces feta cheese, crumbled into small pieces (about 1 cup packed)
1 large egg
2 tablespoons plain full-fat yogurt
About ¼ cup finely chopped fresh mint or tarragon (optional)
Generous grinding of black pepper
2½ cups all-purpose flour, plus extra for surfaces
2 cups plain full-fat yogurt
1½ cups white or whole wheat pastry flour
1¼ teaspoons salt
1 teaspoon baking powder
About 2 tablespoons melted butter for brushing on (optional)
Place one rack in the center of the oven and another one in the upper third. Preheat the oven to 425°F. Set out two baking sheets.
To make the filling, in a small bowl, mix together the cheeses, egg, and yogurt. Add the herbs if you wish and the pepper and mix well. Set aside.
To make the dough, place 2 cups of the all-purpose flour in a large bowl, add the yogurt, and stir to mix well.
In another bowl mix together the pastry flour, salt, and baking powder. Add to the yogurt-flour mixture and mix in thoroughly. Turn out onto a floured surface and knead for several minutes, until very smooth, incorporating more flour as necessary.
Cut the dough into 8 equal pieces (cut it in half, then cut each piece in half and half again). Roll each piece into a ball between your lightly floured palms. Set all but one aside, loosely covered.
Lightly flour your work surface and flatten the remaining dough ball into a round with the floured palm of your hand. Turn the dough over and use a rolling pin to roll it out to a round about 8 inches in diameter. Place 2 tablespoons of filling in the center of the round. Pick up one edge of the dough between your thumb and forefinger and gently place on top of the mound of filling. Repeat with another edge about 1½ inches farther around, pleating the dough over the filling. Repeat all the way around, so the mound of filling is covered by pleated layers of dough; the dough is a little fragile, so you need to work gently to keep the cheese from breaking through. Press down gently on the mound to seal it and send the filling out to the edges of the bread. Turn it over and press again gently, then use your rolling pin with a light touch to roll the dough, working from the center outward, to about a 7-inch round that is less than ½ inch thick.
Transfer to a baking sheet, seam side down. Repeat with 3 more rounds.
Prick each bread four or five times with a fork and put the baking sheet on the top rack in the oven to bake for about 15 minutes. Repeat with the remaining dough and filling, placing the second baking sheet on the center rack. When the breads on the first sheet are firm to the touch and very slightly tinged with color, after about 15 minutes, remove from the oven and move the second sheet to the upper rack to bake until done.
Transfer the baked breads to a cloth-lined basket, brush with butter if you wish, and cover to keep them warm. Khachapuri are often cut into quarters and served that way; leave them whole or cut them as you wish.
Note: Stovetop versions of khachapuri are traditionally cooked on a clay surface called a ketsi, but a lightly oiled cast-iron or other heavy skillet does a fine job (though it’s best to work with two skillets). Heat a little sunflower or extra-virgin olive oil or butter-ghee in each skillet over medium heat. Swirl to coat the surfaces and add one or two breads to each. Cook until firm and touched with color, about 10 minutes; turn them over after about 5 minutes. Keep the first batch warm in a cloth-lined basket while you cook the remaining breads.
One day I drove east out of Tbilisi into the green hills to visit the farm of Ana Mikadze-Chikvaidze, a cheesemaker and altogether lively personality. When I arrived, two of her friends were in the kitchen making khachapuri, using a variety of different fillings. The rest of the group sat outside on the grass talking and drinking Georgian red wine. Soon platters arrived stacked with wedges of hot fresh khachapuri of many kinds. I felt as if I’d landed in a cheese and bread paradise.
That day broadened my idea of what could go into khachapuri. Here are two other fillings. Use them to stuff the quick khachapuri dough (above) or the yeasted version (see recipe).
Four-Cheese Khachapuri Combine different cheeses that you like, a mix of three or four sharp cheeses totaling 1¾ packed cups, with chopped fresh tarragon, mint, or dill, or a little dried mint, and 1 large egg.
Mushroom, Tarragon, and Scallion Khachapuri Cook about 1 pound chopped mushrooms in butter with a little minced scallion. Season with salt and pepper and let cool, then add ½ cup packed chopped fresh tarragon or coriander and minced scallions.
These are more tender and keep better than the quick khachapuri. Use the Home-Style Bread Dough (see recipe), well risen. Divide the dough into 12 pieces and fill with 1 heaping tablespoon filling. Shape and fill the breads as above. Let stand for 15 minutes after shaping them before you bake them as above, in the upper third of the oven. The breads will bake in about 12 minutes.
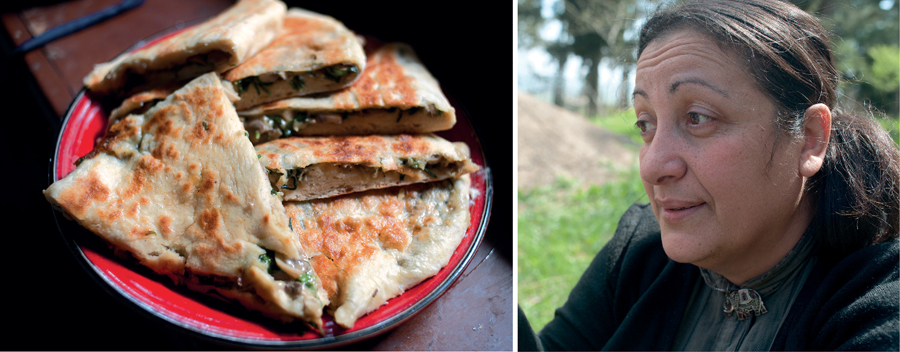
Near Tbilisi, Georgia—A plate of khachapuri filled with a mix of cheese and herbs (left), stove-top baked, and cut into wedges just a moment before, at the farmhouse of Ana Mikadze-Chikvaidze, a cheesemaker and cheese researcher (right).
Cooks in rural places in the three Caucasus countries often live far from a baker and so they still make their own breads, as their mothers and grandmothers did. The difference is that these days they have access to dry yeast and are happy for the certainty it gives.
If you have the time to let your dough do a long, slow rise, cut the yeast back to ½ teaspoon (or use a sourdough starter) and let the bread rise overnight in a cool place. It will have a more complex flavor.
This is a basic white-flour bread dough that is very like the doughs I saw women making (at home and in small bakeries) in Armenia, Georgia, and Azerbaijan. They don’t put in an egg or any dairy product. And they make the dough quite wet and soft, so that the breads are tender, moist, and a little airy.
Use this to make the Georgian Boomerang Breads (see recipe), Lavash (see recipe), Armenian Greens Hand Pies (see recipe), or the yeasted-dough version of khachapuri (see recipe).
Makes about 2 pounds dough
2 cups lukewarm water
1 teaspoon sugar or honey
1 teaspoon active dry yeast
2 cups unbleached all-purpose flour, plus extra for surfaces
2 cups pastry flour or whole wheat pastry flour, or an additional 1¾ cups unbleached all-purpose flour
2 teaspoons sea salt
Place the water in a large bowl, add the sugar or honey, and stir, then add the yeast and stir. Add 2 cups of the all-purpose flour, stirring until you have a smooth batter. If you have the time, set aside for an hour or two, covered.
Add the pastry flour (or additional all-purpose) and salt and stir and turn to incorporate. Flour your work surface generously with all-purpose flour and turn the dough out. Knead until smooth, satiny, and still soft, incorporating flour only as necessary to prevent the dough from sticking. You want a moist dough. Transfer to a clean bowl, cover with plastic wrap, and set aside to rise for about 3 hours, until more than doubled in volume.
These Georgian breads are baked in the Georgian version of a tandoor oven, called a toné, in bakeries all over the country. They look like small boomerangs. A toné is a wide barrel-shaped oven, gas-fired from below. The fire heats the inside walls, then the flame is lowered and the breads are laid onto the hot walls using a pillow, just as naan are baked in central Asia and northern India. But, unlike the long rectangular or oval breads of central Asia, Georgian tandoor breads have pointed ends. As tandoor bakers do in Iran and other places, Georgian bakers use a hook to grab the breads and a kind of scraper to help detach them from the oven wall (see photo).
You can bake these breads at home on a baking stone, but they need to be much smaller than those from bakeries—about 16 inches long, rather than more than 24 inches—so that they fit easily into a regular oven. The breads are fun to eat warm: Cut a slit in the side of the bread and slide in some cheese or slices of salami.
Makes 8 flatbreads, about 15 inches long
Home-Style Bread Dough (see recipe), risen
Flour for surfaces
Cornmeal for dusting (optional)
Pull the risen dough together and turn it out onto a lightly floured surface. Cut it into 8 pieces. Roll each into a cylinder about 8 inches long and set aside to rest for 15 minutes, loosely covered.
Place a baking stone or unglazed quarry tiles on a rack in the upper third of your oven. Preheat the oven to 450°F. Lightly dust a peel or the back of a large baking sheet with flour or cornmeal.
Work with one dough at a time on a lightly floured surface: With floured fingertips, press on the dough to flatten it and then pull on either end to stretch it to about 12 inches long. Fold it in half lengthwise. Flatten it with your fingertips and pull on both ends to stretch them to a point. Transfer the bread to the peel and then to the baking stone or tiles.
Repeat with a second bread if there is room on your stone or tiles. Bake until touched with brown and cooked through, about 7 minutes. Transfer to a rack to cool for a moment, then wrap in cotton cloth to keep warm. Repeat with the remaining dough.
Near Manavi, eastern Georgia—A village baker lifts boomerang-shaped dedas puri off the hot walls of her low tandoor oven, called a toné in Georgian. Behind her, shaped dough rests on a shelf before being stretched and baked.
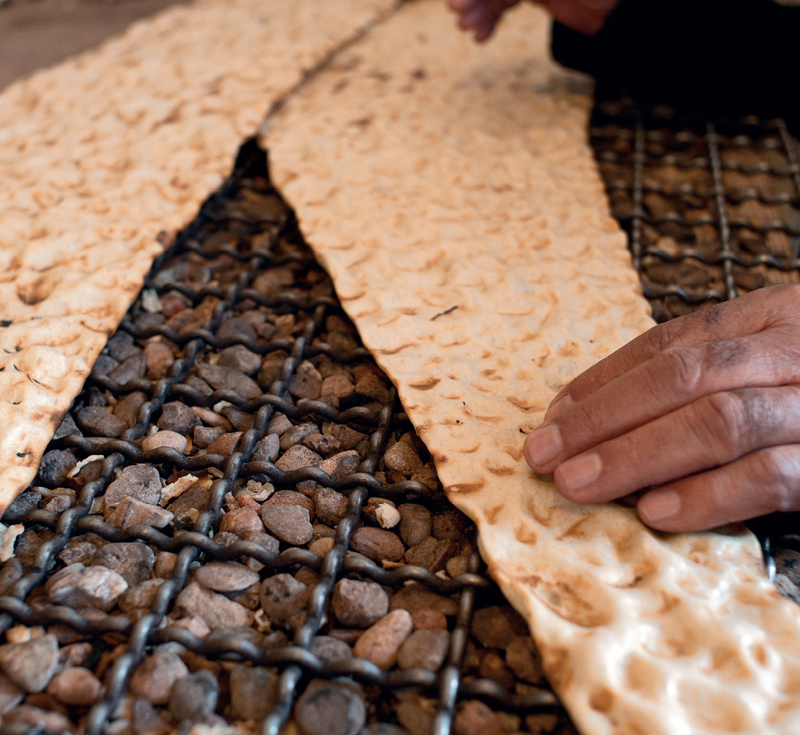
Tabriz, Iran—Sangak bread is baked on a slope of pebbles, a few of which may get embedded in the bread. The rack they’re laid on to cool has over time accumulated its own deep layer of pebbles that have dropped out of the breads.
There’s a kind of reverence surrounding two of the breads of Iran. One is the classic breakfast bread called barbari, with a ridged browned top, and the other is sangak, the chewy, textured “pebble bread” that most often accompanies lunch and supper.
Both sangak and barbari are large flatbreads, made in bakeries in special ovens. These days the ovens are heated with gas. At a sangak bakery, all that’s made is sangak, and barbari bakeries are equally specialized.
The traditional oven of a sangak bakery has a tall, narrow opening, and inside the cavern of the oven is a wall of gravel sloping upward toward the back. Sang means stone or pebble in Persian, so sangak refers to bread baked on a bed of stones. The wet dough is stretched onto a wet peel and laid onto the slope of hot gravel in the oven. When they are lifted out of the oven, the breads have a deeply dimpled bottom surface that often has a few pebbles embedded in it. The baker gives the breads a firm tap or two to dislodge the clinging stones before hanging them on a nail or laying them on a rack.
In the big cities of Iran, though, many sangak bakeries have modernized. A modern sangak oven has no pebbles, but instead a rotating baking surface that has rows of small manufactured bumps on it. Baking is quick, and the breads are quite standardized in shape, color, and texture.
A barbari oven is more like the large hearth ovens of traditional European-style bakeries. The distinctive thing about barbari is the shaping of the bread, rather than the oven. Before it is laid on a peel and placed on the hot hearth, the bread is brushed with a thin starchy paste and scored with parallel lines of dents along its length. The paste results in a very appealing browned surface. And the lines of dents create a lovely texture of alternating soft ridges and crisper “valleys.” Bakers used to create the dents with their fingertips, and some, like the barbari bakers in Massouleh (see photo), still do. But most bakers now “dock” the breads with a sharp-toothed metal tool (see photo).
It’s possible to make reasonable versions of both sangak and barbari in a home oven if you have a baking stone and, for making sangak, a supply of small stones (though you can make it without pebbles; see the variation). The bakery breads in Iran are very large. These versions are smaller, both so they can fit into a home oven and because smaller breads are easier to handle. Homemade Persian flatbreads come close to the bakery versions, and the process of making them gives a real appreciation of the baker’s art. I urge you to give them a try.
Baker’s Notes: If you have a starter going, use it rather than the yeast and lengthen the proofing times as necessary.
The flour used in Iran is a little softer than most North American all-purpose flour. It’s more like European bread flour, at 10 to 11 percent protein. You can use all-purpose, but I like to mix all-purpose and pastry flour. The result is bread that is more tender and closer to the texture of the breads in Iran. There the ovens are very hot and the climate is dry, so the breads’ surfaces tighten and firm up immediately. Once you tear off a piece of bread and bite into it, the surface may be firm and a little dried out, but the crumb is tender.
Left: Isfahan, Iran—Sangak bakers work with long peels to lay the moistened and shaped dough onto a slope of hot pebbles in the oven. Note the baked bread hanging on nails against the wall.
Right: Yazd, Iran—A metal roller that bakers use to dock or pierce barbari breads creates lines of dents along their length.
People line up at sangak bakeries in the late morning, waiting for bread to take home to the family for the noontime meal. The breads are huge, sometimes four feet long and nearly two feet wide, dimpled golden sheets that soon stiffen in the dry air. People carry stacks of them home in their arms, or they may fold them for easier carrying. The breads are cut or torn and eaten with the noon and evening meal, used as wrappers for grilled meats or torn into smaller pieces to scoop up mouthfuls of vegetables or sauces, and snacked on to assuage hunger at any time.
If you don’t want to hassle with stones or pebbles, you can finger-dent the dough; see the variation. Otherwise, you need a thick bed of pebbles on a rimmed baking sheet. (If the pebbles are in just a single layer, the dough drapes around them and too many of them become embedded in it.) I had thought that the stones needed to be rounded river stones, but in fact in Iran the bakers use regular sharp gravel. Smooth-surfaced stones are easier to dislodge from the breads, but if your only source is gravel with some sharp shapes, it’s fine.
You will also need a sturdy baking sheet to hold your bed of gravel. The larger the baking sheet, the larger the breads you can make. Also see Baker’s Notes.
Makes 8 thin, bumpy flatbreads, about 16 inches long and 3 to 4 inches wide
3 cups lukewarm water
1 teaspoon active dry yeast
3 cups fine whole wheat flour (if you can’t get finely milled flour, sift the flour to remove the coarsest bran)
1 cup pastry flour
About 3½ cups unbleached all-purpose flour
4 teaspoons sea salt
1 cup sesame seeds
Twenty-four to 36 hours before you want to bake the breads, place 1 cup of the water, ⅛ teaspoon of the yeast, and 1 cup of the whole wheat flour in a large bowl and stir until you have a smooth batter (or poolish). Cover the bowl with plastic and set aside to ferment for 18 to 24 hours.
About 5 hours before baking the breads, stir the poolish (some water may have separated out), then add the remaining 2 cups lukewarm water and the remaining scant teaspoon yeast and stir again. Add the remaining 2 cups whole wheat flour, the pastry flour, and 2 cups of the all-purpose flour and stir to make a smooth batter. Add the salt and another cup of all-purpose flour and stir and turn to incorporate.
Turn the dough out onto a heavily floured surface (use another ½ cup or so of flour) and knead for 5 to 8 minutes, incorporating flour only as needed. You want the dough to be somewhat soft, not stiff, but no longer sticky. Transfer to a clean bowl, cover with plastic wrap, and set aside to proof for about 5 hours. The dough should double in volume.
Half an hour before you want to start baking, place a baking stone or quarry tiles on a rack in the upper third of your oven. Place the baking sheet of stones (see headnote) on it. Preheat the oven to 500°F.
After the oven has preheated for 15 minutes, shape the breads: Put out a bowl of water so you can moisten surfaces and prevent the breads from sticking to the peel. Gently release the dough from the sides of the bowl and pull it together. Moisten your work surface with water and turn out the dough. Cut it in half and then divide one half into 4 pieces; loosely cover the other half. Depending on the size of your baking sheet, you may be able to bake 2 breads at a time. You can use a peel or the back of a baking sheet to transfer the breads onto the hot stones, or just drop them onto the stones with your hands.
Moisten the peel or back of the baking sheet with water. Pick up one piece of dough with both hands and move your hands apart to stretch it to 15 or 16 inches long. Touch the bottom surface of the bread against the wet countertop to moisten it and lay the dough on the peel, with one end hanging over the front edge by about an inch. Quickly sprinkle on 2 tablespoons sesame seeds, then transfer the bread to the oven, using the hanging end to “catch” the dough on the far side, and slide the peel away as you lay the bread on the hot stones. Alternatively, hold one end of the bread in each hand and place the stretched bread on the hot stones.
Bake until the bread begins to color on top, about 8 minutes. Meanwhile, if your baking sheet will hold 2 breads, shape a second one and slide it onto the stones. Remove the baked bread using a wide spatula or tongs, and place on a rack to cool; rap the bread to dislodge any clinging stones, or pick them out. Repeat shaping and baking the remaining cut dough pieces, and then the remaining dough.
This technique is very like that used by Afghani bakers for making tandoor naan, but this dough is wetter (more hydrated), so the dents result in a bottom surface with dimples that are like those in pebble-baked sangak.
As above, place a baking stone or quarry tiles in the oven and preheat. Set a bowl of water by your work surface. Divide the risen dough as above. Wet your fingertips and, starting at one end of one piece of dough, working with stiff fingers and sharp jabs, make repeated deep dents all over the surface. Open the oven door, pick up the dough on the back of your hands or on your palms, pull them apart gently to stretch the bread to about 15 inches long, and lay it directly on the hot baking stone. If you have room, shape and bake a second bread alongside. Bake as above. Repeat with the remaining dough.
Massouleh, Iran—Bakers in the village shape barbari bread every day, a huge production. Here, instead of a metal roller (see photo), the bakers rely on the traditional technique, denting the breads with their fingertips.

Massouleh, Iran—Barbari bread for breakfast, with honey and a pot of black tea.
On my first trip to Iran, I flew to Tehran and immediately headed out of the city by car. The driver spoke little English, so as we inched along in heavy rush-hour traffic for nearly two hours (a reminder that the city is huge and prosperous), I used the time to learn Arabic numbers. The car license plates and the driver together were my teachers. Finally we turned onto the highway that leads to Shomal, “the north,” and left the worst of the traffic behind. The road cut through the steep mountain barrier that separates the dry central Iranian plateau from the humid Caspian Sea area to the north. As we approached the Caspian, the air grew softer, and soon the windshield was sprinkled with rain. It was after ten at night by the time we followed a narrow winding road uphill and came to a muddy clearing. We’d arrived at the village of Massouleh.
A man was there to meet me, with a flashlight against the dark and a strong shoulder for my bag. We walked along a muddy path in the rain, the flashlight casting shadows here and there. There were puddles to dodge, stone steps to go up, and more steps, and darkness all around. Finally he pulled out some keys and opened a heavy wooden door. This was my room, a large space carpeted with layers of thick rugs, where I’d be staying for the next couple of days. My host told me there’d be breakfast in the morning, and off he went.
Tired from journeying, and chilly in the damp air, I crashed on one of the beds under a load of quilts. Next morning, bundled in layers of wool, I opened the shutters and looked out to see a tightly packed steeply terraced village in shades of slate gray and clay brown, darkened with rain and softened with mist.
My host knocked at the door and came in with a tray of breakfast. Ah, my first meal in Iran, extra welcome because I hadn’t eaten since noon the previous day. On the tray were large pieces of barbari bread hot from the oven, as well as fresh cheese, honey, a pot of tea, a tea glass, and a bowl of sugar cubes. I ate all the bread and cheese and drank all the tea.
And then I went looking for the bakery.
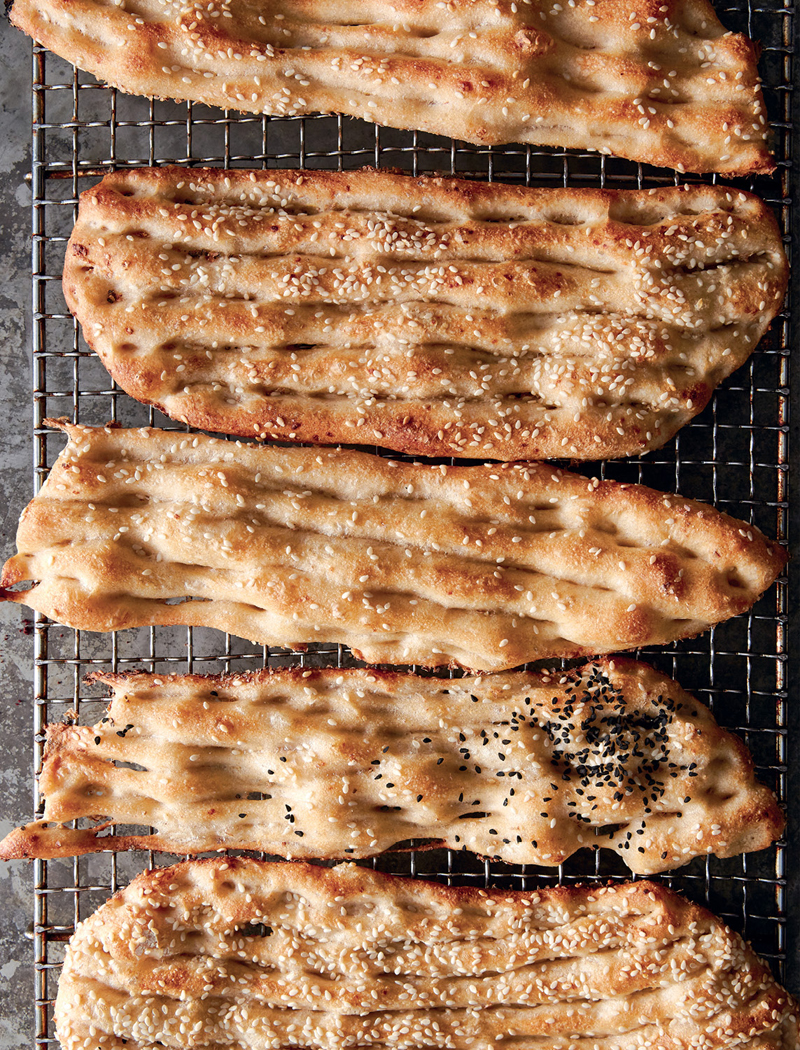
Barbari has ridges down its length and is often topped with a scattering of nigella or sesame seeds. It’s the classic breakfast bread in Iran. Barbari, like the word barbarian, comes from a root word that means foreigner. There are many theories about where the bread originates. People in Iran told me that the best barbari bakers come not from Iran, but from a valley in Afghanistan.
I am indebted to an Iranian-American baker named Omri who posted a lot of information about barbari on a website called The Fresh Loaf (see Bibliography). His notes were a great help as I was trying to figure out a home-style barbari recipe.
In Iran, bakers use a 10-percent-protein flour; I use a blend of pastry flour and all-purpose to mimic that. You can use a sourdough starter to leaven it if you have one going. Otherwise, follow the directions below.
Makes 16 flatbreads
3 cups lukewarm water
1 teaspoon active dry yeast
1 cup whole wheat flour or unbleached all-purpose flour
2 cups pastry flour
About 2 cups unbleached all-purpose flour, plus extra for surfaces
4 teaspoons sea salt
About 1½ cups wheat bran
About ⅓ cup sesame seeds or about 1 tablespoon nigella seeds (optional)
1 cup water
About ¼ cup all-purpose flour, sifted
Place 1 cup of the lukewarm water in a large bowl. Add ⅛ teaspoon of the yeast and stir. Add the whole wheat or all-purpose flour and stir well to make a smooth batter; this is your poolish. Cover with plastic and set aside for 18 to 24 hours to ferment.
The next day, the poolish should have bubbles in it and some water may have separated out; just stir it back in. Add the remaining 2 cups lukewarm water and the remaining scant teaspoon yeast and stir. Add the pastry flour, 1 cup of the all-purpose flour, and the salt and stir in one direction to incorporate the flour. When you have a smooth batter, sprinkle on another cup of flour and stir and turn to incorporate it.
Flour your work surface with another cup or so of flour and turn out the dough. Knead for 7 to 10 minutes, incorporating the flour as necessary, until you have a satiny-smooth dough; it should be tender and soft. Place the dough in a clean bowl and cover with plastic to prevent it from drying out. Set aside in a cool place to rise for 5 or 6 hours, until doubled in volume.
Put out a baking sheet or tray and sprinkle with flour. Turn the dough out onto a lightly floured surface. Fold it a couple of times and cut it in half, then cut each half into 8 equal pieces. Shape each one into a ball under your palm or using both hands, and set on the floured baking sheet, leaving 1½ to 2 inches between the balls of dough.
Cover loosely with plastic wrap and set aside to proof for an hour or so. To test, wet a fingertip and poke it into one of the dough balls; the dent you make should remain rather than bouncing back.
Meanwhile, 30 minutes before you wish to bake, place a baking stone or quarry tiles on a rack in the upper third of your oven and preheat it to 500°F. Put out a peel or an upside-down baking sheet.
To make the flour paste topping, pour the water into a small saucepan and bring to a vigorous boil, then reduce the heat to very low. Start whisking the water and at the same time use your other hand to sprinkle a little of the flour into the water. Continuing to whisk to prevent lumps, add a little more flour, and then a little more, whisking. After about 3 tablespoons of flour and a few minutes whisking, you should have a milky-to-clear paste that’s quite liquid, and a little sticky. It will thicken more as it cools, and you want it to be loose and spreadable. Set the paste aside to cool completely.
Cover a roughly 15-by-18-inch area of your work surface with the wheat bran. Carefully move 8 of the dough pieces onto it, trying not to deflate them. As you move them, they will stretch a little; shape them gently to pull each one into a slightly rectangular pillow shape. Let stand for 10 minutes.
Place the pan of cooled flour paste and a pastry brush by your work surface, as well as a bowl of water.
Start shaping the breads 10 minutes after the oven has reached temperature. Brush some paste onto each of the 8 portions of dough with a very light hand. You want to be sure that you don’t deflate the dough as you shape it. Dip your fingertips into the water and make a continuous line of deep vertical dents in one piece of dough down its full length, about ¼ inch from the edge (see photo). Leaving a ¼-inch space (this will become a puffed ridge in the baked bread), repeat, wetting your fingertips again before making another parallel line of dents, poking vigorously. Repeat until you get to within ¼ inch or so of the other edge. Sprinkle on sesame seeds generously or a few nigella seeds if you wish.
Carefully slide your hands under the dough and lift it onto the peel, pulling your hands apart to stretch it lengthwise; it should end up being 3 to 4 inches wide and 12 to 15 inches long. Don’t worry if it has the odd hole; that just gives even more interesting texture. Quickly slip it onto the hot baking stone, leaving room for one or two more breads if possible. Repeat with another dough or two—whatever you have room for on your baking surface. Bake the breads until the top is well browned, about 8 minutes. Remove the breads from the oven and place them on a rack to cool, or wrap in a cotton cloth to keep them warm and moist. Repeat with the remaining pillows of dough. As you move the breads from the bran surface into the oven, transfer the 8 remaining dough pieces onto the bran so they have time to rest before being shaped.
Repeat the shaping and baking process with the remaining dough; remember to carefully brush on the paste before you start making the dented lines in the breads.
To serve, cut or tear the breads crosswise into smaller lengths and stack them, or put out the whole breads and invite guests to tear off pieces as they wish.
Note: To reheat the breads, place cut pieces of bread in a wet paper bag and heat in a 300°F oven for about 10 minutes.
For this traditional Georgian way of transforming old bread into succulent eating, cubes of dried bread are tossed in hot oil with onions and water and cooked until softened. Quantities are flexible. Whisked egg is stirred into the mass of soft bread and onion to make a kind of frittata. Serve with a green salad, or sliced tomatoes and cucumbers, or pickled peppers, for breakfast or brunch or for a light meal at any time.
This is best made with artisanal bread or a mix of breads with a good firm crust and crumb.
Serves 4 or 5
About 3 tablespoons sunflower or extra-virgin olive oil
1 large onion, chopped (about 1½ cups)
4 to 5 cups 1-inch cubes dried bread (tough crusts trimmed)
1 medium or 2 small tomatoes, coarsely chopped (optional)
6 large eggs
1 teaspoon sea salt, or to taste
About ¼ cup chopped fresh tarragon, coriander, or sorrel (optional)
Freshly ground black pepper
Heat the oil in a wide deep skillet or wide heavy pot over medium heat. Toss in the onion and cook until translucent, 4 to 5 minutes. Add the bread cubes and turn and stir to expose them all to the hot oil, a minute or two. Add water to cover and bring to a boil, then reduce the heat to medium-low and cook, uncovered, until the bread is well softened and most of the water is absorbed, 3 to 5 minutes. If using tomatoes, add them a couple of minutes after the water comes to the boil.
Meanwhile, break the eggs into a bowl, add the salt, and whisk well. Stir in the chopped herbs, if using, and pepper to taste.
Add the eggs to the bread mixture and stir a little to distribute them. Cook for a minute or two, until the eggs have just set. Turn out onto a platter and serve.
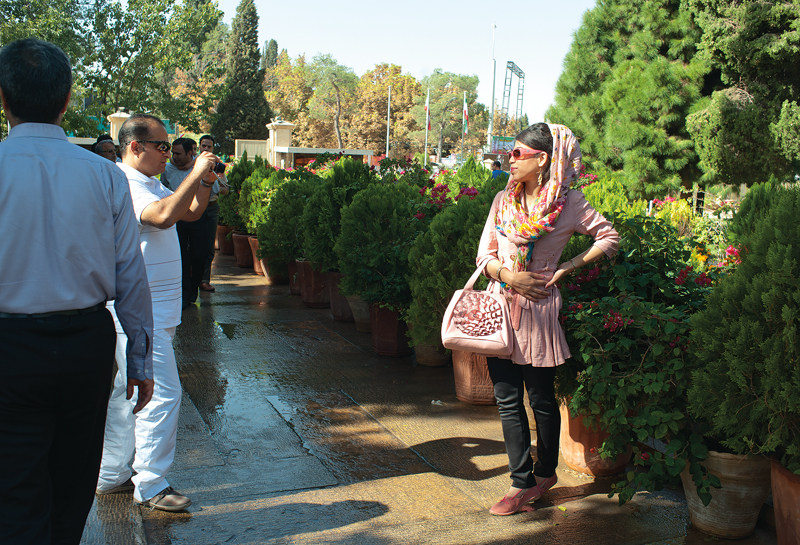
Shiraz, Iran—Posing for a photo in the garden at the tomb of the famed Persian poet Hafez (see Fountains and Gardens, Picnics and Poetry).
Until recently, during wintertime in Armenia, most people living in villages and on farms had access only to what they had put away in their pantry and cold storage, as well as to milk and cheese and bread. Cooks needed to figure out interesting ways of making full use of the ingredients available, and that inventiveness resulted in a number of ways of cooking with dried-out flatbreads.
Banrakhash is rather like a pizza made of leftover bread. Cheese and leftover lavash or other thin breads are layered into a baking pan with some chopped onion, and doused with melted butter, then topped with beaten egg and cream before being baked. The dish is a rich and hearty way to use leftovers, and to warm body and soul on a cold night.
This recipe comes from a place that has seen hard times, the Gyumri area, which lies between Armenia’s capital, Yerevan, and the southern Georgian region called Javaheti. In December 1988, a massive earthquake devastated the city of Gyumri, and the breakup of the Soviet Union a couple of years later stripped Armenia of jobs and income.
But things are looking up. Recently I met an American man who had started an IT company in Gyumri. As he says, it’s hard to export products from a landlocked country like Armenia, but software, the product of Armenians’ brains and ingenuity, is very exportable. The company is prospering and Gyumri is turning into a small IT hub, a reason for optimism in a country where optimism can be in short supply.
You will need a round or square baking pan 10 to 12 inches across. This is an improvised dish that accommodates the tools and ingredients available, so if your pan is smaller, just add another layer to use up all your bread and cheese.
Serve this as a main dish to accompany a soup or a bean stew. Put out an Herb Plate (see recipe) or some cooked greens to balance the richness of the cheese pie. Leftovers are great the next day, served at room temperature or rewarmed in a low oven.
Serves 6 to 8
2 tablespoons sunflower or extra-virgin olive oil
1 or 2 onions, thinly sliced
About 1 pound dried-out lavash or other thin flatbreads (if you have pita, split the breads to make thin layers)
About ⅓ pound chopped cheese: a mix of pot cheese, feta, or other salty, crumbly cheese and string cheese or medium cheddar
8 tablespoons (1 stick) butter, melted
1 medium or large egg
About ¼ cup light cream
Place a rack in the upper third of the oven and preheat the oven to 375°F.
Place a heavy skillet over medium heat. Add the oil and toss in the onions. Fry, stirring occasionally, until translucent and softened. Set aside.
Line a 10- to 12-inch baking pan or dish (see headnote) with some of the bread, overlapping the pieces so the surface is completely covered; it’s fine if some of the pieces come up the side of the pan.
Sprinkle on about a quarter of the cheese. Add another layer of bread. If the bread is very dry and brittle, sprinkle on a tablespoon or two of water. Sprinkle on more than half the remaining cheese and half the cooked onions. Add another layer of bread pieces. Again, if they are extremely dry, sprinkle on a little water. Top with the remaining cheese and onions and cover with another layer of bread. Pour the melted butter over and let stand for a moment.
Whisk the egg and cream together and pour over the top of the dish. Place the pan in the oven and bake for about 25 minutes, until the top is touched with brown and the top layer of bread has crisped up. Let cool for 15 minutes before cutting and serving.
Note on Options: You can include a light sprinkling of nigella seeds on one or two of the cheese layers, or a dusting of dried mint or scattering of fresh tarragon. You can also use this dish as an opportunity to use up tired ends of dried cheese that may be hanging around your refrigerator, making it an even more useful dish for leftovers.
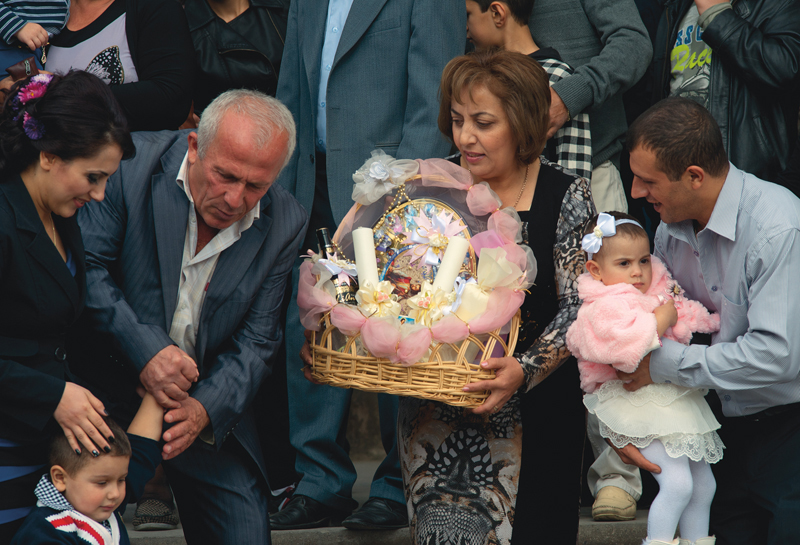
Khor Virap, near Yerevan, Armenia—A family leaving church with a newly christened baby. One of the most revered sites in Armenia, Khor Virap is an ancient monastery in the shadow of Mount Ararat, within sight of the Turkish border.