The proliferation of automatic weaponry during twentieth century warfare meant that charging across open ground to engage the enemy at close quarters became a lot less effective and much more risky. However, it often remained the only way to dislodge determined infantry from strong defensive positions.
If a player wishes a unit to engage an enemy at close quarters, it must be given a Run order and the player must also declare the unit is making an assault.
When a unit makes an assault it moves into touch with the target enemy unit, and the two will then fight at close quarters. This is the only time when opposing units are allowed to deliberately move into touch, as they must normally keep more than 1” away from each other. Close quarter fighting is resolved in the following sequence:
1. Declare target
2. Measure move distance
3. Target reacts
4. Move assaulting models
5. Fight first round of close quarters
a. Attackers roll to damage
b. Defenders take casualties
c. Defenders roll to damage
d. Attackers take casualties
e. Loser surrenders and is destroyed
6. Resolve draws – further rounds of close quarters
7. Winner regroups
The player declares that the unit is making an assault and indicates the enemy unit that will be attacked. The unit making the assault must be able to see the target enemy unit, or must be able to see the building it occupies if the target is inside a building. Note that just as a unit must select one enemy to shoot at, a unit must select one enemy to assault.
Measure the distance between the two units – once again this means the distance between the closest assaulting model and the closest visible model in the target unit. Also bear in mind when measuring that the closest assaulting model must move round impassable terrain, all enemy models and all friendly vehicles that block its most direct path to the enemy – (basically, impassable terrain and all models except friendly infantry and artillery). If the model has to go around any of these, it will make the distance longer than a simple ‘as the crow flies’ normal measurement.
If the distance is greater than the maximum Run move of the assaulting troops (12”) then the assault has failed to contact. Move the assaulting unit as far towards the target as it can get, remembering to leave a gap of more than 1” between then as usual. If the distance is within the maximum Run move of the assaulting troops (12”) then the assault is successful.
If the assault is successful and the target unit has not already taken an action that turn, the target unit can react by opening fire against the assaulters. The opposing player takes an order die from the dice bag and instructs his unit to Fire. Sometimes this reaction fire may be enough to wipe the assaulters out before they even reach their target.
Counterattack in the Krinkelterwald, by Steve Noon © Osprey Publishing Ltd. Taken from Combat 15: US Infantryman vs German Infantryman

If the unit being assaulted has one or more pin markers it is still allowed to react by opening fire. The order is automatically given; no test is required to see if the order is obeyed. Note that because no test is taken the unit does not lose a pin marker for ‘passing’ an order test. Each pin marker on the unit will reduce its chance of hitting in the usual way.
Also note that the shooting is resolved immediately, before any assaulting models are moved. However, even weapons that are out of range count as in range and can shoot, applying the long range to hit penalty regardless of the actual distance to the target – this represents the firer waiting for the assaulting model to be in range before firing.
TOP SECRET
Whenever the assault of the enemy has gone across obstacles or rough ground, thus being shortened to 6”, or when the defender is being fought across an obstacle as described above, the defender has the advantage of readying themselves for the onslaught and place a few blows of their own as the enemy makes its way across the terrain.
This means that the attackers’ normal advantage of going first is cancelled by the defenders’ shelter – instead of the attackers fighting first, both sides fight simultaneously. Calculate the combat with all the models from both sides fighting at the same time, and then remove casualties from both sides. To avoid confusion one player will probably have to resolve his fighting first, but regardless of how many enemy fall casualty, all the models in the opposing unit will fight including casualties.
If the assaulting unit is 6” or less from its target when the assault is declared then the target cannot react. The enemy is just too close and there is not enough time to bring weapons to bear. Note that units in Ambush make exception and ignore this rule – they can still fire at the assaulting unit if assaulted from 6” or less.
Any weapon that has a fixed arc of fire can only respond with reaction fire if the assaulting unit is within its fire arc at the start of the assault move.
If the assault is successful, move the models in the assaulting unit into base contact with the models in the target unit. Arrange the combatants so that as many models from both units touch as possible, distributing the assaulters one on one as far as possible, and then as equally as possible amongst the defenders. Once the assaulting unit has moved, any models in the target unit that are not already in contact with an enemy are moved into touch. Attacking and defending models that are unable to move into contact with an enemy for whatever reason are positioned so that they touch the models in their own unit that are in contact with the enemy and so on, as close as possible to enemy models. These models then count as fighting in the combat even though they are not in base contact with enemies.

The German squad declares that it is assaulting and is found to be in range.
The assaulting models are moved into base contact with their targets.
Diagram 12: Assaulting Defended Obstacles

The closest model (9”) is behind and in contact with an obstacle.
The assaulting unit is moved into contact with the obstacle.
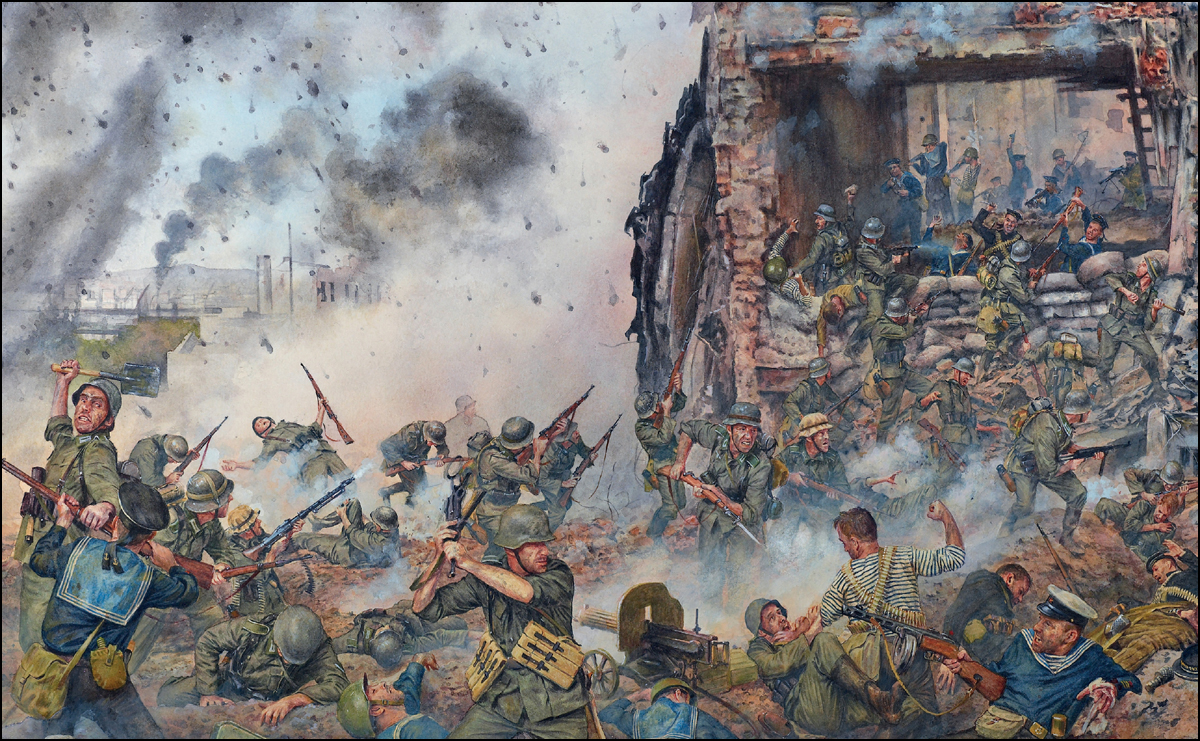
Hand-to-hand combat for the Proletary Cement Factory, by Steve Noon © Osprey Publishing Ltd. Taken from Campaign 281: The Caucasus 1942–43
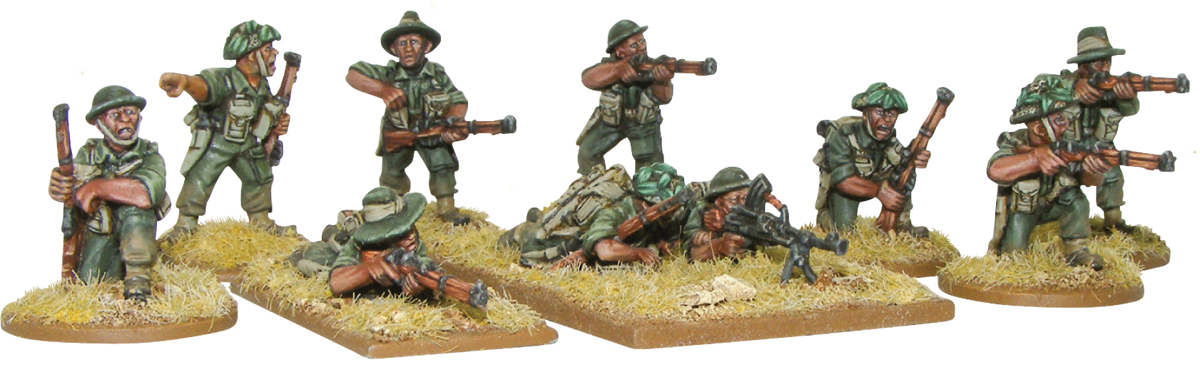
Gurkha Section
Note that individual models can potentially move further than 12” to reach an enemy during an assault. So long as opposing units are within the permitted distance measuring closest to closest in the normal way, the assault goes ahead.
When an infantry unit assaults an enemy unit the usual 1” gap rule that prevents enemies moving within 1” does not apply. Models are allowed to move within 1” of enemy as they assault, but are not allowed to pass within 1” of one enemy unit to assault a different enemy unit that is further away.
As stated earlier, when measuring the distance between the closest assaulting model and the closest visible model in the target unit, you must consider that the model must go around impassable terrain, but otherwise takes the shortest possible route.
If this closest possible route crosses any obstacles or rough ground, the assault move, though still being a run move, is limited to just 6” rather than 12”. Note that the defenders will also benefit from the ‘defensive position’ bonus in the ensuing fight as explained below.
If, when measuring the distance between the closest assaulting model and the closest visible model in the target unit, the line is clear of all terrain except for an obstacle that the target model is sheltering right behind (as shown in Diagram 12), the assaulting unit can Run at full speed (i.e. the full 12”) and if the assault is not stopped by reaction fire, will be placed in base contact with the obstacle itself, or as close as possible to it once the obstacle is full. The target unit is then lined up behind the obstacle opposite the attackers, including any models that were on the enemy side of the assault – imagine they have leapt behind the obstacle to defend it.
The combat is then resolved as normal, but the defenders will benefit from the ‘defensive position’ bonus in the ensuing fight (see here).
To explain things clearly we will refer to the unit making the assault as the attackers and the target unit as the defenders. The fighting is resolved as follows. Note that we are only concerned with attacks against other infantry and artillery crews for the moment. The rules for close quarter fighting against vehicles are a little different and are explained here.
The attackers make one assault attack per man (keep in mind that some weapons and special rules confer additional attacks). As there is no taking cover from a grenade blast, bayonet thrust or point-blank shot, all close quarter attacks against other infantry or artillery crews hit automatically. Roll to inflict damage in the same way as for shooting, including inflicting exceptional damage on rolls of 6 followed by a 6 as explained. Note that no Pen modifiers apply in close quarters, regardless of what weapons the combatants are equipped with, and no weapon special rules apply except for the assault special rule. Also note that pin markers have no effect in close quarters and are ignored for the duration of the fight.
This is done exactly as for shooting damage. The defender picks which models fall casualty, unless the attackers have scored exceptional damage in exactly the same way as for shooting.

Any of the defenders that are still standing after the attacker’s onslaught can fight back, hitting their enemies automatically and rolling to damage as before.
This is just the same as described above for the defenders.
The side that has caused the most casualties in the round of close quarters combat is the winner. The losing unit is destroyed and removed. Any survivors are assumed to be taken prisoner, running for their lives, hiding or playing possum and are treated as having fallen casualty.
If one side is wiped out to a man during the combat itself, it is the loser and the other side wins regardless of the number of casualties suffered – winners must be alive!
If neither side causes more casualties than the other the result is a draw. Immediately fight another round of close quarters combat. Following a drawn combat subsequent fighting is worked out simultaneously as described for fights across obstacles.
If the result is a draw again continue fighting until one side loses or is completely wiped out. Infantry assaults are always decisive resulting in the complete destruction of at least one side.
After the losers are removed, the winners are allowed a special regroup move. This special move does not require an order, does not affect any order the unit already has, and does not prevent the unit receiving an order that turn if it has not already done so. This is a special out-of-sequence move that allows victorious units to regain their formation and arrange themselves into a less exposed position. If they have defeated an enemy sheltering behind an obstacle it allows them to move over the obstacle, for example.
A unit making a regroup move rolls a D6 and can move up to that number of inches. Although regrouping units are moving they cannot exit the battlefield, mount transports or enter buildings (unless they assaulted said building, as explained in the rules for buildings here).

Soviet PPSh-41 Submachine Gun

