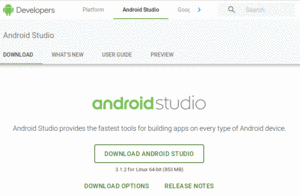
Figure 1: Android Studio Download Page
Now, let us get you set up with the pieces and parts necessary to build an Android app.
NOTE: The instructions presented here are accurate as of the time of this writing. However, the tools change rapidly, and so these instructions may be out of date by the time you read this. Please refer to the Android Developers Web site for current instructions, using this as a base guideline of what to expect.
The Android tools include an emulator, a piece of software that pretends to be an Android device. This is very useful for development — not only does it mean you can get started on Android without a device, but the emulator can help test device configurations that you do not own.
There are two types of emulator: x86 and ARM. These are the two major types of CPUs used for Android devices. You really want to be able to use the x86 emulator, as the ARM emulator is extremely slow.
However, to use the x86 emulator, your development machine must have things set up properly first. Linux users need KVM, while Mac and Windows users need the “Intel Hardware Accelerated Execution Manager” (a.k.a., HAXM).
Also, this only works for certain CPU architectures, ones that support virtualization in hardware:
Those virtualization extensions must also be enabled in your device’s BIOS, and other OS-specific modifications may be required.
Also, at least for newer API levels, your CPU must support SSSE3 extensions, though the details of this requirement are not documented as of October 2017.
Part of the Android Studio installation process will try to set you up to be able to use the x86 emulator. Make note of any messages that you see in the installation wizard regarding “HAXM” (or, if you are running Linux, KVM), as those will be important later.
Compiling and building an Android application, on its own, can be a hardware-intensive process, particularly for larger projects. Beyond that, your IDE and the Android emulator will stress your development machine further. Of the two, the emulator poses the bigger problem.
The more RAM you have, the better. 8GB or higher is a very good idea if you intend to use an IDE and the emulator together. If you can get an SSD for your data storage, instead of a conventional hard drive, that too can dramatically improve the IDE performance.
A faster CPU is also a good idea. The Android SDK emulator, as of 2016, supports CPUs with multiple cores — previously, it only supported a single core. However, other processes on your development machine will be competing with the emulator for CPU time, and so the faster your CPU is, the better off you will be. Ideally, your CPU has 2 to 4 cores, each 2.5GHz or faster at their base speed.
Beyond that, to use the x86 emulator — the emulator that runs well — you need a CPU with certain features:
| Development OS | CPU Requirements |
|---|---|
| Windows | an Intel CPU with support for VT-x, EM64T, and “Execute Disable” (XD) |
| Mac | any |
| Linux | an Intel CPU with support for VT-x, EM64T, and “Execute Disable” (XD), or an AMD CPU with support for AMD-V |
If your CPU does not meet those requirements, you will want to have 1+ Android devices available to you, so that you can test on hardware.
Also, if you are running Windows or Linux, you need to ensure that your computer’s BIOS is set up to support Intel’s virtualization extensions. Unfortunately, many PC manufacturers disable this by default. The details of how to get into your BIOS settings will vary by PC, but usually it involves rebooting your computer and pressing some function key on the initial boot screen. In the BIOS settings, you are looking for references to “virtualization” or “VT-x”. Enable them if they are not already enabled. macOS machines come with virtualization extensions pre-enabled.
When you write Android applications, you typically write them in Java source code. That Java source code is then turned into the stuff that Android actually runs (Dalvik bytecode in an APK file).
Android Studio, starting with version 2.2, ships with its own private copy of OpenJDK 8, and it will use that by default. You are welcome to install and use your own JDK if you wish, though ideally it is for Java 8.
If your development OS is Linux, make sure that you can run 32-bit Linux binaries. This may or may not already be enabled in your Linux distro. For example, on Ubuntu 17.10, you may need to run the following to get the 32-bit binary support installed that is needed by the Android build tools:
sudo apt-get install libncurses5:i386 libstdc++6:i386 zlib1g:i386
As noted in the previous chapter, there are a few developer tools that you can choose from.
This book’s tutorials focus on Android Studio. You are welcome to attempt to use Eclipse, another IDE, or no IDE at all for building Android apps. However, you will need to translate some of the tutorials’ IDE-specific instructions to be whatever is needed for your development toolchain of choice.
At the time of this writing, the current production version of Android Studio is 3.1, and this book covers that version. If you are reading this in the future, you may be on a newer version of Android Studio, and there may be some differences between what you have and what is presented here.
You have two major download options. You can get the latest shipping version of Android Studio from the Android Studio download page.
Figure 1: Android Studio Download Page
Or, you can download Android Studio 3.1 — the version used in this edition of this book — directly, for:
Windows users can download a self-installing EXE, which will add suitable launch options for you to be able to start the IDE.
macOS users can download a DMG disk image and install it akin to other macOS software, dragging the Android Studio icon into the Applications folder.
Linux users (and power Windows users) can download a ZIP file, then
unZIP it to some
likely spot on your hard drive.
Android Studio can then be run from the studio batch file
or shell script from your Android Studio installation’s bin/ directory.
Next, we need to review what pieces of the Android SDK we have already and perhaps install some new items. To do that, you need to access the SDK Manager.
When you first run Android Studio, you may be asked if you want to import settings from some other prior installation of Android Studio:
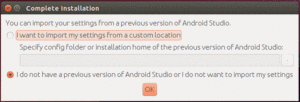
Figure 2: Android Studio First-Run Settings Migration Dialog
For most users, particularly those using Android Studio for the first time, the “I do not have…” option is the correct choice to make.
Then, after a short splash screen and a potentially long “Finding Available SDK Components” progress dialog, you will be taken to the Android Studio Setup Wizard:
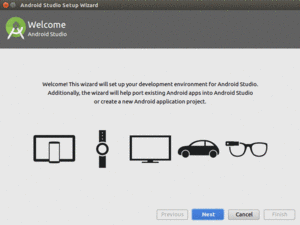
Figure 3: Android Studio Setup Wizard, First Page
Just click “Next” to advance to the second page of the wizard:
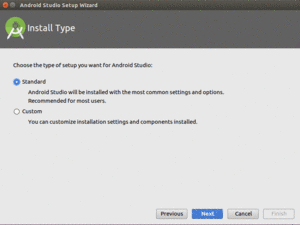
Figure 4: Android Studio Setup Wizard, Second Page
Here, you have a choice between “Standard” and “Custom” setup modes. Most likely, right now, the “Standard” route will be fine for your environment.
If you go the “Standard” route and click “Next”, you should be taken to a wizard page where you can choose your UI theme:
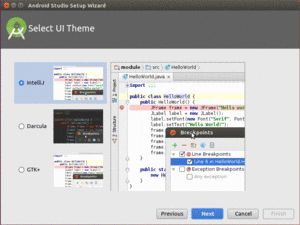
Figure 5: Android Studio Setup Wizard, UI Theme Page
Choose whichever you like, then click Next, to go to a wizard page to verify what will be downloaded and installed:
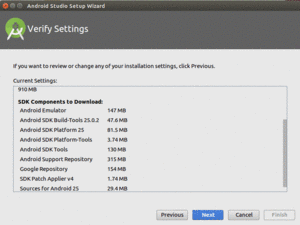
Figure 6: Android Studio Setup Wizard, Verify Settings Page
Clicking Next may take you to a wizard page explaining some information about the Android emulator:
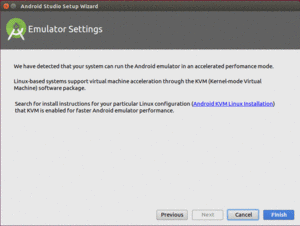
Figure 7: Android Studio Setup Wizard, Emulator Info Page
What is explained on this page may not make much sense to you. That is perfectly normal, and we will get into what this page is trying to say later in the book. Just click “Finish” to begin the setup process. This will include downloading a copy of the Android SDK and installing it into a directory adjacent to where Android Studio itself is installed.
When that is done, after clicking “Finish”, Android Studio will busily start downloading stuff to your development machine. If you are running Linux, and your installation crashes with an “Unable to run mksdcard SDK tool” error, go back to Step #2 and set up 32-bit support on your Linux environment.
Clicking “Finish” will then take you to the Android Studio Welcome dialog:
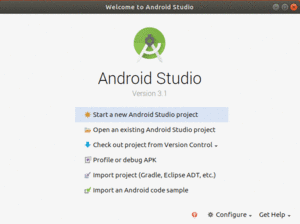
Figure 8: Android Studio Welcome Dialog
Then, in the welcome dialog, click Configure, to bring up a configuration drop-down list:
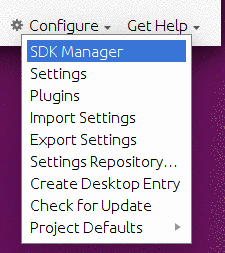
Figure 9: Android Studio Welcome Dialog, Configure Drop-Down List
There, tap on SDK Manager to bring up the SDK Manager.
You should now have the SDK Manager open, as part of the overall default settings for Android Studio:

Figure 10: Android SDK Manager, “SDK Platforms” Tab
The “SDK Platforms” tab lists the versions of Android that you can compile against. The latest version of Android (or possibly a preview edition) is usually installed when you set up Android Studio initially. However, for the tutorials, please also check “Android 7.1 (Nougat)” in the list if it is not already checked, and then click the “Apply” button to download and install those versions. You may need to accept a license confirmation dialog as part of this process — review the license, and if you accept it, click Next to begin the download:
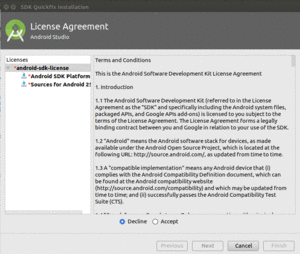
Figure 11: Android SDK Manager, License Confirmation Dialog
When that has completed, you can click “Finish” to close up the download dialog, and then you will be returned to the SDK Manager. Then, you can close up the SDK Manager by clicking the OK button.
… we will create an Android project that will serve as the basis for all our future tutorials, plus set up our emulator and device.