
Housing Essentials
CREATING A HEALTHY, COMFORTABLE HOME

SO YOU’VE DETERMINED THAT BACKYARD CHICKENS
in your municipality are allowed. Maybe you even helped influence changes to local chicken-keeping laws. You’ve consulted with family members and promised to handle the less glamorous chores. Now you can get your chickens, right? Wrong!

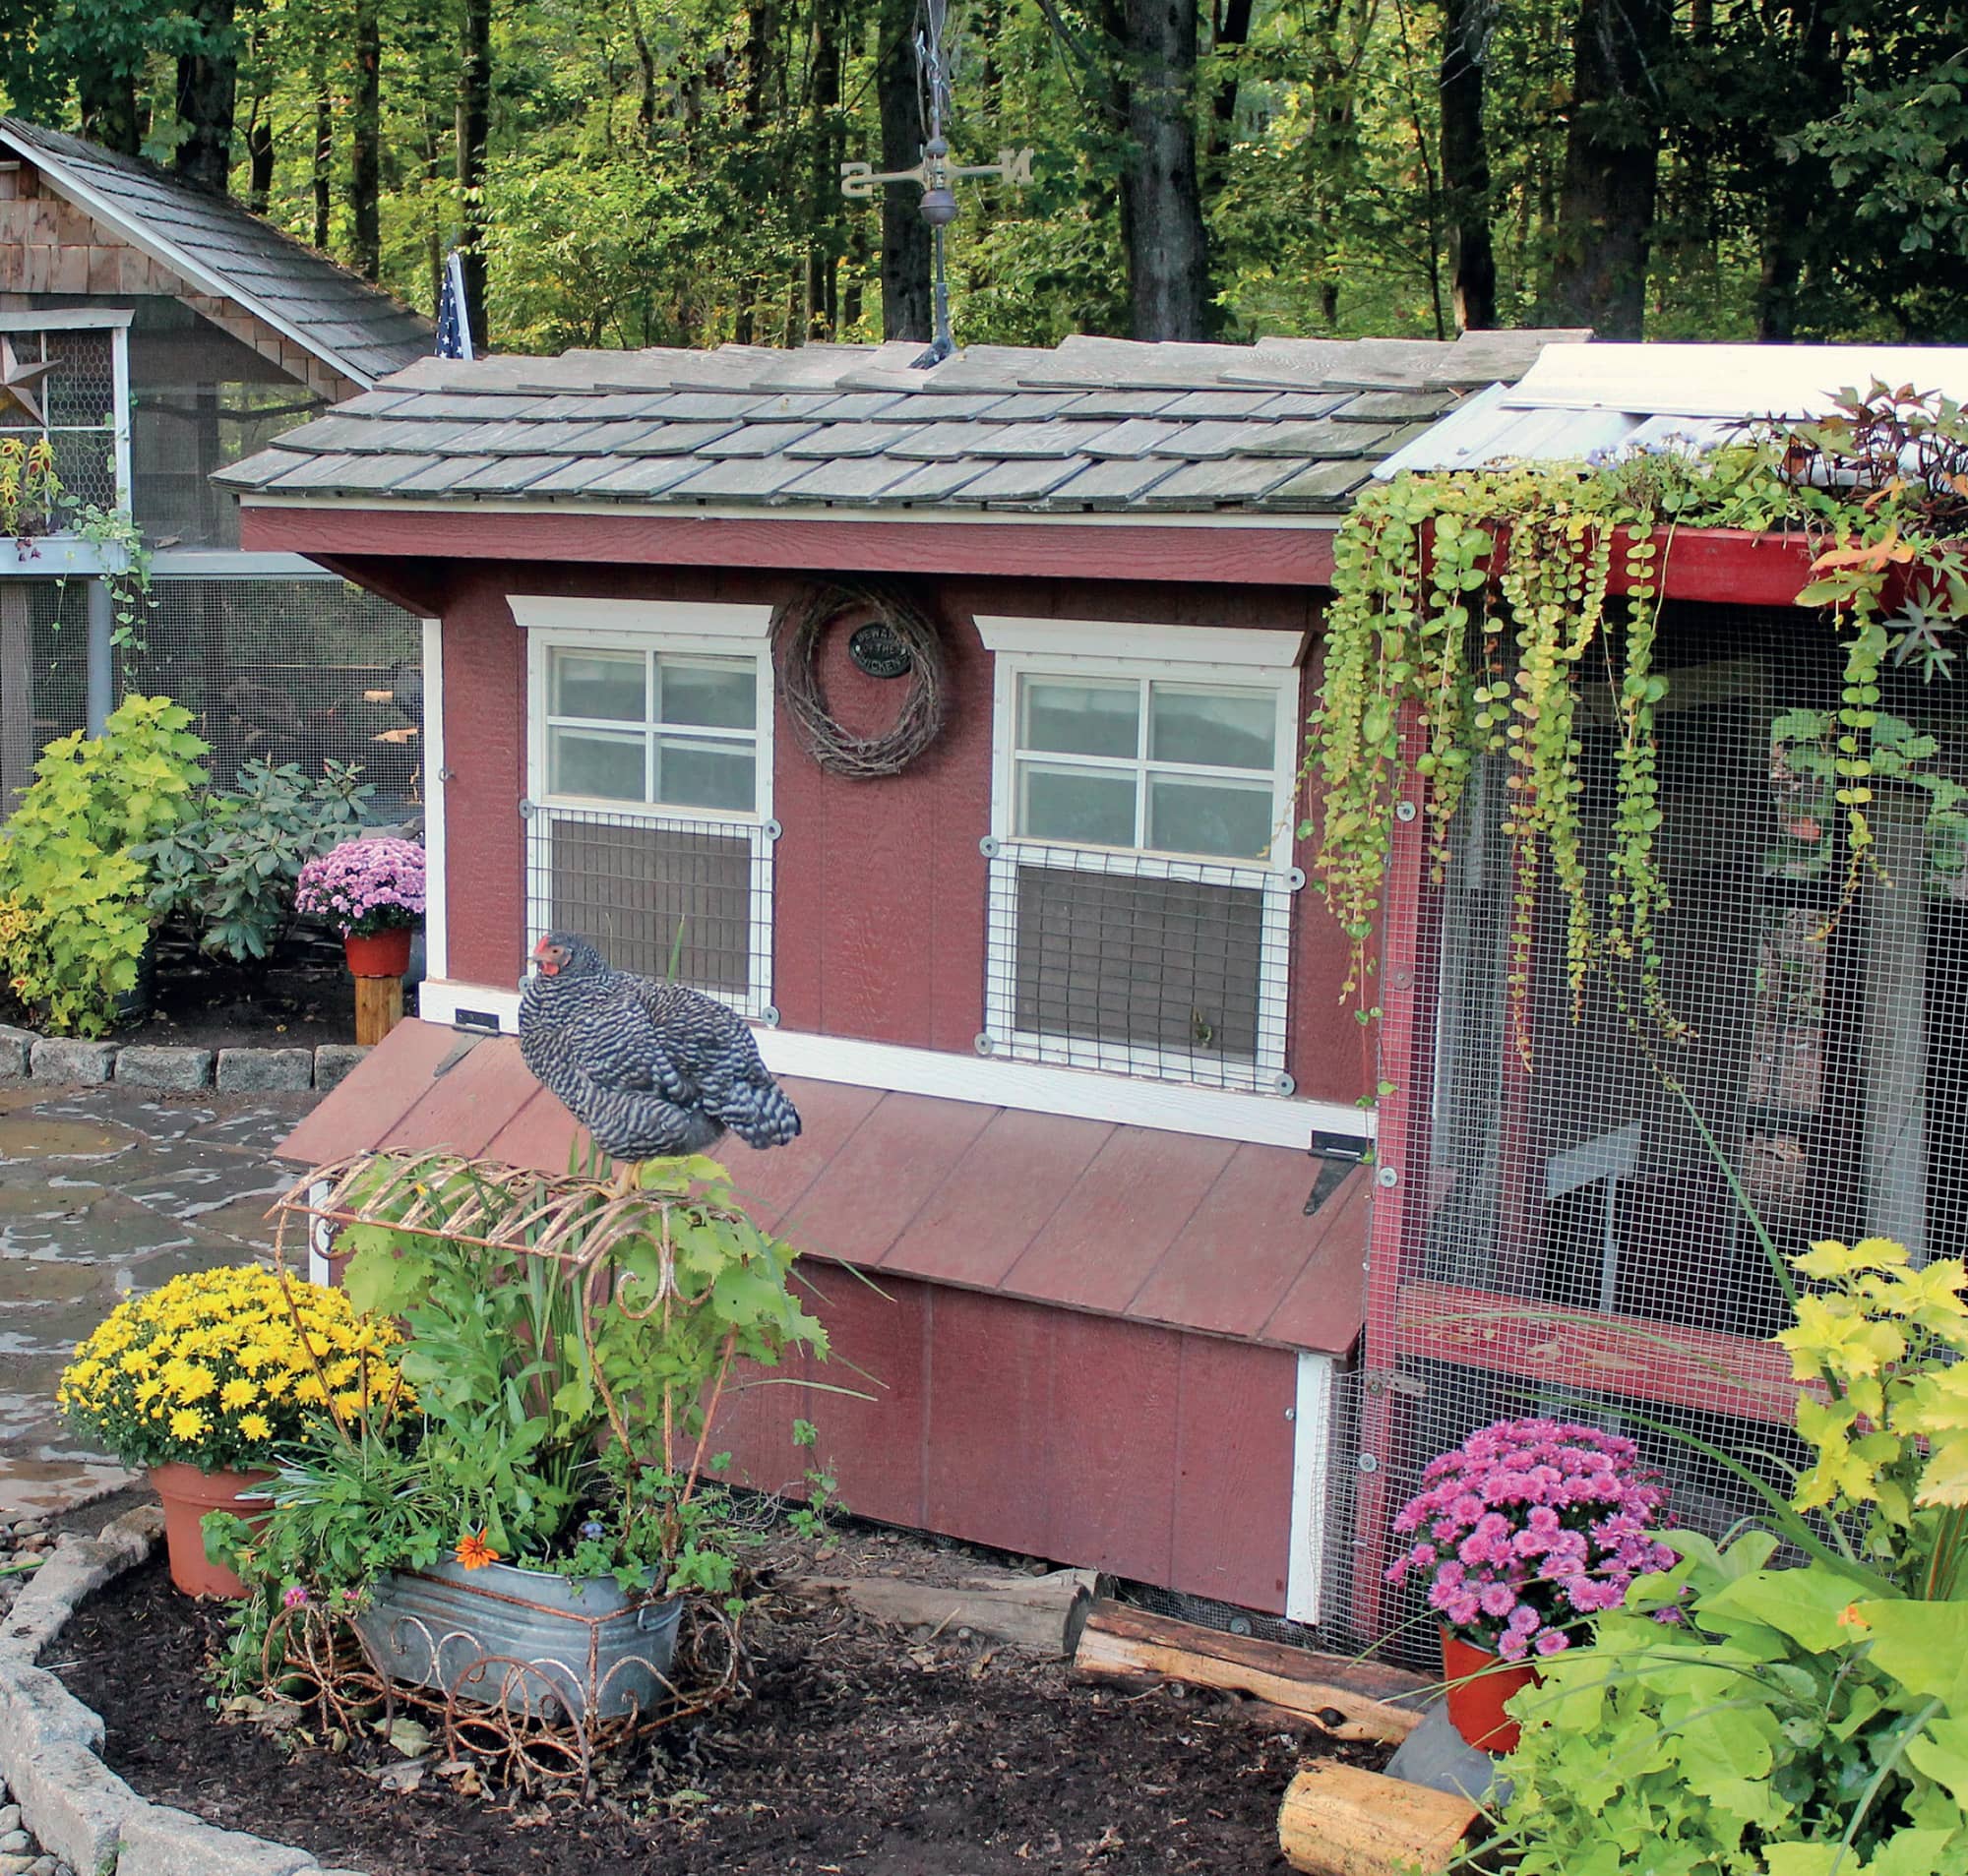
A Dominique hen takes a rest in front of one of my two coops. I recommend making your coop at least twice the size you believe you’ll need.
First, you need a coop. The time to build or buy the coop is before the chickens arrive. Featherweight baby chicks will rapidly become dusty, poop-generating machines you’ll want to evict from your house in a matter of weeks.
Whether you’re building or purchasing a chicken coop, certain features are essential for a high-functioning living space. Chickens do not care about whimsical decor, curb appeal, or the cost of their coop. The cost of a poorly designed coop can be sick chickens, behavioral problems, and overall frustration with what should be an enjoyable and rewarding experience. Any coop design will be tweaked along the way, but by keeping the important features in mind, you can avoid the major pitfalls.
The Coop: Size Matters
Hear me now, believe me later: the coop should be at least twice the size you believe you’ll need. Chickens explore their world with their beaks, and the closer they are to one another, the more likely they are to pick at an emerging pinfeather or an insect on a flockmate’s body, which can result in a minor skin wound that can become a life-threatening injury. Crowded chickens may also begin aggressively picking at each other to enforce their positions in the flock hierarchy. Additions are made to every flock sooner or later, so plan accordingly.
Ideally, chickens will spend time inside the coop only to sleep and lay eggs. All other activities should occur outside. Allow at least 4 square feet per bird inside the coop. Free-range flocks can manage with a bit less indoor space because they spend most of their time outside. Confined flocks that reside primarily in an enclosed run, however, should be afforded as much space as possible.
LOCATION, LOCATION, LOCATION
When plotting the coop’s location, imagine how difficult it will be to get to the coop to care for the flock in the worst weather. Consider the proximity of the coop to the closest water source and food storage area. In cold climates, shoveling snow, hauling water, carrying feed, and collecting eggs can be major burdens if the coop is difficult to reach.
Anticipate weather-related challenges based on climate. In a rainy, wet climate, it’s best to position the coop at the top of a sloped yard and avoid low-lying areas that can flood. In a hot climate, locate the coop in ample shade. Frigid winters? Seek natural windbreaks to protect the flock from harsh winds. In areas that experience both very cold and very hot seasons, favor a shady location because it’s more difficult for chickens to keep cool in the heat than to stay warm in the cold.
Raising the coop a few feet off the ground creates valuable outdoor space underneath, providing shade in hot weather, a dry location in the rain, and a hiding spot for birds seeking solitude. Elevating the coop also protects the bottom from moisture and wood rot. Protect chickens underneath the coop with hardware cloth fencing all around. Chicken wire will not protect chickens from predators.
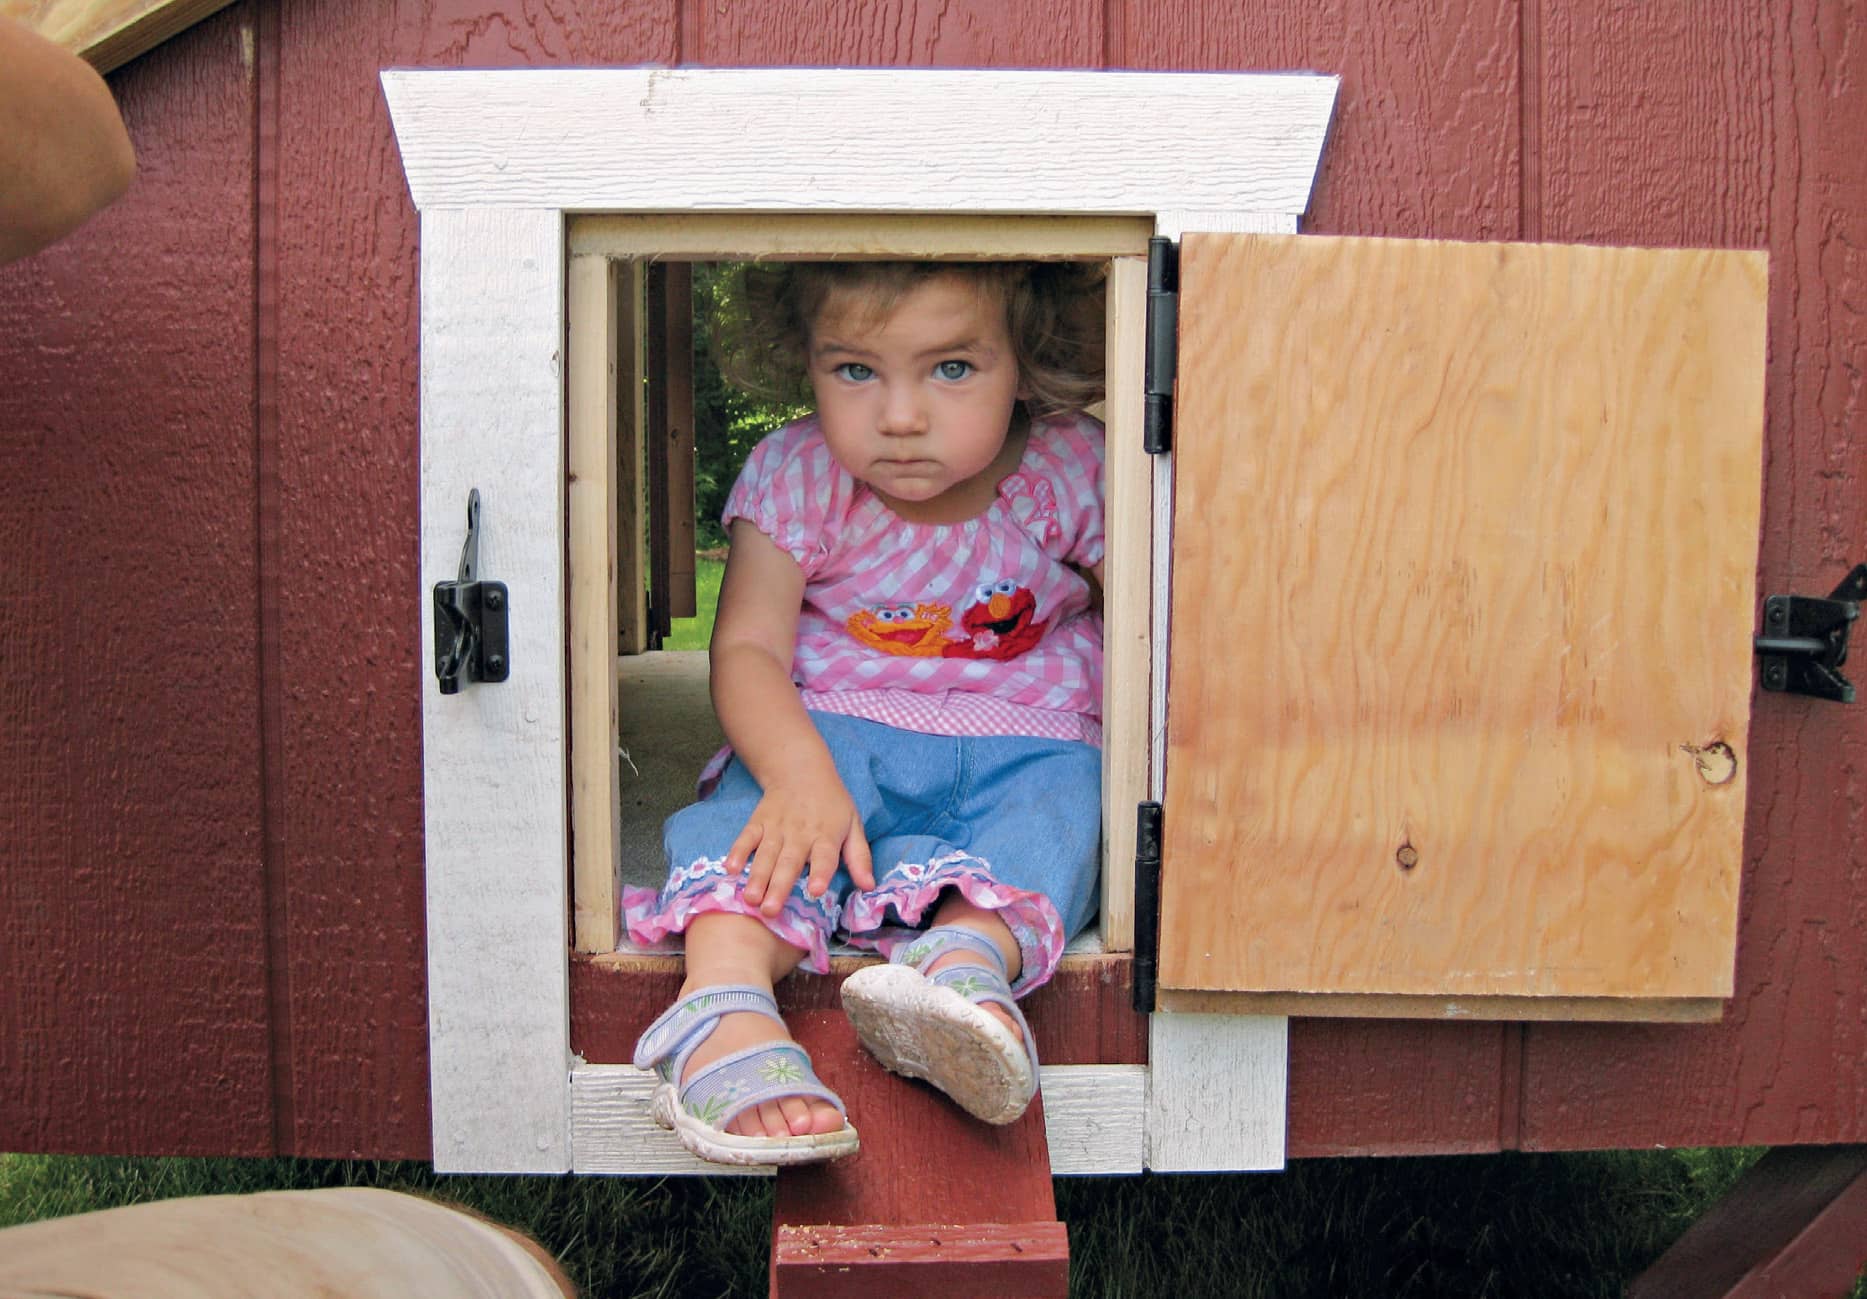
Every inch of the coop should be easily accessible to caretakers, both for ease of cleaning and for handling a sick or injured chicken in need of attention.
ACCESS
Every inch of the coop should be easily accessible to caretakers, both for ease of cleaning and for handling a sick or injured chicken in need of attention.
To enter and exit the coop, chickens use a small “pop door” measuring approximately 12 inches wide by 14 inches tall that opens into the run. A ramp generally leads from the threshold down into the run. A second, people-sized door leading into the coop provides access to human housekeepers and waitstaff. A third door leading from the yard into the chicken run should be tall enough for people to enter without incurring regular head injuries. Finally, an egg door allows eggs inside nest boxes to be accessible from outside the coop.
ROOSTS
Plan for 8 to 12 inches of roost space per bird inside the coop. Position roosts at least 12 inches from the nearest parallel wall, 18 inches from each other, and no more than 2 to 3 feet high unless a ladder or ramp is provided. Install roosts higher than nest boxes. Chickens instinctively seek roosts as high off the ground as possible, so if nest boxes are higher than the roosts, chickens will sleep (and poop) in the nest boxes and eggs will be laid in an unsanitary environment.
Roosts are commonly made from 2×4 lumber, which can be suspended with joist hangers for easy removal, cleaning, and periodic replacement. I don’t believe it matters which side of a 2×4 faces up—either way, chickens can cover their feet in cold weather. Tree branches approximately 3 inches wide are fine too. Closet dowel rods, PVC pipe, and similarly slick, narrow, cylindrical objects are inadvisable because they require more balance and can cause pressure points on the feet, leading to foot pad infections.
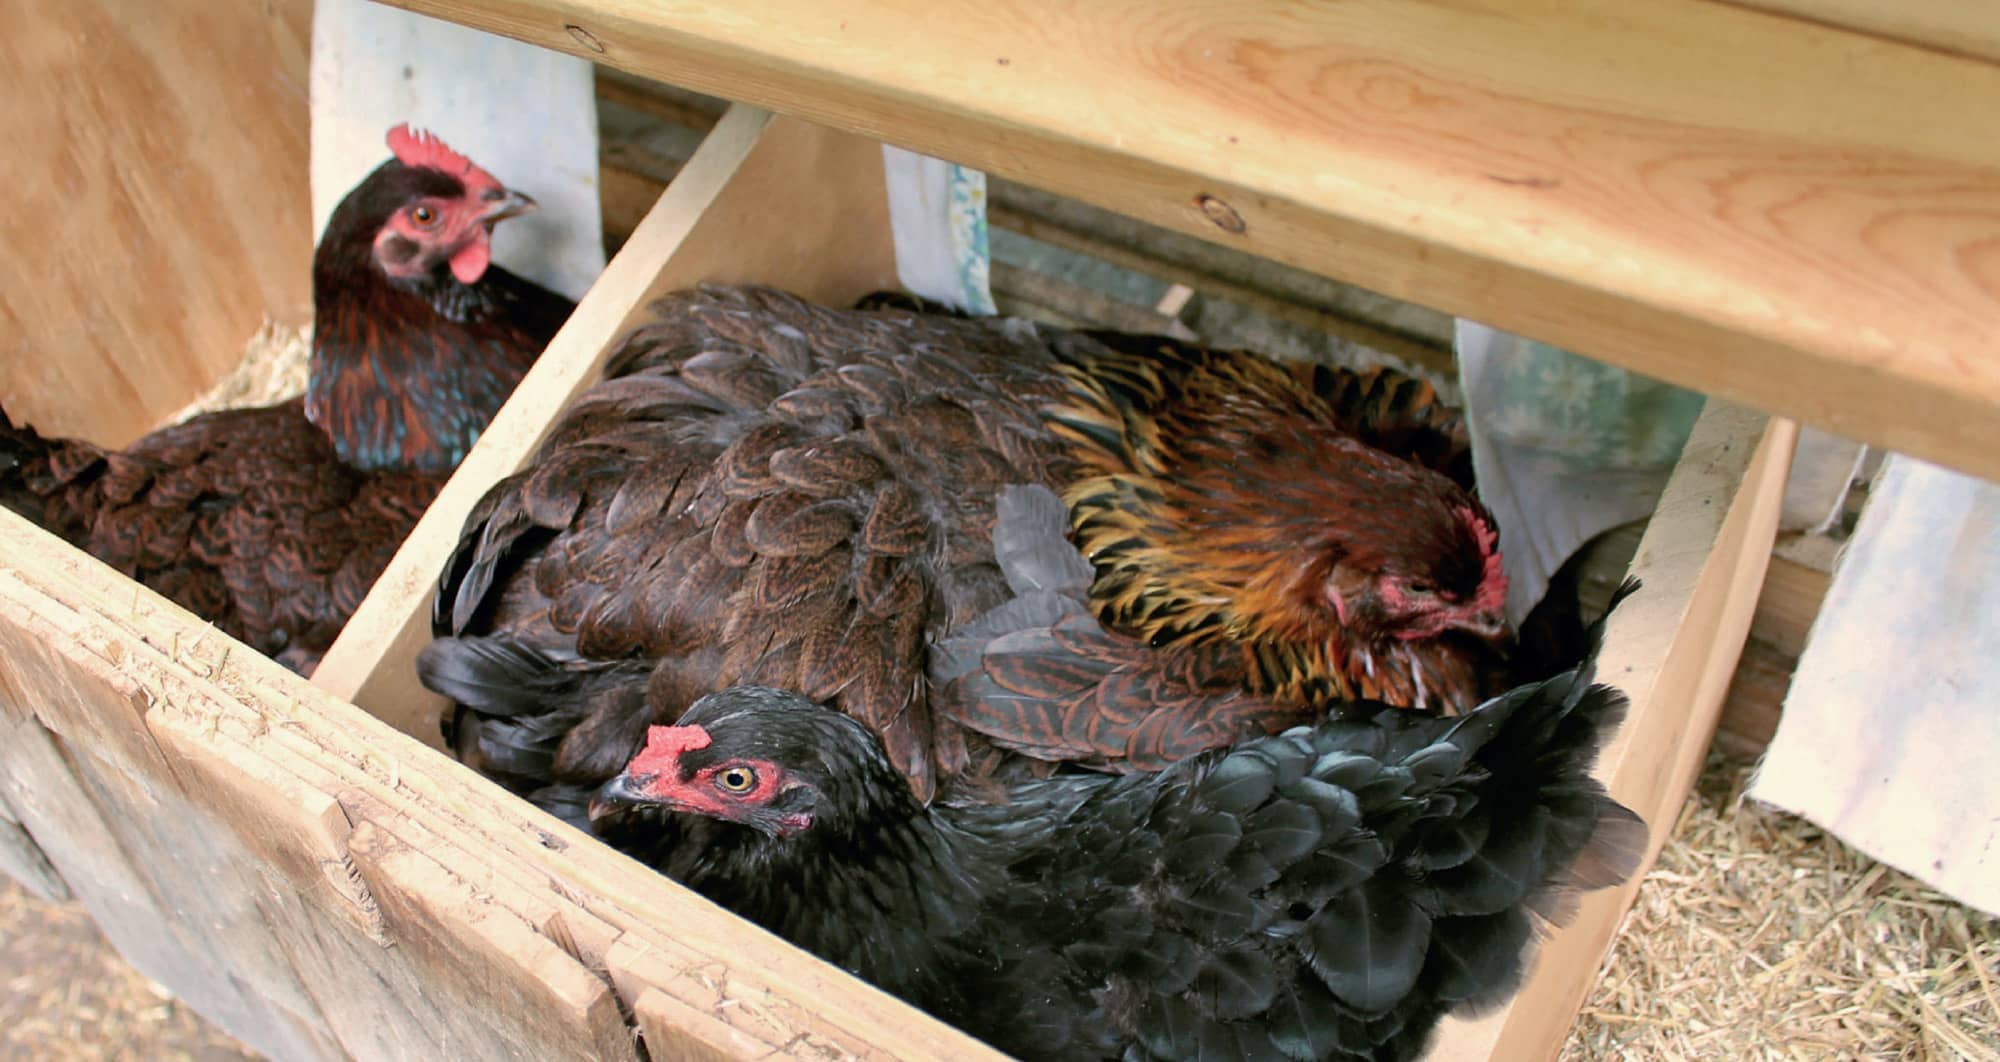
Don’t worry when hens bicker over one nest box or when several sit in it simultaneously—it’s the hen equivalent of women visiting the ladies’ room together.
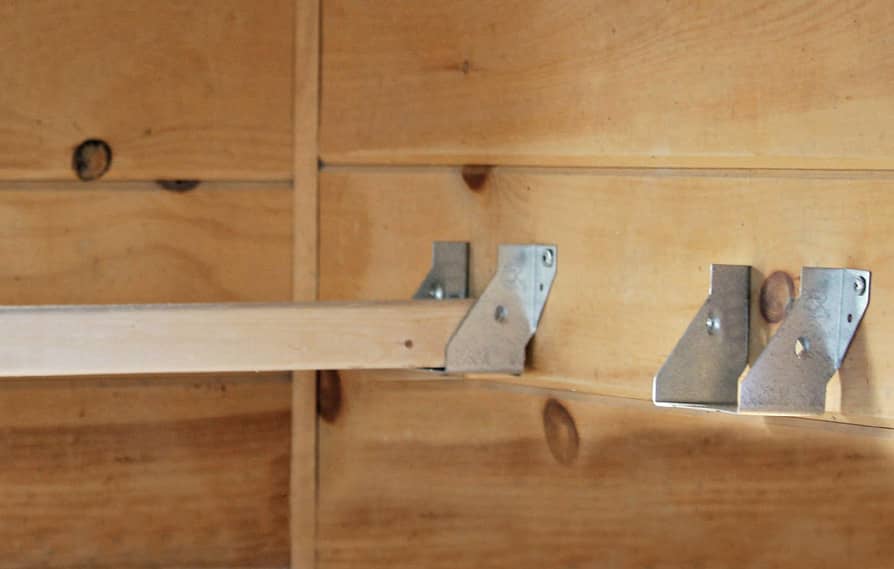
Roosts can be suspended with joist hangers for easy removal, cleaning, and periodic replacement. Install roosts higher than nest boxes. Chickens instinctively seek roosts as high above the ground as possible. If your nest boxes are higher than the roosts, chickens will sleep—and poop—in the nest boxes.
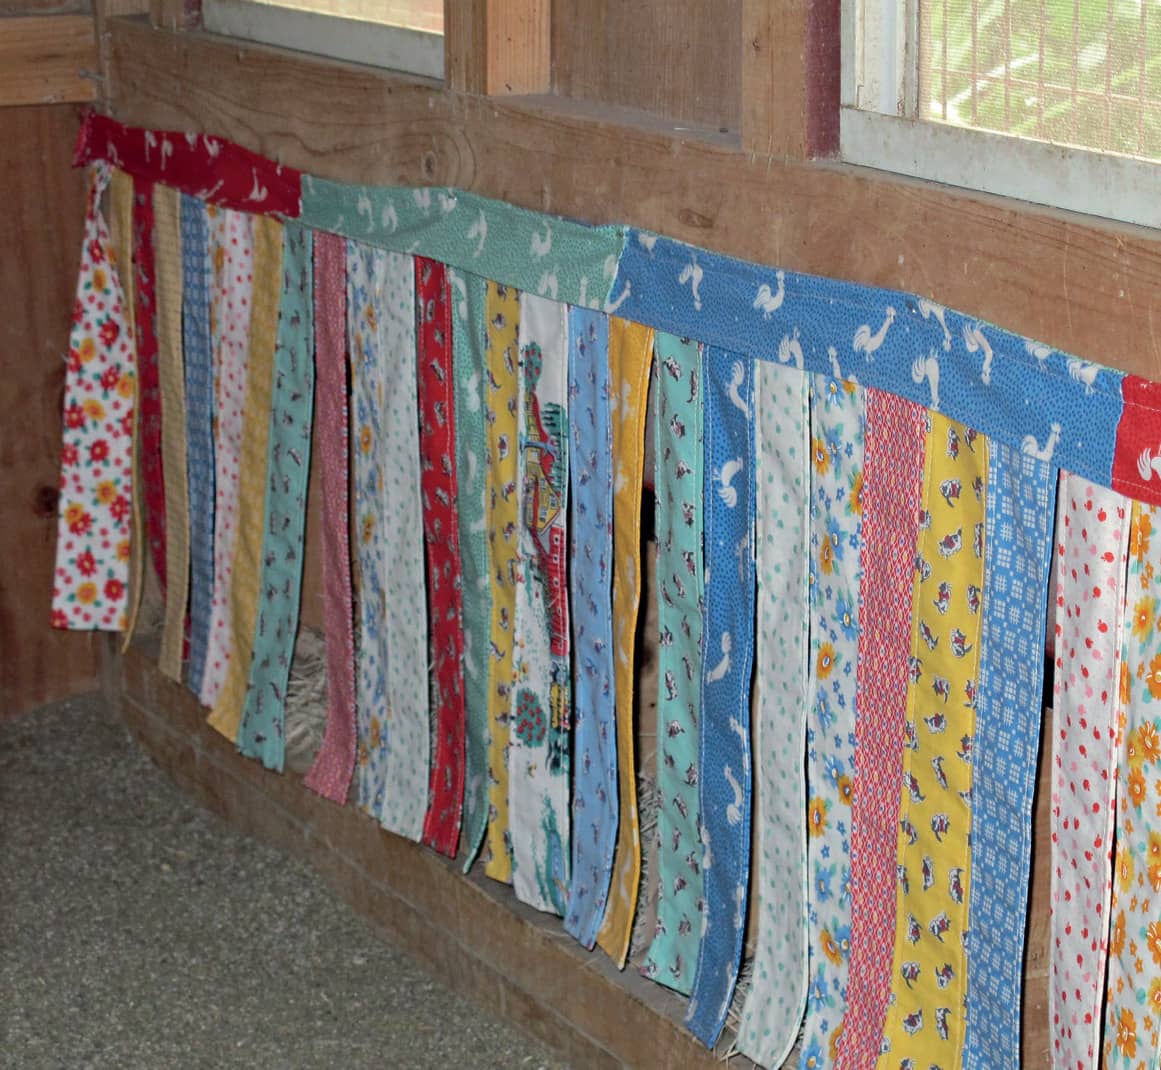
Nest box curtains are more than just an interior design statement—they offer laying hens the privacy they instinctively seek.
NEST BOXES
Hens prefer laying their eggs in dark, private places. The desire for privacy is likely an evolutionary adaptation resulting from the need to hide their potential offspring and hatched chicks from predators. Nest boxes inside the coop provide a good measure of security for laying hens as well as a common, clean spot for them to deposit their eggs.
Provide one nest box for every four chickens. These can be at floor level or higher, as long as they are lower than the roosts. Elevated nest boxes, however, free up valuable floor space, as do built-out nest boxes that are external to the coop. A typical nest box size is 12×12×12 inches. Here, the options are limitless: clean, empty kitty litter containers, 5-gallon buckets with a lip, upcycled baskets, and even gutted computer monitors all work!
Because a hen squats when laying an egg, nest box bottoms should be cushioned. They can be padded with a variety of materials, from pine shavings to plastic nesting pads or chopped hay/straw/zeolite blends. Hens seem to enjoy rearranging nesting material, but its more important function is to protect eggs from breaking, not humoring the hens. I don’t use or recommend regular straw due to its propensity to harbor mites and mold and cause crop impaction.
Nest box curtains offer laying hens more privacy. Curtains can be made of a variety of materials: cotton blends, old linen napkins, empty feed sacks, and more. They can be stapled to the nest boxes or hung with curtain rods. To facilitate entering and exiting the nest boxes, cut vertical strips into the material from the bottom up.
If possible, hang curtains before new pullets occupy the coop. Older hens that have lived in a coop without nest box curtains may be wary of them initially, but once they have inspected the nest boxes and deemed them safe, they will appreciate the privacy upgrade.
In addition to privacy, nest box curtains have other benefits:
• They keep broody hens and eggs out of view, reducing the likelihood of a laying flock turning into a setting flock. The power of maternal suggestion is strong, and seeing a collection of eggs in a nest is all it takes to encourage others to set.
• They discourage egg eating. It may come as a surprise to learn that chickens will eat eggs out of the nest boxes, a habit that is difficult to break and easily taught to other flock members. The less visible the eggs, the less tempted chickens are to eat them.
• They protect laying hens from pecking and cannibalism by keeping their reproductive parts concealed during egg laying. When laying an egg, a portion of a hen’s reproductive tract momentarily becomes visible as it escorts the egg out of the vent. An innocent passerby witnessing this spectacle may be drawn to the exposed tissue and peck at it, causing injury to the laying hen.
VENTILATION AND LIGHT
Excellent airflow through the coop is important in all seasons. Install as much ventilation as high up on the walls as possible. This will facilitate the continuous elimination of moisture and harmful ammonia gases from droppings and will introduce fresh air into the coop. For maximum air exchange, place functioning windows on all four sides of the coop in addition to either open gables, ridge vents, a cupola, or large air vents toward the top of the coop’s walls. In cold weather, adjust ventilation based on prevailing winds to avoid drafts on the birds.
Functioning windows not only provide critical air exchange but also maximize natural light inside the coop. Hormones responsible for egg production are triggered by light, so let it in! Most prefab chicken coops fail miserably in the window and ventilation departments—do not hesitate to take a reciprocating saw to the walls of the coop and add more! Always make windows predator-proof by covering them with hardware cloth secured with screws and washers, not staples.
FLOORING AND LITTER
Solid floors are much better for chicken health, safety, and sanitation than wire-bottomed floors. Wood floors can be protected from moisture and rot by covering with inexpensive linoleum, which also facilitates coop cleaning. Seal linoleum around the edges with silicone caulk for added moisture protection. A lip installed at door thresholds prevents litter from spilling out.
The drier and cleaner the coop, the healthier the environment for the flock. Litter, also misleadingly referred to as bedding, is the material placed on the coop floor to keep it dry and facilitate cleaning. Chickens do not ordinarily sleep in the litter, so it doesn’t matter whether we perceive it as soft and cozy. Its primary purpose is to keep the coop dry.
Proper litter management is a key to healthy backyard chickens. Litters that don’t perform well can lead to disease, bumblefoot, frostbite, parasites, flies, unnecessary work, and a slow leak in one’s wallet. The most common and effective litter materials are pine shavings, chopped straw/chopped hay blends with zeolite, and sand. Each manages moisture in a slightly different way. Regular, unchopped straw should never be used due to its notorious lack of absorbency and tendency to harbor mites, cause crop impaction, form manure mats, and grow mold, which puts chickens at risk for a respiratory disease known as aspergillosis.
Pine shavings are a good choice, but scientific research and personal experience have proven sand to be the better litter. It drains water brilliantly and dries rapidly, resulting in lower bacterial and fungal levels. It’s economical, easy to maintain, and will not decompose. For healthy chickens, sand is the litter superstar!
Sand is not a novel chicken litter concept. Poultry visionary Charles Weeks wrote of the benefits of sand in his 1919 book Egg Farming in California: “Sand is the only material to use on the floors of poultry houses. Clean, dry sand prevents any bacteria from starting. Clean, sharp sand is the freest from dust and easy to keep clean, as the droppings lay on top and are easily lifted off.”

For maximum air exchange, place functioning windows on all four sides of the coop in addition to open gables, ridge vents, a cupola, or large air vents toward the top of the coop’s walls.
Studies at the Auburn University Poultry Science Department comparing pine shavings to sand found sand had lower moisture levels and, because it’s inorganic, lower bacterial and fungal counts. If sand looks cleaner than other litter options, that’s because it is cleaner. Maryland poultry veterinarian Dr. Annika McKillop states, “I advise all of my clients to go from shavings to sand. … Sand decreases coccidiosis problems because the parasites require warm, damp environments with oxygen. Chickens are able to acquire a natural immunity to coccidiosis gradually without contracting the intestinal disease from an overpopulation of disease-causing oocysts promoted by wet litter.”
Sand desiccates droppings and it does not retain moisture or decay, which means less risk of respiratory infection, fly activity, bacterial growth, and frostbite. In addition, there is no increased risk of crop impaction with sand. In fact, sand is beneficial to the digestive tract because it is used as grit in the gizzard to break down fibrous foods.
Due to its high thermal mass, sand maintains more stable coop temperatures. The Auburn studies showed that sand keeps coops cooler in the summer and warmer in the winter. And in inclement weather, sand is dry and dust bath–ready! In wet or muddy outdoor conditions, eggs are cleaner because hens’ feet are cleaned and dried while walking through sand inside the coop to reach nest boxes.
Sand is easily cleaned with a kitty litter sifter. It very infrequently requires wholesale replacement. Removed annually or biannually, sand can be washed, sun-dried, and reused, making it super eco-friendly. The minimal amount of sand that goes into the compost with sifted chicken droppings requires no decomposition, resulting in compost that’s a great amendment to clay-heavy soils and contains a higher percentage of valuable, nitrogen-rich manure than compost made with other litter types.
The correct sand to use for litter (and dust baths) goes by many names, including washed construction-grade sand or river sand. Sand should consist of variable particle sizes through which water drains readily; it is typically sifted and washed, rinsing away the finest particles. By contrast, play sands are manufactured by crushing quartz, which creates fine, dusty particles that are easily inhaled and pack closely together, impeding drainage.
Sand can be used on coop floors that are cement, dirt, or wood. I use approximately 4 inches of sand inside the coop and as much as a foot in the run. Sand in the run or chicken yard is especially ideal in wet climates because water drains through. Periodic turning with a shovel or rototiller keeps well-traveled and wet areas mobile.
Sand can be purchased in bulk relatively inexpensively at garden centers and through landscaping companies. Typically, newly delivered sand will be moist from washing. If this is the case, or if the sand becomes moist from rain, melted snow, or spilled drinking water, a few passes with a rake will facilitate drying.
The one disadvantage of sand is its weight. Sand is heavy and may not be a feasible option for those with physical limitations or in large, mobile chicken tractors.
Regardless of litter type, it is infinitely better not to keep drinking water inside the coop. Encourage outdoor activity and a healthy coop by placing water and feed in the run. This will also limit rodent activity and significantly reduce the fly population inside the coop.

The correct sand to use for litter (and dust baths) goes by many names, including washed construction-grade sand or river sand. Sand should consist of varied particle sizes through which water drains readily; it is typically sifted and washed, rinsing away the finest particles.
DROPPINGS BOARDS
A droppings board is essentially a shelf underneath roosts that catches droppings overnight. It can be permanently affixed or removable for easy cleaning, and is typically scraped down each morning into a bucket before composting. I use a 12-inch taping knife and a big bucket to clean the droppings boards in my two coops, and it makes quick work of the task.
For ease of cleaning, some droppings boards are painted, covered in linoleum, or lined with empty feedbags. Alternatives to traditional, shelf-like droppings boards include plastic boot trays, feedbags, or waterproof canvas material fashioned into a sling suspended underneath the roosts. Even sheets of newspaper or puppy training pads placed on the floor will do the trick.
I view droppings boards as a chicken coop necessity: they eliminate the primary source of moisture, ammonia, and odor from the coop, solving many of the most common coop-management problems, such as flies, respiratory problems, intestinal diseases such as coccidiosis, and frostbite.
One of the first signs of a sick chicken is abnormal poop, and droppings boards provide the invaluable opportunity to assess the health of the entire flock at a glance each day. And because chickens tend to occupy the same roost position each night, identifying the bird that generated the abnormal poop is simplified. In removing most of the day’s droppings from the coop before it hits the floor, the litter stays cleaner longer, which means more time to sit and socialize with the flock!
One instance in which a chicken keeper may not wish to utilize droppings boards is when employing the deep litter method of chicken waste management, which calls for droppings and litter material to compost inside the chicken coop.

I view droppings boards as a chicken-coop necessity: they help easily eliminate the primary source of moisture, ammonia, and odor from the coop, solving many of the most common coop management problems.
The Run
A chicken run is an enclosed, outdoor area ordinarily attached to the coop. Go BIG on the chicken run! Confined birds spend most of their days in it; free-range birds will need it in foul weather. Allocate a bare minimum of 10 square feet per bird in the chicken run for confined flocks. As with the coop, free-range flocks will be fine with less space.
Chickens must have ample elbow room to fend off boredom and obesity, and avoid behavioral problems such as feather picking and egg eating. A roomy run offers the space and opportunity to exercise that does not exist inside most coops.
I recommend sand as the substrate in the chicken yard for the same reasons and with the same maintenance program cited in the “Flooring and Litter” section. With confined flocks, it is best to relocate the run to clean land at least every few months to reduce exposure to disease-causing pathogens and parasites.
University of Connecticut poultry professor Dr. Michael Darre recommends an alternative setup that involves digging out approximately 18 inches of earth then filling with a 6-inch layer of sand covered by 1/4-inch hardware cloth topped by 6 inches of coarse gravel, a second layer of 1/4-inch hardware cloth and then 6 inches of pea stones. This creates a very washable and sanitary “floor” that reduces the number of parasites and pathogens in the run. Provide a small sandbox filled with washed construction-grade sand to encourage dust bathing.
WALLS AND DOORS
Run walls and doors are commonly framed using pressure-treated wood to withstand years of outdoor exposure. For maximum security, use 1/4- or 1/2-inch hardware cloth for the walls, secured to the wood frame with screws and washers. Hardware cloth rolls are 3 feet wide, so to construct a 6-foot wall you’ll need two widths for each section. Use zip ties to join sections of hardware cloth where necessary. Chicken wire is not predator-proof and will not create a secure run (see chapter 3 for more information on hardware cloth installation best practices).
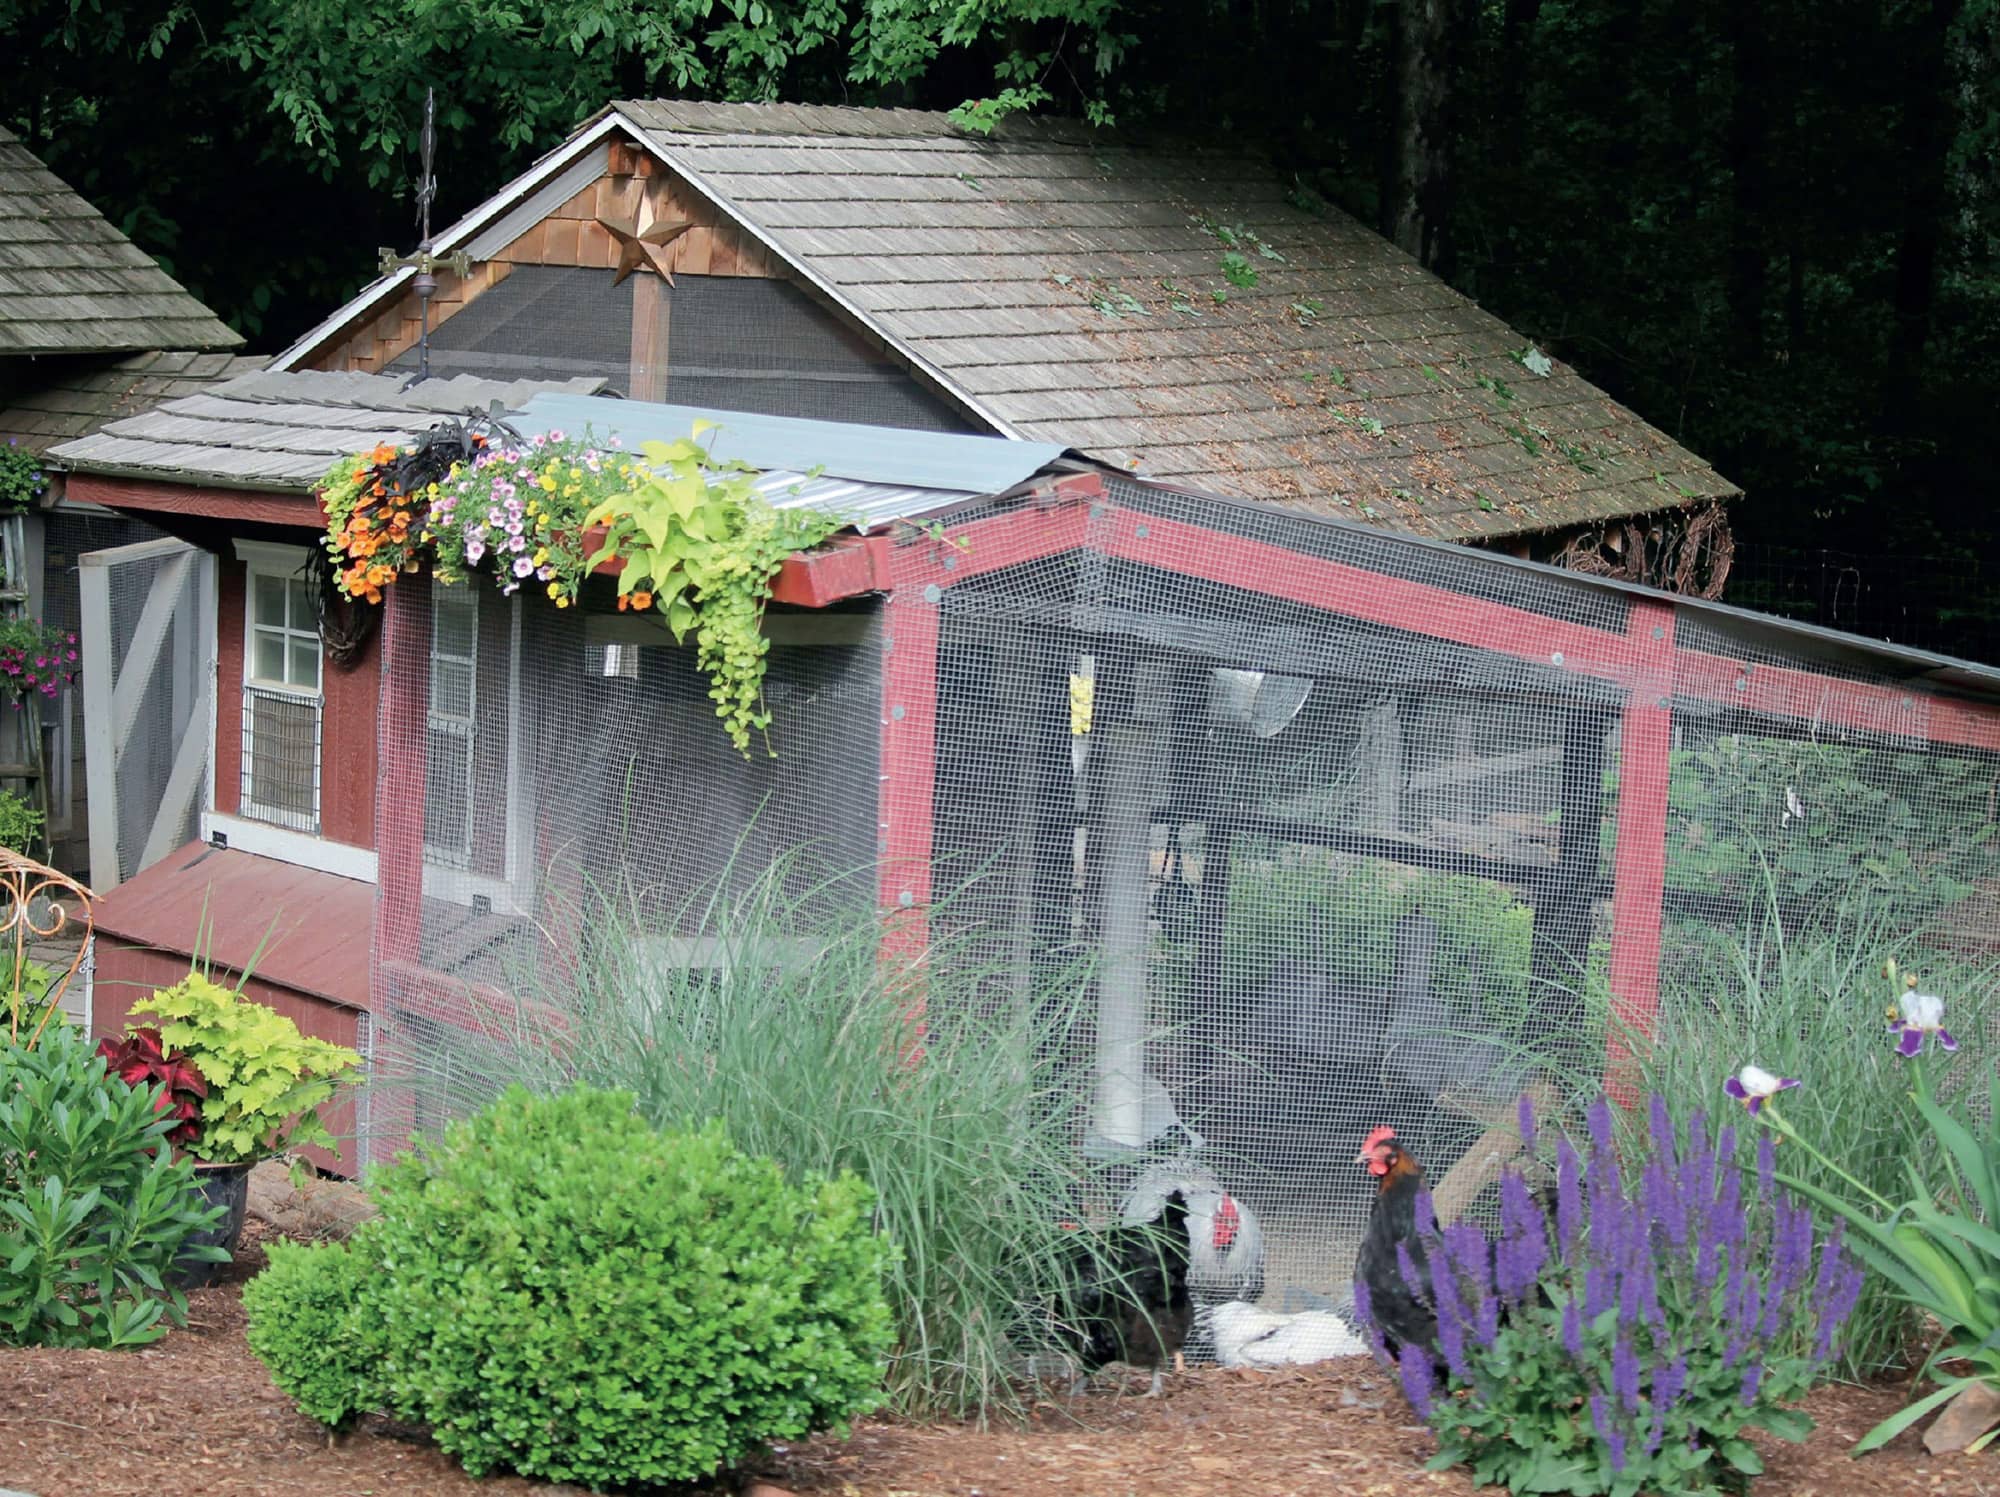
A spacious chicken run is essential for healthy, happy chickens. Provide a bare minimum of 10 square feet per bird in the run.
ROOF
Make it a priority to construct a roof on the chicken run. This provides shelter in inclement weather, shade in the heat, and protection from climbing and aerial predators. Even partial overhead coverage is better than none. Absent a roof, chicken wire or poultry netting secured over the run can offer protection from aerial predators, but it won’t help keep the flock dry in wet weather or safe from climbing predators.
ROOSTS OR PERCHES
Roosting areas in the chicken run create additional vertical space for confined chickens. Add roosts, ladders, chairs, and tree stumps in and around the run.
FEEDERS AND WATERERS
Feeders and waterers should be placed outside the coop in the run to keep coop litter drier and healthier for the flock while reducing the risk of attracting rodents and predators inside the coop and creating a hospitable environment for pathogens and parasites. If keeping the feeder and waterer in the run is not a viable option, install wall-mounted or hanging units to maximize floor space.
DUST BATHING AREAS
In an activity known as dust bathing, chickens dig shallow ditches in the ground, dredge themselves in the loose sand or dirt, and then shake it off along with old skin cells and hitchhiking insects. Chickens also dust bathe to relax, socialize, and cool off in hot weather. Few chicken activities are as entertaining to witness as a dust bath.
Although chickens ordinarily dig their own dusting holes, if they’re confined to a hard-packed yard or run, you should provide some loose, dry dirt or sand. There is no need to concoct a special mixture. In fact, commonly suggested “recipes” for dust baths include additives that run the gamut from wood ash to road debris to diatomaceous earth—all unnecessary and dangerous to varying degrees. Wet wood ash creates lye, which can burn skin; road debris often contains salt and other toxins. And diatomaceous earth is dangerous in high-dust environments when inhaled by humans and chickens (see “Diatomaceous Earth Hazards: The Cut and Dry Truth”). So keep it simple and safeguard their immune systems, delicate mucous membranes, and sensitive respiratory systems.
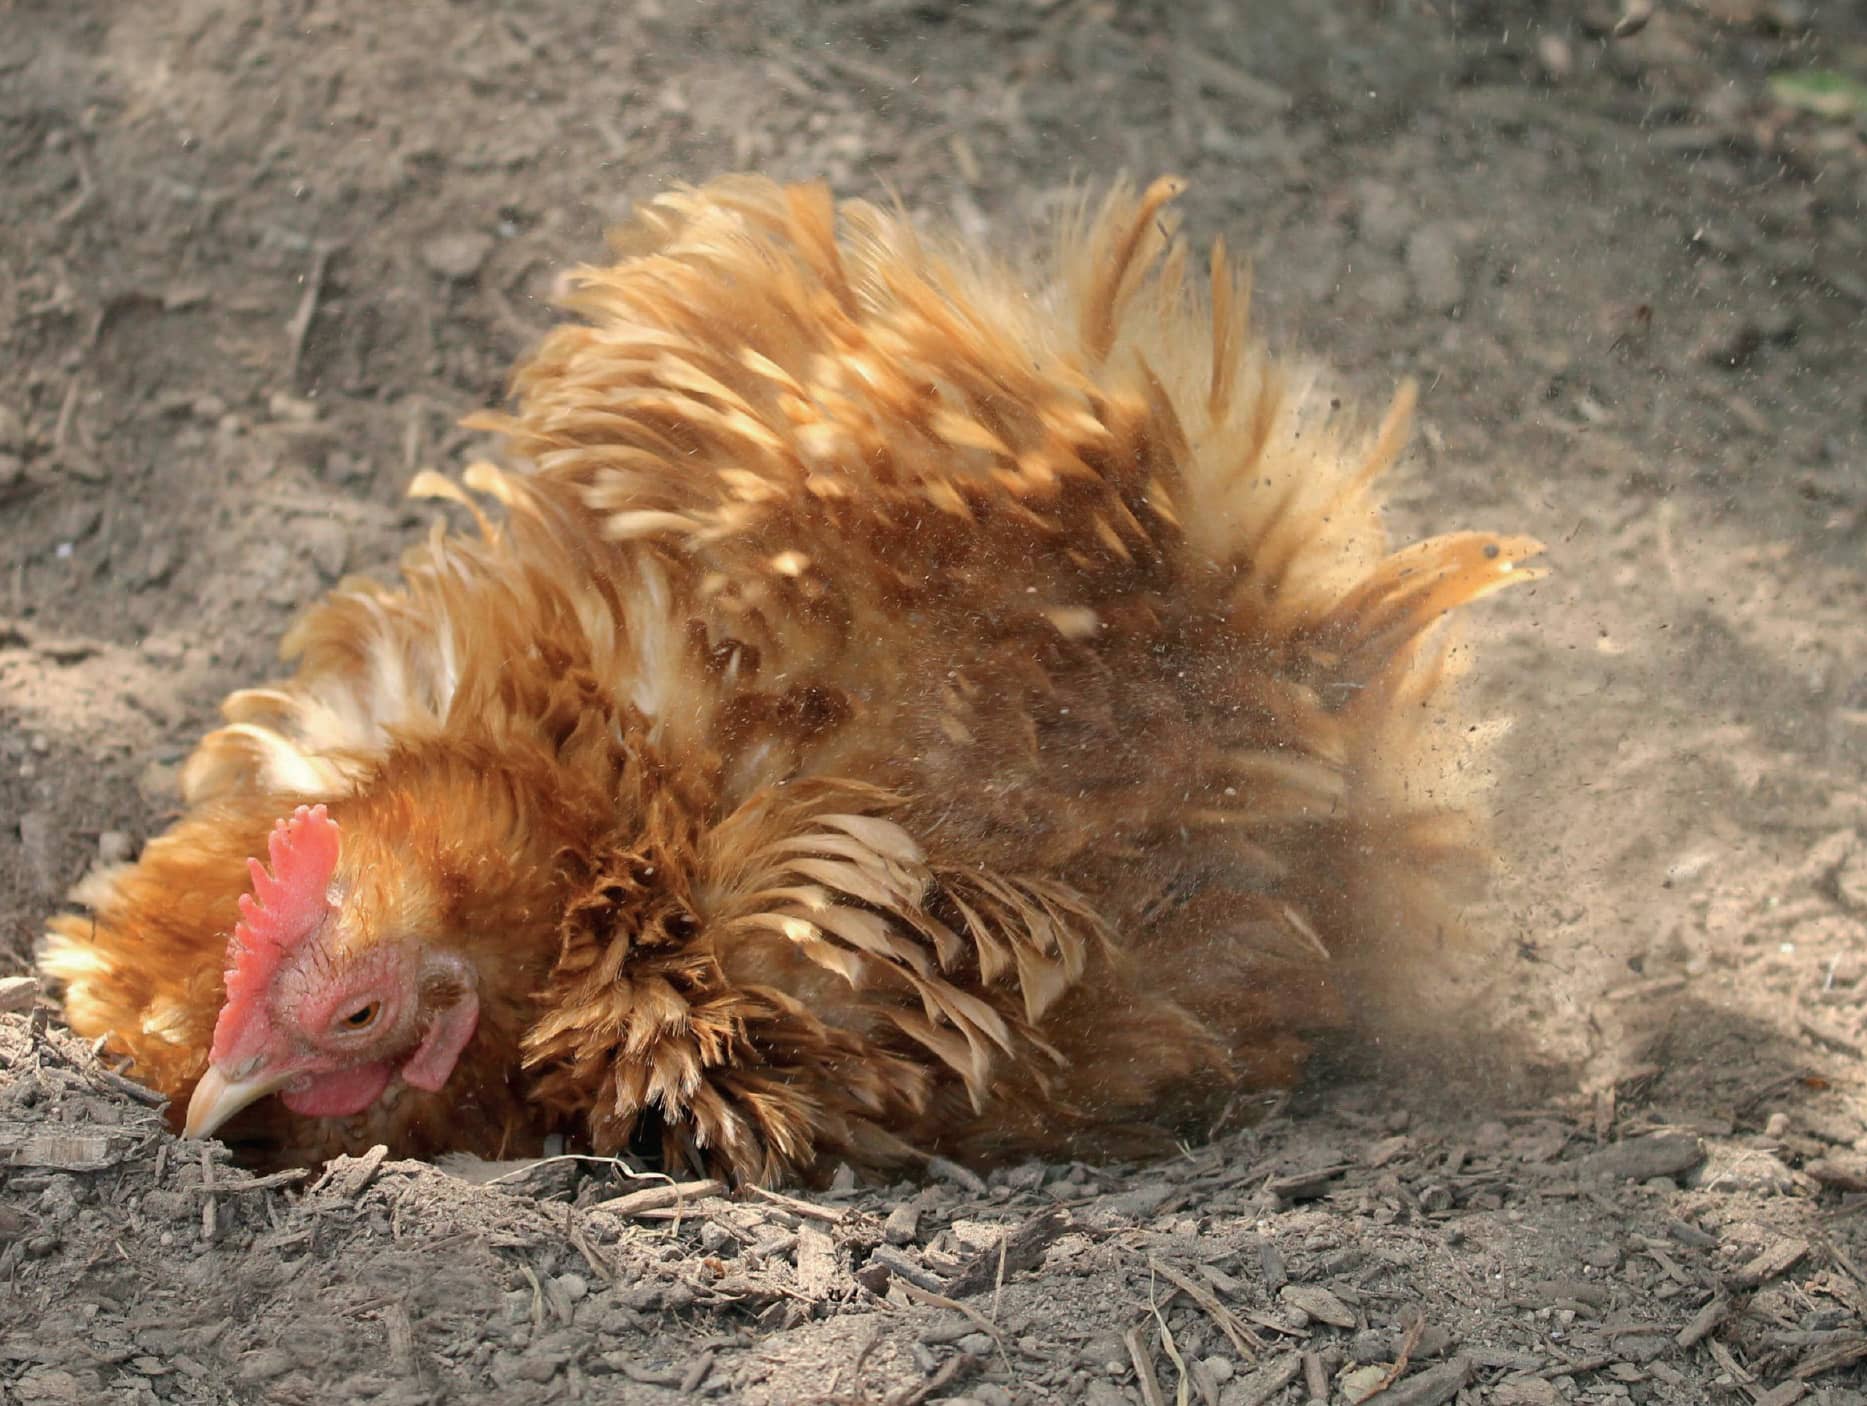
In an activity known as dust bathing, chickens dig shallow ditches in the ground, dredge themselves in the loose sand or dirt, then shake it off along with old skin cells and hitchhiking insects. This is one reason sand is ideal for the chicken run.
Chicken Chores and Maintenance
Now that you’ve feathered your flock’s nest, you’ll want to establish a routine for chicken care and housekeeping. Here are some general guidelines that I like to follow:
DAILY TASKS
• Empty and sanitize open waterers before refilling with clean water (I use 1/4 teaspoon of Oxine per gallon of water).
• Open the pop door first thing in the morning to let chickens out into the run.
• Check nest boxes for cleanliness and replace any dirty nesting material.
• Check around the coop and run for signs of burrowing predators and holes in fencing or hardware cloth.
• Observe flock members for changes in appearance or behavior that may require attention.
• Check that poultry nipple waterers (see chapter 6) are working properly.
• Check feeders and oyster shell dispensers, topping off as needed.
• Scrape droppings boards clean and compost droppings.
• Remove and replace any wet litter from the coop and run.
• Remove droppings in sand with a kitty litter scoop.
• Collect eggs at least once a day, more if possible.
• Remove open feeders at night to discourage predators and pests.
• Close and lock all coop and run doors after the birds are roosting at dusk, but before sunset.
PERIODIC TASKS
• Sanitize feeders, allowing them to dry fully before refilling.
• Wearing a dust mask or respirator, replace litter; frequency varies widely depending on the litter type: sand annually, shavings twice a month.
• In fixed chicken runs, remove and replace soiled litter frequently.
• Turn sand at least quarterly with a shovel, rake, or rototiller.
• Move chicken tractors/mobile coops to fresh land at least several times a month.
ANNUAL OR BIANNUAL TASKS
• Clean and sanitize the coop once or twice a year. Wearing a dust mask or respirator, remove everything from the coop, including litter. With all windows and doors open, dust the coop from top to bottom, scraping or sanding off any droppings on the walls and floor. Leaf blowers and shop vacs are tremendous tools for coop cleaning. Sanitize the coop and allow to dry before replacing the litter. Hand-held steamers are effective sanitizers. I prefer unactivated Oxine diluted at the rate of 1/4 teaspoon per gallon of water. Bleach diluted in water is a good alternative.
• If using sand as litter, replace all the sand in the coop and the top 3 to 4 inches of run sand annually.