FINISHED QUILT: 64˝ × 64˝
Looking for a vivid take on Diamonds and Emeralds I? This version almost shimmers with the subtle color variations and increased negative space that pops against the dark background.
Materials

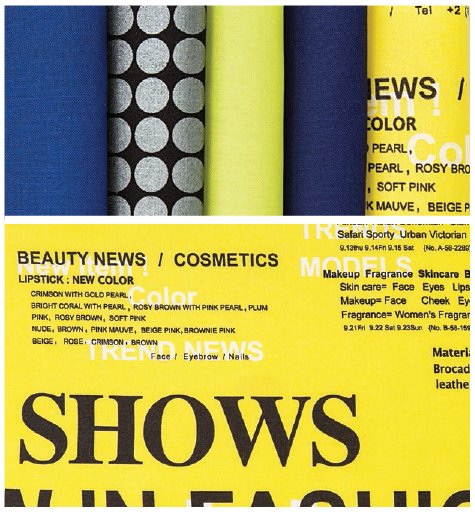
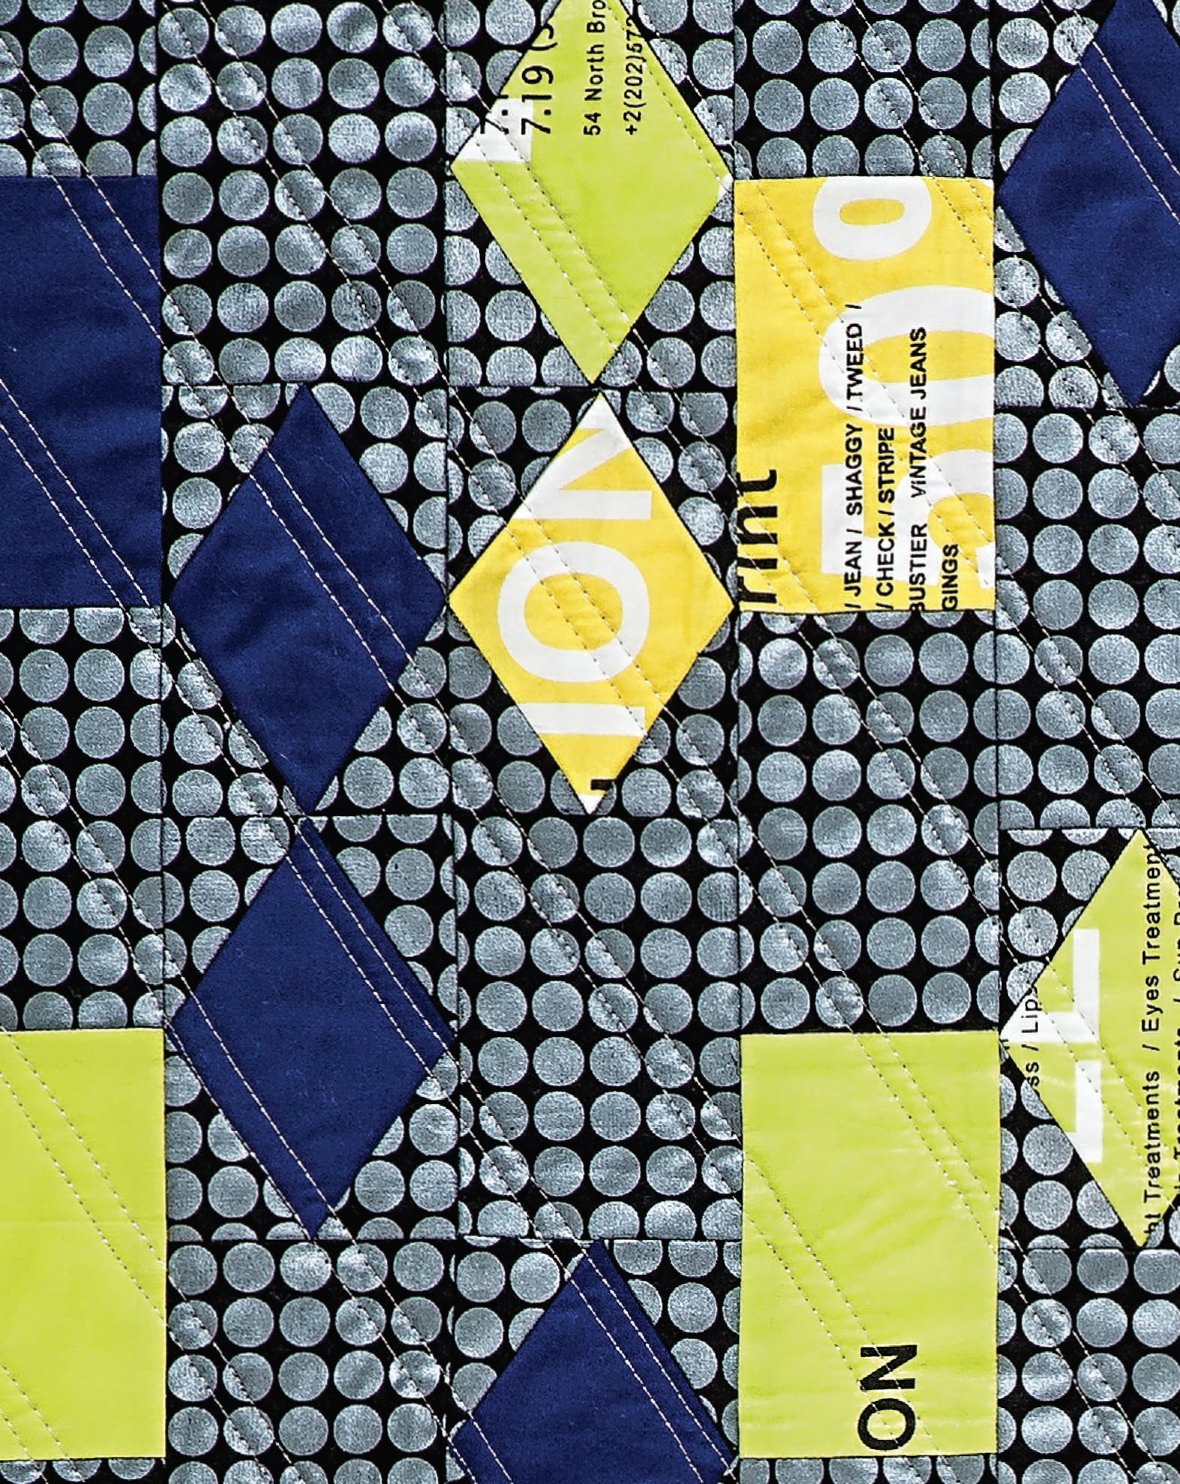
I chose easy-to-read, bright, and graphic modern prints to go with this bold and graphic quilt pattern. The Mirror Ball Dots fabric gave the quilt more interest than a solid black background would have given; since the diamonds were made from either solids or text fabrics with bright backgrounds, the edges of the diamonds are still quite easy to read. I opted to use a rare Japanese text fabric for the green and yellow fabrics, but I filled in with some solid green since I had very little available. Just use a color card to match the background of the print with a solid quilting cotton fabric to keep your fabrics looking cohesive.
Black: 5¼ yards (for background)
Yellow: ½ yard (for 3 rectangles and 12 diamonds)
Green: 1 yard (for 19 rectangles and 44 diamonds)
Bright blue: ½ yard (for 2 rectangles and 13 diamonds)
Blue: 1⅝ yards (for 27 rectangles and 91 diamonds)
Backing: 72˝ × 72˝
Batting: 72˝ × 72˝
Binding: ⅝ yard (for 2½˝-wide binding strips)
Fabric labels or your favorite fabric-marking pen
Patterns: Make 160 copies of the Diamonds and Emeralds II pattern on your favorite 8½˝ × 11˝ paper-piecing paper.
Cutting Directions
WOF = width of fabric
All the fabric pieces are assigned a number or letter (to coordinate with the order in which they are used on the pattern piece). As you cut out the fabric pieces, label each piece with the number or letter indicated. Keep them in piles organized by their labels.
BLACK (BACKGROUND):
•Cut 27 strips 4¼˝ × WOF.
Subcut 1 strip into 8 rectangles 4¼˝ × 3¼˝.
Subcut 26 strips, each into 12 rectangles 4¼˝ × 3¼˝; then subcut each rectangle into “stubbed” triangles, as shown (Pieces 2–5).
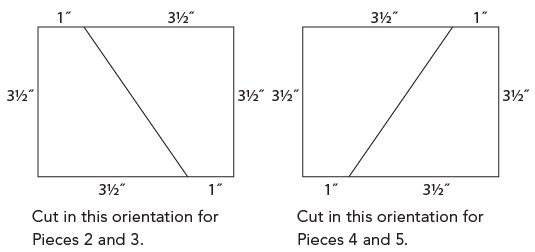
If using prints (or any other fabric with only one right side), subcut half of the squares in one orientation for Pieces 2 and 3 and the other half in the opposite orientation for Pieces 4 and 5.
•Cut 7 strips 3¼˝ × WOF.
Subcut 1 strip into 1 rectangle 3¼˝ × 36½˝ (Piece Z).
Subcut 1 strip into 1 rectangle 3¼˝ × 32½˝ (Piece T). Subcut the remaining fabric from this strip into 1 rectangle 3˝ × 4½˝.
Subcut 1 strip into 1 rectangle 3¼˝ × 20½˝ (Piece U) and 1 rectangle 3¼˝ × 16½˝ (Piece N).
Subcut 1 strip into 1 rectangle 3¼˝ × 20½˝ (Piece P) and 2 rectangles 3¼˝ × 8½˝ (Pieces O and W).
Subcut 1 strip into 3 rectangles 3¼˝ × 8½˝ (Pieces F, G, and I) and 1 rectangle 3¼˝ × 4½˝ (Piece C).
Subcut 2 strips, each into 3 rectangles 3¼˝ × 12½˝ (Pieces E, J, K, M, Q, V).
•Cut 3 strips 4½˝ × WOF. Subcut each strip into 12 rectangles 4½˝ × 3¼˝ (Piece C).
•Cut 9 strips 3˝ × WOF.
Subcut 1 strip into 1 rectangle 3˝ × 28½˝ (Piece Y) and 1 rectangle 3˝ × 10½˝ (Piece X).
Subcut 1 strip into 1 rectangle 3˝ × 26½˝ (Piece R) and 1 rectangle 3˝ × 10½˝ (Piece H).
Subcut 1 strip into 1 rectangle 3˝ × 26½˝ (Piece L) and 1 rectangle 3˝ × 12½˝ (Piece S).
Subcut 1 strip into 1 rectangle 3˝ × 10½˝ (Piece D) and 11 rectangles 3˝ × 2½˝ (Piece A).
Subcut 5 strips, each into 8 rectangles 3˝ × 4½˝ (Piece B).
YELLOW:
•Cut 2 strips 3¾˝ wide. Subcut each strip into 6 rectangles 3¾˝ × 5˝ (Piece 1).
•Cut 1 strip 3˝ × WOF. Subcut into 3 rectangles 3˝ × 4½˝ (Piece 6).
GREEN:
•Cut 6 strips 3¾˝ × WOF.
Subcut 1 strip into 4 rectangles 3¾˝ × 5˝ (Piece 1).
Subcut 5 strips into 8 rectangles 3¾˝ × 5˝ (Piece 1).
•Cut 2 strips 4½˝ × WOF.
Subcut 1 strip into 13 rectangles 4½˝ × 3˝ (Piece 6).
Subcut 1 strip into 6 rectangles 4½˝ × 3˝ (Piece 6).
BRIGHT BLUE:
•Cut 2 strips 3¾˝ × WOF.
Subcut 1 strip into 8 rectangles 3¾˝ × 5˝ (Piece 1).
Subcut 1 strip into 5 rectangles 3¾˝ × 5˝ (Piece 1) and 2 rectangles 3˝ × 4½˝ (Piece 6).
BLUE:
•Cut 3 strips 4½˝ × WOF.
Subcut 2 strips into 13 rectangles 4½˝ × 3˝ (Piece 6).
Subcut 1 strip into 1 rectangle 4½˝ × 3˝ (Piece 6). Cut the remainder of this strip into 3 rectangles 3¾˝ × 5˝ (Piece 1).
•Cut 11 strips 3¾˝ × WOF. Subcut each strip into 8 rectangles 3¾˝ × 5˝ (Piece 1).
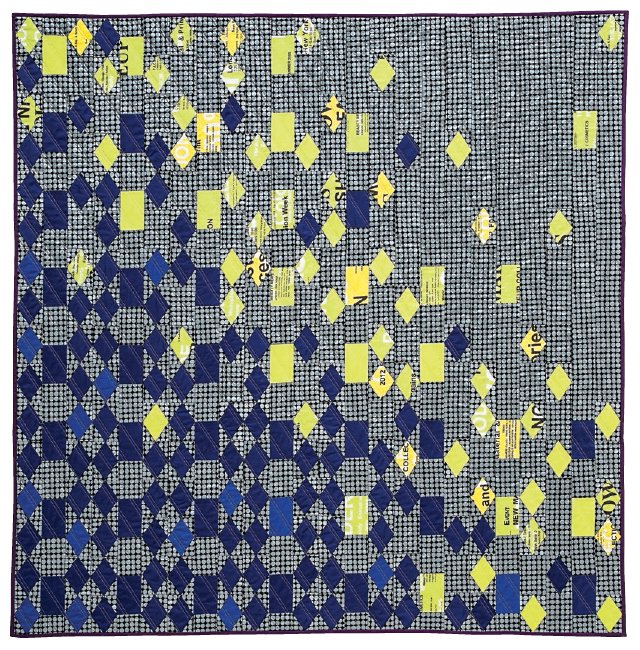
Diamonds and Emeralds II, 64˝ × 64˝, pieced by Lisa Parker, Holly King, and Amy Garro; quilted by Amy Garro
Quilt Top Construction
PAPER-PIECING ASSEMBLY
Work your way through the 160 paper-pieced diamonds. Begin with Piece 1 and work your way through Piece 5 on each pattern. Press each piece open after it is pieced. Refer to Paper-Piecing Basics as needed. As you complete the diamonds, organize them into piles by color.
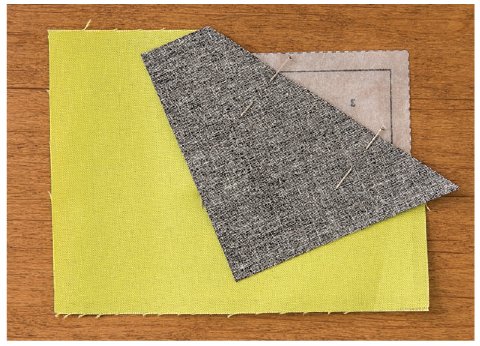
Pieces 2–5 are stubbed triangles. This makes it easier to work with and place these fabric pieces correctly, but their orientation matters. The stubbed corners should be placed toward the middle of the pattern.
LAYOUT AND FINAL ASSEMBLY
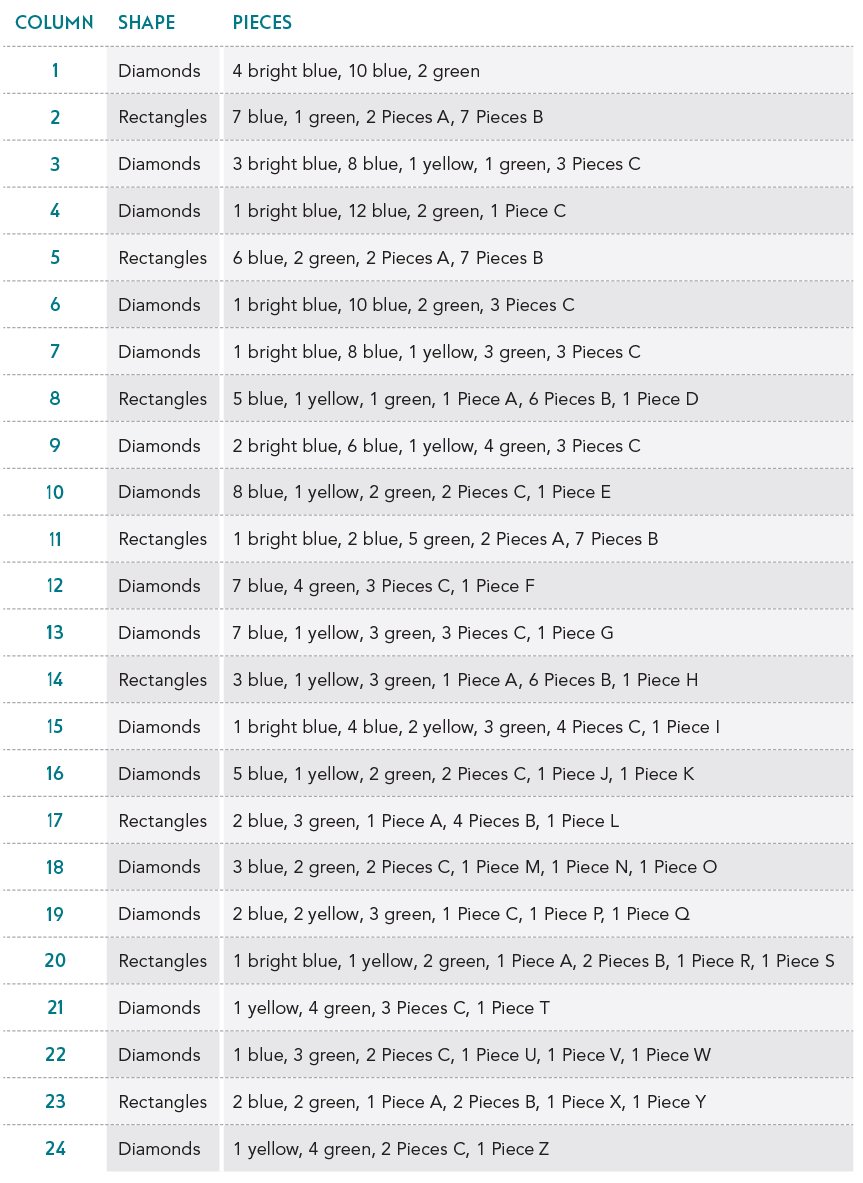
1. Assemble each column as shown in the diagram. Be sure to use a scant ¼˝ seam allowance to avoid cutting the points off of your diamonds. Press seams open when piecing together diamonds. When piecing together areas with negative space (Pieces A–Z), press toward the black fabric.

For each column, you’ll need the following pieces:

2. Sew the columns together. Press the seams open.
TIP
Sewing a large number of long strips together can cause drifting and curving. To combat both of these problems, sew each seam in the opposite direction. Good pinning will also prevent excessive shifting.
Finishing the Quilt
Baste, quilt, and bind using your favorite methods. Refer to Finishing Your Quilts as needed.
SUGGESTED QUILTING OPTIONS
Since this quilt is rather busy, I went with simple straight-line quilting that matched the angle of the edges of the diamonds. With the metallic sheen of the Mirror Ball Dots fabric, I couldn’t resist using metallic silver thread. Evenly spaced lines seemed too simple, but I didn’t think random straight lines fit the vibe of this quilt; instead, I alternated ⅜˝- and 2˝-wide spaces between the quilting lines.
Here are a few more quilting ideas for this project:
•Use an interlocking diamond or argyle pattern to play off of the huge pile of diamonds in this quilt.
•Add interest to your straight-line quilting by using a zigzag specialty stitch (sometimes called a honeycomb stitch) with your walking foot.
•Using thread that matches the diamond colors, quilt swirls across the quilt, changing from one thread color to another to draw the viewer’s attention to the ombré effect.
•Quilt only the black areas of the quilt top with a thread that blends in, leaving the diamonds and emeralds to pop. A thicker batting will help the unquilted areas stand out even more.