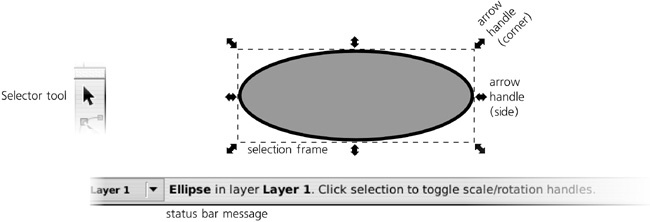
As you may have noticed, right after you create a new object (for example, with the Rectangle tool or Calligraphic pen) that object has a dashed frame around it. That frame indicates that the object is selected.
Selection is a fundamental concept in Inkscape. Almost all tools, commands, dialogs, and shortcuts work only on those objects that are currently selected. Various informational displays, such as the status bar, always describe the selected objects. The ability to quickly and precisely select what you need, as well as to quickly figure out what is currently selected and where, is absolutely vital for effective work in Inkscape.
The main tool that allows you to select objects is called, appropriately enough, the Selector (Figure 2-10). It is also the first (topmost) tool on the toolbox, because selecting is so important. You can switch to this tool not only by clicking its button but also by pressing either  ,
,  , or
, or  . You really can’t miss this tool!
Basic selection with Selector is very easy (as is any other basic thing in Inkscape). You just click any object and voilà, it’s selected. Try it now. Watch also how the status bar message immediately updates to tell you what exactly you have selected: a rectangle, a path, an ellipse, a text object, and so on.
More than one object can be selected at any time, as shown in Figure 2-11. Usually, when you already have something selected, clicking another object deselects the first. However, if you  -click any unselected object, you add it to the list of selected objects. (If you
  -click an already selected object, you will remove it from selection.) Note what the status bar says about your new selection. Note also how each of the selected objects has its own dashed frame.
Need to select 1,000 objects at once? No need to  -click 1,000 times. With Selector, just drag (press the mouse button and move the mouse without releasing the button) across all the objects you want to select. You will see a rectangular rubber band which follows your mouse. When you release the mouse, all objects that are completely inside the rubber band will get selected:
You can select by keyboard shortcuts, too. The  key has the generic meaning of “going to the next one,” so it’s not surprising that in Inkscape, pressing
  selects the next object (typically in the order of creation).
  selects the previous object. The familiar
  , which in many programs means select all, also works as expected.
Need a different selection? Deselect anything you have selected by pressing  or by clicking anywhere on the empty canvas (not on an object).
That’s just a fraction of all the selection methods and techniques Inkscape offers, but it should be enough to get you started. Let’s move on to actually changing what we have selected.


