The BO2k Workspace is used to organize and interact with multiple backdoors, which is particularly useful when working with many similar backdoors on different hosts. If the backdoors differ much in configuration, it is helpful to create a different workspace to interact with each one.
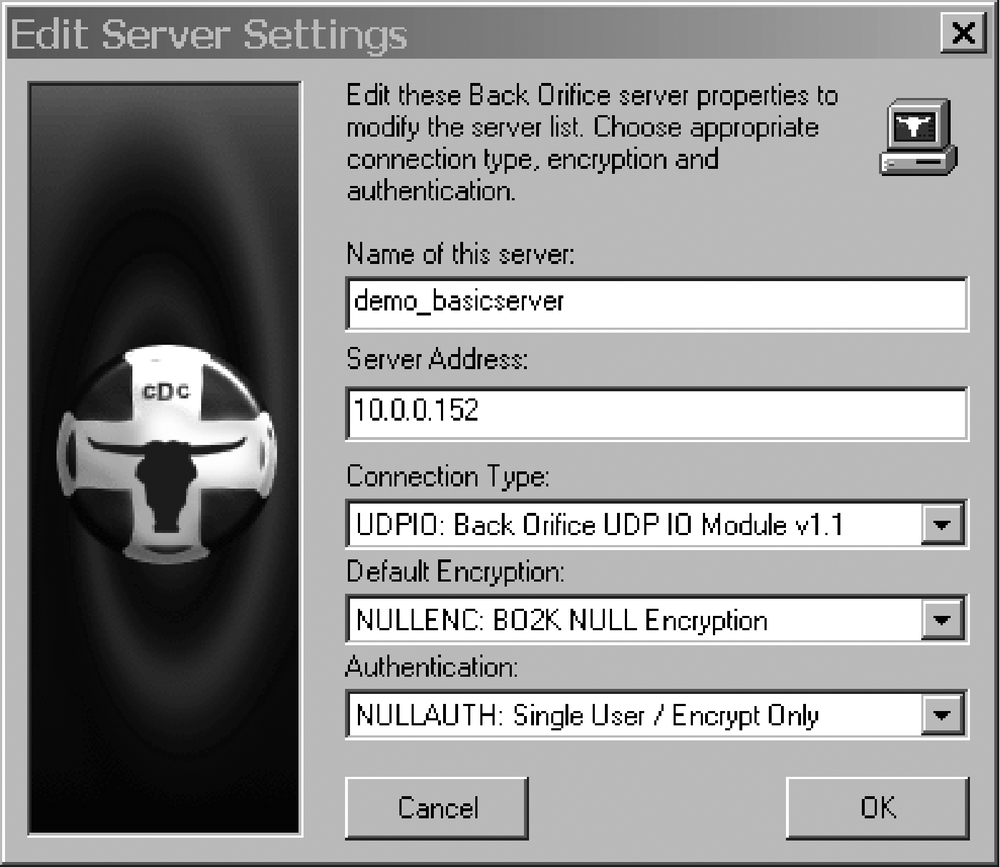
Begin by adding a server to the workspace. Select File → New Server or click the uppermost of the four buttons to the left side of the workspace (Figure 11-9). This displays the Edit Server Settings window as show in Figure 11-11.
The configuration options in this window are somewhat self-explanatory:
- Name of this server
This can be any name you like.
- Server Address
The IP address or DNS name of server on which you're backdoor's been installed.
- Connection Type
This box contains a list of all the IO plug-ins you inserted and configured in the plug-in configuration dialog. For now, select what you have configured your backdoor to use. Enter
UDPIOif you followed the examples.- Default Encryption
Select the encryption module loaded as part of the backdoor—
NULLENCin this case.- Authentication
Select the authentication module loaded as part of the server—likely, it is
NULLAUTH.
Click OK to create the server object and return to your workspace. You can edit these settings any time by either right-clicking on the server object and selecting Configure, or by clicking the server object to highlight it, then clicking the third button down on the left of the workspace. Now that the client is configured to talk to your backdoor(s), it is a great time to save your workspace off to another file to reference later. This can be done by selecting File → Save Workspace As . . . .
