The current security model of most *nix derivatives is based on Discretionary Access Control (DAC). It relies on tools and conventions working on a cooperative basis. Those are the classic user and group file ownership as well as Read, Write, Execute rights. Because the security model is not enforced at any given centralized point, it starts falling apart whenever an attacker manages to gain control of a process through an exploit. It is then possible for the attacker to execute processes with identical ownership as the attacked program.
By contrast, Security Enhanced Linux (SELinux) is an implementation of Mandatory Access Control (MAC) for Linux. Simply put, it is a kernel facility that restricts user mode programs to the minimum amount of kernel privileges they require to do their job. Enforcement is done at kernel level and requires a policy for the various daemons and programs running. Therefore, unless the kernel itself is compromised, it is not possible to access resources outside the context of the locally compromised piece of software. Because SELinux does not require program source code modifications, the security benefits of using SELinux are immediate and can include a wide variety of applications.
In practice, however, one of the biggest and most common drawbacks of this system has been the resolution of mysterious problems seemingly related to enabling SELinux. In fact, being unable to understand why an otherwise correctly installed and configured piece of software does not run has been a major hurdle in its adoption. Until very recently, I too was running my production systems with SELinux disabled, which did not do me one bit of good. Fortunately, with the arrival of Fedora Core 6 and Red Hat Enterprise Server 5, a new set of tools was released that makes effectively using SELinux so easy it is actually becoming trivial!
To use SELinux on Fedora Core 6, the first thing is to edit /etc/sysconfig/selinux and make sure the file contains:
SELINUX=enforcing
SELINUXTYPE=targeted
The second thing is to install the newly released setroubleshoot package.
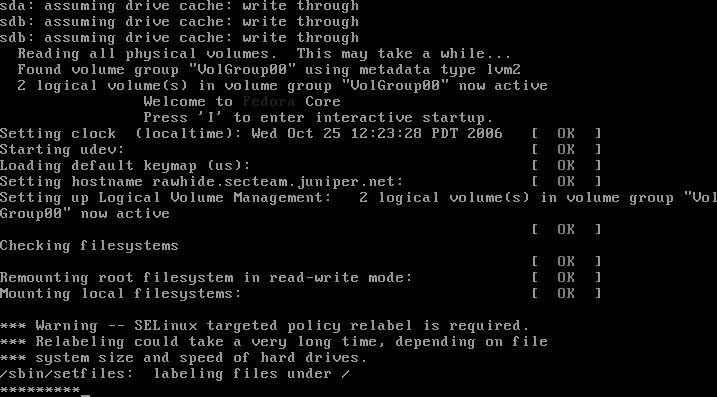
[emoret@renault-5 ˜]$ sudo yum -y install setroubleshootsetroubleshoot provides a framework to monitor SELinux events. This framework will relay any access violation to the end user and provide a clear description of the issue, often suggesting ways to correct the problem. When SELinux prevents access to a given resource, it will relay a message to the end user. Once you have enabled SElinux, you should restart your computer. The first boot may include a relabeling of the filesystem as shown in Figure 14-8.
Once this is finished, log in with your regular user account and start working as usual.
Whenever a policy violation occurs, a pop-up window should appear, as in Figure 14-9.
This kind of alert is hard for a user interacting at the console to miss. For server hosts, it is also possible to configure setroubleshootd to send alerts by email. To do so, edit /etc/setroubleshoot/setroubleshoot.cfg and add root to the recipients list. As usual, make sure root's email is actually routed to a real user by editing /etc/aliases and adding a recipient to root emails. For example:
# Person who should get root's mail
root:      emoret
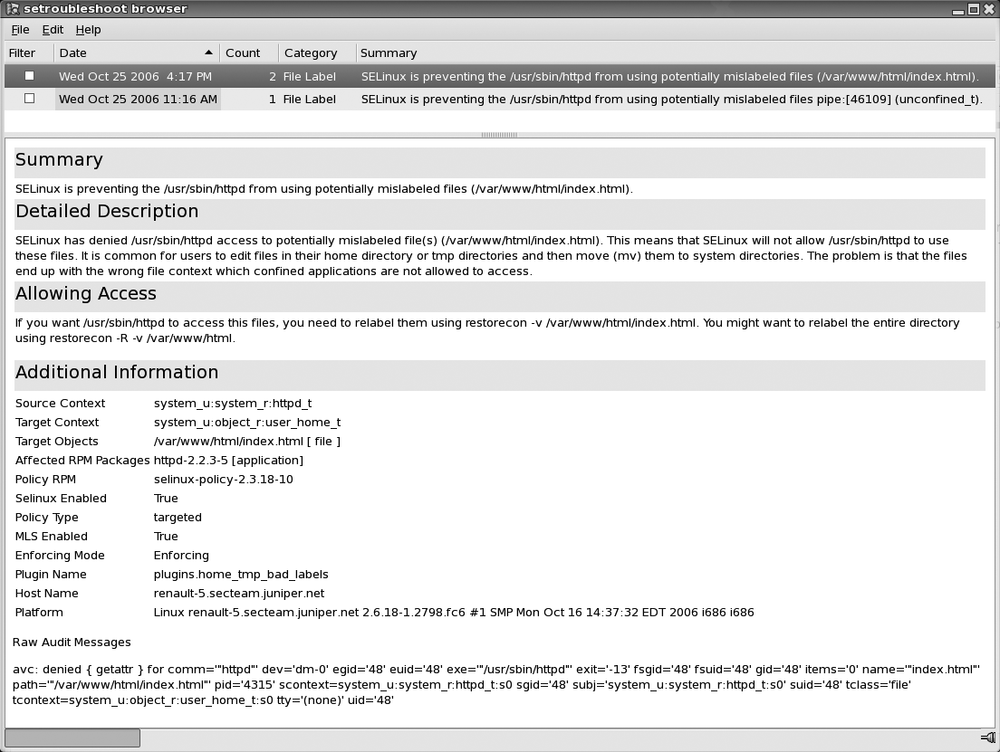
When clicking the icon, the setroubleshoot browser starts and provides not only the raw SELinux violation string but also suggests ways to fix it. In Figure 14-10 we can see the setroubleshoot browser window showing an alert involving the Apache web server being denied to serve the index.html file because it is incorrectly labeled. The simple fix suggested by the tool is to relabel the noncompliant file with the command:
[emoret@renault-5 ˜]$ sudo restorecon -v /var/www/html/index.htmlsetroubleshootd is not only a convenience, it really makes a difference in the day-to-day utilization of SELinux-protected hosts.
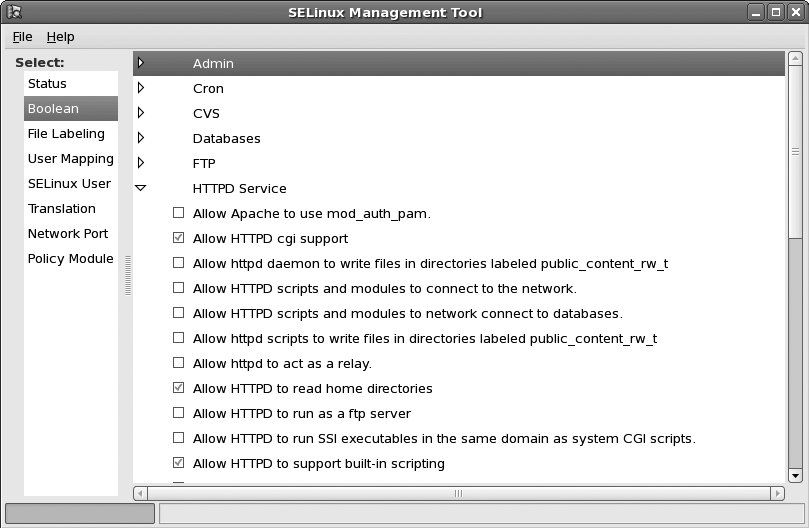
The default Red Hat SELinux Targeted policy includes a number of Boolean variables that can be tweaked to adjust the policy to your specific environment. The new graphical SELinux Management Tool makes tweaking SELinux simpler than ever, and lets you change those variables from within the GUI. You can launch it from the System → Administration menu or from the command line under the name system-config-selinux. As shown in Figure 14-11, the tool allows you to:
Change the default SELinux enforcing mode.
Tweak the current SELinux policy parameters.
Change default file labels.
Map regular Linux users to SELinux users (in the targeted policy this is not used).
Assign roles to SELinux users.
Define SELinux TCP and UDP port types and assign port numbers.
Enable audit for specific policy modules.
In some rare instances, the default policy might not define an access that your specific setup requires. Because SELinux denies anything that has not been explicitly approved, you may have to generate a local policy module. When you receive such a denial, setroubleshoot browser could display a message such as the following:
Sometimes labeling problems can cause SELinux denials.
You could try to restore the default system file context for
audit, restorecon -v audit If this does not work, there is currently
no automatic way to allow this access. Instead, you can generate a
local policy module to allow this access - see FAQ Or you can disable
 SELinux protection altogether. Disabling SELinux protection is not
recommended. Please file a bug report against this package.
Here again, the excellent work put into SELinux usability makes the process of generating a local policy almost trivial:
Start by extracting the specific deny alert you want to allow by cutting and pasting the
avc: deniedentry from the bottom of the setroubleshoot browser window.Change the directory to the local policies and use the audit2allow tool to automatically generate a policy:
[root@renault-5 ˜]#
cd /usr/share/selinux/targeted[root@renault-5 ˜]#echo 'type=AVC msg=audit(1164222416.269:22): avc: denied{ use } for pid=1940 comm="setsebool" name="0" dev=devptsino=2 scontext=system_u:system_r:semanage_t:s0tcontext=system_u:system_r:init_t:s0 tclass=fd' |audit2allow -M mysemanageGenerating type enforcment file: mysemanage.te Compiling policy checkmodule -M -m -o mysemanage.mod mysemanage.te semodule_package -o mysemanage.pp -m mysemanage.mod ******************** IMPORTANT *********************** In order to load this newly created policy package into the kernel, you are required to execute semodule -i mysemanage.ppRecompile the policy file and regenerate the file context file. This does not need to be done more than once; it is permanent and survives reboots:
[root@renault-5 ˜]#
semodule -i /usr/share/selinux/targeted/mysemanage.pp
I never had to know or do more than what is described here; however, for the sake of curiosity, you may want to keep reading as I dive into more of the inner working mechanism and jargon.
SELinux is an implementation of Mandatory Access Control (MAC). It operates at kernel level and enforces rules defined by policies. Those rules apply to sets of security contexts or labels associated with objects and processes from the system. The label format has the notation user:role:type, where the following is true:
userRepresents a user context. In the default Red Hat targeted policy, this can be either
system_ufor system objects oruser_ufor user objects.roleDefines which SELinux user identities can have access to what domain.
typeIs generally involved in making rules for the transition decision process and changes.
A few more definitions will help clarify some of those new SELinux concepts:
- Domain
A type applied to a process.
- Type transition
The creation of a new process that runs under a different domain than the current one. A type transition is also the labeling of a new object with a type different from the source doing the labeling.
In RedHat's targeted policy, all daemons evolve in their own domains. For example, executable file /usr/sbin/crond is of type crond_exec_t. Upon execution, crond will transition over to domain crond_t.
[emoret@renault-5 ˜]$ls -Z /usr/sbin/crond-rwxr-xr-x root root system_u:object_r:crond_exec_t /usr/sbin/crond [emoret@renault-5 ˜]$ps -ZC crondLABEL PID TTY TIME CMD system_u:system_r:crond_t:SystemLow-SystemHigh 2385 ? 00:00:00 crond


