This section covers utilities that will allow you to use the full range of SSH capabilities under the Microsoft Windows operating system. Utilities discussed here include Cygwin, PuTTY, WinSCP, and SecureCRT.
For Windows users who like the Unix look and feel, Cygwin is the way to go. With Cygwin, you can run the actual OpenSSH implementation under Windows, so everything you already know or learned in previous sections about OpenSSH applies under Cygwin. In particular, you can reuse your public and private keys as is. Even keychain is part of the Cygwin list of packages. Installing OpenSSH is a real snap—all you have to do is run the setup.exe file from the cygwin.com web site and check OpenSSH in the list of packages you want to install (keychain is a separate package).
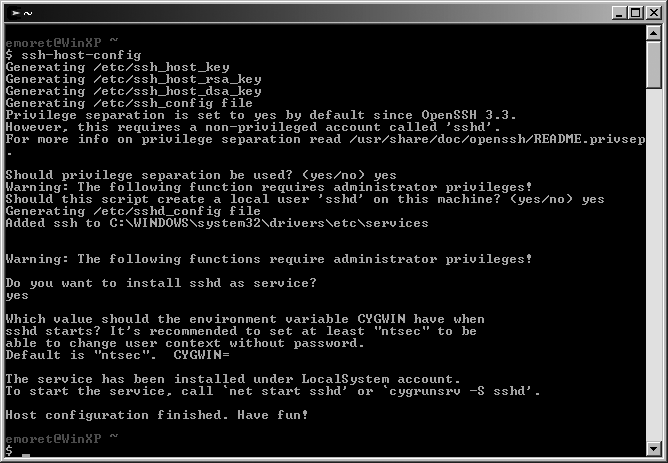
The one thing that is specific to Cygwin is running the SSH daemon, but this is something that the Cygwin developer team has worked on making it easy to do. If you want to run an SSH server on your Windows host, just run the ssh-host-config script file from the Cygwin terminal and follow the onscreen instructions shown in Figure 15-9. This creates a Windows service called CYGWIN sshd.
SSH has become such an important protocol over the past few years that even native Windows clients have emerged. PuTTY is one of those. Although a wild rumor on the Internet reports that the name PuTTY might stand for Plutonium Teletype, it appears that no one has a final answer on the real meaning of the name. PuTTY is distributed under the MIT open source license and implements the following pieces of software:
GUI-based Telnet and SSH client
Command-line-based SCP file transfer client
Command-line-based SFTP file transfer client
GUI-based authentication agent for these tools
GUI-based key management utility that can be used to generate public/private key pairs or import keys from other format into PuTTY
When installing PuTTY, using the Windows installer file is the cleanest way to have icons and files properly copied to your hard drive. In order to find the installer file, you have to scroll down to the bottom of the download page as it is usually located after the standalone executables. At the time of this writing, this file is called putty-0.59-installer.exe.
Warning
Use the Windows installer file to install PuTTY; do not download the binaries one by one!
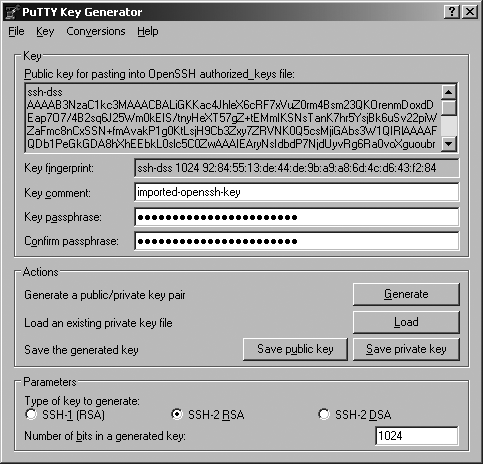
The very first thing you may want to do is to import your OpenSSH private key in the format understood by PuTTY. Just copy your OpenSSH private key to the Windows machine, run the PuTTYgen utility, and select Conversions → Import key. You will be asked for your OpenSSH private key passphrase. Eventually you end up with a screen similar to Figure 15-10. All you have to do at this point is to click the "Save private key" button and select a good location. Think secure and put it on your USB drive!
To avoid entering your key's passphrase each time you open an SSH session, you should configure the authentication agent. This agent creates a Windows taskbar tray icon and displays a list of unlocked private keys when double-clicked.
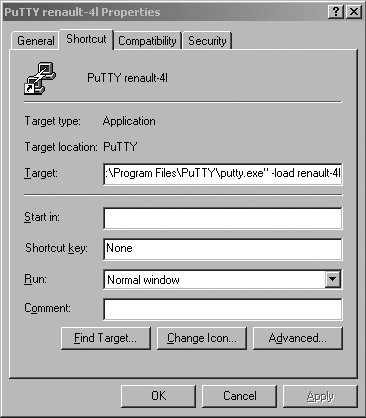
Get PuTTY to automatically load your private key on startup by changing the properties of the Pageant icon from the Windows Start menu and append the path to your private key file in the Target text box as shown in Figure 15-11. Once this is completed, you may want to copy this icon from the PuTTY application menu to the Windows Startup menu so as to have it started every time you open a new Windows session.
Tip
The PuTTY Agent does not survive session closing. Therefore, you have to reissue your passphrase every time you log out and back in on your Windows host.
Test your setup by starting a new PuTTY session to your favorite host. Just enter username@destination
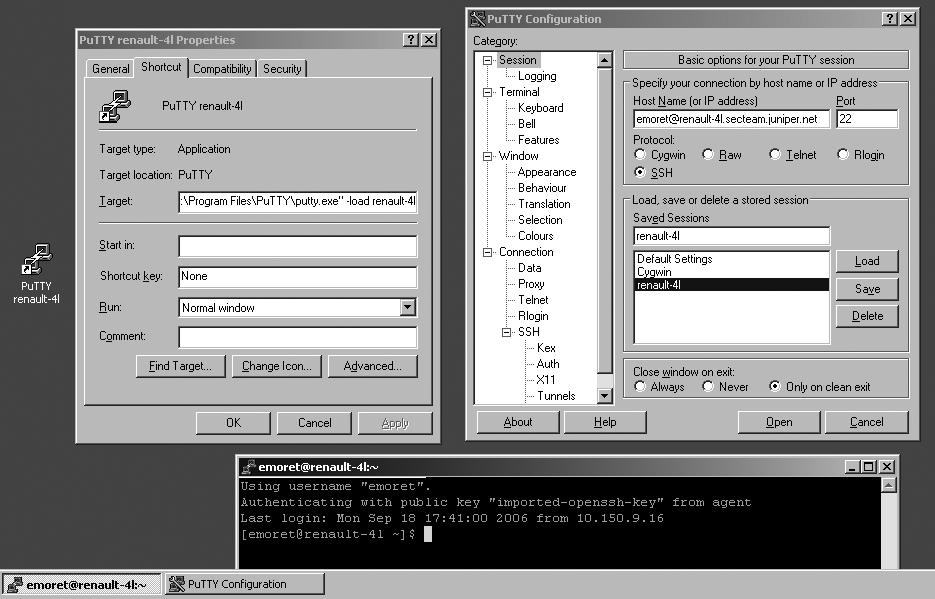
Another nice trick to take advantage of is PuTTY's ability to configure desktop icons that automatically open an SSH session to a remote host without going through the configuration dialog box again. This is a simple three-step configuration:
Start PuTTY and create a new SSH session to a remote host with your username.
Give that session a name and save it.
Create a windows shortcut and edit its properties, then add
-load <session name>to the target field in order to create a direct shortcut. Look at Figure 15-12 for more details.
Next time you double-click this icon (assuming Pageant is loaded with your public key), PuTTY opens an SSH session without asking for password or configuration.
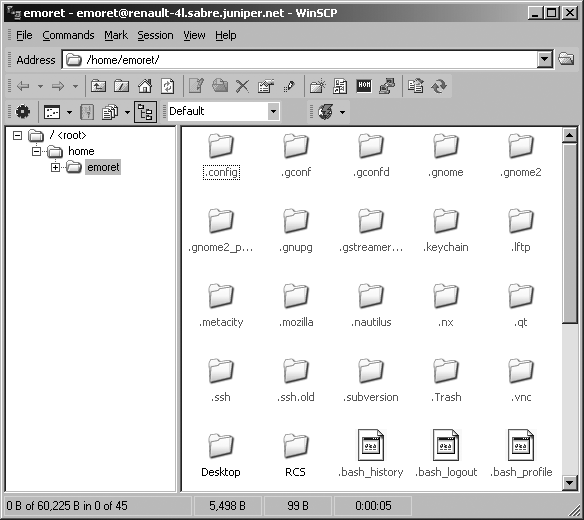
Working hand in hand with PuTTY is a GUI-based file transfer program called WinSCP, which is shown in Figure 15-13. This application uses the same private key file format as PuTTY and provides a nice interface for file transfer with the SFTP and SCP protocols. I usually like to select the Windows Explorer interface because the GUI allows you to drag-and-drop files from and to the SSH server directly through your local Windows Explorer file manager. When using the PuTTY authentication agent, the application does not even ask for a passphrase. Real neat and easy to use!
The same trick as for PuTTY works for WinSCP. You can save predefined sessions and use the -load flag to load them at program startup.
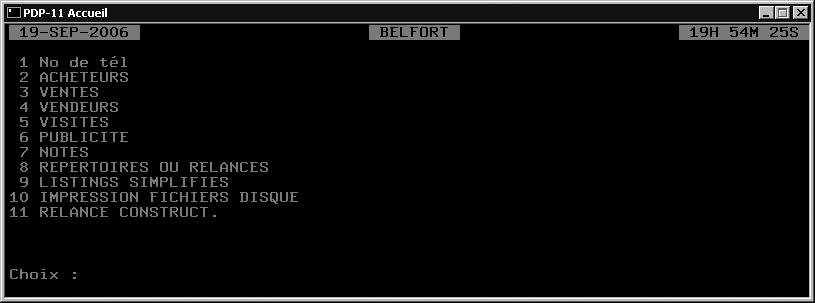
Another excellent SSH implementation is the commercial SecureCRT application shown in Figure 15-14. It is particularly good for its terminal emulation. My dad knows pdp-11 assembly and was running a production system using VT-220 terminals. Because the hardware was becoming increasingly hard to maintain, I migrated him over to running p11, a DEC PDP-11 emulator on Linux, but had a hard time to find a complete VT-220 emulator...until I stumbled on SecureCRT. This application has by far the best terminal emulation I have seen.
Tip
In my experience, SecureCRT has the best terminal emulation available for Windows.
J. Van Dyke, founder of Vandyke Software and the publisher of SecureCRT, has been drafting some of the RFC documenting the SSH protocol. It is therefore assumed that SecureCRT's SSH protocol implementation is clean and secure.
