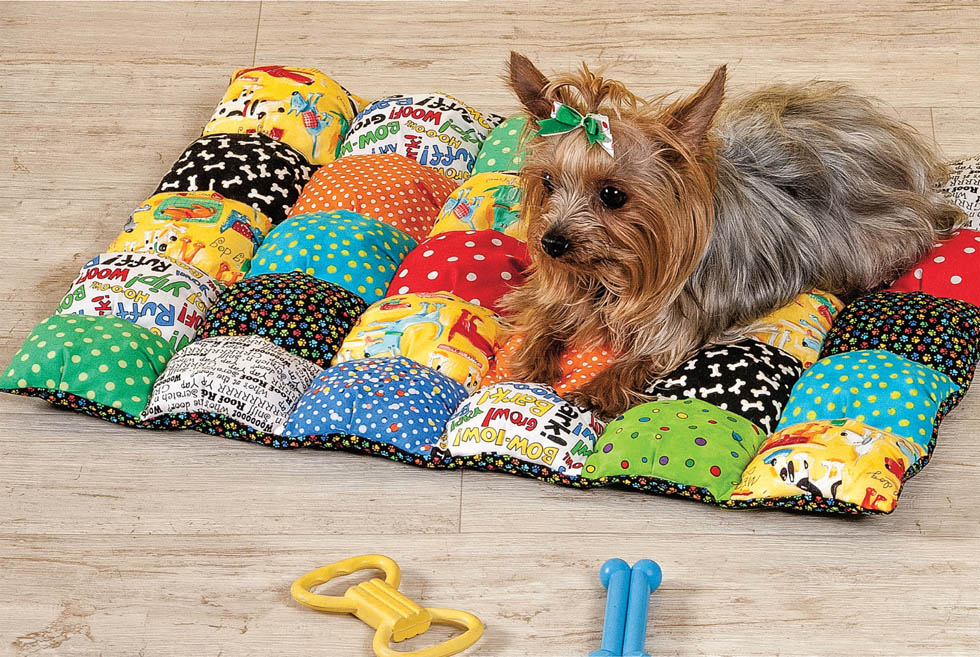
Sweet Dreams Pet Bed
A book filled with dog and cat projects wouldn’t be complete without something for our sweet pets! They will love the comfort and warmth of a puff quilt bed, and it can be made with fun scraps that you will love.
Skill Level
Confident Beginner
Specifications
Bed Size: 24" × 20"
Materials
• Assorted lining scraps at least 4½" square*
• Assorted print scraps at least 5" square
• ¾ yard backing fabric
• Batting to size (optional)
• Polyester fiberfill
• Thread
• Basic sewing tools and supplies
*Note: The lining fabric will not be seen in the finished bed, so it is an opportunity to use less desirable prints/colors.
Project Notes
Read all instructions before beginning this project.
Stitch right sides together using a ¼" seam allowance unless otherwise specified.
Refer to General Instructions for specific construction tips and techniques.
Materials and cutting lists assume 40" of usable fabric width.
Cutting
From lining scraps:
• Cut 30 (4½") B squares.
From assorted print scraps:
• Cut 30 (5") A squares.
From backing fabric:
• Cut 1 (20½" by fabric width) strip.
Subcut strip into 1 (20½" × 24½") rectangle.
Assembling the Bed
1. Select one each A and B square.
2. With wrong sides together, place an A square with a B square. Match corners and pin. Make a single pleat in the center of three sides of the A square until it matches the size of the B square as shown in Figure 1.
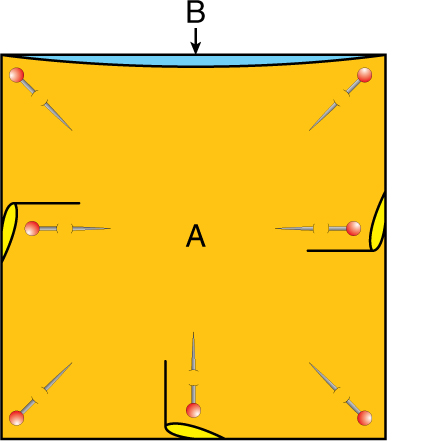
Figure 1
3. Stitch around the three pleated sides ![]() from the edges.
from the edges.
4. Repeat with remaining A and B squares to make a total of 30 units.
5. Lightly stuff each unit with polyester fiberfill; do not overfill. After stuffing, pin the open edges together, folding in a pleat to match the other sides. Stitch with a ![]() seam allowance as shown in Figure 2 to complete one puff unit. Repeat to make 30 puff units.
seam allowance as shown in Figure 2 to complete one puff unit. Repeat to make 30 puff units.
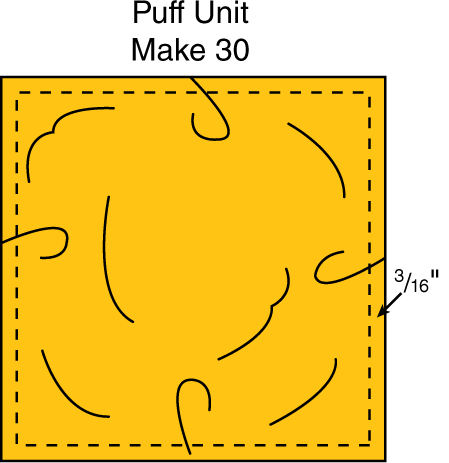
Figure 2
6. Arrange puff units into five rows of six units each.
7. To sew units together, place two A sides together and stitch with a ¼" seam allowance. Join the units in each row.
Here’s a Tip
Small binding clips are very helpful as a substitute for pins in this project when sewing the puff units and rows together.
8. Pin the rows together, finger-pressing the seam allowances in opposite directions as you pin. Sew the rows together with a ¼" seam allowance to complete the top.
9. Pin the backing to the puff top, right sides facing. Note: You will have to pull at the pleated part of each puff to align the top with the backing.
10. Sew all around with a ¼" seam allowance, leaving a 5" opening on one side. Trim the corners and turn the pet bed right side out through the opening.
11. If you want to add a layer of batting, slip the batting rectangle inside the bed between the puff top and the backing. Adjust as needed to position the sides and corners.
12. Fold in the seam allowances of the opening and slip-stitch closed.
13. To keep the layers in place, make a few small hand or machine stitches at the intersection of the puff units as shown in Figure 3. ![]()
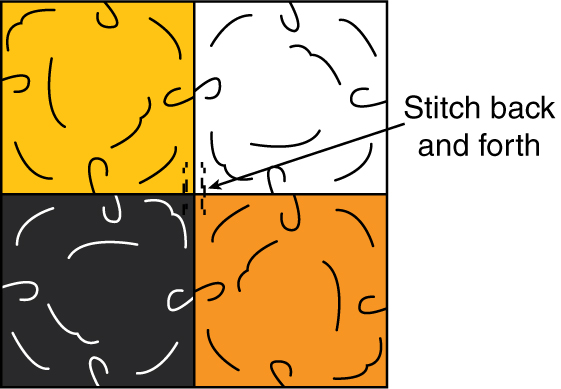
Figure 3

Sweet Dreams Pet Bed
Placement Diagram 24" × 20"