 Load Peachtree Complete® on your computer following the defaults
This chapter introduces the use of the computer software application called “Peachtree Complete®.” This is a partial illustration of how all the manually collected information can be transformed into electronically generated financial statements. In other words, the concepts introduced in chapters 1 through 5, such as the chart of accounts, the balance sheet, and the income statement are presented here.
Following is a step by step illustration of the use of Peachtree Complete® in generating a balance sheet and an income statement.
Load Peachtree Complete® on your computer following the defaults
Double click on the “peach” icon
You will be in “Peachtree Accounting—Start” window with six options
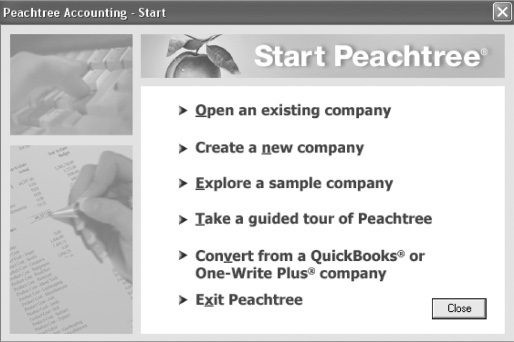
Select: Create a new company and click on it
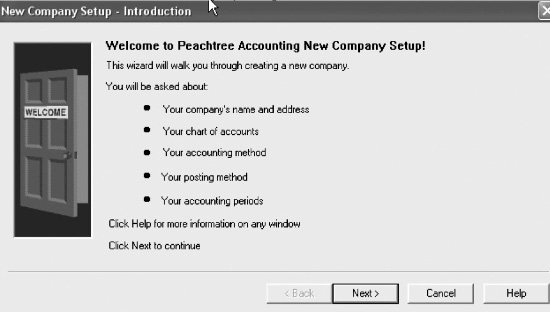
You will be in “New Company Setup—Introduction” window. Click on “Next”
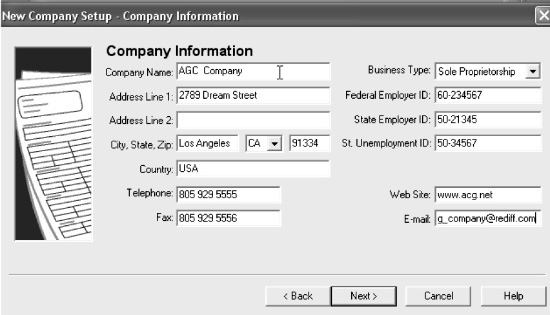
You will be in “New Company Setup—Company Information” window. Fill in Company details. Make up your own Company Name, Address, City, State, Zip, Country, Telephone, Fax, Federal Employer ID, Web Site, and E-mail
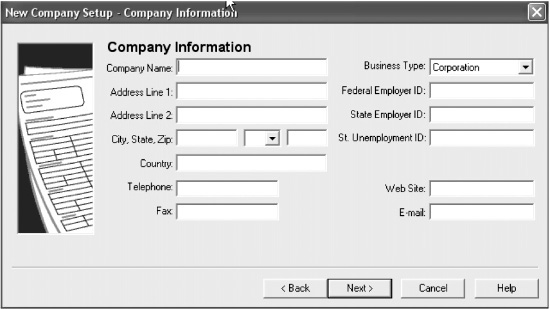
For Business Type, select Sole Proprietorship. Click “Next”
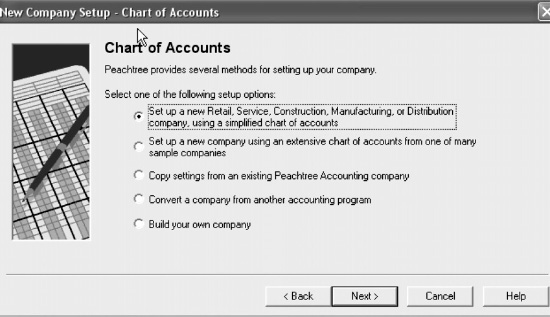
You will be in “New Company Setup—Chart of Accounts.” Click on the first default option “Set up a new Retail, Service, Construction, Manufacturing, or Distribution company, using a simplified chart of accounts.” Click “next”
You will be in “New Company Setup—Chart of Accounts.” Click on “Service Company”
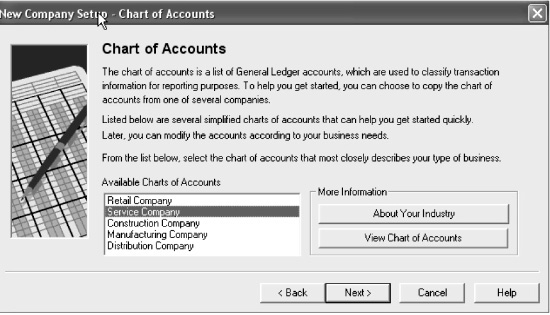
Click on “Next”
You will be in “New Company Setup—Accounting Method.” Click on “Accrual” (default)
Click “Next”
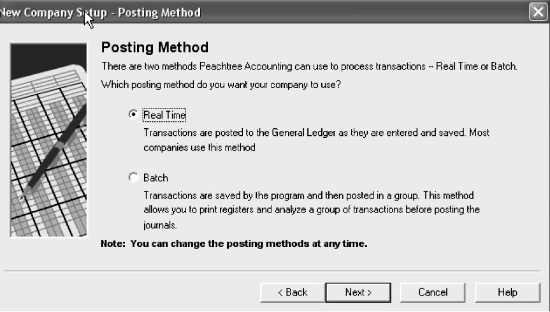
You will be in “New Company Setup—Posting Method.” Click on “Real Time” (default)
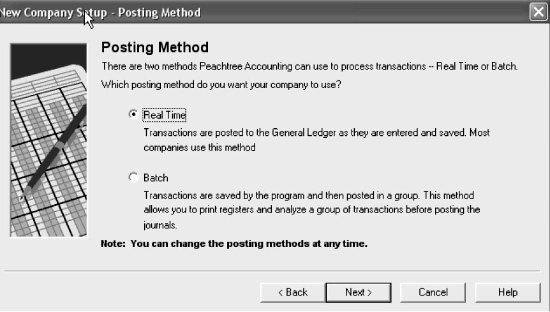
Click “Next”
You will be in “New Company Setup—Accounting Periods.” Click on “12 monthly accounting periods” (default)
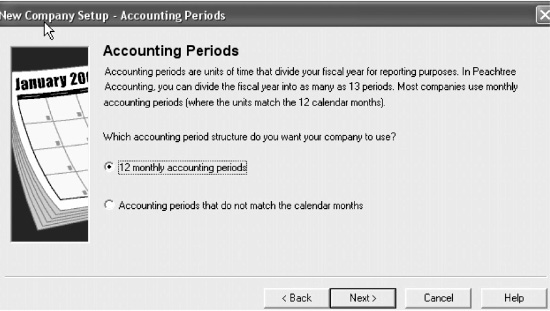
Click “Next”
You will be in “New Company Setup—Accounting Periods.” Click on January 2006, again January 2006 and 2006
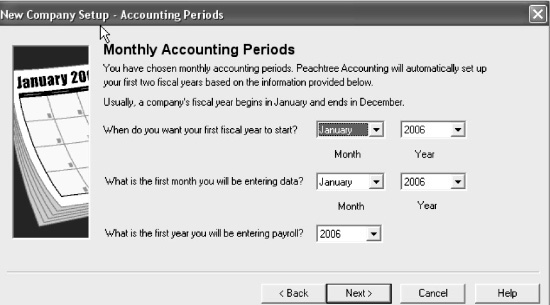
Click on “Next”
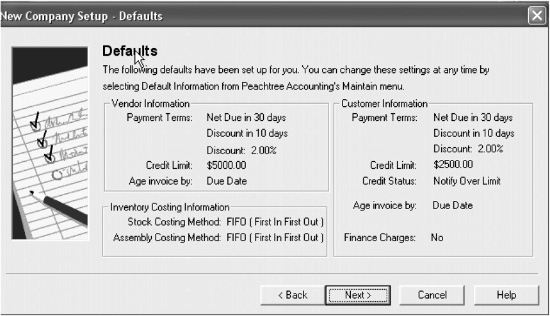
You will be in “New Company Setup—Defaults.” Click on “Next”
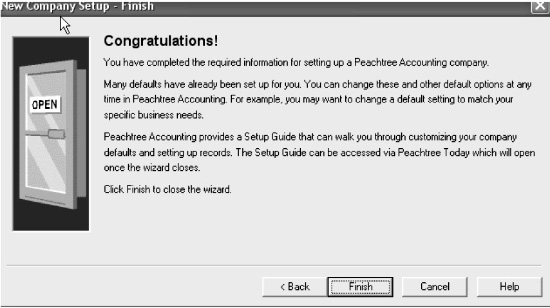
You will be in “New Company Setup—Finish.” Click on “Finish”
Peachtree Complete will compile New Company Information and you will come to the screen “Peachtree Today—Welcome”
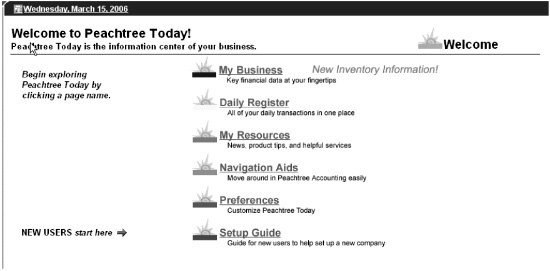
You may go through “NEW USERS start here: Setup Guide.” Click on it to understand different parts of the setup such as General Ledger, Accounts Payable, Accounts Receivable, Payroll, Inventory, and Jobs.
You may skip this entirely, or click at any time on the Menu Bar “Maintain,” third after File and Edit, and select and click on “Chart of Accounts”
You will be in the “Maintain Chart of Accounts.” Go to magnifying glass next to Account ID, click on it, and you will see a list of account numbers and names; double click on “Cash on Hand”
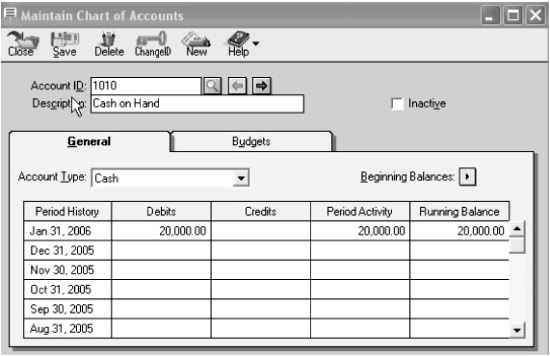
You will be in Account ID 1010 and Description Cash on Hand. Click on “Beginning Balances” and select period from 1/1/06 through 1/31/06. Click OK
You will be in “Chart of Accounts Beginning Balances” and 1010 Cash on Hand will be highlighted. Enter 20,000 under Assets, Expenses and go on top Menu Bar and click OK
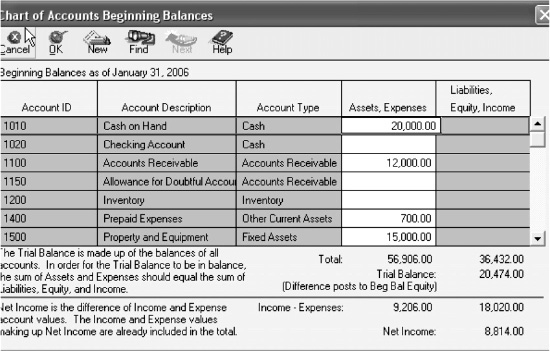
Repeat these steps to enter balances for individual Assets, Liabilities, Owner’s Equity, Revenues, and Expense accounts
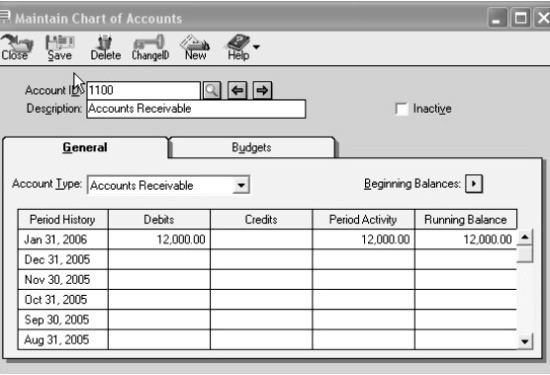
Repeat:
• While you are in “Maintain Chart of Accounts.”
• Go to magnifying glass next to Account ID and click on it.
• Select the next appropriate account from the list of account numbers and names and double click on it.
• Click on “Beginning Balances” and select period from 1/1/06 through 1/31/06 and click OK.
• You will be on “Chart of Accounts Beginning Balances” and 101 Cash on Hand will be highlighted. Scroll down to the appropriate account and enter the $ amount under Assets, Expenses or Liabilities, Equity, Income. Go to top Menu Bar and click OK.
You will be told that Peachtree will adjust your Trial Balance. Click on it
Go to the top of the Menu Bar and click on “Report”
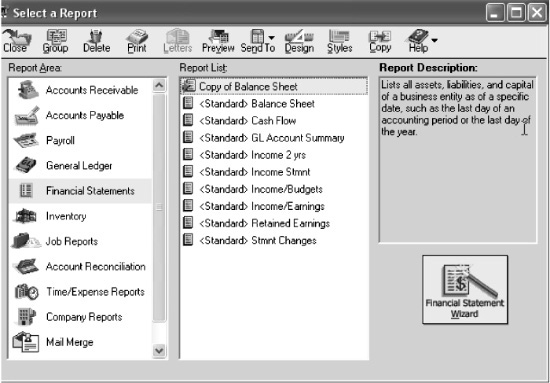
Then click on “Financial Statements”
Double click on “Copy of Balance Sheet,” then click OK
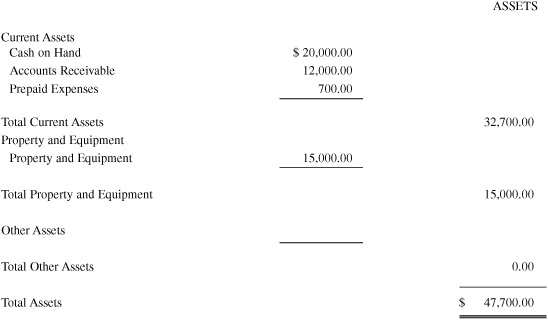
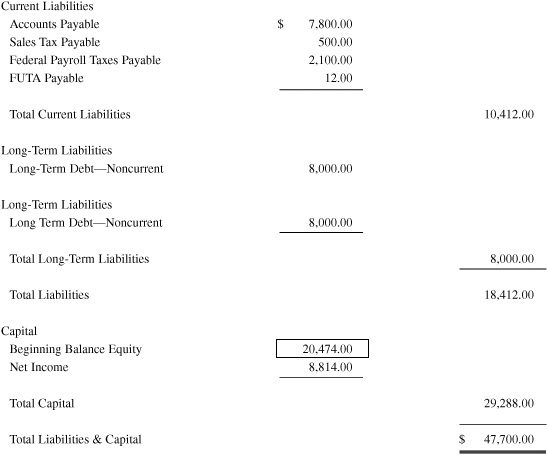
You will see the Balance Sheet
ACG Company Balance Sheet January 31, 200X
LIABILITIES AND CAPITAL
Go to the top of the Menu Bar and click on “Reports” again and choose “Financial Statements”
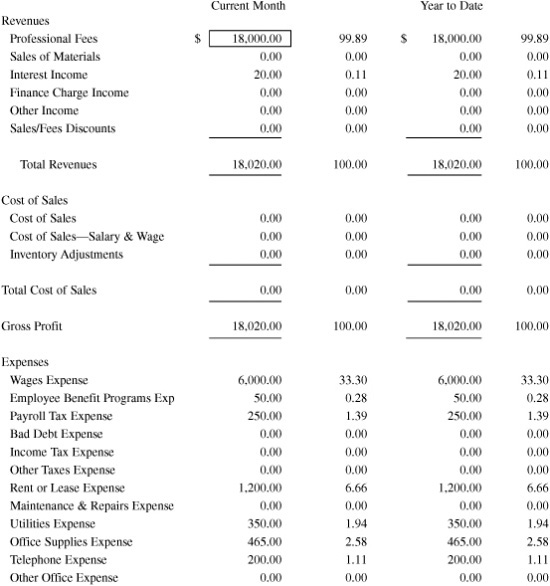
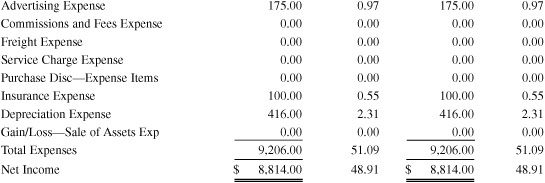
Double click on “<standard> Income Stmnt”
You will see the Income Statement.
ACG Company Income Statement For the One Month Ending January 31, 200X
If you have been successful in “walking through” this illustration and would like further help in implementing Peachtree Complete® Software, you may take the “guided tour” of Peachtree Complete®. In addition, you may consult the book by Carol Yacht, “Computer Accounting with Peachtree Complete® 2005 for Microsoft® Windows®” published by McGraw Hill. Further details about this book are found at: www.mhhe.com/yacht. Another comparable software to Peachtree Complete® is QuickBooks Pro®. For more details on how to use QuickBooks Pro®, go to www.mhhe.com/ulmer2004.