
Pressing is very important when making blocks and assembling quilts. Remember, in quilt-making, you don’t iron but ‘press’ to avoid distorting the fabric. Always set your seam after sewing by pressing the seam as sewn, to ease tension and prevent the seam line from distorting. Then open up the fabric pieces and press on the right side of the fabric, usually towards the darker fabric (or as described in the project). If necessary, guide the seam underneath to make sure the seam is going in the right direction. When pressing fabric pieces in foundation paper piecing it is often helpful to press seams open, to reduce bulk. Take care if using steam and don’t use steam anywhere near a bias edge.
Some of the quilts in the book already have borders, but you can add a border to any of the designs to make them larger. When attaching a border it is important to do it properly, because a badly attached border will flare and never lie flat.
1 Start by measuring your trimmed quilt – see Fig 1. Measure the height along the left edge (a), along the right edge (b) and down the centre (c). Add the three measurements together and divide by three to give an average measurement (d). This is the length that the two side borders need to be cut.
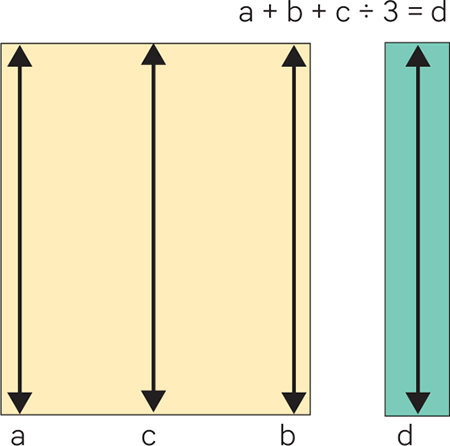
FIG 1
2 To sew the side border strips in place, fold the quilt in half lengthwise. Place a pin on the fold to mark the centre point. Fold it in half again and place pins in the two resulting folds to mark the quarter points. Fold the two side border strips in the same way to mark the same points along the edge.
3 Pin the border to the body of the quilt with right sides together, ensuring that the ends line up and that all the pin-marked points are pinned to each other. Place a few more pins between these points, ensuring that the fabric is evenly distributed (Fig 2). Sew the border strips in place (Fig 3). You may need to ease the fabric slightly while sewing a border to the body of the quilt, but by using this method you will create a beautifully squared quilt. Press the border seams.
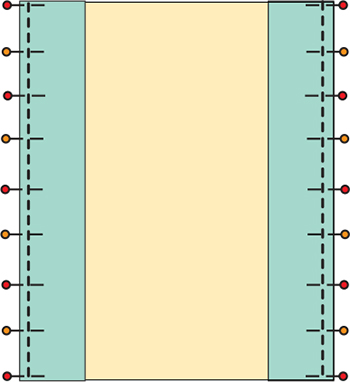
FIG 2
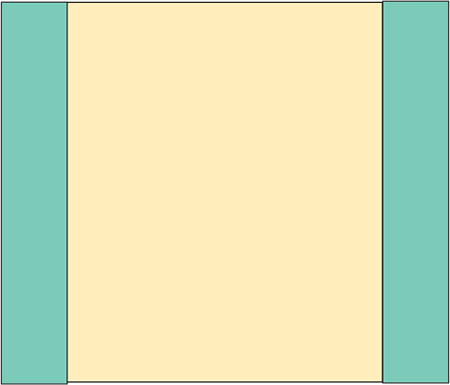
FIG 3
4 Use the same method to measure and attach the top and bottom border strips (Fig 4).
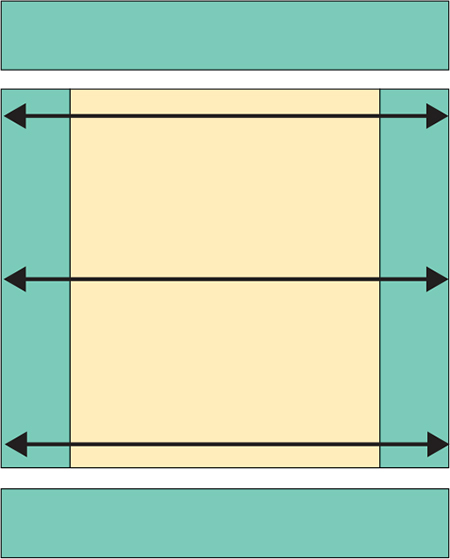
FIG 4
The fabric requirements for the backing fabric and the wadding (batting) in the larger projects are given with an extra 4in all round, to allow for long-arm quilting should you wish to use this service. For the smaller projects, or if you are quilting on a domestic machine at home (or by hand), then you will probably only need an extra 2in all round. So, remember that the backing will always need to be larger than the quilt top.
If the backing needed for a quilt is 42in or less on one side, then you can use a width-of-fabric piece. For example, if the quilt backing needs to be 42in x 72in, then buy 2yds of fabric. Trim off the selvedges so the width is 42in. The length will be as you bought it, i.e., 2yds (72in).
If your quilt is more than 42in on one side, then you will need to piece the backing (unless you plan to use extra-wide backing fabric). For example, the Howl quilt top is 60in x 80in. If you wanted to have the quilt long-arm quilted, you would need a backing piece measuring 68in x 88in (allowing 4in extra all round for the quilting process). A backing this size can be made up of two pieces each cut 341⁄4in x 88in and then sewn together along the long edge to make a piece 68in wide x 88in long – see Fig 5. Two pieces 88in long need a total yardage of 4.8, i.e., 5yds of backing in total. Always press piecing seams on backing fabric open to reduce bulk.
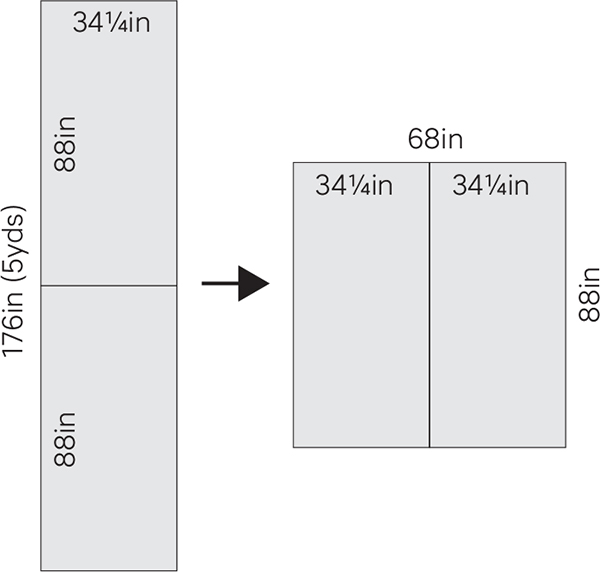
FIG 5
Everyone has their favourite method of making a quilt sandwich – tacking (basting) or pins or spray glue – so use the method you are comfortable with. Place the pressed backing fabric right side down and smooth it flat. Add the wadding (batting) on top, wrinkle free, and then add the quilt right side up. Secure the layers well. If you are having the quilt long-arm quilted then you won’t need to make a sandwich as the long-arm quilter will do that.
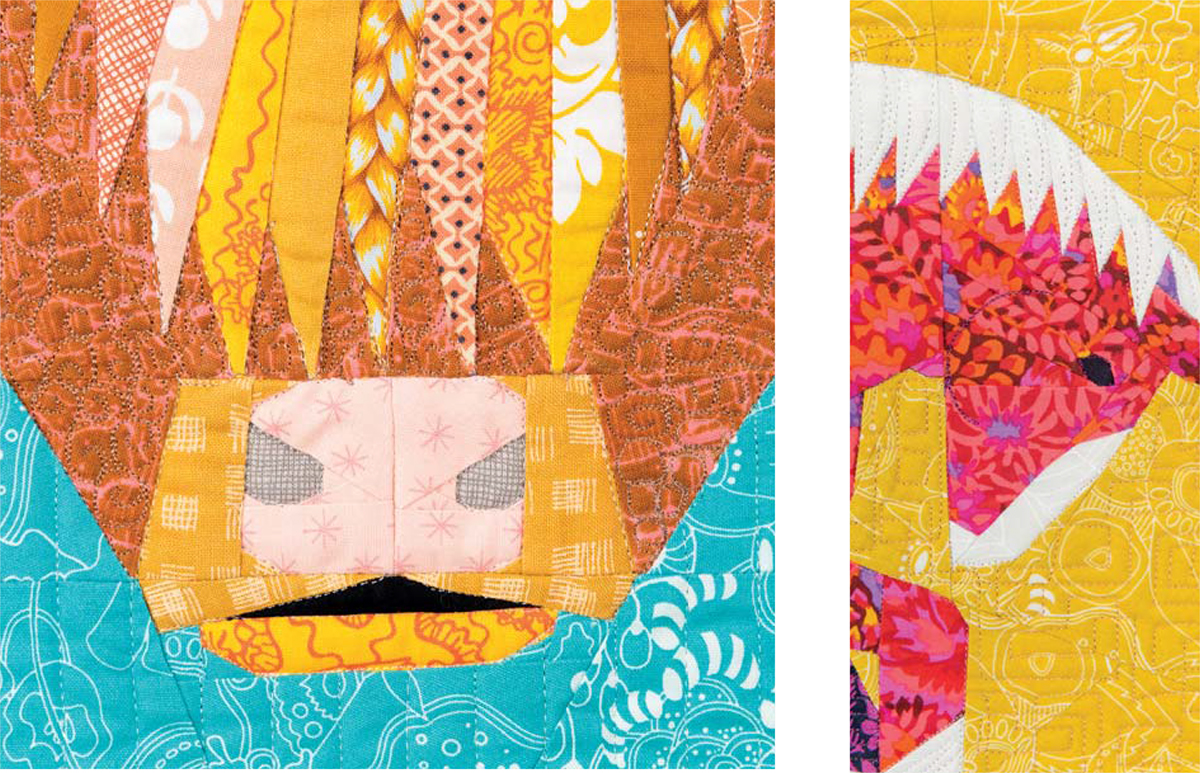
One of the fun things about quilting is that it can really emphasize the details of a design. The majority of the quilts in this book were custom quilted by Leeanne Hopper, a talented long-arm quilter. She knows without asking that my preferred option is to stitch in the ditch around the important elements of the design and then use filler designs to fill the background and, where necessary, the animal. She always does an outstanding job for me, but I must admit that it is not necessary to pay to get the quilting done. I quilted Hunted myself. The majority of the work was done using a walking foot. I stitched in the ditch around the owl and many of the feathers, to emphasize the outline. If there were spots where I felt that the contrast between background and foreground was not as great as I would like it to be, then I used a contrasting thread to emphasize the fabric transition. The background was filled with gently waving parallel lines. I was a little bit adventurous and added free-motion quilting to the owl itself.
For those who feel that their quilting skills are not up to this level of detail, all is not lost. Great contemporary results can be achieved with simple straight-line quilting over the whole quilt.
When quilting, take care in areas where there are lots of small pieces as these can become bulky and may need you to work more slowly and cautiously than normal.
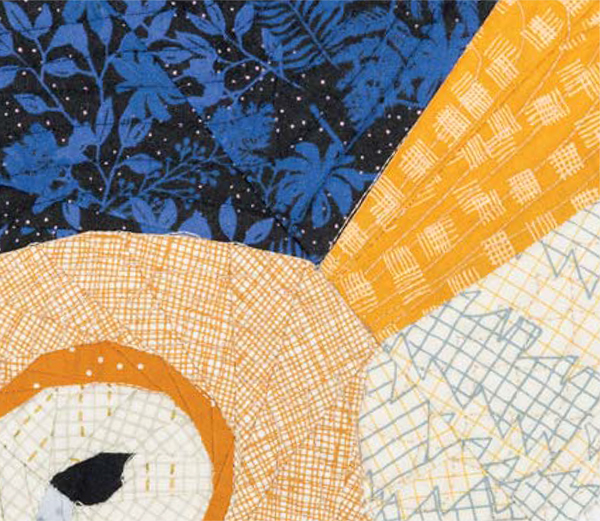
The fabric requirements in this book are for a 21⁄4in double-fold binding cut on the straight grain.
1 Trim the excess backing and wadding (batting) so that the edges are even with the quilt top.
2 Join the binding strips together with 45-degree seams, as follows. Trim off selvedges. Lay two strips right sides together at right angles to each other. Sew diagonally from outside corner to outside corner. Trim to a 1⁄4in seam and press the seam open. By joining the seams in this way, there is minimal bulk created in a single spot. The only time that I would join binding using a vertical seam is if I was using stripes or a print that will clearly show the join. When the binding strips are sewn into a continuous length, make sure there is sufficient to go around the quilt plus about 10in extra to allow for corners and overlapping ends. Aim to start roughly in the centre of one side, but before you start sewing, check to make sure that none of your binding joins fall on a corner, as this can create an ugly, bulky corner. If necessary, reposition your binding to avoid this.
3 With wrong sides together, press the binding in half lengthways. On the right side of the quilt and leaving a binding tail of about 5in, align the raw edges of the double thickness binding with the raw edge of the quilt and pin to hold in place. Sew with a 1⁄4in seam allowance. At the first corner, stop 1⁄4in from the edge of the fabric and backstitch (Fig 6). Lift the needle and presser foot (or take the quilt off the machine if you prefer) and fold the binding upwards (Fig 7). Fold the binding again but downwards (Fig 8). Stitch from the edge to 1⁄4in from the next corner and repeat the turn. Continue all around the quilt working each corner in the same way.
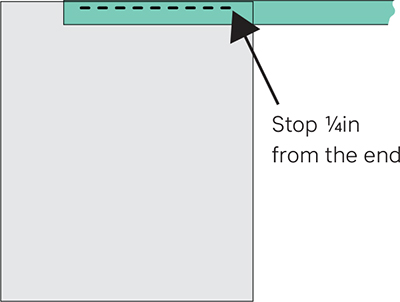
FIG 6
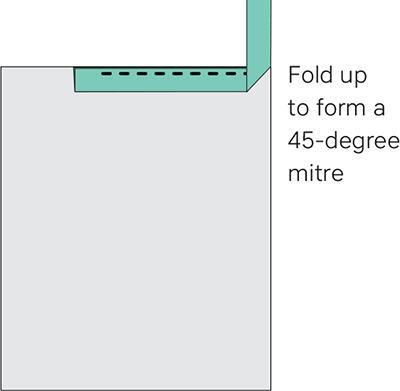
FIG 7
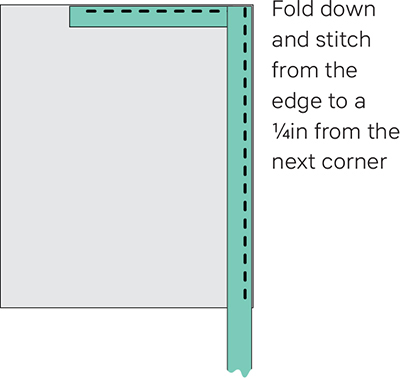
FIG 8
4 When you return to the first side, leave a binding tail and an unsewn gap of about 8in. Lay both binding tails along the remaining unsewn edge. At a point in the centre of the stitching gap, fold the binding pieces back on themselves – the folds of the two ends should butt against each other. Press these folds to create clear creases. Now unfold the binding and lay the tails with right sides together at right angles to each other. Line up the crosses formed by the central fold of the binding and the fold that you just created. At this point, I like to place two pins on the diagonal (to check that I am about to sew the correct diagonal). Sew the seam, trim to a 1⁄4in seam allowance and press the seam open. Now sew the remaining section of the binding in place on the quilt.
5 Press the binding away from the front of the quilt. Fold the binding over to the back of the quilt and hand stitch in place, folding the binding at each corner to form a neat mitre.
I tend to sew zips into my cushions, which you can do too if you like. However, you might prefer a simple Oxford-style cushion cover, which is quick and easy. This method doesn’t usually have any fastenings but just a hemmed opening that overlaps at the centre.
1 Start by calculating the size of the two backing pieces needed, as follows. Measure the width of the cushion, divide this number in half and then add 4in. So, for a 20in wide cushion, this would be 20in ÷ 2 = 10in + 4in = 14in. Cut two pieces this width. The height of the pieces needs to be the same as the front of the cushion.
2 On both pieces of fabric along one long side, create a hem by turning the edge over by about 1⁄2in, twice. Sew with matching thread and press (Fig 9).
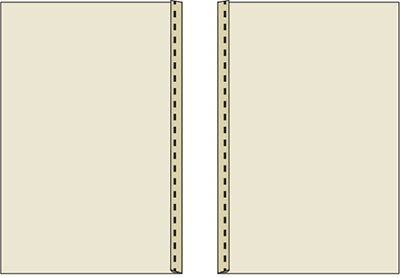
FIG 9
3 Place the patchwork cushion front right side up. Place one backing piece on top, right side down and with the hem towards the centre. Place the second backing piece on top, right side down and with the hem towards the centre. Make sure the outer edges of all three pieces are aligned and pin in place (Fig 10).
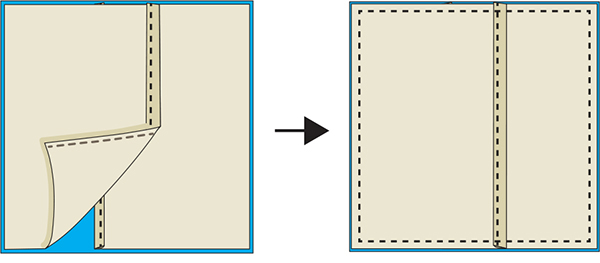
FIG 10
4 Sew the layers together around the outside, using a 1⁄4in–3⁄8in seam. Remove pins, clip the corners a little to remove bulk and press. Turn through to the right side. Poke out the corners well and press. Insert a cushion pad to finish.